Big Flavors from a Tiny Kitchen

menu icon
go to homepage
  • Recipes
  • About
  • Events
  • Contact
  • Subscribe
    • Facebook
    • Instagram
    • Pinterest
  • subscribe
    search icon
    Homepage link
    • Recipes
    • About
    • Events
    • Contact
    • Subscribe
    • Facebook
    • Instagram
    • Pinterest
  • ×
    Home » Recipes

    Italian Cream Cheese and Ricotta Cheesecake

    January 19, 2018 by Ashley 59 Comments

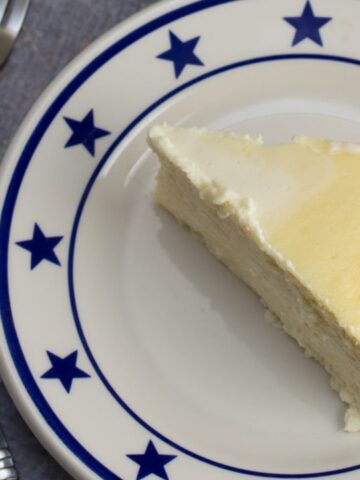
    Overhead shot of a plate topped with a slice of Italian Cheesecake

    This super rich, creamy, tangy, no frills, crustless Italian-style cheesecake is easier than you'd think to prepare at home!

    Italian cream cheese and ricotta cheesecake is always a HUGE hit with everyone at the table.

    Perfect for holiday desserts, dinner parties, and celebratory meals.
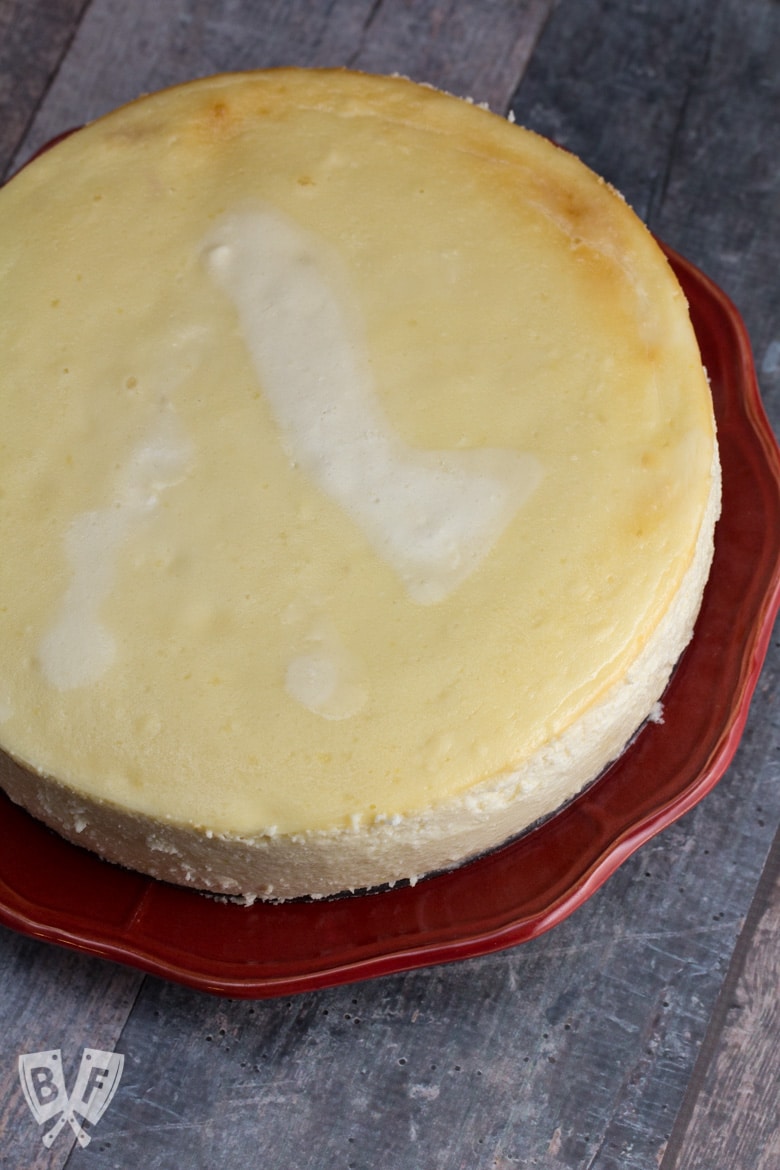
    Overhead shot of a whole cheesecake sitting on a red plate.

    A few years ago, my Italian in-laws came over for New Year's Eve, and I wanted to make a delicious dessert to go with our prime rib dinner.

    I had recently come across a great sale on ricotta cheese, so there was only one thing on my mind...

    Cheesecake.

    Glorious, decadent cheesecake.

    This is a super rich, creamy, tangy, no frills, crustless Italian-style cheesecake. It was a HUGE hit with everyone at the table.

    And it was much easier than I had anticipated to prepare!

    I made a few changes to the directions from the original recipe.

    I added some layers of foil on the outside of the pan and then placed that in a baking sheet with a water bath to help cook the cheesecake more evenly and prevent cracking.
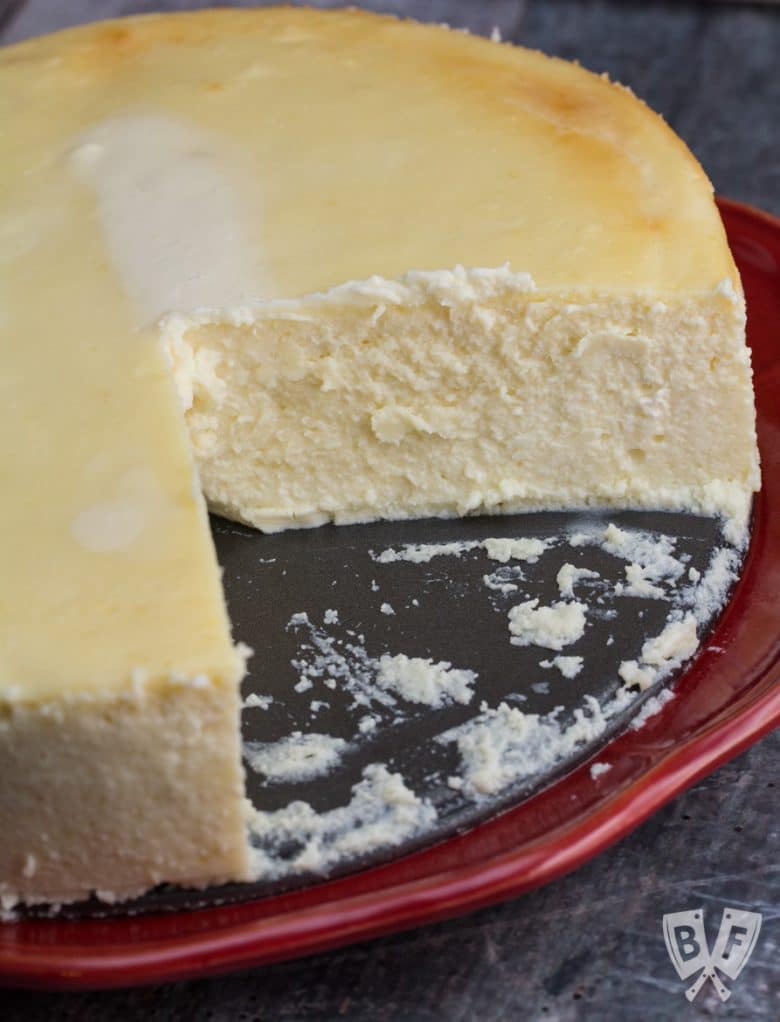
    Overhead shot of a whole cheesecake with a slice taken out sitting on a red plate.

    I also decided to leave it sit in the oven for an extra hour before I chilled it.

    The only thing I may change next time is to let it cool on the counter for a while before putting it into the fridge.

    I had a bit of condensation form under the foil that was covering the cheesecake, and it made a little wet area on top of the cake, which had a bit of discoloration.

    All cosmetic.

    Still ridiculously delicious.

    (Psssst: stay tuned for a post coming up with tips for how to "fix" some common cheesecake troubles - I have some fun tricks for you!)
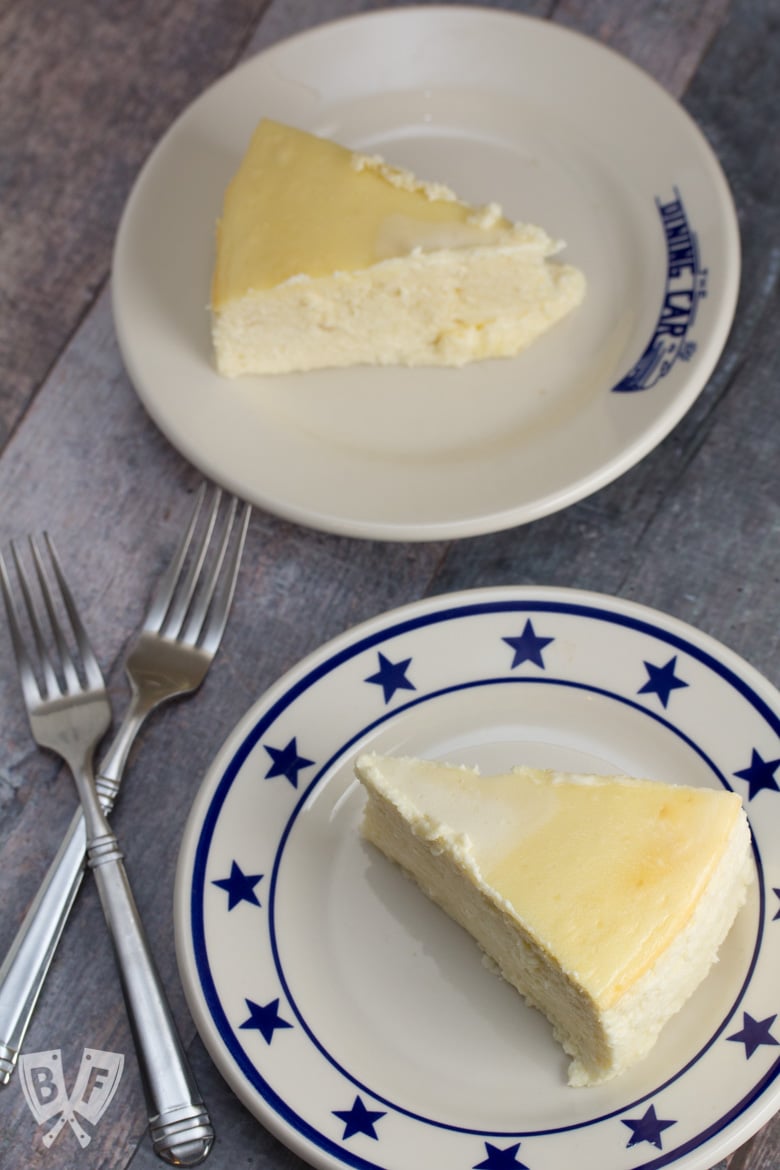
    Overhead shot of two plates, each topped with a slice of Italian Cheesecake

    This is a surefire hit for any dinner party! Make sure you give yourself plenty of time to let it chill - several hours to overnight.

    It just gets better and better the longer it sits in the fridge. But it's pretty hard to resist picking on it!

    I've made this cheesecake (and a few variations!) a few times now, and it always turns out deliciously! It's a really solid Italian cheesecake recipe that has gotten many, many thumbs up. Italians and non-Italians all agree on this one - it's a keeper!

    One final note - go the full-fat route when making this cheesecake.

    But if you do decide to use reduced/fat-free, do report back to let me know if it worked out for you!

    Looking for more 5-star dessert recipes? Check out some of our favorites:

    • Rich Cocoa Brownie Bites
    • Elvis-Style Frozen Bananas
    • Sweet + Salty Dark Chocolate Clusters
    • 5-Ingredient Samoa Cereal Bowls
    • Orange Scented Cannoli Dip
    • Double Chocolate Chip Cookies with Vanilla Icing
    • Dessert Nachos with Fresh Baked Cinnamon Tortilla Chips
    • Tolon's Strawberry Basil Shortcake
    • Cranberry Orange Snickerdoodles
    • Bourbon Bacon Pecan Pie with a Whole Wheat Crust
    • Chocolate Cream Pie with Orange Zested Whipped Cream
    • Great Grandma Francesca Cardile's Cookies
    • Triple-Chocolate Pumpkin Pie
    • Ricotta Cookies
    • Grandma's Christmas Cookies

    📖 Recipe

    Italian Cream Cheese and Ricotta Cheesecake
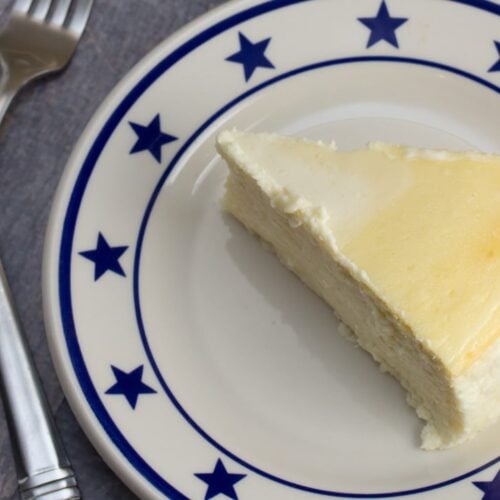
    Overhead shot of a plate topped with a slice of Italian Cheesecake
    This super rich, creamy, tangy, no frills, crustless Italian-style cheesecake is easier than you'd think to prepare at home! It's always a HUGE hit with everyone at the table. Perfect for holiday desserts, dinner parties, and celebratory meals.
    Big Flavors from a Tiny Kitchen - Ashley Covelli (adapted from Allrecipes)
    4.57 from 16 votes
    Print Recipe Pin Recipe
    Servings: 12 -16 servings
    Course: Dessert
    Cuisine: Italian
    Prep Time 15 minutes mins
    Cook Time 1 hour hr
    Total Time 3 hours hrs 15 minutes mins

    Ingredients
     

    • 2 8 ounce packages full fat cream cheese, softened
    • 1 16 ounce container whole milk ricotta cheese
    • 1 ½ cups granulated sugar
    • 4 large eggs
    • 1 tablespoon freshly squeezed lemon juice
    • 1 teaspoon vanilla extract
    • 3 tablespoons cornstarch
    • 3 tablespoons all-purpose flour
    • ½ cup unsalted butter melted and cooled
    • 16 ounces full fat sour cream

    Instructions
     

    1. Preheat oven to 350°F. Bring a pot or kettle of water to a boil. Lightly grease a 9-inch springform pan. Wrap the outside of the springform with 2 layers of aluminum foil and place it inside of a deep roasting pan or baking dish.
    2. Add cream cheese and ricotta to a large mixing bowl. Mix together with an electric mixer until well combined. Add sugar, eggs, lemon juice, vanilla, cornstarch, flour, and the cooled butter and mix well. Stir in the sour cream until no white streaks remain.
    3. Pour the mixture into the prepared springform pan. Pour hot water into the perimeter of the baking dish until it comes about ½ inch up the sides of the springform pan.
    4. Bake in the preheated oven 1 hour. Turn oven off and leave in oven 2 hours more (don't open the oven door until all 3 hours have passed).
    5. Remove cheesecake to the counter to finish cooling, then cover and transfer to the refrigerator to chill completely, preferably overnight, before serving.

    Video

    Notes

    If the cheesecake is still warm when you need to transfer it to the refrigerator, cover the pan with a layer of paper towels, then aluminum foil. This will help prevent any condensation from forming and dripping down, which can discolor the top of your cheesecake.
    Recipe adapted from Allrecipes.

    Did you make this recipe?

    Leave a comment + star rating below to let people know how it was!
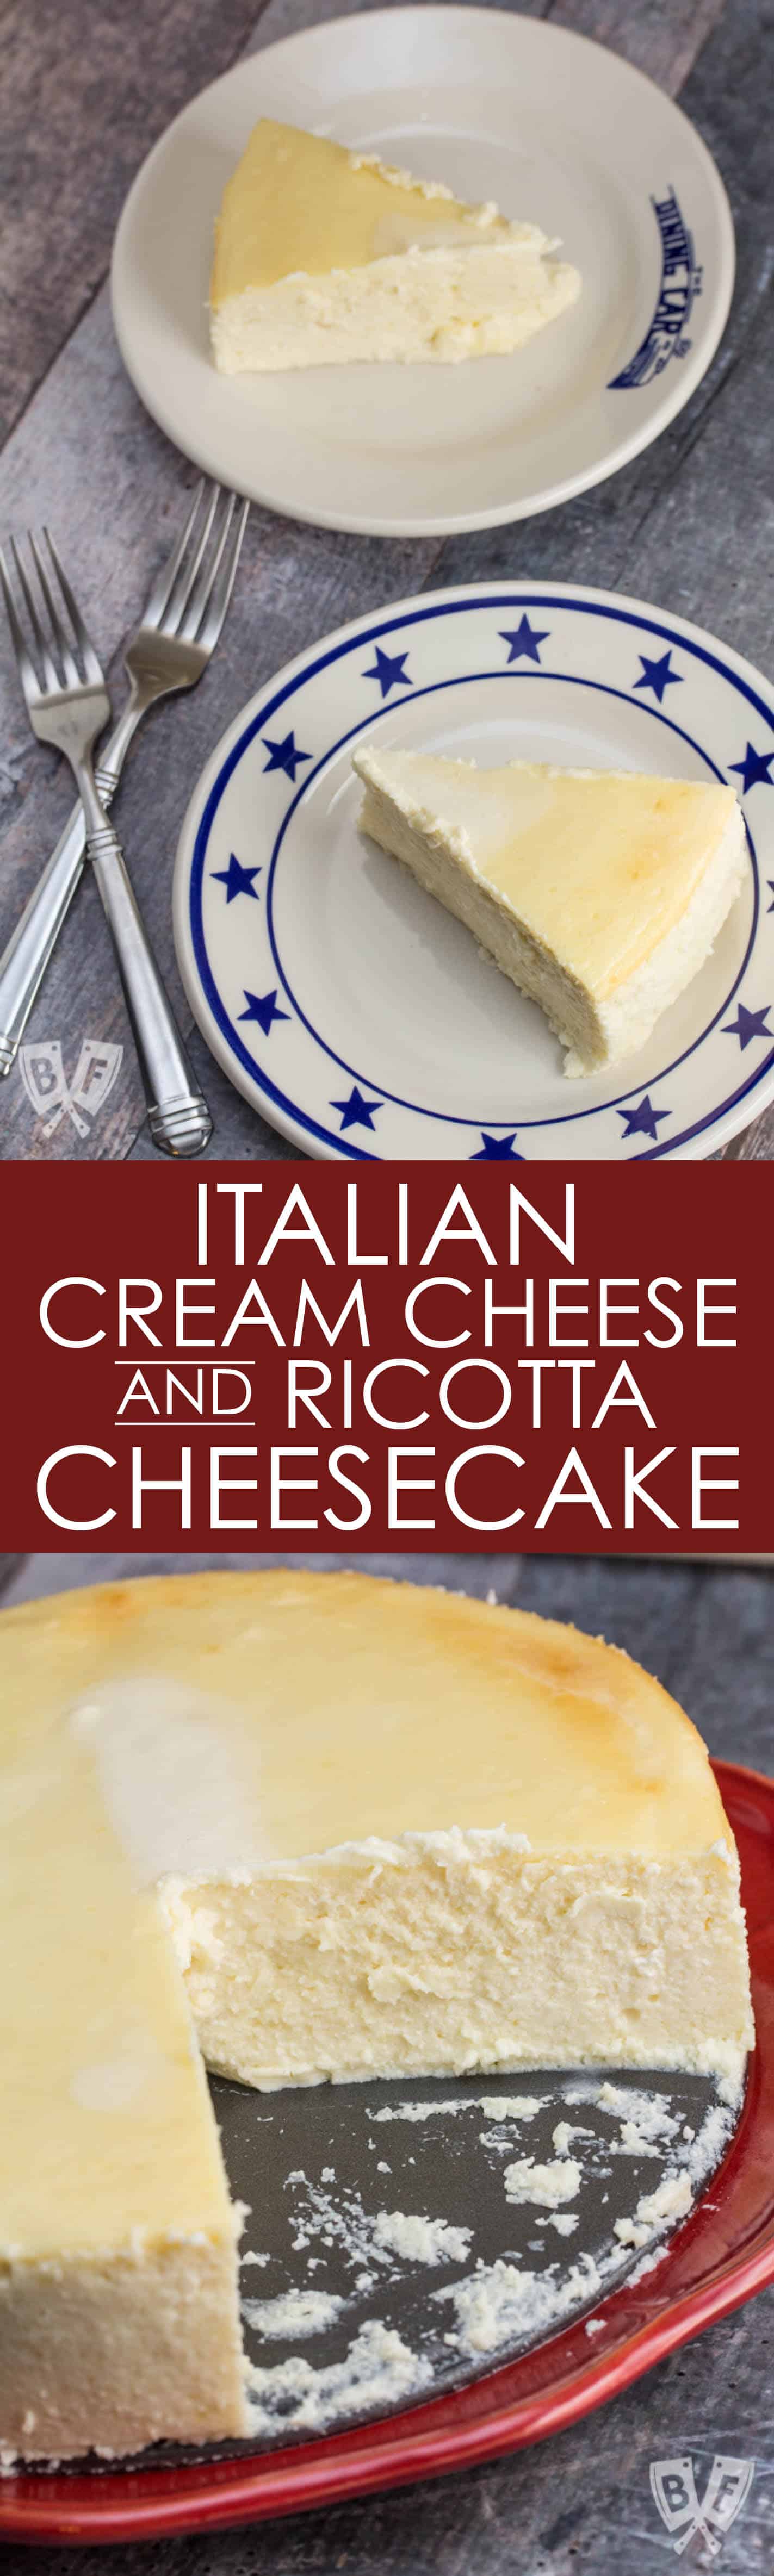
    2 photos of a cheesecake - one overhead shot of 2 slices of cheesecake on plates with forks off to the side and one ¾ view of a whole cheesecake with a slice taken out of it, sitting on a red plate.

    Baked Chicken Thighs with Potatoes and Peas

    January 18, 2018 by Ashley 36 Comments

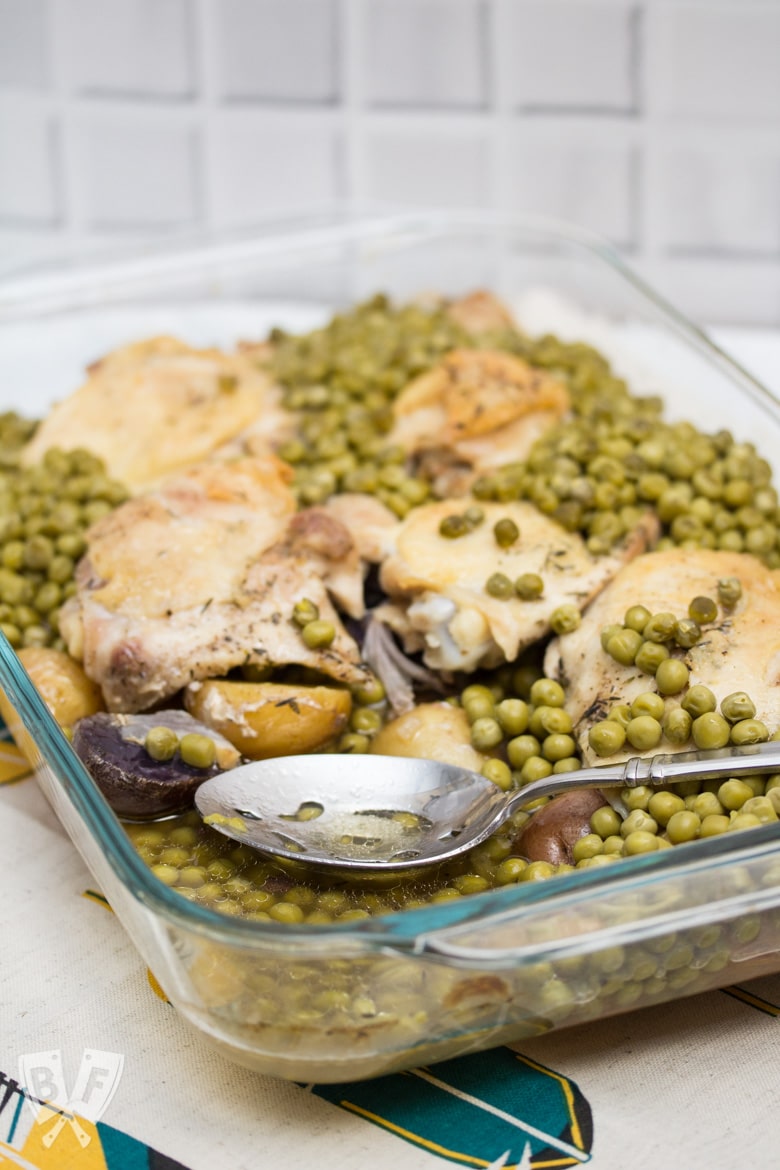
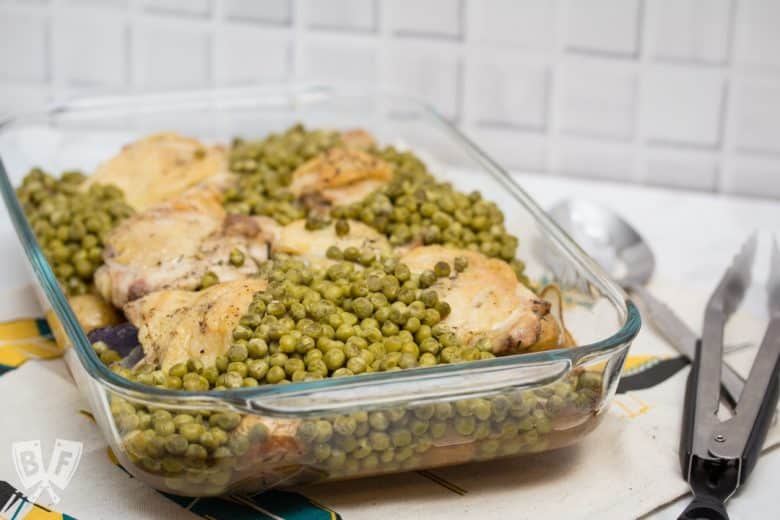
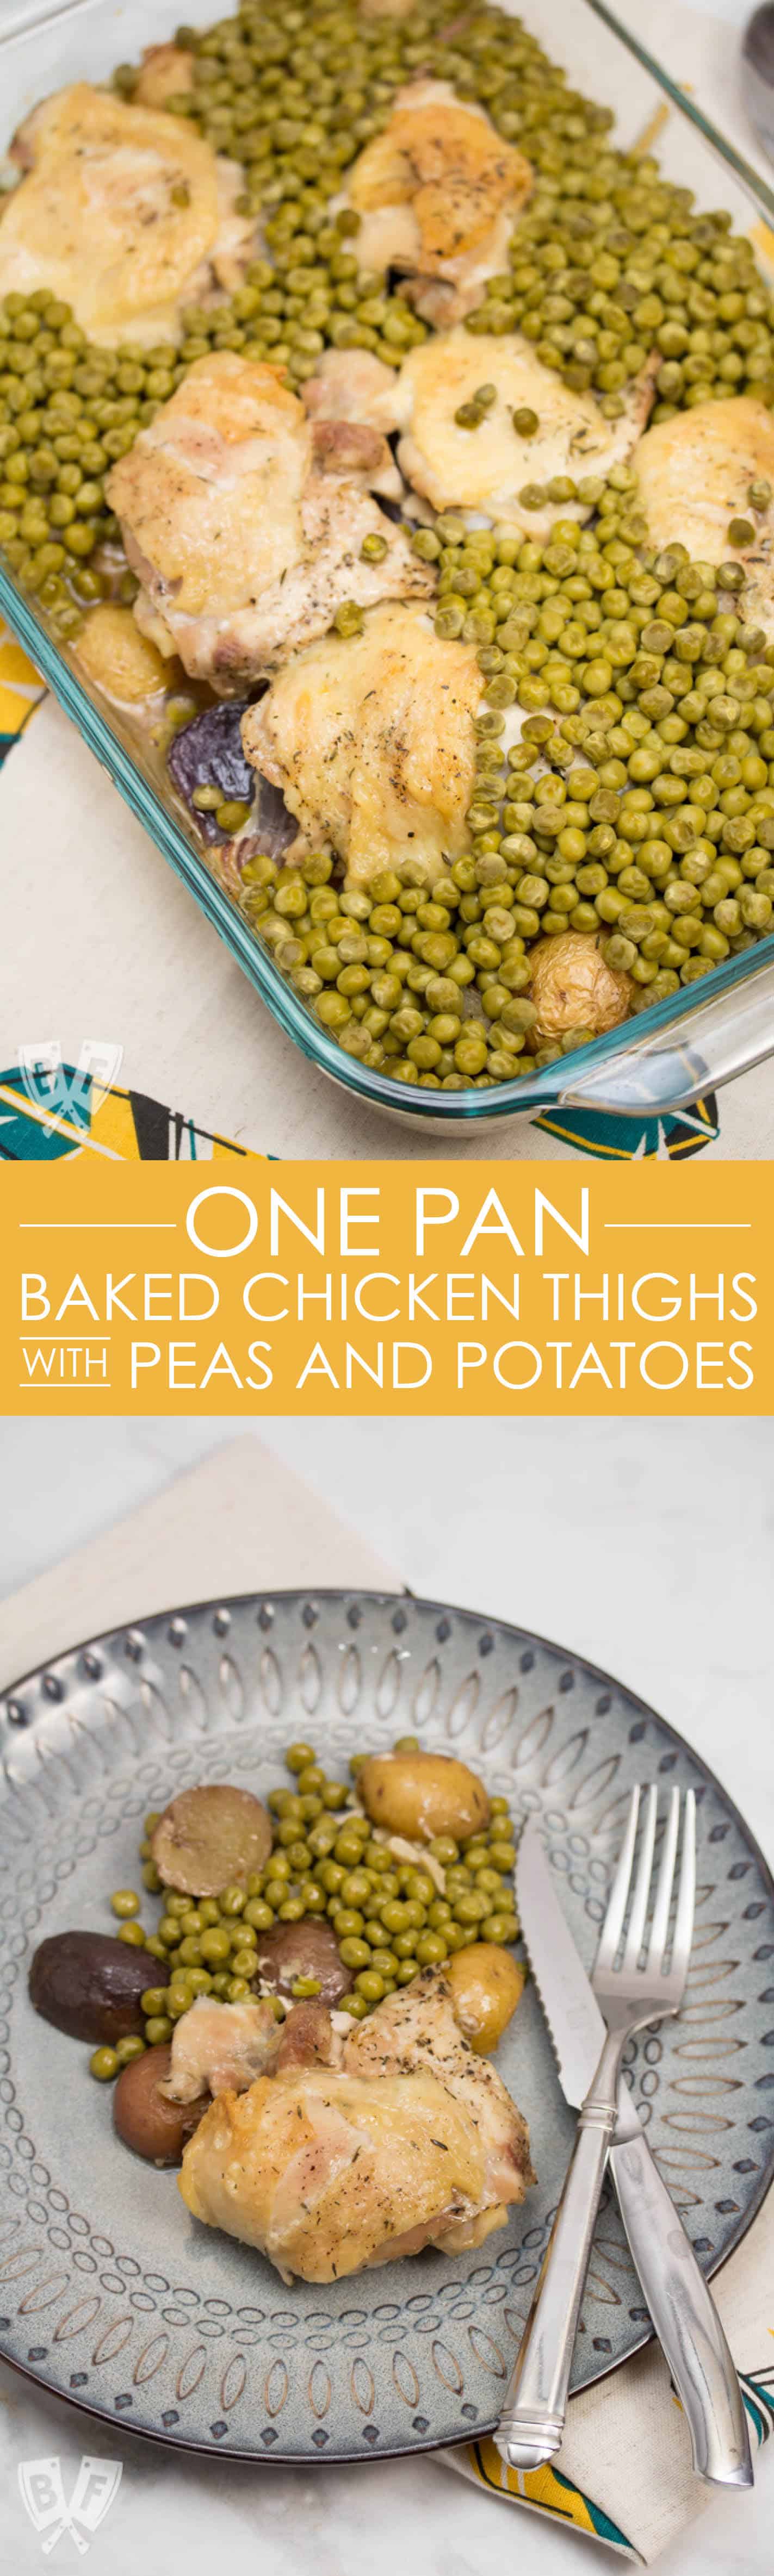
    3/4 view of a casserole dish filled with baked chicken thighs, peas, and potatoes with tongs and a serving spoon.

    This one pan chicken recipe is weeknight comfort food at its best and a total family favorite! Just 6 ingredients plus oil, salt, and pepper and a little time in the oven are all you need for this easy chicken dinner.

    This dish is one of the first family dinners I remember having with my husband and his parents back when we first started dating.

    I loved that his family sat down for meals together every night. My situation was a bit more casual, involving lots of TV shows with just me and my mom.

    And while that was fun, too, there's just something special about sitting down at the dinner table at the end of the day and enjoying a meal together. I do that with my husband and son now, but we sometimes throw the TV on while we eat, too.

    It's all about balance.

    Close up of a serving spoon in a casserole dish filled with baked chicken thighs, peas, and potatoes.

    My father-in-law has been making this one pan chicken dish for yeeeears now. It was a childhood favorite of my husband's. I think his grandma used to make a version of this, too.

    It's just straight-up, easy-to-make comfort food.

    When I told my husband I was going to take notes on how his dad made it, and then do it myself to post here on Big Flavors, he gave me the side-eye. He said it's not really a recipe because everyone knows this meal. But I didn't! It just goes to show that what is "standard fare" for some people is not at all for others!

    And I wanted to be sure that other people could enjoy this comfort food meal in their own homes with their families.

    Plus, I've been getting a lot of requests for simple, one-pan recipes, so this totally fits the bill!

    So I bought all the ingredients and had my father-in-law come over to cook with me.

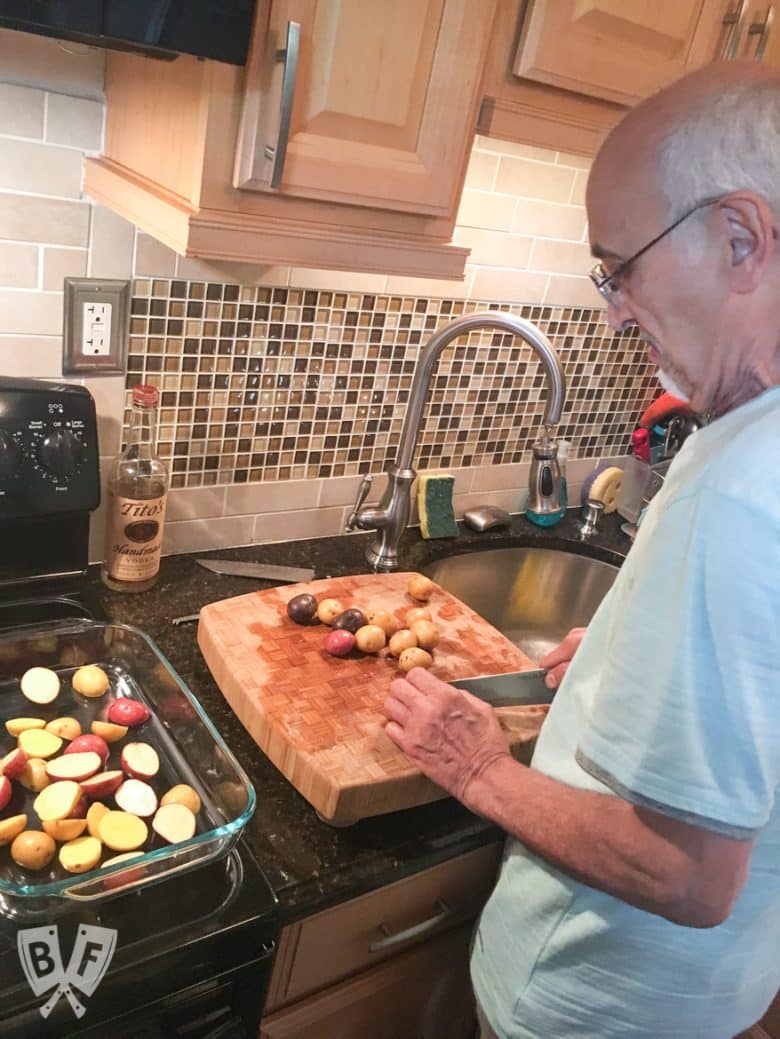
    Over-the shoulder photo of a man in a kitchen cutting potatoes and placing them into a casserole dish.

    One thing that I changed up a bit was the type of potatoes we used. He usually makes it with larger Yukon gold potatoes that he cuts down, but I figured smaller potatoes would be easier.

    Plus, I'm a sucker for those colorful bags of baby potatoes.

    And when it comes to a dish like this there's not a ton of color, so a little bit here went a long way!

    I don't typically care for canned peas (I prefer frozen), but they're so right in this dish. The creamy texture is really nice with the chicken and potatoes.

    This recipe comes together in just one dish, but the main ingredients all have different cooking times, so we're going to work in stages.

    ¾ view of a casserole dish filled with baked chicken thighs, peas, and potatoes with tongs and a serving spoon.

    The potatoes get tossed with garlic, oil, dried thyme, salt, and pepper and hop into the oven tor 30 minutes. While they're roasting, you score the chicken skin with your knife a few times - this helps it crisp up in the oven. Soggy chicken skin is not a good thing!

    The chicken gets added to the partially cooked potatoes, then back into the oven. Lastly, the peas go in and get heated with the potatoes and chicken.

    The result is beautifully crispy, tender chicken, deliciously roasted potatoes, and warm, creamy peas.

    My husband's family is big on dunking crusty bread into the pan juices, so feel free to have a loaf handy!

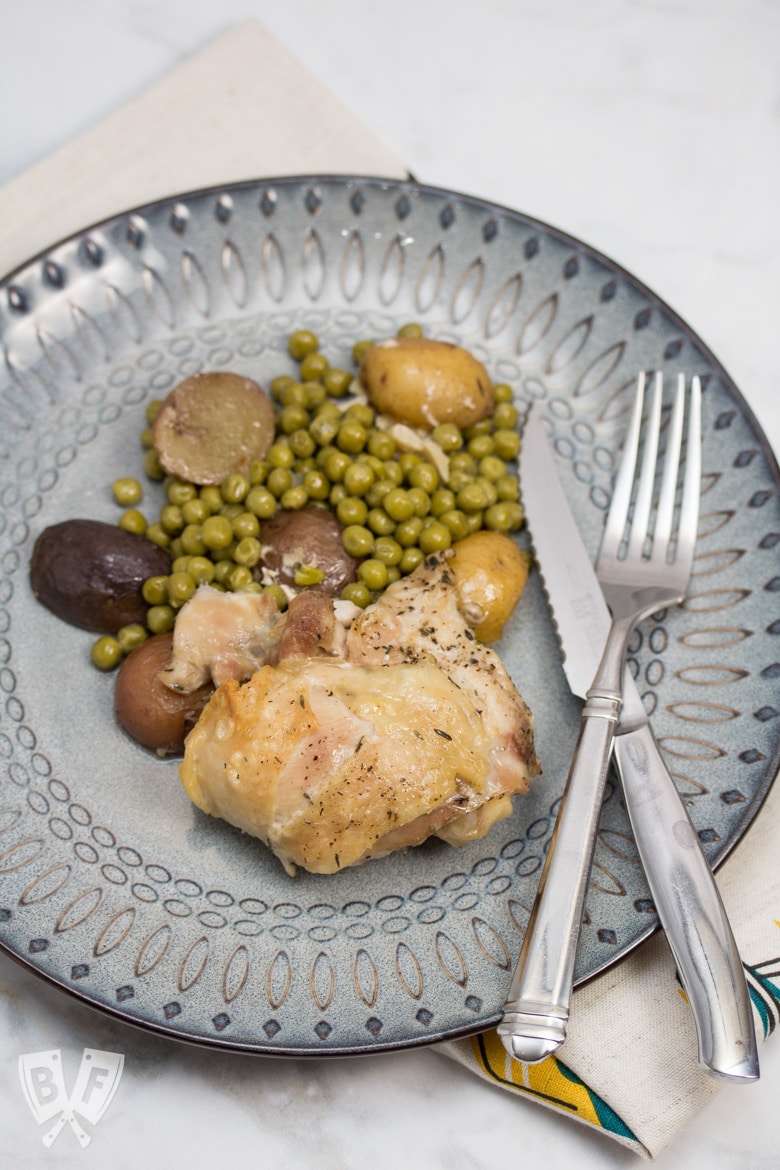
    Dinner plate with chicken thigh, peas, and potatoes with a fork and knife off to the side.

    What are your favorite one pan meals? I'd love to hear about them in the comments section below!

    Looking for more one pan recipes? Check out some of our favorites:

    • Skillet Lasagna with Lamb, Ricotta + Mint
    • Spanish Chicken + Sausage Skillet
    • Pan-Roasted Pork Tenderloin with Balsamic Tomatoes
    • Iron Skillet Chicken + Carrots with Toasted Lager Mustard Sauce
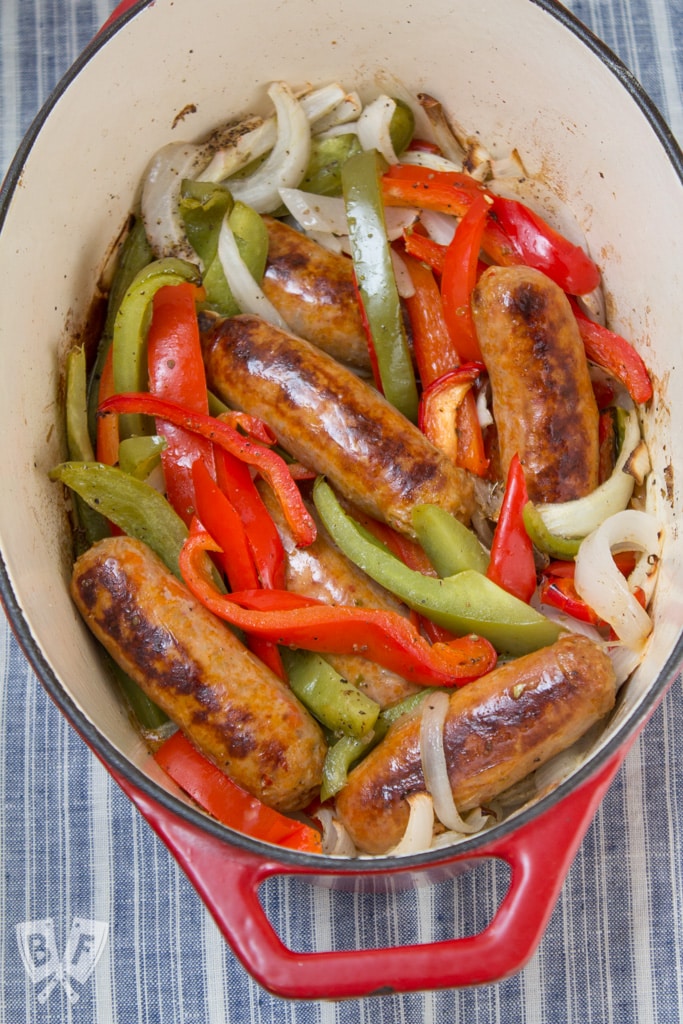
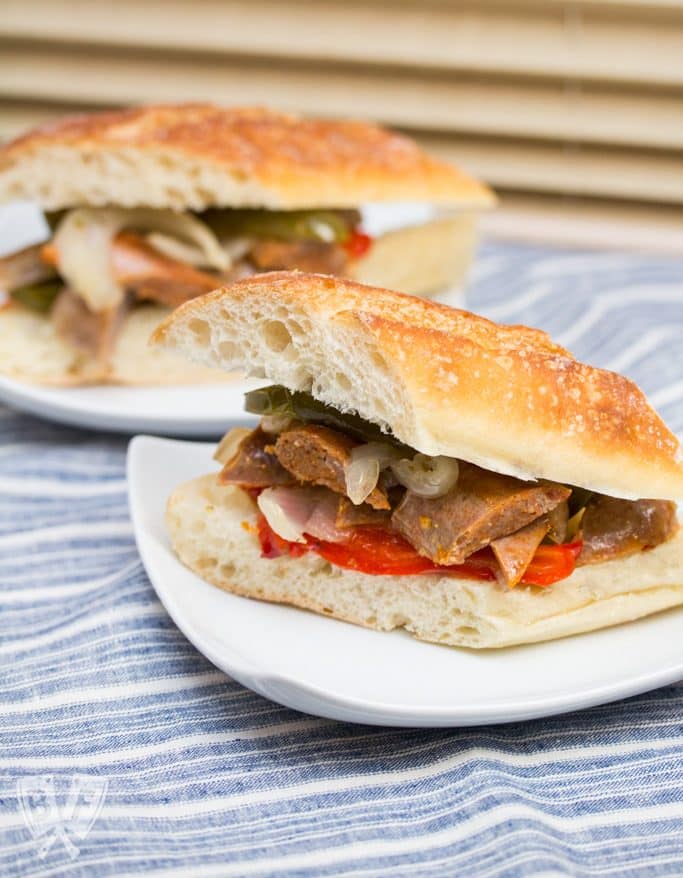
    • Sausage and Peppers
    • Our Favorite Steak Fajitas
    • Single-Skillet Bacon-Rosemary Chicken Thighs with Roasted Tomatoes
    • Pan Roasted Pork Tenderloin with Fairy Tale Eggplant & Tomatoes
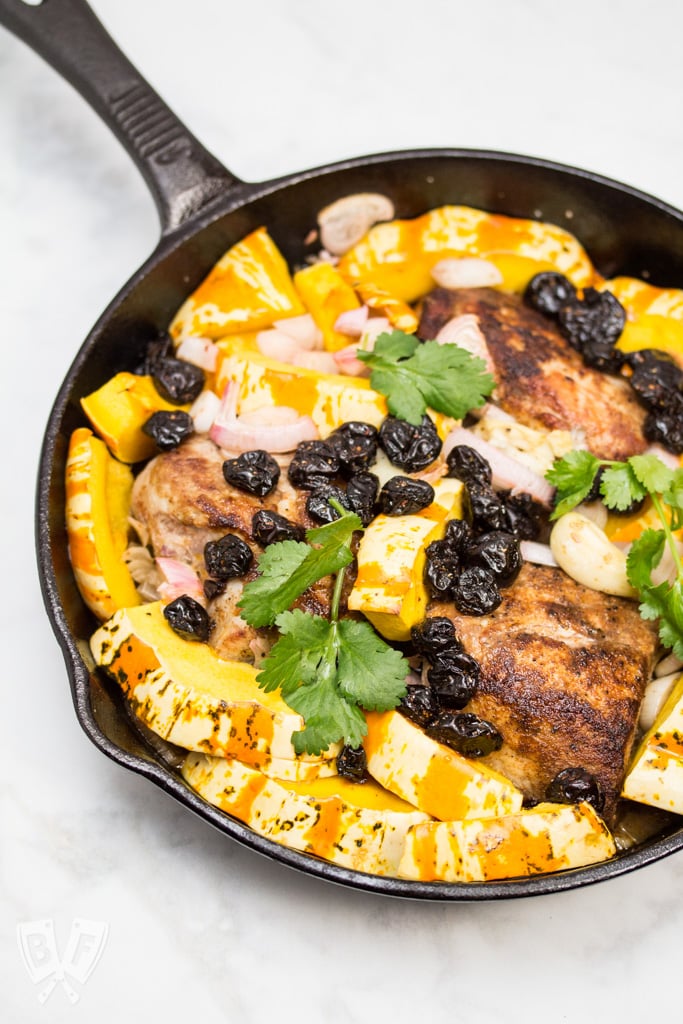
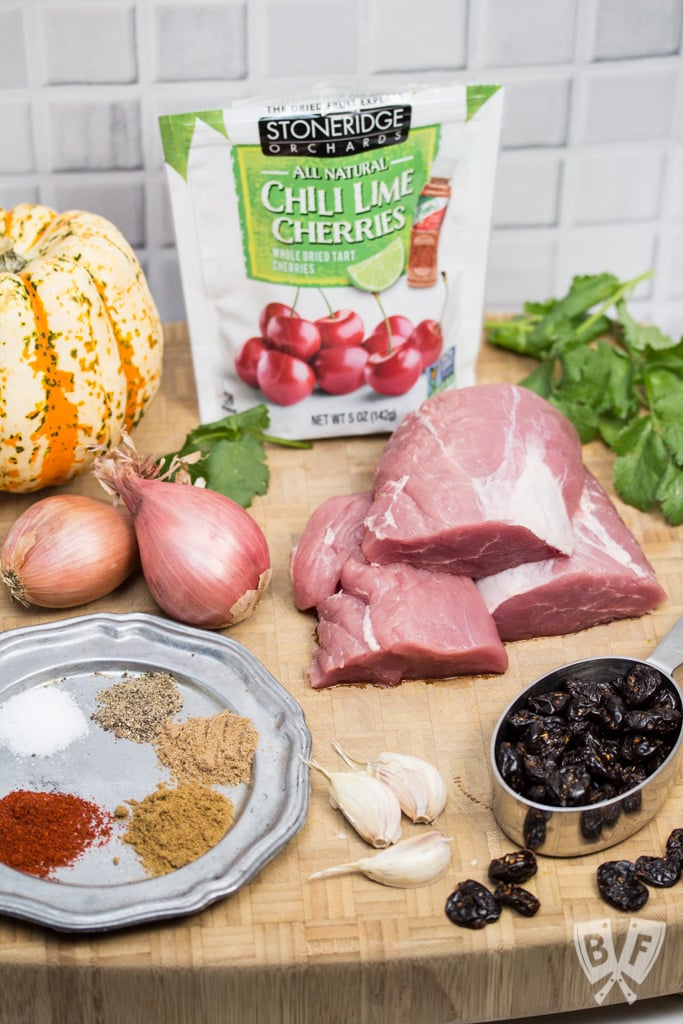
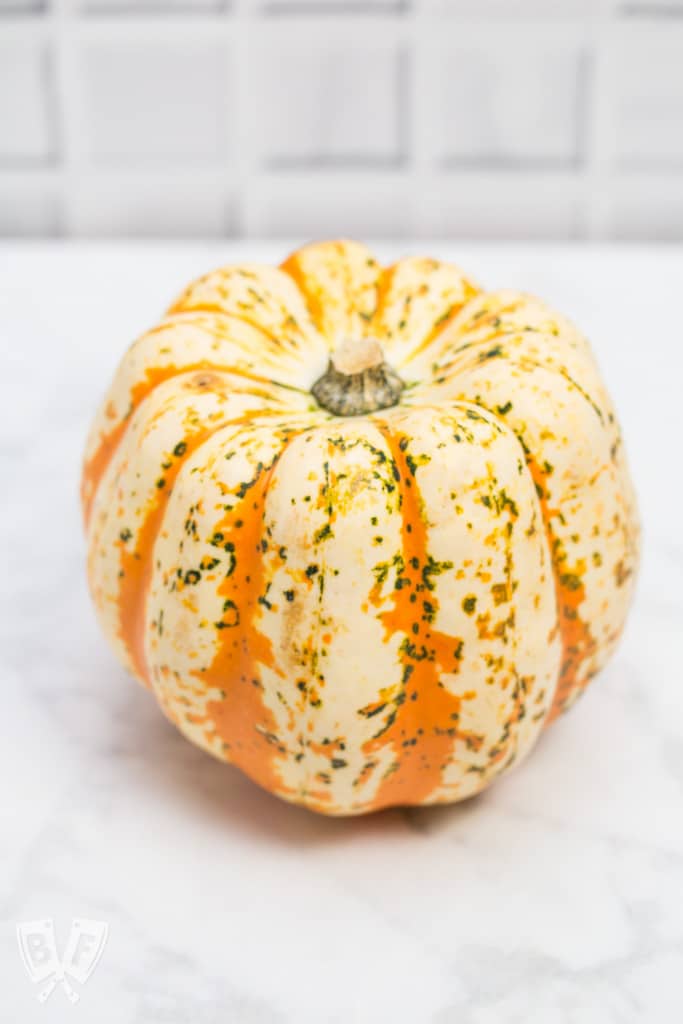
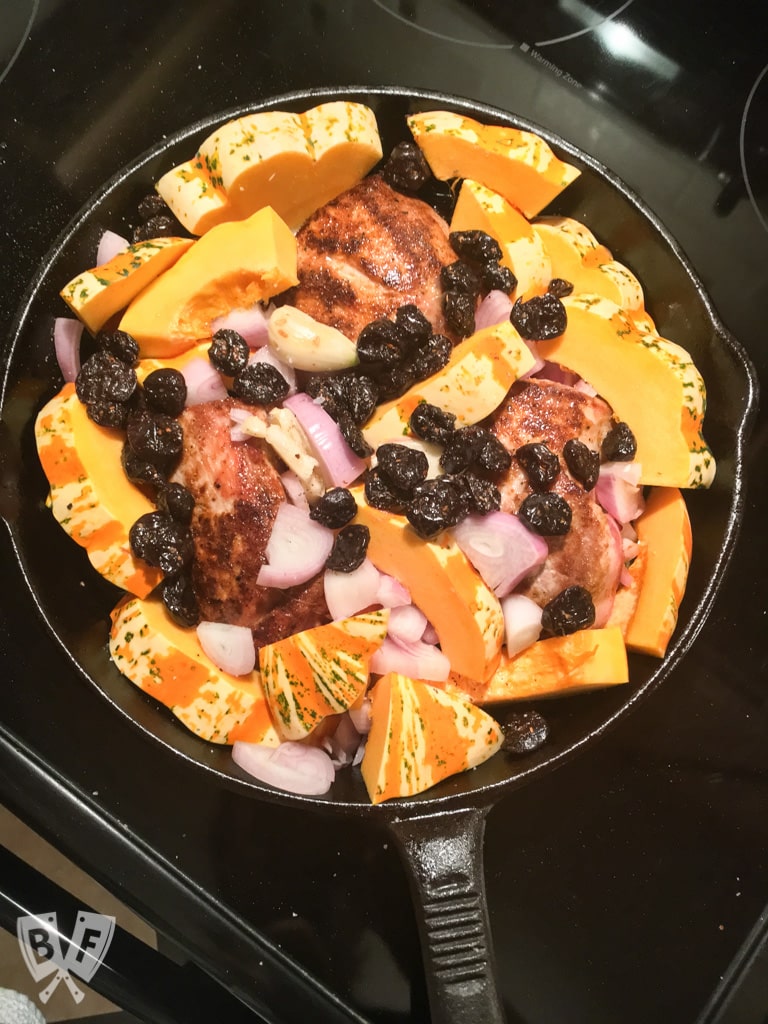
    • Latin-Spiced Pork + Squash Skillet with Chili Lime Cherries

    📖 Recipe

    Baked Chicken Thighs with Potatoes and Peas

    ¾ view of a casserole dish filled with baked chicken thighs, peas, and potatoes with tongs and a serving spoon.
    This one pan chicken recipe is weeknight comfort food at its best and a total family favorite! Just 6 ingredients plus oil, salt, and pepper and a little time in the oven are all you need for this easy chicken dinner.
    Big Flavors from a Tiny Kitchen - Ashley Covelli
    4.93 from 13 votes
    Print Recipe Pin Recipe
    Servings: 6 servings
    Course: Dinner
    Cuisine: Italian
    Prep Time 10 minutes mins
    Cook Time 1 hour hr 30 minutes mins
    Total Time 1 hour hr 40 minutes mins

    Ingredients
     

    • 24 ounces baby potatoes halved
    • 3 cloves garlic smashed
    • ½ small red onion sliced
    • ¼ cup olive oil divided
    • 1 teaspoon kosher salt divided
    • 1 teaspoon dried thyme divided
    • ½ teaspoon freshly cracked black pepper
    • 6 bone-in skin on chicken thighs
    • 2 15-ounce cans sweet peas, drained
    • Crusty bread for serving (optional)

    Instructions
     

    1. Preheat oven to 375 F.
    2. In a 3 quart baking dish, toss potatoes with garlic, onion, 2 tablespoons oil, ½ teaspoon salt, ½ teaspoon thyme, and ¼ teaspoon pepper. Transfer to preheated oven and bake for 30 minutes.
    3. While potatoes are cooking, trim excess skin from chicken thighs. Score the chicken 4 times (I like to make an XX pattern crossing in opposite directions) on the skin side, about ¼-inch deep. Toss with remaining oil, salt, thyme, and pepper and set aside until potatoes are ready.
    4. Place seasoned thighs on top of potatoes in a single layer, skin-side up, and return to the oven for 40 minutes.
    5. Add drained peas, tucking them down around the chicken, and cook another 15-20 minutes, until warmed.
    6. Serve chicken with crusty bread for dunking into the pan juices, if desired.

    Did you make this recipe?

    Leave a comment + star rating below to let people know how it was!
    2 overhead photos - one of a casserole dish filled with baked chicken thighs, peas, and potatoes and one of chicken with potatoes and peas on a plate with a fork and knife.

    Slow Cooker "Roasted" Beets

    January 2, 2018 by Ashley 13 Comments

    Slow Cooker "Roasted" Beets: Roast your own beets at home with less fuss by using your slow cooker - no need to turn on your oven!

    Roast your own beets at home with less fuss by using your slow cooker - no need to turn on your oven!

    This method takes very little effort and delivers the same flavor as oven roasted beets. It creates beautifully tender beets - perfect for adding to salads!

    Slow Cooker "Roasted" Beets: Roast your own beets at home with less fuss by using your slow cooker - no need to turn on your oven!

    I picked up a few bunches of beets from the Farmers Market yesterday, and while I knew what I wanted to do with the greens, I wasn't 100% sure what I wanted to do with the actual beets.

    I knew I wanted to roast at least some of them, but the thought of heating up the oven for an hour or more really didn't sound too appealing in the midst of this summer heat.

    Then I had an idea - what if I prepared them the same way as I would to roast them in the oven, but just put them in the slow cooker for a few hours on high instead?

    Slow Cooker "Roasted" Beets: Roast your own beets at home with less fuss by using your slow cooker - no need to turn on your oven!

    I recently tried wrapping salmon in foil and cooking it in the slow cooker, and it was fantastic, so why not give this a shot?

    I checked them after 3 hours and they were almost tender enough, so I let them go another hour and they were absolutely perfect. They tasted just like oven roasted beets! Nice and sweet and earthy, and since I cooked them in foil, my slow cooker was clean when they were finished!

    They turned out great, and I think this may be my new go-to method! Success!!

    Slow Cooker "Roasted" Beets: Roast your own beets at home with less fuss by using your slow cooker - no need to turn on your oven!

    Looking for ways to use beets? Check out some of our favorite beet recipes:

    • Green and Red Salad with Goat Cheese and Raw Almonds
    • Roasted Beets with Goat Cheese and Dill
    • Cheesy Potato Skins with Smoky-BBQ Shredded Beets
    • Pax Romana's Quinoa Salad with Mixed Vegetable, Goat Cheese & Orange Dressing
    • Straight Outta Comté Leftover Salad
    • Ruby Radiance Juice
    • Massaged Kale Salad with Herbed Goat Cheese Croquettes & Fresh Blueberry Vinaigrette
    • Spicy Sautéed Beet Greens with Garlic Chips
    • Fresh Beet, Apple, Carrot, Orange Cucumber Juice
    • Raw Kohlrabi and Beet Slaw

    📖 Recipe

    Slow Cooker "Roasted" Beets

    Slow Cooker "Roasted" Beets: Roast your own beets at home with less fuss by using your slow cooker - no need to turn on your oven!
    Roast your own beets at home with less fuss by using your slow cooker - no need to turn on your oven! This method takes very little effort and delivers the same flavor as oven roasted beets. It creates beautifully tender beets - perfect for adding to salads!
    Big Flavors from a Tiny Kitchen - Ashley Covelli
    4.67 from 3 votes
    Print Recipe Pin Recipe
    Servings: 1 bunch beets
    Course: Vegetables
    Cuisine: American
    Prep Time 5 minutes mins
    Cook Time 3 hours hrs
    Total Time 3 hours hrs 5 minutes mins

    Ingredients
     

    • 1 bunch beets washed, greens trimmed off (and preferably saved to prepare this dish!)
    • extra-virgin olive oil
    • sea salt & freshly cracked black pepper
    • aluminum foil

    Instructions
     

    1. Tear pieces of foil large enough to completely enclose each beet. Lay one piece of foil underneath each beet and drizzle each with a little bit of oil, sprinkle with a pinch of sea salt and a few grinds of black pepper.
    2. Wrap each beet tightly in foil. You can double wrap them if they don't completely close, this way they will cook properly and won't make a mess in your slow cooker.
    3. Place beets inside your slow cooker, cover and cook on high for 3-5 hours, or until tender. Remove from foil packets and slide the skin off, if desired (I didn't).

    Did you make this recipe?

    Leave a comment + star rating below to let people know how it was!
    Slow Cooker "Roasted" Beets: Roast your own beets at home with less fuss by using your slow cooker - no need to turn on your oven!

    Triple Citrus Exfoliating Salt Scrub

    December 28, 2017 by Ashley 5 Comments

    A spoon in a glass jar full of homemade salt scrub surrounded by the products used to make it.

    This post has been compensated as part of my partnership with Barleans. As always, all opinions are 100% my own.

    Homemade salt scrubs are perfect for the kitchen or bathroom. Essential oils, citrus zest, and coconut oil make this DIY salt scrub an energizing, refreshing treat for your skin.

    Salt scrubs keep your hands and body soft, smooth, and moisturized.

    And making your own is a great way to get all the benefits of high-end products without breaking the bank. (Looking for more homemade DIY beauty products? This 3 Ingredient Refreshing Rose Face Mask is another great option!)

    Perfect for gift-giving and fighting the winter blues!

    Close up of a spoon in a glass jar full of homemade salt scrub surrounded by fresh citrus fruit and peels.

    How's your skin holding up this winter?

    Between cooking, cleaning, and having a house full of sick people (seriously - we're still under quarantine!), I've been washing my hands so much that my skin feels like it's falling off!

    But fret not! I have a homemade salt scrub recipe to share today that will combat winter's wrath. (And be sure to check out the giveaway later in this post to get a container of coconut oil for yourself!)

    DIY Triple Citrus Exfoliating Salt Scrub

    A spoon in a glass jar full of homemade salt scrub surrounded by the products used to make it.

    This salt scrub has a combination of 2 types of salt, organic virgin coconut oil, 2 different essential oils, and fresh citrus zest.

    It's like capturing the Florida sunshine in a jar, and stashing that jar in the kitchen or bathroom cabinet to use whenever you need a little boost.

    This salt scrub mixture smells absolutely heavenly, and has been a life saver for my chapped winter skin.

    Let's gather the tools and ingredients for our homemade exfoliating salt scrub recipe, shall we?

    Three quarters view of the products and tools used to make a homemade citrus salt scrub.

    You don't need a lot of time to put this scrub together, and you may even have everything you need in your kitchen already!

    • Coconut oil - I'm using Barlean's Organic Virgin Coconut Oil here. It smells like the tropics and is super versatile. And it makes your skin feel incredibly smooth! For this salt scrub recipe, you'll need to use it in its liquid form. If your coconut oil is solid, you can melt it in the microwave and just let it cool a bit before you mix the rest of the ingredients together. I like to melt coconut oil or butter at half power in 20 second intervals, stirring in between each interval to make sure it melts evenly and doesn't splatter all over my microwave.
    • Essential oils - your choice here, but I used 2 different citrus oils - grapefruit and tangerine. Be sure to use essential oils that are safe for topical use so you don't irritate your skin.
    • Salt - I used a combination of 2 salts in this DIY salt scrub recipe to get the perfect texture for exfoliating and smoothing the skin. I like using a fine grain salt in addition to a coarse salt, but feel free to use whatever you have on hand. Sea salt is a great choice here, too, and comes in lots of different grain sizes. There's a great guide on the differences between iodized, kosher, and sea salt in this post over at The Splendid Table.
    Overhead view of the products and tools used to make a homemade citrus salt scrub.
    • Fresh citrus - again, use whatever you have on hand. I had a clementine and an orange in my refrigerator. Truth be told, the clementine wasn't very easy to zest, so I used the orange for this recipe.
    • Microplane - this is the perfect way to get the zest off of your citrus. If you don't have a microplane or other grater, you could use a vegetable peeler to get some strips of skin off of the fruit, then finely chop it with a knife.
    • Microwave safe measuring cups - especially if you need to melt your coconut oil. Don't mess around with microwaving dishes that don't specifically say they're microwave safe.
    • Mason jars or other containers that have tight-fitting lids that you can use to store your homemade salt scrub. I recommend using glass or BPA-free plastic. Pop a waterproof label on the jar and give as gifts with a cute little spoon. If you're splitting the scrub up into multiple containers, these itty bitty glass jars that I picked up from the Container Store are absolutely perfect!
    • Measuring cups and measuring spoons to get the proportions right.
    Overhead view of a spoon in a glass jar full of homemade salt scrub surrounded by the products used to make it.

    I've been keeping a stash of this scrub in a container underneath my kitchen sink and using it at nighttime after the dishes are done and I'm ready for bed.

    I may play around with more fragrance combinations, but I'm currently obsessed with this bright citrus blend.

    The next batch I make is going to go in a jar in my shower caddy.

    Overhead view of a spoon in a glass jar full of homemade salt scrub surrounded by fresh citrus fruit and peels.

    What do you do to help your skin stay healthy during the winter? I'd love to hear your tips and tricks in the comments section below!

    Want to try making more of your own skincare products at home? This 3 Ingredient Refreshing Rose Face Mask is a real treat (and super simple to put together)!

    A spoon in a glass jar full of homemade salt scrub surrounded by the products used to make it.

    Looking for more ways to use citrus? Check out some of our favorite recipes:

    • Fennel + Citrus Salad with Shallots and Capers
    • Seared Scallops with Citrus Trio + Wild Rice
    • Spanish Chicken + Sausage Skillet
    • Cranberry Orange Snickerdoodles
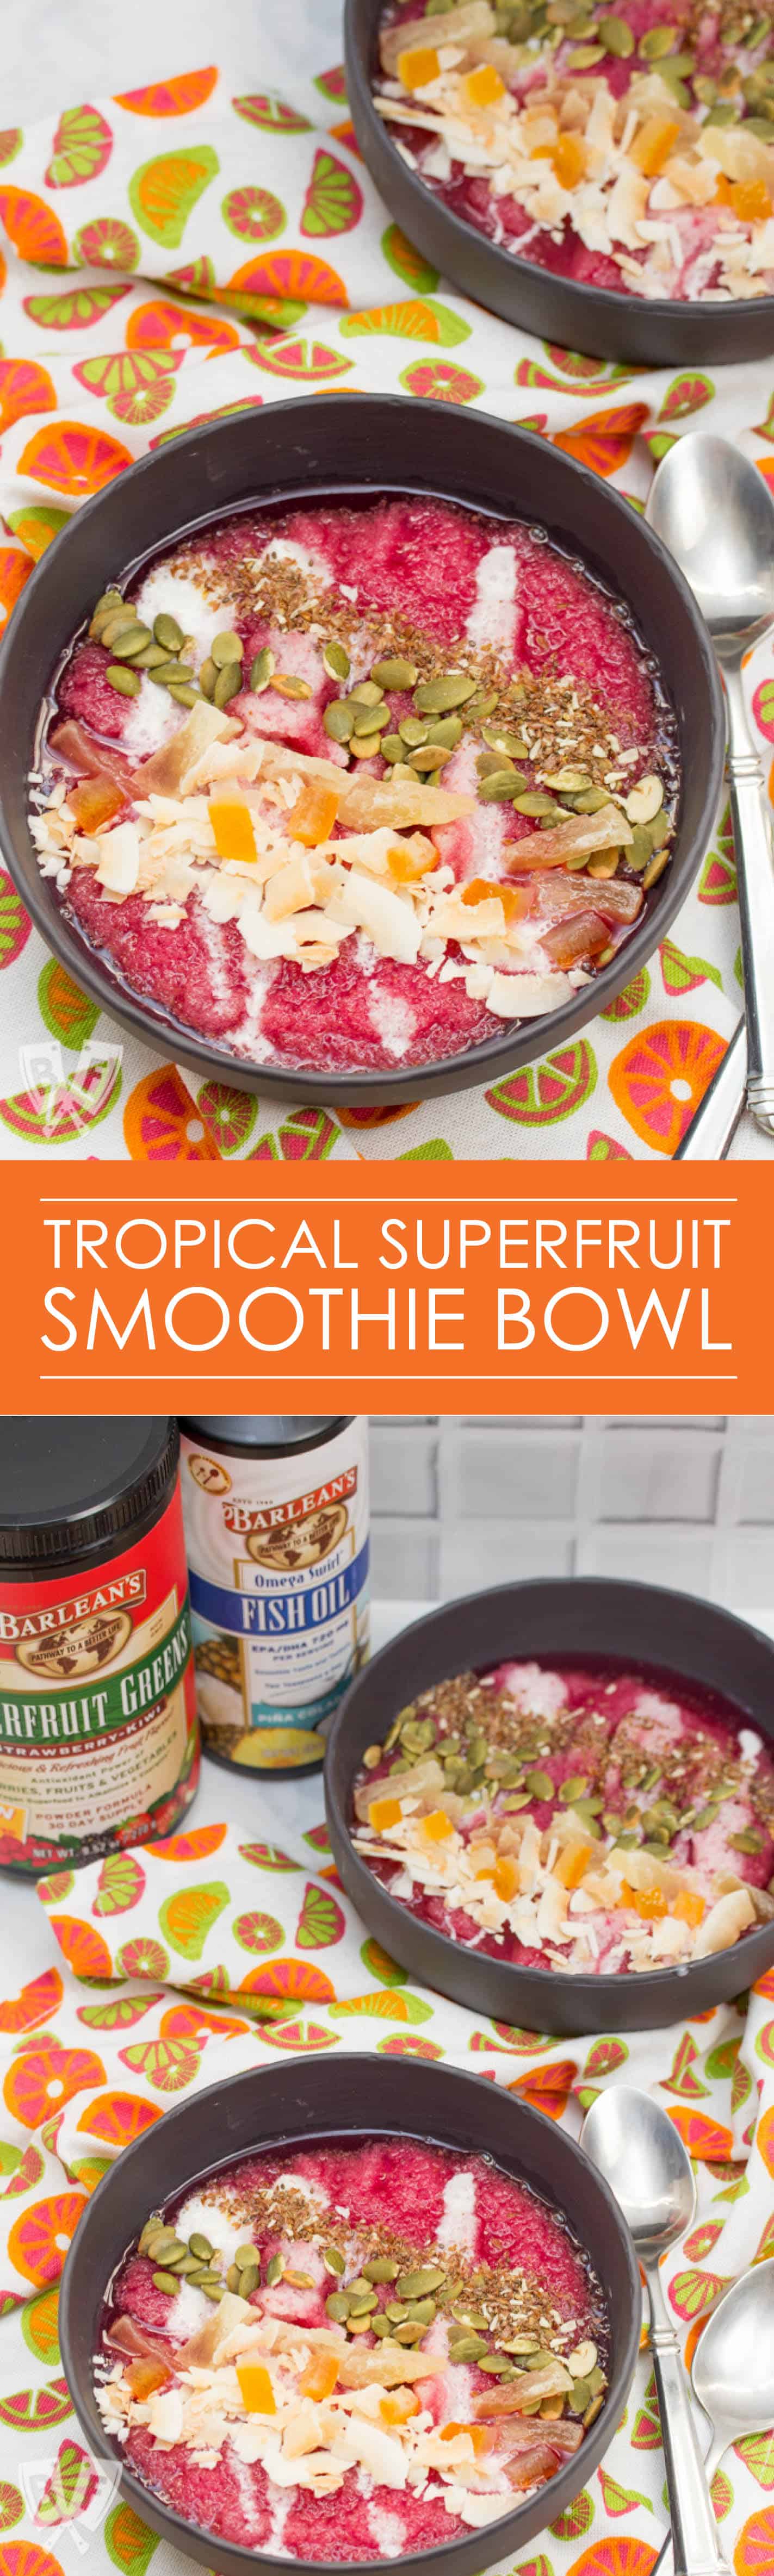
    • Tropical Superfruit Smoothie Bowl
    • Killer Shrimp Cocktail
    • Dark Chocolate Pinwheel with Creamsicle Yogurt Dip
    • Mom & Tot Creamsicle Smoothies
    • Smoky Seared Scallops with Roasted Fennel, Rainbow Carrots + Popped Sorghum
    • Mandarin Chipotle Pork Tacos
    • Margarita Donuts
    • Pan-Seared Salmon with Lemon-Dill Butter + Roasted Purple Sweet Potatoes
    2 photos - one close up of a spoon in a glass jar full of homemade salt scrub and one of the ingredients used to make it.

    📖 Recipe

    Triple Citrus Exfoliating Salt Scrub

    A spoon in a glass jar full of homemade salt scrub surrounded by the products used to make it.
    Homemade salt scrubs are perfect for the kitchen or bathroom. Essential oils, citrus zest, and coconut oil make this DIY salt scrub an energizing, refreshing treat for your skin. It keeps your hands and body soft, smooth, and moisturized without breaking the bank. Perfect for gift giving and fighting the winter blues!
    Big Flavors from a Tiny Kitchen - Ashley Covelli
    4 from 1 vote
    Print Recipe Pin Recipe
    Servings: 1 jar
    Course: DIY, Health & Beauty
    Cuisine: American
    Prep Time 5 minutes mins
    Total Time 5 minutes mins

    Ingredients
     

    • 3 tablespoons fine grain salt I used iodized salt
    • 5 tablespoons coarse grain salt I used kosher salt
    • ½ cup liquid coconut oil
    • 1 teaspoon fresh citrus zest such as orange lemon, or tangerine
    • 4 drops grapefruit essential oil
    • 4 drops tangerine essential oil

    Instructions
     

    1. Place fine grain salt and kosher salt in a bowl. Pour coconut oil on top and add citrus zest, grapefruit oil, and tangerine oil. Stir well to fully incorporate.
    2. Store at room temperature in a sealed glass or plastic container.

    Notes

    If your coconut oil is solid, melt it in the microwave first and let cool for a few minutes before mixing.
    To use as a hand scrub, wet hands. Stir the salt scrub mixture to incorporate the oil and add a spoonful to the palm of your hands. Massage and rub for at least 30 seconds and up to 2 minutes, then rinse off.
    Can also be used as a body scrub in the shower, or as a foot scrub if you soak your feet for a few minutes first.

    Did you make this recipe?

    Leave a comment + star rating below to let people know how it was!
    Falafel-Spiced Cucumber Bites

    December 27, 2017 by Ashley 19 Comments

    Close up of a few cucumber slices topped with a spiced chickpea purée.

    This post has been compensated as part of my ongoing partnership with Stonyfield. As always, all opinions are 100% my own.

    These cucumber bites are a healthy party appetizer recipe with major Middle Eastern flair! They're quick & easy to assemble and make a great addition to any dinner or cocktail party.

    These would also be perfect for game day appetizer spreads along with our favorite easy hummus recipe (no soaking required!), these mayo-free deviled eggs, this buffalo chickpea dip, and this layered taco dip.

    Platter of cucumber slices topped with a spiced chickpea purée.

    'Tis the season for lots of holiday parties and indulgences.

    And while I love to make (and eat!) decadent dinner party food and desserts (helloooooo epic holiday cookie list), I also enjoy having lighter party fare.

     I've always been a fan of crudité platters (shoutout to Gustavo Fring!), but while I could go.to.town on that alone, not everyone wants a pile of veggies nestled up against a bowl of Ranch dip.

    So let's elevate the veggie presentation, shall we?

    Platter of cucumber slices topped with a spiced chickpea purée.

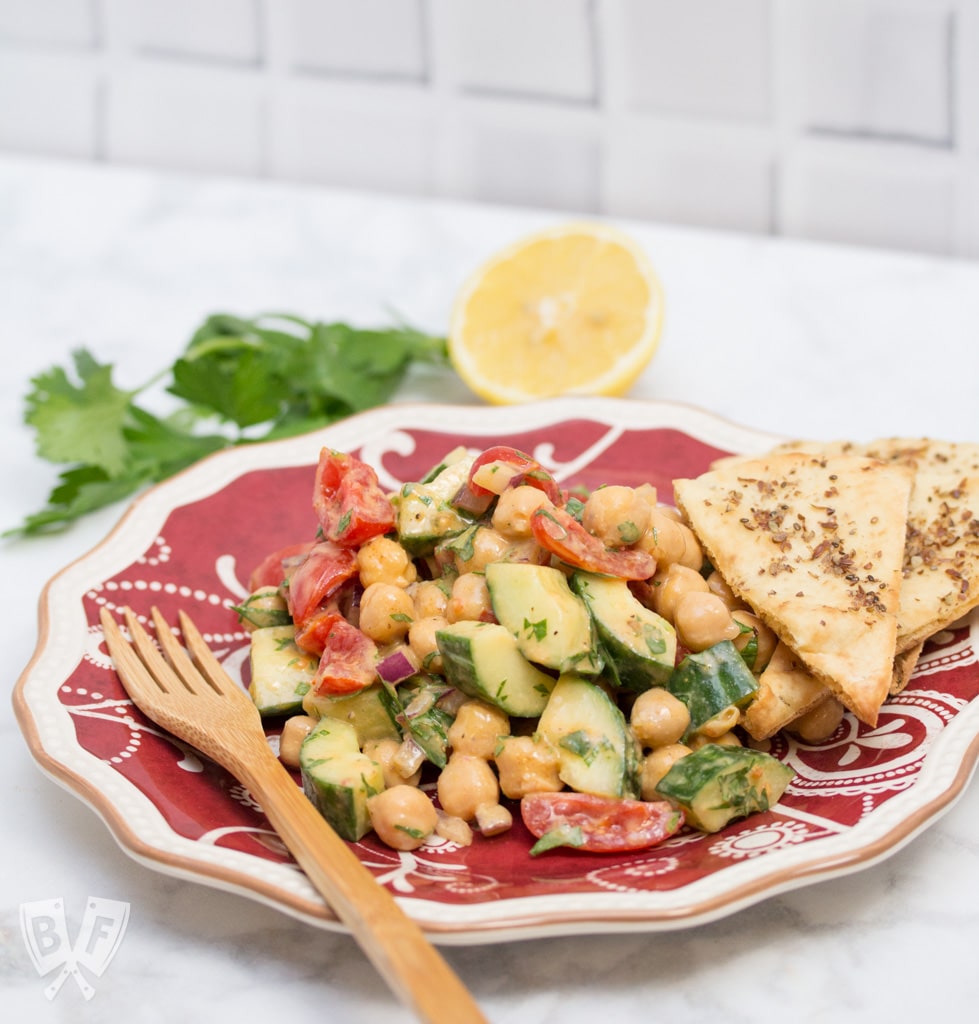
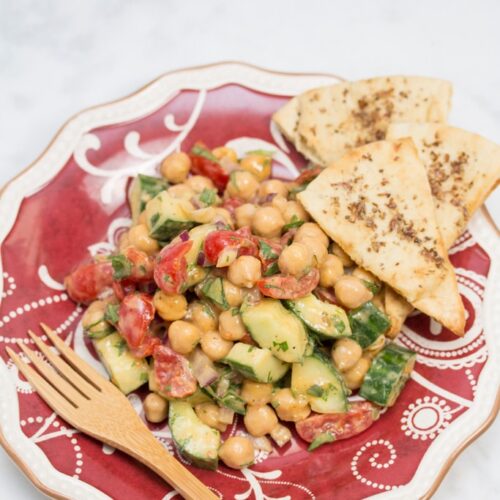
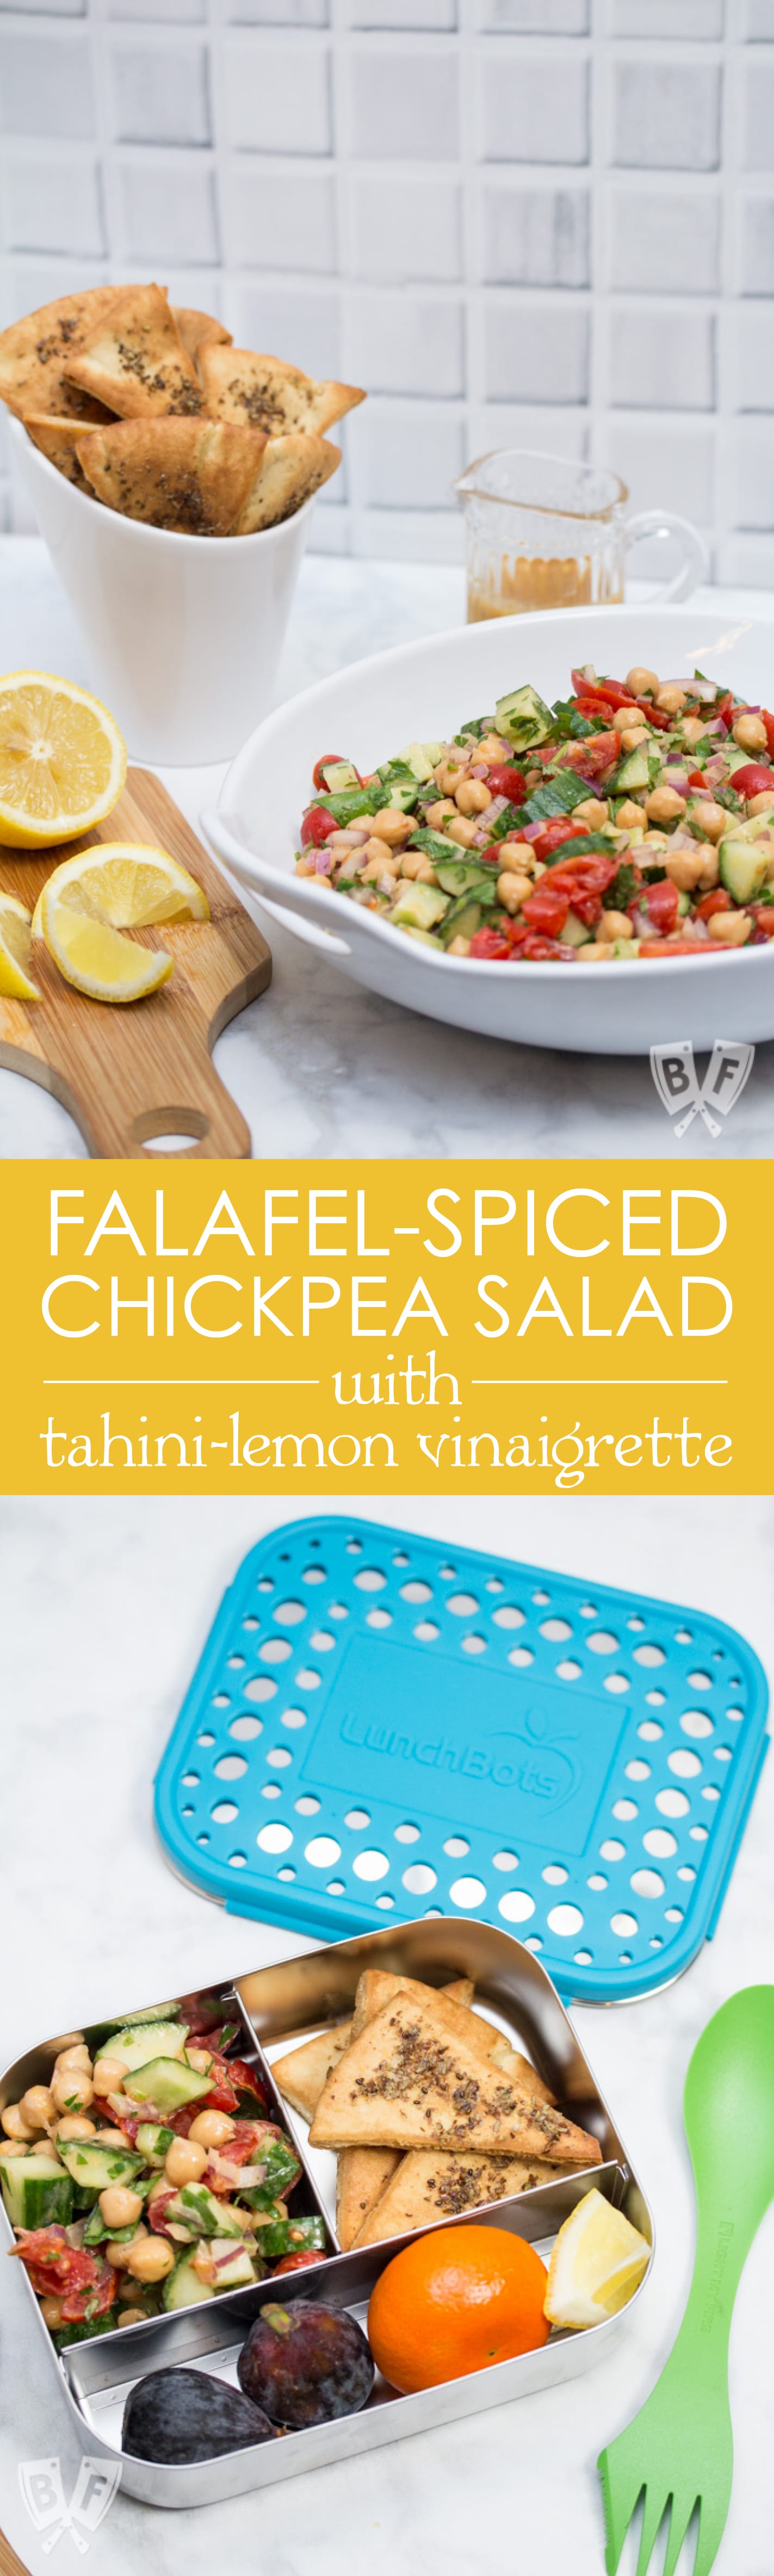
    I have a mild obsession with falafel. Standard Falafel with Yogurt-Herb Sauce, Falafel-Spiced Chickpea Flatbreads, Falafel-Spiced Chickpea Salad with Tahini-Lemon Vinaigrette... If I can falaf-ify it, I will!

    I also have a not-so-mild obsession with making up words. Just roll with me here...

    This time around, I figured I'd combine all of my favorite falafel flavors into a simple, elegant appetizer.

    And what better vessel for delivering this gorgeousness to your mouth than on top of a crisp, cool cucumber slice?

    Close up of a few cucumber slices topped with a spiced chickpea purée.

    These may look complicated, but make no mistake - all you're doing is throwing some ingredients into your food processor and puréeing them until smooth. You can then scoop or pipe the filling on top of the aforementioned cucumber slices, garnish (or not!), and you're good to go!

    The falafel purée here is made extra creamy by the addition of one of my favorite refrigerator staples: Stonyfield Double Cream.

    I've talked about double cream before - it's even thicker and richer than the whole milk Greek yogurt and not quite as tangy. This makes it a perfect whole milk, full fat substitution for sour cream and oils in cooking and baking.

    And all that creaminess makes the chickpea purée that tops these cucumber bites niiiiiice and smooth.

    Close up of a few cucumber slices topped with a spiced chickpea purée and a platter in the background.

    If you find your purée is a little too thick, go ahead and add another tablespoon of the double cream. And make sure you run the food processor till it's super smooth.

    I didn't run it quite long enough at first and I got a little bit of chickpea clogging the tip of my decorating bottle, so I put it back into the food processor and let it go for another 20 seconds. It was a quick fix!

    If you don't have a decorating bottle, you can use a metal scoop or a spoon to mound the filling on top, or you can put it into a large zip-top plastic bag, snip off the corner, and pipe it that way.

    Heck, you could even just put it in a bowl and serve thepurée as a dip with cucumber sticks or slices on the side, along with some other fresh veggies. Totally up to you!

    Close up of a hand holding a cucumber slice topped with a spiced chickpea purée with a platter out of focus in the background.

    I made these to bring to my friend's house for a gift wrapping party last week, and they were a HUGE hit! I was able to put them together in just a few minutes before the party started, which makes this an awesome last minute party appetizer recipe.

    You could even make the purée ahead of time if you wanted and just store it in the fridge until you're ready to serve. Then all you need to do is slice up your cucumber, pipe or scoop a little chickpea purée on top, and garnish away!

    Close up of a hand holding a cucumber slice topped with a spiced chickpea purée with a bite taken out of it.

    I chopped up twice as many herbs as I needed for the filling so I'd have extra for sprinkling, but it's not necessary. I like sliced tomato and red onion stuffed into pita bread with my falafel, so I added a little of that on top, too. Not everyone loves raw red onion as much as I do, so I opted for thinly sliced shallots, which have a milder flavor.

    I also kind of "deviled" them by adding a sprinkling of paprika on top of each one. It's an ingredient that went into the chickpea purée, so I already had the container out. Plus it added a nice pop of color to the tops of these bit-sized apps.

    Last but not least, I added a drizzle of Sriracha to the tops of my cucumber bites. I only did it to half of them, since I figured the kids (and some adults) wouldn't want that spicy heat at the end.

    Close up of a few cucumber slices topped with a spiced chickpea purée and a platter in the background.

    These cucumber bites disappeared pretty quickly at the party! The kids were all excited to try them (even the picky eaters!), and some of them even braved the Sriracha-drizzled ones AND LOVED THEM!

    Success!

    Again, these look fancy but they don't take a lot of work! And you can omit the garnishes or just reserve a bit of the herbs and sprinkle them on at the end for a bit of panache.

    Close up of a plate with a few cucumber slices topped with a spiced chickpea purée.

    I loved how quickly these came together, and how crisp and refreshing the flavor was. Not only were they delicious, I felt good about the ingredients that I used to make them.

    The next time you're looking for appetizer ideas, I hope you'll give these falafel-spiced cucumber bites a try.

    If you love cucumber recipes, check out some of our very favorites in this roundup: 25+ Must-Try Cucumber Recipes

    And if you're looking for more ways to use cumin, check out this post that showcases 21 of our favorite cumin recipes.

    What are your favorite party food recipes? I'd love to hear about them in the comments section below!

    And stay tuned later this week for a roundup of healthy cocktail party recipe options - just in time for your New Year's and game day celebrations!

    Looking for more bite-sized favorites? Check out these 5-star recipes:

    • French-Inspired Deviled Eggs
    • Patatas Bravas with Chipotle Aioli
    • Killer Shrimp Cocktail
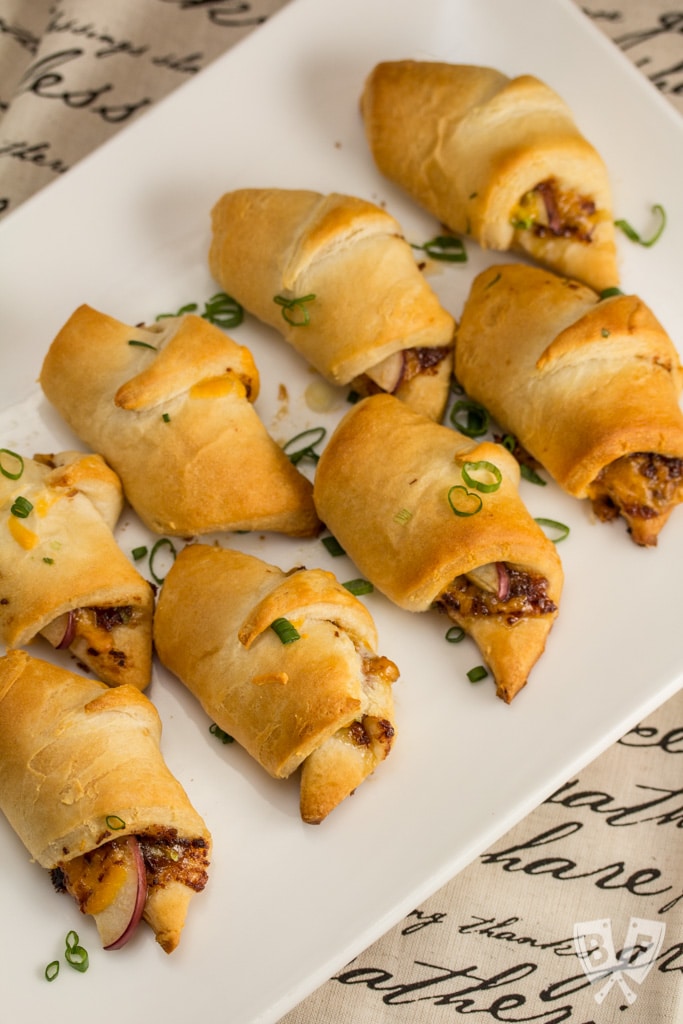
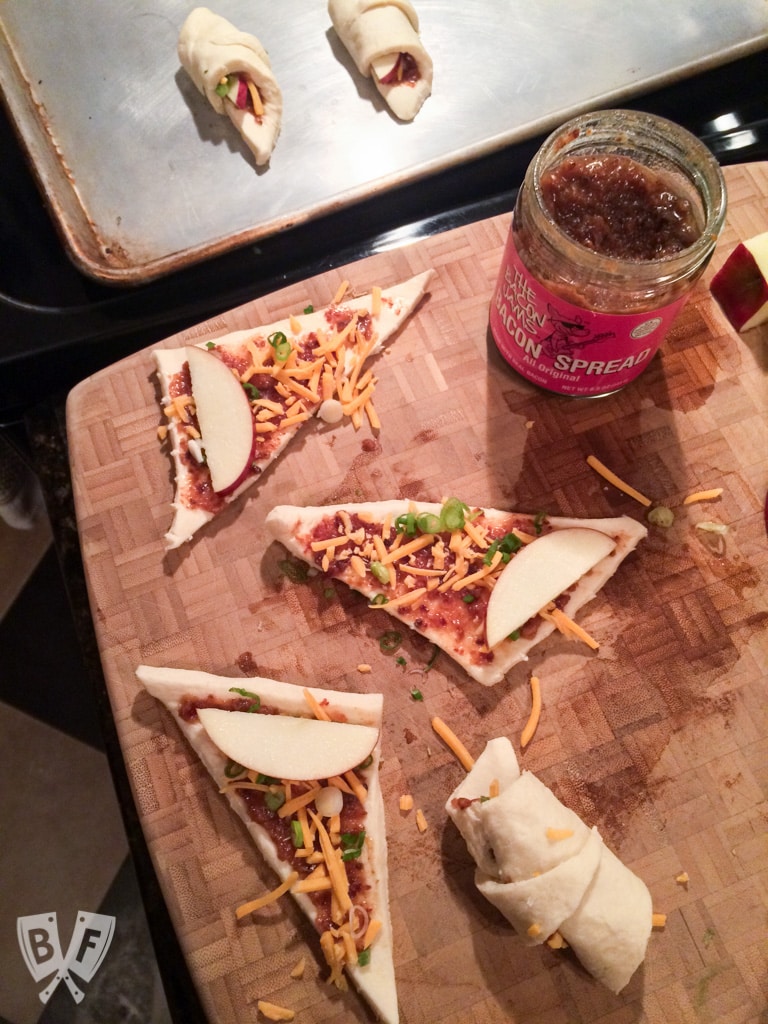
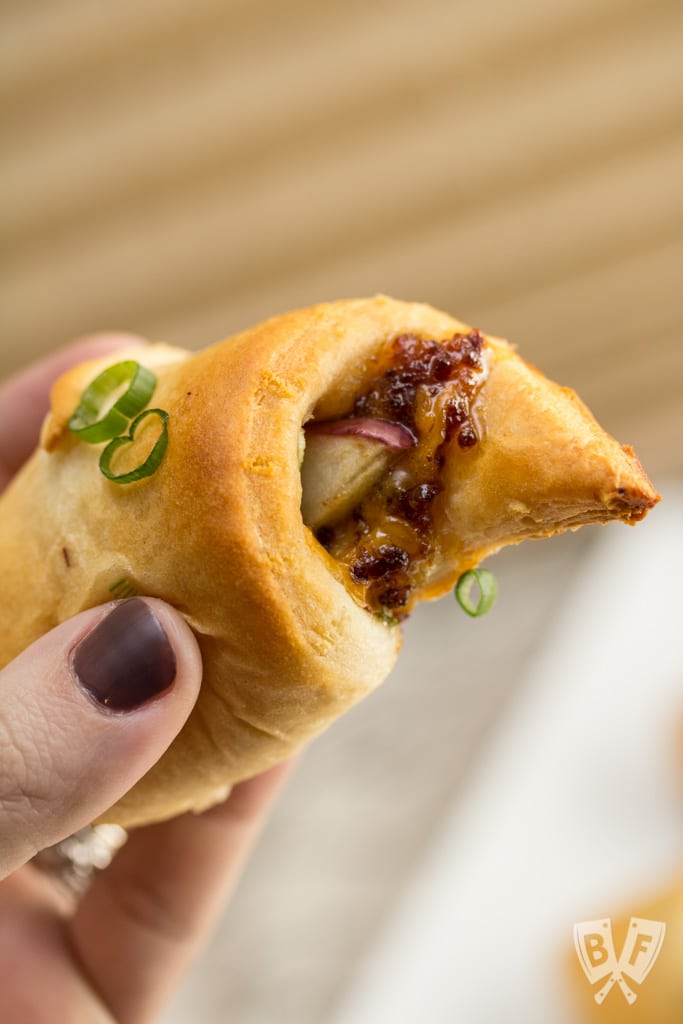
    • Cheesy Bacon + Apple Croissants
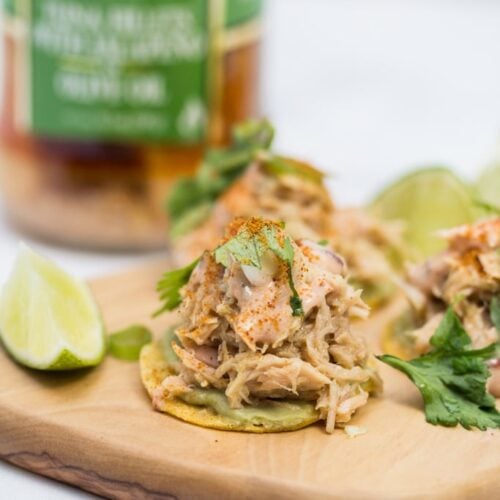
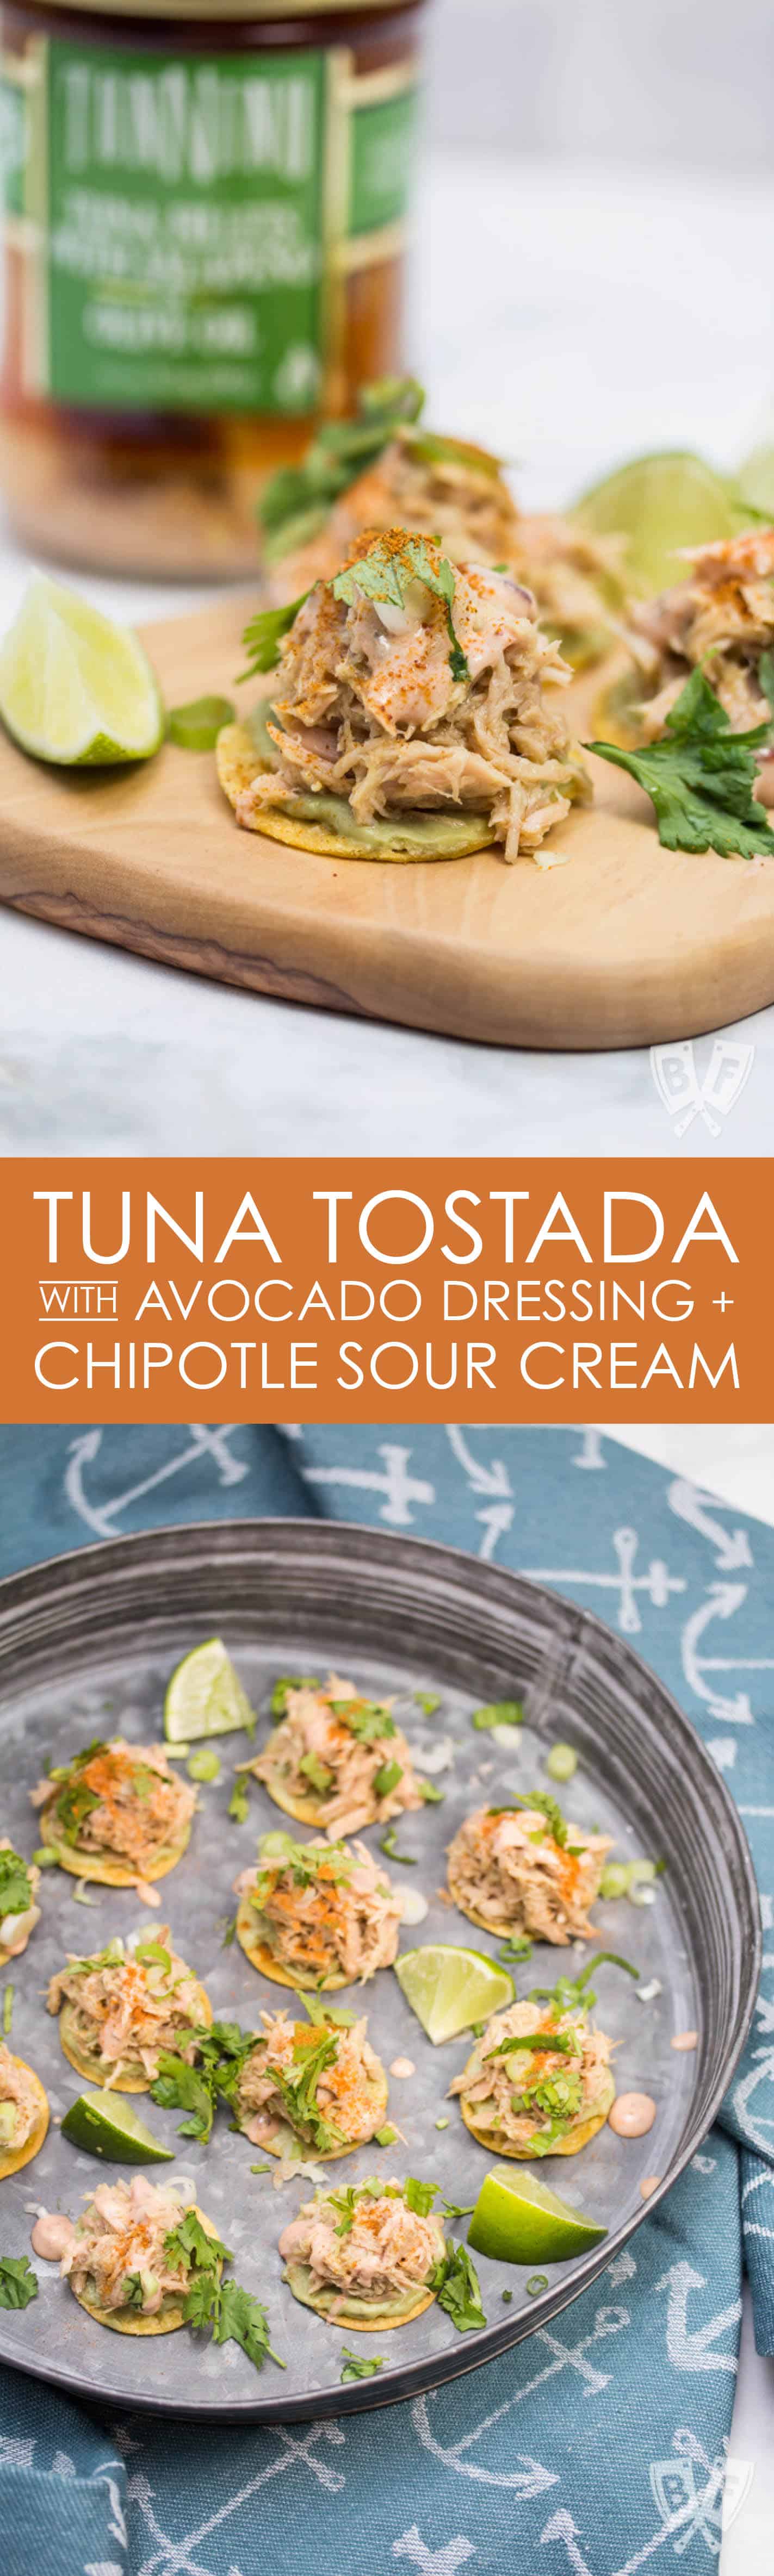
    • Tuna Tostada with Avocado Dressing + Chipotle Sour Cream
    • Marcona Almond + Dried Cherry Popcorn with Crispy Rosemary
    • Veggie Cream Cheese Roll-ups
    • No Mayo Deviled Eggs
    • Mini Turkey Pot Pies with Puff Pastry

    📖 Recipe

    Falafel-Spiced Cucumber Bites

    Close up of a few cucumber slices topped with a spiced chickpea purée.
    These cucumber bites are a healthy party appetizer recipe with major Middle Eastern flair! They're quick & easy to assemble and make a great addition to any dinner or cocktail party. These would also be perfect for game day appetizer spreads!
    Big Flavors from a Tiny Kitchen - Ashley Covelli
    5 from 6 votes
    Print Recipe Pin Recipe
    Servings: 24 Pieces
    Course: Appetizer
    Cuisine: Middle Eastern
    Prep Time 15 minutes mins
    Total Time 15 minutes mins

    Ingredients
     

    For Cucumber Bites:
    • 1 15.5 ounce can chickpeas, drained and rinsed
    • 6 tablespoons plain Greek yogurt
    • 2 tablespoons tahini
    • 1 tablespoon freshly squeezed lemon juice
    • ½ teaspoon ground cumin
    • ½ teaspoon ground coriander
    • ½ teaspoon ground paprika
    • ¼ teaspoon kosher salt
    • ⅛ teaspoon freshly cracked black pepper
    • 2 tablespoons finely chopped cilantro divided
    • 2 tablespoons finely chopped parsley divided
    • 1 English cucumber
    For Garnish (optional, but encouraged):
    • Ground paprika
    • Grape tomatoes, quartered
    • Thinly sliced shallot
    • Sriracha

    Instructions
     

    1. In the bowl of a food processor, place chickpeas, yogurt, tahini, lemon juice, cumin, coriander, paprika, salt, pepper, and 1 tablespoon each of the parsley and cilantro. Process until smooth.
    2. Slice the cucumber into ½-inch thick coins. Scoop or pipe the chickpea mixture on top.
    3. Garnish with remaining chopped herbs, paprika, tomatoes, shallot, paprika, and Sriracha, if desired.

    Notes

    • Chickpea purée can be made in advance and stored in the refrigerator until ready to serve.
    • If your purée isn't smooth enough, process a little longer, and if it's still too thick, add another tablespoon of yogurt.
    • If you want the striped look on your cucumbers, simply use a vegetable peeler to peel off a few strips down the length of the skin before slicing the cucumber.

    Useful products:

    food processor
    sriracha
    silicone decorating bottle kit

    Nutrition information

    Nutrition Facts
    Falafel-Spiced Cucumber Bites
    Amount per Serving
    Calories
    42
    % Daily Value*
    Fat
     
    1
    g
    2
    %
    Saturated Fat
     
    0.2
    g
    1
    %
    Polyunsaturated Fat
     
    1
    g
    Monounsaturated Fat
     
    0.4
    g
    Cholesterol
     
    0.2
    mg
    0
    %
    Sodium
     
    28
    mg
    1
    %
    Potassium
     
    88
    mg
    3
    %
    Carbohydrates
     
    6
    g
    2
    %
    Fiber
     
    2
    g
    8
    %
    Sugar
     
    1
    g
    1
    %
    Protein
     
    2
    g
    4
    %
    Vitamin A
     
    71
    IU
    1
    %
    Vitamin C
     
    1
    mg
    1
    %
    Calcium
     
    18
    mg
    2
    %
    Iron
     
    1
    mg
    6
    %
    * Percent Daily Values are based on a 2000 calorie diet.

    Did you make this recipe?

    Leave a comment + star rating below to let people know how it was!
    Melt-in-Your-Mouth Buttermilk Chocolate Cookies

    December 19, 2017 by Ashley 115 Comments

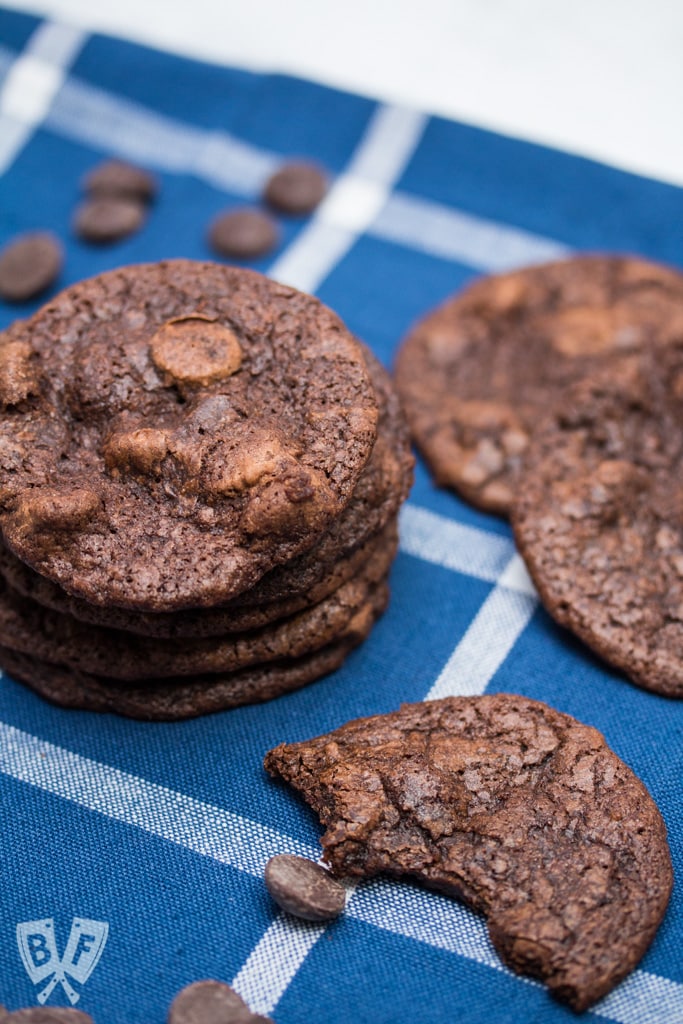
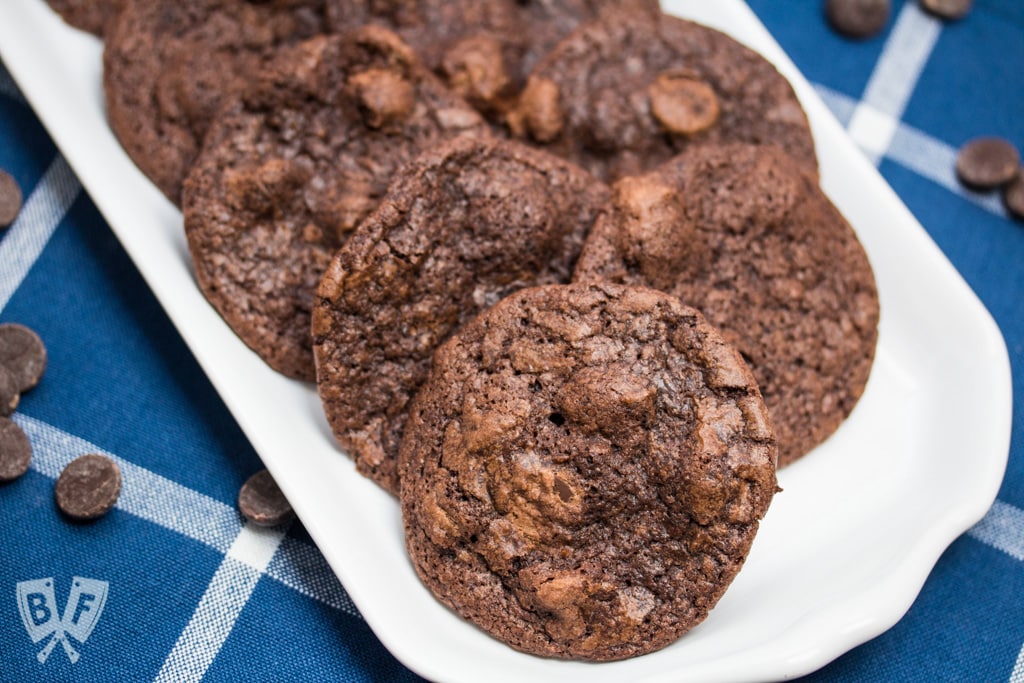
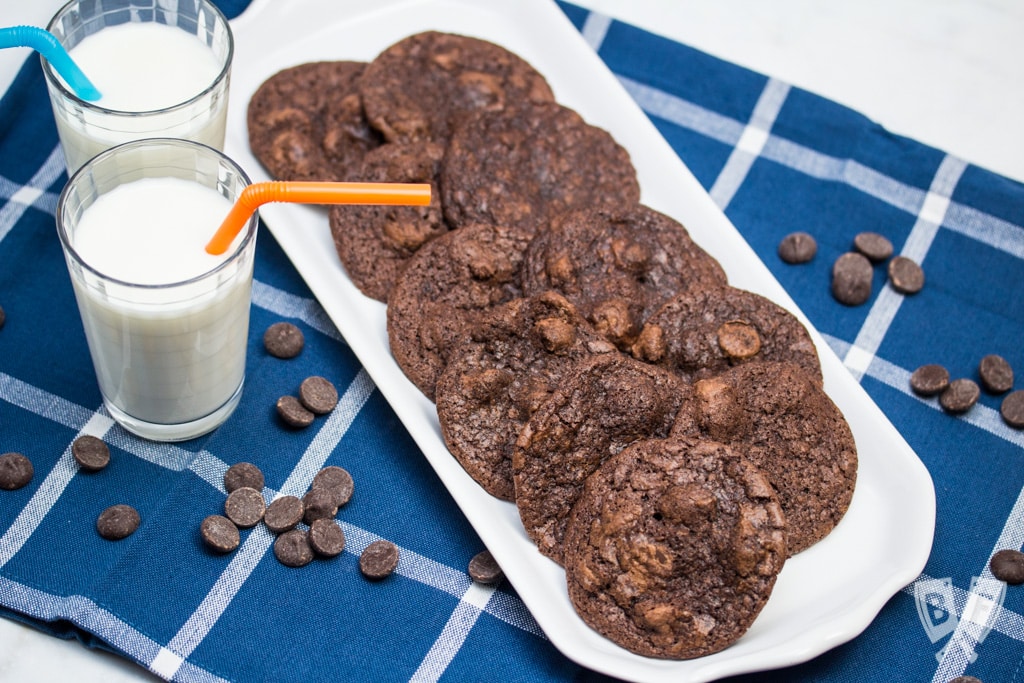
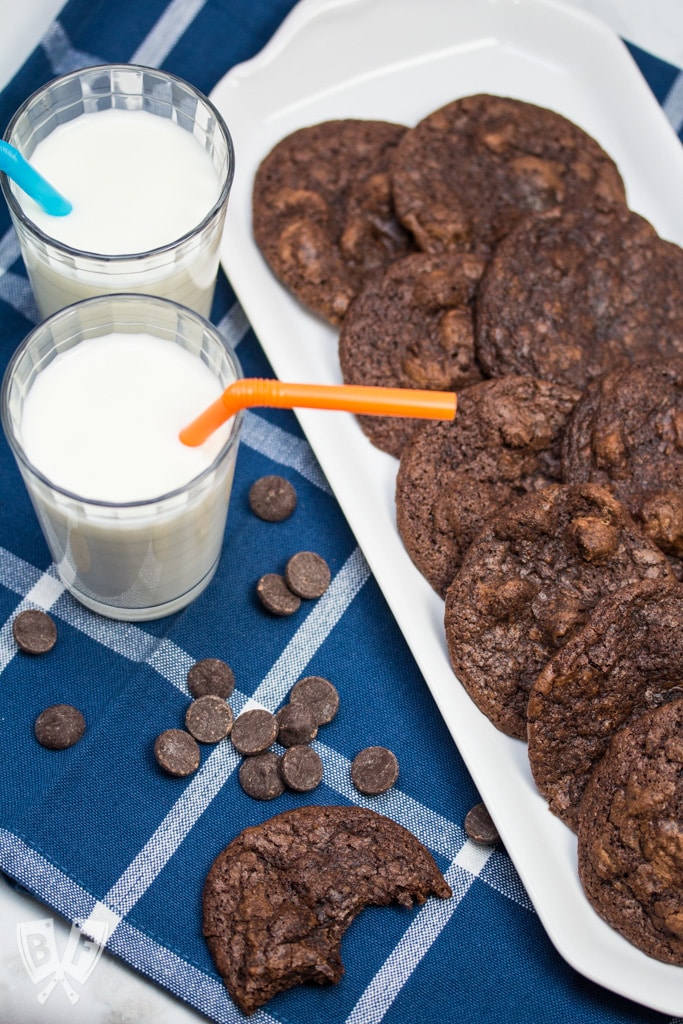
    Chocolate cookies and chocolate chips on a blue and white backdrop.

    These supremely chocolatey cookies are a great way to use a partial container of buttermilk - guaranteed to satisfy even the strongest chocolate cravings.

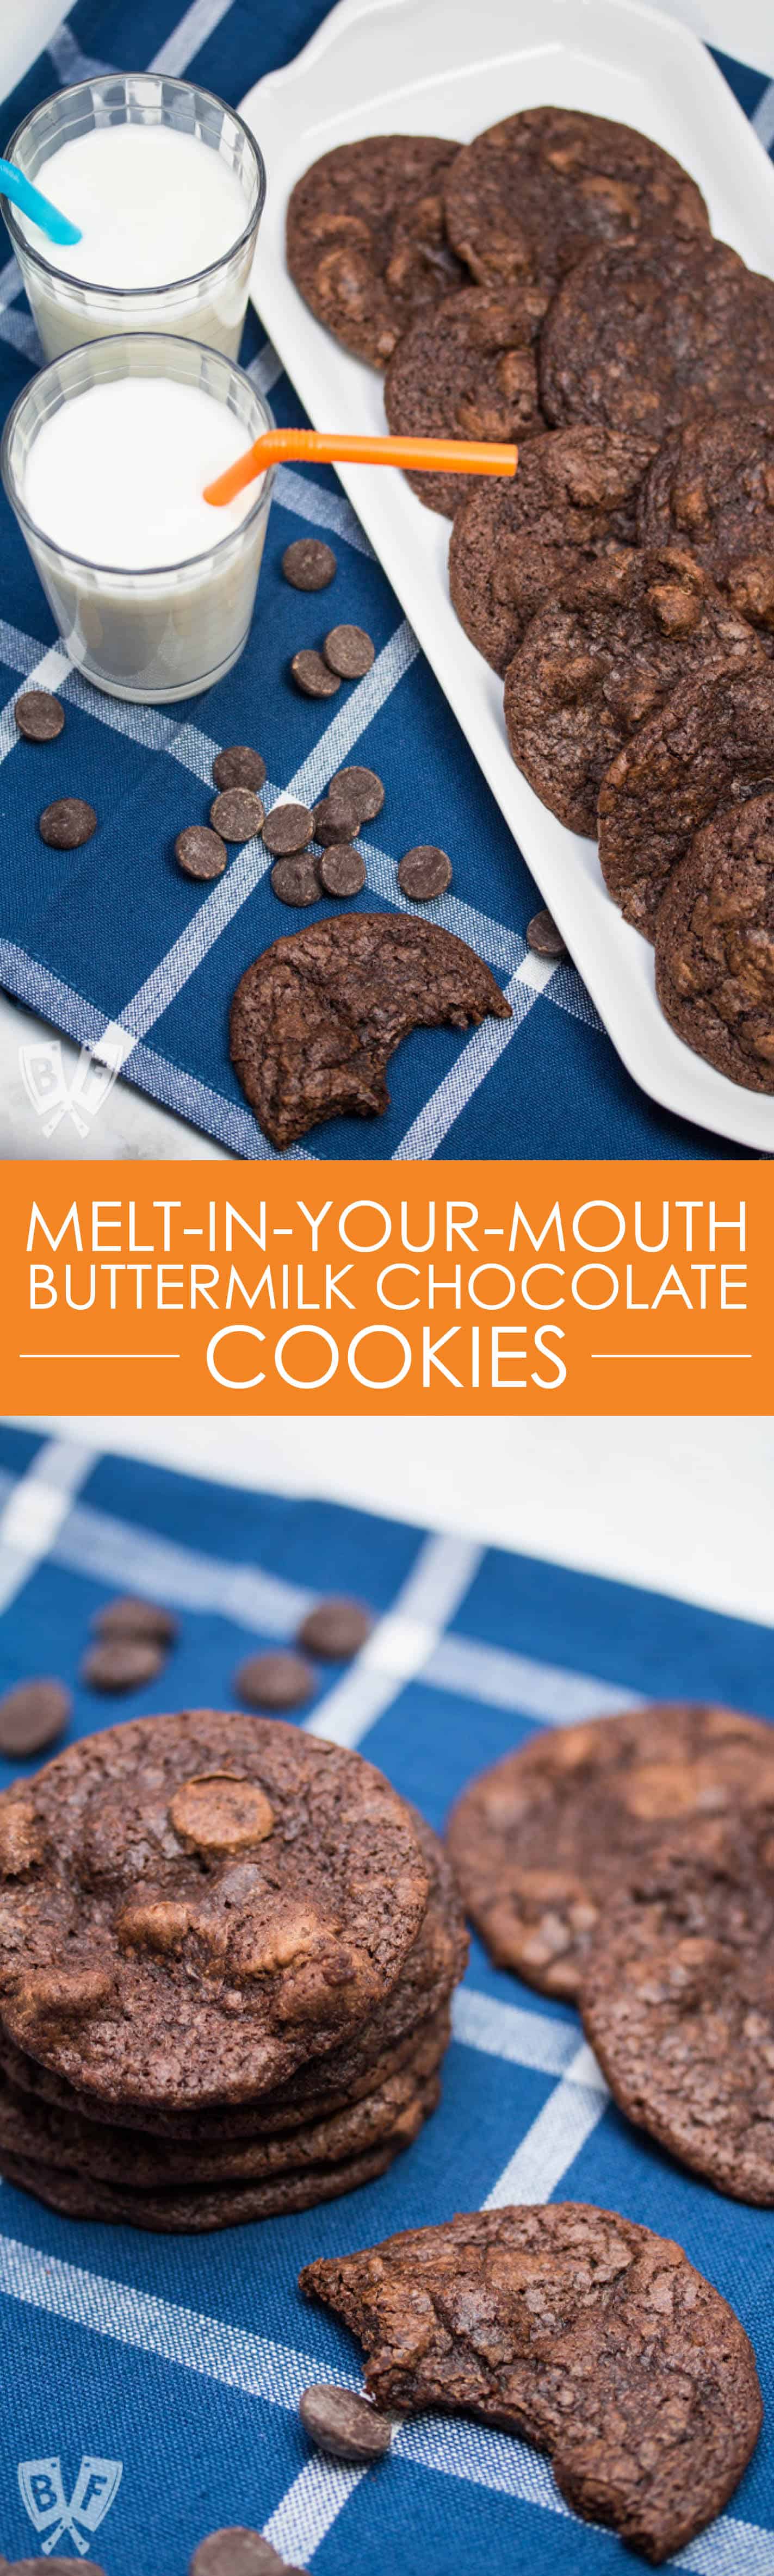
    These Melt-in-Your-Mouth Buttermilk Chocolate Cookies are a supremely chocolatey dessert recipe that is a great way to use a partial container of buttermilk - guaranteed to satisfy even the strongest chocolate cravings.

    Do you ever find yourself with a partial container of buttermilk and not know what to do with it? Look no further!

    This recipe will have you wanting to keep buttermilk on hand at all times so you have an excuse to make these mouthwateringly delicious, decadent chocolate cookies!

    If you're looking for another chocolatey favorite, these espresso chocolate chip brownies are another fantastic choice.

    These Melt-in-Your-Mouth Buttermilk Chocolate Cookies are a supremely chocolatey dessert recipe that is a great way to use a partial container of buttermilk - guaranteed to satisfy even the strongest chocolate cravings.

    I've been making these cookies for yeeeeears.

    I first saw them in this post over on Baking Bites and thought that the cookies sounded unique and delicious.

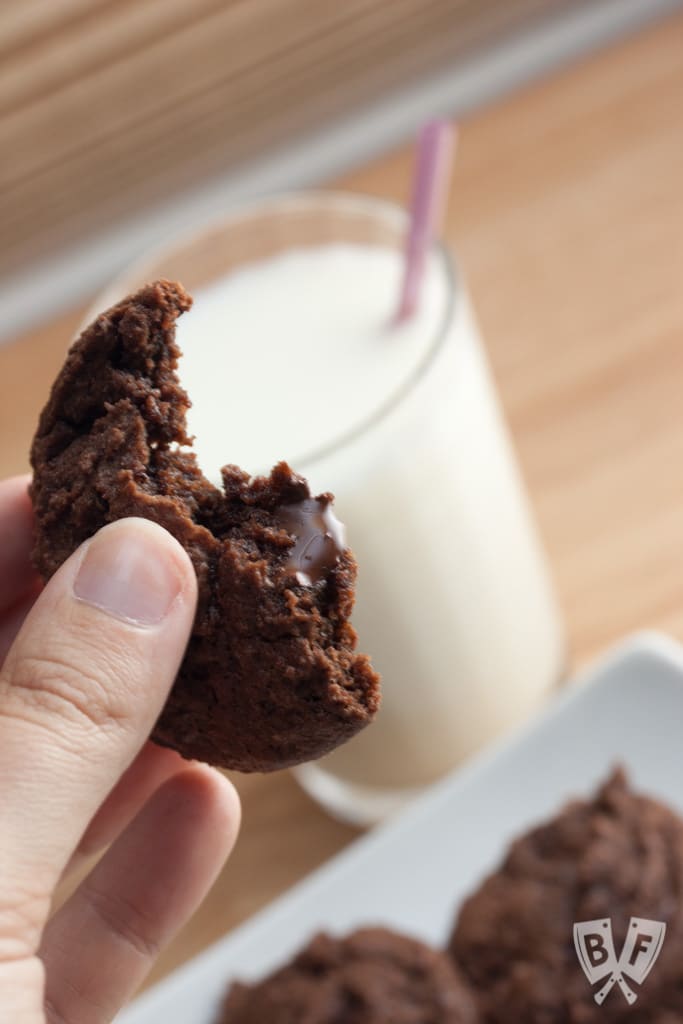
    These cookies really do melt in your mouth. The buttermilk keeps the cookies incredibly moist, and the chocolate chips get nicely gooey and delicious.

    I like using a mix of regular-sized semi-sweet chocolate chips along with these bittersweet chocolate baking chips from Ghirardelli when I bake these cookies.

    They're a lot wider than standard chocolate chips, and they really intensify the chocolatey goodness of these cookies.

    These Melt-in-Your-Mouth Buttermilk Chocolate Cookies are a supremely chocolatey dessert recipe that is a great way to use a partial container of buttermilk - guaranteed to satisfy even the strongest chocolate cravings.

    I actually buy them in bulk from the wholesale club because I like them so much.

    Sometimes I chop them up a little smaller, sometimes I melt them, and sometimes I leave them whole - it all depends on my mood that day and the recipe I'm using.

    If you can't find the baking chips, you can use any other type of chocolate chips that you enjoy, or just use 2 cups total of one type.

    I happen to really enjoy the mix of different types of chocolate here, but it's totally up to you!

    These Melt-in-Your-Mouth Buttermilk Chocolate Cookies are a supremely chocolatey dessert recipe that is a great way to use a partial container of buttermilk - guaranteed to satisfy even the strongest chocolate cravings.

    To further ensure a high level of dark chocolatey flavor in this recipe, I like using Dutch process cocoa powder.

    What could be better?! Any time I find myself with a partial carton of buttermilk to use up, I bake a batch of these beauties. Yum!

    I used a #50 cookie scoop for this recipe and got just over 4 dozen cookies from this mix.

    You could make them a little larger if you like.

    It's really key to let them sit on the baking sheet for a few minutes before transferring them to rack to cool, as they're extremely delicate fresh out of the oven.

    A super thin spatula will be your best friend here.

    These Melt-in-Your-Mouth Buttermilk Chocolate Cookies are a supremely chocolatey dessert recipe that is a great way to use a partial container of buttermilk - guaranteed to satisfy even the strongest chocolate cravings.

    Torn cookies still taste good, but they sure aren't as pretty.

    I'm also curious to try chilling the cookie dough next time to see if it makes them a little thicker.

    I'm not super well versed on the science behind many of the aspects of baking, but I sure do love to experiment!

    Looking for more dessert recipes? Check out some of our favorites:

    • Rich Cocoa Brownie Bites
    • Elvis-Style Frozen Bananas
    • Sweet + Salty Dark Chocolate Clusters
    • 5-Ingredient Samoa Cereal Bowls
    • Orange Scented Cannoli Dip
    • Double Chocolate Chip Cookies with Vanilla Icing
    • Dessert Nachos with Fresh Baked Cinnamon Tortilla Chips
    • Tolon's Strawberry Basil Shortcake
    • Cranberry Orange Snickerdoodles
    • Bourbon Bacon Pecan Pie with a Whole Wheat Crust
    • Chocolate Cream Pie with Orange Zested Whipped Cream
    • Great Grandma Francesca Cardile's Cookies
    • Triple-Chocolate Pumpkin Pie
    These Melt-in-Your-Mouth Buttermilk Chocolate Cookies are a supremely chocolatey dessert recipe that is a great way to use a partial container of buttermilk - guaranteed to satisfy even the strongest chocolate cravings.

    📖 Recipe

    Melt-in-Your-Mouth Buttermilk Chocolate Cookies

    Chocolate cookies and chocolate chips on a blue and white backdrop.
    These supremely chocolatey cookies are a great way to use a partial container of buttermilk - guaranteed to satisfy even the strongest chocolate cravings.
    Big Flavors from a Tiny Kitchen - Ashley Covelli (adapted from Baking Bites)
    4.72 from 21 votes
    Print Recipe Pin Recipe
    Course: Cookies, Desserts
    Cuisine: American
    Prep Time 15 minutes mins
    Cook Time 10 minutes mins
    Total Time 25 minutes mins

    Ingredients
     

    • 2 cups all-purpose flour
    • ½ teaspoon baking soda
    • ½ teaspoon salt
    • ½ cup unsalted butter
    • ¾ cup Dutch process cocoa powder
    • 2 cups sugar
    • 1 teaspoon vanilla extract
    • ⅔ cup buttermilk
    • 1 cup semi-sweet chocolate chips
    • 1 cup dark chocolate baking chips or another cup of chocolate chips

    Instructions
     

    1. Preheat the oven to 350°F. Line a baking sheet with a silicone baking mat or parchment paper.
    2. In a medium bowl, whisk together flour, baking soda and salt and set aside.
    3. In a large microwave-safe bowl, melt the butter (I like to do this in 15 second increments at 50% power, but you can also do it in a small saucepan on the stovetop and transfer it to a bowl afterward). While the butter is still warm, add the cocoa powder to the butter and whisk until very smooth. Whisk in sugar, vanilla extract and buttermilk.
    4. Gradually add the flour mixture and stir until no streaks of flour remain (I like to stir in about ⅓ of the mixture at a time to fully, evenly incorporate it). Gently stir in the chocolate chips.
    5. Drop dough by heaping tablespoons (I like using a #50 scoop) onto prepared baking sheet, leaving a few inches in between each cookie to allow for spread.
    6. Bake for 10-14 minutes, until cookies are set around the edges.
    7. Cool for 3-5 minutes on the baking sheet, then use a spatula to gently transfer them to a wire rack to cool completely.

    Did you make this recipe?

    Leave a comment + star rating below to let people know how it was!
    These Melt-in-Your-Mouth Buttermilk Chocolate Cookies are a supremely chocolatey dessert recipe that is a great way to use a partial container of buttermilk - guaranteed to satisfy even the strongest chocolate cravings.

    Goat Cheese-Stuffed Quinoa & Kale Balls with Romesco Sauce

    December 8, 2017 by Ashley 17 Comments

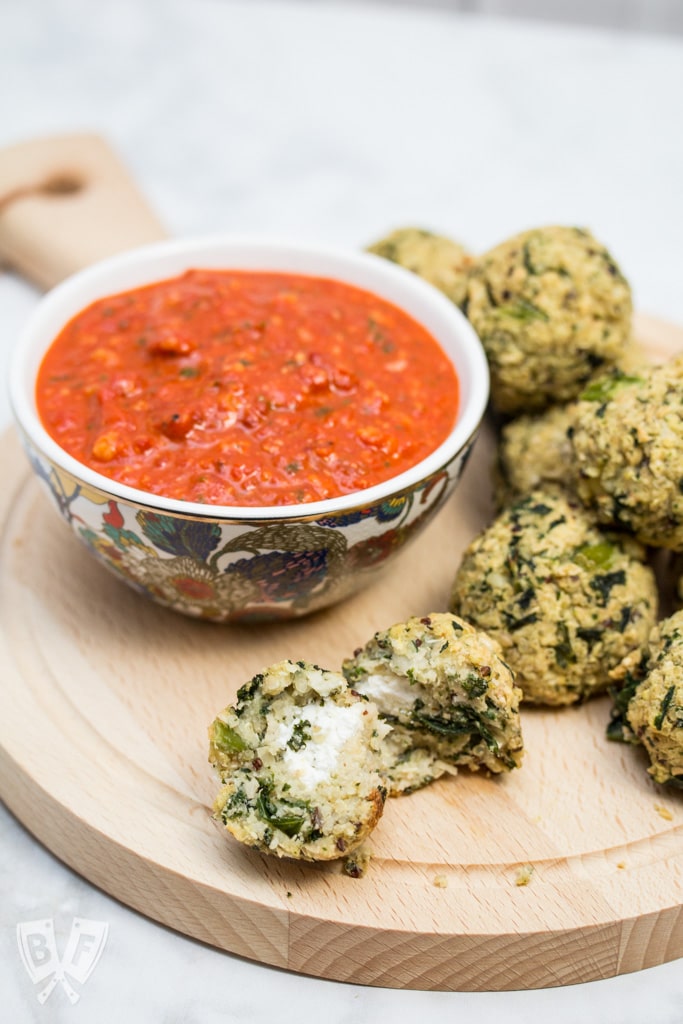
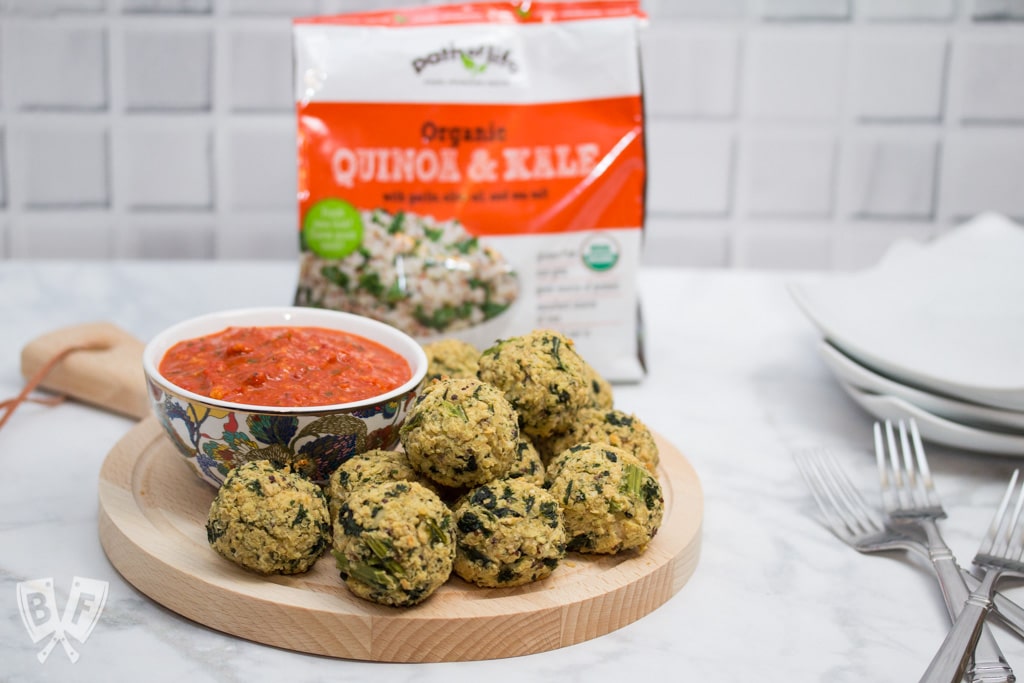
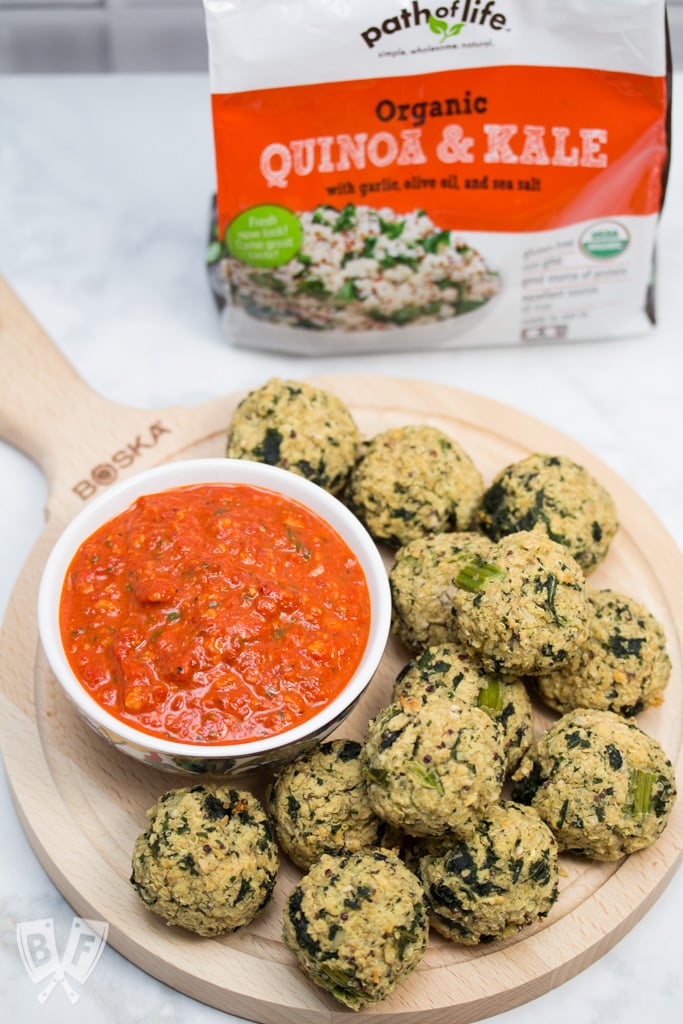
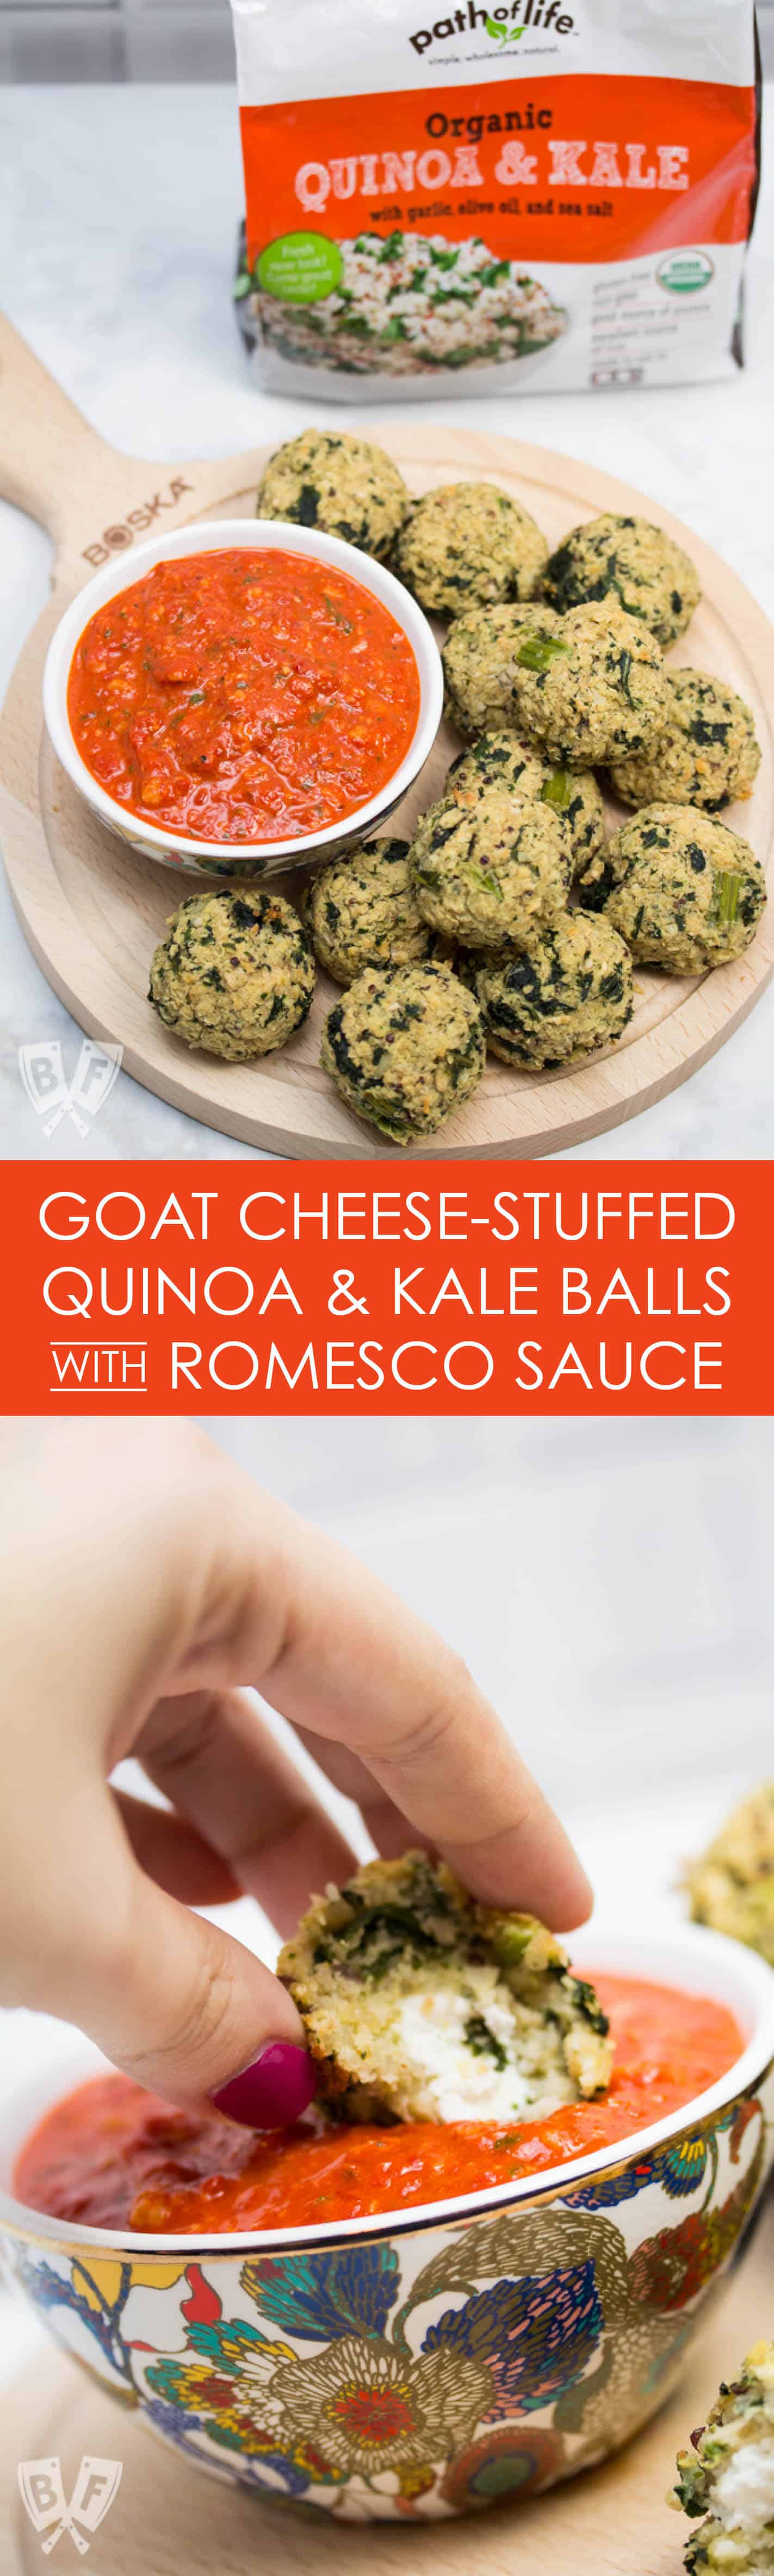
    Goat Cheese-Stuffed Quinoa & Kale Balls with Romesco Sauce: (#ad) This hearty goat cheese-stuffed vegetarian "meatball" recipe with quick romesco sauce makes an elegant party appetizer or main course for Meatless Monday!

    This post has been compensated as part of my partnership with Path of Life. As always, all opinions are 100% my own.

    This hearty goat cheese-stuffed vegetarian "meatball" recipe with quick romesco sauce makes an elegant party appetizer or main course for Meatless Monday!

    Goat Cheese-Stuffed Quinoa & Kale Balls with Romesco Sauce: (#ad) This hearty goat cheese-stuffed vegetarian "meatball" recipe with quick romesco sauce makes an elegant party appetizer or main course for Meatless Monday!

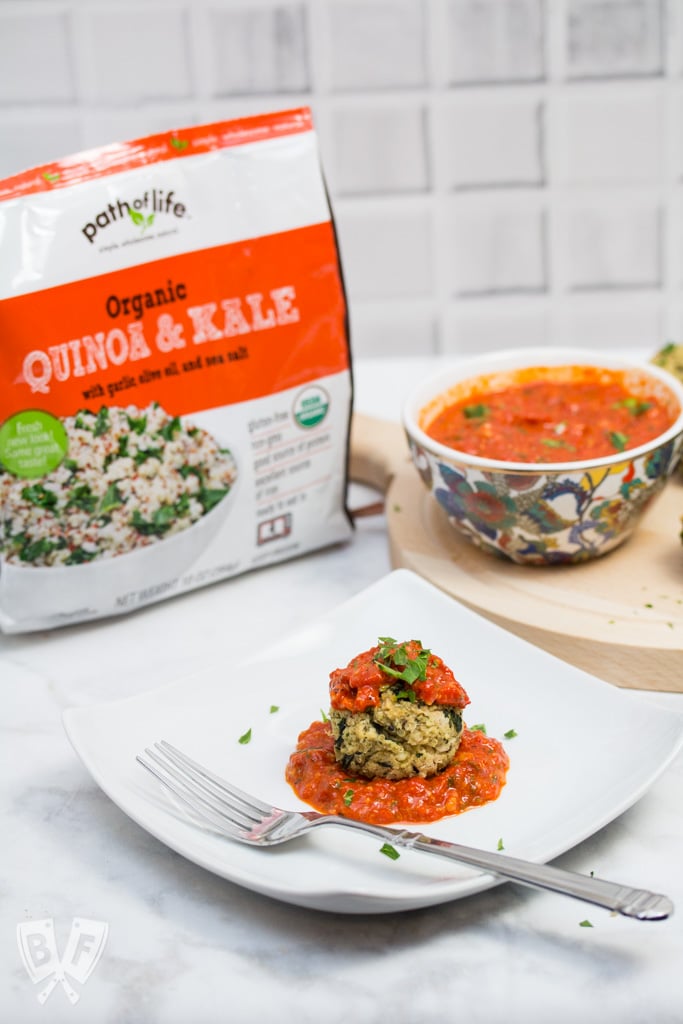
    I was first introduced to Path of Life this past summer. I got to sample several of their frozen quinoa & vegetable side dish products and was seriously impressed!

    I don't know that I would have believed that these dishes came out of a frozen package moments beforehand if I hadn't watched them cook up in a microwave right in front of me.

    Path of Life offers a wide variety of natural and organic side dish options that will compliment any type of meal you're preparing. They're perfect for when you're short on time but still want a healthy, clean addition to your plate.

    Goat Cheese-Stuffed Quinoa & Kale Balls with Romesco Sauce: (#ad) This hearty goat cheese-stuffed vegetarian "meatball" recipe with quick romesco sauce makes an elegant party appetizer or main course for Meatless Monday!

    The Organic Quinoa & Kale has been a lifesaver for me at mealtimes over the past few busy weeks. Between birthdays, holiday parties, work deadlines, sick family members, and just general life stuff, I haven't been as on top of my meal planning game as usual.

    But with just 3 minutes of microwave time, I'm rewarded with fluffy, perfectly cooked quinoa and kale that can go alongside pretty much any meal.

    This particular variety is simply seasoned with garlic, extra-virgin olive oil, salt, and pepper. They also have several other quinoa blends with flavor profiles that span the globe - everything from Asian to Southwestern to Mediterranean.

    The other thing I love about this particular blend of quinoa and kale is that it's a perfect canvas to incorporate into more involved recipes, for days when I have a bit more time on my hands.

    Goat Cheese-Stuffed Quinoa & Kale Balls with Romesco Sauce: (#ad) This hearty goat cheese-stuffed vegetarian "meatball" recipe with quick romesco sauce makes an elegant party appetizer or main course for Meatless Monday!

    It's no secret that I'm a big fan of appetizers. And cheese.

    And appetizers that involve cheese (like like these Garlicky Goat Cheese + Herb Stuffed Peppadews, these Cheesy Bacon + Apple Croissants, or these Brie Waffle Bites).

    One of my favorite cheeses to work with is goat cheese. It adds a creamy, tangy flavor that goes well with so many different dishes. I often lean toward Italian flavors when I work with goat cheese, but this time around I took a bit of inspiration from Spain.

    According to Wikipedia, romesco is a nut and red pepper-based sauce that originated from Tarragona, Catalonia, in Northeastern Spain.

    It is often served alongside fish, but I thought it would work really well as an accompaniment to some vegetarian "meatballs".

    Goat Cheese-Stuffed Quinoa & Kale Balls with Romesco Sauce: (#ad) This hearty goat cheese-stuffed vegetarian "meatball" recipe with quick romesco sauce makes an elegant party appetizer or main course for Meatless Monday!

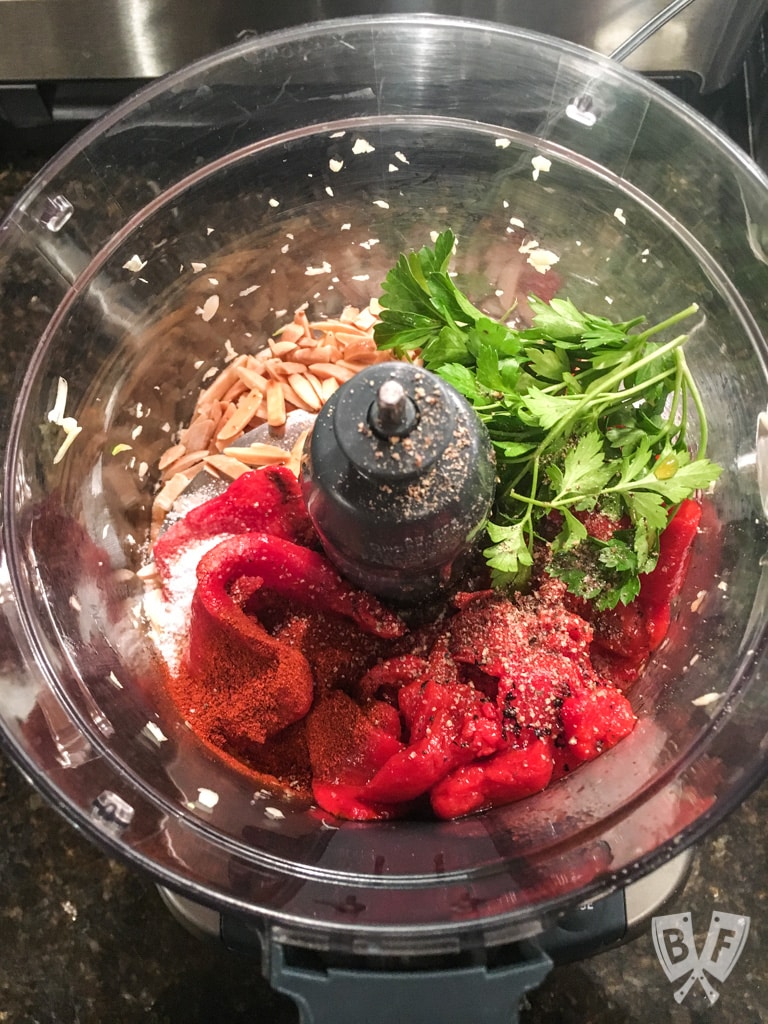
    My romesco sauce recipe is super simple, and can be put together in just a few minutes using a handful of ingredients and a food processor.

    One of my favorite tips for mincing fresh garlic is to turn on your food processor, then drop a peeled clove (or however many cloves you need) of garlic down the feed chute while the motor is running. It does a fantastic job of mincing the garlic without you needing to use a knife to chop it by hand.

    It works really well for recipes like this, where you're using your food processor anyway, and you don't want to end up with giant chunks of garlic throughout your sauce.

    You can make the sauce ahead of time if you like, and stash it in the refrigerator. I recommend letting it come back to room temperature before serving.

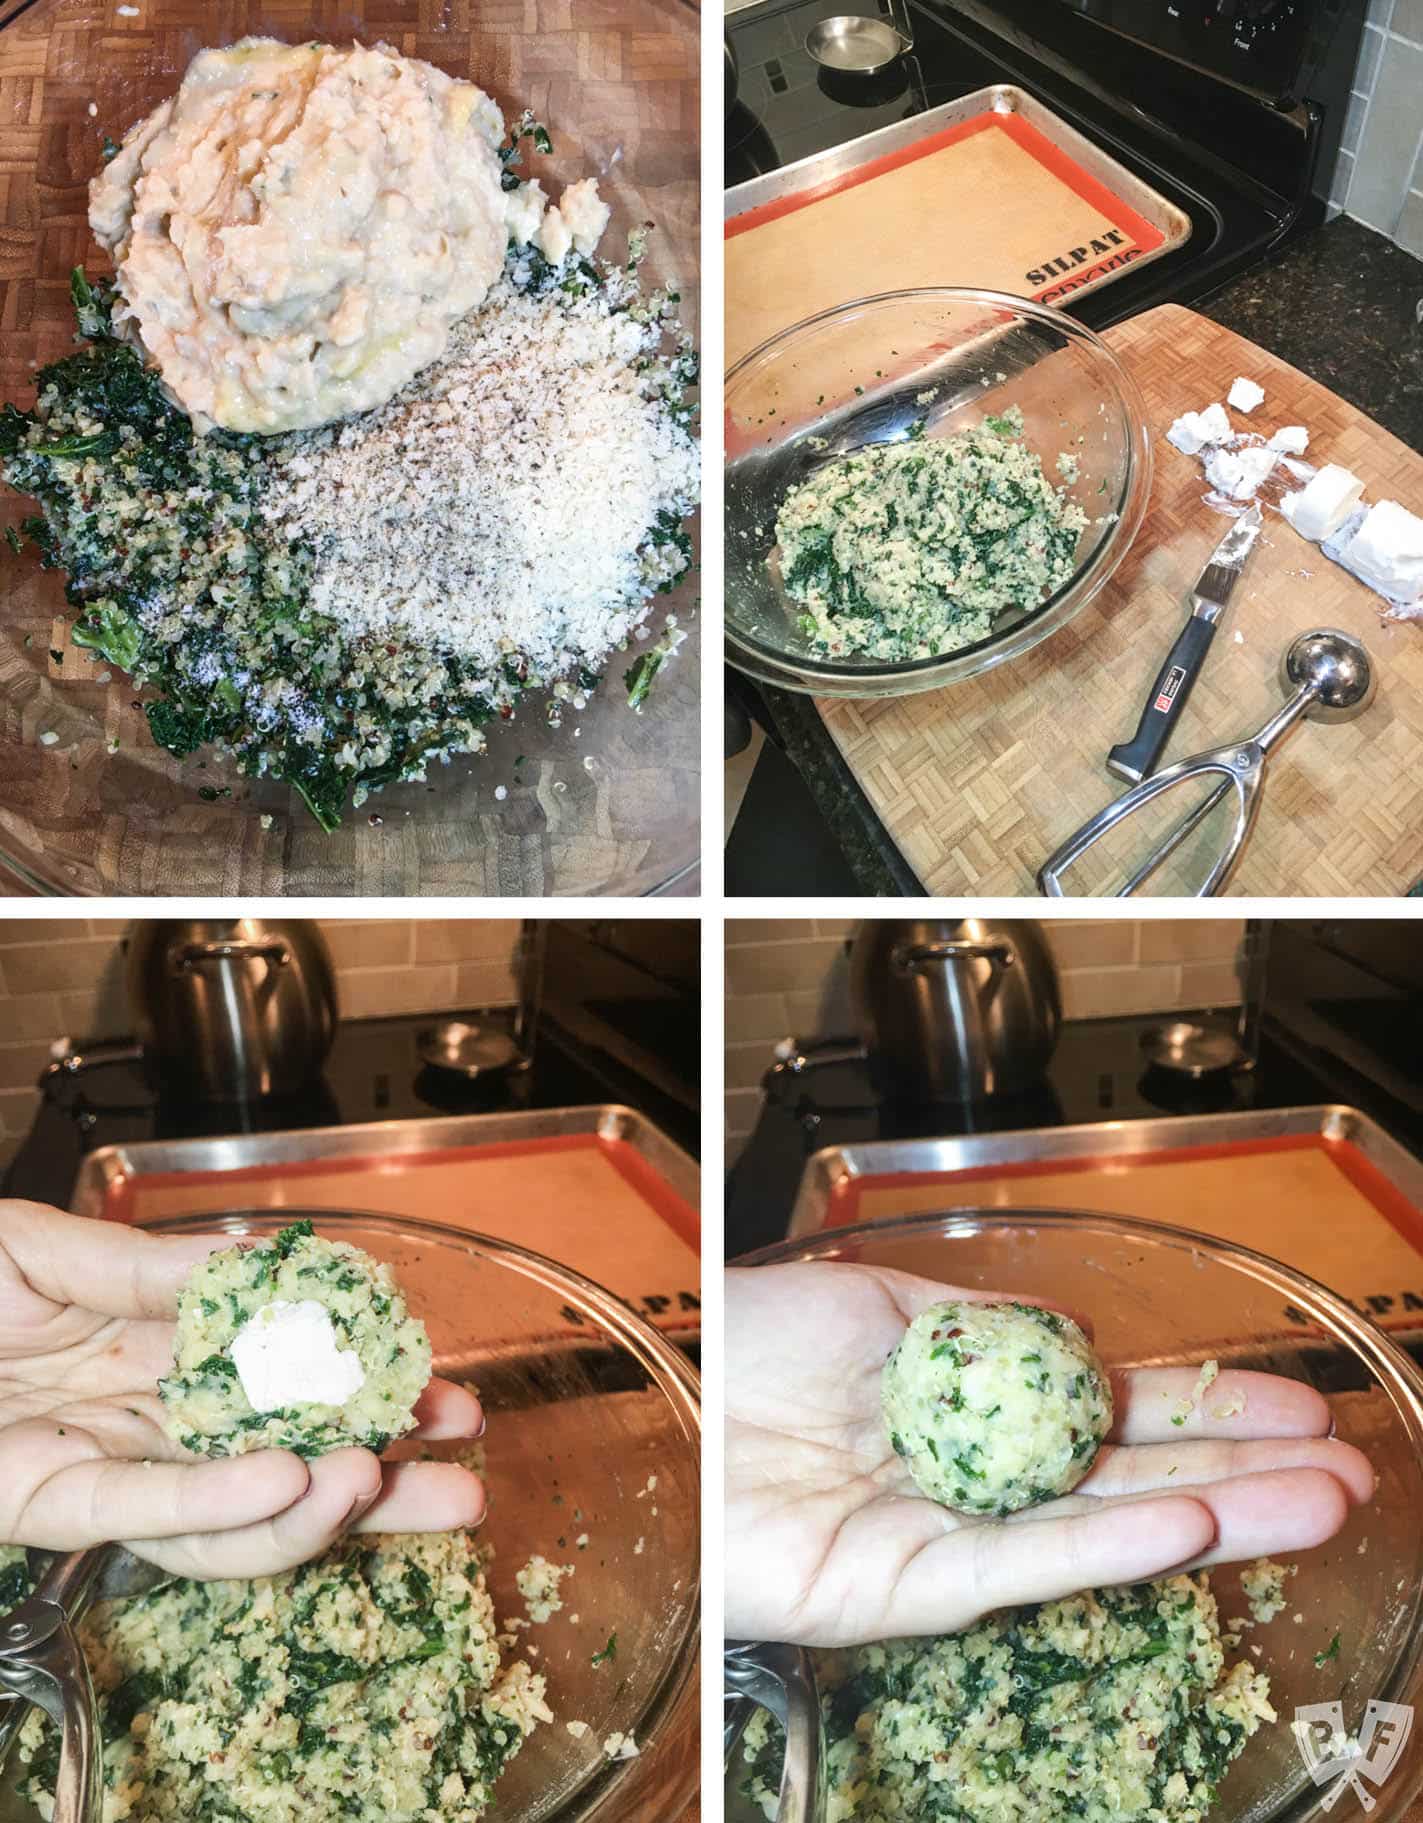
    Now rinse out your food processor and use it to mince another clove of garlic. Then add the drained white beans and egg, and purée until smooth. Add it to the bowl of perfectly cooked, fluffy quinoa and kale and get ready to stuff!

    Goat Cheese-Stuffed Quinoa & Kale Balls with Romesco Sauce: (#ad) This hearty goat cheese-stuffed vegetarian "meatball" recipe with quick romesco sauce makes an elegant party appetizer or main course for Meatless Monday!

    A few quick tips here to help streamline your quinoa ball-making process:

    • Take the goat cheese out of the refrigerator to let it soften up a bit before you start cooking.
    • Pop the quinoa into the microwave while you toast the almonds.
    • Place the cooked quinoa in a large bowl to cool off a bit while you make the romesco sauce - you don't want the quinoa to be piping hot when you add the egg to the mix.
    • Use a metal disher to make your goat cheese-stuffed quinoa balls all the same size. I used a #30 scoop, which is just over 2 tablespoons. Here's a handy reference guide for disher/ice cream scoop sizes.
    • Line your baking sheet with a silicone mat or parchment paper to help prevent sticking and make removing your quinoa balls super simple.
    • Drizzle the finished quinoa balls with extra-virgin olive oil right before serving to help keep them from drying out. The flavor of the oil really enhances the other flavors going on in this dish!
    Goat Cheese-Stuffed Quinoa & Kale Balls with Romesco Sauce: (#ad) This hearty goat cheese-stuffed vegetarian "meatball" recipe with quick romesco sauce makes an elegant party appetizer or main course for Meatless Monday!

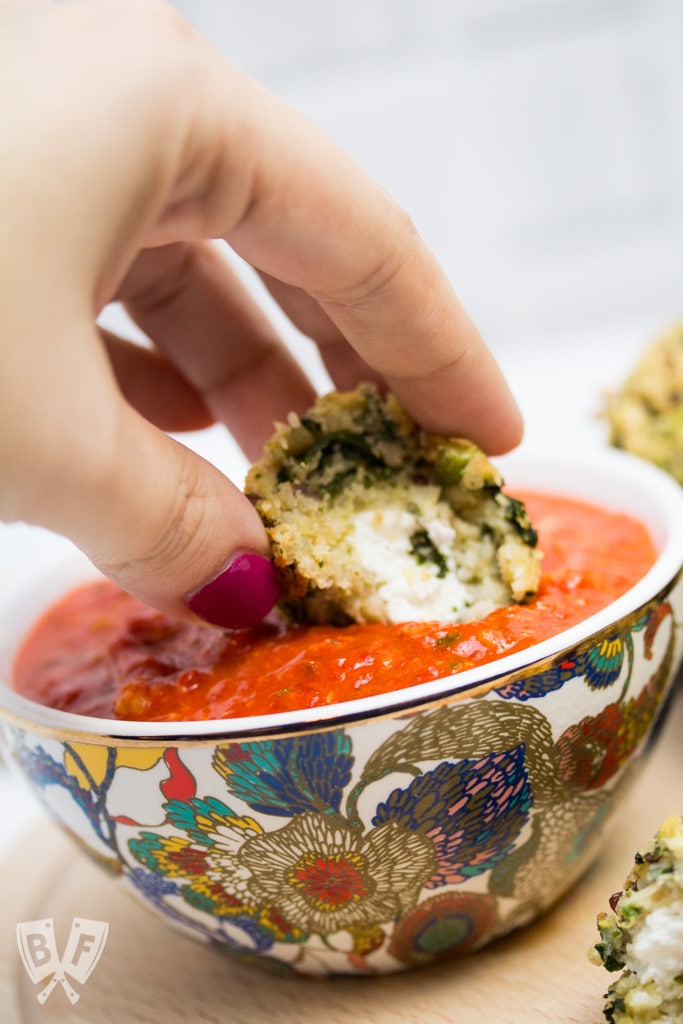
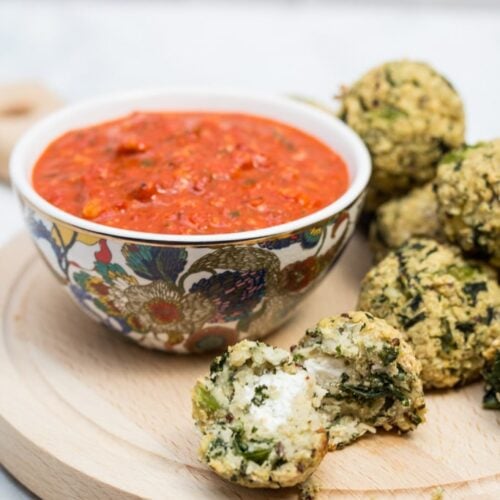
    These quinoa balls turned out so well! They held up nicely to dunking in the easy romesco sauce. And since they're baked, not fried, they're a healthier choice than many of the other meatless meatball recipes I've tried.

    We really enjoyed these as an appetizer, but they'd also be a great option for a Meatless Monday dinner. If you're trying to keep them vegan, a flax egg would be a fine substitute for the large egg, and you could use a dairy-free cheese inside, or leave the cheese out completely. They'd still be delicious!

    I also think these vegetarian "meatballs" would be great served up with marinara sauce in a vegetarian meatball parmesan. YUM.

    Goat Cheese-Stuffed Quinoa & Kale Balls with Romesco Sauce: (#ad) This hearty goat cheese-stuffed vegetarian "meatball" recipe with quick romesco sauce makes an elegant party appetizer or main course for Meatless Monday!

    What are your favorite appetizers? I'd love to hear about them in the comments section below!

    Looking for more appetizer recipes? We have a whole section of appetizers we love! Check out some of our favorites:

    • French-Inspired Deviled Eggs
    • Patatas Bravas with Chipotle Aioli
    • Killer Shrimp Cocktail
    • Cheesy Bacon + Apple Croissants
    • Tuna Tostada with Avocado Dressing + Chipotle Sour Cream
    • Marcona Almond + Dried Cherry Popcorn with Crispy Rosemary
    • Veggie Cream Cheese Roll-ups
    • No Mayo Deviled Eggs
    • Mini Turkey Pot Pies with Puff Pastry

    📖 Recipe

    Goat Cheese-Stuffed Quinoa & Kale Balls with Romesco Sauce

    Goat Cheese-Stuffed Quinoa & Kale Balls with Romesco Sauce: (#ad) This hearty goat cheese-stuffed vegetarian "meatball" recipe with quick romesco sauce makes an elegant party appetizer or main course for Meatless Monday!
    This hearty goat cheese-stuffed vegetarian "meatball" recipe with quick romesco sauce makes an elegant party appetizer or main course for Meatless Monday!
    Big Flavors from a Tiny Kitchen - Ashley Covelli
    5 from 2 votes
    Print Recipe Pin Recipe
    Course: Appetizer, Vegetarian
    Cuisine: Italian
    Prep Time 30 minutes mins
    Cook Time 30 minutes mins
    Total Time 1 hour hr

    Ingredients
     

    For Romesco Sauce:
    • ⅓ cup slivered almonds
    • 1 clove garlic peeled
    • 12- ounce jar roasted red peppers drained
    • 1 ½ teaspoons sherry vinegar
    • 2 tablespoons flat leaf parsley
    • 1 teaspoon smoked paprika
    • ½ teaspoon kosher salt
    • ¼ teaspoon freshly cracked black pepper
    • ¼ cup extra virgin olive oil
    For Quinoa Balls:
    • 1 10-ounce package Path of Life Organic Quinoa & Kale
    • 1 clove garlic peeled
    • 1 15.5-ounce can cannellini beans, drained and rinsed
    • 1 large egg lightly beaten
    • ½ cup unseasoned panko bread crumbs
    • ½ teaspoon kosher salt
    • ¼ teaspoon freshly cracked black pepper
    • 3 ounces goat cheese softened
    • 1-2 tablespoons extra-virgin olive oil for drizzling

    Instructions
     

    1. For Romesco Sauce: Place almonds in a dry skillet over medium heat. Cook, stirring occasionally, until toasted. Set aside to cool.
    2. With the food processor motor running, drop garlic clove into the feed chute to mince. Stop the food processor, then add the toasted almonds, drained peppers, sherry vinegar, parsley, smoked paprika, salt, and pepper and process until smooth. Scrape down the sides of the food processor bowl, then stream in olive oil slowly, with the motor running until the oil is fully incorporated and the sauce is smooth.
    3. For Quinoa Balls: Preheat oven to 375°F. Line a baking sheet with a silicone mat or parchment paper.
    4. Cook quinoa & kale according to package instructions. Pour cooked quinoa into a large bowl and set aside to cool.
    5. With the food processor motor running, drop garlic clove into the feed chute to mince. Add drained cannellini beans and egg and purée until smooth. Add the bean purée to the bowl of quinoa along with bread crumbs, salt, and pepper and stir to combine.
    6. Slice goat cheese into 4 rounds, and cut each round into 4 pieces to get 16 square-ish chunks.
    7. Scoop quinoa mixture, about 2 heaping tablespoons at a time (I like using a #30 disher), and nestle a piece of goat cheese in the center, tucking and pressing the quinoa around the cheese to fully conceal it. Place on prepared baking sheet and repeat with remaining mixture.
    8. Bake quinoa balls for 20-30 minutes, or until lightly golden and firm.
    9. Transfer quinoa balls to a serving platter and drizzle with oil. Serve warm with romesco sauce alongside.

    Did you make this recipe?

    Leave a comment + star rating below to let people know how it was!
    Goat Cheese-Stuffed Quinoa & Kale Balls with Romesco Sauce: (#ad) This hearty goat cheese-stuffed vegetarian "meatball" recipe with quick romesco sauce makes an elegant party appetizer or main course for Meatless Monday!

    Ricotta Cookies - A Family Favorite Italian Holiday Dessert Recipe

    November 26, 2017 by Ashley 70 Comments

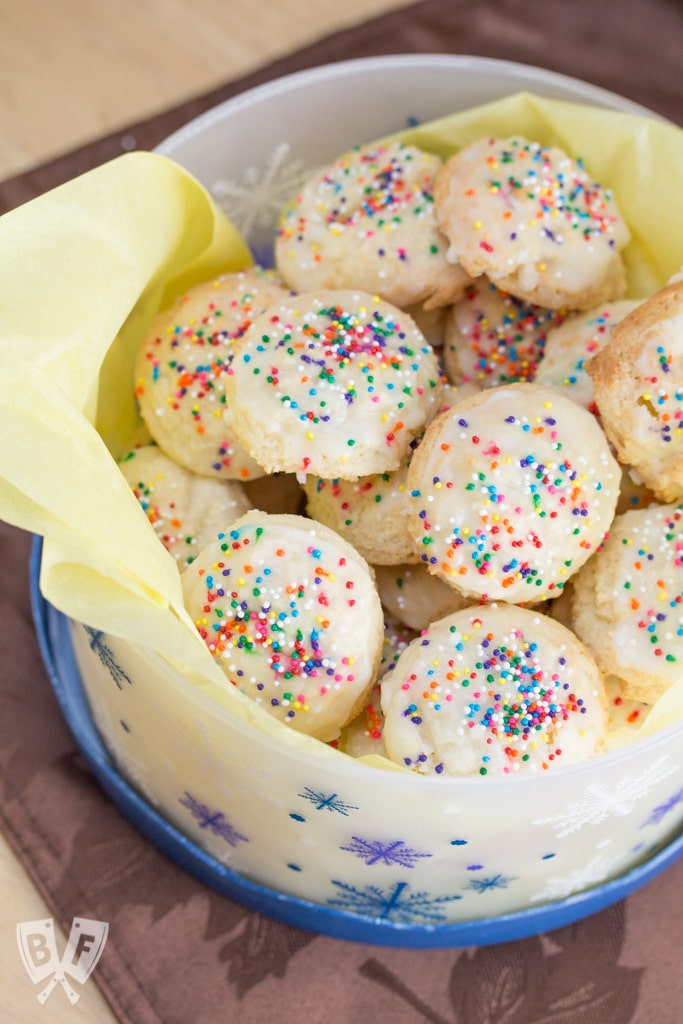
    Container of ricotta cookies with tissue paper.

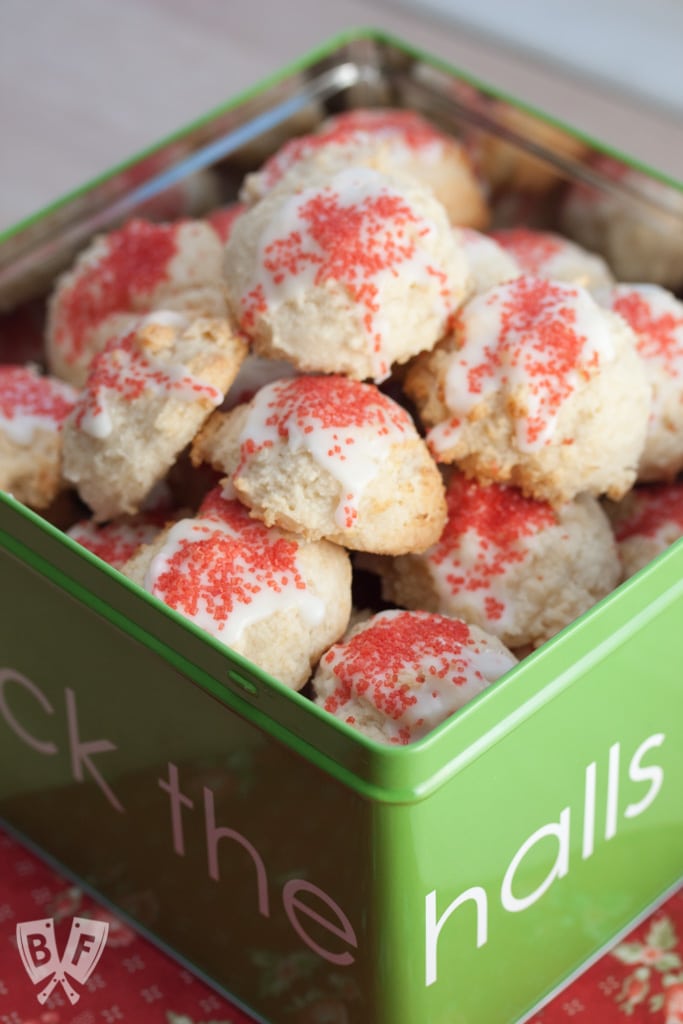
    This simple dessert recipe makes lots of pillowy soft, tender cookies that are sure to be a family favorite! Perfect for cookie exchanges & holiday parties.

    These Ricotta Cookies are divine.

    They're hands down some of the best cookies I make. I've been baking them every year for Christmas since 2008, and it's a tradition that will definitely keep on going.

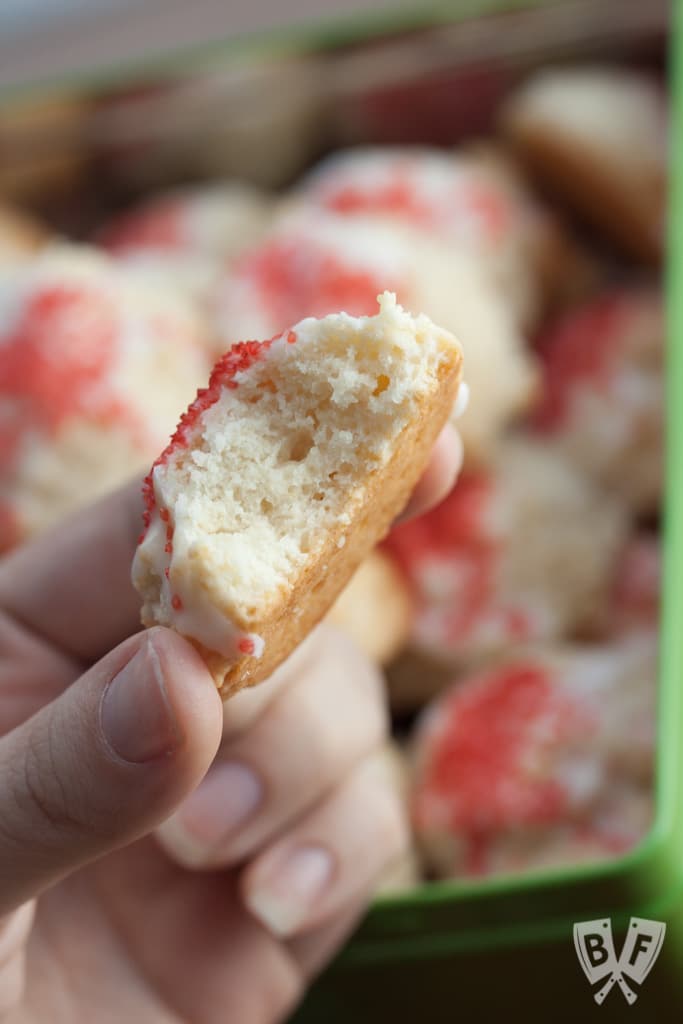
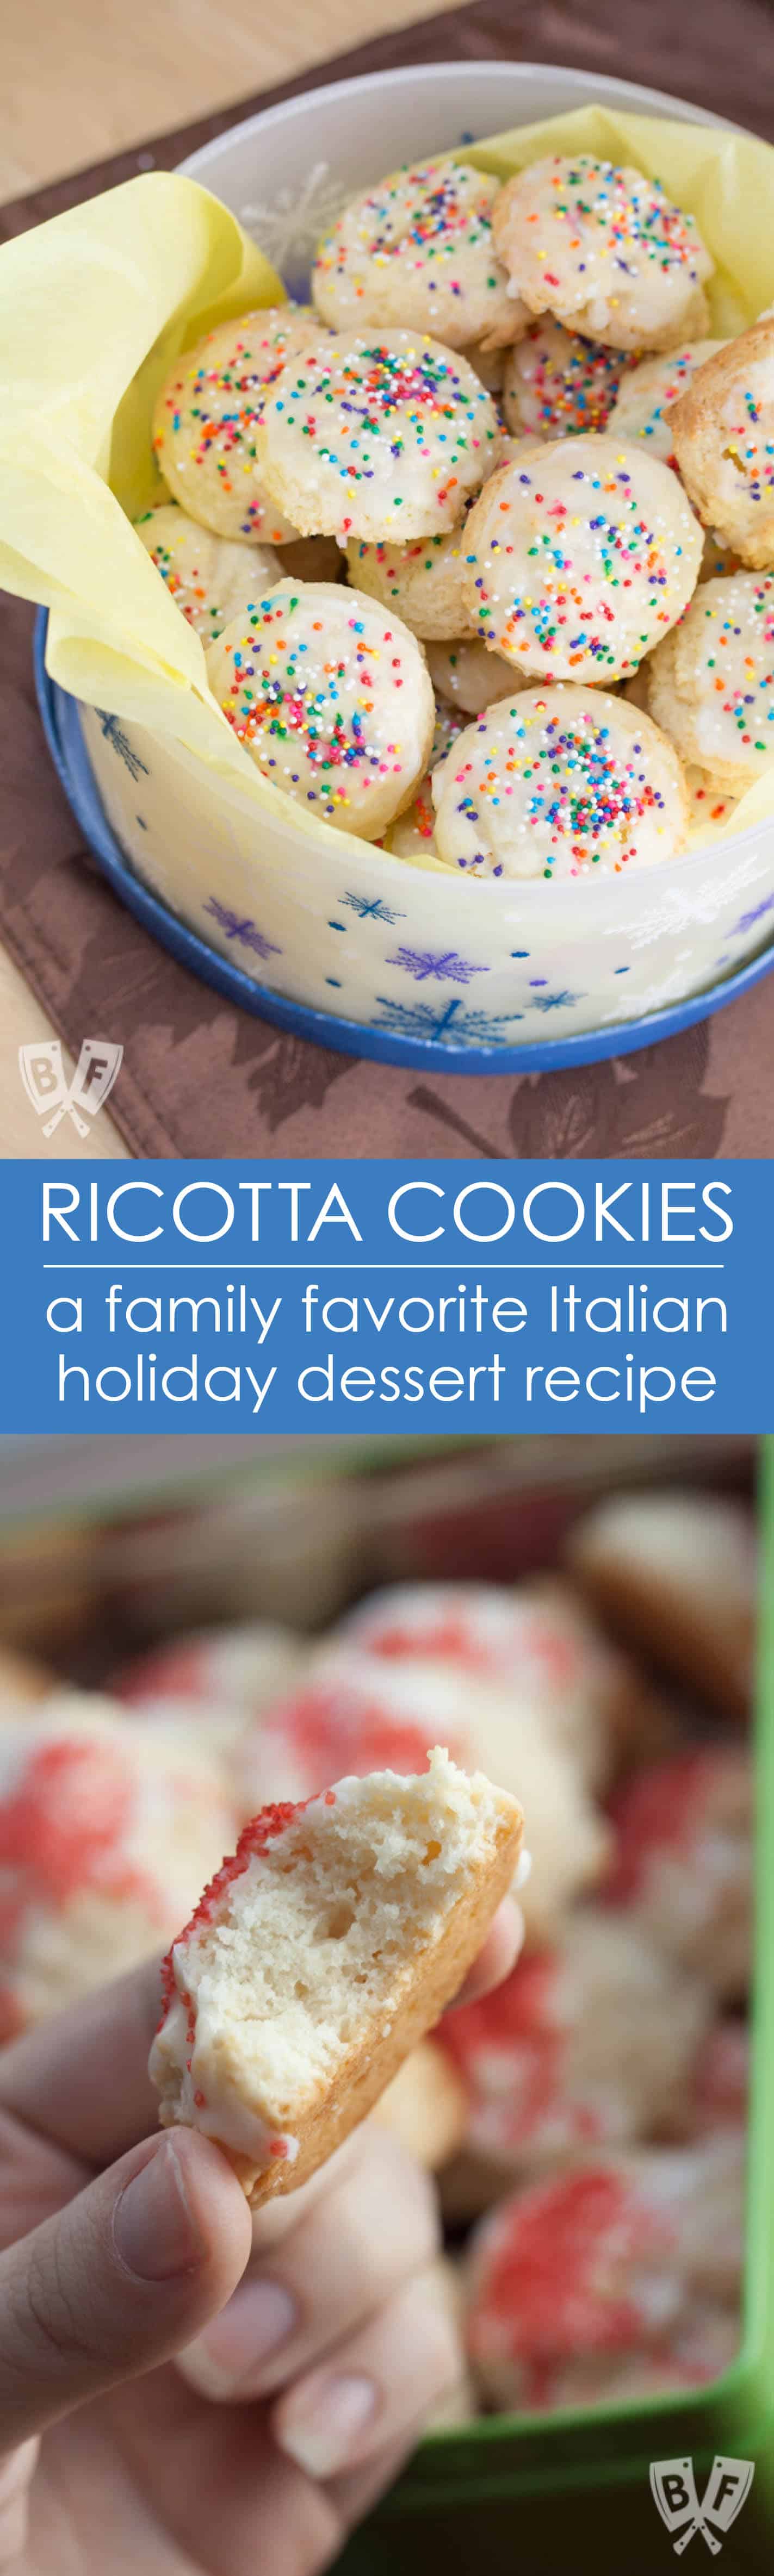
    These ricotta cookies are a simple dessert recipe makes oodles of pillowy soft, tender cookies that are sure to be a family favorite! Perfect for cookie exchanges & holiday parties. They've been a family tradition for years!

    This is a perfect recipe to make for the holidays because it makes a ton - I get about 7 dozen out of it, which is plenty to hand out to neighbors, teachers, and friends.

    Sometimes I even make a second batch of these since my Italian in-laws' require a big container of these every year for Christmas dessert.

    One of my favorite things about this recipe is having my kiddo help out with the baking and decorating.

    He really gets a kick out of watching the butter and sugar get nice and fluffy during the 5 minutes of high-speed mixing.

    Sometimes I have the neighbor kids come over and we have a big ol' decorating party.

    Sprinkles. Get. Everywhere. But it's so fun!

    Speaking of sprinkles, I've found that the nonpareil variety hold up best here.

    Since the cookies are so moist, larger decorations like these tend to get really soggy once they've been stored for a few days.

    Not ideal.

    These ricotta cookies are a simple dessert recipe makes oodles of pillowy soft, tender cookies that are sure to be a family favorite! Perfect for cookie exchanges & holiday parties. They've been a family tradition for years!

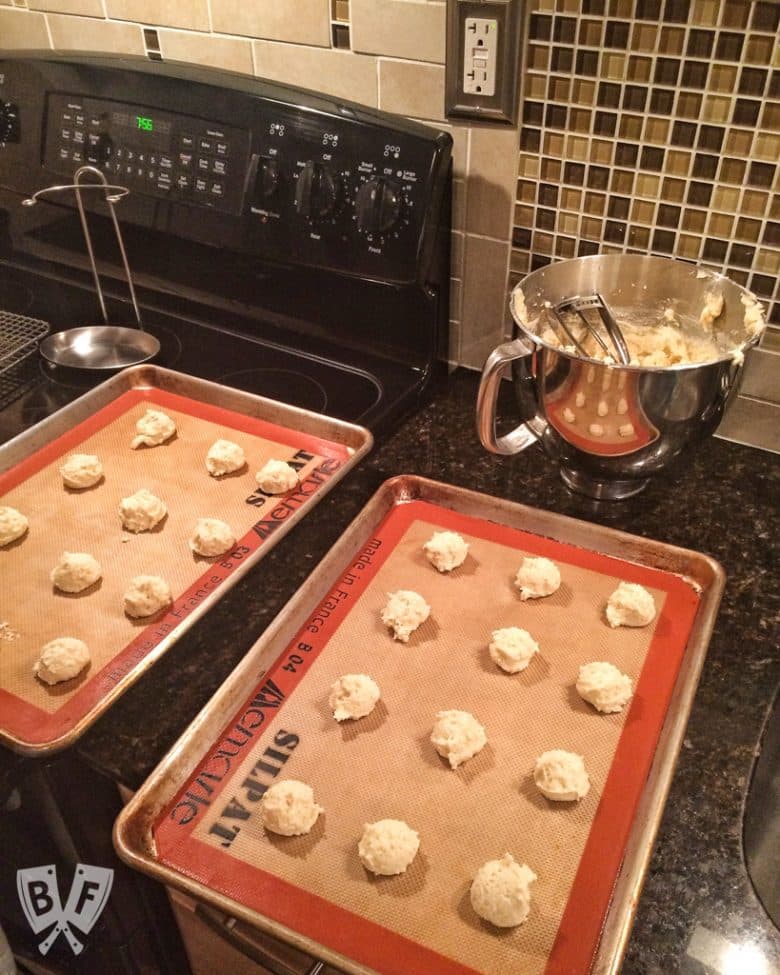
    I also like to make these (and most other cookie recipes) using scoops.

    They come in all sorts of different sizes and help ensure you get consistently sized cookies that are evenly baked.

    Plus the little squeeze release handle makes faster work of portioning out the dough.

    I use a #50 scoop when I make this recipe and usually get about 7 dozen, depending how much of the batter we eat raw on the day.

    These ricotta cookies are a simple dessert recipe makes oodles of pillowy soft, tender cookies that are sure to be a family favorite! Perfect for cookie exchanges & holiday parties. They've been a family tradition for years!

    Another thing that I rarely bake without is a silicone baking mat.

    I use one on each baking sheet and it helps ensure that nothing sticks to the pan, and the cookies release from the sheet easily.

    The ricotta makes these cookies incredibly soft and fluffy - it's nearly impossible to eat just one!

    These ricotta cookies are a simple dessert recipe makes oodles of pillowy soft, tender cookies that are sure to be a family favorite! Perfect for cookie exchanges & holiday parties. They've been a family tradition for years!

    While these cookies are great for Christmas, they're really perfect for any occasion (not that you need an occasion for cookies!).

    I make them for Easter fairly often, too. You can jazz 'em up with different colors - red for Valentine's Day, green for St. Patrick's Day, etc. And rainbow colored sprinkles are always a hit!

    And luckily, my kiddo is usually excited to help with clean up, too 😉

    You can also check out my Lemon Ricotta Cookie variation a while back. It's just as delicious but different enough to feel like a totally different cookie.

    Looking for more dessert recipes? Check out some of our favorites:

    • Rich Cocoa Brownie Bites
    • Elvis-Style Frozen Bananas
    • Sweet + Salty Dark Chocolate Clusters
    • 5-Ingredient Samoa Cereal Bowls
    • Orange Scented Cannoli Dip
    • Double Chocolate Chip Cookies with Vanilla Icing
    • Dessert Nachos with Fresh Baked Cinnamon Tortilla Chips
    • Tolon's Strawberry Basil Shortcake
    • Cranberry Orange Snickerdoodles
    • Bourbon Bacon Pecan Pie with a Whole Wheat Crust
    • Chocolate Cream Pie with Orange Zested Whipped Cream
    • Great Grandma Francesca Cardile's Cookies
    • Triple-Chocolate Pumpkin Pie

    📖 Recipe

    Ricotta Cookies

    These ricotta cookies are a simple dessert recipe makes oodles of pillowy soft, tender cookies that are sure to be a family favorite! Perfect for cookie exchanges & holiday parties. They've been a family tradition for years!
    This simple dessert recipe makes lots of pillowy soft, tender cookies that are sure to be a family favorite! Perfect for cookie exchanges & holiday parties.
    Big Flavors from a Tiny Kitchen - Ashley Covelli (adapted from Allrecipes)
    4.91 from 10 votes
    Print Recipe Pin Recipe
    Course: Dessert
    Cuisine: Italian
    Prep Time 20 minutes mins
    Cook Time 13 minutes mins
    Total Time 33 minutes mins

    Ingredients
     

    For Cookies:
    • 2 cups white sugar
    • 1 cup unsalted butter softened
    • 15 ounces whole milk ricotta cheese
    • 2 teaspoons vanilla extract
    • 2 eggs
    • 4 cups all-purpose flour
    • 2 tablespoons baking powder
    • 1 teaspoon salt
    For Decorating:
    • 2 cups powdered sugar
    • 4 tablespoons milk plus more if needed
    • Sprinkles I find that the nonpareil style works best

    Instructions
     

    1. Preheat oven to 350° F. Line 2 baking sheets with silicone baking mats or parchment paper.
    2. In the bowl of a stand mixer (or a in large bowl with an electric mixer), beat together sugar and butter and on low speed until combined. Increase speed to high and beat until light and fluffy, about 5 minutes. Scrape the sides and bottom of the bowl with a rubber spatula and stir gently. Add ricotta, vanilla, and eggs and beat on medium speed until combined. Scrape the bowl again.
    3. Add flour, baking powder, and salt. Return mixer to low speed and continue to beat until dough forms.
    4. Drop the dough by small scoopfuls (I used a #50 scoop) onto the lined baking sheets. Place 12 on each baking sheet, leaving space between each scoop of dough.
    5. Bake in preheated oven until cookies are very lightly golden, about 13-16 minutes (cookies will be soft). Using a spatula, carefully transfer cookies to wire rack to cool before decorating.
    6. When cookies are completely cool, prepare the icing. In small bowl, whisk together the powdered sugar and milk until smooth. If the mixture is too thick, add a little more milk. If it's too thin, add more powdered sugar. Spread a little icing over each cookie, then top with sprinkles while the icing is still wet. Allow the icing to dry completely before storing cookies in an airtight container.

    Video

    Notes

    Use the paddle attachment with your stand mixer if you have one.
    Recipe adapted from Allrecipes.

    Did you make this recipe?

    Leave a comment + star rating below to let people know how it was!
    These ricotta cookies are a simple dessert recipe makes oodles of pillowy soft, tender cookies that are sure to be a family favorite! Perfect for cookie exchanges & holiday parties. They've been a family tradition for years!

    Holiday Gift Ideas to Upgrade Your Kitchen & Dining Experience

    November 24, 2017 by Ashley 3 Comments

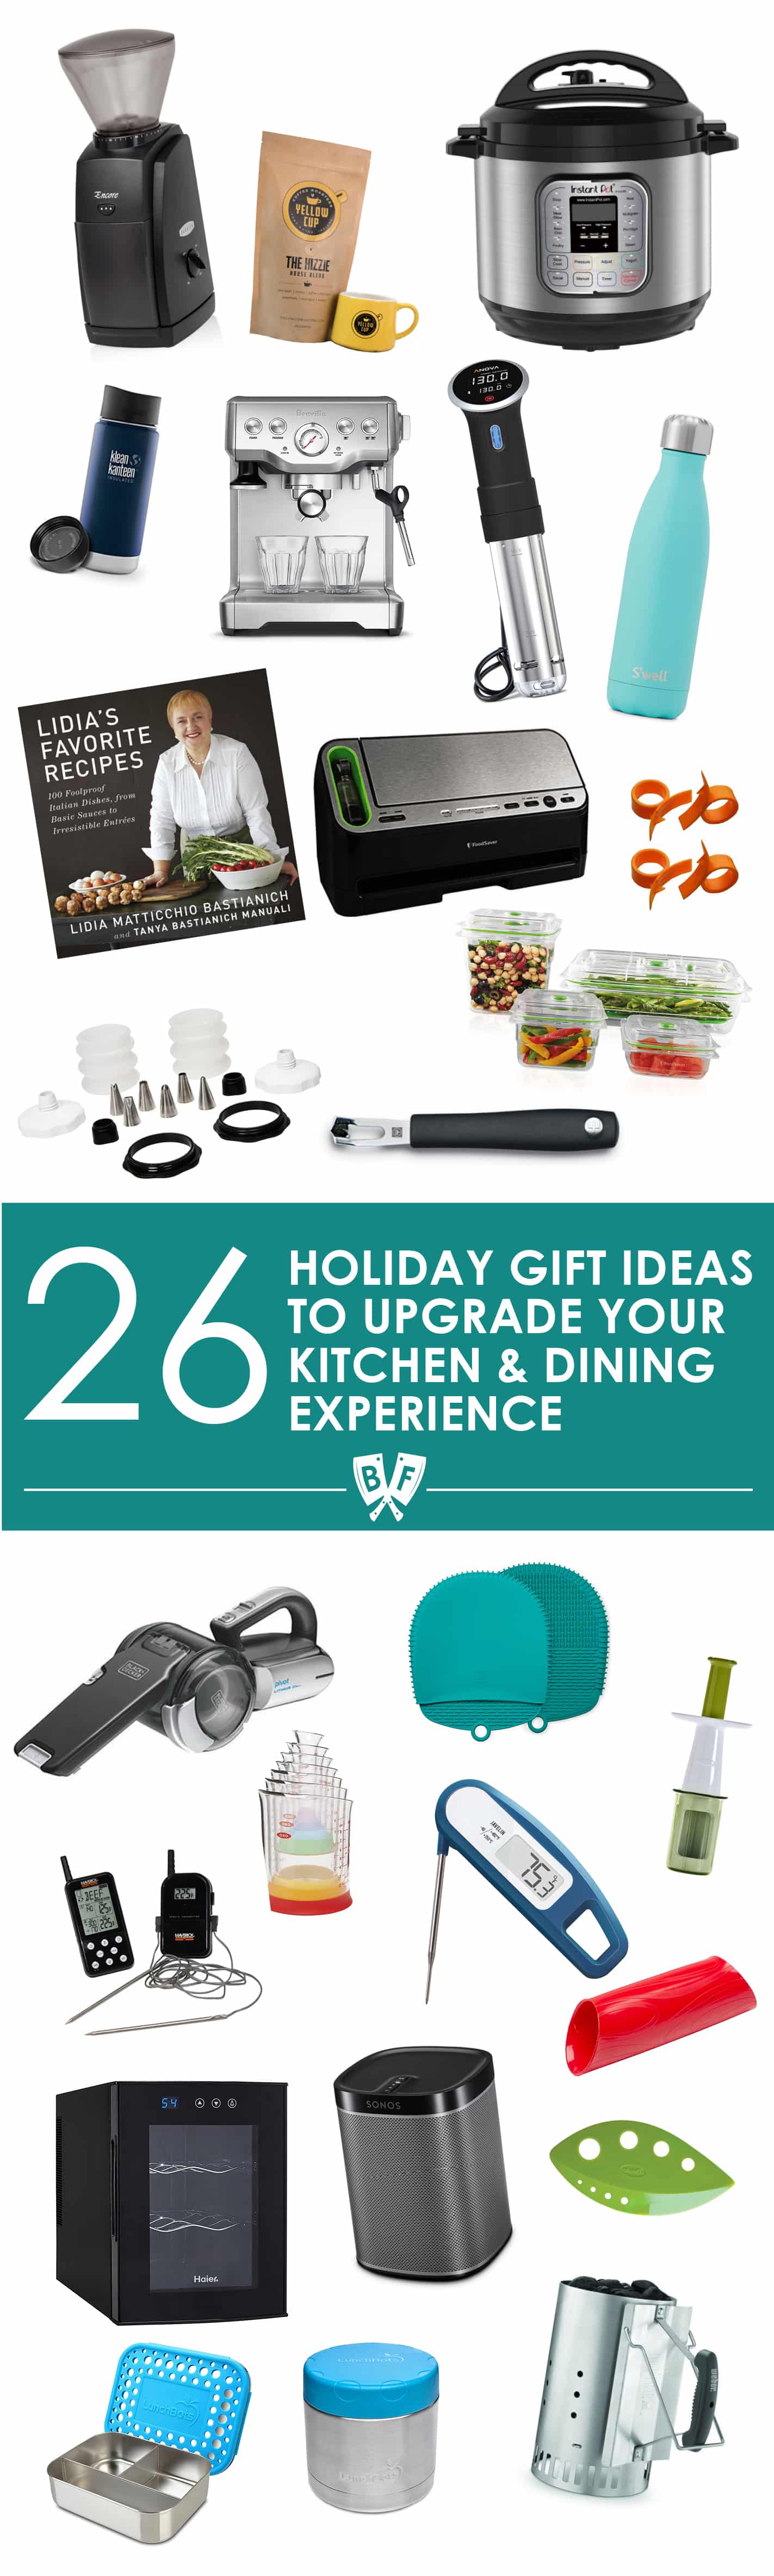
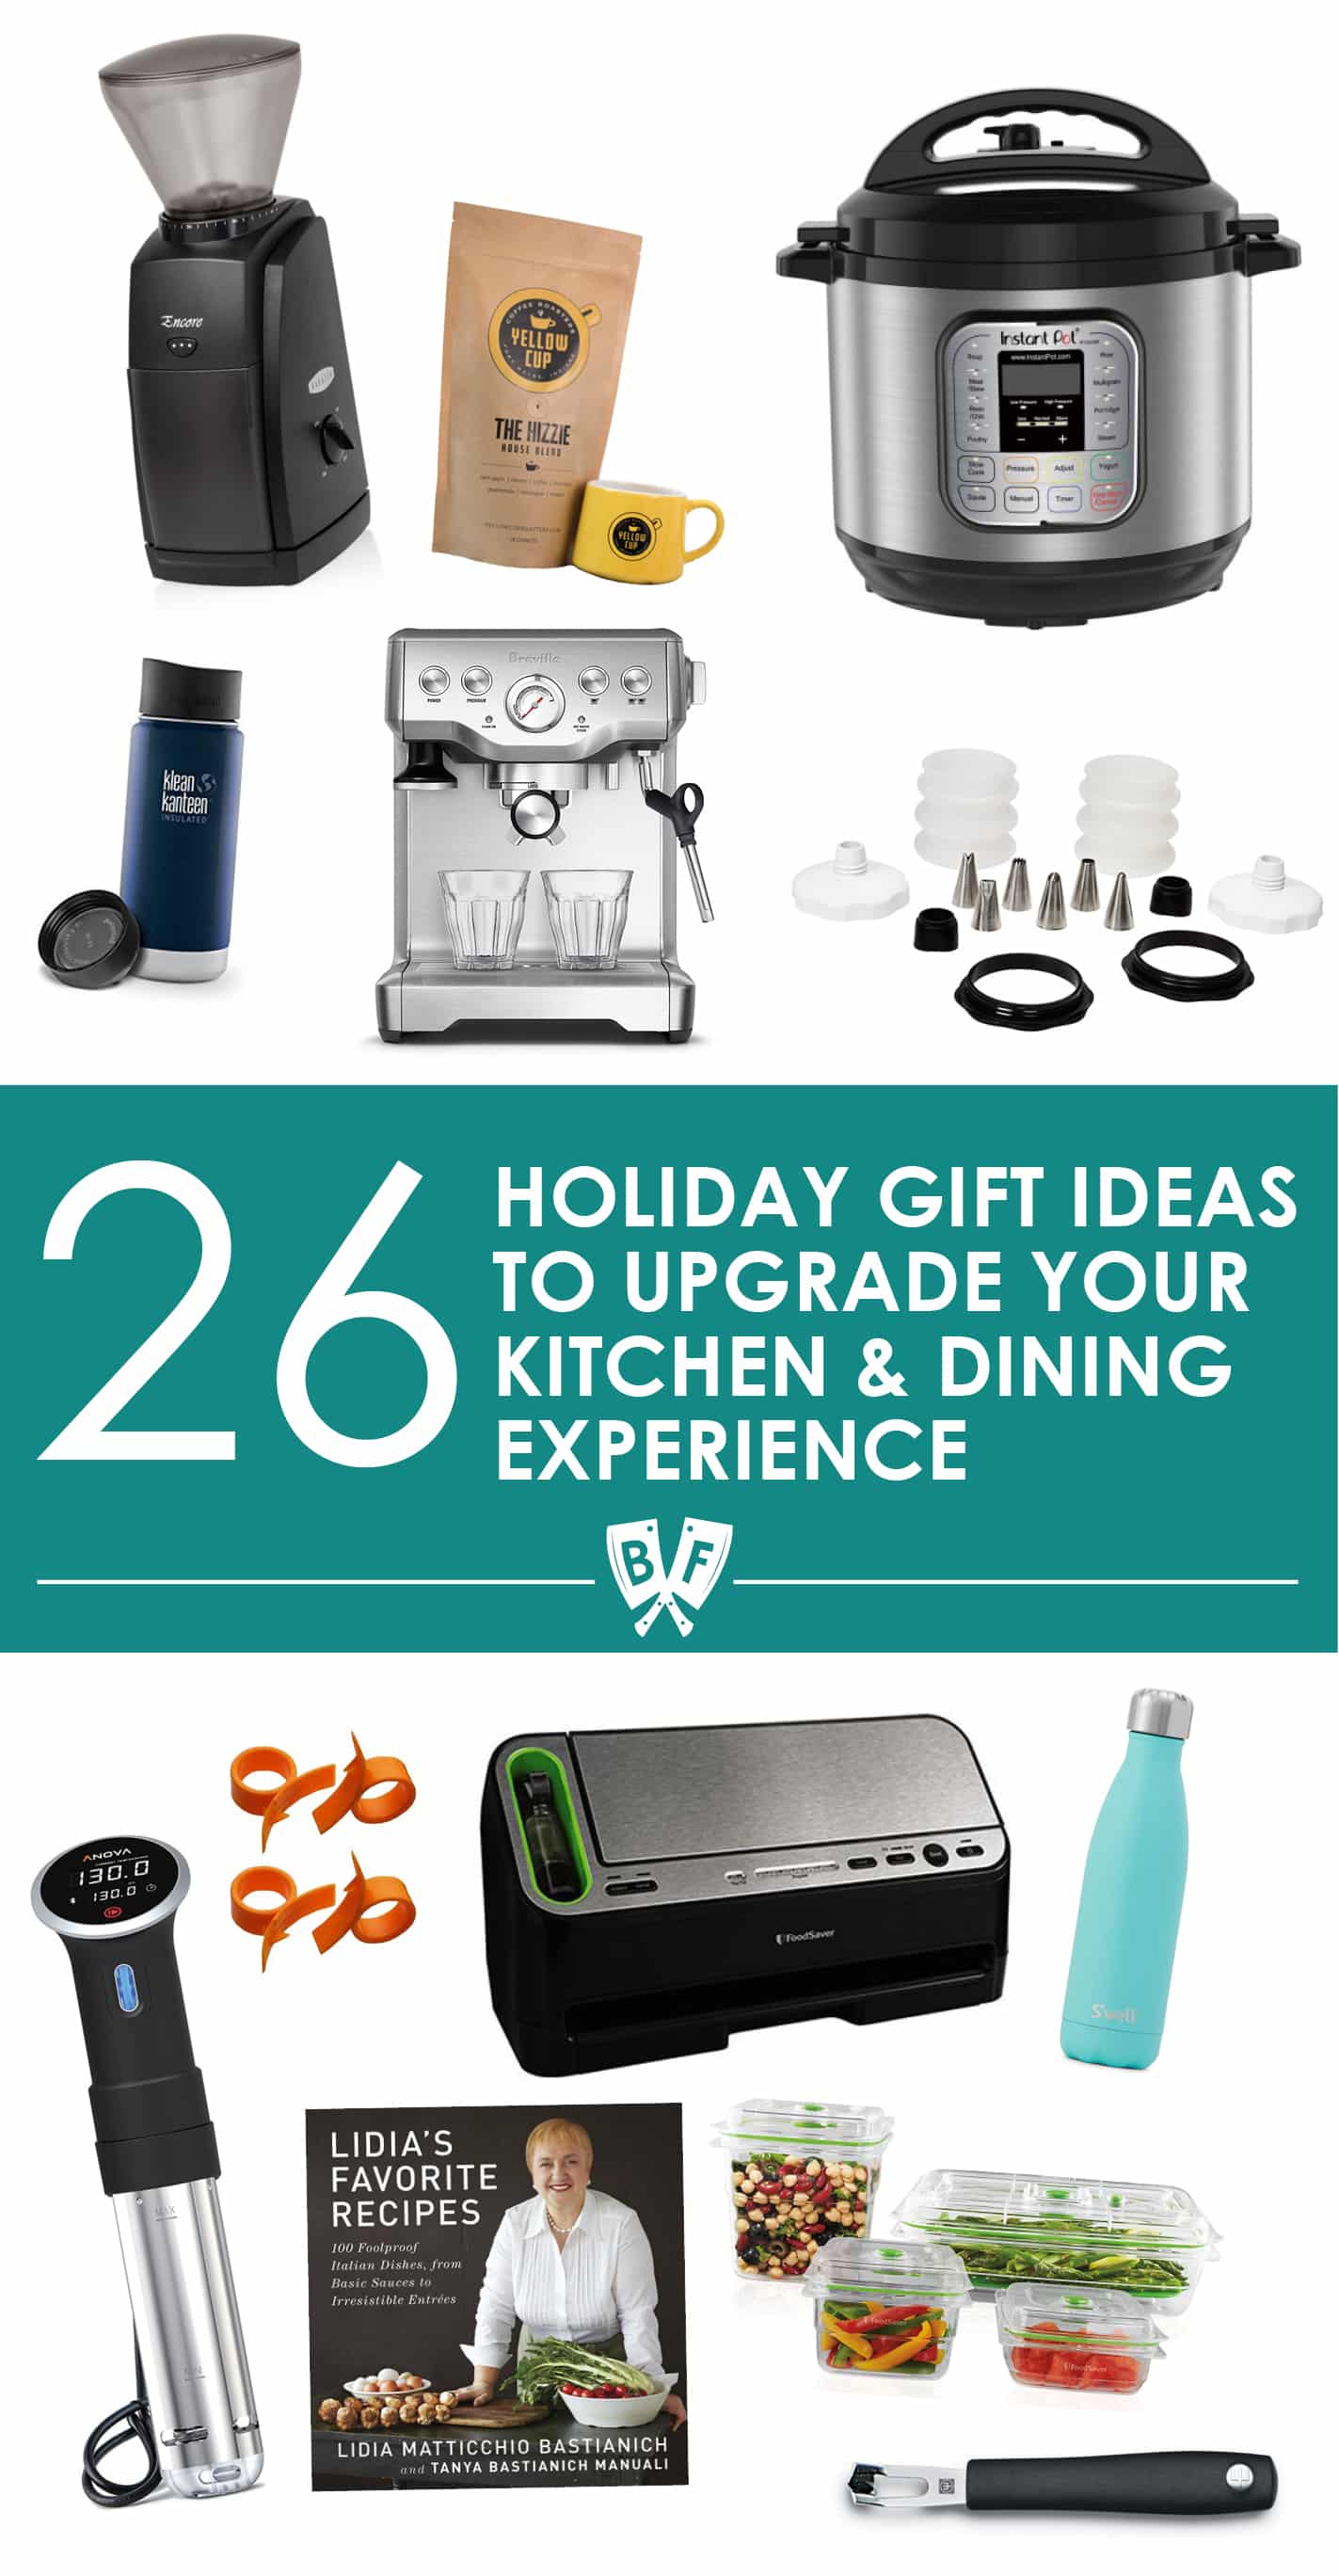
    Holiday Gift Ideas to Upgrade Your Kitchen & Dining Experience: A list of holiday gift ideas + stocking stuffers for people who enjoy spending time cooking & entertaining. These 26 items will seriously rock your world!

    I've put together a list of holiday gift ideas + stocking stuffers for people who enjoy spending time cooking & entertaining. These 26 items will seriously rock your world!

    Holiday Gift Ideas to Upgrade Your Kitchen & Dining Experience: A list of holiday gift ideas + stocking stuffers for people who enjoy spending time cooking & entertaining. These 26 items will seriously rock your world!

    This post contains affiliate links.

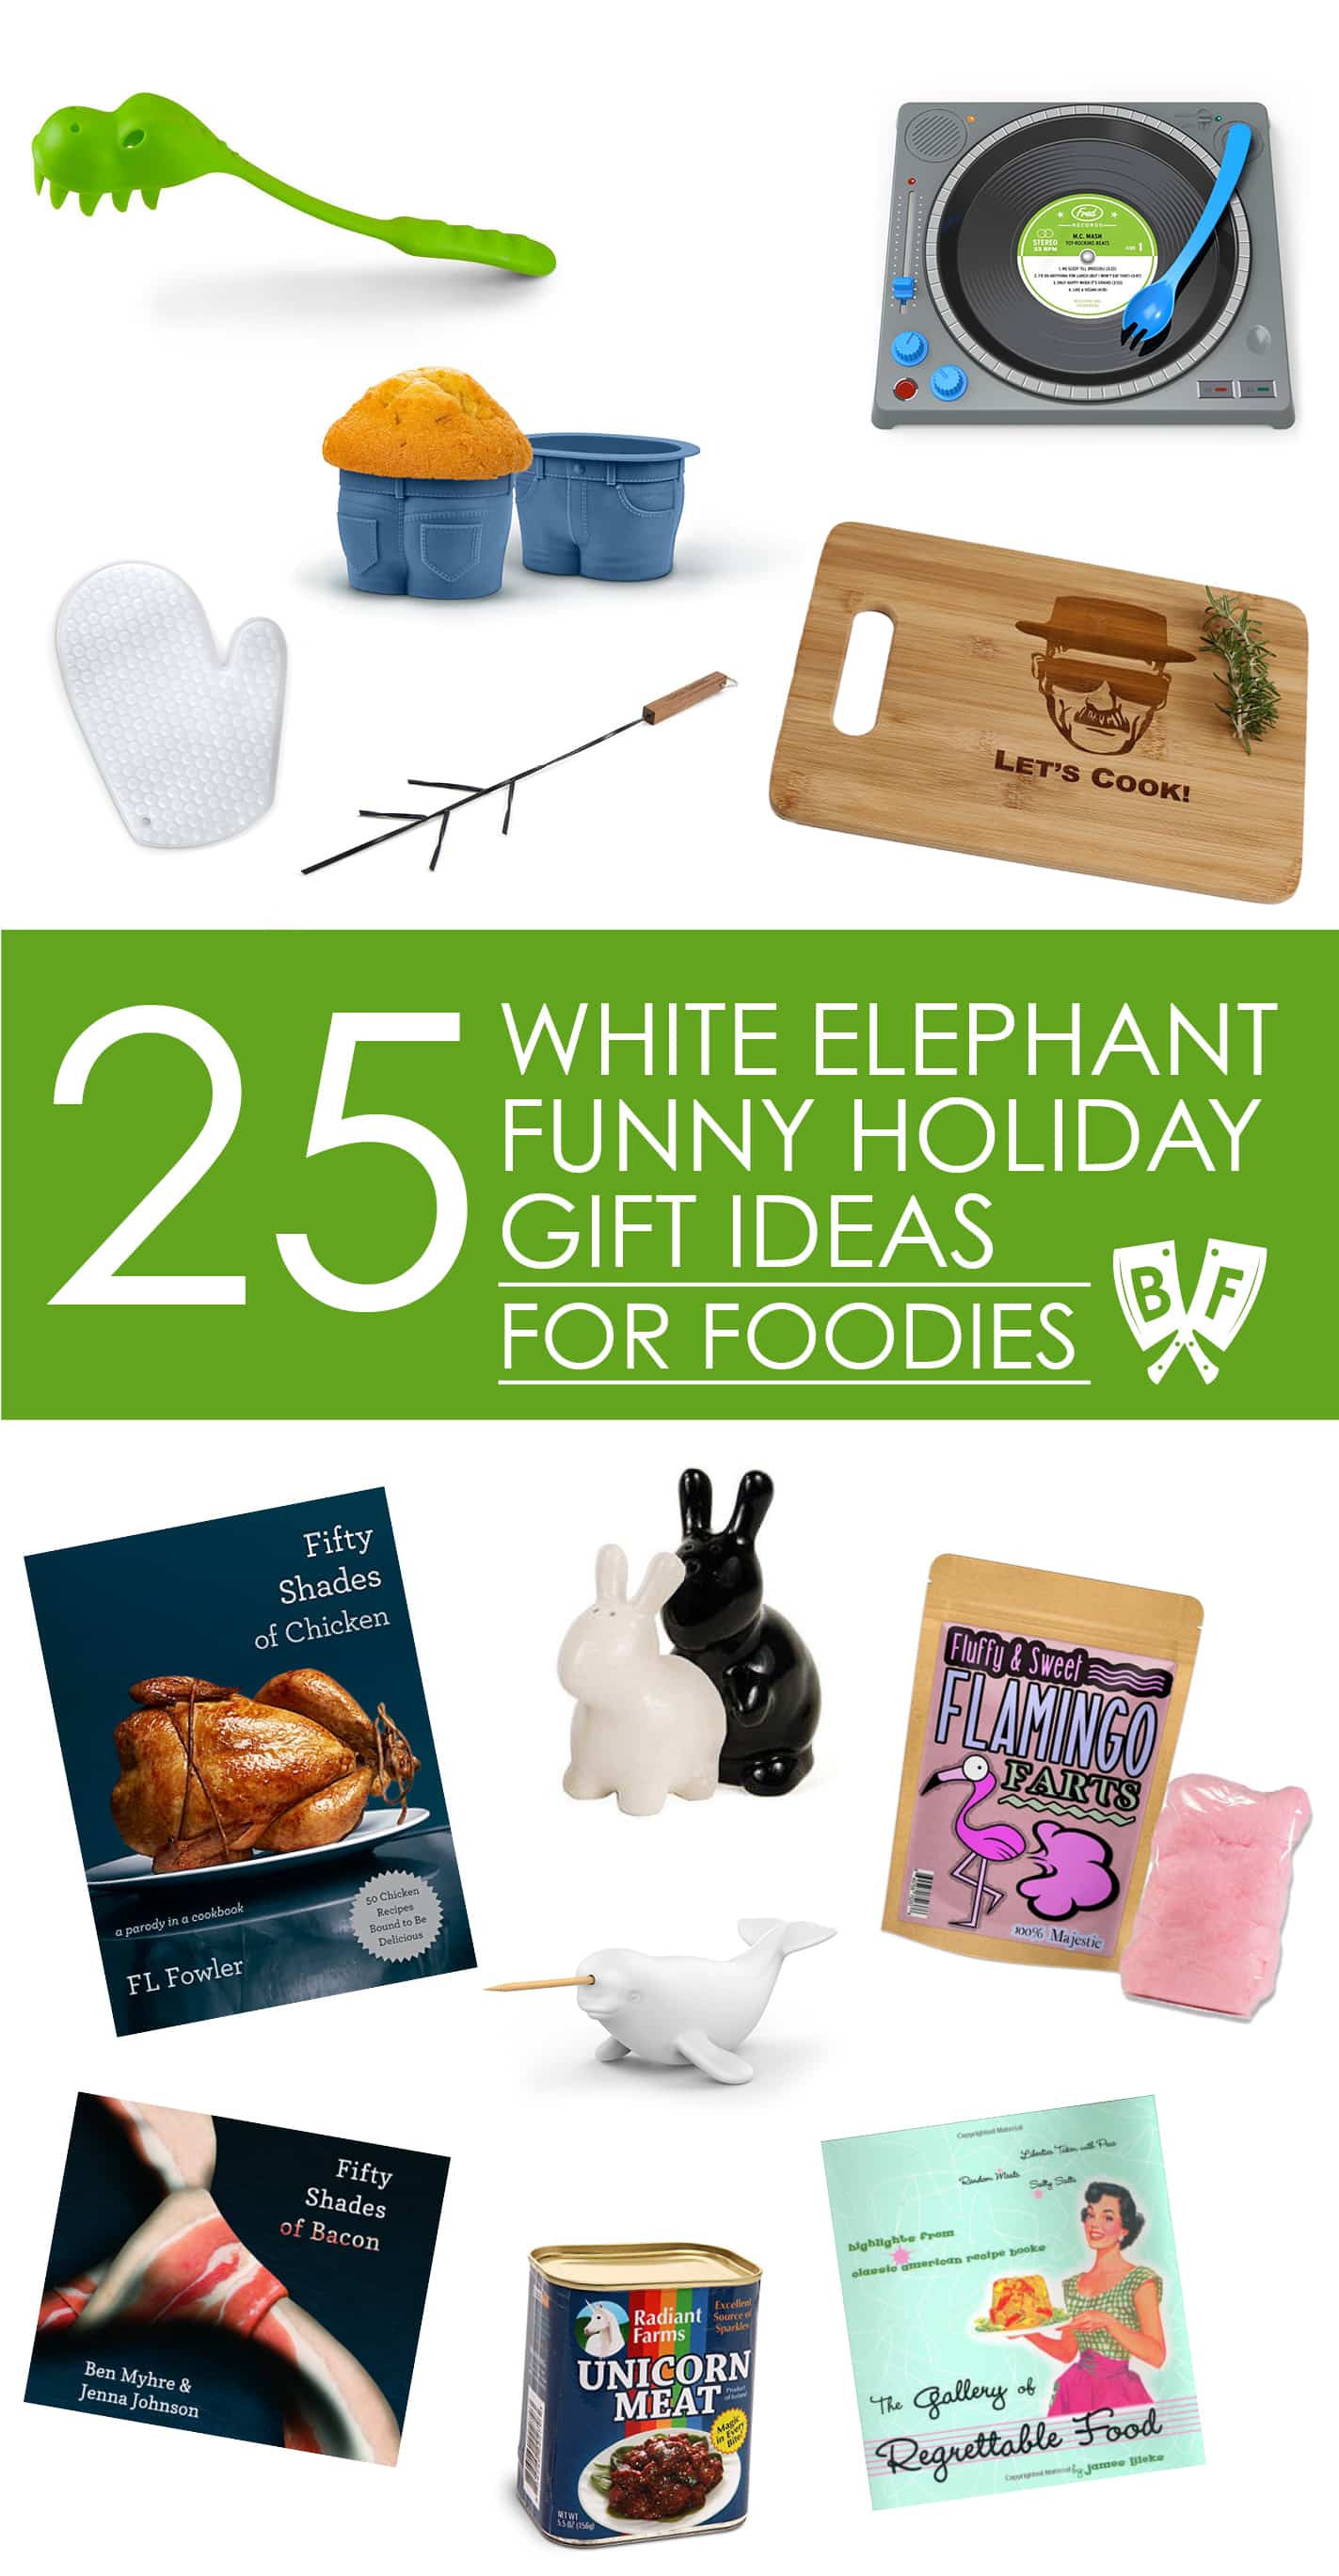
    Earlier this week I shared a list of White Elephant Funny Holiday Gift Ideas for Foodies. It was a ton of fun to put together, but I also wanted to put together a super solid list of tried & true items.

    The following items are all things that I actually own and absolutely LOVE, and would recommend without hesitation to anyone looking for holiday gift ideas.

    These gift ideas are perfect for people who love to cook, people who love to eat, people who love coffee and/or wine, or any combination of the aforementioned.

    If you need even more inspiration, check out my full roster of gift guides by clicking here.

    Holiday Gift Ideas to Upgrade Your Kitchen & Dining Experience: A list of holiday gift ideas + stocking stuffers for people who enjoy spending time cooking & entertaining. These 26 items will seriously rock your world!

    1. Baratza Encore Conical Burr Coffee Grinder - one of the best things I did to improve my home coffee game was to invest in a burr grinder. It has 40 different grind settings, allowing you to get everything from super fine to really coarse. We use a few different settings regularly in my tiny kitchen - one for espresso, one for drip coffee, and one for cold brew. It grinds the beans perfectly evenly every.single.time.

    2. Yellow Cup Coffee Roasters (Update for 2023: Yellow Cup has closed their doors. They will be forever missed!) - speaking of coffee, I recently happened upon some phenomenally delicious coffee that would be perfect for any coffee lover on your holiday shopping list. My brother lives out in Fort Wayne, Indiana, and his coworker, Mitch Smith, has started up a small-batch coffee roasting business. He is incredibly passionate about brewing that perfect cup of coffee and has perfected several blends to showcase that passion. I bought a bag of The Hizzie (House) Blend (a blend of organic coffee from Guatemala, Nicaragua and Mexico) last week and had my brother bring it out here to New York for me when he came to visit. It is incredibly smooth, and I've been savoring each and every cup. And the good news is that Yellow Cup is now shipping! They have several types of beans available as well as cups & equipment.

    3. Instant Pot - oh yes, the Instant Pot is back on the gift guide for another year! If I could only recommend ONE thing on this list, it would be the Instant Pot. The model I have is the Instant Pot DUO60 6 Qt 7-in-1 Multi-Use Programmable Pressure Cooker, Slow Cooker, Rice Cooker, Steamer, Sauté, Yogurt Maker and Warmer. We just got one for my father-in-law. This thing is a total workhorse in the kitchen - I use it several times a week. You can sear right in it, then pressure cook items in a fraction of the time they'd take in an oven or slow cooker. I use it for cooking rice, hard and soft boiling eggs, making steel-cut oats, pot roast, soups, mashed potatoes... you name it, I'll try it in my Instant Pot. You can check out all the recipes I've written up for the Instant Pot by clicking here. I have a LOT more in the works, especially after the rockin' Thanksgiving dinner we had this year. It's a total game changer. Pinky promise.

    4. Klean Kanteen Coffee Set - I (clearly) love a good cup of coffee. And having my coffee able to be well-insulated in a portable mug is key for when I'm on the go. My husband got me one of these Klean Kanteen mugs from a coffee shop in NYC a few years ago, and it's been my go-to travel mug ever since. Its double walled design insulates hot beverages up to 6 hours and iced drinks up to 24 hours. And the mouth piece just feels right. What can I say? I enjoy an ergonomically sound coffee mug.

    5. Breville Infuser Espresso Machine - our old (and not very good) espresso machine bit the dust a while back, and we wanted to upgrade. I did a lot of research and found this to be the best home espresso machine I could get without spending over a thousand dollars or getting a dedicated water line put into my kitchen. We've been loving it for over a year now, and combined with the Baratza from #1 above, our kitchen can crank out some seriously delicious lattes.

    6. OXO Baker's 8pc Silicone Decorating Bottle Kit - if you've ever caught one of my Instagram Stories, chances are you've seen me use this set. I most frequently use it for piping the filling into my deviled eggs (like these No Mayo Deviled Eggs or these French-Inspired Deviled Eggs), frosting cupcakes, and making Garlicky Goat Cheese + Herb Stuffed Peppadews.

    7. Anova Culinary Sous Vide Precision Cooker Bluetooth, Immersion Circulator - this is a kitchen gadget that we went back and forth on for a while before we finally took the plunge this past Amazon Prime Day. We haven't done a ton with it yet, but it's definitely saved us time and frustration for several meals. The Anova is able to be put into any container to create a temperature controlled water bath. You can cook things like chicken at the exact temperature it needs to be cooked at, and it will be incredibly juicy and tender, because it literally can't get overcooked. And I'm going to have to do a post on the reverse-sear method for steak. Holy moly.

    8. Citrus Fruit Peelers - this one looks a bit odd, I know. My husband put a few of these in my Christmas stocking last year. They make peeling oranges (and other citrus fruit) super simple! My son gets a kick out of them, too.

    9. FoodSaver V4440 2-in-1 Automatic Vacuum Sealing System - I had been eyeing a vacuum sealer for many many years, but just got it this past Prime Day. It works so well for freezing portions of meat, and is a great companion for the Anova Sous Vide. It has helped me really cut back on waste - my food doesn't get freezer burn when I seal it properly using the FoodSaver. I like buying bulk meat, portioning it out into smaller bags, sealing them with the FoodSaver and freezing them.

    10. S'well Vacuum Insulated Stainless Steel Water Bottle - again, I love beverages. I usually have a hot and a cold with me at my desk at all times. And I love having a nice double walled bottle to tote water around with me when I'm out and about. This is my most recent favorite - it keeps beverages cold for 24 hours, hot for 12. And apparently it also keeps carbonated beverages fresh. I've only used mine for water, but I do love it!

    11. Lidia's Favorite Recipes - I grew up watching Lidia Bastianich cook incredible Italian food on TV. Her cookbooks are ALL solid, but this is my most recent favorite. And total fangirl brag moment here - I met her at the Summer Fancy Food Show here in NYC this year and she was somehow even sweeter in person than on TV. I have never had a recipe from her that was anything less than incredible.

    12. FoodSaver Vacuum Sealed Fresh Containers - we use this set of 4 canisters for things we want to seal air-tight. Since we're coffee nerds in my house, we use 2 of them for coffee beans (one regular, one espresso), and we use another for my husband's homemade peanut butter. These work with the retractable handheld sealer that's part of the FoodSaver.

    13. Wüsthof Silverpoint Channel Knife - this is key if you want to make those long, gorgeous strips of citrus to garnish beverages like a pro. You can see an example in our Bourbon Rouge.

    Holiday Gift Ideas to Upgrade Your Kitchen & Dining Experience: A list of holiday gift ideas + stocking stuffers for people who enjoy spending time cooking & entertaining. These 26 items will seriously rock your world!

    14. BLACK+DECKER BDH2000PL MAX Lithium Pivot Vacuum - OK this one may seem out of place here, but hear me out. Cleaning up is an inevitable part of cooking, eating, and entertaining. And I'm all for making it easier whenever possible. This thing has been a godsend - we keep it docked in the living room and do a quick once-over after every meal. And trust me, when you have a kindergartener eating anything at the dinner table, there will be crumbs and grains of rice everywhere. EVERYWHERE! The Pivot makes cleaning it up SO simple. Plus, it has almost 7,000 reviews on Amazon with a 4.5 star average. That's huge! And yes, I think of that PIVOT scene from F.R.I.E.N.D.S every time I use it.

    15. The Ultimate Silicone Oven Mitts / Pot Holders - my old pot holders recently bit the dust, so I replaced them with these beauties. They're heat proof up to 500°F, made of 100% silicone, are able to be cleaned in the dishwasher or washing machine, and are super flexible. I've been loving them so far!

    16. OXO Tot Grape Cutter - this tool makes super quick work of quartering grapes. I use it to cut up grape tomatoes for taco night really often. It's quick and easy to use and is one of the few gadgets I actually use on a regular basis.

    17. Zak Designs E-Z-Roll Garlic Peeler - I laughed when I saw this in my Christmas stocking last year, but it's actually awesome! If you peel a lot of garlic in your kitchen, this tool makes it super simple. You just pop a few cloves in the tube and press down a little while rolling it. The skins pop right off!

    18. Maverick ET-738 325 Ft Long Range Wireless Dual Probe BBQ Smoker Meat Thermometer - my husband uses this a LOT. It's awesome for grilling or smoking meat where you want to monitor the temperature of 2 different types of meat that need to cook to different temperatures (like white and dark meat in a turkey). You pop the probes in the meat, set the base next to the grill, and take the wireless piece with you. It'll alert you when your meat has reached the proper temperature, which gives you more time to do literally anything else!

    19. Sonos Play:1 Compact Wireless Speaker - this is another one that has been a total game changer in my tiny kitchen. This small speaker will fill your kitchen or dining room with rich, deep sound. You can control it from your phone, laptop, or Alexa. You can be in one room of the house and Rick Roll your husband while he's doing dishes. Or so I hear. Ahem. You can stream music from online services like Spotify or use your phone's music library. You can dance and cook at the same time! You can even stream internet and local radio stations. I absolutely looooove it.

    20. OXO Good Grips 7-Piece Nesting Measuring Beaker Set - these are just adorable, and come in really handy when measuring out and prepping ingredients. I love the nested storage, too, since I'm working with minimal space in my tiny kitchen. They'd be a great stocking stuffer for the baker in your life. Bonus points for them being dishwasher safe!

    21. Haier Wine & Beverage Center - because sometimes mama needs some wine, and she'd like it to be at the proper temperature without taking up precious refrigerator storage space. This holds 6 bottles, and fits perfectly in a little corner in our dining room. I try to keep an assortment of red, white, and bubbly at all times.

    22. Lavatools PT12 Javelin Digital Instant Read Meat Thermometer - my go-to tool for checking meat temperatures. I love that it folds closed and has a little magnet on the back. I keep mine on my refrigerator so I never have to scramble to find it hidden in a kitchen drawer.

    23. Chef'n LooseLeaf Kale, Chard, Collard Greens and Herb Stripper - I thought this tool might be overrated when I first got it, but I've actually used it a LOT! It has different sized holes to accommodate different herbs and leafy greens. You pull them through the holes and it de-stems them with ease!

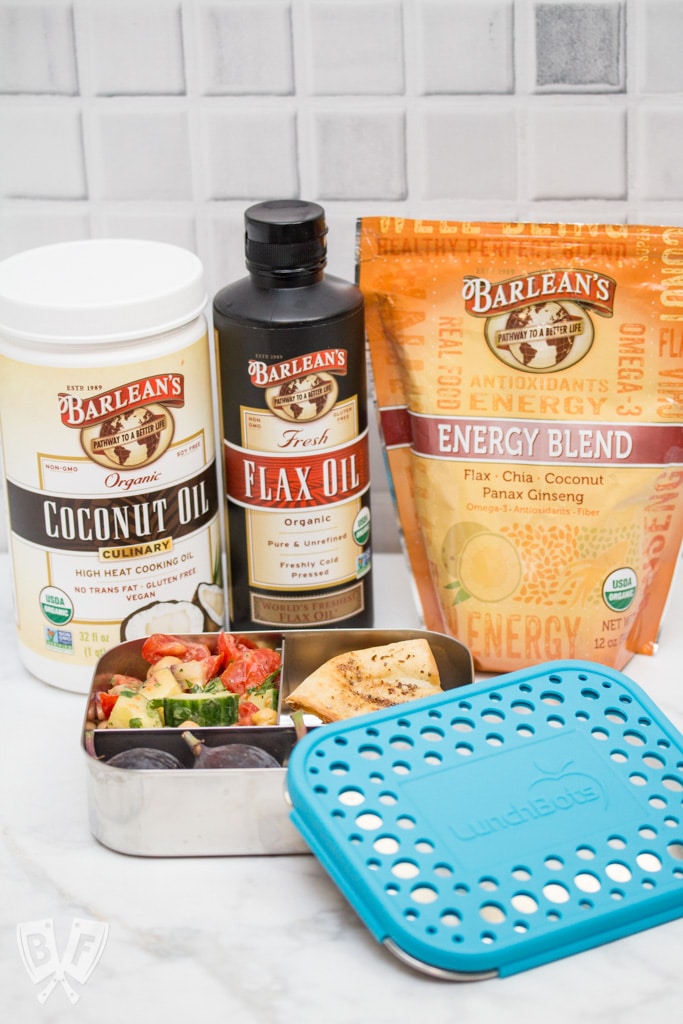
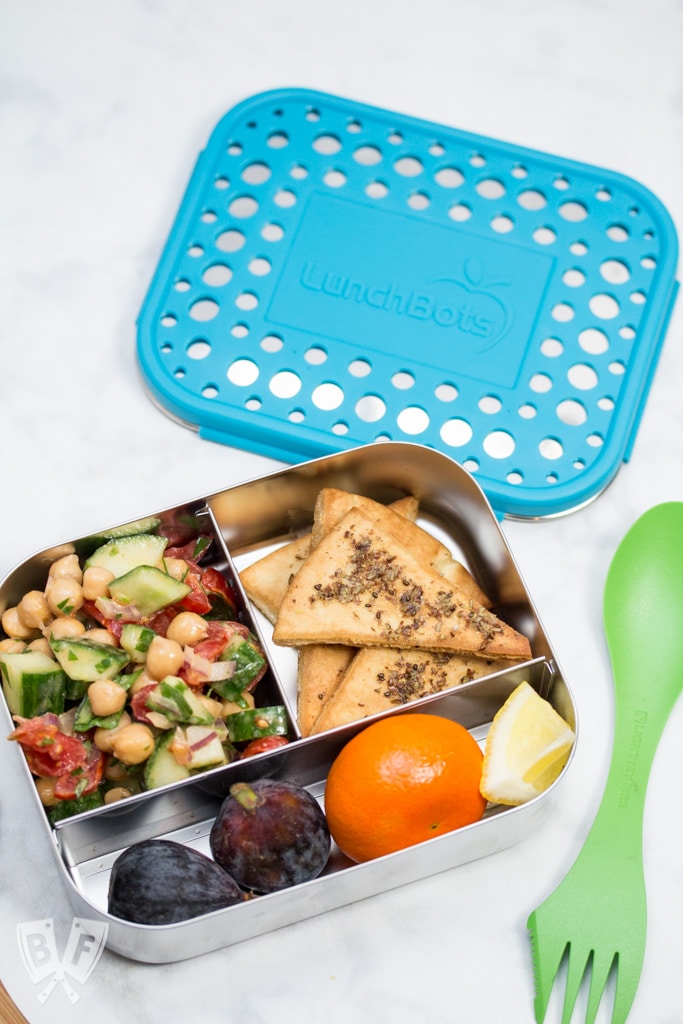
    24. Lunchbots Trio Stainless Steel Food Container - this has been my go-to lunchbox to send to kindergarten with my son. I like taking it for snacks at the park, too. It's durable and comes in several colors. I wrote a bit more about it in my post on Falafel-Spiced Chickpea Salad with Tahini-Lemon Vinaigrette.

    25. LunchBots Wide Thermal All Stainless Steel Bowl Insulated Food Container - once I started sending cold lunches to school with my son, I realized he needed a thermal container, too. This one is perfect for sending soup, pasta, and oatmeal in with him. It keeps his food nice an hot until lunchtime (which is at 1:15pm for his class!).

    26. Weber 7416 Rapidfire Chimney Starter - a lot of people are hesitant to use charcoal grills because they think they take too long to warm up. A chimney starter will help with that! You load it up with coal, ball up some newspaper underneath, and light it on fire. It concentrates the flames so the coals heat up in a fraction of the time. Mu husband uses it every time he fires up the grill!

    Well, there you have it! I hope this has helped you make your holiday shopping go a bit smoother.

    Looking for more gift ideas? Check out all of my gift guides for more inspiration:

    • Shop Small with the Big Flavors 2020 Holiday Gift Guide - Part 3
    • Shop Small with the Big Flavors 2020 Holiday Gift Guide - Part 2
    • Shop Small with the Big Flavors 2020 Holiday Gift Guide - Part 1
    • Big Flavors 2019 Holiday Gift Guide for Food Lovers
    • Big Flavors 2018 Holiday Gift Guide Part 2
    • Big Flavors 2018 Holiday Gift Guide Part 1
    • Holiday Gift Ideas to Upgrade Your Kitchen & Dining Experience
    • White Elephant Funny Holiday Gift Ideas for Foodies
    • 2016 Holiday Gift Guide (Part 2)
    • 2016 Holiday Gift Guide (Part 1)
    • 2015 Holiday Gift Guide
    • 2013 Holiday Gift Guide

    Need a cocktail to go with your online holiday shopping? Here are a few recommendations:

    • The Grace Lane Graduate
    • Wine-Beyond-the-Wall (or, Wine-ter is Coming)
    • Cucumber Gin Elderflower Smash
    • DM Old Fashioned
    • The Aztec
    • DM Espresso Martini
    • Bourbon Rouge
    • Chile Libre
    • DM Bloody Mary
    • The Herbalist
    • Hot Hot Hot Chocolate
    • Rooster Shots

    Triple-Chocolate Pumpkin Pie

    November 21, 2017 by Ashley 3 Comments

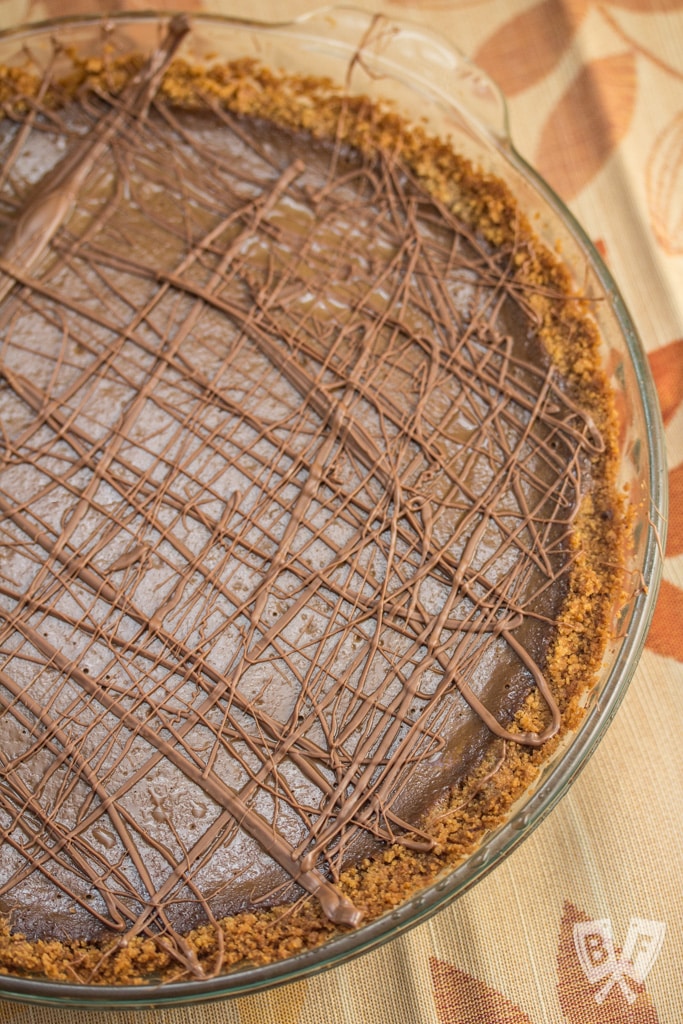
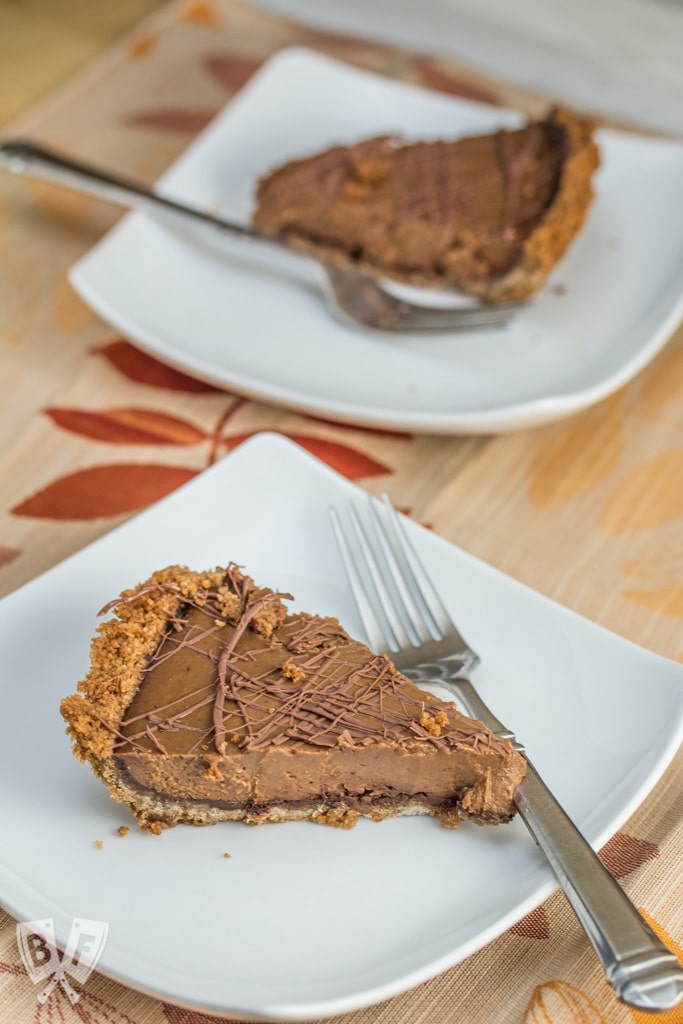
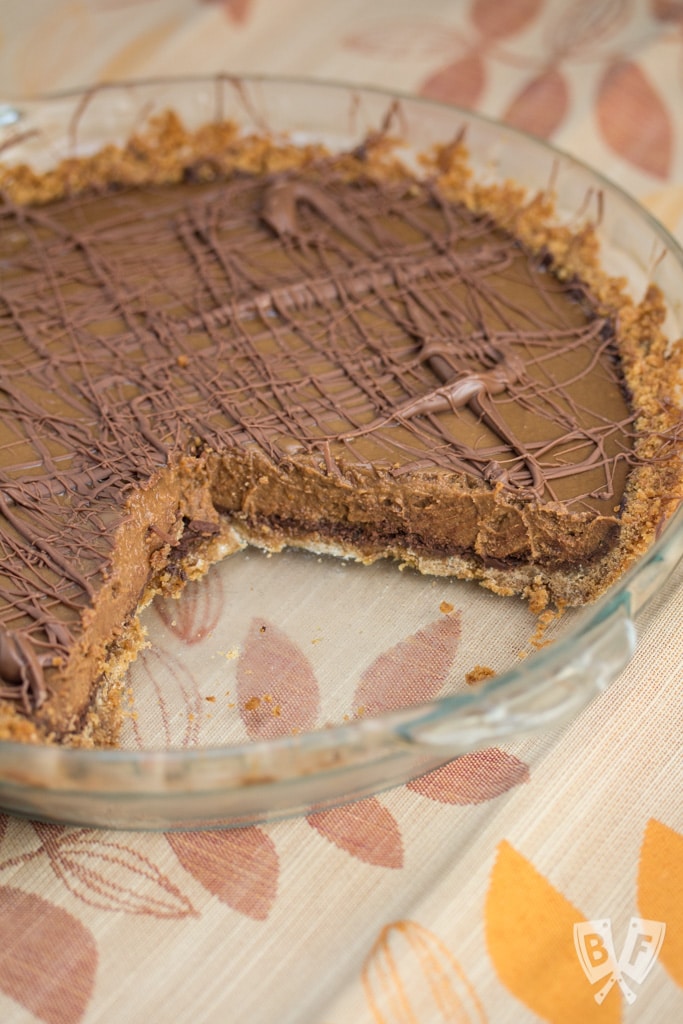
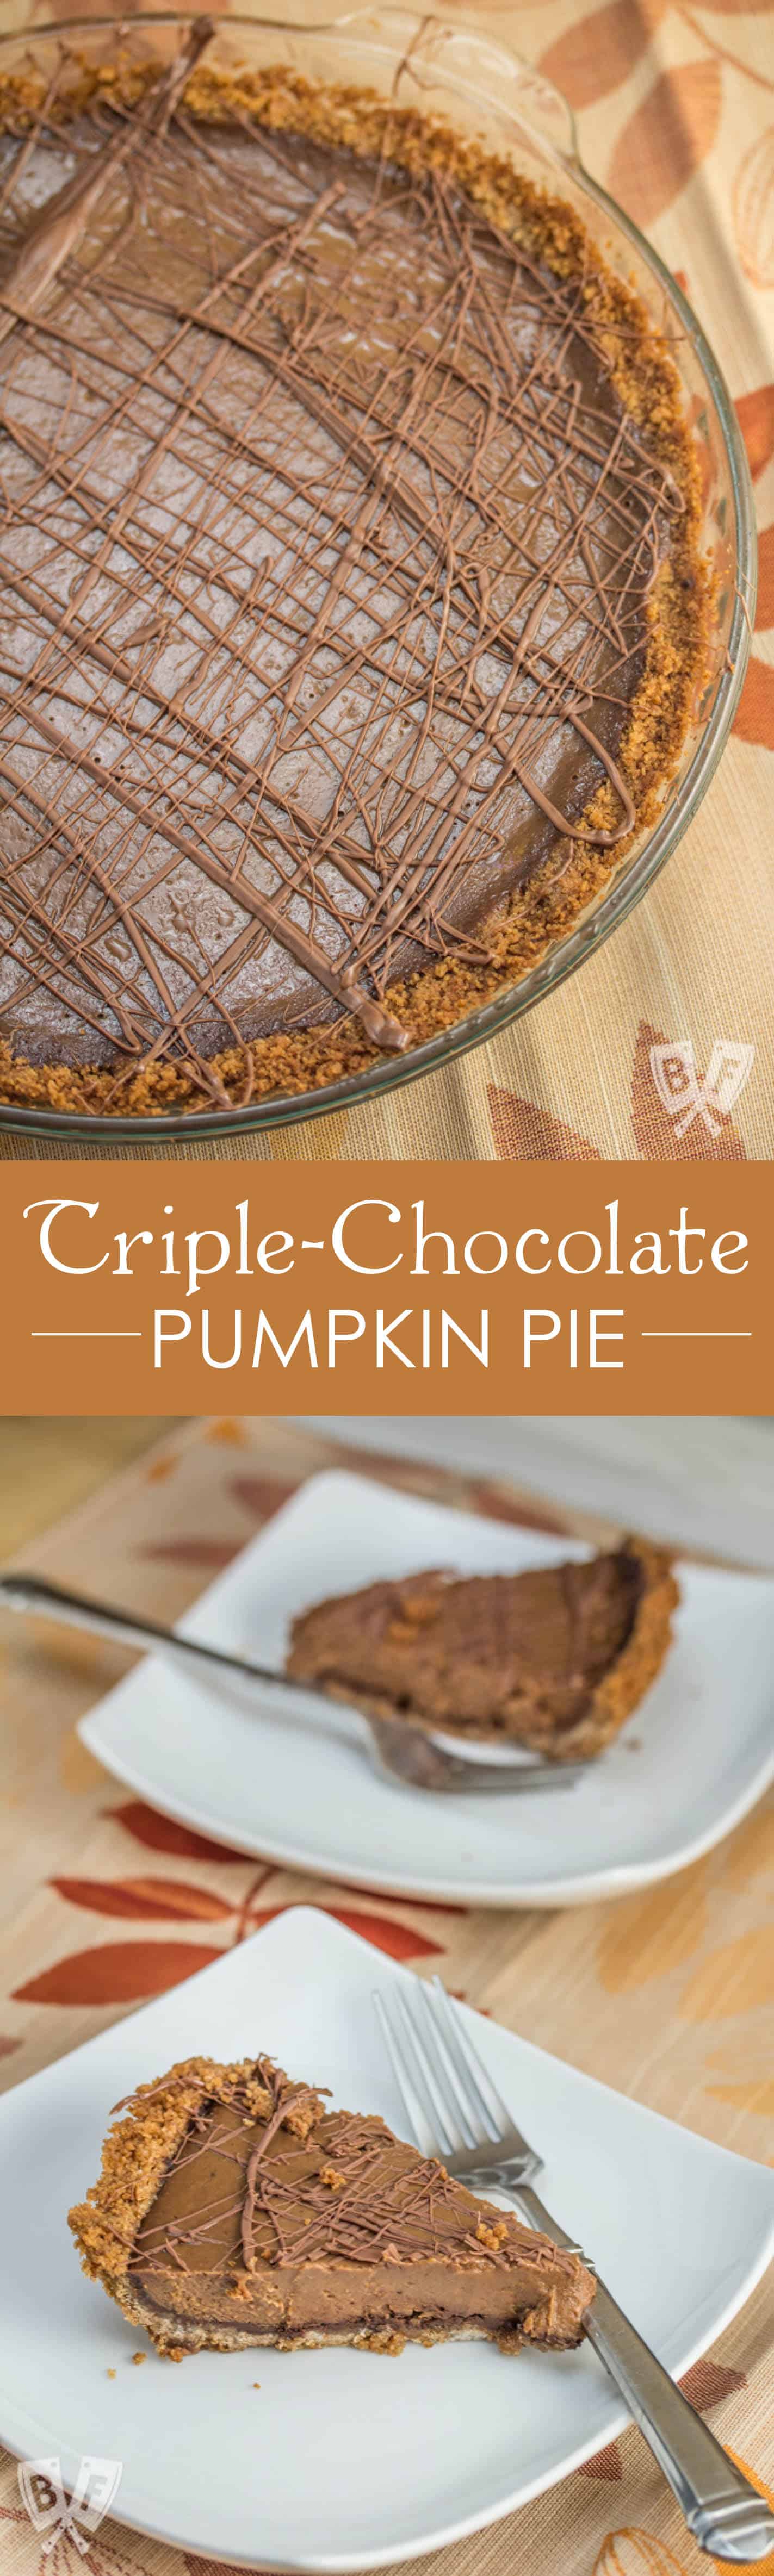
    Triple-Chocolate Pumpkin Pie - Graham cracker crust is slathered with a layer of bittersweet chocolate that's hidden beneath a pumpkin & semi-sweet chocolate filling. Sure to be your new Thanksgiving holiday favorite!

    Graham cracker crust is slathered with a layer of bittersweet chocolate that's hidden beneath a pumpkin & semi-sweet chocolate filling.

    We were invited to a dinner party at our friends' house and I was asked to bring dessert. These particular friends were open to anything, so I decided to try out a new (to me) pie recipe that was full of fall flavor.

    Plus 3 types of chocolate. Because chocolate times three. It's kind of a no brainer.

    Triple-Chocolate Pumpkin Pie - Graham cracker crust is slathered with a layer of bittersweet chocolate that's hidden beneath a pumpkin & semi-sweet chocolate filling. Sure to be your new Thanksgiving holiday favorite!

    This pie was a major show stopper! It looked absolutely beautiful and decadent - which is exactly what it was.

    The graham cracker crust is slathered with a layer of bittersweet chocolate that is hidden beneath a pumpkin and semi-sweet chocolate filling.

    After it chills in the refrigerator, it gets a final drizzle of milk chocolate before you dive in face first serve it for dessert.

    Triple-Chocolate Pumpkin Pie - Graham cracker crust is slathered with a layer of bittersweet chocolate that's hidden beneath a pumpkin & semi-sweet chocolate filling. Sure to be your new Thanksgiving holiday favorite!

    This pie would be perfect for Thanksgiving - especially for those pumpkin pie haters. This one is sure to win them over.

    My only major note is that this recipe made enough filling for me to make two pies. I saved half of the filling, covered, in the refrigerator for a couple of days and made a new crust and baked it and it was just as good (and arguably even better!) than the first.

    So just think - you can make TWO of these gorgeous pies with this recipe. Extra perfect for Thanksgiving! You could definitely shortcut it and use a store-bought graham cracker crust, but I really liked the flavor of this one. Both times ;).

    Triple-Chocolate Pumpkin Pie - Graham cracker crust is slathered with a layer of bittersweet chocolate that's hidden beneath a pumpkin & semi-sweet chocolate filling. Sure to be your new Thanksgiving holiday favorite!

    Looking for more dessert recipes? Check out some of our favorites:

    • Rich Cocoa Brownie Bites
    • Elvis-Style Frozen Bananas
    • Sweet + Salty Dark Chocolate Clusters
    • 5-Ingredient Samoa Cereal Bowls
    • Orange Scented Cannoli Dip
    • Double Chocolate Chip Cookies with Vanilla Icing
    • Dessert Nachos with Fresh Baked Cinnamon Tortilla Chips
    • Tolon's Strawberry Basil Shortcake
    • Cranberry Orange Snickerdoodles
    • Bourbon Bacon Pecan Pie with a Whole Wheat Crust
    • Chocolate Cream Pie with Orange Zested Whipped Cream
    • Great Grandma Francesca Cardile's Cookies
    • Ricotta Cookies

    📖 Recipe

    Triple-Chocolate Pumpkin Pie

    Triple-Chocolate Pumpkin Pie - Graham cracker crust is slathered with a layer of bittersweet chocolate that's hidden beneath a pumpkin & semi-sweet chocolate filling. Sure to be your new Thanksgiving holiday favorite!
    Graham cracker crust is slathered with a layer of bittersweet chocolate that's hidden beneath a pumpkin & semi-sweet chocolate filling.
    5 from 1 vote
    Print Recipe Pin Recipe
    Servings: 2 pies
    Course: Dessert
    Cuisine: American
    Prep Time 20 minutes mins
    Cook Time 1 hour hr 10 minutes mins
    Total Time 1 hour hr 30 minutes mins

    Ingredients
     

    For crusts:
    • 4 cups finely ground graham cracker crumbs about 32 crackers
    • 6 ounces 12 tablespoons unsalted butter, melted
    • 2 tablespoons granulated sugar
    • ¼ cup packed light-brown sugar
    • 1 teaspoon coarse salt
    • 1 teaspoon ground cinnamon
    • 6 ounces bittersweet chocolate preferably 61 percent cacao, finely chopped
    For filling:
    • 12 ounces semisweet chocolate preferably 55 percent cacao, chopped
    • 4 ounces 6 tablespoons unsalted butter, cut into small pieces
    • 1 can 15 ounces solid-pack pumpkin
    • 1 can 12 ounces evaporated milk
    • ¾ cup packed light-brown sugar
    • 3 large eggs
    • 1 tablespoon cornstarch
    • 1 teaspoon pure vanilla extract
    • 1 ½ teaspoons coarse salt
    • ¾ teaspoon ground cinnamon
    • ¾ teaspoon ground ginger
    • ¼ teaspoon ground nutmeg
    • Pinch of ground cloves
    For topping:
    • 2 ounces milk chocolate melted

    Instructions
     

    1. Preheat oven to 350 degrees.
    2. Combine graham cracker crumbs, butter, sugars, salt, and cinnamon in bowl. Firmly press half of mixture into bottom and up sides of a deep, 9 ½-inch pie plate. Repeat with remaining mixture in second pie plate. Place on a rimmed baking sheet and bake until firm, 8 to 10 minutes.
    3. Remove from oven, and sprinkle half of bittersweet chocolate over bottom of each crust. Return to oven to melt chocolate, about 1 minute. Spread chocolate in a thin layer on bottom and up sides. Let cool on a wire rack. Reduce oven temperature to 325 degrees.
    4. In a large heatproof bowl set over a pot of simmering water, melt semisweet chocolate and butter, stirring until smooth. Remove from heat.
    5. Mix pumpkin, milk, brown sugar, eggs, cornstarch, vanilla, salt, cinnamon, ginger, nutmeg, and a pinch of cloves in a medium bowl. Whisk ⅓ pumpkin mixture into chocolate mixture. Whisk in remaining pumpkin mixture until completely incorporated.
    6. Pour half of pumpkin mixture into each crust. Bake until center is set but still a bit wobbly, 55 to 60 minutes. Let cool in pie dish on a wire rack. Refrigerate until well chilled, at least 8 hours (preferably overnight). Before serving, drizzle melted milk chocolate over top of both pies. Serve immediately.

    Notes

    Adapted from Martha Stewart

    Did you make this recipe?

    Leave a comment + star rating below to let people know how it was!
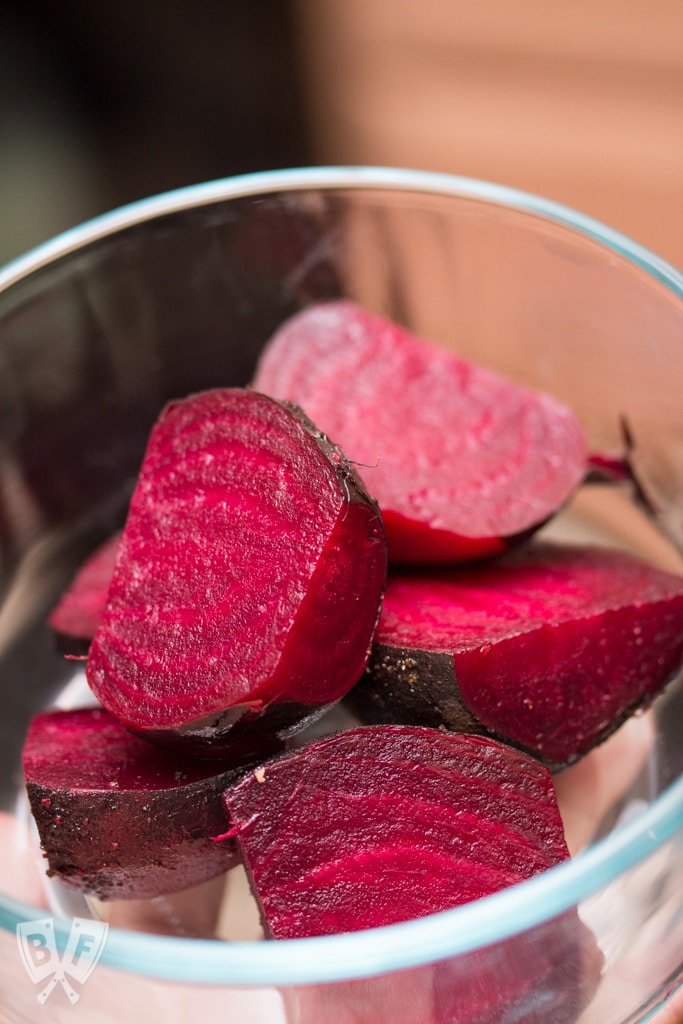
    Triple-Chocolate Pumpkin Pie - Graham cracker crust is slathered with a layer of bittersweet chocolate that's hidden beneath a pumpkin & semi-sweet chocolate filling. Sure to be your new Thanksgiving holiday favorite!

    White Elephant Funny Holiday Gift Ideas for Foodies

    November 20, 2017 by Ashley 8 Comments

    White Elephant Funny Holiday Gift Ideas for Foodies: Looking for funny stocking stuffers + holiday gift ideas for the food lovers in your life? This collection of 25 food + drink items is sure to be a hit!

    Looking for funny stocking stuffers + holiday gift ideas for the food lovers in your life? This collection of 25 food + drink items is sure to be a hit!

    White Elephant Funny Holiday Gift Ideas for Foodies: Looking for funny stocking stuffers + holiday gift ideas for the food lovers in your life? This collection of 25 food + drink items is sure to be a hit!

    I was having a deliciously productive breakfast meet-up/work session at a local coffee shop last week with my friend Jen (from Cuddles and Chaos) when the topic of holiday gift guides came up.

    We've both done gift guides in the past - you can find my full roster of gift guides by clicking here.

    While we were discussing this year's holiday picks, we started talking about funny gifts and white elephant gift exchanges. Have you ever participated in one?

    I love a good gift swap. At my last office job, I was the (voluntary!) organizer for anyone who wanted to get in on the holiday gift exchange fun.

    Jen and I did a little digging online to see what the majority of people called this type of gift exchange - it mostly came down to white elephant or Yankee swap.

    We decided to go with white elephant and looked into the history of the name. It's actually pretty interesting - according to whiteelephant.info:

    The origin of the name "White Elephant" comes from the Thai phrase: "Chang Samkhan", but in Thai language white in this instance is not a reference to the color, but rather desirability. The direct translation is referring to "purity" and the actual translation is "Auspicious Elephant" thus confirming the desirability of these rare animals for the rulers of these lands in ancient times.

    Whatever you decide to call it, a gift exchange that includes ridiculously over-the-top, quirky, silly, pun-tastic gifts is always a good time. I personally enjoy throwing at least one silly gift under the Christmas tree or as a stocking stuffer each year, too.

    And now, without further ado, here are my 25 picks for funny gifts that are perfect for the food and beverage enthusiasts in your life.

    White Elephant Funny Holiday Gift Ideas for Foodies: Looking for funny stocking stuffers + holiday gift ideas for the food lovers in your life? This collection of 25 food + drink items is sure to be a hit!

    1. PASTASAURUS - this pasta server features a dinosaur-shaped head with "pasta-snagging teeth". It has eye holes and nostrils that are used to drain cooking liquid away from your pasta. And it's top-rack dishwasher safe, just like most dinosaurs. Rawr.

    2. DINNER DJ - this interactive kids' dining set has a record-style spinning plate, "tone arm" spork, and moveable knobs and levers. It's a fun way to play with your food without getting in trouble! My son would love this set, though at the moment he takes sooooo long to eat his dinner that I'd be afraid he'd be stuck at the table all day trying to make it through each and every meal.

    3. Muffin Tops Denim-Style Baking Cups - I first saw these yeeeears ago and I still crack up every time I come across them. "As Muffin Tops bake, they develop that little extra bulge around the middle... Eat up, it's just a little more to love."

    4. Silicone Bubble Wrap Oven Mitt - un-poppable and legitimately functional for pulling hot items out of the oven. If I owned this I'd giggle every.single.time I used it.

    5. Charcoal Companion Non-Stick Marshmallow Twig Skewer - this would be so much fun to take on a camping trip upstate to my uncle's hang gliding and paragliding park. You can really maximize the number of marshmallows you roast at once and upgrade your s'mores game big time!

    6. Breaking Bad Cutting Board - a laser engraved bamboo cutting board for the Breaking Bad fans in your life. Ready? Let's Cook!

    7. Fifty Shades of Chicken - this parody cookbook was actually the main point of inspiration for this gift guide. I had picked it up from the library a few years ago because the title and cover art cracked me up. I made a few of the recipes and they ended up being absolutely delicious! I personally can vouch for the Roasted Chicken with Bacon and Sweet Paprika and Roast Chicken with Brandy-Vanilla Butter. With recipe titles like Dripping Thighs, Sticky Chicken Fingers, and Bacon-Bound Wings, this book is sure to tantalize your senses.

    8. Bunny Rabbit Salt & Pepper Shaker Set - my brother & sister-in-law have these on their stove. We like to refer to them as the "doin' it bunnies" because... well... you get the idea. You may have spied them in the background of some of my Instagram photos when I was out in Indiana cooking for them over the summer. I had a few people ask where they could find them, so I figured they'd fit in perfectly this snarky holiday gift guide.

    9. Flamingo Toots Cotton Candy - this would be a perfect stocking stuffer. The packaging claims that it's fluffy & sweet. Nothing like a little cute-yet-crude humor to get you through the holidays, right?

    10. POLAR PICKS Ceramic Toothpick Dispenser - I never want a toothpick delivered to me by any other method than narwhal from here on out. Please and thank you.

    11. Fifty Shades of Bacon - another funny cookbook that's billed as, "...an erotic cookbook that delves into the full bacon experience. Ok, it is not erotic at all, but it is a tongue in cheek delivery of some great bacon recipes.". It contains 50 bacon-tastic recipes. (And if you're looking for my own collection of bacon recipes, you can check them out here!)

    12. Bag of Unicorn Farts - this is a bag of cotton candy that claims "a rainbow of smiles inside". There used to be a great canned unicorn product that came in a SPAM-like tin can, but now it's just a regular can of unicorn meat (without a description of what's actually in the can, so who can be sure??).

    13. The Gallery of Regrettable Food - this is another item that I actually own. It was a gift from my mom and it is hysterically terrible. The back of the book warns, "This is not a cookbook. You'll find no tongue-tempting treats within -- unless, of course, you consider Boiled Cow Elbow with Plaid Sauce to be your idea of a tasty meal." It's a hilarious assortment of poorly photographed food from the 1940s, '50s, and '60s. Expect lots of Jello molds and aspic. SO much aspic.

    White Elephant Funny Holiday Gift Ideas for Foodies: Looking for funny stocking stuffers + holiday gift ideas for the food lovers in your life? This collection of 25 food + drink items is sure to be a hit!

    14. Gin and Titonic Ice Cube Tray - because nothing ups your G&T game like floating ocean liners and icebergs. Just add Leo DiCaprio, Kate Winslet, and get ready to draw me like one of your French girls.

    15. Floppy Disk All-weather Coasters - boring coasters are a thing of the past! These retro coasters are dishwasher safe and good for indoor or outdoor use.

    16. Insulated Wine Tote Bag with Key chain Bottle Opener - sneak your drink with this covert accessory. This handbag holds a full bottle of wine under a divider and includes a magnetic closure flap that hides access to spigot for easy wine pouring. You can even use it with ice packs to keep your wine cold for hours. I can think of several upcoming occasions where this would come in VERY handy.

    17. The WineRack - OK now this item cracked me up more than any other item on my list. It's a legit sports bra that you can fill with wine. It comes with polyurethane bladder that holds 25 ounces of your favorite beverage and fits anything from size 34A through 34D. It has a long drinking tube with easy-to-use on/off valve to control the flow. Reading some of the customer reviews here is hilarious, too.

    18. Zombie Rising up From the Grave Wine Bottle Holder - why keep the Halloween decorations restricted to October? This piece depicts a zombie rising up from the grave to deliver a bottle of your finest vintage.

    19. Toast of the Zombie Sculptural Goblets - because apparently we've been doing it wrong while toasting during episodes of The Walking Dead up till now. Dead wrong. (I'll show myself out...)

    20. Toilet Mug - like potty humor? This mug looks like a toilet and holds up to 12 ounces of your favorite beverage. You can also use it as a candy dish. Just don't forget to wash your hands after using it.

    21. The Prescription Coffee Mug - I actually bought this for my step-sister a few years ago as a graduation gift when she finished nursing school. This mug holds up to 12 ounces of the world's best medicine - coffee!

    22. SLOW BREW Sloth Tea Infuser - a heat resistant silicone tea infuser hangs patiently inside your mug while you brew the perfect cup of tea.

    23. Cat Glass Cup Tea Mug with Fish Tea Infuser Strainer Filter - this mug will help you raise through the ranks on your way to becoming the ultimate crazy cat lady.

    24. Elixer of the Undead Zombie Wine Bottle Holder - I actually have a few friends who would love to have this piece in their homes. It's made of resin and the zombie's hands and mouth will securely hold most 750 milliliter wine bottles at an angle (to help preserve the life of the cork).

    25. Pink Freud Mug - another hit from the Unemployed Philosophers Guild (home of so many of my favorite gifts to date), this mug depicts Freud's portrait in Flamingo-pink as part of the iconic artwork from Pink Floyd's Dark Side of the Moon. "Is There Anybody Out There? Nobody's as out-there as this mug."

    OK, that's all I have for now. I had so much fun compiling this list. I'd love to hear about your favorite gag gifts in the comments section below!

    Still looking for more ideas? Head over to Cuddles and Chaos to check out Jen's list of funny white elephant gift ideas, too! And while you're at it, check out her new podcast, Majestically Awkward. She refers to it as, "...an amusing exploration of awkwardness that will get better with age." and it has been a phenomenal addition to my podcast repertoire.

    Looking for more gift guides? You can check out other gift guides I've compiled by clicking here.

    Need a cocktail to go with your online holiday shopping? Here are a few recommendations:

    • The Grace Lane Graduate
    • Wine-Beyond-the-Wall (or, Wine-ter is Coming)
    • Cucumber Gin Elderflower Smash
    • DM Old Fashioned
    • The Aztec
    • DM Espresso Martini
    • Bourbon Rouge
    • Chile Libre
    • DM Bloody Mary
    • The Herbalist
    • Hot Hot Hot Chocolate
    • Rooster Shots

    Bourbon-Orange Cranberry Sauce

    November 16, 2017 by Ashley 18 Comments

    This Bourbon-Orange Cranberry Sauce is a boozy side dish that can be prepared several days in advance and is the perfect accompaniment to any holiday meal! It's always on my Thanksgiving menu!

    Skip the canned cranberry sauce - this boozy side dish can be prepared several days in advance and is the perfect accompaniment to any holiday meal!

    This post may contain affiliate links.

    I've been making a stovetop version of this Bourbon Cranberry Sauce for several years now, and this year I decided to add even more flavor to it.

    Hellooooo, orange.

    This Bourbon-Orange Cranberry Sauce is a boozy side dish that can be prepared several days in advance and is the perfect accompaniment to any holiday meal! It's always on my Thanksgiving menu!

    Citrus zest packs so much flavor, and since orange and cranberry work so well together (see these Cranberry Orange Trifles with Candied Walnuts for proof!), I knew it would be a natural fit.

    I used some juice from my orange after zesting it, and it really added a nice flavor.

    You know, in addition to all.that.bourbon.

    Which does not get cooked out of the sauce, mind you. It gets stirred in at the end.

    This Bourbon-Orange Cranberry Sauce is a boozy side dish that can be prepared several days in advance and is the perfect accompaniment to any holiday meal! It's always on my Thanksgiving menu!

    This sauce was a huge hit this year! I doubled the amount I'm posting here for our small Thanksgiving dinner because I knew we'd be wanting plenty of leftovers. It holds up really well for an entire week in the fridge - if it lasts that long!

    My husband used to love the can-o-cranberry sauce, but this stuff is a total (tipsy) game-changer.

    Looking for more Thanksgiving favorites? Check out these 5-star recipes:

    • Triple-Chocolate Pumpkin Pie
    • Roasted Garlic Mashed Potatoes
    • Mini Turkey Pot Pies with Puff Pastry
    • Italian Cream Cheese and Ricotta Cheesecake
    • Zoodle Frittata
    • No Mayo Deviled Eggs
    • Best Ever Green Bean Casserole
    • Classic Green Bean Casserole
    • Sweet and Sour Meatballs

    📖 Recipe

    Bourbon-Orange Cranberry Sauce

    This Bourbon-Orange Cranberry Sauce is a boozy side dish that can be prepared several days in advance and is the perfect accompaniment to any holiday meal! It's always on my Thanksgiving menu!
    This boozy side dish can be prepared several days in advance and is the perfect accompaniment to any holiday meal!
    Big Flavors from a Tiny Kitchen - Ashley Covelli (adapted from Bon Appétit)
    No ratings yet
    Print Recipe Pin Recipe
    Course: Side Dish
    Cuisine: American
    Prep Time 5 minutes mins
    Cook Time 35 minutes mins
    Total Time 40 minutes mins

    Ingredients
     

    • 1 pound about 4 cups cranberries
    • 2 cups sugar
    • 1 teaspoon fresh orange zest
    • 2 tablespoons fresh orange juice
    • ¼ teaspoon ground cinnamon
    • ¼ cup bourbon

    Instructions
     

    1. In a medium saucepan with a tight-fitting lid, place cranberries, sugar, orange zest, orange juice and cinnamon. Stir. Bring to a boil, then reduce the heat to medium-low, cover and simmer, stirring every 10 minutes, until it reaches your desired consistency (about 35-35 minutes).
    2. Take pan off heat and stir in bourbon. Refrigerate until well chilled.

    Notes

    Recipe by Big Flavors from a Tiny Kitchen - Ashley Covelli - adapted from Bon Appétit November 1991

    Did you make this recipe?

    Leave a comment + star rating below to let people know how it was!
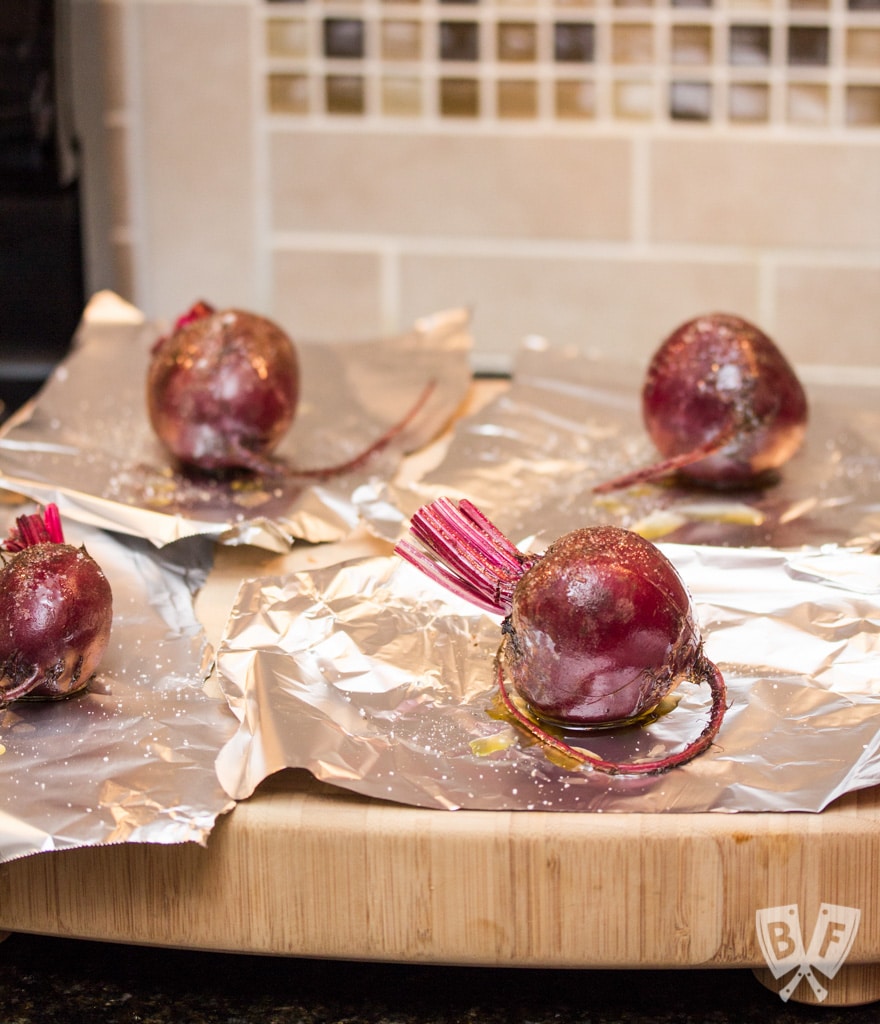
    This Bourbon-Orange Cranberry Sauce is a boozy side dish that can be prepared several days in advance and is the perfect accompaniment to any holiday meal! It's always on my Thanksgiving menu!

    Great Grandma Maria Francesca Cardile's Italian Easter Cookies

    November 16, 2017 by Ashley 23 Comments

    Great Grandma Francesca Cardile's Cookies are an elegant, lightly sweet dessert that are a Calabrese tradition, passed down through the generations and enjoyed annually at Christmas and Easter.

    These elegant, lightly sweet cookies are a Southern Italian tradition, passed down through the generations and enjoyed annually at Easter and Christmas.

    Great Grandma Francesca Cardile's Cookies are an elegant, lightly sweet dessert that are a Calabrese tradition, passed down through the generations and enjoyed annually at Christmas and Easter.

    Keeping family traditions alive through food is one of my favorite parts of the holidays. And one of the best parts of marrying into an Italian family is learning their traditional holiday recipes.

    I'm doing my best to take copious notes and keep these family favorites going for the next generation.

    My husband gets together with his dad and uncle to make his paternal grandma's Turdilli & Chinudille for Christmas for many years now, but he hadn't ever made the cookies that his maternal grandmother always made until fairly recently.

    These cookies are known as Pupa con L'Uova and are typically baked with an egg in the middle. They're supposed to resemble a woven Easter basket.

    Traditionally, our family skipped the egg and any naming convention whatsoever; "cookies" was enough for us.

    His mom's cousin Lorraine came over to show us how to make these beauties. She said that his grandma might not have put the orange juice in when she made them, but we really liked the flavor that it added.

    We found out that this recipe actually came from his great grandmother Maria Francesca Cardile, who was from Santo Stefano in Reggio Calabria, Italy.

    I was so excited to finally get to sit in and help make a batch of these traditional Italian Easter cookies, as well as documenting the process.

    The shaping of the cookies is one of the most interesting parts, and it takes a bit of practice to get the hang of it.

    Great Grandma Francesca Cardile's Cookies are an elegant, lightly sweet dessert that are a Calabrese tradition, passed down through the generations and enjoyed annually at Christmas and Easter.

    These cookies are light and fluffy and not overly sweet. They go perfectly with a hot cup of tea. The orange flavor is really nice. The recipe makes a lot of cookies (and this is apparently half the size of the batch she used to make!).

    The tricky part is shaping them, but you can really make them any shape that you want to, as long as they're all a consistent size.

    Our son was a toddler when we got together to make these, and he absolutely loved them (they're great for teething!). I'm so glad I got to be part of this tradition, and now it's something that we can pass down to our son and enjoy for years to come.

    I forgot to note exactly how many cookies this recipe made, but I'll keep a tally next time and update the recipe here. I'm including some photos to use as visual cues to help you in your Italian Christmas cookie baking adventures.

    This is what the consistency of the dough should look like:

    Great Grandma Francesca Cardile's Cookies are an elegant, lightly sweet dessert that are a Calabrese tradition, passed down through the generations and enjoyed annually at Christmas and Easter.

    My husband learning how to roll out the cookies:

    Great Grandma Francesca Cardile's Cookies are an elegant, lightly sweet dessert that are a Calabrese tradition, passed down through the generations and enjoyed annually at Christmas and Easter.

    You have to twist and twirl the dough:

    Great Grandma Francesca Cardile's Cookies are an elegant, lightly sweet dessert that are a Calabrese tradition, passed down through the generations and enjoyed annually at Christmas and Easter.

    The final shape:

    Great Grandma Francesca Cardile's Cookies are an elegant, lightly sweet dessert that are a Calabrese tradition, passed down through the generations and enjoyed annually at Christmas and Easter.

    Finishing them off with an egg wash:

    Great Grandma Francesca Cardile's Cookies are an elegant, lightly sweet dessert that are a Calabrese tradition, passed down through the generations and enjoyed annually at Christmas and Easter.

    Looking for more dessert recipes? Check out some of our family favorites:

    • Rich Cocoa Brownie Bites
    • Elvis-Style Frozen Bananas
    • Sweet + Salty Dark Chocolate Clusters
    • 5-Ingredient Samoa Cereal Bowls
    • Orange Scented Cannoli Dip
    • Double Chocolate Chip Cookies with Vanilla Icing
    • Dessert Nachos with Fresh Baked Cinnamon Tortilla Chips
    • Tolon's Strawberry Basil Shortcake
    • Cranberry Orange Snickerdoodles
    • Bourbon Bacon Pecan Pie with a Whole Wheat Crust
    • Chocolate Cream Pie with Orange Zested Whipped Cream
    • Ricotta Cookies

    📖 Recipe

    Maria Francesca Cardile's Italian Easter Cookies

    Great Grandma Francesca Cardile's Cookies are an elegant, lightly sweet dessert that are a Calabrese tradition, passed down through the generations and enjoyed annually at Christmas and Easter.
    These elegant, lightly sweet cookies are a Southern Italian tradition, passed down through the generations and enjoyed annually at Easter and Christmas.
    Big Flavors from a Tiny Kitchen - Ashley Covelli (adapted from Francesca Cardile)
    5 from 1 vote
    Print Recipe Pin Recipe
    Servings: 5 dozen
    Course: Dessert
    Cuisine: Italian
    Prep Time 30 minutes mins
    Cook Time 10 minutes mins
    Total Time 40 minutes mins

    Ingredients
     

    Cookie dough:
    • 9 cups all purpose flour
    • ½ teaspoon cinnamon
    • ¼ cup baking powder
    • 1 large orange
    • 1 ½ cups Crisco
    • 9 eggs
    • 2 cups sugar
    • 1 ½ tablespoons vanilla extract
    Egg wash:
    • 2 egg yolks
    • splash of milk
    • 1 tablespoon sugar

    Instructions
     

    1. Put the flour, cinnamon and baking powder in a large bowl and mix together with a fork. Add the zest of the orange and stir to combine. Mix in Crisco with a fork or your fingers until the consistency resembles coarse sand.
    2. In another large bowl, beat the eggs and sugar with an electric mixer, adding one egg and a sprinkle of sugar at a time, until all 9 eggs and 2 cups of sugar are combined. Beat in the juice of the orange and vanilla. Gradually add the flour mixture to the eggs, beating until it is all combined. Great Grandma Francesca did the entire thing by hand, but we like to use an electric mixer until the dough gets too thick, and then we switch to a wooden spoon to finish incorporating the ingredients. The finished dough should resemble pizza dough. If it's too sticky, you can add more flour.
    3. To shape the cookies, put a light sprinkle of flour on the countertop. Grab a handful of dough and knead it on the counter a couple of times to get it nice and smooth. Break off a walnut-sized piece of dough and roll it between your palm and the countertop until it forms a smooth ball. Roll that ball into a log, about 8 inches long. Bring the ends of the log up next to each other to form a "U" shape, grab the bottom of the "U" with your other hand, and twist it a few times until the dough forms a tight spiral. Place the spiral on the counter and wrap it around your finger to form a circle. Pull the top end over the bottom and pinch it underneath slightly to close. Place onto a cookie sheet.
    4. Beat the egg wash ingredients together in a small bowl, and brush lightly over each cookie. Bake at 350°F until the cookies have puffed up and are nice and golden brown on top, about 10-15 minutes.

    Notes

    Recipe adapted from Francesca Cardile by Big Flavors from a Tiny Kitchen - Ashley Covelli

    Did you make this recipe?

    Leave a comment + star rating below to let people know how it was!
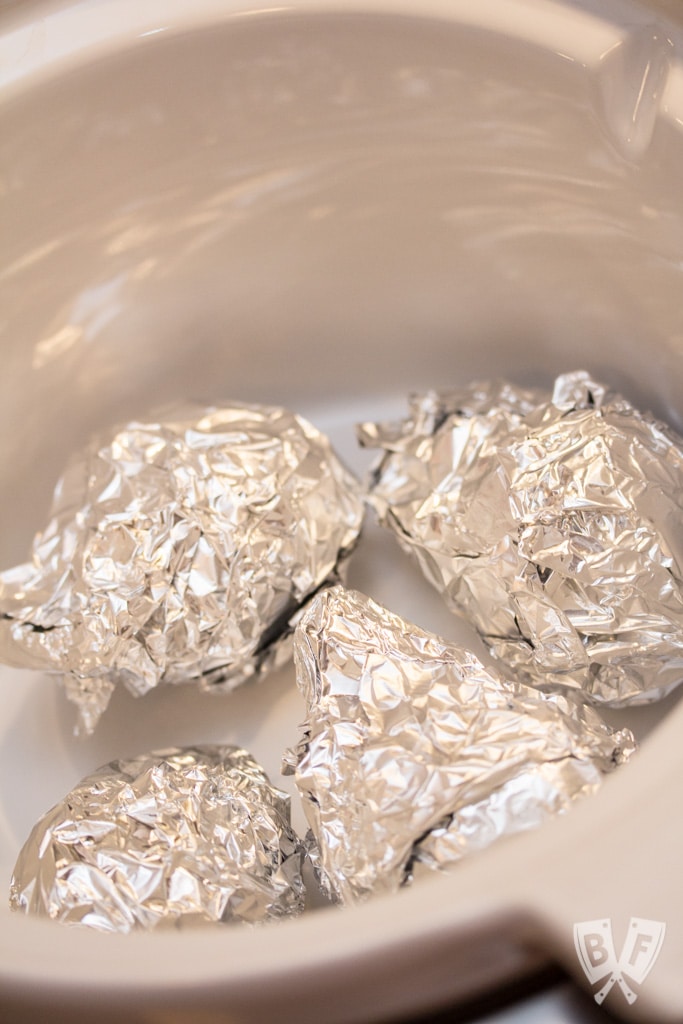
    Great Grandma Francesca Cardile's Cookies are an elegant, lightly sweet dessert that are a Calabrese tradition, passed down through the generations and enjoyed annually at Christmas and Easter.

    Zoodle Frittata

    November 14, 2017 by Ashley 5 Comments

    3/4 view of a slice of zoodle frittata topped with fresh herbs and a balsamic tomato salad.

    A drizzle of aged balsamic, grated Parmesan, garden fresh tomatoes and basil adorn this deliciously elegant yet simple breakfast dish.

    Zoodle Frittata - A drizzle of aged balsamic, grated Parmesan, garden fresh tomatoes and basil adorn this deliciously elegant yet simple breakfast dish.

    I've been playing around with my spiralizer quite a bit, and I thought it would be fun to put a zoodle-y spin on a breakfast classic.

    This frittata is really simple to put together. And it's definitely worth breaking out the cast iron skillet for this beauty!

    Sauté a few aromatics together in an oven-proof skillet, add zoodles, top with a mixture of eggs, milk and Parmesan cheese and bake till set.

    Then serve it up with beautifully ripe garden tomatoes, some torn basil and a drizzle of aged balsamic.

    And an extra sprinkle of Parmesan cheese. Because PARMESAN CHEESE.

    Obviously.

    Looking for more frittata recipes? This squash blossom frittata and this spinach, bacon, green onion, and cheddar frittata are great options. And if quiche is more your style, this spinach and cheddar quiche is a family favorite.

    Zoodle Frittata - A drizzle of aged balsamic, grated Parmesan, garden fresh tomatoes and basil adorn this deliciously elegant yet simple breakfast dish.

    Many of you know that I'm a sucker for all things cast iron. I love using our 10-inch cast iron skillet for frittatas.

    You could also use a 12-inch skillet if you wanted it to be thinner, or if you were adding more eggs to feed a bigger crowd.

    I love bringing a freshly baked frittata right out to the table, popping it onto a trivet, and making a Pac-Man joke with my son as I cut the first wedge out.

    I tend to use a serrated pie server to cut into a frittata - that way it'll give you a clean cut and you can pop it out of the skillet easily, too.

    This recipe is a great way to celebrate summer's bounty.

    If you're making this when tomatoes aren't super ripe, I'd suggest using some grape or Campari tomatoes, since they're pretty consistently sweet.

    This dish would be great any time of year, for breakfast, lunch or dinner.

    Or maybe even a midnight snack…

    Zoodle Frittata - A drizzle of aged balsamic, grated Parmesan, garden fresh tomatoes and basil adorn this deliciously elegant yet simple breakfast dish.

    Looking for more breakfast and brunch favorites? Check out these 5-star recipes:

    • Our Favorite Buttermilk Pancakes
    • Waffle Pulled Pork Eggs Benedict
    • Tropical Superfruit Smoothie Bowl
    • 5-Ingredient Samoa Cereal Bowls
    • Ashwagandha Chai Porridge
    • Brunch Week Recipe Roundup
    • Turkey-Scotch Eggs
    • Squash Blossom Frittata
    • Caramelized Banana Breakfast
    • Chunky Monkey Greek Yogurt Parfaits
    • Brie Waffle Bites
    • Mediterranean Quiche Duo with Cucumber-Chickpea Salad
    • Wobble Café's Pain Perdu
    • Baked Apple Spice Donuts with Maple Frosting + Pumpkin Granola
    • Baby Spinach and Cheddar Quiche

    📖 Recipe

    Zoodle Frittata

    ¾ view of a slice of zoodle frittata topped with fresh herbs and a balsamic tomato salad.
    A drizzle of aged balsamic, grated Parmesan, garden fresh tomatoes and basil adorn this deliciously elegant yet simple breakfast dish.
    Big Flavors from a Tiny Kitchen - Ashley Covelli
    5 from 1 vote
    Print Recipe Pin Recipe
    Servings: 6 Servings
    Course: Breakfast
    Cuisine: American
    Prep Time 5 minutes mins
    Cook Time 20 minutes mins
    Total Time 25 minutes mins

    Ingredients
     

    • 2 tablespoons olive oil
    • 2 cloves garlic minced
    • ¼ cup yellow onion thinly sliced
    • Pinch of red pepper flakes
    • 2 medium zucchini spiralized (about 3 ½ to 4 cups - I used the shredding blade for medium-sized noodles)
    • 6 eggs beaten
    • 1 cup reduced fat milk
    • ¼ cup freshly grated Parmesan cheese
    • ¼ teaspoon kosher salt
    For garnish:
    • Ripe tomatoes cut into wedges
    • Basil leaves torn
    • Aged balsamic
    • Freshly grated Parmesan cheese

    Instructions
     

    1. Preheat oven to 350°F.
    2. Heat oil in an oven-proof skillet, preferably cast iron, over medium heat. Add garlic, onion and red pepper flakes and sauté until the onions are translucent. Add zucchini noodles and sauté for 2 minutes.
    3. In a large bowl, whisk together eggs, milk, Parmesan, and salt. Pour into skillet over zucchini noodles. Flatten any stray zoodles down with a spatula or spoon and transfer the skillet to the preheated oven for 20-30 minutes, or until a knife comes out clean. If you want a little extra color on top at the end, you can broil it for 2 minutes. Let cool slightly before cutting.
    4. To serve, cut frittata into wedges and serve with tomato wedges alongside. Sprinkle torn basil leaves on top of frittata, drizzle with aged balsamic and an extra sprinkle of Parmesan cheese.

    Did you make this recipe?

    Leave a comment + star rating below to let people know how it was!
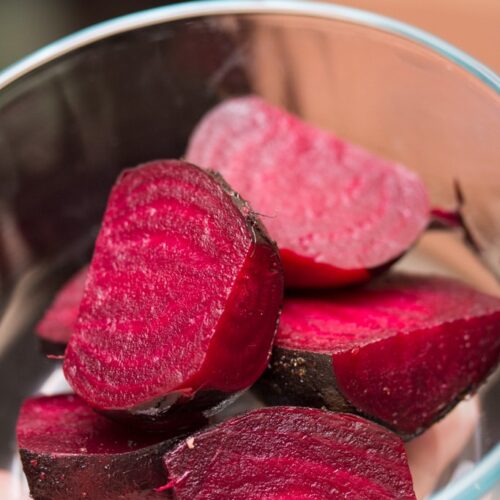
    Zoodle Frittata: A drizzle of aged balsamic, grated Parmesan, garden fresh tomatoes and basil adorn this deliciously elegant yet simple breakfast dish.

    Mini Turkey Pot Pies with Puff Pastry

    November 13, 2017 by Ashley 6 Comments

    Puff pastry helps you make the most of your holiday leftovers with these easy bite-sized turkey pot pies. Perfect for Thanksgiving, Christmas or Easter!

    Puff pastry helps you make the most of your holiday leftovers with these easy bite-sized turkey pot pies. Perfect for Thanksgiving, Christmas or Easter!

    My father-in-law can cook up a storm, especially when it comes to the holidays. Easter, St. Patrick's Day, Thanksgiving, Christmas Eve, or New Year's Day - he's always down to cook up a big ol' feast.

    And one of my favorite parts of a big holiday feast is leftovers!

    Puff pastry helps you make the most of your holiday leftovers with these easy bite-sized turkey pot pies. Perfect for Thanksgiving, Christmas or Easter!

    I first made these mini turkey pot pies after Easter a few years back.

    I was looking at some leftover turkey and roasted potatoes and figured I could turn them into something more exciting.

    Not that I have any trouble enjoying a straight-up plate of holiday leftovers in their original form.

    So I headed to the store for some puff pastry with pot pie on my mind.

    But bite-sized food is always more fun, isn't it? Almost anything gets exponentially cuter once you shrink it down - and food is no different!

    These mini pot pies are actually more like savory tarts, since there's no top layer of pastry sealing all that heat in.

    And the great part about that is that they cool off way faster than a typical pot pie, which is good for those of us who are a little impatient when it comes to letting our food cool before we devour it dig in (and consequently end up with a burnt roof of the mouth).

    Puff pastry helps you make the most of your holiday leftovers with these easy bite-sized turkey pot pies. Perfect for Thanksgiving, Christmas or Easter!

    Let me tell you… These. Are. Wonderful. Bite-sized comfort food may just be my new favorite thing.

    Not only is this a great way to use up leftover turkey but it would also be great with rotisserie chicken. It would even be great with just veggies (substituting vegetable broth if you want to keep it vegetarian).

    That actually reminds me… I meant to put some frozen peas in here. Dang! But these were so good that I didn't even miss them.

    I had a little bit of leftover filling, which I stirred into some pasta for my son and he absolutely loved it!

    Dino and I each ate 3 for dinner, which was the perfect amount. And we still have some leftover for lunches during the weekend. Yessss!

    This would be great as a party appetizer, too! Who says leftovers have to be boring?!

    Looking for more bite-sized favorites? Check out these 5-star recipes:

    • French-Inspired Deviled Eggs
    • Patatas Bravas with Chipotle Aioli
    • Killer Shrimp Cocktail
    • Cheesy Bacon + Apple Croissants
    • Tuna Tostada with Avocado Dressing + Chipotle Sour Cream
    • Marcona Almond + Dried Cherry Popcorn with Crispy Rosemary
    • Veggie Cream Cheese Roll-ups
    • No Mayo Deviled Eggs
    Puff pastry helps you make the most of your holiday leftovers with these easy bite-sized turkey pot pies. Perfect for Thanksgiving, Christmas or Easter!

    📖 Recipe

    Mini Turkey Pot Pies with Puff Pastry

    Mini Turkey Pot Pies with Puff Pastry on serving plates.
    Puff pastry helps you make the most of your holiday leftovers with these easy bite-sized turkey pot pies. Perfect for Thanksgiving, Christmas or Easter!
    Big Flavors from a Tiny Kitchen - Ashley Covelli
    No ratings yet
    Print Recipe Pin Recipe
    Servings: 12 Mini Pot Pies
    Course: Appetizer
    Cuisine: American
    Prep Time 15 minutes mins
    Cook Time 30 minutes mins
    Total Time 45 minutes mins

    Ingredients
     

    • 1 tablespoon extra-virgin olive oil
    • 1 package puff pastry 2 sheets, thawed
    • 1 shallot diced
    • 2 carrots trimmed, scrubbed, and diced
    • 2 stalks celery diced
    • 1 clove garlic minced
    • 4 ounces baby bella mushrooms diced
    • 2-4 sprigs fresh thyme leaves removed and finely chopped
    • 1-2 sprigs fresh rosemary leaves removed and finely chopped
    • kosher salt & freshly ground black pepper to taste
    • 2 tablespoons flour
    • 1 tablespoon butter
    • 2 cups chicken stock
    • 2 cups leftover roast turkey or chicken diced
    • 1 cup leftover cooked potatoes diced

    Instructions
     

    1. Preheat oven to 350°F.
    2. Heat oil in a large, nonstick pan over moderate heat. Sauté the shallot, carrots, celery, garlic and mushrooms, seasoned with salt and pepper, until soft. Add herbs, flour and butter and let cook, stirring occasionally, until the butter has melted and the flour has cooked a little bit (about 2 minutes). Add stock and let it cook for a few minutes to thicken, stirring occasionally.
    3. Stir in meat and potatoes, season again with salt and pepper, and remove from heat.
    4. Cut each sheet of puff pastry into 6 equal rectangles (this will give you 12 total). Press each piece of pastry into one cup of a muffin tin, making sure to flatten the bottom and leave the edges hanging out. Portion the pot pie filling into each of the prepared muffin cups. (I found that using an ice cream scoop gave me perfect portions for each cup).
    5. Bake until the pastry has puffed and the edges are golden, around 20 minutes.

    Did you make this recipe?

    Leave a comment + star rating below to let people know how it was!
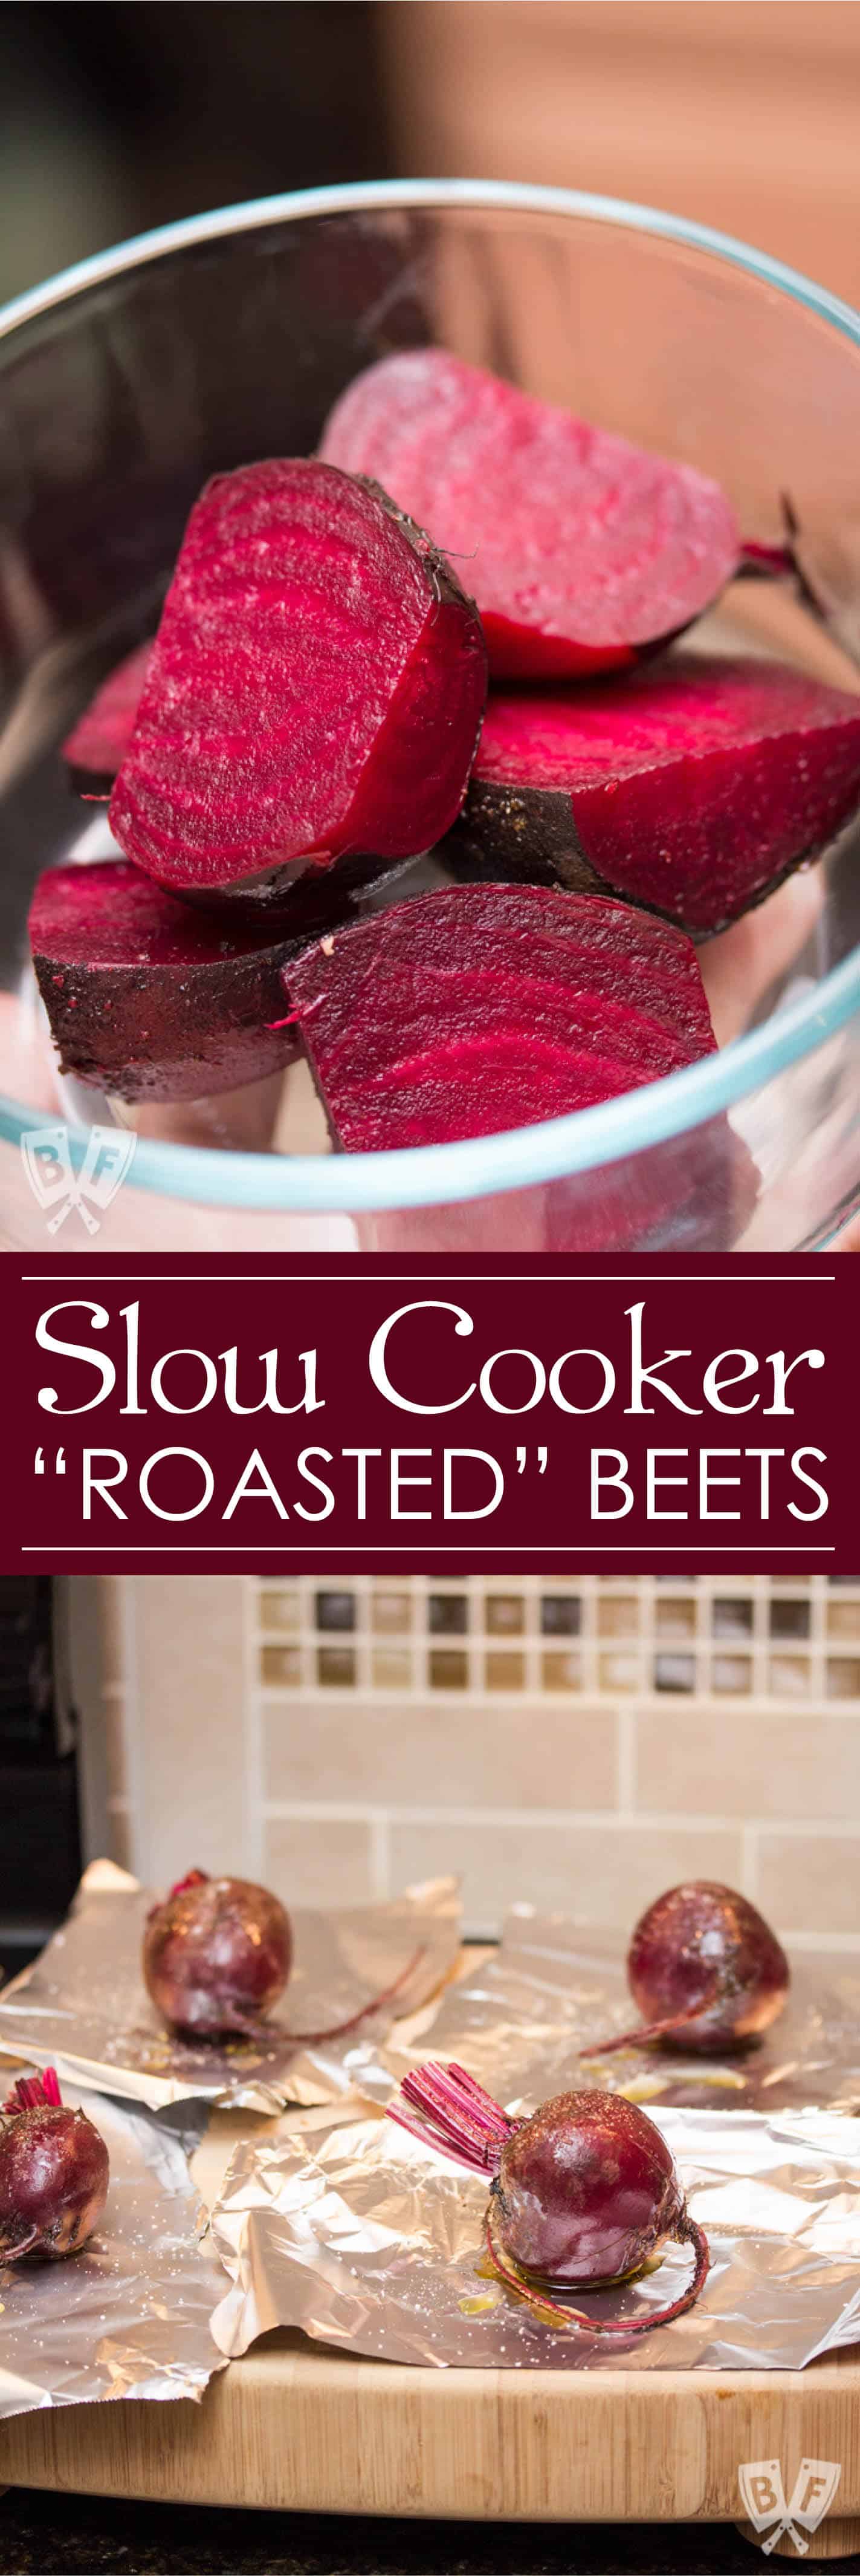
    Garlicky Mushroom Ricotta Pizza with Wild Arugula + Aged Balsamic

    October 29, 2017 by Ashley 25 Comments

    Mushroom and ricotta pizza with baby arugula drizzled with aged balsamic, sliced into triangles.

    Sautéed mushrooms are topped with ricotta and Parmesan cheeses and baked into a store-bought pizza crust for an easy, elegant weeknight meal!

    Mushroom and ricotta pizza with baby arugula drizzled with aged balsamic, sliced into triangles.

    Let's talk pizza. Pizza is such a classic meal. It's a staple of birthday parties, movie nights, and late-night hang-out sessions.

    It also happens to be one of the tastiest, easiest, most customizable meal options for home cooking.

    There are different types of at-home pizza-making

    There are different "levels" of at-home pizza-making, depending on the amount of time and effort that you want to put into it.

    The way I see it, there's a pizza scale, of sorts:

    1. Order pizza delivery at home. No need to get out of your pajamas.
    2. Go out for pizza at a local pizzeria (bonus points for legit brick oven pizza at an Italian pizzeria, which is luckily very easy to do here in New York)
    3. Buy a frozen pizza and bake it at home.
    4. Pick up a ready-made pizza crust and top it/heat it up at home.
    5. Buy pizza dough from the grocery store or a local pizzeria and prepare it at home.
    6. Make pizza dough from scratch (I like this recipe for Lazy Pizza Dough from Smitten Kitchen) and bake it on a screamin' hot pizza stone or steel at home (homemade pizza sauce optional, but encouraged)
    7. Grow your own wheat, harvest it, mill it… OK I'm totally kidding here, though there's one member of my Supper Club who just might go that far for a recipe if he had the time…

    It's all about options here, folks.

    For this particular pizza, I didn't want to go all out and make my own dough, so I took a middle-of-the-road option - #4 on the good ol' pizza scale.

    But who says we have to stick to the standard tomato sauce, shredded mozzarella, and pepperoni format? Not that it wouldn't be totally delicious (like on a homemade pizza bagel), but we can do better than that, can't we?

    Flatbread on a cutting board with mushrooms, ricotta, baby arugula, and balsamic drizzle.

    I had some mushrooms leftover in the fridge, and I thought they would go beautifully sautéed with lots of garlic, a shallot and a little heat from some red pepper flakes.

    I picked up a rectangular artisan flatbread from the grocery store to work with for my pizza.

    Any shape of crust would work here, but rectangular pizza just looks fun, doesn't it?

    This would be wonderful served as a dinner party starter or main course (which is how we enjoyed it).

    The creaminess from the ricotta is absolutely perfect here, and the fresh greens at the end add a nice peppery bite.

    Mushroom pizza sliced into triangles topped with greens and aged balsamic.

    Aged balsamic vinegar and a nice extra-virgin olive oil dress this pizza up enough so that you don't need any sauce.

    It's kind of like a mix between a mushroom pizza and a salad pizza.

    Side note: I had never heard of salad pizza before moving to New York. If you find a place that makes a good salad pizza, I highly recommend giving it a try!

    This pizza rocked our world! I'm excited to experiment with other fun flavor combos soon. It's been way too long since I've made pizza at home!

    My garlicky cilantro naan recipe and my garlicky broccoli rabe are also excellent choices if you're looking for more recipes with a kick of garlic at your table.

    What are your favorite pizza toppings? I'd love to hear about them in the comments section below!

    Still hungry? You may also like...

    Maple Roasted Butternut Squash Pizza with Brussels Sprouts, Bacon + Pomegranate
    Maple Roasted Butternut Squash Pizza with Brussels Sprouts, Bacon + Pomegranate
    Overhead view of a sheet pan with Falafel-Spiced Chickpea Flatbread on top surrounded by garnishes.
    Falafel-Spiced Chickpea Flatbreads
    Close up of mini pizza bagels on a platter with fresh basil.
    Easy Homemade Mini Pizza Bagels
    Overhead view of a slice cut out of a Burrata Pizza with Prosciutto and Pickled Grapes
    Burrata Pizza with Prosciutto and Pickled Grapes

    Doing some online shopping? Check out my Amazon shop page for recommendations!

    📖 Recipe

    Garlicky Mushroom Ricotta Pizza with Wild Arugula + Aged Balsamic

    Mushroom and ricotta pizza with baby arugula drizzled with aged balsamic, sliced into triangles.
    Sautéed mushrooms are topped with ricotta and Parmesan cheeses and baked into a store-bought pizza crust for an easy, elegant weeknight meal!
    Big Flavors from a Tiny Kitchen - Ashley Covelli
    5 from 1 vote
    Print Recipe Pin Recipe
    Servings: 6 -8 Slices of Pizza
    Course: Dinner
    Cuisine: Italian
    Prep Time 10 minutes mins
    Cook Time 20 minutes mins
    Total Time 30 minutes mins

    Ingredients
     

    • 2 tablespoons olive oil
    • 1 shallot thinly sliced (about ¼ cup)
    • 3 cloves garlic minced
    • Pinch of red pepper flakes
    • 8 ounces sliced mushrooms I used shiitake and baby bella
    • ½ teaspoon kosher salt
    • 1 ready-made pizza crust I used a 7 ounce Stonefire Artisan Flatbread
    • 6 tablespoons part-skim ricotta
    • 2 tablespoons freshly grated Parmesan
    • 2 tablespoons fresh chives minced or snipped with scissors
    • 1-2 handfuls wild or baby arugula
    • 2-3 tablespoons aged balsamic
    • 2-3 tablespoons good quality extra-virgin olive oil

    Instructions
     

    1. Preheat oven to 425°F with a pizza stone on the bottom rack if you have one (you want the pizza stone to heat up with the oven).
    2. Heat 2 tablespoons olive oil in a large, non-stick skillet over medium-high heat. Add shallot, garlic, and red pepper flakes and cook for 2-3 minutes, stirring occasionally, until the shallot begins to soften. Add mushrooms and salt and cook, stirring occasionally, until the mushrooms are well browned, about 7-10 minutes.
    3. Place pizza crust on top of a pizza peel or wooden cutting board. Top crust with mushroom mixture and spread evenly, leaving a 1-inch border around the outer edges. Dot with ricotta and sprinkle Parmesan and chives over top.
    4. Transfer pizza to the preheated pizza stone (or a baking sheet, if you're using that instead) and bake for 5-6 minutes (8-9 minutes without the pizza stone).
    5. Remove pizza from oven and transfer to a cutting board. Scatter wild arugula over top and drizzle with aged balsamic and olive oil. Cut into slices and enjoy!

    Useful products:

    aged balsamic
    baking sheet
    pizza cutter wheel

    Did you make this recipe?

    Leave a comment + star rating below to let people know how it was!
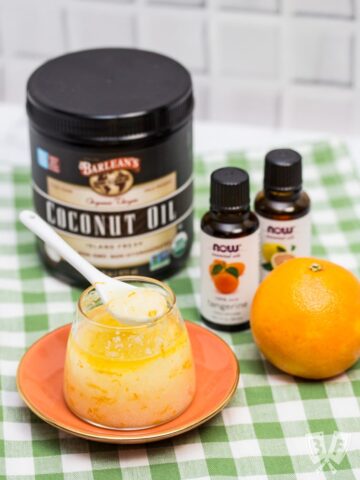
    Check out my latest posts...

    • Jar of homemade Italian seasoning blend.
      Italian Seasoning Blend
    • Bowl of tzatziki with olive oil drizzled over the top.
      Easy Homemade Tzatziki
    • Turkey sausage patties and a jar of breakfast sausage seasoning.
      Turkey Sausage Patties

    Killer Shrimp Cocktail

    October 23, 2017 by Ashley 27 Comments

    Killer Shrimp Cocktail: A flavorful shrimp boil and homemade cocktail sauce bring this Beetlejuice-inspired appetizer to life! Perfect for dinner parties and Halloween festivities!

    A flavorful shrimp boil and homemade cocktail sauce bring this Beetlejuice-inspired appetizer to life! Perfect for dinner parties and Halloween festivities!

    Who doesn't love a memorable appetizer? Presenting even the most basic dishes in a fun way can totally take them to the next level and impress your dinner guests without much extra effort on your part.

    Shrimp cocktail arranged around the rim of a glass with lemon wedges.

    I have a mild obsession with shrimp cocktail (and Halloween - especially Beetlejuice!). Throw in a homemade cocktail sauce and I.am.all.in.

    Full disclosure: I've been known to order shrimp cocktail and 1 or 2 other appetizers as my meal when my family goes out to dinner.

    There's just something about it that's so much fun. It's light, cool, and refreshing.

    One of my favorite Supper Club themes to date was Movie Foods. I jumped at the opportunity to pay tribute to one of my favorite movie scenes of all time - the dinner party scene from Beetlejuice. Who could forget that shrimp cocktail coming to life and grabbing everyone's faces?

    Typically, cocktail sauce is made with jazzed up store-bought ingredients. I decided to challenge myself by making homemade slow cooker ketchup as the base for my sauce, and flavoring it with lemon juice and zest, some horseradish for spice, Worcestershire sauce and a bit of hot sauce.

    Dipping shrimp into cocktail sauce.

    Feel free to use whatever ketchup you have in your pantry here. The homemade ketchup was a fun touch, but by no means necessary.

    I also made a flavorful shrimp boil instead of buying pre-cooked shrimp, which worked out really well. It imparted such a nice flavor to the shrimp, and was simple to put together.

    This turned out phenomenally - it was totally worth the effort I put into making it. Plus, I had to present it in a manner worthy of one of my favorite childhood movies. I must say, it looked killer!

    One of the best parts about this recipe is that you can make all of the components in advance. When dinner is about to be served, just pop them on a fancy martini glass (I like using one that has a little ice holder underneath to keep the cocktail sauce extra cold) and serve!

    Shrimp cocktail arranged around a glass with lemon slices.

    I just realized I said "Beetlejuice" more than 3 times in this post and Michael Keaton hasn't shown up! He must be stuck in Sandworm Land...

    What are your favorite dinner party appetizers? I'd love to hear about them in the comments section below.

    Looking for more shrimp recipes? Check out some of our favorites:

    • Big Shrimpin' Bacon-Wrapped Shrimp and Grit Cakes
    • Spicy Shrimp + Napa Cabbage Stir-Fry
    • Shrimp with Coconut Curry Sweet Potato Noodles
    • Smoky Shrimp with Charred Corn Salsa
    • Tequila-Lime Shrimp Tacos
    • Thai Shrimp "Alfredo"
    • Smoky Shrimp Salad with Green Goddess Dressing
    • Argentinean Red Shrimp a la Chesapeake Bay
    • Shrimp and Vegetable Fried Rice
    • Fire Roasted Tomato and Black Bean Shrimp with Lime-Scented Quinoa
    • Apricot Soy Chili Glazed Shrimp with Quinoa

    📖 Recipe

    Killer Shrimp Cocktail

    Shrimp cocktail displayed on a glass with ice.
    A flavorful shrimp boil and homemade cocktail sauce bring this Beetlejuice-inspired appetizer to life! Perfect for dinner parties and Halloween festivities!
    Big Flavors from a Tiny Kitchen - Ashley Covelli
    4 from 1 vote
    Print Recipe Pin Recipe
    Servings: 4 -6 Servings
    Course: Appetizer
    Cuisine: American
    Prep Time 5 minutes mins
    Cook Time 15 minutes mins
    Total Time 20 minutes mins

    Ingredients
     

    For the Shrimp:
    • 1 lemon quartered
    • 1 tablespoon whole black peppercorns
    • 1 dried bay leaf
    • 1 small white onion quartered
    • 2 cloves garlic smashed
    • 1 pound large shrimp peeled and deveined
    For the Cocktail Sauce:
    • 1 ¼ cup ketchup I used homemade
    • 1 tablespoon prepared horseradish
    • ½ teaspoon freshly grated lemon zest
    • 1 tablespoon lemon juice
    • 1 teaspoon Worcestershire sauce
    • 1 teaspoon hot sauce
    • Lemon wedges for garnish

    Instructions
     

    1. For the Shrimp: Place the lemon, peppercorns, bay leaf, onion and garlic in a large stock pot and fill with water. Bring the water to a boil, then reduce the heat and simmer for 10 minutes, uncovered.
    2. Add shrimp to the water and cook until pink and slightly firm, about 3 minutes. Plunge the shrimp into ice water to stop the cooking. Drain shrimp and chill until ready to use.
    3. For the Cocktail Sauce: Combine ketchup, horseradish, lemon zest and juice, Worcestershire and hot sauce in a bowl Chill until ready to serve.
    4. To serve, arrange shrimp on a serving platter. Squeeze a lemon wedge over the shrimp and serve with extra lemon wedges and cocktail sauce for dipping. To make it more Beetlejuice-esque, pour a little cocktail sauce into a martini glass and line the rim of the glass with shrimp and lemon wedges.

    Did you make this recipe?

    Leave a comment + star rating below to let people know how it was!
    Killer Shrimp Cocktail: A flavorful shrimp boil and homemade cocktail sauce bring this Beetlejuice-inspired appetizer to life! Perfect for dinner parties and Halloween festivities!

    Falafel-Spiced Chickpea Salad with Tahini-Lemon Vinaigrette

    October 15, 2017 by Ashley 30 Comments

    Plate of Falafel-Spiced Chickpea Salad with Tahini-Lemon Vinaigrette and a fork.

    This post has been compensated as part of my ongoing partnership with Barlean's. As always, all opinions are 100% my own.

    This quick, simple Middle Eastern salad + homemade pita chips brings all the flavor of falafel in a fraction of the time - no deep frying required!

    Do you like falafel? I have a favorite falafel recipe that my family absolutely loves, but it does take a bit of time to put together.

    But sometimes I'm craving the flavors of falafel without having to put in a ton of effort, and that's where this Falafel-Spiced Chickpea Salad with Tahini-Lemon Vinaigrette comes in!

    Falafel-Spiced Chickpea Salad with Tahini-Lemon Vinaigrette (#ad): This quick, simple Middle Eastern salad + homemade pita chips brings all the flavor of falafel in a fraction of the time - no deep frying required! #snackwithbarleans

    This salad comes together quickly, is packed with plant-based nutrition, and is a great dish to take on-the-go.

    Since I typically enjoy my falafel stuffed in a pita, I thought it would be fun to turn some pita bread into homemade pita chips to pack up alongside my salad.

    This is a really simple treat to make at home, and pita chips are a fun addition to any snack or lunch box meal.

    Falafel-Spiced Chickpea Salad with Tahini-Lemon Vinaigrette (#ad): This quick, simple Middle Eastern salad + homemade pita chips brings all the flavor of falafel in a fraction of the time - no deep frying required! #snackwithbarleans

    To make the pita chips extra special, I added one of my favorite super seed blends from Barlean's. Their Energy Blend is a mix of Panax ginseng, organic flaxseed, chia seed and coconut. It's full of Omega-3 (ALA), antioxidants, and fiber.

    I love sprinkling this blend on my cottage cheese and fruit in the morning, or on yogurt parfaits. And it makes a great addition to pita chips!

    I haven't tried it yet, but the Energy Blend is also able to be mixed into bars and baked goods. Barlean's recommends swapping out ½ cup of flour in a recipe that calls for 2 cups total with ½ cup of energy blend.

    To get the seeds to stick, I used a little melted coconut oil. This is another versatile ingredient that I use for all sorts of things in my tiny kitchen, including seasoning our cast iron skillets!

    Falafel-Spiced Chickpea Salad with Tahini-Lemon Vinaigrette (#ad): This quick, simple Middle Eastern salad + homemade pita chips brings all the flavor of falafel in a fraction of the time - no deep frying required! #snackwithbarleans

    This salad can be assembled while the pita chips bake. The whole thing can be ready in around 15 minutes!

    My Tahini-Lemon Vinaigrette includes a simple mix of spices that give it a Middle Eastern flair. I absolutely love the mix of cumin, coriander, and paprika.

    I used flax oil in this dressing because it's a great, plant-based source of Omega-3. It's not intended for heated applications, so you shouldn't sauté or bake with it, but it's great in vinaigrettes like this one. I used it in these Roasted Veggie Bowls with Lemon-Flaxseed Vinaigrette a while back, and it was great there, too!

    You'll get about ½ cup of vinaigrette here, so I recommend starting with about half of it and tossing that into your salad before adding more to your taste.

    Falafel-Spiced Chickpea Salad with Tahini-Lemon Vinaigrette (#ad): This quick, simple Middle Eastern salad + homemade pita chips brings all the flavor of falafel in a fraction of the time - no deep frying required! #snackwithbarleans

    I've made this dish a few times now, and I find that if I make the vinaigrette in the bottom of a large bowl and just add the salad ingredients on top of it, it's a little too heavily dressed.

    Of course, you could always add in some more chickpeas or a few more veggies if you find it gets too saucy.

    I've been packing this dish up to bring out and about with me. It totally hits the spot for lunches and snack time. It's a great, hearty vegan dish with a lot of flavor that packs a nutritional punch.

    Falafel-Spiced Chickpea Salad with Tahini-Lemon Vinaigrette (#ad): This quick, simple Middle Eastern salad + homemade pita chips brings all the flavor of falafel in a fraction of the time - no deep frying required! #snackwithbarleans

    I've been all about this stainless steel bento-style container from LunchBots. It holds just the right amount of food for snack time. It's well designed, and is nice and compact. It's the perfect size for my kindergartener's school lunch.

    I ended up buying the insulated thermal container from LunchBots to send hot foods to school with him for lunch, too. Both containers have been a big hit and a great addition to our food-on-the-go container stash.

    Psst... I'm giving away one of the bento-style containers from LunchBots, along with your choice of one of the 3 Barlean's items pictured above - check out the end of my post to win one of your own!

    I've found that this salad pairs incredibly well with fresh figs. For snacking, 2 pita chips, a bit of salad, and some fresh fruit is just the right amount. If you're having this as a meal, 4 pita chips alongside a larger portion of the salad is perfect.

    Falafel-Spiced Chickpea Salad with Tahini-Lemon Vinaigrette (#ad): This quick, simple Middle Eastern salad + homemade pita chips brings all the flavor of falafel in a fraction of the time - no deep frying required! #snackwithbarleans

    Be sure to check out my Falafel-Spiced Chickpea Flatbreads if you want to try out another one of our favorite spins on falafel. It's total street food/comfort food mashup!

    Looking for more of our favorite salads? Check out these 5-star recipes:

    • Roma Salad with Caper-Dill Vinaigrette
    • Taco Salad with Homemade Chipotle Ranch Dressing
    • Quick Chickpea Salad with Lemon-Dill Vinaigrette
    • Pax Romana's Quinoa Salad with Mixed Vegetable, Goat Cheese & Orange Dressing
    • Fennel + Citrus Salad with Shallots + Capers
    • Creamy Cucumber, Avocado, Chickpea, & Sun-Dried Tomato Salad
    • Smoky Shrimp Salad with Green Goddess Dressing
    • BBQ Ranch Chopped Chicken Salad
    • Cantaloupe, Prosciutto and Shaved Parmesan Salad
    • Triple Crunch Asian Salad

    📖 Recipe

    Falafel-Spiced Chickpea Salad with Tahini-Lemon Vinaigrette

    Plate of Falafel-Spiced Chickpea Salad with Tahini-Lemon Vinaigrette and a fork.
    This quick, simple Middle Eastern salad + homemade pita chips brings all the flavor of falafel in a fraction of the time - no deep frying required!
    Big Flavors from a Tiny Kitchen - Ashley Covelli
    5 from 1 vote
    Print Recipe Pin Recipe
    Servings: 4 Servings
    Course: Salad
    Cuisine: Mediterranean
    Prep Time 15 minutes mins
    Cook Time 8 minutes mins
    Total Time 15 minutes mins

    Ingredients
     

    For Pita Chips:
    • 2 pieces pita bread
    • 1-2 tablespoons coconut oil melted
    • 2-3 teaspoons Barlean's Energy Blend
    For Tahini-Lemon Vinaigrette:
    • 3 tablespoons flax oil
    • 2 tablespoons tahini
    • 1 tablespoon freshly squeezed lemon juice
    • ½ teaspoon ground cumin
    • ½ teaspoon ground coriander
    • ½ teaspoon ground paprika
    • ¼ teaspoon kosher salt
    • ⅛ teaspoon freshly cracked black pepper
    For Salad:
    • 1 15.5-ounce can chickpeas, rinsed and drained
    • 1 cup grape tomatoes quartered
    • 1 English cucumber seeded and chopped
    • ½ cup finely chopped red onion
    • 2 tablespoons fresh cilantro chopped
    • 2 tablespoons fresh parsley chopped

    Instructions
     

    1. For Pita Chips: Preheat oven to 400°F. Cut each piece of pita bread in half, then cut each half into 4 triangles. Place pita triangles in a single layer on a baking sheet. Brush each pita with a thin layer of coconut oil and sprinkle with Barlean's Energy Blend. Bake in preheated oven for 8 minutes, until the pita is starting to brown. Set aside and let cool.
    2. For Vinaigrette: In a small bowl, whisk together flax oil, tahini, lemon juice, cumin, coriander, paprika, salt and pepper.
    3. For Salad: In a large bowl, place chickpeas, tomatoes, cucumber, red onion, cilantro and parsley. Pour in half of the vinaigrette and stir well to combine. Add more dressing, if desired.

    Notes

    Makes about ½ cup vinaigrette

    Did you make this recipe?

    Leave a comment + star rating below to let people know how it was!
    Falafel-Spiced Chickpea Salad with Tahini-Lemon Vinaigrette (#ad): This quick, simple Middle Eastern salad + homemade pita chips brings all the flavor of falafel in a fraction of the time - no deep frying required! #snackwithbarleans

    Latin-Spiced Pork + Squash Skillet with Chili Lime Cherries

    October 12, 2017 by Ashley 31 Comments

    Latin-Spiced Pork + Squash Skillet with Chili Lime Cherries: (#ad) This smoky-sweet single skillet meal is a quick and easy way to get a comfort food dinner with Latin flair on the table any night of the week.

    This post has been compensated as part of my ongoing partnership with Stoneridge Orchards. As always, all opinions are 100% my own.

    This smoky-sweet single skillet meal is a quick and easy way to get a comfort food dinner with Latin flair on the table any night of the week.

    It's time for some real talk.

    Life has been hectic lately. In the past few weeks we've had house guests, new school schedules, busy work schedules, never-ending piles of housework...

    ...and then I came down with the flu and was out of commission for a week. UGH.

    When I was finally able to get back to some sort of normalcy, I wanted comfort food and I wanted it NOW. And I didn't want to dirty a bunch of dishes while making it.

    Latin-Spiced Pork + Squash Skillet with Chili Lime Cherries: (#ad) This smoky-sweet single skillet meal is a quick and easy way to get a comfort food dinner with Latin flair on the table any night of the week.

    Single skillet meals are a total game changer in the kitchen! They're perfect for when you're low on time and/or energy but still want a home-cooked meal without much fuss.

    I had toyed with a version of this pork dish a while back when I was trying out the Chili Lime Cherries with Tajin® from Stoneridge Orchards, and I knew it had major potential to be an all-in-one-skillet meal if I added in some more veggies.

    It's hard to beat a meal that's made up of a beautifully seared piece of meat that's nice and juicy inside served with roasted veggies and a flavorful pan sauce.

    And all from just one pan!

    And pork tenderloin is such a versatile ingredient. Some of our very favorite recipes utilize it, like this balsamic marinated pork tenderloin, this pan-roasted pork tenderloin with balsamic tomatoes, these peanut noodles with roasted pork tenderloin + honeyed oranges, and this breaded pork tenderloin with lemon caper sauce.

    Latin-Spiced Pork + Squash Skillet with Chili Lime Cherries: (#ad) This smoky-sweet single skillet meal is a quick and easy way to get a comfort food dinner with Latin flair on the table any night of the week.

    I had seen Tajin in the Latin aisle at my local supermarket in the past, but hadn't ever experimented with it at home until I tried these cherries.

    Tajin is a popular spice blend used in Mexican cooking. It's made of premium chilis, lime juice, and sea salt. The result is a mild kick that can be added to all sorts of dishes.

    I love pairing sweet and spicy together, so the fact that these cherries are already perfectly spiced makes them perfect for snacking.

    Latin-Spiced Pork + Squash Skillet with Chili Lime Cherries: (#ad) This smoky-sweet single skillet meal is a quick and easy way to get a comfort food dinner with Latin flair on the table any night of the week.

    Do you have a favorite type of squash? I used a carnival squash for this recipe.  According to this awesome winter squash reference article on epicurious, carnival squash is a mix between an acorn squash and a sweet dumpling squash.

    Growing up, I think I only ever had butternut squash. I still remember the first time I tried prepping one at home - what a nightmare! It's such a hassle to peel them - it took forever and I was sure I was going to cut myself!

    In fact, it's now one of the few ingredients that I'll pay more for at the store to just buy some that's already peeled and diced. It saves me a lot of time and frustration, so I think it's worth it!

    Latin-Spiced Pork + Squash Skillet with Chili Lime Cherries: (#ad) This smoky-sweet single skillet meal is a quick and easy way to get a comfort food dinner with Latin flair on the table any night of the week.

    Since I've branched out and tried lots of types of squash now, I find myself gravitating toward ones that you don't have to peel.

    That's right - there are some varieties of squash that you can go ahead and eat the skin of!

    Bonus points for the extra fiber, ease of prep, and how pretty it looks in the pan when the skin is left on!

    Latin-Spiced Pork + Squash Skillet with Chili Lime Cherries: (#ad) This smoky-sweet single skillet meal is a quick and easy way to get a comfort food dinner with Latin flair on the table any night of the week.

    You could use any squash that you like here - but if you use something like butternut or spaghetti squash, you won't be able to eat the skin.

    Be sure to cut your squash into consistent sized slices so they'll cook evenly. Truth be told, I cut the ones in this dish a little too thick, so I had to cook it a little longer for them to fully cook. Around ½-inch thick slices should be just fine.

    You could also use sweet potatoes or even cauliflower in this dish - it really is versatile!

    Latin-Spiced Pork + Squash Skillet with Chili Lime Cherries: (#ad) This smoky-sweet single skillet meal is a quick and easy way to get a comfort food dinner with Latin flair on the table any night of the week.

    After the pork is cooked, let it sit for 5-10 minutes before slicing it up and serving. Make sure to drizzle the pan sauce and plumped-up cherries over the meat before serving - you won't be sorry!

    What are your favorite one-dish meals? I'd love to hear about them in the comments section below!

    Looking for more single skillet recipes? Check out some of our favorites:

    • Skillet Lasagna with Lamb, Ricotta + Mint
    • Spanish Chicken + Sausage Skillet
    • Pan-Roasted Pork Tenderloin with Balsamic Tomatoes
    • Iron Skillet Chicken + Carrots with Toasted Lager Mustard Sauce
    • Sausage and Peppers
    • Our Favorite Steak Fajitas
    • Single-Skillet Bacon-Rosemary Chicken Thighs with Roasted Tomatoes
    • Pan Roasted Pork Tenderloin with Fairy Tale Eggplant & Tomatoes

    📖 Recipe

    Latin-Spiced Pork + Squash Skillet with Chili Lime Cherries

    Latin-Spiced Pork + Squash Skillet with Chili Lime Cherries: (#ad) This smoky-sweet single skillet meal is a quick and easy way to get a comfort food dinner with Latin flair on the table any night of the week.
    This smoky-sweet single skillet meal is a quick and easy way to get a comfort food dinner with Latin flair on the table any night of the week.
    Big Flavors from a Tiny Kitchen - Ashley Covelli
    No ratings yet
    Print Recipe Pin Recipe
    Servings: 4 Servings
    Course: Dinner
    Cuisine: Latin
    Prep Time 15 minutes mins
    Cook Time 20 minutes mins
    Total Time 35 minutes mins

    Ingredients
     

    • 2 tablespoons peanut or grapeseed oil
    • 1 piece pork tenderloin cut into thirds (about 1 pound total)
    • 1 teaspoon kosher salt divided
    • ½ teaspoon freshly cracked black pepper divided
    • ½ teaspoon ground cumin
    • ½ teaspoon smoked paprika
    • ½ teaspoon ground coriander
    • 3 cloves garlic smashed
    • 2 shallots sliced
    • 1 small acorn or delicata squash about 1 pound, halved, seeded, and sliced ½-inch thick
    • ½ cup Stoneridge Orchards Chili Lime cherries
    • ¼ cup low sodium chicken stock or broth
    • 2 tablespoons apple cider vinegar
    • Cilantro for garnish

    Instructions
     

    1. Preheat oven to 375°F.
    2. Heat oil in a large, ovenproof skillet over medium-high heat. Pat pork dry and season with half of the salt and pepper, the cumin, smoked paprika and coriander. Rub the seasoning all over. Once oil is hot, place pork in the skillet and sear for 2-3 minutes per side, until nicely browned all over. Add garlic, shallots, squash, cherries, chicken stock, and vinegar to pan. Season with remaining ½ teaspoon salt and ¼ teaspoon pepper.
    3. Place skillet in the oven and roast for 15-20 minutes, until the internal temperature reaches 145°F and squash is tender when pierced with a knife. Remove from oven and let rest for 5-10 minutes.
    4. To serve, slice pork into medallions. Serve with veggies alongside, drizzling with the pan juices and plumped cherries. Garnish with chopped cilantro, if desired.

    Did you make this recipe?

    Leave a comment + star rating below to let people know how it was!
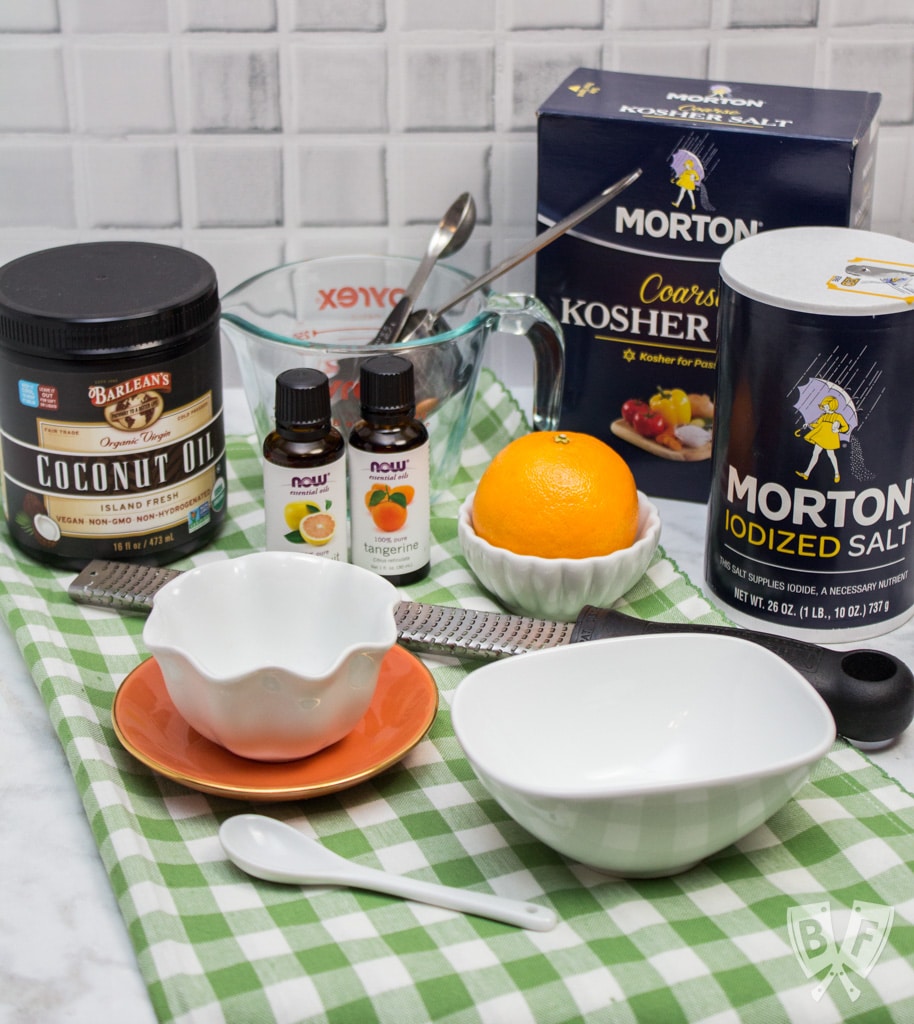
    Latin-Spiced Pork + Squash Skillet with Chili Lime Cherries: (#ad) This smoky-sweet single skillet meal is a quick and easy way to get a comfort food dinner with Latin flair on the table any night of the week.

    Ghost with the Most Roasted Sweet Potato Ravioli

    September 28, 2017 by Ashley 54 Comments

    Ghost with the Most Roasted Sweet Potato Ravioli: Homemade black + white pasta is stuffed with roasted veggies, topped with brown butter sauce & crispy sage leaves in my Halloween tribute to Beetlejuice!

    Homemade black and white pasta is stuffed with roasted veggies and topped with brown butter sauce and crispy sage leaves in my Halloween tribute to Beetlejuice!

    Halloween is my favorite holiday, hands down. I love any excuse to do something spooky, and when a few of my food blogger buddies suggested doing a scary movie tribute, I knew I needed to get in on that action.

    I've done a culinary tribute to Beetlejuice before, but that movie is just too much fun to not get creative with it again.

    And this time, I went BIG.

    Ghost with the Most Roasted Sweet Potato Ravioli: Homemade black + white pasta is stuffed with roasted veggies, topped with brown butter sauce & crispy sage leaves in my Halloween tribute to Beetlejuice!

    I was inspired by the scene where Beetlejuice turns into a big tent and does the whole, "Attention Kmart Shoppers" bit (check it out starting at 1:30 in this clip, if you're interested).

    Granted, he wears that black and white striped outfit all the time, but that scene always stood out to me. I even got to see part of the actual costume that appeared in the film at a Tim Burton exhibit at MoMa in New York City several years ago and it was incredible.

    My mind immediately went to ravioli. I haven't used my KitchenAid's pasta roller attachment in way too long, and I've never used the ravioli maker attachment that I got as a wedding gift over 8 years ago. *GASP*

    Ghost with the Most Roasted Sweet Potato Ravioli: Homemade black + white pasta is stuffed with roasted veggies, topped with brown butter sauce & crispy sage leaves in my Halloween tribute to Beetlejuice!

    Let me just start out by saying that this was not easy. It was partially my fault for being overambitious with this idea when it's been several years since I've made my own pasta. I really should have re-familiarized myself with the pasta machine before diving into this recipe.

    But I didn't. And this past Saturday did not go well for me in my tiny kitchen. I made a giant mess, wasted a bunch of squid ink, ended up ordering takeout for dinner and still had to clean up the aforementioned messy kitchen.

    Seriously, this was one of my messiest kitchen disasters to date. My kitchen may be tiny, but it still takes a while to clean up after all that cooking.

    Ghost with the Most Roasted Sweet Potato Ravioli: Homemade black + white pasta is stuffed with roasted veggies, topped with brown butter sauce & crispy sage leaves in my Halloween tribute to Beetlejuice!

    I woke up on Sunday morning determined not to let this failure defeat me. I did some research on how to use my pasta attachments, because apparently I had forgotten a lot over the years!

    I also decided to try out a new pasta recipe that was much easier than what I set out to do originally. The Kitchn has an awesome tutorial on how to make pasta dough in the food processor, and I can't recommend it highly enough. This made it so.much.easier for me. I didn't feel like it would be the end of the world if I ended up having to throw out dough that only took a few minutes to come together.

    So what I did was to make 2 separate batches of that pasta dough. The first one I prepared as written, and for the second I added 4 teaspoons of squid ink. I definitely had to add more flour both when making and rolling the black pasta, since there was extra moisture in it. But 2 teaspoons of squid ink per cup of flour works out well for a really nice, black pasta.

    A photo posted by Ashley Covelli (@bigflavors) on Oct 25, 2015 at 7:28pm PDT

    Once the dough had rested, the really tedious part began. I'm planning to do a step-by-step tutorial sometime, but for now, I'll do my best to explain how I managed to get a successful black and white stripe design on these beauties.

    I started by cutting my ball of plain pasta dough into quarters. I took one quarter out and left the rest wrapped in plastic to prevent it from drying out. I lightly floured my work surface and dusted the ball of dough before running it through my pasta rollers. I started on the widest setting (on my roller set, that's #1).

    I ran the dough through a few times, folding it in half after each pass until it started to feel soft and elastic - about 5 or 6 passes did the trick. I started on the lowest speed and after 2 or 3 passes moved it up one notch higher. Folding the ragged edges in helped square them off, which made the sheet of pasta dough much cleaner to work with.

    I dusted it with more flour whenever it started to get sticky so it wouldn't get caught between the rollers. I then moved on to roller setting #2 and did 2-3 passes, without any more folding. I repeated this process until I got up to #5 and did one pass at that setting.

    I then dusted the long sheet of plain pasta with a little flour and folded it in half so it would fit on a lightly floured baking sheet, covered with a slightly damp kitchen towel while I prepared a sheet of black pasta.

    A photo posted by Ashley Covelli (@bigflavors) on Oct 25, 2015 at 7:44pm PDT

    I did the same thing with the black pasta, and after it was done being rolled out, I used the fettuccine cutter attachment to get consistently sized strips. I tossed those lightly with flour and rolled them into a little nest and put that under the towel with the other pasta.

    I then pulled out the white pasta sheet and cut it into a manageable length. I took a few of the black strips out and set them next to it.

    To adhere the stripes, the best method I found was to use a pastry brush and sprinkle a little water all over the top of the pasta sheet. I kept the pastry brush and small bowl of water next to me on standby. I rubbed the water evenly over the sheet of plain pasta with my hand and began evenly spacing black fettuccine strands evenly down the length of the sheet.

    Once they were all in place, I checked the ends of each strand, and if they were loose/dry underneath, I brushed a small amount of water underneath and pressed the black piece down gently to adhere. I then pressed down all over the whole piece with the palms of my hands to set everything in place before going back to the pasta roller.

    I trimmed the ends of the sheet of pasta so the strips weren't hanging off unevenly (because these can easily get stuck and pulled too quickly in the rollers). I dusted the sheet with flour and rubbed it around until it wasn't sticky at all so I could proceed with rolling. I took the striped sheet and ran it through on setting #1 a few times, then once or twice at #2 and #3, followed by a single pass at #4. That seemed to adhere the stripes well enough for everything to hold together.

    📖 Recipe

    Ghost with the Most Roasted Sweet Potato Ravioli

    Ghost with the Most Roasted Sweet Potato Ravioli: Homemade black + white pasta is stuffed with roasted veggies, topped with brown butter sauce & crispy sage leaves in my Halloween tribute to Beetlejuice!
    Homemade black and white striped pasta is stuffed with roasted veggies and topped with brown butter sauce and crispy sage leaves my Halloween tribute to Beetlejuice!
    Big Flavors from a Tiny Kitchen - Ashley Covelli
    5 from 9 votes
    Print Recipe Pin Recipe
    Servings: 4 Servings (plus extra filling)
    Course: Pasta
    Cuisine: Italian
    Prep Time 20 minutes mins
    Cook Time 45 minutes mins
    Total Time 1 hour hr 5 minutes mins

    Ingredients
     

    For sweet potatoes:
    • 2.5 sweet potato peeled and cut into ½- to 1-inch chunks
    • 3 cloves garlic peeled and smashed
    • 2 tablespoons olive oil
    • ½ teaspoon kosher salt
    • ¼ teaspoon freshly cracked black pepper
    For kale:
    • 2 tablespoons olive oil
    • 1 bunch lacinato kale thick stems removed, roughly chopped
    • ¼ teaspoon kosher salt
    • ¼ cup water
    To finish ravioli filling:
    • 15 ounces part skim ricotta
    • ½ teaspoon freshly grated nutmeg
    • Homemade black & white striped pasta dough*
    For sauce:
    • 1 stick unsalted butter
    • 10 fresh sage leaves
    For garnish:
    • Freshly shaved Parmesan cheese

    Instructions
     

    1. Preheat oven to 425°F.
    2. For sweet potatoes: Place sweet potatoes and garlic in a single layer on a large, rimmed baking sheet. Drizzle on 2 tablespoons oil and season with salt and pepper. Toss gently to coat. Roast for 15 minutes, stir, then roast for an additional 10 minutes, or until potatoes are tender when pierced with a fork and are beginning to caramelize around the edges.
    3. For kale: While the sweet potatoes are roasting, heat 2 tablespoons oil in a large, nonstick skillet over medium high heat. Add kale and toss with tongs a few times to coat it in the oil. Add salt and water, then cover with a tight-fitting lid. Let cook, tossing occasionally, until the kale is dark, glossy green and has wilted down a bit.
    4. To finish ravioli filling: In the bowl of a food processor, add kale and pulse several times until evenly chopped. Pour kale into a large bowl and do the same with half of the sweet potato mixture. Pulse it several times to mash it up, but don't worry about getting it super smooth. Add that to the kale and process the other half of the sweet potatoes. Don't forget to include those roasted garlic cloves! If there are any large chunks of potato, you can mash them with a fork if desired. Add ricotta and nutmeg and mix well to combine.
    5. To prepare ravioli: Fill striped pasta sheets with the roasted sweet potato mixture and seal well (see my blog post for notes/techniques for this portion of the recipe).
    6. For sauce: Place butter in a medium skillet. Turn the heat on to medium-low and allow the stick to melt fully without stirring the butter. Once melted, add the sage leaves. Continue to cook, swirling the pan occasionally, until the butter foams up and brown bits start to form. Let it cook until it's nicely brown, being careful not to burn it.
    7. Remove sage leaves from the butter with tongs and place on a paper towel lined plate.
    8. To serve, divide ravioli between plates. Pour a few spoonfuls of brown butter sauce over each portion and garnish with crispy sage leaves and shaved Parmesan. Season with additional salt and pepper, if desired. Enjoy!

    Notes

    *Be sure to check out the notes on my blog post above for the notes/technique on how to make homemade striped black and white pasta sheets, and to fill the ravioli.
    I happened to have a giant sweet potato to work with, so this recipe makes a ton of filling. The sauce is enough for 4 servings, but there's much more filling than that. Feel free to scale it back!

    Did you make this recipe?

    Leave a comment + star rating below to let people know how it was!

    PHEW. So that was intense, right? Like I said, I'll put together a tutorial with step-by-step photos in the future if there's enough interest. Let me know!

    Wanna see what else the FFFB group came up with to honor their favorite Halloween films? These bloggers KILLED it! Pun oh so very much intended 😉

    Ashley from Quarter Life [Crisis] Cuisine RedRUM Cocktail inspired by The Shining

    Matt from Nomageddon made Pea Soup with Crabmeat and a Balsamic Drizzle inspired by The Exorcist

    Sophia from NY Foodgasm made Red Velvet Pecan Pie inspired by Evil Dead

    Julie from Bread Booze Bacon made Reanimation Reagent Rum Jello Shots inspired by Re-Animator

    Happy Halloween, everyone!

    Ghost with the Most Roasted Sweet Potato Ravioli: Homemade black + white pasta is stuffed with roasted veggies, topped with brown butter sauce & crispy sage leaves in my Halloween tribute to Beetlejuice!

    Cheesy Bacon + Apple Croissants

    September 11, 2017 by Ashley 21 Comments

    Cheesy Bacon + Apple Croissants: Bacon jam adds smokiness to this sweet-and-salty 5 ingredient appetizer recipe. An easy apple-studded hors d'oeuvre that will be a hit at any fall party!

    Bacon jam adds smokiness to these sweet-and-salty 5 ingredient appetizers!

    Looking for a simple appetizer for your next dinner party? Look no further! These beauties are crazy delicious and can be ready in a snap!

    Cheesy Bacon + Apple Croissants: Bacon jam adds smokiness to this sweet-and-salty 5 ingredient appetizer recipe. An easy apple-studded hors d'oeuvre that will be a hit at any fall party!

    Have you tried bacon jam? It's such a fun, sweet-and-salty condiment that can be added to so many different recipes. You can buy it or make your own - either way, this is a fun addition to your pantry, and a fun ingredient to talk about when your friends and family ask what that awesome flavor is.

    I've been coming up with all sorts of ways to use bacon jam lately. It has a really deep, smoky flavor that is great in both sweet and savory applications.

    For this recipe, I wanted something simple that I could throw together quickly as a last-minute dinner party appetizer. It only requires a few ingredients, and it's a great way to use up some of the fall apple-picking bounty.

    Cheesy Bacon + Apple Croissants: Bacon jam adds smokiness to this sweet-and-salty 5 ingredient appetizer recipe. An easy apple-studded hors d'oeuvre that will be a hit at any fall party!

    This one was a real winner - it had the perfect balance of sweet and salty, all wrapped up in a buttery, fluffy croissant.

    Everything gets nice and melty in the oven, and that flaky pastry makes each bite absolutely heavenly. And they're so easy to put together! Just unfold your croissant dough, spread with jam, sprinkle with cheese (I like a nice sharp cheddar here), sprinkle on a little bit of green onion, top it with a thin slice of apple, and roll it up!

    It makes fantastic party food, and you can easily double (or triple!) the recipe to suit your needs.

    Psst - If you're looking for another fun way to enjoy bacon in a sweet-and-salty recipe, this peanut butter banana milkshake with bacon is made without ice cream and has tons of flavor!

    Cheesy Bacon + Apple Croissants: Bacon jam adds smokiness to this sweet-and-salty 5 ingredient appetizer recipe. An easy apple-studded hors d'oeuvre that will be a hit at any fall party!

    I used the original flavor of this this bacon jam, and croissant dough from Trader Joe's.

    Make sure you slice your apples fairly thinly so they get nice and tender during the baking time. This would work with any variety of apple that you enjoy - or even a mix of a few types of apples.

    Pears would be a great choice as well - play around with it and have fun with your fillings!

    Cheesy Bacon + Apple Croissants: Bacon jam adds smokiness to this sweet-and-salty 5 ingredient appetizer recipe. An easy apple-studded hors d'oeuvre that will be a hit at any fall party!

    Looking for more ways to use apples? Check out some of our favorite recipes:

    • French Cheese + Caramelized Onion Crostini Trio
    • Baked Apple Spice Donuts with Maple Frosting + Pumpkin Granola
    • Carrot Apple Ginger Refresher
    • Bacon and Caramelized Onion Jam Naan Pizza with Gorgonzola and Apples
    • Camembert and Apple Panini with Coarse Ground Mustard and Mixed Greens
    • Fresh Beet, Apple, Carrot, Orange Cucumber Juice
    • Fruit Salad
    • White Sangria
    • Green and Orange Smoothie

    📖 Recipe

    Cheesy Bacon + Apple Croissants

    Cheesy Bacon + Apple Croissants: Bacon jam adds smokiness to this sweet-and-salty 5 ingredient appetizer recipe. An easy apple-studded hors d'oeuvre that will be a hit at any fall party!
    Bacon jam adds smokiness to these sweet-and-salty 5 ingredient appetizers!
    Big Flavors from a Tiny Kitchen - Ashley Covelli
    No ratings yet
    Print Recipe Pin Recipe
    Servings: 8 Servings
    Course: Appetizer
    Cuisine: American
    Prep Time 5 minutes mins
    Cook Time 12 minutes mins
    Total Time 17 minutes mins

    Ingredients
     

    • 1 8 ounce can refrigerated croissant dough
    • 8 teaspoons bacon jam
    • 8 teaspoons shredded cheddar cheese
    • 1 green onion finely chopped
    • 8 thin slices apple

    Instructions
     

    1. Preheat oven as directed on the croissant package (mine said 350°F).
    2. Separate the croissant dough into triangles. Spread 1 teaspoon bacon jam evenly on the surface of each triangle. Sprinkle each with 1 teaspoon cheddar and ⅛th of the green onion. Place an apple slice on the wide end of each triangle and roll up toward the narrow pointed end and press lightly to secure the tip.
    3. Place rolled croissants on a baking sheet 2 inches apart and bake as directed on the package (mine said 12-14 minutes) until golden brown. Remove from baking sheet with a spatula and transfer to a platter to serve. Enjoy!

    Video

    Did you make this recipe?

    Leave a comment + star rating below to let people know how it was!
    Cheesy Bacon + Apple Croissants: Bacon jam adds smokiness to this sweet-and-salty 5 ingredient appetizer recipe. An easy apple-studded hors d'oeuvre that will be a hit at any fall party!

    Surf Rider Smoothie Bowl + Beautiful Smoothie Bowls Review

    September 7, 2017 by Ashley 4 Comments

    Surf Rider Smoothie Bowl: Green tea, raw cashews, kiwis and blueberries team up in this simple, delicious smoothie bowl. A vegan treat to start (or end!) any day of the week. Plus a review of Beautiful Smoothie Bowls by Carissa Bonham.

    Green tea, raw cashews, kiwis and blueberries team up in this simple, delicious smoothie bowl. A vegan treat to start (or end!) any day of the week.

    Last year I was at a conference where fellow blogger and food lover Carissa Bonham (of Creative Green Living) was part of a panel on stepping up your Instagram game (have you seen her Instagram? It's gorgeous!).

    She mentioned that she had a book in the works that was all about smoothie bowls and I was stoked to get my hands on a copy!

    Beautiful Smoothie Bowls

    Carissa sent over a copy of the finished book earlier this summer for me to review, and I've been absolutely loving it!

    Beautiful Smoothie Bowls is a collection of 80 recipes that are bursting with colorful, naturally delicious ingredients. The recipes come from Carissa herself along with several of her favorite healthy food bloggers and Instagrammers from around the world.

    Every recipe in the book has labels to indicate which ones are vegan, paleo, gluten free, and dairy free. It comes in handy, especially if you want to make a smoothie bowl for someone with dietary restrictions.

    In fact, my friend Teri was over at my house earlier this week and spotted the book on my dining room table and was immediately floored that the recipes looked so good and fit with her current restrictions.

    Surf Rider Smoothie Bowl: Green tea, raw cashews, kiwis and blueberries team up in this simple, delicious smoothie bowl. A vegan treat to start (or end!) any day of the week. Plus a review of Beautiful Smoothie Bowls by Carissa Bonham.

    The book has lots of great introductory info on different superfood ingredients, equipment you should use to be successful in your smoothie bowl making. She also has tips on what to freeze yourself vs. what to buy already frozen, how to prep the ingredients, and how to get your freezer ready for your new smoothie bowl habit.

    It also has a great chart on troubleshooting for those instances where something goes awry and you need to fix it (is your smoothie too runny or your ingredients are sinking to the bottom? Blend in more frozen fruit or ice cubes!)

    One of the things that stood out to me in Carissa's approach, versus some others that I've seen, is that she makes it really approachable - even for the not-so-green types. She really wants everyone to be able to enjoy these gorgeous, wholesome recipes.


    A post shared by Healthy Food🍏Carissa Bonham (@creativegreenkitchen) on Feb 19, 2017 at 8:09am PST

    There really is an art to the presentation of a smoothie bowl. As she points out in the book,

    Anyone can dump a smoothie into a bowl. The real fairy dust that elevates a smoothie poured into a bowl to the status of "smoothie bowl" is the toppings.

    You don't have to get super fancy with it, but you certainly can! Smoothie bowls are very adaptable to the time and ingredients you have on hand.

    It was hard for me to choose which recipe I wanted to make first, so I took a peek in my fridge/freezer/pantry to see if I had anything that stood out as something I should use sooner than later.

    I had a whole bunch of kiwis and a pint of blueberries in the fridge, so I turned to the Surf Rider (page 198). I would have never thought to pair kiwi with cashews before, but they worked really well together!

    Surf Rider Smoothie Bowl: Green tea, raw cashews, kiwis and blueberries team up in this simple, delicious smoothie bowl. A vegan treat to start (or end!) any day of the week. Plus a review of Beautiful Smoothie Bowls by Carissa Bonham.

    I loved that this only needed a few ingredients and that it called for brewed green tea as well.

    This smoothie bowl came together in a snap and was nice and filling. I really enjoyed the extra crunch of cashews on top.

    The texture was so thick and luscious - more than most other smoothie bowls I've made. You can tell she spent a lot of time getting the ingredient amounts just right.

    Surf Rider Smoothie Bowl: Green tea, raw cashews, kiwis and blueberries team up in this simple, delicious smoothie bowl. A vegan treat to start (or end!) any day of the week. Plus a review of Beautiful Smoothie Bowls by Carissa Bonham.

    Another thing stood out in this book was the inclusion of vegetables in a lot of the recipes.

    I really enjoy adding veggies to my fresh juices, but hadn't thought to put anything outside of leafy greens in my smoothies before.

    I'm totally eyeing the Island Sunrise (page 114) which contains a carrot, along with orange, pineapple, peach, strawberry, coconut, and flaxseed) for my next smoothie bowl.

    I like giving my kiddo the toppings separate when I make his smoothie bowls so he can have fun and be creative with the presentation. Interactive food is always more fun, right?

    Surf Rider Smoothie Bowl: Green tea, raw cashews, kiwis and blueberries team up in this simple, delicious smoothie bowl. A vegan treat to start (or end!) any day of the week. Plus a review of Beautiful Smoothie Bowls by Carissa Bonham.

    Carissa was kind enough to spend some time answering a few questions for me to share here, as well as giving some bonus tips on smoothie bowl success!

    Big Flavors: How did you get into cooking?

    Carissa: When I was in 8th grade, I announced I was becoming a vegetarian. In response, my mom told me that was fine but she wasn't going to make special meals for me. That meant I had to make my own meals (or at least the main course) most of the time. I ate a lot of omelettes and mac and cheese!

    College was when I really starting digging into cooking healthier foods, cooking from scratch and smoothies. That was almost 15 years ago now but I just kept experimenting and trying new things!

    Big Flavors: Do you have any tips for getting people into the habit of making healthier food choices?

    Carissa: Start small so you don't feel overwhelmed!

    If you change nothing else, I recommend switching to organic produce and grain products when feasible. This is going to reduce your exposure to pesticides that mess with your hormones and in some cases can cause cancer.

    Another easy thing to do is to add more fruits and veggies. Add an extra serving of plants to your lunch or dinner by adding a salad or swapping out your regular lunch for a smoothie bowl. You can also exchange your ice cream habit for a nice cream habit - which will reduce your sugar and preservative intake as well as increase the amount of fruits and veggies you eat.

    Surf Rider Smoothie Bowl: Green tea, raw cashews, kiwis and blueberries team up in this simple, delicious smoothie bowl. A vegan treat to start (or end!) any day of the week. Plus a review of Beautiful Smoothie Bowls by Carissa Bonham.

    Big Flavors: What is a good starting point for someone who is overwhelmed with the plethora of superfood ingredient options that are available?

    Carissa: "Superfood" sounds scary but I think people will be surprised by how many superfoods they are already familiar with - blueberries, carrots, and peaches for example. For superfoods you aren't familiar with, get a good cookbook (like Beautiful Smoothie Bowls!) where someone can hold your hand by giving you recipes showing you exactly how to prepare them. Once you are comfortable with it, you will start branching out on your own to try your own combinations and ways to prepare them!

    Big Flavors: I can totally relate to the "I'm still hungry syndrome" when it comes to standard smoothies. Which smoothie bowl recipes would you recommend for someone who wants to feel like they've had a substantial meal?

    Carissa: Most of the bowls in the book are going to fill you up as-is but if you are the kind of person who really likes heartier things, try one of the recipes that use oats like Blueberry Muffin (page 177), Carrot Cake (page 129) or Cherry Cobbler (page 77).

    Surf Rider Smoothie Bowl: Green tea, raw cashews, kiwis and blueberries team up in this simple, delicious smoothie bowl. A vegan treat to start (or end!) any day of the week. Plus a review of Beautiful Smoothie Bowls by Carissa Bonham.

    Big Flavors: What's a surprising flavor combination that works really well in smoothie bowl form? And were there any that you tried that just didn't work out?

    Carissa: Zucchini with cherries and lime! I realize this sounds crazy but the zucchini is so mild tasting that what it really brings to this combination is texture. Zucchini definitely isn't an ingredient most people add to their smoothies!

    While I was making recipes I really struggled to find spirulina combinations that used enough spirulina to make it beneficial nutritionally but did not taste like dirt! The two recipes in the book that ended up with spirulina in them really just add it for color.

    Big Flavors: What are your family's favorite recipes from Beautiful Smoothie Bowls?

    Carissa: My favorite, hands down, is the Piña Colada Nice Cream. The fresh coconut meat really gives it an amazing flavor.

    My husband's favorite is Carrot Cake (page 129). My kids love just about everything but my oldest especially likes Piña Colada Nice Cream - I think because he is obsessed with cracking open fresh coconuts.

    Surf Rider Smoothie Bowl: Green tea, raw cashews, kiwis and blueberries team up in this simple, delicious smoothie bowl. A vegan treat to start (or end!) any day of the week. Plus a review of Beautiful Smoothie Bowls by Carissa Bonham.

    Big Flavors: Are there plans for a third cookbook, or any other big projects on the horizon?

    Carissa: Beautiful Smoothie Bowls is coming out in Spanish in December as Deliciosos Smoothie Bowls -  so it's almost like having a third book (but without all the work)! For now, though, I'm focusing on my website, Creative Green Living, and will decide in 2018 if I want to work on a new book.

    Carissa Bonham

    You can find Carissa over at the Creative Green Living website, or on Facebook, the Creative Green Living Instagram, the Creative Green Kitchen Instagram, Pinterest, YouTube, or Twitter.

    Looking for more smoothie favorites? Check out some of our favorite recipes:

    • Tropical Superfruit Smoothie Bowl
    • Mom & Tot Creamsicle Smoothies
    • Kiwi, Spinach, Pineapple & Banana Smoothie Bowls
    • Green and Orange Smoothie
    • Matcha Fruit Antioxidant Smoothie
    • Mango, Banana, Chia Kale Smoothie
    • Orange, Pear, Avocado Kale Smoothie
    • Mango, Apple, Carrot, Orange Coconut Smoothie
    • Kiwi, Mango, Avocado, Kale, Celery Green Smoothie

    📖 Recipe

    Surf Rider Smoothie Bowl + Beautiful Smoothie Bowls Review

    Surf Rider Smoothie Bowl: Green tea, raw cashews, kiwis and blueberries team up in this simple, delicious smoothie bowl. A vegan treat to start (or end!) any day of the week. Plus a review of Beautiful Smoothie Bowls by Carissa Bonham.
    Kiwi and berry are a timeless combination. A tart, ripe kiwi balanced by sweet berries is enough to make any mouth sing! The addition of raw cashews to this classic combo gives the bowl just the right amount of crunch.
    No ratings yet
    Print Recipe Pin Recipe
    Servings: 1 Smoothie Bowl
    Course: Breakfast
    Cuisine: American
    Prep Time 5 minutes mins
    Total Time 5 minutes mins

    Ingredients
     

    Smoothie Bowl:
    • 2 kiwis peeled
    • 1 ¾ cups frozen blueberries
    • ¾ cup brewed green tea chilled
    Toppings:
    • 1 kiwi peeled and sliced
    • ¼ cup blueberries
    • 2 tablespoons raw cashews

    Instructions
     

    1. 1. Combine all smoothie bowl ingredients in a blender jar and blend until smooth and no chunks remain.
    2. 2. Pour into a bowl and add toppings.

    Notes

    Recipe reprinted with permission from Carissa Bonham of Creative Green Living, and is included in her cookbook Beautiful Smoothie Bowls.

    Did you make this recipe?

    Leave a comment + star rating below to let people know how it was!
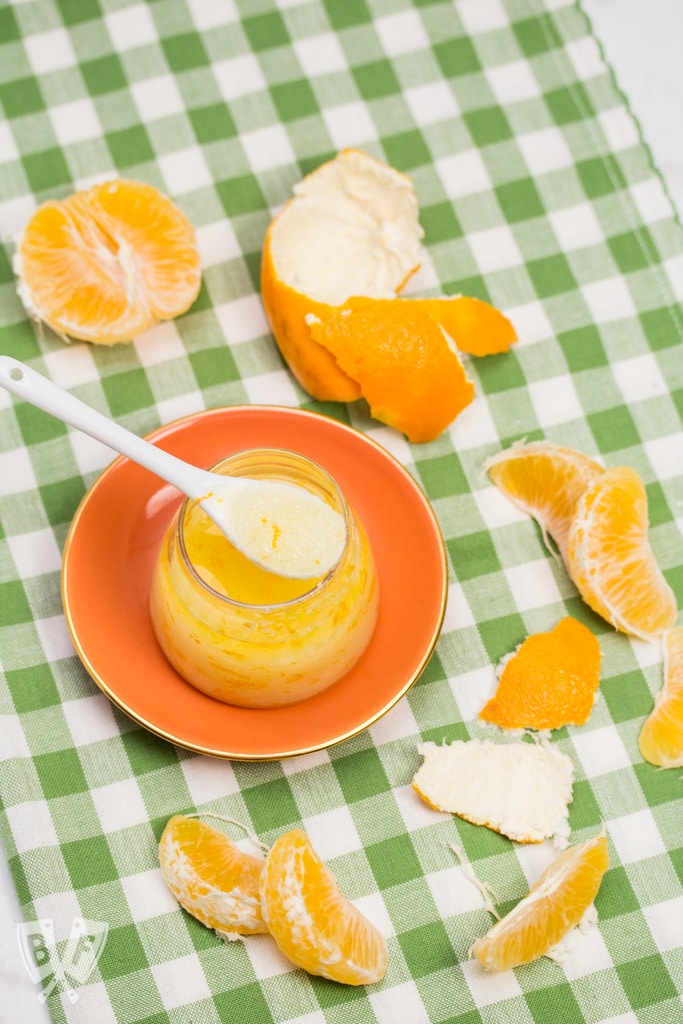
    Surf Rider Smoothie Bowl: Green tea, raw cashews, kiwis and blueberries team up in this simple, delicious smoothie bowl. A vegan treat to start (or end!) any day of the week. Plus a review of Beautiful Smoothie Bowls by Carissa Bonham.

    Roma Salad with Caper-Dill Vinaigrette

    September 1, 2017 by Ashley 30 Comments

    (#ad) Roma Salad with Caper-Dill Vinaigrette: Chickpeas, corn, black beans, feta cheese, + sun-dried tomatoes turn salad greens into a deliciously filling meal. Top it with a tangy homemade vinaigrette! #CookingWithCoke #CollectiveBias

    This shop has been compensated by Collective Bias, INC. and The Coca-Cola Company, all opinions are mine alone. The following content is intended for readers who are 21 and older. #CookingWithCoke #CollectiveBias. 

    Chickpeas, corn, black beans, feta cheese, + sun-dried tomatoes turn salad greens into a deliciously filling meal. Top it with a tangy homemade vinaigrette!

    (#ad) Roma Salad with Caper-Dill Vinaigrette: Chickpeas, corn, black beans, feta cheese, + sun-dried tomatoes turn salad greens into a deliciously filling meal. Top it with a tangy homemade vinaigrette! #CookingWithCoke #CollectiveBias

    Fall is sneaking up on us here in New York, and one of the most exciting things to come to town is the Food Network & Cooking Channel New York City Wine and Food Festival presented by Coca-Cola™.

    I've been to NYCWFF in the past, and it is a phenomenally fun experience! I was able to taste food prepared by some of my favorite celebrity chefs, and got to meet lots of them, too. It's an event that I highly recommend to anyone who is able to attend.

    But it's not just for locals! I'm thrilled to announce that Big Flavors readers have a chance to enter a sweepstakes to be able to attend the delicious festivities this October in NYC.

    Not only that, the Grand Prize winner gets travel and lodging for 6, 6 one-day access tickets to the event on October 15, 2017, and the winner will have the opportunity to take center stage with celebrity chef Scott Conant at the Food Network & Cooking Channel New York City Wine & Food Festival’s Grand Tasting!

    The winner will be selected on, or around September 18, 2017. Entering is easy - simply text the keyword SHOPRITE to the short code 26739 between October 12-15th. You can also head here to enter.

    I would be so thrilled if one of my readers won this prize. Travel and lodging in NYC isn't cheap, and the NYCWFF experience is fabulous, so this prize is pretty epic. Good luck, everyone!

    (#ad) Roma Salad with Caper-Dill Vinaigrette: Chickpeas, corn, black beans, feta cheese, + sun-dried tomatoes turn salad greens into a deliciously filling meal. Top it with a tangy homemade vinaigrette! #CookingWithCoke #CollectiveBias

    Speaking of ShopRite®, I headed over to a local (and newly renovated!) ShopRite store recently to stock up on supplies to make a quick, delicious meal.

    My family absolutely LOVES fried chicken. It's a meal that's requested often. And while I do make my own on occasion, we've come to find that the grocery store has some really tasty fried chicken that's fresh fried and ready to go (and doesn't involve me busting out my cast iron dutch oven for deep frying).

    I love that I can find ShopRite fried chicken both hot or already cooled down and refrigerated. That way I can pick up what's best for my meal plan - hot if we're going to be eating it right away or cold if I'm planning to heat it up later on or the next day.

    In my local store, there are 2 areas next to the produce section near the deli that have ShopRite Kitchen fresh fried 8-piece chicken - one that's heated, next to the rotisserie chicken, and one that's refrigerated.

    I actually called my local store to see what time of day the chicken goes out, for times when I want the freshest fried chicken. For this area, it's 10-10:30am.

    This time around, I knew I wasn't going to be reheating it until the following evening, so I went ahead and bought a chilled package.

    I made a pit stop over at the soda aisle to pick up someDiet Coke® to go with the chicken.

    (#ad) Coca Cola ShopRite Collage #CookingWithCoke #CollectiveBias

    To round out the meal, I put together a quick, flavorful salad inspired by one that I enjoy over at a local tea house. Their Roma Salad is a mix of lettuces topped with a combination of chickpeas, corn, black beans, feta cheese, sun-dried tomatoes, and a dill vinaigrette.

    There's something about that specific combination of toppings along with the tangy vinaigrette that works so beautifully together. And it's super easy to make a similar salad at home!

    I used capers in my vinaigrette to get the tanginess, and it was a little different than the one at the tea house, but it was equally delicious. And I love that I can just open a few cans, rinse and drain them, and top my salad.

    A post shared by Ashley Covelli (@bigflavors) on Aug 25, 2017 at 11:17am PDT

    You can buy already julienne-cut sun-dried tomatoes or halves that you can then cut into strips yourself. I usually buy the halves so I have the option to cut or not cut them, depending on what I'm making.

    Cutting them into strips for this salad is definitely the way to go. The way the sweetness plays off of the salty feta and tangy capers is really nice here.

    The vinaigrette is super simple to put together, too. It's only 5 ingredients (6 if you count the black pepper). It's made with pantry staples and is a really nice change of pace from standard salad dressings.

    I happen to adore capers - they're so briny and delicious. The vinaigrette is pretty tangy, so a little goes a long way.

    I also used a new (to me) trick that I came across recently for the easiest way to chop garlic evenly in the food processor, and let me say - it worked like a charm! Who knew it would be so easy!?

    Total game changer.

    (#ad) Roma Salad with Caper-Dill Vinaigrette: Chickpeas, corn, black beans, feta cheese, + sun-dried tomatoes turn salad greens into a deliciously filling meal. Top it with a tangy homemade vinaigrette! #CookingWithCoke #CollectiveBias

    I have plans to make another similar vinaigrette soon that's more dill-y than caper-y, too. It's all about options to keep salads interesting!

    While I used this salad as a side dish, the addition of hearty toppings makes it a filling vegetarian meal option as well.

    This meal was a huge hit with my family! I put the salad together while I reheated the chicken in the oven. And I had time to spare.

    Have I mentioned that my husband is a master of reheating food? Seriously. It's a legit skill. We're actually considering starting a series here on Big Flavors dedicated to properly reheating leftovers.

    There's nothing more sad than ruining a perfectly good meal by making it all soggy in the microwave. Or reheating it for too long and ending up with dried out bits.

    We have your back! Here are our tips for perfectly crispy reheated fried chicken...

    (#ad) Roma Salad with Caper-Dill Vinaigrette: Chickpeas, corn, black beans, feta cheese, + sun-dried tomatoes turn salad greens into a deliciously filling meal. Top it with a tangy homemade vinaigrette! #CookingWithCoke #CollectiveBias

    Our go-to method is to let the chicken come to room temperature. Line a baking sheet with a wire rack (or grease/line with foil). For dark meat, bake at 400°F for 8-12 minutes, flipping halfway through if you aren't using a baking rack.

    The skin will be nice and crispy and the meat will still be juicy and tender.

    If you're reheating white meat, 15 minutes should do the trick.

    (#ad) Roma Salad with Caper-Dill Vinaigrette: Chickpeas, corn, black beans, feta cheese, + sun-dried tomatoes turn salad greens into a deliciously filling meal. Top it with a tangy homemade vinaigrette! #CookingWithCoke #CollectiveBias

    Letting the chicken come to room temperature before reheating is ideal and definitely worth the extra time, because it'll ensure the chicken gets fully heated through without overcooking.

    That crispy skin is so key for the fried chicken experience - don't rush it, guys!

    But if you do decide to go straight from the fridge, lower the oven temperature to 375°F and cook it a little longer. It won't be quite as crisp, but it'll still be delicious.

    (#ad) Roma Salad with Caper-Dill Vinaigrette: Chickpeas, corn, black beans, feta cheese, + sun-dried tomatoes turn salad greens into a deliciously filling meal. Top it with a tangy homemade vinaigrette! #CookingWithCoke #CollectiveBias

    What do you like to serve with your fried chicken? I'd love to hear about it in the comments section below!

    Be sure to catch other ShopRite and Coca-Cola bundles that are in stores now.

    Add a 16oz Coca-Cola™ or 20oz FUZE Fusions® for .50¢ when you buy a 11.25-11.75oz Ready Pac Multi-Serve Salad in a single transaction with your Shoprite PRICE PLUS® Club card between 8/27/17 - 12/31/17 while supplies last. Taxes and Deposits Extra where Applicable.

    Coupon advertisement for a Coca-cola offer.

    Looking for more salad favorites? Check out these 5-star recipes:

    • Taco Salad with Homemade Chipotle Ranch Dressing
    • Quick Chickpea Salad with Lemon-Dill Vinaigrette
    • Pax Romana's Quinoa Salad with Mixed Vegetable, Goat Cheese & Orange Dressing
    • Grilled Niçoise Salad Flatbreads
    • Antipasto Pasta Salad
    • Fennel + Citrus Salad with Shallots + Capers
    • Creamy Cucumber, Avocado, Chickpea, & Sun-Dried Tomato Salad
    • Farmers Market Salad with Burrata + Fresh Fruit
    • BBQ Ranch Chopped Chicken Salad

    📖 Recipe

    Roma Salad with Caper-Dill Vinaigrette

    (#ad) Roma Salad with Caper-Dill Vinaigrette: Chickpeas, corn, black beans, feta cheese, + sun-dried tomatoes turn salad greens into a deliciously filling meal. Top it with a tangy homemade vinaigrette! #CookingWithCoke #CollectiveBias
    Chickpeas, corn, black beans, feta cheese, + sun-dried tomatoes turn salad greens into a deliciously filling meal. Top it with a tangy homemade vinaigrette!
    Big Flavors from a Tiny Kitchen - Ashley Covelli
    No ratings yet
    Print Recipe Pin Recipe
    Servings: 4 -6 Servings
    Course: Salad
    Cuisine: American
    Prep Time 5 minutes mins
    Total Time 5 minutes mins

    Ingredients
     

    For Vinaigrette:
    • 2 cloves garlic peeled
    • ¼ cup nonpareil capers drained
    • 2 tablespoons caper brine
    • 2 tablespoons dijon mustard
    • 2 teaspoons dried dill
    • ½ teaspoon freshly cracked black black pepper
    • ⅔ cup extra-virgin olive oil
    For Salad:
    • 5 ounces salad greens I used a baby lettuce mix
    • 3 ounces sliced sun-dried tomatoes not oil-packed
    • 1 15-ounce can chickpeas, drained & rinsed
    • 1 15.5-ounce can black beans, drained & rinsed
    • 1 15.25-ounce can whole kernel sweet corn, drained and rinsed
    • 4-6 tablespoons crumbled feta cheese

    Instructions
     

    1. For Caper-Dill Vinaigrette: With the food processor running, drop the whole cloves of garlic down the feed chute. Allow it to run until they're chopped nice and small. Alternately, you could mince them by hand, but this method is really easy! Add capers, brine, dijon, dried dill, and pepper, and process until chopped. With the motor running, slowly stream the oil down through the feed chute and continue to process until the mixture emulsifies. Makes about 1 cup.
    2. For Salad: Place salad greens in a large bowl and top with sun-dried tomatoes, chickpeas, black beans, corn, and feta. Serve with Caper-Dill Vinaigrette alongside.

    Did you make this recipe?

    Leave a comment + star rating below to let people know how it was!
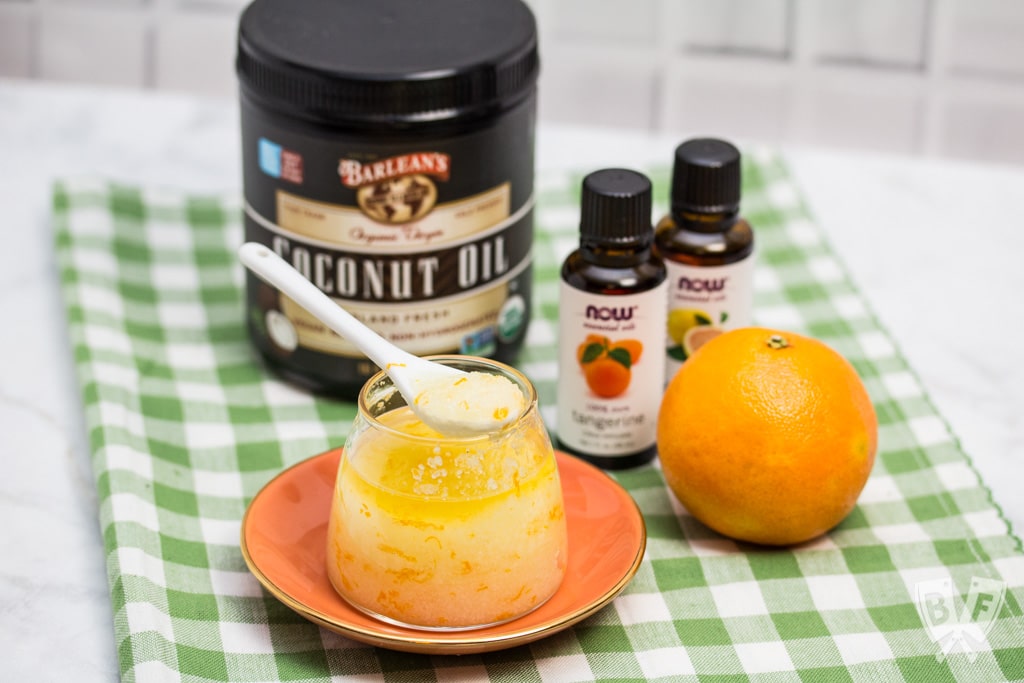
    (#ad) Roma Salad with Caper-Dill Vinaigrette: Chickpeas, corn, black beans, feta cheese, + sun-dried tomatoes turn salad greens into a deliciously filling meal. Top it with a tangy homemade vinaigrette! #CookingWithCoke #CollectiveBias

    Grilled PB&J Sticks

    August 29, 2017 by Ashley 30 Comments

    Grilled PB&J sticks on a plate.

    This shop has been compensated by Collective Bias, Inc. and its advertiser. All opinions are mine alone. #ShopRitePBJLove #CollectiveBias. Be sure to check out the so many ways to PB&J this Back To School on ShopRite.com.

    ShopRite is having a great deal received at check-out from 8/27 to 9/2 for Buy 4, Save $4 on the following products: Smucker’s® Fruit Spreads (17.5 – 18oz), Jif® Peanut Butter (16 oz), Pepperidge Farm Harvest Classics Bread and Slider Rolls, Ziploc® Sandwich Bags (40 ct). 

    Grilled cheese sandwiches don't get to have all the fun - take your everyday peanut butter and jelly sandwich to the next level by grilling + dipping!

    It recently came to my attention that my husband had never had a grilled PB&J.

    Like... ever.

    I thought that was something that everyone grew up with, but apparently I was sorely mistaken.

    As a parent, I feel it's my duty to make sure my kiddo has lots of fun, comfort food memories. And a grilled peanut butter and jelly sandwich is just one of the many that I'm sharing with him!

    #AD Grilled PB&J Sticks: Grilled cheese sandwiches don't get to have all the fun - take your everyday peanut butter and jelly sandwich to the next level by grilling + dipping! #ShopRitePBJLove #CollectiveBias

    Back to school season is upon us, and now that my son is going to be in full day kindergarten (!!!), I'm going to be packing a lot more lunches.

    He absolutely looooooves PB&J. He would eat it every single day if I'd let him. And while I won't go quite that far, I do like to mix up the way I offer his PB&J from time to time.

    Grape jelly, raspberry jam, or strawberry preserves? Creamy or chunky peanut butter? On bread, toast, or crackers? I've even rolled it up in tortillas to make PB&J "sushi". He loves it any which way I serve it up.

    So when I asked him if he wanted to try a grilled peanut butter and jelly sandwich, he was beyond thrilled.

    #AD Grilled PB&J Sticks: Grilled cheese sandwiches don't get to have all the fun - take your everyday peanut butter and jelly sandwich to the next level by grilling + dipping! #ShopRitePBJLove #CollectiveBias

    I headed over to my local ShopRite to pick up the necessities for my Grilled PB&J Sticks.

    Jif® Peanut butter, Smucker's® Fruit Spreads and Ziploc® Sandwich Bags are the perfect pairings for Back to School lunches. Ziploc® Sandwich Bags are great for portability easy for taking lunch to school.

    I found everything I needed in the last aisle - right across from the beginning of the frozen food section. The sandwich bags were right next to the peanut butter & jelly, and the bread was at the end of that aisle as well. Easy peasy.

    #AD Grilled PB&J Sticks: Grilled cheese sandwiches don't get to have all the fun - take your everyday peanut butter and jelly sandwich to the next level by grilling + dipping! #ShopRitePBJLove #CollectiveBias

    I was really intrigued by the Jif® Creamy Peanut Butter with Omega-3 DHA & EPA. It actually contains fish oil, but you'd never know it based on the taste. It was just deliciously smooth, rich peanut butter. Not fishy at all, but with the added benefit of the fish oil.

    My son loves any flavor of jam/jelly/preserves that I give him, so I tend to keep a few different ones in the fridge at home. For this recipe, I picked up some Smucker’s® Strawberry Preserves. A quick stir in the jar and it was the perfect texture for both spreading and dipping.

    Dipping? Yup.

    I wanted to make this sandwich into sticks so we could dunk them into a little extra peanut butter and/or jelly. Alternatively, you could put just peanut butter OR jelly in the sandwich and use the other for dunking.

    And if you want to go truly over the top, do one flavor of jelly in the sandwich and another for dipping. So. Much. Fun.

    #AD Grilled PB&J Sticks: Grilled cheese sandwiches don't get to have all the fun - take your everyday peanut butter and jelly sandwich to the next level by grilling + dipping! #ShopRitePBJLove #CollectiveBias

    I may have been packing it up for my son's lunch, but you better believe I ate some, too.

    What can I say? It's hard to beat a classic.

    When you're grilling a PB&J, you need to be aware that things might get messy if you put the peanut butter or jelly on very thick and let it sit in the pan for too long. The heat melts the filling and things get deliciously warm and gooey.

    It's great eaten fresh and warm (and I highly encourage you to try that out if you haven't!), but if you're going to cut it into sticks, you'll need to chill it first to prevent a mountain of stickiness.

    #AD Grilled PB&J Sticks: Grilled cheese sandwiches don't get to have all the fun - take your everyday peanut butter and jelly sandwich to the next level by grilling + dipping! #ShopRitePBJLove #CollectiveBias

    I like to butter one side of each slice of bread while my pan (preferably cast iron!) heats up. A layer of peanut butter gets slathered on the opposite side, and then I top one of the peanut buttered slices with jelly/jam/preserves.

    The peanut butter acts as a moisture barrier, which will keep the inside of your sandwich from getting soggy if you aren't eating it right away.

    Close up your sandwich, pop it into the pan to crisp up on both sides, and you're good to go!

    Grilling the sandwiches makes them much more sturdy for dunking, and that was the most fun part of this meal for my kiddo.

    #AD Grilled PB&J Sticks: Grilled cheese sandwiches don't get to have all the fun - take your everyday peanut butter and jelly sandwich to the next level by grilling + dipping! #ShopRitePBJLove #CollectiveBias

    For my 5-year-old, half of one of these sandwiches (2 sticks) and half a hard boiled egg was a perfect portion, along with some of his favorite fresh fruits and veggies.

    It's nice because I can make one of these sandwiches, and split it up into two separate baggies, split the egg as well, and have 2 days worth of lunches made at once. And having things prepped ahead of time will be especially nice when we're rushing out the door to catch the school bus.

    We had this for dinner at home one night last week, and I have to say - the combination with these sides works really well together. It was a very satisfying meal, even for an adult!

    And the votes are in - we unanimously enjoyed dipping into the strawberry preserves more than the peanut butter. But it was a fun experiment!

    #AD Grilled PB&J Sticks: Grilled cheese sandwiches don't get to have all the fun - take your everyday peanut butter and jelly sandwich to the next level by grilling + dipping! #ShopRitePBJLove #CollectiveBias

    What are your favorite lunch packing tips? I'd love to hear about them in the comments section below!

    Looking for more of our favorite sandwiches? Check out these 5-star recipes:

    • TABLET Sandwich (Tuna Avocado Bacon Lettuce Egg Tomato)
    • Sausage and Peppers
    • Our Favorite Sloppy Joe Sandwiches
    • Turkey Salad Tea Sandwiches with Dried Cherries
    • French-Inspired Egg Salad Sandwiches
    • Garlicky Tomato, Ri(goat)ta Cheese, Thyme, Honey + Aged Balsamic Toast
    • Persian Malbec Lamb Burgers with Mast-o-Khiar and Pomegranate Tomato Jam
    • Challah Nutella Banana Panini
    • Falafel with Yogurt-Herb Sauce
    • Brie, Tomato and Purple Basil Sandwich with Aged Balsamic

    📖 Recipe

    Grilled PB&J Sticks

    #AD Grilled PB&J Sticks: Grilled cheese sandwiches don't get to have all the fun - take your everyday peanut butter and jelly sandwich to the next level by grilling + dipping! #ShopRitePBJLove #CollectiveBias
    Grilled cheese sandwiches don't get to have all the fun - take your everyday peanut butter and jelly sandwich to the next level by grilling + dipping!
    Big Flavors from a Tiny Kitchen - Ashley Covelli
    No ratings yet
    Print Recipe Pin Recipe
    Servings: 1 Sandwich
    Course: Lunch
    Cuisine: Amer
    Prep Time 5 minutes mins
    Cook Time 5 minutes mins
    Total Time 10 minutes mins

    Ingredients
     

    • 1 tablespoon unsalted butter softened
    • 2 slices bread
    • Jif® Creamy Peanut Butter with Omega-3 DHA & EPA
    • Smucker’s® Strawberry Preserves

    Instructions
     

    1. Preheat a skillet over medium-high heat.
    2. Spread half the butter on one side of each slice of bread. Flip over and spread a layer of peanut butter on the reverse side. Spread a layer of jelly on top of one of the peanut buttered sides, then flip the other slice of bread on top to close the sandwich, butter-side up.
    3. Place the sandwich in the hot skillet and cook until golden brown, about 1-3 minutes. Flip and repeat on the other side. Remove from skillet and let cool. You can refrigerate or freeze the sandwich to speed this process up to make cutting it less messy.
    4. Once cooled, use a serrated knife to cut the sandwich into 4 slices. Serve with additional peanut butter or jelly on the side for dipping.

    Did you make this recipe?

    Leave a comment + star rating below to let people know how it was!
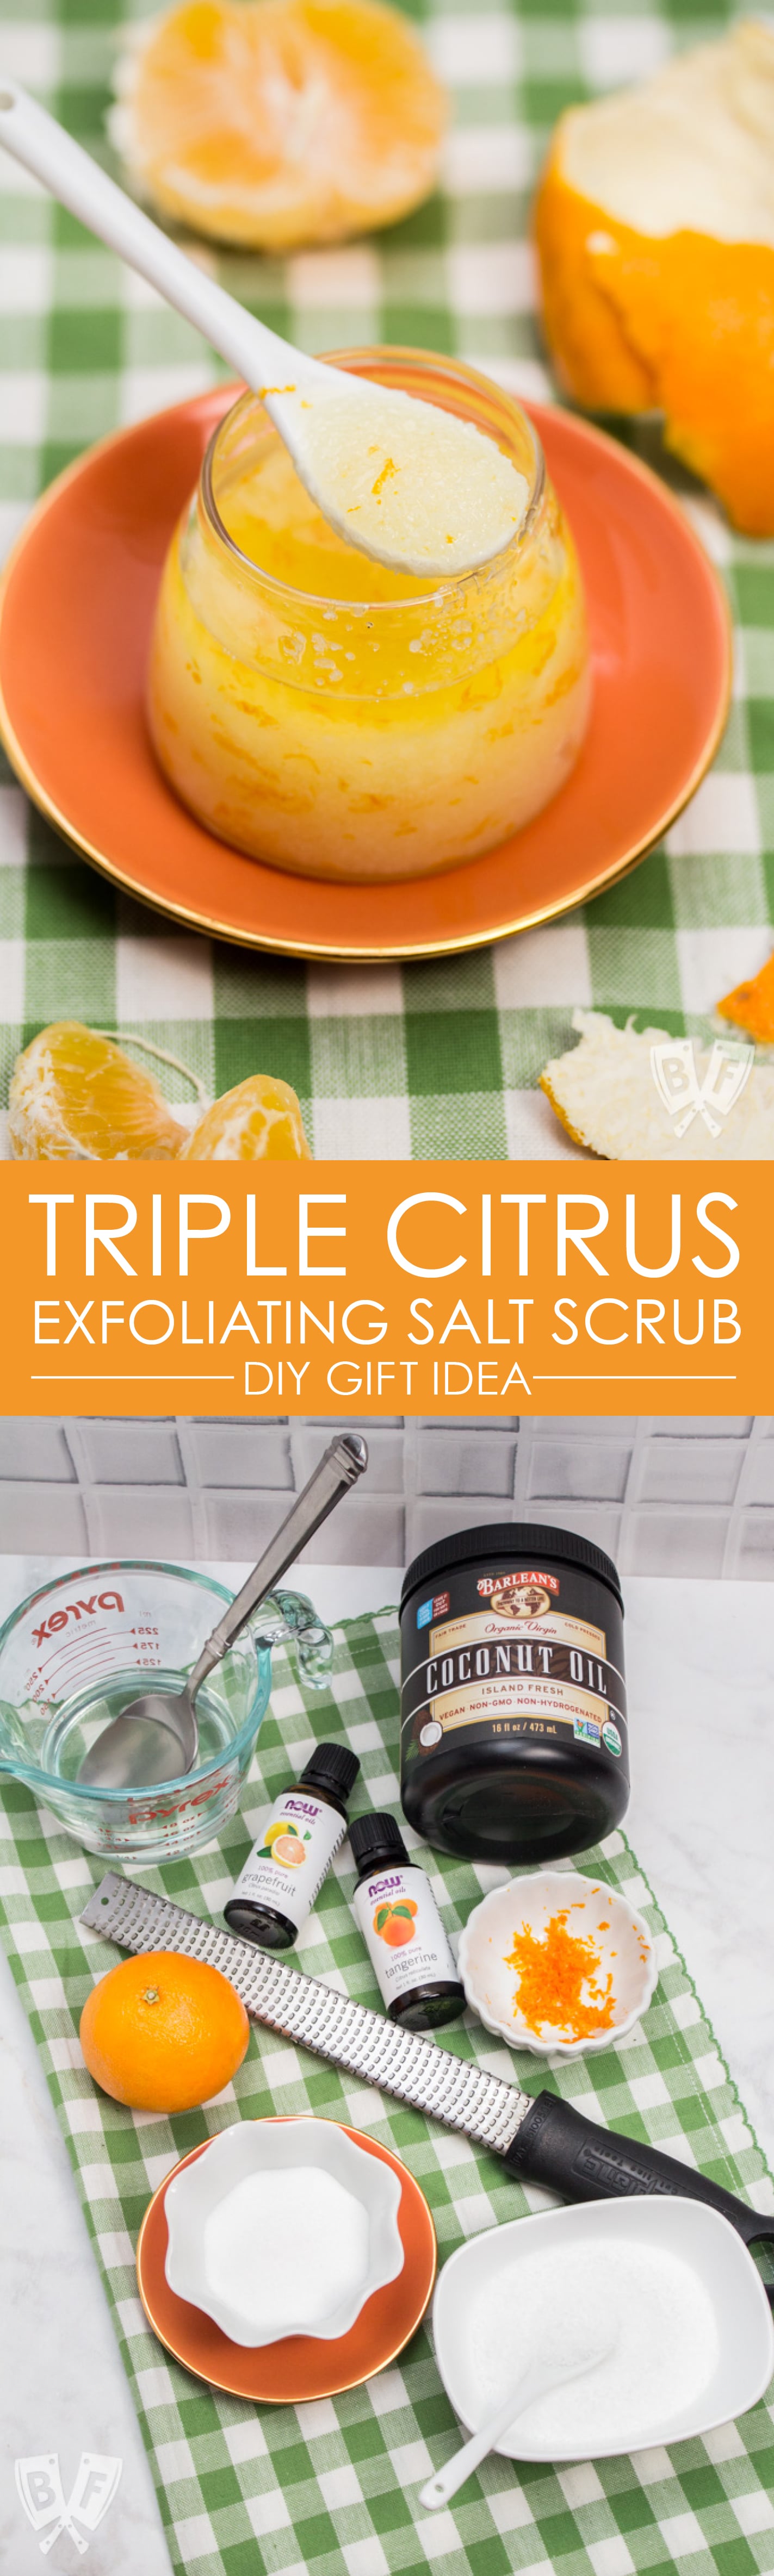
    Check out the so many ways to PB&J this Back To School on ShopRite.com.

    #AD Grilled PB&J Sticks: Grilled cheese sandwiches don't get to have all the fun - take your everyday peanut butter and jelly sandwich to the next level by grilling + dipping! #ShopRitePBJLove #CollectiveBias

    Big Shrimpin' Bacon-Wrapped Shrimp and Grit Cakes

    August 23, 2017 by Ashley 2 Comments

    Big Shrimpin' Bacon-Wrapped Shrimp and Grit Cakes: Classic shrimp and grits gets an upscale makeover in this over-the-top, bacon-wrapped presentation. Easy, delicious, and sure to impress your dinner guests! #BaconMonth

    Classic shrimp and grits gets an upscale makeover in this over-the-top, bacon-wrapped presentation. Easy, delicious, and sure to impress your dinner guests!

    It all started with some socks that I found at Target a while back. I bought them because they were ridiculous, bright yellow socks with a shrimp pattern all over them.

    It wasn't until I got home that I noticed that one sock said "Big" and the other said "Shrimpin'".

    And I could not stop laughing!

    Big Shrimpin' Bacon-Wrapped Shrimp and Grit Cakes: Classic shrimp and grits gets an upscale makeover in this over-the-top, bacon-wrapped presentation. Easy, delicious, and sure to impress your dinner guests! #BaconMonth

    I looooove me a good pun. Especially when you throw in a pop culture reference for good measure. So this was a natural fit for me. Let's examine some evidence, shall we?

    Exhibit A: My go-to trivia team name is The Big Kapowski.

    Exhibit B: My family dressed up as the Belcher family from Bob's Burgers for Halloween back in 2013. I even pun-ified my son's name to work with a "Burger of the Day" special.

    And when I realized that this post would coincide with the final Bacon Month post for 2017, I figured I needed to do some bacon-wrapped shrimp goodness.

    So in the spirit of Jay Z's Big Pimpin', I decided that I wanted to to use the biggest shrimp I could find and bling this recipe out, pulling out all the stops and going over the top with the decadence factor.

    Truth be told, I wanted to use colossal shrimp, which are so large that there are usually only about 10 of them per pound, but I couldn't track any down in time to make this dish.

    I went with the largest my store had, which was jumbo. Not quite as big pimpin' as I'd like, but it worked out just fine.

    Another thing that I thought would make shrimp and grits more upscale would be to use polenta instead of grits.

    Even though they're very similar, polenta just sounds fancier, and with the pre-made tubes of polenta available at most grocery stores, prep was a snap.


    A post shared by Ashley Covelli (@bigflavors) on Aug 5, 2017 at 12:12pm PDT

    One thing that I needed to think about was how to make sure the bacon was cooked all the way through without overcooking the shrimp. I found an awesome tip for par-cooking bacon over at Inspired Taste, and it worked like a charm!

    I tossed the jumbo shrimp in a garlicky-herb butter situation, wrapped them up in that par-cooked bacon, then skewered and baked them till the shrimp was cooked through and the bacon was golden brown.

    While they were in the oven, I cut the polenta into rounds and sautéed them to make a gorgeous base for my shrimp.

    Big Shrimpin' Bacon-Wrapped Shrimp and Grit Cakes: Classic shrimp and grits gets an upscale makeover in this over-the-top, bacon-wrapped presentation. Easy, delicious, and sure to impress your dinner guests! #BaconMonth

    Of course, this is Bacon Month, and we're going over-the-top here, so I took the extra bit of bacon that I didn't need for the shrimp, crisped it up in the pan, and sprinkled it over the polenta cakes.

    A generous dose of freshly shredded Parmesan cheese was the perfect topping for this first layer.

    You know, cuz it's Big Shrimpin', shredded cheese...

    Big Shrimpin' Bacon-Wrapped Shrimp and Grit Cakes: Classic shrimp and grits gets an upscale makeover in this over-the-top, bacon-wrapped presentation. Easy, delicious, and sure to impress your dinner guests! #BaconMonth

    The dish turned out so incredibly well. The polenta got nice and crispy and was the perfect textural contrast to the bacon-wrapped shrimp.

    It was eyes-rolling-back-into-your-head good.

    My 5-year-old couldn't get enough. He was all about that bacon, and probably ate more than me and my husband combined. Hey, and with that metabolism, he can afford it!

    This was so luxurious and would make a great cocktail party appetizer. I think Hova would approve...

    Big Shrimpin' Bacon-Wrapped Shrimp and Grit Cakes: Classic shrimp and grits gets an upscale makeover in this over-the-top, bacon-wrapped presentation. Easy, delicious, and sure to impress your dinner guests! #BaconMonth

    Wanna check out what everyone else is whipping up for this installment of Bacon Month?

    Aug 23rd Bacon Month Collage

    Bacon Pecan Baked Brie

    Bacon Root Beer Bundt Cake

    Cheesy Bacon Hashbrown Casserole

    Chicken Bacon Ranch Casserole

    Bacon Brussels Sprouts

    Bacon Caramel Sticky Buns

    Crack Dip

    Big Shrimpin' Bacon-Wrapped Shrimp and Grit Cakes

    Looking for more seafood favorites? Check out these 5-star recipes:

    • Spicy Salmon Poke Bowl
    • Tuna Tostada with Avocado Dressing + Chipotle Sour Cream
    • Garlicky Littleneck Clams with Bacon + Wine
    • Lemony Almond Crusted Cod with Homemade Mayo-Free Tartar Sauce
    • Pan-Seared Salmon with Lemon-Dill Butter + Roasted Purple Sweet Potatoes
    • Garlicky Beer + Tarragon Steamed Mussels
    • Spicy Shrimp + Napa Cabbage Stir-Fry
    • Shrimp with Coconut Curry Sweet Potato Noodles
    • Killer Shrimp Cocktail

    📖 Recipe

    Big Shrimpin' Bacon-Wrapped Shrimp and Grit Cakes

    Big Shrimpin' Bacon-Wrapped Shrimp and Grit Cakes: Classic shrimp and grits gets an upscale makeover in this over-the-top, bacon-wrapped presentation. Easy, delicious, and sure to impress your dinner guests! #BaconMonth
    Classic shrimp and grits gets an upscale makeover in this over-the-top, bacon-wrapped presentation. Easy, delicious, and sure to impress your dinner guests!
    Big Flavors from a Tiny Kitchen - Ashley Covelli
    No ratings yet
    Print Recipe Pin Recipe
    Servings: 4 -6 Servings
    Course: Main Dish
    Cuisine: American
    Prep Time 15 minutes mins
    Cook Time 30 minutes mins
    Total Time 45 minutes mins

    Ingredients
     

    • 1 package bacon don't use thick cut here
    • ¼ cup unsalted butter melted
    • 2 tablespoons minced fresh parsley
    • 2 tablespoons minced green onions about 1 medium
    • 1 clove garlic minced
    • 1 pound jumbo shrimp peeled and deveined, tails left on
    • Kosher salt and freshly cracked black pepper to taste
    • Small wooden skewers soaked in water for at least 20 minutes
    • 2 tablespoons olive oil
    • 1 18-ounce tube polenta, sliced into 10 rounds
    • 1 teaspoon paprika
    • Freshly grated Parmesan cheese for serving

    Instructions
     

    1. Line a large, rimmed baking sheet with aluminum foil and set an oven-proof baking rack on top. Place bacon in a single layer on top of the sheet and place it in the oven. Set the oven to 425 and let the bacon cook for 12-15 minutes, until the bacon starts to render some of its fat and gets a little bit of color around the edges. Remove from oven to a paper towel-lined plate to drain excess fat.
    2. Meanwhile, in a small bowl, combine butter, parsley, green onion and garlic. Take 3 tablespoons of this mixture and place it in a large bowl, then add shrimp, season with salt and pepper, and toss until well coated.
    3. Cut each piece of par-cooked bacon in half crosswise. Take each half piece, wrap it around a shrimp, secure with a soaked skewer, then place it back on the baking sheet. Repeat with remaining shrimp, reserving any extra bacon on the side. Return to the oven and bake for until the shrimp is cooked through and the bacon is golden and crispy, about 10-15 minutes.
    4. While the shrimp are cooking, heat 2 tablespoons of oil and the remainder of the butter mixture in a large skillet (preferably nonstick) over moderate heat. Sprinkle each slice of polenta with a little paprika, salt and pepper and add to the skillet. Sauté until brown on both sides. Remove to a platter, and immediately top with a few tablespoons of freshly grated Parmesan cheese.
    5. Take any extra bacon and slice it, then fry it in the pan until golden and crispy. Remove to a paper towel-lined plate to drain the excess grease, then scatter over the polenta.
    6. Serve bacon-wrapped shrimp on top of fried polenta rounds with extra Parmesan, green onion, and parsley scattered over top if desired.

    Did you make this recipe?

    Leave a comment + star rating below to let people know how it was!
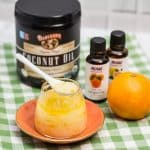
    Big Shrimpin' Bacon-Wrapped Shrimp and Grit Cakes: Classic shrimp and grits gets an upscale makeover in this over-the-top, bacon-wrapped presentation. Easy, delicious, and sure to impress your dinner guests! #BaconMonth

    TABLET Sandwich (Tuna Avocado Bacon Lettuce Egg Tomato)

    August 16, 2017 by Ashley 25 Comments

    Side view of a platter with 2 open-faced TABLET Sandwiches (Tuna Avocado Bacon Lettuce Egg Tomato) and ingredients off to the sides.

    A classic BLT, tuna salad, and avocado toast join forces in this epic sandwich mashup! An easy, delicious lunchtime classic that's sure to be a hit!

    It's hard to argue with the classics.

    Tuna salad. Egg salad. BLT.

    But sometimes classics can be a little… less than exciting.

    So just in time for my third Bacon Month post, I figured it was time to make sandwich time a little more something to look forward to.

    TABLET Sandwich: A classic BLT, tuna salad, and avocado toast join forces in this epic sandwich mashup! An easy, delicious lunchtime classic that's sure to be a hit! #BaconMonth

    I didn't grow up eating seafood at all, let alone tuna salad sandwiches, but my husband did. He makes a killer tuna salad sandwich that remains one of the most requested lunch items in my house. Even our 5-year-old is obsessed with them.

    I like my tuna salad on some well toasted sliced bread. Not burnt, but nice and crispy. My kiddo likes his with a pile of crackers to make little mini sandwiches. My husband has been using keto bread or wraps lately.

    TABLET Sandwich: A classic BLT, tuna salad, and avocado toast join forces in this epic sandwich mashup! An easy, delicious lunchtime classic that's sure to be a hit! #BaconMonth

    Over the last few months, I found myself adding more and more things into my tuna salad sandwiches. Slices of juicy, ripe tomato? Absolutely! Avocado? You bet!

    We don't usually put hard boiled eggs in our tuna salad, but sliced on top of the tuna salad is absolutely delicious! It's like the best of both worlds - tuna salad and egg salad.

    TABLET Sandwich: A classic BLT, tuna salad, and avocado toast join forces in this epic sandwich mashup! An easy, delicious lunchtime classic that's sure to be a hit! #BaconMonth

    Then one day it dawned on us that there was a pretty epic sandwich that could be made combining the best parts of a few of our favorites.

    And that is how the this sandwich was born. It's so much more than a BLT... it's a TABLET.

    This combination hits all the right notes. It's crunchy, creamy, salty, fresh, and satisfying.

    My family absolutely loved this combo. My 5-year-old even ate almost a full one all by himself!

    TABLET Sandwich: A classic BLT, tuna salad, and avocado toast join forces in this epic sandwich mashup! An easy, delicious lunchtime classic that's sure to be a hit! #BaconMonth

    Next week will be the last Bacon Month post for this year. If you missed the last 2 weeks, be sure to check out my Garlicky Littleneck Clams with Bacon + Wine and Elvis-Style Frozen Bananas recipes.

    Want to see what everyone else is cooking up this week?

    Aug 16th Bacon Month Collage

    Crab & Bacon Rolls

    Epic Bacon Croque Madame Pizza

    TABLET Sandwich

    Bacon Pesto

    Bacon Chicken Noodle Casserole

    Grilled Cheese Bacon Burger

    7-Layer Salad

    No Churn Bacon Ice Cream

    BLT Puff Pastry Tart

    Looking for more sandwich favorites? Check out these 5-star recipes:

    • Our Favorite Sloppy Joe Sandwiches
    • Sausage and Peppers
    • Turkey Salad Tea Sandwiches with Dried Cherries
    • French-Inspired Egg Salad Sandwiches
    • Garlicky Tomato, Ri(goat)ta Cheese, Thyme, Honey + Aged Balsamic Toast
    • Persian Malbec Lamb Burgers with Mast-o-Khiar and Pomegranate Tomato Jam
    • Challah Nutella Banana Panini
    • Falafel with Yogurt-Herb Sauce
    • Brie, Tomato and Purple Basil Sandwich with Aged Balsamic


    📖 Recipe

    TABLET Sandwich (Tuna Avocado Bacon Lettuce Egg Tomato)

    Side view of a platter with 2 open-faced TABLET Sandwiches (Tuna Avocado Bacon Lettuce Egg Tomato) and ingredients off to the sides.
    A classic BLT, tuna salad, and avocado toast join forces in this epic sandwich mashup! An easy, delicious lunchtime classic that's sure to be a hit!
    Big Flavors from a Tiny Kitchen - Ashley Covelli
    No ratings yet
    Print Recipe Pin Recipe
    Servings: 4 Sandwiches
    Course: Sandwich
    Cuisine: American
    Prep Time 5 minutes mins
    Total Time 5 minutes mins

    Ingredients
     

    For Tuna Salad:
    • 2 5-ounce cans oil packed tuna, drained
    • ¼ cup plus 1 tablespoon mayonnaise
    • ½ teaspoon dijon
    • 2 teaspoons dried parsley
    • 1 teaspoon dried minced onion
    • ¼ teaspoon garlic powder
    • ¼ teaspoon celery seed
    • ½ teaspoon kosher salt
    • ⅛ teaspoon ground white pepper
    For Sandwich:
    • 8 slices toasted bread
    • Mayonnaise
    • 2 ripe avocados pitted and peeled
    • 4 large lettuce leaves
    • 4 slices cooked bacon halved crosswise
    • 1 tomato thinly sliced
    • 2 hard boiled eggs sliced

    Instructions
     

    1. Make Tuna Salad: In a medium bowl, combine tuna, mayonnaise, dijon, parsley, onion, garlic, celery seed, salt, and pepper. Cover and refrigerate until ready to use.
    2. Assemble Sandwich: Spread a thin layer of mayonnaise on one side of each slice of toasted bread. Place half an avocado on 4 of the slices of toast and use a fork to mash it into an even layer. Top with ¼ of the tuna salad mixture, lettuce, bacon, tomato, and egg. Top each sandwich with another slice of toasted bread, mayo side down.

    Video

    Did you make this recipe?

    Leave a comment + star rating below to let people know how it was!
    TABLET Sandwich: A classic BLT, tuna salad, and avocado toast join forces in this epic sandwich mashup! An easy, delicious lunchtime classic that's sure to be a hit! #BaconMonth

    Elvis-Style Frozen Bananas

    August 9, 2017 by Ashley 16 Comments

    Banana halves on popsicle sticks coated in peanut butter and bacon.

    Elvis-Style Frozen Bananas take the classic Elvis sandwich (peanut butter, banana + bacon) to a new level! This easy 3 ingredient frozen dessert is fit for The King!

    It's time for another Bacon Month post!

    Last week I brought you the recipe for these scrumptious Garlicky Littleneck Clams with Bacon + Wine. It's a ridiculously tasty recipe that I do hope you'll try out sometime.

    But maybe you're in the mood for a sweet-and-salty way to end your meal. And you still want to get in on that delicious bacon-y action.

    Look no further than my easy, 3 ingredient Elvis-Style Frozen Bananas recipe.

    Elvis-Style Frozen Bananas take the classic Elvis sandwich (peanut butter, banana + bacon) to a new level! This easy 3 ingredient frozen dessert is fit for The King! #BaconMonth

    Oh, yes. I am aware that this is over the top decadent.

    And I won't apologize for that.

    It's also super simple, and guaranteed to wow anyone that you serve it to.

    Did I mention that there's about one and a half slices of beautifully crispy bacon on each of these beauties?

    Yeah... I went there.

    Elvis-Style Frozen Bananas take the classic Elvis sandwich (peanut butter, banana + bacon) to a new level! This easy 3 ingredient frozen dessert is fit for The King! #BaconMonth

    In addition to The King of Rock and Roll, the one and only Elvis Presley, this recipe was inspired by a recent trip to Ocean City, Maryland.

    My family has made an annual tradition of this trip, and one of our favorite parts is evenings on the boardwalk.

    We typically spend some time playing arcade games, doing a bit of shopping and riding rides before deciding on what we'll have for dessert that evening.

    Aside from frozen custard, one of my favorites is the chocolate-covered frozen banana with peanuts.

    You know, because there's always money in the banana stand.


    A post shared by Ashley Covelli (@bigflavors) on Jul 11, 2017 at 4:24pm PDT

    Bananas take on a really interesting texture once they're frozen and are nice and refreshing - especially in the middle of summer.

    So there I was, eating a frozen banana with all the hubbub of the boardwalk to one side of me, and the peaceful crashing of the Atlantic Ocean waves to the other when I realized how easy these frozen treats would be to make at home.

    And then I remembered that Bacon Month was upon us, and figured this would be the perfect opportunity to merge a classic dessert with a classic sandwich!

    Elvis-Style Frozen Bananas take the classic Elvis sandwich (peanut butter, banana + bacon) to a new level! This easy 3 ingredient frozen dessert is fit for The King! #BaconMonth

    Have you heard of the legendary Elvis sandwich? Have you ever tried one?

    They are delicious, rest assured, but they're awfully heavy.

    Not that these Elvis-Style Frozen Bananas are light, but they're definitely more refreshing than a pan-fried sandwich.

    It's still indulgent but a bit of a better choice than a lot of other desserts out there.

    Elvis-Style Frozen Bananas take the classic Elvis sandwich (peanut butter, banana + bacon) to a new level! This easy 3 ingredient frozen dessert is fit for The King! #BaconMonth

    If you're looking for other Elvis-inspired recipes, I also have a recipe for Elvis-style French toast, and a delicious peanut butter banana milkshake with bacon. All excellent choices!

    For these frozen bananas you're going to want to start with some ripe, yet firm bananas for this recipe. Don't use ones that are falling apart mushy.

    Cut each of those bananas in half, peel, then insert a craft stick into the cut end.

    Lay them out on a baking sheet that's lined with either a silicone mat or parchment paper and let them freeze for a bit before you get to Elvis-ifying them.

    Elvis-Style Frozen Bananas take the classic Elvis sandwich (peanut butter, banana + bacon) to a new level! This easy 3 ingredient frozen dessert is fit for The King! #BaconMonth

    I would be remiss of me not to mention that my father-in-law used to play bass in an amazing Elvis Presley cover band. A good time was had by all whenever they took the stage. It was the closest I'll ever get to seeing The King perform live. I'll be sure to post tour dates if they ever start playing again!

    But back to these Elvis-inspired treats.

    I microwaved my peanut butter quickly to loosen it up a bit before coating my bananas. A quick dip and some spreading with a spoon got them nice and coated.

    Immediately after they get a peanut butter dip, roll the bananas into your pile of crispy, chopped bacon and place them back onto the baking sheet.

    If you really want to take it up a notch, try making these with homemade peanut butter! It's a super simple recipe that's deliciously creamy and you have full control over the ingredients.


    A post shared by Ashley Covelli (@bigflavors) on Aug 8, 2017 at 6:41pm PDT

    I chopped my bacon right before assembling, so I just rolled them around right on the cutting board. But feel free to chop it up ahead of time and spread it out on a plate when the time comes. Whatever is easiest for you!

    Repeat this process with all of your frozen bananas and transfer the tray to the freezer until they're fully set, about 3 hours.

    Though, in the interest of full disclosure, I'll tell you that I totally grabbed one to try out after about 1 hour and it was still pretty flippin' delicious.

    Elvis-Style Frozen Bananas take the classic Elvis sandwich (peanut butter, banana + bacon) to a new level! This easy 3 ingredient frozen dessert is fit for The King! #BaconMonth

    After the bananas are fully frozen, you can seal them in a freezer bag or other airtight container if you aren't planning to eat them right away.

    These frozen bananas are a really fun spin on a boardwalk classic, and one that my family absolutely loved.

    So the next time you're making bacon for breakfast, let me encourage you to make a little extra and use it for these tasty treats!

    Elvis-Style Frozen Bananas take the classic Elvis sandwich (peanut butter, banana + bacon) to a new level! This easy 3 ingredient frozen dessert is fit for The King! #BaconMonth

    I think The King would approve of this bacon-covered dessert recipe.

    Thank you, thank you very much.

    Wanna see what the other Bacon Month bloggers are up to? Check out the full collection of this week's bacon-y recipes:

    Aug 9th Bacon Month Collage

    Bourbon Bacon Pecan Pie

    Teriyaki Bacon Wrapped Pineapple Chicken

    Bacon Chocolate Chip Skillet Cookie

    Caprese Salad Skewers with Pesto and Bacon

    Crustless Bacon Quiche

    Bacon, Egg & Cheese Breakfast Donuts

    Bacon Jalapeno Eggs Cups

    Elvis-Style Frozen Bananas

    Bacon Tater Tot Breakfast Casserole

    Looking for more of my own bacon favorites? Check out these 5-star recipes:

    • Garlicky Littleneck Clams with Bacon + Wine
    • Instant Pot Chicken, Bacon, and Potato Soup
    • Red Lentil Fusilli with Bacon, Butternut Squash, and Spinach
    • Instant Pot "Baked" Beans
    • Cheesy Bacon + Apple Croissants
    • Bacon and Caramelized Onion Jam
    • Maple Roasted Butternut Squash Pizza with Brussels Sprouts, Bacon + Pomegranate
    • Single-Skillet Bacon-Rosemary Chicken Thighs with Roasted Tomatoes
    • Bourbon Bacon Pecan Pie with a Whole Wheat Crust
    • Bacon and Caramelized Onion Jam Naan Pizza with Gorgonzola and Apples

    📖 Recipe

    Elvis-Style Frozen Bananas

    Banana halves on popsicle sticks coated in peanut butter and bacon.
    Elvis-Style Frozen Bananas take the classic Elvis sandwich (peanut butter, banana + bacon) to a new level! This easy 3 ingredient frozen dessert ROCKS!
    Big Flavors from a Tiny Kitchen - Ashley Covelli
    No ratings yet
    Print Recipe Pin Recipe
    Servings: 8 Servings
    Course: Snack
    Cuisine: American
    Prep Time 15 minutes mins
    Total Time 4 hours hrs

    Ingredients
     

    • 4 ripe but firm bananas
    • 1 cup peanut butter
    • 12-14 slices cooked bacon the crispier the better!

    Instructions
     

    1. Line a baking sheet with a silicone mat or parchment paper and set aside. Cut each banana in half crosswise, then peel. Insert a craft stick into the center of the cut end of each banana and place on the lined baking sheet, making sure to leave a little space around each banana. Transfer to the freezer until firm, at least 30 minutes.
    2. Coarsely chop cooked bacon and pile it up on your cutting board or a plate.
    3. Place peanut butter in a microwave safe bowl or measuring cup. Microwave on high for 15 seconds, stir, then microwave for another 15 seconds and stir again.
    4. Remove tray of bananas from the freezer. One at a time, dip each frozen banana into the peanut butter, using a spoon to coat the whole thing and smooth it out if necessary. Immediately roll the peanut butter-covered banana in the chopped bacon to coat all sides, then place back onto the baking sheet. Repeat with remaining bananas.
    5. Transfer baking sheet back into the freezer and let set until completely frozen, about 3 hours. Once frozen, bananas can be stored in a freezer bag or other airtight container.

    Nutrition information

    Nutrition Facts
    Elvis-Style Frozen Bananas
    Serving Size
     
    1 banana half
    Amount per Serving
    Calories
    0
    % Daily Value*
    * Percent Daily Values are based on a 2000 calorie diet.

    Did you make this recipe?

    Leave a comment + star rating below to let people know how it was!
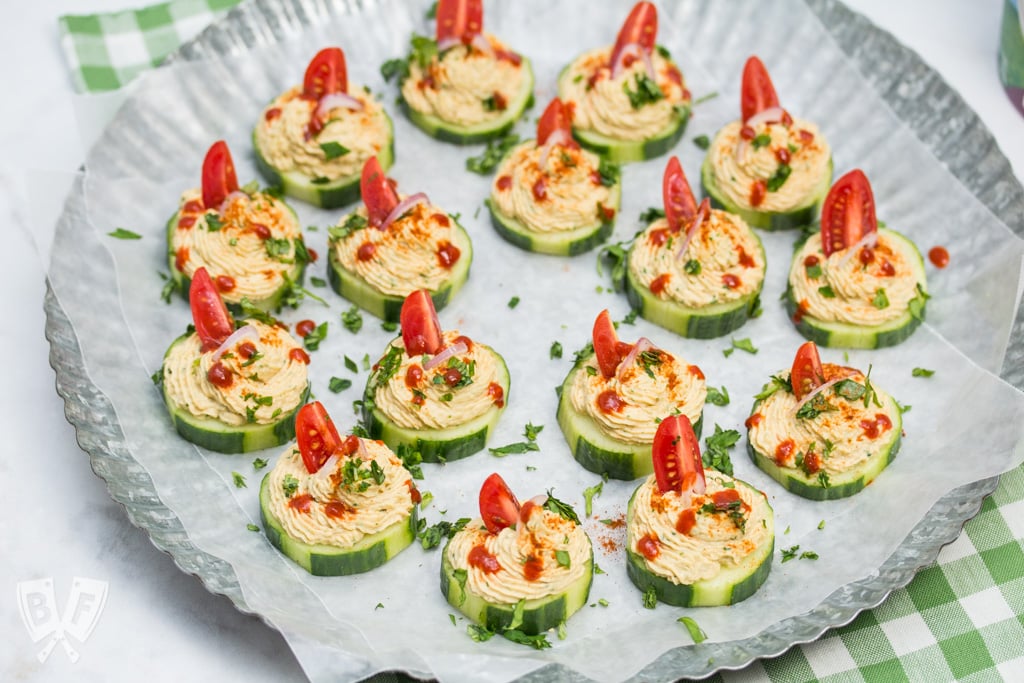
    Elvis-Style Frozen Bananas take the classic Elvis sandwich (peanut butter, banana + bacon) to a new level! This easy 3 ingredient frozen dessert is fit for The King! #BaconMonth

    Sweet + Salty Dark Chocolate Clusters

    August 4, 2017 by Ashley 6 Comments

    #ad Satisfy your sweet tooth with this 5 ingredient dark chocolate dessert. These Sweet + Salty Dark Chocolate Clusters are easy to make, no bake, & perfect for times when you're craving both sweet AND salty!

    This post has been compensated as part of my ongoing partnership with Stoneridge Orchards and may contain affiliate links. As always, all opinions are 100% my own.

    Satisfy your sweet tooth with this 5 ingredient dark chocolate dessert. Easy to make, no bake, & perfect for times when you're craving both sweet AND salty!

    Sweet + Salty Dark Chocolate Clusters: #ad Satisfy your sweet tooth with this 5 ingredient dark chocolate dessert. These Sweet + Salty Dark Chocolate Clusters are easy to make, no bake, & perfect for times when you're craving both sweet AND salty!

    Are you an indecisive snacker? Do you crave sweets, or do you lean more toward the salty side? Would you rather have a big chunk of chocolate, or would you prefer popcorn? Is dried fruit more your fancy?

    I tend to think that sweet and salty both have their rightful place in any snacking repertoire. And some days you just deserve want the best of both worlds, without feeling like you're eating total junk food.

    Enter these Sweet + Salty Dark Chocolate Clusters.

    I took a bunch of my favorite healthy-ish snack-time ingredients and rolled them up into one deliciously decadent package that's sure to satisfy all of your cravings. They're super simple to make at home and can even be made in advance!

    #ad Stoneridge Orchards Greek Yogurt-Covered Montmorency Cherries make a great road trip snack!

    First things first - let's talk about these Montmorency Cherries Dipped in Greek Style Yogurt from Stoneridge Orchards. I've talked about my love for their dried fruit before, and these yogurt-dipped ones are no exception.

    They're super plump and delicious and they have the perfect balance of sweet and tart. The resealable bag makes them a great snack, especially when my family is on the go. I can just toss a bag into my purse and head out the door.

    My family takes a lot of road trips, especially in the summertime. And having a good stash of both sweet and salty snacks lined up for the car ride is a MUST.

    Packing the perfect assortment of treats for whatever mood we happen to be in when snack o'clock rolls around is one of the keys to a successful road trip.

    Because trust me, when you're on hour 7 of a 12 hour drive, you don't want to have to make a pit stop for some questionable (and possibly regrettable) gas station snacks.

    I also don't like having to stop more often than necessary, unless we need to stretch our legs to find a new geocache or re-up on coffee. I'm all about streamlining things to make our road trips go as smoothly as possible.

    Sweet + Salty Dark Chocolate Popcorn: #ad Satisfy your sweet tooth with this 5 ingredient dark chocolate popcorn. Easy to make and perfect for times when you're craving both sweet AND salty!

    Popcorn is one of my son's absolute favorite snacks. I like making it at home because I can control how much salt/butter (if any) goes into it. A lot of times, I just pop some up in my microwave popcorn popper and munch on it plain or with a drizzle of butter flavored coconut oil. Sometimes a little truffle salt if I'm feeling fancy.

    It's also fun to mix sweet and salty ingredients into popcorn to get a more interesting assortment of textures and flavors. And dried fruit is one of my favorite ways to sweeten up popcorn - especially when it's still nice and plump and juicy.

    I took all the same ingredients that I used for these cluster candies and tossed a handful of each in with some popcorn. It made an awesome treat for the road! My son loved picking through and taking bites of each ingredient separately, then together, then making different flavor combinations in his mouth.

    Hey, cheap entertainment. I'll take it!


    A post shared by Ashley Covelli (@bigflavors) on Jul 28, 2017 at 8:04am PDT

    The clusters themselves are really easy to make - you just need to melt some chocolate, make little piles, and load them up with your favorite sweet and salty toppings.

    I like to drizzle a little extra chocolate on top at the end to kind of seal everything in there, then finish it off with some coarse sea salt to really drive home the flavor combo.

    I used both the yogurt-dipped cherries and blueberries here, but you could certainly use one or the other. They work reeeeeeally well together though, so definitely use both if you feel so inclined.

    Sweet + Salty Dark Chocolate Clusters: #ad Satisfy your sweet tooth with this 5 ingredient dark chocolate dessert. These Sweet + Salty Dark Chocolate Clusters are easy to make, no bake, & perfect for times when you're craving both sweet AND salty!

    These clusters will set up  pretty quickly in the freezer, and they need to be stored there or in the refrigerator to keep them from melting. They taste great cold, so they're perfect for summer snacking!

    Now, if your road trip happens to involve a cooler, as ours often do, you can totally bring the clusters along for the ride. But make sure you have some wipes handy, especially if you have kids eating them in the hot summer sun, because they'll likely get melty!

    Let the record show that this was my 5-year-old's legitimate reaction to his first bite of these clusters.

    Legit eyes-rolling-back-in-his-head, pure chocolate bliss right here, folks.

    He was super into this treat in popcorn form while we were on the road, but very excited to get to eat something messy while sitting in the back of our car.

    Road trips aside, these clusters are a great last minute dessert. You can use any combination of chocolate, dried fruit, and salty treats that you like.

    I chose a pretty dark chocolate here to go along with the fruit, plus popcorn and roasted, salted pepitas. I think pretzels or potato chips would be great alternatives, too. Just raid your pantry and see what works and what doesn't.

    You could even let your kids sprinkle their own assortment of different toppings on each cluster. They'll be waiting in the fridge whenever your snack craving strikes!

    Sweet + Salty Dark Chocolate Clusters: #ad Satisfy your sweet tooth with this 5 ingredient dark chocolate dessert. These Sweet + Salty Dark Chocolate Clusters are easy to make, no bake, & perfect for times when you're craving both sweet AND salty!

    Looking for more snack time favorites? Check out these recipes:

    • 5-Ingredient Samoa Cereal Bowls
    • Marcona Almond + Dried Cherry Popcorn with Crispy Rosemary
    • Chunky Monkey Greek Yogurt Parfaits
    • Challah Nutella Banana Panini
    • Banana Split Granola Kabobs
    • Mulberry-Hemp Energy Balls
    • Chocolate Covered Raspberry Petit Fours with Petite Crème Filling

    📖 Recipe

    Sweet + Salty Dark Chocolate Clusters

    #ad Satisfy your sweet tooth with this 5 ingredient dark chocolate dessert. These Sweet + Salty Dark Chocolate Clusters are easy to make, no bake, & perfect for times when you're craving both sweet AND salty!
    Satisfy your sweet tooth with this 5 ingredient dark chocolate dessert. Easy to make, no bake, & perfect for times when you're craving both sweet AND salty!
    Big Flavors from a Tiny Kitchen - Ashley Covelli
    No ratings yet
    Print Recipe Pin Recipe
    Servings: 12 Clusters
    Course: Snack
    Cuisine: American
    Prep Time 5 minutes mins
    Cook Time 30 minutes mins
    Total Time 35 minutes mins

    Ingredients
     

    • 1 cup coarsely chopped dark chocolate I used 60% cacao baking chips
    • ½ cup Stoneridge Orchards Greek Yogurt-Covered Fruits coarsely chopped (I used a mix of Montmorency cherries and blueberries)
    • ¼ cup roasted salted pepitas
    • ¼ cup air popped popcorn
    • Coarse sea salt for garnish

    Instructions
     

    1. Line a baking sheet with a silicone mat or parchment paper. Set aside.
    2. Place chocolate in a microwave safe bowl. Microwave on high until melted, stirring every 20-30 seconds, about 3 minutes total. Let chocolate cool down for a few minutes before assembling the clusters.
    3. Pour the chocolate onto the prepared baking sheet to form 12 little puddles, about 1 tablespoon each. Gently press a few pieces of fruit, pepitas, and popcorn into the surface of each mound of chocolate. Drizzle another teaspoon or so of chocolate over the top of each, then sprinkle with a pinch of sea salt.
    4. Transfer baking sheet to the refrigerator or freezer and chill until set, at least 30 minutes. Once firm, gently remove clusters with a spatula and store in an airtight container in the refrigerator or freezer.

    Did you make this recipe?

    Leave a comment + star rating below to let people know how it was!
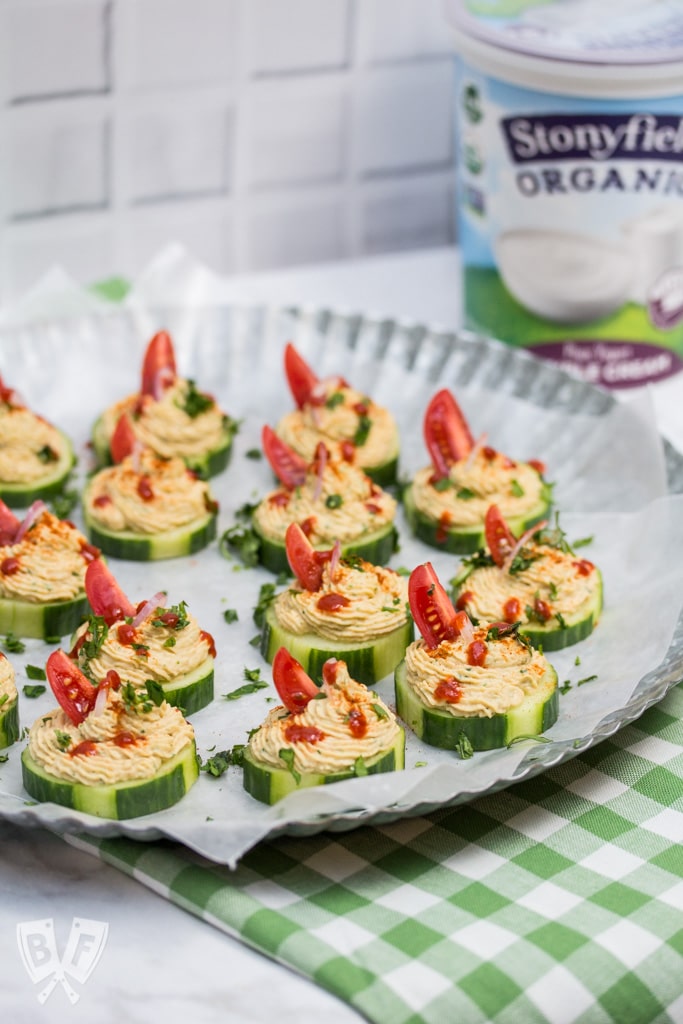
    Sweet + Salty Dark Chocolate Clusters: #ad Satisfy your sweet tooth with this 5 ingredient dark chocolate dessert. These Sweet + Salty Dark Chocolate Clusters are easy to make, no bake, & perfect for times when you're craving both sweet AND salty!

    Garlicky Littleneck Clams with Bacon + Wine Over Sautéed Spring Veggies

    August 2, 2017 by Ashley 14 Comments

    Garlicky Littleneck Clams with Bacon + Wine Over Sautéed Spring Veggies: A bed of sautéed veggies makes the perfect base for this bacon-loaded seafood dish. Make sure you have plenty of crusty bread for dunking! #BaconMonth

    A bed of sautéed veggies makes the perfect base for this bacon-loaded seafood dish. Make sure you have plenty of crusty bread for dunking!

    Guys. Have you heard about Bacon Month?

    My friend Julie over at Bread Booze Bacon is hosting her 5th Annual Bacon Month celebration, and I was stoked to hop on board with a rockin' team of bloggers to celebrate all things bacon-centric for the next 4 Wednesdays.

    I figured I should kick things off with a bang by combining a few of my very favorite ingredients for this week's Bacon Month contribution:

    Bacon. Wine. Seafood.

    Garlicky Littleneck Clams with Bacon + Wine Over Sautéed Spring Veggies: A bed of sautéed veggies makes the perfect base for this bacon-loaded seafood dish. Make sure you have plenty of crusty bread for dunking! #BaconMonth

    Now before I get too far ahead of myself, let me introduce you to the people who will LITERALLY be bringin' home the bacon for our August celebration...

    Bacon Month 2017 Bloggers

    Bread Booze Bacon | Cooking in Stilettos | Big Flavors From a Tiny Kitchen

    Rants From My Crazy Kitchen | Kleinworth & Co. | Live Laugh Rowe

    Served Up with Love | Kudos Kitchen by Renee | Wholesome Yum

    We'll each be sharing a different bacon-centric recipe for the next 4 weeks - that's 9 new bacon recipes each and every week!

    And if that's not enough bacon-y goodness, you can also check out my other bacon recipes or grab bacon recipes from Julie's previous Bacon Months too!

    And now, onto my luscious bacon and clam recipe!


    A post shared by Ashley Covelli (@bigflavors) on May 6, 2017 at 7:03pm PDT

    I actually made this recipe back in May after a beautiful day at my local Farmers Market. It was an absolutely beautiful day, and there were a ton of inspiring ingredients at the various vendors' booths.

    The first thing that caught my eye was some gorgeous littleneck clams. If you haven't heard of littleneck clams before, Wikipedia has you covered with this info on hard clams:

    In fish markets, there are specialist names for different sizes of this species of clam. The smallest legally harvestable clams are called countnecks, next size up are littlenecks, then topnecks. Above that are the cherrystones, and the largest are called quahogs or chowder clams.

    Littlenecks are nice because they're small and cook up really quickly. Just make sure you give them a soak to remove any grit, followed by a good scrub before cooking with them.

    Garlicky Littleneck Clams with Bacon + Wine Over Sautéed Spring Veggies: A bed of sautéed veggies makes the perfect base for this bacon-loaded seafood dish. Make sure you have plenty of crusty bread for dunking! #BaconMonth

    After purchasing some clams, I was at a produce vendor grabbing a few veggies when I saw my friend Luis, who owns the local coffee shop in my town (which, by the way, is fabulous and just won Best of Westchester's Best Latte! Yay, Ossining!!).

    Luis saw the items that I was getting and started buying the same things, joking around that he was copying my shopping.

    I already had some tomatoes and asparagus, so he grabbed those, and I saw that he was eyeing the shiitake mushrooms, so I snagged a few of those as well.

    We jokingly turned it into a contest to see who could make a better meal with the ingredients we bought.


    A post shared by Ashley Covelli (@bigflavors) on May 6, 2017 at 9:39am PDT

    After plenty of laughs, I came home with a bounty of beautiful ingredients and started thinking about what I wanted to cook with them.

    I love any dish that encourages the sopping up of juices with a nice piece of crusty bread (bonus points if that bread is grilled and garlic-rubbed!) and this dish is no exception!

    I cooked the veggies in one skillet and let them sit off to the side while I got the bacon nice and crispy in another pot, then steamed the clams in wine.

    When cooking clams, make sure to keep an eye on them. You want to stop the cooking process as soon as they all open up. The longer they sit on the heat after they've opened, the more likely they are to overcook. And nobody likes a rubbery clam.

    If any of your clams don't open up, they're no good and should be discarded.

    Garlicky Littleneck Clams with Bacon + Wine Over Sautéed Spring Veggies: A bed of sautéed veggies makes the perfect base for this bacon-loaded seafood dish. Make sure you have plenty of crusty bread for dunking! #BaconMonth

    These clams turned out to be nice and plump, and when paired with all that smoky bacon... YUM.

    I really enjoyed the mix of veggies and meat in this dish, and my family absolutely loved it as well. This made just the right amount of food for me, my husband, and our 5-year-old. It could definitely be stretched to 4 servings if you had a salad or some other side dish to go with it.

    You can also easily just add some more clams to the pot to up the number of servings you'll get out of this recipe. It's total date night food, too, and it doesn't take forever to prepare.

    Now that's my kind of meal!

    Garlicky Littleneck Clams with Bacon + Wine Over Sautéed Spring Veggies: A bed of sautéed veggies makes the perfect base for this bacon-loaded seafood dish. Make sure you have plenty of crusty bread for dunking! #BaconMonth

    Curious to see what everyone else is whipping up for this week's bacon extravaganza? Check out the full list here:

    Aug 2nd Bacon Month Collage

    Crock Pot Bacon Ranch Cheesy Chicken Hash

    Bacon Wrapped Sweet Pepper Poppers

    Garlicky Littleneck Clams with Bacon + Wine

    Brown Sugar Bacon Wrapped Chicken Bites

    Bacon & Ranch Slow Cooker Potatoes

    BLT Skewers with Grilled Cheese Bites

    Zucchini Noodle Salad with Bacon and Tomatoes

    Bacon Cheddar Ranch Chicken Salad

    Bacon Caramelized Onion Dip

    Looking for more of my own bacon favorites? Check out these 5-star recipes:

    • Instant Pot Chicken, Bacon, and Potato Soup
    • Red Lentil Fusilli with Bacon, Butternut Squash, and Spinach
    • Instant Pot "Baked" Beans
    • Cheesy Bacon + Apple Croissants
    • Bacon and Caramelized Onion Jam
    • Maple Roasted Butternut Squash Pizza with Brussels Sprouts, Bacon + Pomegranate
    • Single-Skillet Bacon-Rosemary Chicken Thighs with Roasted Tomatoes
    • Bourbon Bacon Pecan Pie with a Whole Wheat Crust
    • Bacon and Caramelized Onion Jam Naan Pizza with Gorgonzola and Apples

    📖 Recipe

    Garlicky Littleneck Clams with Bacon + Wine Over Sautéed Spring Veggies

    Garlicky Littleneck Clams with Bacon + Wine Over Sautéed Spring Veggies: A bed of sautéed veggies makes the perfect base for this bacon-loaded seafood dish. Make sure you have plenty of crusty bread for dunking! #BaconMonth
    A bed of sautéed veggies makes the perfect base for this bacon-loaded seafood dish. Make sure you have plenty of crusty bread for dunking!
    Big Flavors from a Tiny Kitchen - Ashley Covelli
    No ratings yet
    Print Recipe Pin Recipe
    Servings: 2 -3 Servings
    Course: Dinner
    Cuisine: Italian
    Prep Time 10 minutes mins
    Cook Time 20 minutes mins
    Total Time 30 minutes mins

    Ingredients
     

    For Veggies:
    • 2 tablespoons olive oil
    • 2 cloves garlic minced
    • 2 tablespoons thinly sliced shallot about ½ of a medium-large shallot
    • 2 heads Shanghai bok choy stem end removed, then cut into 1-inch wide slices, dark green parts separated
    • ½ cup sliced shiitake caps from about 10 mushrooms
    • ¾ cup chopped tomatoes
    • 1 bunch asparagus about 12 stalks, trimmed and cut into 1-inch long pieces
    • ½ cup water
    • Kosher salt and freshly cracked black pepper to taste
    For Clams:
    • 5-6 slices bacon sliced into lardons (about 1 cup total)
    • 2 cloves garlic smashed
    • 2 tablespoons thinly sliced shallot about ½ of a medium-large shallot
    • ¾ cup chopped tomatoes
    • 24 little neck clams soaked and scrubbed
    • ½ cup white wine I used Pinot Grigio
    • Fresh snipped chives for serving (optional)
    • Crusty bread for dunking (optional)

    Instructions
     

    1. For Veggies: Heat a large skillet over medium-high heat. Add garlic and shallot and cook until fragrant and starting to soften, about 1-2 minutes. Add the thick ends of the bok choy to the skillet, season with salt and pepper, and sauté, stirring occasionally, until they start to get tender, about 3 minutes.
    2. Reduce heat to medium and add the dark green ends of the bok choy, mushrooms, and tomatoes to the pan and season with salt and pepper. Continue to cook, stirring occasionally, until the tomato melts down into the rest of the veggies. Add asparagus and water and cook until the asparagus is just tender. Set aside, covered, to keep warm while you prepare the clams.
    3. For Clams: Place bacon in a large saucepan and cook over medium-high heat, stirring occasionally. until crispy. Remove bacon to a paper towel lined plate and discard all but 1-2 tablespoons of the bacon grease from the pan.
    4. Add garlic and shallot to the pan and cook until they start to brown, stirring occasionally, about 2 minutes. Add tomato and let cook for another minute or 2 until it melts down a bit. Add clams to the pan along with wine and cover with a tight-fitting lid. Cook, covered, until the clams are fully opened, about 5 minutes. Remove lid and scatter bacon over the cooked clams.
    5. Serve clams on top of the sautéed veggies with snipped chives scattered on top and a side of crusty bread for dunking, if desired.

    Did you make this recipe?

    Leave a comment + star rating below to let people know how it was!
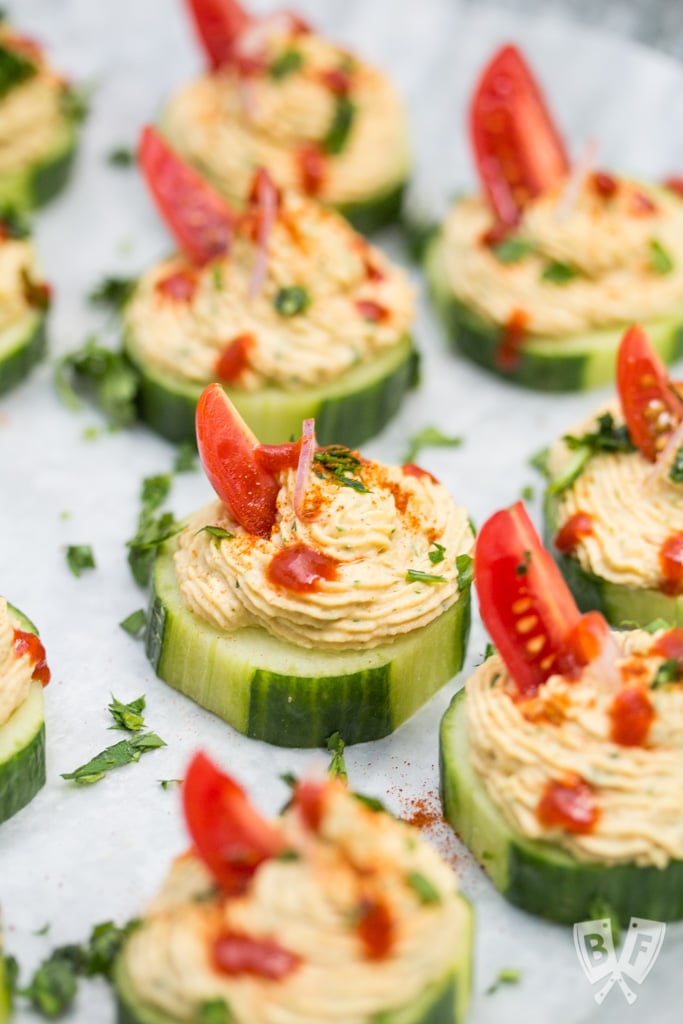
    Garlicky Littleneck Clams with Bacon + Wine Over Sautéed Spring Veggies: A bed of sautéed veggies makes the perfect base for this bacon-loaded seafood dish. Make sure you have plenty of crusty bread for dunking! #BaconMonth

    Tropical Superfruit Smoothie Bowl

    August 1, 2017 by Ashley 6 Comments

    Text reads, "Big Flavors Eleventh Blogiversary".

    This post has been compensated as part of my ongoing partnership with Barlean's and may contain affiliate links. As always, all opinions are 100% my own.

    This tropical smoothie bowl is loaded with antioxidants and Omega-3s and is ready in under 5 minutes! An easy, delicious way to wake up and eat your greens!

    #ad This tropical smoothie bowl is loaded with antioxidants and Omega-3s and is ready in under 5 minutes! An easy, delicious way to wake up and eat your greens! #ChillWithBarleans

    Before we dive in to this vibrant bowl of goodness, I wanted to take a moment to say THANK YOU to all of my readers and supporters for making the last ELEVEN (!!!) years so awesome.

    Big Flavors started as a hobby to take my mind off of my day job back on August 1, 2006, and it has grown by leaps and bounds into something that I'm super proud of.

    Thanks for all of the questions, suggestions, and feedback, and social media love over the years! I have some big things in the works and hope to continue inspiring you to get in the kitchen and make something delicious for yourself and your loved ones.

    This year has been a little tough for my family on a personal level with losses and sickness and lots of bumps in the road, but food has always been my favorite way to get back into a comfortable, happy place.

    I've also been working behind-the-scenes cleaning up and revamping old posts to offer better ingredient lists, instructions, and photos.

    I have so many delicious things to share, and I'll have more time to do that once my kiddo starts kindergarten next month. Time sure does fly, right?

    And now, back to this goooooorgeous smoothie bowl!

    #ad This tropical smoothie bowl is loaded with antioxidants and Omega-3s and is ready in under 5 minutes! An easy, delicious way to wake up and eat your greens! #ChillWithBarleans

    Smoothies are a delicious way to start any day, and when you make them into smoothie bowls, they can be even more fun!

    I love using a fun mix of flavors, colors, and textures on top of smoothie bowls to accentuate whatever is going on in the actual blended smoothie.

    For this particular bowl, I made a quick blend of coconut water, ice, and Strawberry-Kiwi Superfruit Greens from Barlean's. The greens are a powder that you can mix right into water, juice, or yogurt. The canister comes with a scoop for easy measuring.

    It's been pretty hot here in New York lately, so I figured I'd enjoy something nice and icy cold. I also wanted to try out the Piña Colada Fish Oil Omega Swirl with this smoothie bowl.

    I'll admit I was a little skeptical about trying fish oil in this format. I take fish oil supplements and love seafood, but I was expecting the swirl to taste... fishy. Which is not something I'd typically associate with a smoothie or smoothie bowl. But let me tell you - Barlean's really managed to harness the goodness of fish oil supplements in a creamy, emulsified form that tastes like dessert. Not fishy at all.

    If you've ever had trouble swallowing large supplements, this is going to be a total game changer for you! And by emulsifying the oil into these swirls, the Omega-3s are more absorbable to your body - 3x more than standard fish oil. You can add it to your smoothies, use it as a topping, or eat it right off the spoon.

    Even my kid loved the flavor. They have several flavors, and I'm looking forward to trying the others out. I'm even going to give one away at the end of this post, so read on if you'd like to win one to try out on your own!

    #ad This tropical smoothie bowl is loaded with antioxidants and Omega-3s and is ready in under 5 minutes! An easy, delicious way to wake up and eat your greens! #ChillWithBarleans

    After drizzling the Omega Swirl on top of my smoothie, I sprinkled on some of the dried items I had hanging out in my pantry. I went with dried pineapple, toasted coconut flakes and candied orange peel to go with the whole tropical vibe, and added some roasted, salted pepitas for crunch.

    I also added a bit of Energy Blend (a mix of flax, chia, coconut, and Panax Ginseng), but you could use all chia or flax seeds if you have that at home. Or skip it altogether. The beauty of bowls like this is that you can use what you have on hand.

    And keeping an interesting mix of dried fruit, nuts, and seeds really helps you avoid getting into a breakfast rut. I like keeping a bunch of different types of nuts and seeds in the freezer - they stay fresh much longer and the oils won't spoil.

    It's also nice to have healthier snack options in the house, especially when snack o'clock rolls around.

    #ad This tropical smoothie bowl is loaded with antioxidants and Omega-3s and is ready in under 5 minutes! An easy, delicious way to wake up and eat your greens! #ChillWithBarleans

    We really enjoyed the bright, fruity flavor combination of these smoothie bowls. It was perfect for summer, and I can imagine it being a nice way to transport myself to a tropical island in the middle of the winter months, too.

    Looking for more of our favorite ways to start the day? Check out these recipes:

    • 5-Ingredient Samoa Cereal Bowls
    • Our Favorite Buttermilk Pancakes
    • Kiwi, Spinach, Pineapple & Banana Smoothie Bowls
    • Chunky Monkey Greek Yogurt Parfaits
    • Waffle Pulled Pork Eggs Benedict
    • Mom & Tot Creamsicle Smoothies
    • Ashwagandha Chai Porridge

    📖 Recipe

    Tropical Superfruit Smoothie Bowl

    Overhead view of Tropical Superfruit Smoothie Bowls with colorful toppings.
    This tropical smoothie bowl is loaded with antioxidants and Omega-3s and is ready in under 5 minutes! An easy, delicious way to wake up and eat your greens!
    Big Flavors from a Tiny Kitchen - Ashley Covelli
    No ratings yet
    Print Recipe Pin Recipe
    Servings: 1 Serving
    Course: Smoothie
    Cuisine: American
    Prep Time 5 minutes mins
    Total Time 5 minutes mins

    Ingredients
     

    For Smoothie:
    • 8 ounces coconut water
    • 1 scoop Barlean's Strawberry-Kiwi Superfruit Greens
    • 2 cups ice cubes
    For topping:
    • 2 teaspoons Barleans Piña Colada Fish Oil Omega Swirl
    • 1 tablespoon dried pineapple
    • 1 tablespoon toasted coconut flakes
    • 1 tablespoon candied orange peel
    • 1 tablespoon roasted salted pepitas
    • 1 tablespoon Barleans Energy Blend or chia seeds

    Instructions
     

    1. Place coconut water, Superfruit Greens, and ice cubes in a blender and process until smooth.
    2. Pour into a bowl, drizzle with Omega Swirl, and sprinkle on rows of your favorite toppings (about 1 tablespoon each). Grab a spoon and enjoy!

    Did you make this recipe?

    Leave a comment + star rating below to let people know how it was!
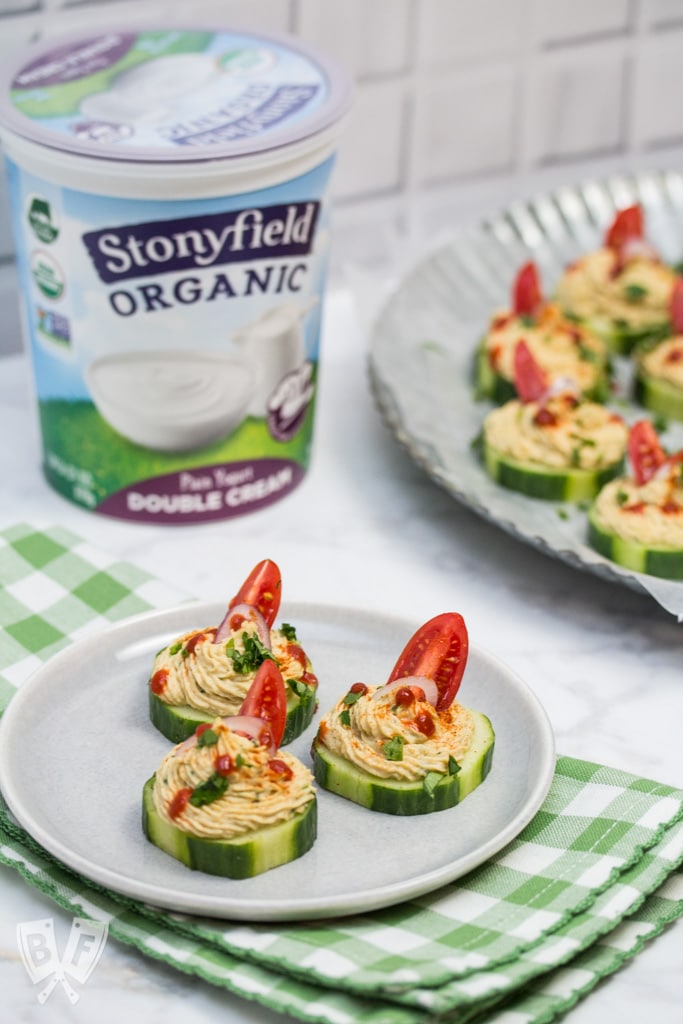
    #ad This tropical smoothie bowl is loaded with antioxidants and Omega-3s and is ready in under 5 minutes! An easy, delicious way to wake up and eat your greens! #ChillWithBarleans

    Tuna Tostada with Avocado Dressing + Chipotle Sour Cream

    July 25, 2017 by Ashley 10 Comments

    Tuna Tostada with Avocado Dressing + Chipotle Sour Cream (#ad): These bite-sized beauties have a Mexican flair that will wow your dinner party guests. You'll love how easy this tuna tostada appetizer is to put together!

    Special thanks to Tonnino for sponsoring this post. As always, all opinions are 100% my own. Thank you for supporting the brands that keep me creative in my tiny kitchen!

    These bite-sized beauties have a Mexican flair that will wow your dinner party guests. You'll love how easy this tuna tostada appetizer is to put together!

    Tuna Tostada with Avocado Dressing + Chipotle Sour Cream (#ad): These bite-sized beauties have a Mexican flair that will wow your dinner party guests. You'll love how easy this tuna tostada appetizer is to put together!

    A while back, I was invited to a dinner party in New York City hosted by Tonnino - a company touting "a better tuna for a better you".

    I was intrigued by the idea - 100% yellowfin fillets with lower mercury levels, caught in the wild and jarred by hand. The event included a live cooking demo with Chef Roblé, who showcased a variety of recipes using Tonnino's offerings.

    Chef Roblé created a menu with flavors from all over the globe to really demonstrate the quality and versatility of the tuna. Everything was delicious, and he and his team were knowledgeable, friendly, and entertaining while cooking up a storm.

    My favorite bite of the evening was his Tuna Tostada.


    A post shared by Ashley Covelli (@bigflavors) on Apr 27, 2017 at 8:11pm PDT

    All of the dishes were out of this world delicious - I couldn't believe that these little jars of tuna really tasted that good! I had seen Tonnino in my local grocery store before, but the price tag is a bit steep, so I was a little skeptical.

    After actually trying it, I totally get it and it's absolutely worth the cost. The oil in the jars is so tasty that you can drizzle it over salad greens, top it with the tuna, and have a deliciously well seasoned (and dressed!) salad.

    I haven't seen quality like that from pre-cooked tuna before, and it really got me thinking about the possibilities for using their tuna in my tiny kitchen.

    Tonnino shared Chef Roblé's tuna recipes with me, and I couldn't wait to make the tostadas at home!

    This particular recipe calls for tuna fillets with jalapeño in olive oil, but I've made it a few times now and it's great with the Ventresca tuna in olive oil as well. I've also done 1 jar of the jalapeño and 2 of the Ventresca to keep the heat level down a little when I was cooking for people who weren't into spicy food.

    Tuna Tostada with Avocado Dressing + Chipotle Sour Cream (#ad): These bite-sized beauties have a Mexican flair that will wow your dinner party guests. You'll love how easy this tuna tostada appetizer is to put together!

    This dish has 3 main components. The 2 sauces (avocado dressing and chipotle sour cream) can be prepped in advance and stored in the refrigerator. If you get that ready ahead of time, this appetizer really does come together quickly and is great for entertaining!

    Instead of using the food processor for both sauces (and having to clean it out in between), I prefer to make the avocado dressing in it and then do the chipotle sour cream by just chopping the chipotle pepper by hand and stirring that sauce together in a bowl.

    For the tortillas, you can cut down regular sized ones with a round cookie/biscuit cutter or you could buy those little tortilla scoop chips and just fill them. The rounds are super easy to make though, and they look really pretty.

    You could also buy tostada shells and make larger ones for more of a main course type of dish.

    Tuna Tostada with Avocado Dressing + Chipotle Sour Cream (#ad): These bite-sized beauties have a Mexican flair that will wow your dinner party guests. You'll love how easy this tuna tostada appetizer is to put together!

    I made this dish for a dinner party at my house and people absolutely LOVED them! The sauces were so great with each bite and we really enjoyed the combination of flavors.

    I'd advise doubling the avocado dressing so you can have more to be able to spread on the bottoms of each tostada. I doubled the entire recipe for another party that I attended and didn't have quite enough to go around. It was still delicious, but that little extra layer on the bottom of each chip is really nice.

    This appetizer recipe was such a big hit at the party I brought them to that several people asked me for the recipe. They couldn't believe how flavorful the tuna was! Needless to say, new fans were made, and I'm always happy to share tips for new products that I find to be so awesome.

    Tuna Tostada with Avocado Dressing + Chipotle Sour Cream (#ad): These bite-sized beauties have a Mexican flair that will wow your dinner party guests. You'll love how easy this tuna tostada appetizer is to put together!

    There are currently 8 varieties of the jarred Tonnino tuna, as well as a canned variety.

    You can even "trace your tuna" by entering the information from your specific can of tuna, and see where your particular jar tuna was sourced from.

    What are your favorite party foods? I'd love to hear about them in the comments section below!

    Tuna Tostada with Avocado Dressing + Chipotle Sour Cream (#ad): These bite-sized beauties have a Mexican flair that will wow your dinner party guests. You'll love how easy this tuna tostada appetizer is to put together!

    Looking for more appetizer favorites? Check out these 5-star recipes:

    • Marcel Vigneron's Chimi-Verde Dip
    • Patatas Bravas with Chipotle Aioli
    • Marcona Almond + Dried Cherry Popcorn with Crispy Rosemary
    • No Mayo Deviled Eggs
    • Smoked Salmon Roll-ups
    • Chicken Quesadillas with Chipotle Ranch Dip
    • Grilled Niçoise Salad Flatbreads
    • Cheesy Bacon + Apple Croissants
    • Garlicky Goat Cheese + Herb Stuffed Peppadews

    📖 Recipe

    Tuna Tostada with Avocado Dressing + Chipotle Sour Cream

    Mini tuna tostadas on a platter with lime and cilantro.
    These bite-sized beauties have a Mexican flair that will wow your dinner party guests. You'll love how easy this tuna tostada appetizer is to put together!
    Big Flavors from a Tiny Kitchen - Ashley Covelli
    No ratings yet
    Print Recipe Pin Recipe
    Servings: 4 Servings (More as an appetizer)
    Course: Main Dish
    Cuisine: Mexican
    Prep Time 20 minutes mins
    Cook Time 10 minutes mins
    Total Time 30 minutes mins

    Ingredients
     

    For Tostadas:
    • 4 small corn tortillas or pre-made tostada shells
    • ½ cup peanut oil
    • Sea salt to taste
    For Avocado Dressing:
    • 1 ripe haas avocado skin and pit removed
    • 1 tablespoon sour cream
    • ¼ teaspoon ground cumin
    • Juice of half a lime
    • Sea salt to taste
    For Chipotle Sour Cream:
    • ½ cup sour cream plain Greek yogurt, or Mexican crema
    • 1 chipotle pepper from the can in adobo sauce
    • 2 tablespoons ketchup
    • Sea salt to taste
    To Assemble:
    • 3 6.7-ounce jars Toninno tuna with Jalepeño, drained, cut into large chunks and jalepeños chopped
    • 2 scallions washed, ends trimmed and cut into rings
    • ¼ cup fresh cilantro leaves washed and dried
    • 1 each lime cut into 4 wedges

    Instructions
     

    1. Preheat the oven to 325°F. Lightly brush both sides of the tortillas with oil and season with salt. Place tortillas onto a cookie sheet or bake sheet and toast in to oven until crisp, about 10 minutes. When crisp, transfer onto paper towels to cool.
    2. Combine all the ingredients for the avocado dressing in a food processor and blend until smooth. This can be prepared ahead of time if kept in a small container with plastic wrap pressed onto the surface.
    3. Combine all ingredients for the chipotle cream in a food processor. Blend until smooth. Alternately you can chop the chipotle and stir the ingredients together. This can hold covered in the fridge for up to two weeks.
    4. To assemble, dress the tuna chunks with the avocado purée in a bowl. Spread any remaining avocado onto the tostada shells and evenly distribute dressed tuna on each shell. Drizzle with chipotle sour cream and top with scallion slices and cilantro leaves. Serve with a lime wedge and enjoy.

    Notes

    Recipe slightly adapted from Chef Roble, printed with permission from Tonnino Tuna.
    Big Flavors Rating: 5 Stars

    Did you make this recipe?

    Leave a comment + star rating below to let people know how it was!
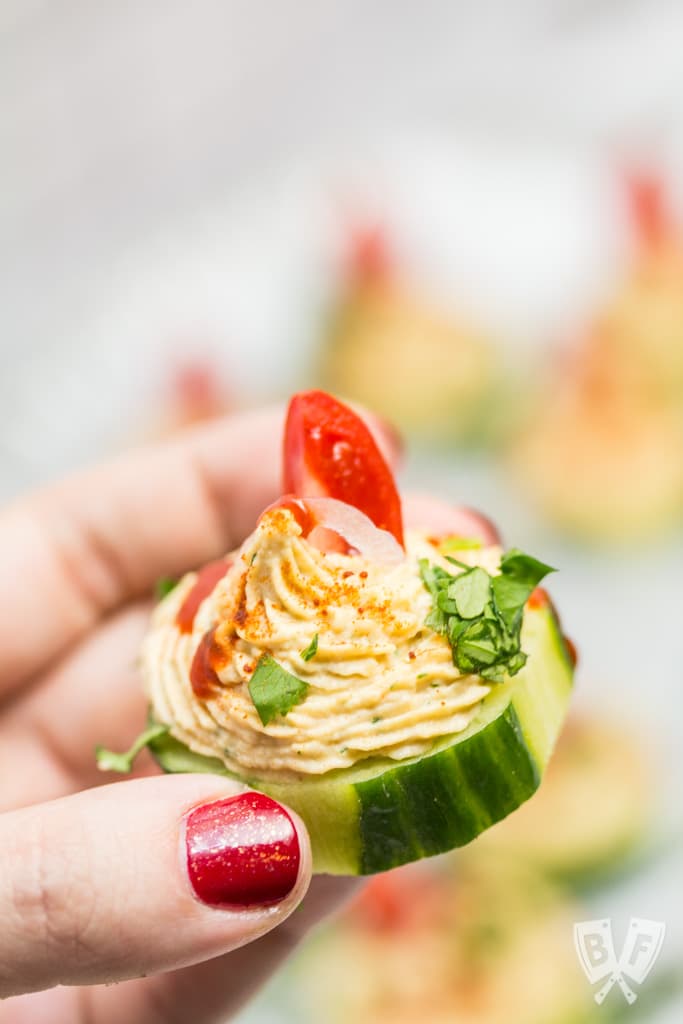
    Tuna Tostada with Avocado Dressing + Chipotle Sour Cream (#ad): These bite-sized beauties have a Mexican flair that will wow your dinner party guests. You'll love how easy this tuna tostada appetizer is to put together!

    Sausage and Peppers

    July 21, 2017 by Ashley 45 Comments

    Overhead view of a dutch oven filled with sausages, peppers, and onions.

    This simple, classic Italian comfort food recipe makes a perfect weeknight meal and is easily scaled up to feed a crowd. Inspired by my Calabrese father-in-law!

    Sausage and peppers is one of the first traditional Italian recipes that I was introduced to back when my husband and I first started dating.

    At the time, I was an incredibly picky eater, and I did not like sausage at all.

    OK, there was one exception.

    True to my Midwestern roots, I could go to town on a plate of cheddar cheese, crackers, and summer sausage. YUM.

    But as for any other type of sausage, I was not a fan.

    Overhead view of a Dutch oven full of sausage, peppers, and onions.

    My Italian in-laws always keep a well-stocked refrigerator (2 refrigerators, actually!).

    They are stocked with lots of food items that I didn't grow up with (I'm looking at you, broccoli rabe), and there are always several types of sausage.

    Living under their roof when I first moved to New York really got me excited about trying more new and different types of food - even some that were outside of my comfort zone back in 2004.

    My father-in-law is a phenomenal cook. A few of my favorite recipes that I learned from him are:

    • Calabrese Potato Salad with Green Beans + Tomatoes
    • Settino's Italian Bruschetta
    • Baked Chicken Thighs with Potatoes and Peas
    • Settino's Italian Stuffed Mushrooms

    He's originally from Calabria, Italy, and spent most of his childhood in Belgium before moving to New York in 1963.

    As a toolmaker, his work hours got him back home in the mid-afternoon, so he started cooking delicious dinners as a hobby.


    And the award for best FIL and #grill master goes to... 🔥🔥🔥 #grilling up some #Italian #sausage & peppers, #chicken & more for #dinner tonight.

    A post shared by Ashley Covelli (@bigflavors) on Jul 3, 2016 at 2:45pm PDT

    In fact, we used to cook together almost every night after work while I lived there.

    It was an absolute blast, and we may or may not have enjoyed a hearty amount of wine during that process.

    We improvised many meals together, and it really got me comfortable cooking for the family.

    He cooks based on his mood and what's hanging around in that incredibly well-stocked kitchen.

    He rarely uses a recipe, and you'll never have a bad meal in his house. You'll also never get the same exact meal twice.

    But me? Improvise recipes every single time? Nope.

    I want to be able to make the same thing more than once and be able to share the deliciousness with other people so they can enjoy it with their families as well.

    I do a lot more improvisation now than I used to, but I do like documenting successes and failures in the kitchen.


    My kiddo learning the art of #baking #creampuffs w grandpa. #dessert #kidsofinstagram

    A post shared by Ashley Covelli (@bigflavors) on Jan 16, 2017 at 2:20pm PST

    I've been making sure that I spend time cooking with him while measuring ingredients and taking copious notes so that recipes like this classic sausage & peppers can be made for years and years to come.

    And I've made my version for him several times now, and it got an enthusiastic stamp of approval from him.

    Fantastico!

    Sausage and peppers served as sandwiches on 2 plates.

    Look for Italian sausage in the grocery store in the refrigerated meat section, usually near the pork chops and roasts. You'll typically see 2 types of Italian sausage - hot and sweet.

    The sweet sausage generally contains fennel, which was initially the reason I wasn't a fan of sausage, but it has since grown on me.

    I like using a mix of hot and sweet when I make this dish for my family.

    The hot is sometimes pretty spicy, and my son prefers the sweet.

    There's a little something for everyone!

    You can eat this dish as is, slice it up and put it on top of pasta, or get some nice crusty bread and turn it into sandwiches.

    Don't forget to sop up the pan juices - they pack a ton of flavor!

    You can even make this on the grill or in pizza form!

    Sliced pizza topped with Italian sausage and peppers.

    This dish is super simple and a great way to enjoy a delicious Italian comfort food dinner in your own home.

    Looking for more Italian-inspired favorites? Check out these 5-star recipes:

    • Pork Scallopini with White Bean-Tomato Salad
    • My Favorite Garlic Bread
    • Ravioli Lasagna
    • Antipasto Pasta Salad
    • Garlicky Mushroom Ricotta Pizza with Wild Arugula + Aged Balsamic
    • Skillet Lasagna with Lamb, Ricotta + Mint
    • Great Grandma Francesca Cardile's Cookies
    • Balsamic Roasted Grape Tomatoes Over Angel Hair
    • Pax Romana's Quinoa Salad with Mixed Vegetable, Goat Cheese & Orange Dressing
    • Turdilli & Chinudille (Traditional Italian Christmas Cookies)
    • Skillet Garlic Parmesan Bread
    • Ricotta Cookies

    📖 Recipe

    Sausage and Peppers

    Sausage and peppers in a dutch oven.
    This simple, classic Italian comfort food recipe makes a perfect weeknight meal and is easily scaled up to feed a crowd. Inspired by my Calabrese father-in-law!
    Big Flavors from a Tiny Kitchen - Ashley Covelli
    5 from 10 votes
    Print Recipe Pin Recipe
    Servings: 4 Servings
    Course: Main Dish
    Cuisine: Italian
    Prep Time 5 minutes mins
    Cook Time 50 minutes mins
    Total Time 55 minutes mins

    Ingredients
     

    • 3 tablespoons olive oil divided
    • 6 Italian sausages hot, sweet, or a mix of both
    • 1 large white onion sliced
    • 1 large red bell pepper sliced
    • 1 large green bell pepper sliced
    • ½ teaspoon dried oregano
    • ½ teaspoon kosher salt
    • ¼ teaspoon freshly cracked black pepper
    • ¼ cup white wine
    • Crusty bread for serving

    Instructions
     

    1. Preheat oven to 375°F.
    2. Heat 2 tablespoons oil in a large Dutch oven over medium-high heat. Add sausages and sear until browned on both sides.
    3. Add onion and bell peppers. Drizzle with remaining tablespoon of oil and season with oregano, salt and pepper. Pour wine over top and give it a stir. Transfer to preheated oven and cook, uncovered, for about 45 minutes, or until onions and peppers have cooked down and softened a bit.
    4. Serve sausage and peppers in crusty bread and prepare to meet your new favorite sandwich!

    Did you make this recipe?

    Leave a comment + star rating below to let people know how it was!
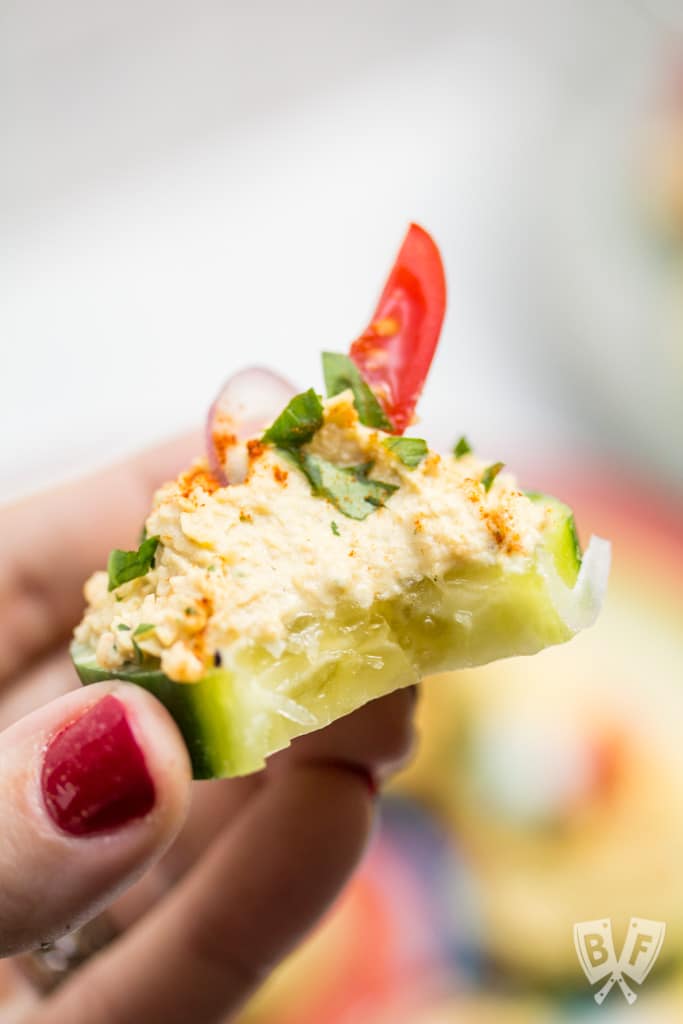
    Sausage and Peppers is a simple, classic Italian comfort food recipe makes a perfect weeknight meal and is easily scaled up to feed a crowd. Inspired by my Calabrese father-in-law!

    Taco Salad with Homemade Chipotle Ranch Dressing

    June 27, 2017 by Ashley 13 Comments

    Taco Salad with Homemade Chipotle Ranch Dressing (#ad) is a healthier spin on Taco Tuesday that still packs lots of Mexican flavor. The homemade taco seasoning and chipotle ranch come together in a snap! #StonyfieldBlogger

    This post has been compensated as part of my partnership with Stonyfield and Taylor Farms. As always, all opinions are 100% my own.

    A healthier spin on Taco Tuesday that still packs lots of Mexican flavor. The homemade taco seasoning and chipotle ranch come together in a snap!

    Taco Salad with Homemade Chipotle Ranch Dressing (#ad) is a healthier spin on Taco Tuesday that still packs lots of Mexican flavor. The homemade taco seasoning and chipotle ranch come together in a snap! #StonyfieldBlogger

    Taco night is always a hit with my family. We do some sort of tacos at least once a week. I often use a packet of taco seasoning or homemade seasoning mix on some ground beef, turkey, or bison, and serve it up alongside a bunch of toppings.

    I love meals like this because I can cut up whatever veggies I have on hand while the meat simmers away, and dinner is on the table in 20-30 minutes.

    Our typical go-to toppings are tomatoes, lettuce, red onion, cheddar cheese, avocado, hot sauce, and a big ol' dollop of Stonyfield Whole Milk Plain Greek Yogurt.

    Taco Salad with Homemade Chipotle Ranch Dressing (#ad) is a healthier spin on Taco Tuesday that still packs lots of Mexican flavor. The homemade taco seasoning and chipotle ranch come together in a snap! #StonyfieldBlogger

    I started using Greek yogurt instead of sour cream several years ago, because my lactose-intolerant husband and kiddo couldn't eat sour cream, but were totally fine with yogurt.

    But since I was the only one who could eat sour cream, we didn't go through it very fast. We already had Greek yogurt in the fridge (it's our favorite for breakfast parfaits), so I decided to give it a try on my tacos one night.

    Lo and behold, I loved it! It's nice and tangy, and the whole milk version is so rich that it's a fantastic substitute for sour cream.

    I even use it on my baked potatoes now, too. I'm at the point where I prefer it in almost all of the dishes where I previously used sour cream.

    And if you want something even more rich and luxurious, you have to check out the new Double Cream Yogurt. (Swoooooon...)

    Taco Salad with Homemade Chipotle Ranch Dressing (#ad) is a healthier spin on Taco Tuesday that still packs lots of Mexican flavor. The homemade taco seasoning and chipotle ranch come together in a snap! #StonyfieldBlogger

    Since it's already swimsuit season summer, I decided it would be nice to do a taco salad instead of standard tacos for Taco Tuesday dinner.

    My husband has been doing a keto diet lately, so he isn't eating tortillas anyhow. I added a handful of crushed tortilla chips to my salad, my son got a pile on the side of his, and we were all more than satisfied!

    For this particular salad, I wanted to make a cool, creamy dressing that would do the same job as a dollop of Greek yogurt on a taco, but with a bit of a kick.

    So I mixed some whole milk Greek yogurt with whole milk smooth & creamy to give it a thick-yet-pourable consistency.

    Taco Salad with Homemade Chipotle Ranch Dressing (#ad) is a healthier spin on Taco Tuesday that still packs lots of Mexican flavor. The homemade taco seasoning and chipotle ranch come together in a snap! #StonyfieldBlogger

    I remember the days when I would only use iceberg lettuce on my tacos. Maaaaaybe romaine. I grew up eating tacos with that crispy cool lettuce, so I just stuck with it.

    But then one day I had some baby arugula on hand and figured it might be a good substitute and let me tell you - I was blown away!

    I loved the peppery bite that it added to my tacos, and since it's a salad green that we often have on hand, it works out perfectly to throw a handful on tacos when we make them.

    I used baby arugula from Taylor Farms for this particular taco salad. Taylor Farms works with over 100 family growers across the country to produce lots of deliciously green goodies that can be found in your produce aisle.

    Their salad greens are delicious, and when I'm hard-pressed for time, I'm a big fan of having one of their salad kits for lunch, or served alongside dinner.

    The Caesar Salad Kit is phenomenal - one of the tastiest Caesar dressings I've ever had! And I'm a total sucker for the Homestyle Ranch & Cheddar Salad Kit - the onion crisps are the perfect topping.

    Taco Salad with Homemade Chipotle Ranch Dressing (#ad) is a healthier spin on Taco Tuesday that still packs lots of Mexican flavor. The homemade taco seasoning and chipotle ranch come together in a snap! #StonyfieldBlogger

    When it came to topping our taco salads, I decided to go for an "eat the rainbow" approach. I wanted these bowls to be vibrant and welcoming. Plus, my son really enjoys picking out a little of each color of topping to add to his salad. Use your favorites here, and feel free to mix-and-match whatever you have on hand.

    In making my rainbow of toppings, I wanted some purple cabbage, and the one at my local grocery store happened to be from Taylor Farms as well. I also opted for pre-shredded carrots to make prep easier.

    So while this may look like a lot of ingredients, much of it can be done in advance. You can chop your veggies while you cook the meat like I do, or do it in advance and have it all ready to go ahead of time. I find that I usually have plenty of time to prep all the toppings while the meat simmers away.

    The spice mix for the Chipotle Ranch dressing can be made and stored in your pantry. You can scale it up and make a big batch to fill a jar. Then, whenever you want to make your own ranch dressing, you just add a tablespoon of that mix to ½ cup each regular and Greek yogurt.

    Throw in some adobo sauce from a can of chipotle peppers, and your dressing is good to go! It keeps well in the fridge for several days, too.

    Taco Salad with Homemade Chipotle Ranch Dressing (#ad) is a healthier spin on Taco Tuesday that still packs lots of Mexican flavor. The homemade taco seasoning and chipotle ranch come together in a snap! #StonyfieldBlogger

    This salad was a big hit with my family. The dressing really took it to the next level. The added smokiness of the chipotle peppers brought a super rich flavor to the dish that we all enjoyed.

    And it was oh so creamy!

    Looking for more ways to use chipotle peppers? Check out some of our favorite recipes:

    • Chicken Quesadillas with Chipotle Ranch Dip
    • Patatas Bravas with Chipotle Aioli
    • Deep Dish Southwest Salad Pizza
    • Slow Cooker Chipotle Pork Tacos with Avocado + Chipotle Cremas
    • Mandarin Chipotle Pork Tacos
    • Aztec Torte with Honey Chipotle Cinnamon Mascarpone
    • Spicy Turkey Three-Bean Chili

    📖 Recipe

    Taco Salad with Homemade Chipotle Ranch Dressing

    Bowls of Taco Salad with Homemade Chipotle Ranch Dressing.
    A healthier spin on Taco Tuesday that still packs lots of Mexican flavor. The homemade taco seasoning and chipotle ranch come together in a snap!
    Big Flavors from a Tiny Kitchen - Ashley Covelli
    5 from 7 votes
    Print Recipe Pin Recipe
    Servings: 4 Servings
    Course: Salad
    Cuisine: Mexican
    Prep Time 15 minutes mins
    Cook Time 15 minutes mins
    Total Time 30 minutes mins

    Ingredients
     

    For Ranch Seasoning Mix:
    • 1 teaspoon dried parsley
    • 1 teaspoon kosher salt
    • ½ teaspoon freshly cracked black pepper
    • ½ teaspoon garlic powder
    • ½ teaspoon onion powder
    • ½ teaspoon dried dill
    • ¼ teaspoon dried thyme
    • ¼ teaspoon ground paprika
    • ⅛ teaspoon celery seed
    For Chipotle Ranch Dressing:
    • 1 tablespoon Ranch Seasoning Mix see above
    • ½ cup whole milk plain Greek yogurt I used Stonyfield
    • ½ cup whole milk plain yogurt I used Stonyfield
    • 1-2 tablespoons adobo sauce from canned chipotle in adobo depending how spicy you like it
    For Taco Meat:
    • 1 pound ground turkey chicken, or beef
    • 2 tablespoons tomato paste
    • 1 tablespoon chili powder
    • 1 teaspoon dried oregano
    • 1 teaspoon paprika
    • ½ teaspoon kosher salt
    • ½ teaspoon garlic powder
    • ½ teaspoon onion powder
    • ¾ cup water
    For Salad (mix and match your favorites):
    • 2 cups baby arugula
    • ¼ cup shredded cheddar cheese
    • ¾ cup canned corn drained
    • ¾ cup crushed corn tortilla chips
    • ½ cup chopped cherry or grape tomatoes
    • ¼ cup shredded purple cabbage
    • ¼ cup thinly sliced radishes
    • ¼ cup thinly sliced red onion
    • ¼ cup shredded carrots
    • 1 avocado peeled, pitted, and chopped

    Instructions
     

    1. For Chipotle Ranch Dressing: In a small bowl, mix together the ingredients for the Ranch Seasoning Mix (dried parsley through celery seed). Place 1 tablespoon of this mixture in a medium bowl, add Greek and plain yogurts and adobo sauce. Mix thoroughly, cover and refrigerate until ready to use (this makes about 1 cup of dressing, so you'll have plenty leftover. It keeps well in the fridge for several days).
    2. For Taco Meat: Heat a large, non-stick skillet over medium-high heat. Add meat and fry, breaking up the meat as it cooks, until browned all over. Drain excess fat from the pan (if there is any). Add tomato paste, chili powder, oregano, paprika, garlic powder and onion powder. Stir to combine and pour in water. Bring to a boil, then reduce the heat to medium and cook until the liquid is almost gone and meat is fully cooked, stirring occasionally, about 3 to 5 minutes. Set aside.
    3. For Salad: Place ½ cup baby arugula in each of 4 salad bowls. Top with ¼ each of the meat, cheese, corn, tortilla chips, tomatoes, cabbage, radishes, and carrots. Feel free to mix and match any of your favorite taco salad toppings here - this list is just my personal favorite. Serve with Chipotle Ranch dressing.

    Did you make this recipe?

    Leave a comment + star rating below to let people know how it was!
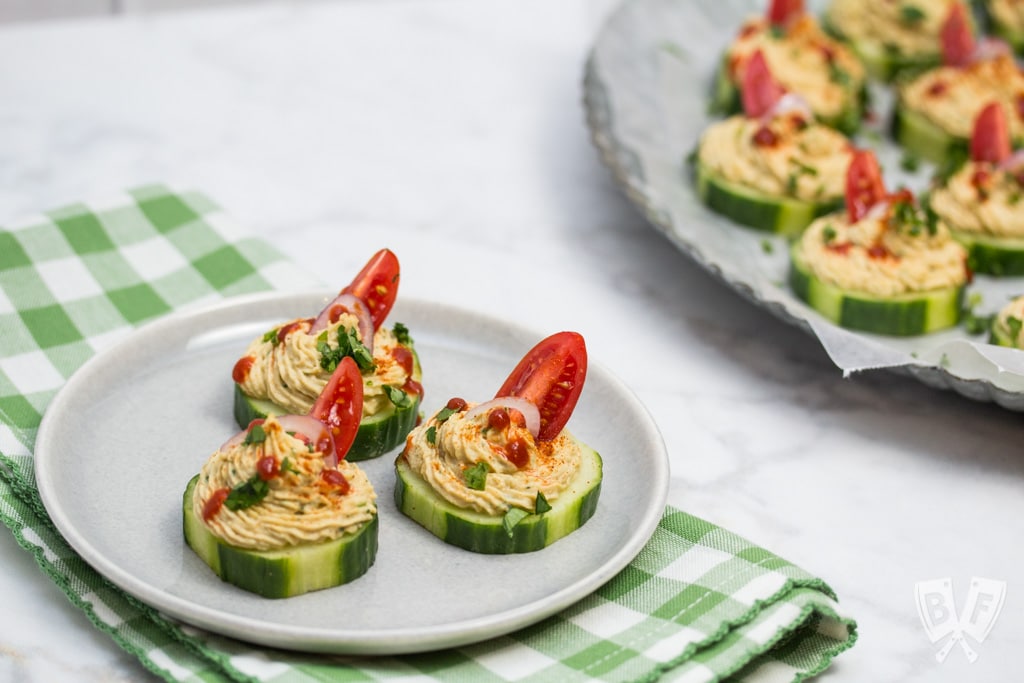
    Taco Salad with Homemade Chipotle Ranch Dressing (#ad) is a healthier spin on Taco Tuesday that still packs lots of Mexican flavor. The homemade taco seasoning and chipotle ranch come together in a snap! #StonyfieldBlogger

    Patatas Bravas with Chipotle Aioli

    June 15, 2017 by Ashley 19 Comments

    Patatas Bravas with Chipotle Aioli: (#ad) A Spanish tapas favorite that's easy to make at home using only a few ingredients! These crispy fried potatoes make a great addition to any meal. #chosenfoods #cocomayo #mambofoodie

    This post has been compensated as part of my partnership with Mambo Sprouts and Chosen Foods. As always, all opinions are 100% my own.

    A Spanish tapas favorite that's easy to make at home using only a few ingredients! These crispy fried potatoes make a great addition to any meal.

    Patatas Bravas with Chipotle Aioli: (#ad) A Spanish tapas favorite that's easy to make at home using only a few ingredients! These crispy fried potatoes make a great addition to any meal. #chosenfoods #cocomayo #mambofoodie

    Have you ever gone out for tapas? Tapas, in Spanish cuisine, are basically little appetizers - small plates/bites of food.

    If you've ever been to a tapas restaurant, you have no doubt encountered patatas bravas. They are a staple on any tapas menu. And there's such beauty in their simplicity -- crispy fried potatoes, often served with a spiced aioli.

    I've been wanting to try making patatas bravas at home for quite some time now, so when I got my hands on the new Coconut Oil Mayo from Chosen Foods, I knew the time had come!

    Patatas Bravas with Chipotle Aioli: (#ad) A Spanish tapas favorite that's easy to make at home using only a few ingredients! These crispy fried potatoes make a great addition to any meal. #chosenfoods #cocomayo #mambofoodie

    Let's talk about this mayo for a minute, shall we? My family is all.about.mayo. It's our condiment of choice for sandwiches. But we aren't fans of canola oil, and a lot of mayos are made with it.

    This Coconut Oil Mayo is made with cage-free, organic eggs. It's gluten-free, soy & canola free, and Non-GMO Project verified. And it tastes SO good! It's not coconutty at all, and the texture is silky smooth.

    I inquired about the sugar content, since my husband is doing a keto diet at the moment, because he told me that most mayo has a lot of sugar and is off limits for him. So I asked the brand and they told me there are less than .5 grams of sugar per serving.

    He came to the conclusion that he could happily enjoy this mayo and the chipotle aioli, but not the potatoes. It made him a very happy camper, to say the least.

    Patatas Bravas with Chipotle Aioli: (#ad) A Spanish tapas favorite that's easy to make at home using only a few ingredients! These crispy fried potatoes make a great addition to any meal. #chosenfoods #cocomayo #mambofoodie

    This is the 5th clean-label mayo in the Chosen Foods condiment collection. You can check out the rest of the line here. The Black Garlic and Harissa Avocado Oil Mayos are both aweeeesome, too. Yum.

    ::Moment of silence for the day I dropped a full jar of Avocado Oil Mayo in my tiny kitchen.::

    Patatas Bravas with Chipotle Aioli: (#ad) A Spanish tapas favorite that's easy to make at home using only a few ingredients! These crispy fried potatoes make a great addition to any meal. #chosenfoods #cocomayo #mambofoodie

    Anyhow, back to the patatas bravas. One of the best parts of this dish is the beautifully crispy exterior of these potatoes. Soaking the potatoes in cold water for 10 minutes (or longer, if you have more time) removes excess starch from the potatoes. Be sure to dry them well afterward so they'll crisp up.

    The other key to getting them nice and crispy is to get your oil really hot in a heavy-bottomed skillet, preferably cast iron. The reason for this is that the heat will hold more evenly on the bottom of the pan, even after items are introduced to the oil.

    I like using peanut oil for high-temperature frying, but sunflower oil, butter flavored coconut oil, or avocado oil could be good here, too.

    I browned the potatoes on 2 sides, then lowered the heat so the insides of the potatoes could finish cooking through.

    Patatas Bravas with Chipotle Aioli: (#ad) A Spanish tapas favorite that's easy to make at home using only a few ingredients! These crispy fried potatoes make a great addition to any meal. #chosenfoods #cocomayo #mambofoodie

    You can whip up the aioli while the potatoes are frying, or you can make it ahead of time and keep it in the fridge until you're ready to serve. It's only 4 ingredients, including salt, and can be stirred together in a bowl or made in the food processor. Totally your call.

    My food processor was being used for another dish the evening I made my patatas bravas, so I just stirred it together.

    I served this dish to my in-laws, and they L-O-V-E-D it. They couldn't get over how good the sauce was! I told them it was super simple, and my husband has been slathering and drizzling it on his lunches ever since.

    Patatas Bravas with Chipotle Aioli: (#ad) A Spanish tapas favorite that's easy to make at home using only a few ingredients! These crispy fried potatoes make a great addition to any meal. #chosenfoods #cocomayo #mambofoodie

    Looking to get in on this Coconut Oil Mayo action? It's available at select Kroger locations as well as online at chosenfoods.com.

    Craving more small plates? Check out some of our favorite appetizer recipes:

    • Marcona Almond + Dried Cherry Popcorn with Crispy Rosemary
    • No Mayo Deviled Eggs
    • Chicken Quesadillas with Chipotle Ranch Dip
    • Smoked Salmon Roll-ups
    • Cheesy Bacon + Apple Croissants
    • Top Chef All Star Marcel Vigneron's Chimi-Verde Dip
    • Cheesy Potato Skins with Smoky-BBQ Shredded Beets
    • Garlicky Goat Cheese + Herb Stuffed Peppadews
    • French-Inspired Deviled Eggs

    📖 Recipe

    Patatas Bravas with Chipotle Aioli

    Patatas bravas in a bowl with chipotle mayo alongside.
    A Spanish tapas favorite that's easy to make at home using only a few ingredients! These crispy fried potatoes make a great addition to any meal.
    Big Flavors from a Tiny Kitchen - Ashley Covelli
    No ratings yet
    Print Recipe Pin Recipe
    Servings: 4 to 6 Servings
    Prep Time 15 minutes mins
    Cook Time 20 minutes mins
    Total Time 35 minutes mins

    Ingredients
     

    For Patatas Bravas:
    • 1 pound new potatoes halved and diced into even-sized pieces
    • Peanut oil to coat the bottom of the skillet
    • Kosher salt
    For Chipotle Aioli:
    • 1 chipotle chile from can of chipotles in adobo sauce
    • ½ cup Coconut Oil Mayo
    • 1 teaspoon freshly squeezed lime juice
    • ¼ teaspoon kosher salt
    For Garnish (optional):
    • Chopped cilantro
    • Chopped green onion

    Instructions
     

    1. For Patatas Bravas: Place diced potatoes in a large bowl and cover with cold water by a few inches. Let soak for at least 10 minutes, then drain and dry thoroughly with a kitchen towel.
    2. While potatoes are soaking, heat a thin layer of peanut oil over medium-high heat in a large, heavy-bottomed skillet, preferably cast iron.
    3. Once oil is nice and hot, place dried potatoes in an even layer and fry until golden brown. Flip potatoes and let the other side brown as well. Once they are mostly browned all over, reduce heat to low and let cook, stirring occasionally, until tender when pierced with a knife, about 20-30 minutes total.
    4. Remove potatoes to a plate lined with a kitchen towel and sprinkle with a good pinch of salt while they're still nice and hot.
    5. For Chipotle Aioli: Place all ingredients (chipotle chile through salt) in a food processor and purée until smooth. Alternately, finely chop the chipotle chile and stir all the ingredients together in a small bowl.
    6. Serve patatas bravas with chipotle aioli alongside, sprinkling chopped cilantro and green onion over top, if desired.

    Did you make this recipe?

    Leave a comment + star rating below to let people know how it was!
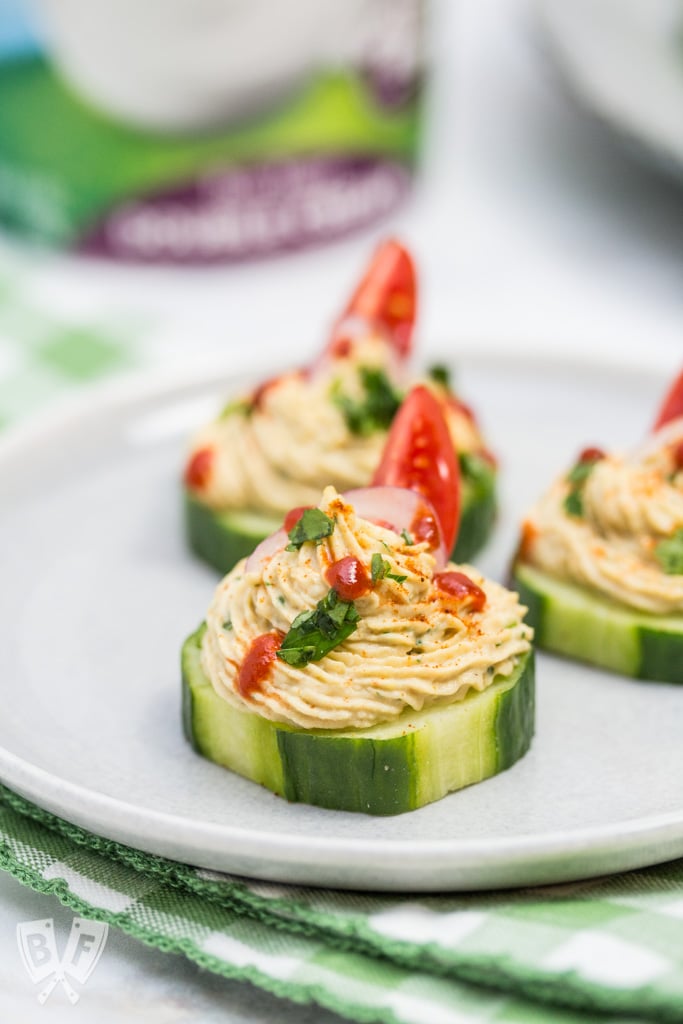
    Patatas Bravas with Chipotle Aioli: (#ad) A Spanish tapas favorite that's easy to make at home using only a few ingredients! These crispy fried potatoes make a great addition to any meal. #chosenfoods #cocomayo #mambofoodie

    Chicken Fajita Skewers over Cilantro Cauliflower Rice

    June 9, 2017 by Ashley 7 Comments

    Chicken Fajita Skewers over Cilantro Cauliflower Rice: A rich, flavorful marinade makes these fajitas on a stick the perfect excuse to fire up the grill! Add a paleo side for a low carb summer meal! #OrganicMoments #ad

    This post has been compensated as part of my partnership with Mambo Sprouts and Simply Organic. As always, all opinions are 100% my own.

    A rich, flavorful marinade makes these fajitas on a stick the perfect excuse to fire up the grill! Add a paleo side for a low-carb summer meal!

    Chicken Fajita Skewers over Cilantro Cauliflower Rice: A rich, flavorful marinade makes these fajitas on a stick the perfect excuse to fire up the grill! Add a paleo side for a low carb summer meal! #OrganicMoments #ad

    It's no secret that I am completely obsessed with a fan of fajitas. Chicken and steak are both on regular rotation in my house. It's one of the meals that my husband has perfected over the years, and it's my go-to request for him when he's cooking dinner.

    I even revamped the recipe for Our Favorite Steak Fajitas recently to reflect their new and improved awesomeness.

    But those fajitas... they take a while to cook and dirty quite a few dishes. Don't get me wrong, it's totally worth the extra time spent caramelizing the onions and cooking everything in batches in the cast iron skillet, but... some days you just need something simple.

    Enter the new line of Simmer Sauces from Simply Organic.

    Chicken Fajita Skewers over Cilantro Cauliflower Rice: A rich, flavorful marinade makes these fajitas on a stick the perfect excuse to fire up the grill! Add a paleo side for a low carb summer meal! #OrganicMoments #ad

    I was really excited to try these sauces out to see how they'd compare to homemade spice mixes, and let me tell you - I was super impressed!

    My family has been fans of Simply Organic for years now - their Adobo Seasoning is my go-to for nights when I don't know what to cook. It's good on e-v-e-r-y-t-h-i-n-g!

    The Classic Fajita Simmer Sauce is meant to be used with beef or chicken. The flavor is rich, bold, and smoky with just a little bit of heat. It was just the right amount for my family, including my 5-year-old, to enjoy.

    I thought it would be fun to try something a little different than our traditional fajitas cooked in a cast iron skillet for my first attempt using this sauce, and my mind went straight to the grill and food on a stick!


    A post shared by Ashley Covelli (@bigflavors) on Jun 3, 2017 at 5:14pm PDT

    I had cubed the chicken earlier in the day and used ¾ of the packet of Simmer Sauce as a marinade.

    I soaked some skewers in water right before I went to pick my husband up from the train station so they'd be ready when I got back for assembly time. After we got home, he prepped the grill while I skewered all of the ingredients.

    Now I realize that it looks fancy to have meat and veggies on the same skewers, but in my experience it's best to separate those items. The meat and veggies cook at different times, so separating things really helps you make sure everything is cooked evenly and properly.

    Chicken Fajita Skewers over Cilantro Cauliflower Rice: A rich, flavorful marinade makes these fajitas on a stick the perfect excuse to fire up the grill! Add a paleo side for a low carb summer meal! #OrganicMoments #ad

    I'm always looking for an excuse to throw tomatoes on the grill, and I figured they'd go great with the fajita skewers, and they totally did. Feel free to use any veggies you like or have on hand here though.

    My husband has been doing a keto diet for swimsuit season the last few months, so I've been trying to keep carbs at a minimum for him. (What exactly is a Ketogenic Diet, you ask? This article was super helpful helpful for me in figuring out what types of foods I could cook that would fit into his diet).

    I decided to forego the standard tortillas or Mexican rice in favor of a jazzed up, yet simple, cauliflower rice. We all enjoyed it, and I didn't even miss eating "regular" rice!

    Chicken Fajita Skewers over Cilantro Cauliflower Rice: A rich, flavorful marinade makes these fajitas on a stick the perfect excuse to fire up the grill! Add a paleo side for a low carb summer meal! #OrganicMoments #ad

    This cauliflower rice comes together really quickly, and you can make it before, during, or after you cook the skewers. I made it ahead and just left it sitting covered on the stovetop, off the heat, until we were ready to eat.

    Use whatever type of butter you like here. I'm obsessed with this butter flavored coconut oil lately, and it worked beautifully here. Plus, if you're using tofu or strictly veggies on your skewers, this meal would be totally vegan.

    Chicken Fajita Skewers over Cilantro Cauliflower Rice: A rich, flavorful marinade makes these fajitas on a stick the perfect excuse to fire up the grill! Add a paleo side for a low carb summer meal! #OrganicMoments #ad

    Another thing that makes this dish really special is grilled lime. It's tooootally optional, but very much encouraged. You just pop lime halves, cut-side down, onto the grill for a few moments until they get a little charred. Squeeze that juice over your skewers for a really nice pop of flavor at the end.

    I've been known to slather tortillas with plain Greek yogurt when I eat fajitas, so I served these skewers with a big ol' bowl for dipping.

    If you happen to have leftovers, this dish works great in a bowl! I reheated all the components in the microwave (with some water splashed over the chicken to prevent it from drying out), brushed it with some Simmer Sauce, and had a beautifully colorful Tex-Mex fajita bowl for lunch the next day.

    I highly recommend it!

    Chicken Fajita Skewers over Cilantro Cauliflower Rice: A rich, flavorful marinade makes these fajitas on a stick the perfect excuse to fire up the grill! Add a paleo side for a low carb summer meal! #OrganicMoments #ad

    And, for the record, I did also try some standard chicken fajitas simmered pretty much according to the package directions, and they turned out deliciously as well! I'm thrilled that we can get the deep flavor of fajitas in such a short amount of time. Perfect for when you need to get your weeknight fajita fix!

    Looking for more reasons to fire up your grill? Check out some of our favorite recipes:

    • Bar-B-Q Turkey Burgers with Grilled Pineapple Guacamole
    • Coffee Pork Chops
    • Bavarian Grilled Sand Shark with Lemon + Dill
    • Garlicky Beer + Tarragon Steamed Mussels
    • Grilled Steak with Spicy Latin Rub
    • Low Country Boil Kabobs
    • Grilled Niçoise Salad Flatbreads
    • Sokalbi Gui (Korean Barbecued Beef Short Ribs)
    • Root Beer-Can Chicken

    📖 Recipe

    Chicken Fajita Skewers over Cilantro Cauliflower Rice

    A platter of grilled chicken fajita skewers over cauliflower rice with dipping sauce.
    A rich, flavorful marinade makes these fajitas on a stick the perfect excuse to fire up the grill! Add a paleo side for a low carb summer meal!
    Big Flavors from a Tiny Kitchen - Ashley Covelli
    No ratings yet
    Print Recipe Pin Recipe
    Servings: 4 to 6 Servings
    Course: Dinner
    Cuisine: Mexican
    Prep Time 10 minutes mins
    Cook Time 20 minutes mins
    Total Time 30 minutes mins

    Ingredients
     

    For the Fajita Skewers:
    • 1 ¾ to 2 pounds boneless skinless chicken breast, cut into equal sized cubes
    • 1 8-ounce packet Simply Organic Classic Fajita Simmer Sauce, divided
    • 3 yellow onions cut into wedges
    • 3-4 bell peppers cut into equal sized chunks
    • 1 pint grape or cherry tomatoes
    For the Cauliflower Rice:
    • 1 head cauliflower
    • 2 tablespoons butter I used butter flavored coconut oil
    • 3 cloves garlic minced
    • ½ teaspoon dried cumin seed
    • ½ teaspoon kosher salt
    • ⅛ teaspoon freshly cracked black pepper
    • ½ cup chopped cilantro
    For Serving:
    • Plain Greek yogurt or sour cream
    • 1-2 limes cut in half if grilling, or into wedges if leaving raw

    Instructions
     

    1. For the Fajita Skewers: Place cubed in a medium bowl. Pour in ⅔ of the simmer sauce, reserving the remaining sauce for serving. Cover the bowl of chicken and place in the refrigerator to marinate for 2-6 hours.
    2. If using bamboo skewers, soak them in water for 20-30 minutes, then drain off water. Preheat grill to medium-high. Thread chicken onto skewers, discarding any marinade that remains in the bowl. Thread bell peppers, onions, and tomatoes on separate skewers. At this point you can also remove the reserved Simmer Sauce from the refrigerator so it warms up to room temperature for serving.
    3. Oil grill grates, place skewers on the grill. Cover and let cook, covered, until charred and cooked through to your liking, turning once to ensure even cooking. The chicken should take about 6 to 8 minutes, the peppers and onions will take longer, and the tomatoes will cook pretty quickly, so don't walk away for too long!
    4. If desired, you can also place lime halves, cut-side down, on the grill for a few moments until they get charred.
    5. For the Cauliflower Rice: Chop cauliflower into florets and grate in a food processor using the shredding disc (or use a box grater), working in batches and transferring to a bowl if needed.
    6. Heat 2 tablespoons butter in a large skillet over medium-high heat. Add garlic and cumin seed and sauté until fragrant, 1-2 minutes. Add cauliflower, season with salt and pepper. Sauté, stirring occasionally, until cooked through to your preferred doneness, about 3-5 minutes, making sure to stir and scrape the bottom of the pan. Taste for seasoning and add more salt if needed. Remove from heat, stir in cilantro.
    7. Serve skewers on cauliflower rice with a dollop of yogurt or sour cream and limes (grilled or raw) alongside. Feel free to brush the reserved Simmer Sauce over your chicken skewers, or use it as a dip as well!

    Did you make this recipe?

    Leave a comment + star rating below to let people know how it was!
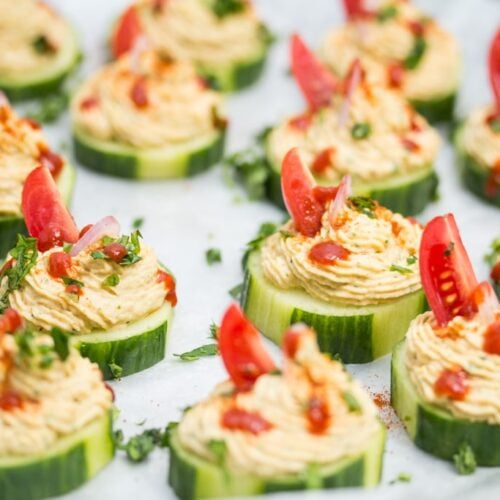
    Chicken Fajita Skewers over Cilantro Cauliflower Rice: A rich, flavorful marinade makes these fajitas on a stick the perfect excuse to fire up the grill! Add a paleo side for a low carb summer meal! #OrganicMoments #ad

    Our Favorite Sloppy Joe Sandwiches

    June 7, 2017 by Ashley 13 Comments

    Sloppy Joe sandwich with pickles and sweet potato fries

    Old fashioned comfort food at its best! Sloppy Joes are an easy weeknight meal that’s always a hit. Try switching the ground beef for turkey, bison, or vegan ground meat alternative and serve with roasted green beans and coleslaw.

    Our Favorite Sloppy Joe Sandwiches: Old fashioned comfort food at its best! Sloppy Joes are an easy weeknight meal that’s always a hit. Try switching the ground beef for turkey or bison next!

    Whenever I think of Sloppy Joes, I think of that school cafeteria scene from Billy Madison. While it’s true that Sloppy Joes can look less than appealing, there’s no arguing their status in the American Comfort Food Hall of Fame™.

    OK, full disclosure, I just googled that to see if it was really a thing and it isn’t. But it totally should be! I’d take a road trip to see what type of exhibits would be on display at a place like that!

    A while back, my my husband was digging through my old recipe posts and he came across our beloved (but often neglected) Sloppy Joes.

    Our Favorite Sloppy Joe Sandwiches: Old fashioned comfort food at its best! Sloppy Joes are an easy weeknight meal that’s always a hit. Try switching the ground beef for turkey or bison next!

    What a throwback INDEED! Sloppy Joes happen to be the very first thing I posted here on Big Flavors from a Tiny Kitchen back on August 1, 2006.

    It's a recipe that my mom used to make pretty often when I was a kid. The original version was from a Betty Crocker cookbook that she had at home. It's also the base for a chili recipe that my family loves, which is also due for a revamp here on Big Flavors!

    Since then, I have adapted the recipe a few times, including trying out several alternatives to beef. My family is a big fan of ground turkey in Sloppy Joes, and most recently, bison has been our go-to.

    Our Favorite Sloppy Joe Sandwiches: Old fashioned comfort food at its best! Sloppy Joes are an easy weeknight meal that’s always a hit. Try switching the ground beef for turkey or bison next!

    I decided that this was one of the posts that was in major need of an overhaul, so I’ve updated the recipe and images throughout. I mean, Sloppy Joes aren’t necessarily photogenic, ya know?

    But I’ve revamped them and I think they look (and taste) better than ever now! And, just for kicks, here’s a photo progression so you can see my attempts at prettify-ing a plate full of Sloppy Joe Sandwiches over the last 10+ years.

    Our Favorite Sloppy Joe Sandwiches: Old fashioned comfort food at its best! Sloppy Joes are an easy weeknight meal that’s always a hit. Try switching the ground beef for turkey or bison next!
    Top row: 2006 (left) and 2010 (right). Bottom row: 2011 (left) and 2013 (right).

    I made these for dinner a few weeks back, and my husband was spot on – our son absolutely looooved them!

    This time around I made cole slaw and baked some frozen sweet potato waffle fries to go alongside and it was the perfect comfort food meal.

    I like serving Sloppy Joes either sandwich-style with the filling in between hamburger buns or brioche rolls, topped with some dill pickle chips. They’re also great served open-faced and eaten with a fork and knife.

    Our Favorite Sloppy Joe Sandwiches: Old fashioned comfort food at its best! Sloppy Joes are an easy weeknight meal that’s always a hit. Try switching the ground beef for turkey or bison next!

    My dad’s favorite way to enjoy them is piled high with shredded cheddar cheese, so I’m including that as an option here as well.

    How do you like your Sloppy Joes? I’d love to hear your favorites in the comments section below!

    Looking for more comfort food favorites? Check out these 5-star recipes:

    • Waffle Pulled Pork Eggs Benedict
    • Tex-Mex Meatballs with Mexican Cauliflower Rice
    • Our Favorite Buttermilk Pancakes
    • Ravioli Lasagna
    • Instant Pot Chicken, Bacon, and Potato Soup
    • Caramelized Banana Breakfast Porridge
    • Instant Pot Herbed Pot Roast
    • Sausage and Peppers
    • Roast Chicken with Dijon Root Vegetables

    📖 Recipe

    Sloppy Joes

    Sloppy Joe sandwich on a plate with waffle fries and pickles.
    Old fashioned comfort food at its best! Sloppy Joes are an easy weeknight meal that’s always a hit. Try switching the ground beef for turkey or bison next!
    Big Flavors from a Tiny Kitchen - Ashley Covelli (adapted from Betty Crocker's Cooking for Two)
    5 from 5 votes
    Print Recipe Pin Recipe
    Servings: 6 Servings
    Course: Sandwich
    Cuisine: American
    Prep Time 5 minutes mins
    Cook Time 45 minutes mins
    Total Time 50 minutes mins

    Ingredients
     

    • 1 tablespoon unsalted butter
    • 1 small yellow onion diced (about ½ cup)
    • 2 pounds ground meat we like beef, turkey, or bison
    • ⅔ cup ketchup
    • ½ cup water
    • 1 stalk celery diced (about ¼ cup)
    • 1 tablespoon packed dark brown sugar
    • 1 ½ teaspoons Worcestershire sauce
    • 1 ½ teaspoons kosher salt
    • 1 teaspoon cider vinegar
    • ¼ teaspoon dried mustard also known as ground mustard or dried ground mustard seed
    For serving:
    • Hamburger buns brioche rolls, or your favorite bread
    • Dill pickle chips optional
    • Shredded cheddar cheese optional

    Instructions
     

    1. Melt butter in a large skillet with a tight-fitting lid over medium-high heat. Add onion and sauté until it begins to soften, about 3 to 5 minutes. Add ground meat and continue cooking, breaking up the large pieces with a wooden spoon occasionally, until browned, draining any excess fat that accumulates in the pan.
    2. Add remaining ingredients (ketchup through dried mustard) and reduce heat to low. Cover and let simmer for 30 minutes.
    3. Serve Sloppy Joe mixture piled atop your favorite bread and top with cheese and pickles, if desired.

    Notes

    Nutrition information is for sloppy joes only, not buns.
     

    Did you make this recipe?

    Leave a comment + star rating below to let people know how it was!

    Our Favorite Sloppy Joe Sandwiches: Old fashioned comfort food at its best! Sloppy Joes are an easy weeknight meal that's always a hit. Try switching the ground beef for turkey or bison next!

    Our Favorite Yogurt Recipes

    May 30, 2017 by Ashley 4 Comments

    Falafel-Spiced Chickpea Flatbreads

    This post has been compensated as part of my ongoing partnership with Stonyfield. As always, all opinions are 100% my own.

    It's no secret that my family loves yogurt - especially Stonyfield! We always have at least a quart of Smooth & Creamy Whole Milk Plain yogurt and a quart of Whole Milk Greek Plain yogurt in our fridge, in addition to an assortment of cups, pouches & smoothies.

    Living in Westchester County, New York, I'm fortunate to have access to a wide array of organic food at my choice of many different stores. But it's not like that everywhere.

    I'm currently visiting my family in the Midwest (hooray for my SIL's Alice in Wonderland tea party themed baby shower!!), and the one store that's everywhere is Walmart. And luckily, they are now carrying more and more organic items, including oodles of Stonyfield products!

    Our Favorite Yogurt Recipes: 63 of my family's favorite yogurt recipes. Breakfast, brunch, appetizers, salads, sandwiches, side dishes, main courses, desserts & beverages. #StonyfieldBlogger #ad

    I took a trip to Walmart a few weeks ago to scope out the variety of organic items that they had in stock and was very pleasantly surprised with the variety of offerings that were on the shelves. They actually had more varieties of Stonyfield in the dairy case than I've seen at any other store in my area. Pretty impressive!

    They also had a lot of organic produce, dried goods, and baking supplies. I even managed to find an organic variety of unsweetened coconut flakes, which are always really tricky to find.

    It wasn't too long ago that my family and readers in various parts of the country were having a hard time tracking down organic ingredients, but times are changing. People are demanding more access, and it's happening in a big way.

    Our Favorite Yogurt Recipes: 63 of my family's favorite yogurt recipes. Breakfast, brunch, appetizers, salads, sandwiches, side dishes, main courses, desserts & beverages. #StonyfieldBlogger #ad

    I figured that a great way to celebrate this progress would be to do a roundup of our favorite ways to use yogurt.

    So without further ado, here are 62 of my family's favorite yogurt recipes. Breakfast, brunch, appetizers, salads, sandwiches, side dishes, main courses, desserts & beverages.

    If it can be made better with yogurt, you'll find it here!

    Chunky Monkey Greek Yogurt Parfaits: Chunks of premium dark chocolate, banana chips, toasted walnuts + a drizzle of honey bring these dessert-inspired breakfast parfaits to the next level! #StonyfieldBlogger #TheWholeYou #ad

    Breakfast + Brunch:
    5-Ingredient Samoa Cereal Bowls
    Baked Apple Spice Donuts with Maple Frosting + Pumpkin Granola
    Bircher Muesli
    Caramelized Banana Breakfast Porridge
    Garlicky Goat Cheese + Herb Stuffed Peppadews
    Kiwi, Spinach, Pineapple & Banana Smoothie Bowls
    Pie Spiced Granola + Yogurt Parfaits

    French-Inspired Deviled Eggs: These mayo-free beauties get a big boost of flavor from fresh tarragon, cornichons and dijon. #StonyfieldBlogger

    Appetizers + Snacks:
    Banana Split Granola Kabobs
    Buffalo Chickpea Dip
    Caramelized Onion Dip
    Cheesy Potato Skins with Smoky-BBQ Shredded Beets
    Chicken Quesadillas with Chipotle Ranch Dip
    Crudité Cups with Homemade Ranch Dressing
    French-Inspired Deviled Eggs
    Mulberry-Hemp Energy Balls
    No Mayo Deviled Eggs
    Pasta Salad Skewers with Creamy Balsamic Vinaigrette
    Spinach and Yogurt Dip with Caramelized Onion

    BBQ Ranch Chopped Chicken Salad

    Salads + Sandwiches:
    Antipasto Pasta Salad
    Bazlama (Turkish Flat Bread)
    BBQ Ranch Chopped Chicken Salad
    Broccoli Salad
    Falafel-Spiced Chickpea Flatbreads
    Falafel with Yogurt-Herb Sauce
    French-Inspired Egg Salad Sandwiches
    Halal Chicken on a Pita AKA Rafakey 2.0
    Persian Malbec Lamb Burgers with Mast-o-Khiar and Pomegranate Tomato Jam
    Smoky Shrimp Salad with Green Goddess Dressing

    Roasted Garlic Mashed Potatoes

    Side Dishes:
    Asian Broccoli Slaw
    Asian Slaw
    Eggplant with Buttermilk Sauce
    Greek Yogurt Mustard Cole Slaw
    Mast O Khiar
    Mast-o-Khiar with Walnuts + Raisins
    Roasted Garlic Mashed Potatoes
    Soused Cucumbers in Yogurt and Fresh Mint (Kakadi Raita)
    Sweet Corn Muffins
    Turkish Cacik

    Our Favorite Steak Fajitas: These tender steak fajitas are one of my family's very favorite meals - a perfect Tex-Mex dinner made in a single cast iron skillet.

    Main Courses:
    Chimichurri Marinated London Broil
    Crispy Skinned Salmon Over Red Lentils with Caper Dill Yogurt Sauce
    Crispy Skinned Salmon Over Roasted Veggies with Cilantro Mint Yogurt Sauce
    Deep Dish Southwest Salad Pizza
    Grazin’ TriBeCa’s Lamb Burger
    Lemony Almond Crusted Cod with Homemade Mayo-Free Tartar Sauce
    Mandarin Chipotle Pork Tacos
    Our Favorite Steak Fajitas
    Power-Packed Tacos
    Slow Cooked Green Chile Pork Enchiladas
    Slow Cooker Chipotle Pork Tacos with Avocado + Chipotle Cremas
    Swedish Roast Chicken with Spiced Apple Rice

    Rich Cocoa Brownie Bites: Bust out your favorite cocoa powder and satisfy your brownie cravings with this super rich, bite-sized chocolate-packed dessert. Plus B Corp basics. #StonyfieldBlogger #ad

    Desserts:
    3 Ingredient Raspberry Frozen Yogurt
    3 Ingredient Frozen Mummy Cups
    The Best Banana Bundt Cake
    Dark Chocolate Pinwheel with Creamsicle Yogurt Dip
    Double Chocolate Chip Cookies with Vanilla Icing
    Guinness Chocolate Cheesecake
    Marbled-Chocolate Banana Bread
    Nutella-Stuffed Brown Butter + Sea Salt Chocolate Chip Cookies
    Persian Pudding
    Rich Cocoa Brownie Bites

    Mom & Tot Creamsicle Smoothies

    Beverages:
    Blueberry Banana Smoothie
    Mom & Tot Creamsicle Smoothies

    Is your favorite yogurt recipe represented here? Is there anything else you'd like to see added to this list in the future? Let me know in the comments section below!

    Turkey Salad Tea Sandwiches with Dried Cherries

    May 22, 2017 by Ashley 14 Comments

    Turkey Salad Tea Sandwiches with Dried Cherries: Dried sour cherries add a pop of sweet-tart flavor to the turkey filling in this simple yet elegant tea sandwich recipe. Perfect party food! #ad

    Special thanks to Stoneridge Orchards for sponsoring this post. As always, all opinions are 100% my own.

    Dried sour cherries add a pop of sweet-tart flavor to the turkey filling in this simple yet elegant tea sandwich recipe. Perfect party food!

    Turkey Salad Tea Sandwiches with Dried Cherries: Dried sour cherries add a pop of sweet-tart flavor to the turkey filling in this simple yet elegant tea sandwich recipe. Perfect party food! #ad

    There's something magical about a well made tea sandwich. The ingredients can be simple, but the flavors have to really deliver. And your presentation needs to be on point.

    I'm talking trimming the crusts off, cutting them into pretty shapes... the whole nine yards.

    Of course, this turkey salad is equally delicious slapped between 2 pieces of bread, spread atop crackers, or even served in lettuce wraps. You could even spoon it into endive leaves for a gorgeous dinner party presentation. The choice is yours!

    No matter how you serve it up, this stuff is absolutely delicious.

    Turkey Salad Tea Sandwiches with Dried Cherries: Dried sour cherries add a pop of sweet-tart flavor to the turkey filling in this simple yet elegant tea sandwich recipe. Perfect party food! #ad

    The real star of the show here is the addition of Stoneridge Orchards' dried Montmorency cherries. These little beauties are plump and juicy and just jam-packed with intense real cherry flavor.

    According to Wikipedia, Montmorency cherries are a variety of sour cherries that have a history that dates back to ancient Rome. They are named for an area of France, and have been cultivated in the United States since at least the early 20th century.

    There is a lot of research around the health benefits of tart cherries - studies have shown that they have tons of potential from reducing the risk of heart disease, fighting inflammation, soothing arthritis and post-workout muscle pain, and even promoting a better night's sleep.

    Anthony Komaroff, M.D., Editor in Chief of Harvard Health Letter shared some great perspective on the benefits of dried fruit in this Ask the doctor piece:

    Dried fruits also contain more fiber and more of the antioxidants called phenols than fresh fruit, per ounce. Fiber fights heart disease, obesity, and some types of cancer (although its possible protective effect against colon cancer is controversial). People with diets rich in plant phenols have lower rates of heart disease, diabetes, several kinds of cancer, and possibly degenerative brain diseases.

    Stoneridge Orchards Dried Fruit #ad

    I first got acquainted with Stoneridge Orchards this past December when I attended ShiftCon in New Orleans, and fell in love at first bite! I have always been a fruit lover - fresh, dried, dehydrated... you name it, I am happy to gobble it up.

    My 5-year-old is the same way - we have to divvy fruit up between us at home. And let me tell you - the bag of strawberries dipped in dark chocolate was a hot commodity when I got back from my trip. It didn't even last a full day.

    Stoneridge Orchards' dried fruit packs so much flavor. I love that they use whole fruit - not just pieces. And they offer lots of different varieties of dried fruit - even some dipped in dark chocolate or Greek style yogurt.

    Stoneridge Orchards Dried Fruit #ad

    I couldn't get over how plump the cherries were! Up until that point, my dried cherry experiences had all been really thin, sticky flakes of cherries. These really do feel like an indulgence.

    Their fruit is proudly grown  by third-generation family farmers in Washington State. Their products are all natural, gluten-free, non-GMO, and free of artificial colors, flavors, hydrogenated oils, sulfites, and high fructose corn syrup.

    It's just ridiculously delicious fruit.

    And then there's the chili lime cherries, which were aweeeeesome in the Pan-Roasted Pork Tenderloin with Chili Lime Cherry Sauce that I made mid-week. But that deserves its own post here sometime soon!

    A post shared by Ashley Covelli (@bigflavors) on May 12, 2017 at 8:54pm PDT

    The inspiration for my tea sandwiches came from a (now closed) local tea house that served a turkey salad with dried cranberries mixed in. The little bits of sweetness were really nice, and it has a vaguely Thanksgiving-ish vibe. Actually, this would be a great recipe to go to when you're looking to repurpose leftover turkey from Thanksgiving dinner.

    Turkey breast chops are poached in a mixture of chicken stock and white wine along with a dried bay leaf and a few black peppercorns. Once the turkey is cooked and cooled, give it a few whirls in the food processor to chop it up nice and small.

    I roughly chopped the dried cherries while my turkey was cooling. They're a little sticky, so be careful while you're chopping. Stir in a few more ingredients and pop the turkey salad in the fridge until you're ready to serve.

    Turkey Salad Tea Sandwiches with Dried Cherries: Dried sour cherries add a pop of sweet-tart flavor to the turkey filling in this simple yet elegant tea sandwich recipe. Perfect party food! #ad

    In true teahouse fashion, I've called for buttering your bread and trimming the crusts off. While these aren't necessary steps, they really take the sandwiches up a notch. You could spread a little mayo on the bread instead of butter if you want - just some moisture barrier to help keep them from getting soggy.

    I made this turkey salad on a Friday morning and slapped together a sandwich and brought it out on a picnic playdate with my son and some friends. It was fantastic, and it was even better the next day after it chilled in the fridge overnight.

    And, as a side note, I won this insulated picnic backpack at an auction at my son's school and we have been loving it!! Perfect for toting lunches like this around. I look forward to bringing more delicious dried fruits along for many more family picnics.

    Looking for more delicious sandwiches? Check out these 5-star recipes:

    • French-Inspired Egg Salad Sandwiches
    • Garlicky Tomato, Ri(goat)ta Cheese, Thyme, Honey + Aged Balsamic Toast
    • Emeril's Classic Fried Shrimp Po'boys
    • Persian Malbec Lamb Burgers with Mast-o-Khiar and Pomegranate Tomato Jam
    • Challah Nutella Banana Panini
    • Falafel with Yogurt-Herb Sauce
    • Halal Chicken on a Pita AKA Rafakey 2.0

    Stoneridge Orchards Dried Fruit #ad

    📖 Recipe

    Turkey Salad Tea Sandwiches with Dried Cherries

    Turkey Salad Tea Sandwiches on a platter.
    Dried sour cherries add a pop of sweet-tart flavor to the turkey filling in this simple yet elegant tea sandwich recipe. Perfect party food!
    Big Flavors from a Tiny Kitchen - Ashley Covelli
    No ratings yet
    Print Recipe Pin Recipe
    Servings: 6 tea sandwiches
    Course: Lunch
    Cuisine: American
    Prep Time 10 minutes mins
    Cook Time 10 minutes mins
    Total Time 20 minutes mins

    Ingredients
     

    • 2 cups chicken stock
    • 2 cups water
    • ½ cup white wine
    • 1 dried bay leaf
    • 3 whole black peppercorns
    • 1 pound turkey breast chops or cutlets
    • ½ cup small diced celery about 1 stalk
    • ½ cup dried Montmorency cherries roughly chopped
    • 2 green onions finely chopped (about ½ cup total)
    • ¾ cup mayonnaise
    • ½ teaspoon white wine vinegar
    • ½ teaspoon kosher salt
    • ¼ teaspoon freshly cracked black pepper
    • 12 slices bread
    • Butter or mayo
    • Pea shoots or microgreens for serving (optional)

    Instructions
     

    1. Place chicken stock, water, wine, bay leaf, and peppercorns in a medium saucepan and bring to a boil. Gently slide in turkey. Reduce heat and simmer until turkey is cooked through, about 10-12 minutes. Transfer turkey to a cutting board to cool down, or run underneath cold water to speed up the process.
    2. Once turkey is cool, place in a food processor and pulse until finely chopped. You may need to do this in batches. You can also finely chop the turkey if you don't have a food processor.
    3. Place turkey in a large bowl along with celery, cherries, green onions, mayo, vinegar, salt, and pepper and stir well to combine.
    4. Spread a thin layer of butter or mayo on one side of each slice of bread. Divide turkey mixture between 6 of the slices, and top each with another slice of bread, butter or mayo side down.
    5. Trim off crusts and cut each sandwich into 4 pieces and serve, garnishing with pea shoots or microgreens if desired.

    Did you make this recipe?

    Leave a comment + star rating below to let people know how it was!

    Turkey Salad Tea Sandwiches with Dried Cherries: Dried sour cherries add a pop of sweet-tart flavor to the turkey filling in this simple yet elegant tea sandwich recipe. Perfect party food! #ad

    Our Favorite Steak Fajitas

    May 19, 2017 by Ashley 6 Comments

    Cast iron skillet full of steak fajitas with toppings and tortillas alongside.

    These tender steak fajitas are one of my family's very favorite meals - a perfect Tex-Mex dinner made in a single cast iron skillet.

    Overhead view of steak fajitas in an iron skillet with tortillas and toppings.

    While it's true that I do a majority of the cooking at home, my husband does his fair share. He mostly does breakfast on the weekends (like pancakes, crepes, waffles, omelets, or poached eggs), but he has a few delicious dinner recipes, too.

    And one of those dishes just so happens to be one of my favorite meals on the planet - fajitas!

    He's been perfecting his fajita recipe over the past decade or so, and they're so good that I can't order them out at restaurants anymore because it's just never as good as homemade.

    And now that I've perfected a homemade fajita seasoning recipe, they're somehow even better!

    Steak fajitas in an iron skillet with toppings and tortillas alongside.

    I decided that it was time to do an overhaul of his recipe so I could measure amounts and share this goodness with kitchens other than my own.

    This is similar to how he makes chicken fajitas, but a bit different, so buckle up and pay attention. Your stomach will thank you!

    First things first - you're gonna need a cast iron skillet. It really is key for getting that wonderful charred flavor and blistered pepper action. We have several that we like to use, but this 12-inch from Lodge is our go-to for big meals like this.

    We've also tried out a lot of different store-bought fajita seasonings in the past, but this one from Penzeys is our current favorite.

    Before I came up with my own homemade copycat Penzeys fajita seasoning recipe, I would order it in bulk. I don't like being caught without fajita seasoning when the mood strikes!

    Cast iron skillet filled with steak fajita mixture.

    A few fajita tips from my husband:

    • For timing purposes, I like to cut the onions while the skillet preheats, and then cut the peppers while the onions are cooking.
    • It's worth the extra time to really caramelize the onions, but if you're short on time, just put them in with the peppers.
    • You want the peppers to caramelize and blister while you're cooking them - make sure to scrape the bottom of the skillet while you're stirring to ensure even cooking without burning.
    • The acid from tomatoes can be rough on cast iron, so that's why I add the tomato paste at the end.
    • Be sure to clean your cast iron skillet well! Ashley got The Ringer for me last Christmas and it's a great tool for removing stuck on gunk from the bottom of the pan. We also use scrapers like these.
     

    A post shared by Ashley Covelli (@bigflavors) on Mar 29, 2017 at 1:33pm PDT

    You can use flank steak or skirt steak here - whichever looks better at the store. Skirt steak usually slices up nicer, but it can be hard to find in my neighborhood, so we use flank steak fairly often.

    I like to spread a decent amount of Stonyfield plain whole milk Greek yogurt on my tortillas before loading them up with steak, peppers, and onions.

    I used to use sour cream all the time, but I prefer the tanginess of Greek yogurt now. Note - this isn't one of my sponsored posts from Stonyfield - I just big-fat-puffy-heart love their yogurt!

    Overhead view of an iron skillet filled with steak fajitas.

    Looking for more cast iron meal favorites? Check out these 5-star recipes:

    • Spanish Chicken + Sausage Skillet
    • Our Favorite Chicken Fajitas
    • Garlicky Beer + Tarragon Steamed Mussels
    • Turkey-Scotch Eggs
    • Deep Dish Southwest Salad Pizza
    • Spicy Shrimp + Napa Cabbage Stir-Fry
    • Zoodle Frittata
    • Steakhouse Style Steak
    • Pan-Seared Lamb Chops Over Roasted Spaghetti Squash w Pomegranate + Aged Balsamic

    📖 Recipe

    Our Favorite Steak Fajitas

    Cast iron skillet full of steak fajitas with toppings and tortillas alongside.
    These tender steak fajitas are one of my family's very favorite meals - a perfect Tex-Mex dinner made in a single cast iron skillet.
    Big Flavors from a Tiny Kitchen - Dino & Ashley Covelli
    5 from 2 votes
    Print Recipe Pin Recipe
    Course: Entree
    Cuisine: Tex-Mex
    Prep Time 45 minutes mins
    Cook Time 1 hour hr
    Total Time 1 hour hr 45 minutes mins

    Ingredients
     

    For Fajitas:
    • 1 tablespoon fajita seasoning
    • 2 tablespoons water
    • 1 pound skirt or flank steak
    • ¼ cup olive oil
    • 1 tablespoon freshly squeezed lime juice
    • 2 tablespoons peanut oil
    • 2 medium yellow onions sliced ¼-inch thick
    • 1 teaspoon kosher salt divided
    • 1 tablespoon unsalted butter
    • 3 bell peppers seeded and sliced ¼-inch thick
    • 1 tablespoon tomato paste
    • ¾ teaspoon low sodium soy sauce optional
    For Serving:
    • Flour tortillas warmed
    • Greek yogurt or sour cream
    • Lime wedges

    Instructions
     

    1. Combine fajita seasoning and water in gallon-sized ziptop bag and set aside.
    2. Pat the steak dry with paper towels and trim off any large pieces of fat. Cut meat against the grain into ¼-inch thick slices and add to the bag of seasoning. Add olive oil and lime juice and seal bag, squeezing out as much air as you can. Transfer to refrigerator for at least 30 minutes, or up to 4 hours.
    3. Heat a large cast iron skillet over medium-high heat. Once hot (this takes a few minutes), add peanut oil and turn to coat bottom of the skillet. Add onions and break them up w a wooden spoon. Lower heat to medium-low and season with ½ teaspoon salt. Constantly stir until it stops sizzling.
    4. When the pan cools down, add butter. Stir every 10 min or so until caramelized, about 45 minutes to 1 hour. Transfer to a bowl, scraping out all the browned bits and cover. DO NOT CLEAN THE PAN.
    5. Return skillet to medium-high heat. Pan should be smoking.
    6. Drain the marinade from the bag of steak and put the meat in the hot skillet. Spread over the bottom of the pan using metal tongs, turning until browned on all sides, about 2-3 minutes. Once browned, place into the bowl with onions and cover.
    7. Add peppers to pan and season with ½ teaspoon salt. Cook, stirring constantly. When they start to stick to the bottom of the pan, lower the heat to medium.
    8. Add onions and meat back into the skillet, then add tomato paste, turn off heat and stir in until well combined. At this point, you can pour in soy sauce to get that sizzling sound and smoke for when you bring it to the table.
    9. Serve fajitas with warmed flour tortillas, Greek yogurt, and lime wedges alongside.

    Notes

    Nutrition information doesn't include your choice of tortillas.

    Did you make this recipe?

    Leave a comment + star rating below to let people know how it was!

    Our Favorite Steak Fajitas: Our Favorite Steak Fajitas: These tender steak fajitas are one of my family's very favorite meals - a perfect Tex-Mex dinner made in a single cast iron skillet.

    Chunky Monkey Greek Yogurt Parfaits

    May 9, 2017 by Ashley 8 Comments

    Chunky Monkey Greek Yogurt Parfaits: Chunks of premium dark chocolate, banana chips, toasted walnuts + a drizzle of honey bring these dessert-inspired breakfast parfaits to the next level! #StonyfieldBlogger #TheWholeYou #ad

    This post was created in partnership with Stonyfield and prAna. As always, all opinions are 100% my own.

    Chunks of premium dark chocolate, banana chips, toasted walnuts + a drizzle of honey bring these dessert-inspired breakfast parfaits to the next level!

    Chunky Monkey Greek Yogurt Parfaits: Chunks of premium dark chocolate, banana chips, toasted walnuts + a drizzle of honey bring these dessert-inspired breakfast parfaits to the next level! #StonyfieldBlogger #TheWholeYou #ad

    Life has been hectic lately. Between work, family, personal obligations, and seasonal allergies (gahhhh I love living in New York but it has been absolutely insane this spring) I have been feeling overwhelmed and just plain spent these past few weeks.

    There has just been so much going on that I've been having to make a point of keeping things simple when I can and remembering to spend a little time taking care of me, not just everyone else.

    So I've been trying to embrace simplicity and live in the moment, even when that moment is pure chaos (like the giant tantrum-fest my 5-year-old threw for a good chunk of the day yesterday).

    Chunky Monkey Greek Yogurt Parfaits: Chunks of premium dark chocolate, banana chips, toasted walnuts + a drizzle of honey bring these dessert-inspired breakfast parfaits to the next level! #StonyfieldBlogger #TheWholeYou #ad

    So even though yesterday was completely draining, I managed to make a delicious snack while wearing the comfiest yoga pants ever.

    Seriously, the Juniper Pant from prAna is ridiculously flattering. The bell bottom design is right up my alley, and I loved the Cargo Green on Point pattern. I'm fairly tall, so I don't wear a lot of patterned pants, but these were really fun without being loud.

    They also come in a solid coal color that I may just need to scoop up as well. And they were plenty long enough, which can sometimes be tricky. #tallgirlproblems

    Chunky Monkey Greek Yogurt Parfaits: Chunks of premium dark chocolate, banana chips, toasted walnuts + a drizzle of honey bring these dessert-inspired breakfast parfaits to the next level! #StonyfieldBlogger #TheWholeYou #ad

    Comfiness level maxed out, I moved on to making a fun after school treat to enjoy with my kiddo.

    You know I love yogurt, and I'm always looking for ways to incorporate it into new dishes. I have a parfait of some sort for breakfast almost every morning. My favorite combo usually involves berries, granola, chia/flax seeds, and a drizzle of honey.

    I wanted to do something a little more special for this one, so I looked to the first flavor of Ben & Jerry's ice cream I ever tried for inspiration - Chunky Monkey.

    Chunky Monkey Greek Yogurt Parfaits: Chunks of premium dark chocolate, banana chips, toasted walnuts + a drizzle of honey bring these dessert-inspired breakfast parfaits to the next level! #StonyfieldBlogger #TheWholeYou #ad

    I always have a quart of plain Stonyfield Whole Milk Greek Yogurt in my fridge, but vanilla would work beautifully here as well. Or you could stir a little vanilla bean paste into the plain yogurt to jazz it up a bit.

    I took a few minutes earlier in the day to toast the walnuts for these parfaits. It brings out the nutty flavor, but feel free to skip this step if you're short on time or just don't want to bother.

    This is a judgement free zone.

    Chunky Monkey Greek Yogurt Parfaits: Chunks of premium dark chocolate, banana chips, toasted walnuts + a drizzle of honey bring these dessert-inspired breakfast parfaits to the next level! #StonyfieldBlogger #TheWholeYou #ad

    Since I used plain yogurt here, I went with a little drizzle of honey for sweetness.

    This parfait is a great way to satisfy your chocolate cravings without eating a ton of chocolate, too. This time around I used a 72% cacao dark chocolate bar, which is rich and delicious, but use your favorite here.

    There are lots of studies on the health benefits of dark chocolate, but I'm not claiming this is health food. It's definitely a healthier option, and certainly something that you can indulge in a little more often with less guilt.

    And the same goes for whole milk greek yogurt! There's a lot of information about the benefits of whole vs. reduced fat or fat-free options. My family has switched over to full fat dairy, and we've been loving it.

    It tastes luxurious and is more filling than the lighter options.

    Chunky Monkey Greek Yogurt Parfaits: Chunks of premium dark chocolate, banana chips, toasted walnuts + a drizzle of honey bring these dessert-inspired breakfast parfaits to the next level! #StonyfieldBlogger #TheWholeYou #ad

    I loved the assortment of toppings on these parfaits. The crunchy banana chips and walnuts added great texture. If you want to pack this to go, I'd recommend putting the banana, nuts, and chocolate in a separate container to prevent them from getting soggy while you wait to dig in.

    This was a great afternoon snack, but it would be perfect for breakfast or dessert as well. Really, any time of day is a good time to enjoy yogurt!

    Chunky Monkey Greek Yogurt Parfaits: Chunks of premium dark chocolate, banana chips, toasted walnuts + a drizzle of honey bring these dessert-inspired breakfast parfaits to the next level! #StonyfieldBlogger #TheWholeYou #ad

    Looking for more ways to use yogurt? Check out some of our favorite recipes:

    • 5-Ingredient Samoa Cereal Bowls
    • Banana Split Granola Kabobs
    • Buffalo Chickpea Dip
    • Chicken Quesadillas with Chipotle Ranch Dip
    • No Mayo Deviled Eggs
    • Rich Cocoa Brownie Bites
    • Caramelized Banana Breakfast Porridge
    • Antipasto Pasta Salad
    • French-Inspired Egg Salad Sandwiches

    📖 Recipe

    Chunky Monkey Greek Yogurt Parfaits

    Bowls of Greek yogurt parfaits topped with banana chips, chocolate chunks, and walnuts.
    Chunks of premium dark chocolate, banana chips, toasted walnuts + a drizzle of honey bring these dessert-inspired breakfast parfaits to the next level!
    Big Flavors from a Tiny Kitchen - Ashley Covelli
    No ratings yet
    Print Recipe Pin Recipe
    Servings: 4 Servings
    Course: Breakfast
    Cuisine: American
    Prep Time 5 minutes mins
    Cook Time 10 minutes mins
    Total Time 15 minutes mins

    Ingredients
     

    • ½ cup shelled walnuts
    • 2 cups plain or vanilla Greek yogurt I used Stonyfield whole milk
    • ½ cup banana chips
    • 2-4 ounces premium dark chocolate roughly chopped
    • ¼ cup honey

    Instructions
     

    1. Toast the walnuts: Place walnuts in a dry skillet. Set stovetop to medium heat and let nuts cook, stirring occasionally, until fragrant and lightly toasted, about 10 minutes total. Remove toasted walnuts to a bowl to cool down (leaving them in the pan will cause them to continue cooking). Chop nuts once cool, if desired.
    2. To assemble: For each bowl, start with ½ cup Greek yogurt. Top yogurt with 2 tablespoons each banana chips and walnuts. Sprinkle with chocolate chunks and a drizzle of honey. Enjoy!

    Nutrition information

    Nutrition Facts
    Chunky Monkey Greek Yogurt Parfaits
    Serving Size
     
    1 /2 cup yogurt, plus toppings
    Amount per Serving
    Calories
    0
    % Daily Value*
    * Percent Daily Values are based on a 2000 calorie diet.

    Did you make this recipe?

    Leave a comment + star rating below to let people know how it was!
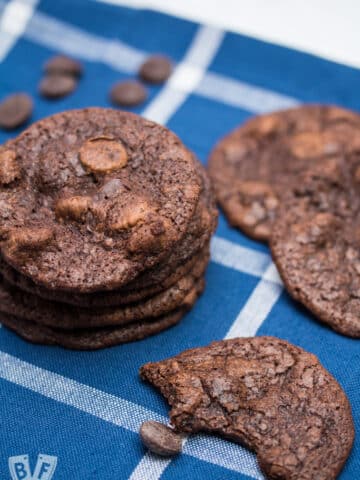
    Chunky Monkey Greek Yogurt Parfaits: Chunks of premium dark chocolate, banana chips, toasted walnuts + a drizzle of honey bring these dessert-inspired breakfast parfaits to the next level! #StonyfieldBlogger #TheWholeYou #ad
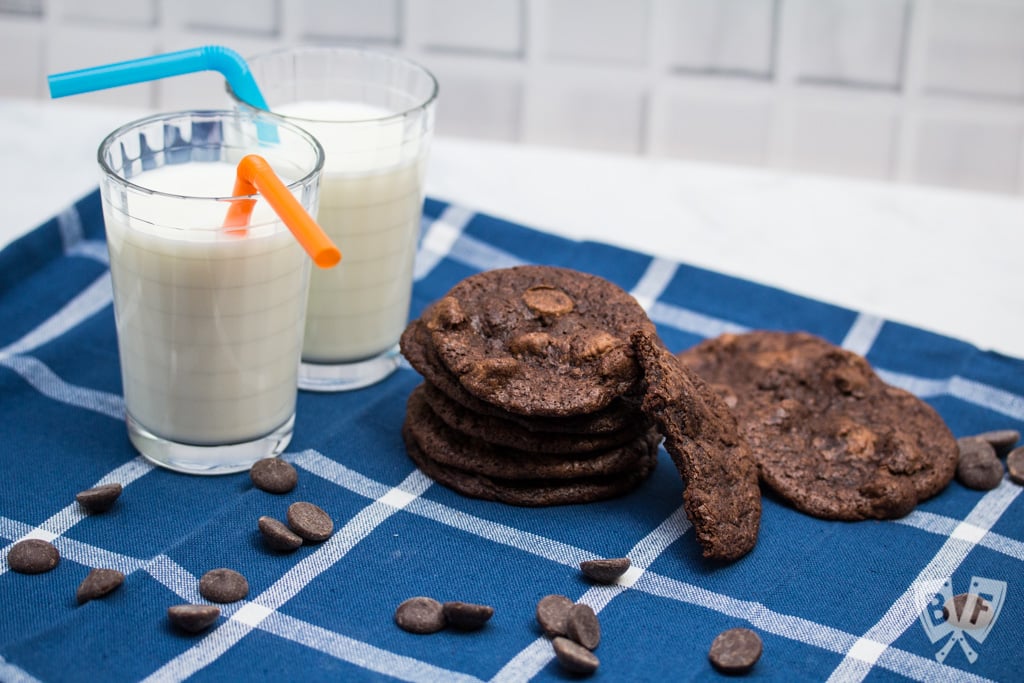
    Chunky Monkey Greek Yogurt Parfaits: Chunks of premium dark chocolate, banana chips, toasted walnuts + a drizzle of honey bring these dessert-inspired breakfast parfaits to the next level! #StonyfieldBlogger #TheWholeYou #ad
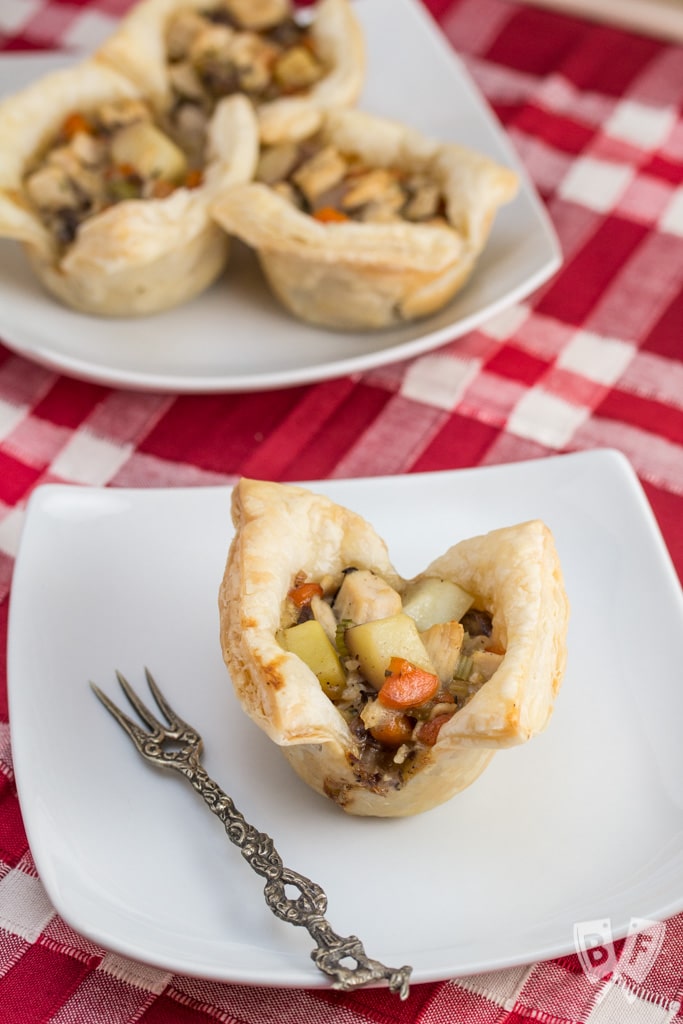
    • « Previous Page
    • 1
    • …
    • 3
    • 4
    • 5
    • 6
    • 7
    • …
    • 35
    • Next Page »

    Hi, I'm Ashley and I’ve been writing about food & recipes here at Big Flavors from a Tiny Kitchen since 2006. I want to help you (yes, you!) gain confidence in the kitchen so you are excited to cook at home for yourself and your loved ones.

    More about me →

    Favorite Spring Recipes

    • Mayo-free Deviled Eggs
    • Middle Eastern Fattoush Salad with Homemade Pita Chips
    • Birthday Cake Confetti Pancakes with Sprinkles
    • Italian Cream Cheese and Ricotta Cheesecake
    • Garlicky Mushroom Ricotta Pizza with Wild Arugula + Aged Balsamic
    • Slow Cooker "Roasted" Beets
    • Honey Balsamic Roasted Carrots
    • Italian Ricotta Cookies
    • Rhubarb Custard Pie
    • Easy Instant Pot Herbed Potato Salad

    Mother's Day + Easter Brunch

    • Epic Brunch Board on a Budget
    • Baby Spinach and Cheddar Quiche Made with Fresh Spinach
    • Turkey Salad Tea Sandwiches with Dried Cherries
    • Great Grandma Maria Francesca Cardile's Italian Easter Cookies
    • Brie Waffle Bites
    • Challah French Toast
    • Creamsicle Smoothies
    • DM Bloody Mary
    • Turkey Scotch Eggs
    • The Herbalist

    Popular Now

    • Cast iron skillet full of chicken fajitas.
      Favorite Restaurant-Style Chicken Fajitas
    • Overhead view of spinach and cheddar quiche with forks.
      Baby Spinach and Cheddar Quiche Made with Fresh Spinach
    • Chicken and bell pepper stir-fry served over white rice.
      Chicken and Bell Pepper Stir-Fry
    • Serving dish of cooked shrimp garnished with chopped parsley.
      Quick and Easy Sautéed Shrimp
    • Overhead view of a dutch oven filled with sausages, peppers, and onions.
      Sausage and Peppers
    • Overhead view of assorted breakfast items displayed on a board.
      Epic Brunch Board on a Budget

    Footer

    ↑ back to top

    About

    • About Ashley
    • Press + Recognition
    • Events
    • Virtual Cooking Classes
    • Podcast
    • Contact
    • Privacy Policy

    Newsletter

    • Sign up to receive delicious recipes and exclusive content right to your inbox!

    As an Amazon Associate I earn from qualifying purchases at no added cost to you.

    ©2006–2026  BIG FLAVORS FROM A TINY KITCHEN LLC | ALL RIGHTS RESERVED

    *Third-party advertisers may collect or use non-personally identifiable information to serve you more relevant ads.

    Rate This Recipe

    Your vote:


    A rating is required
    A name is required
    An email is required