
This post may contain affiliate links, which won’t change your price but will share some commission.
This post is sponsored by the Georgia Peanut Commission. All thoughts and opinions are my own.
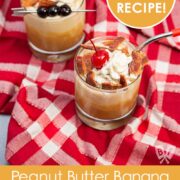
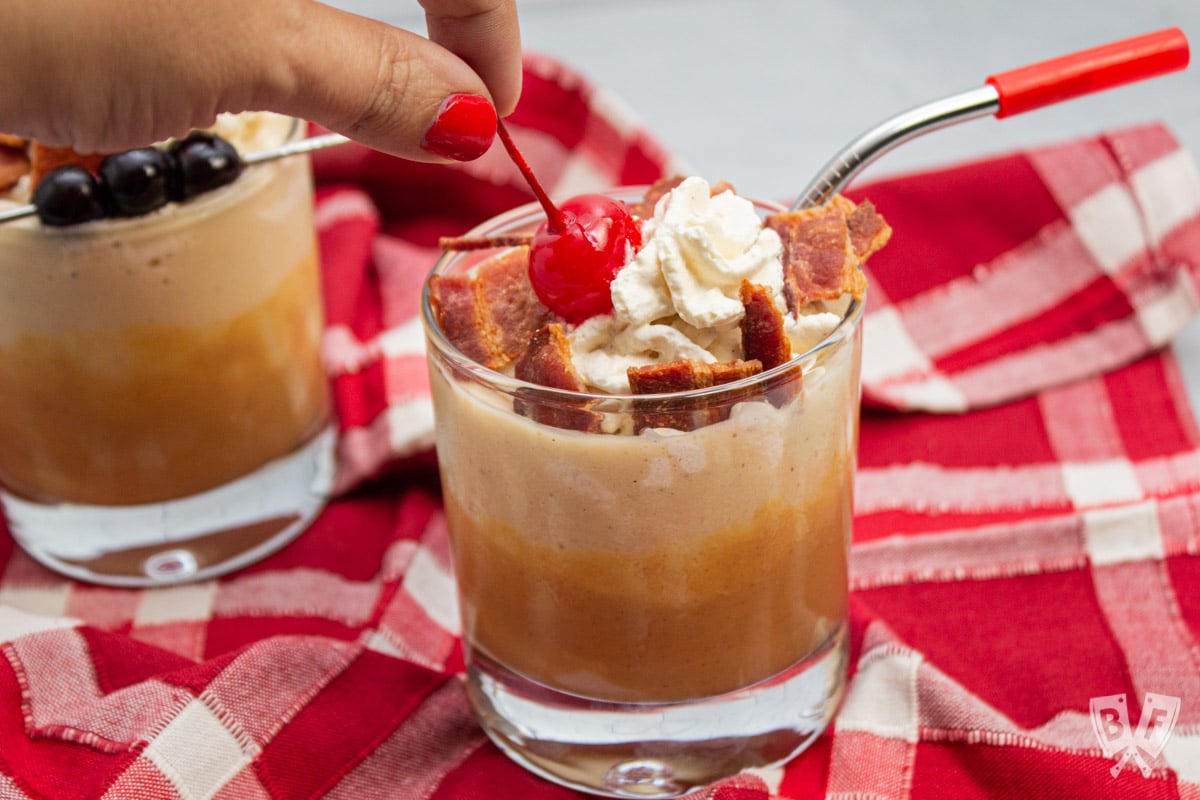
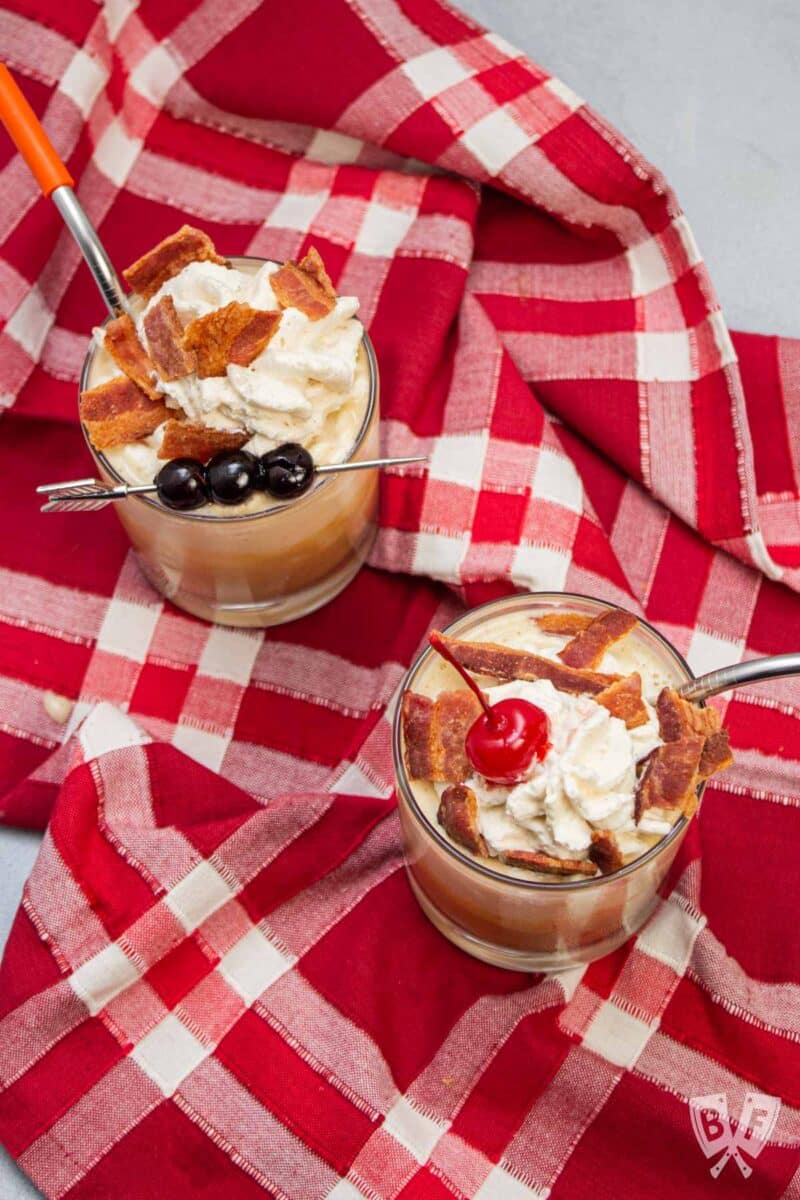
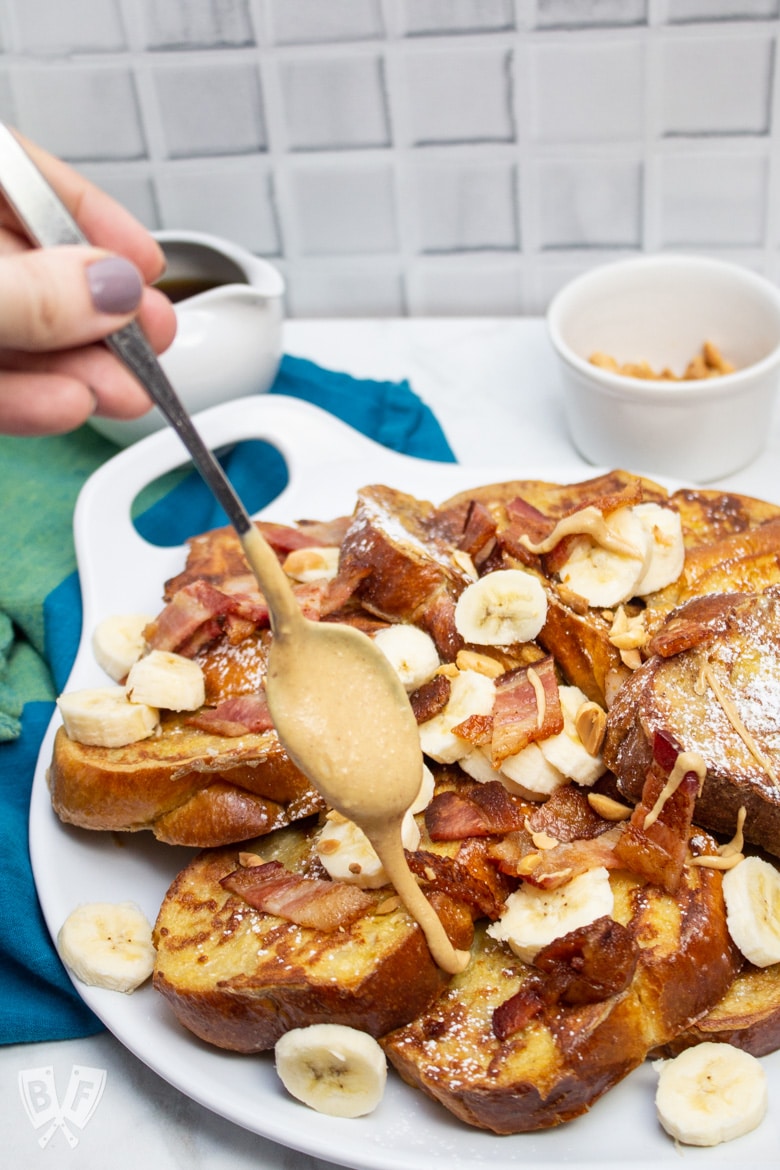
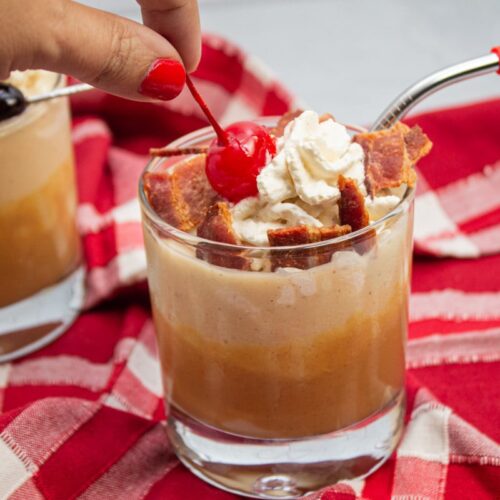
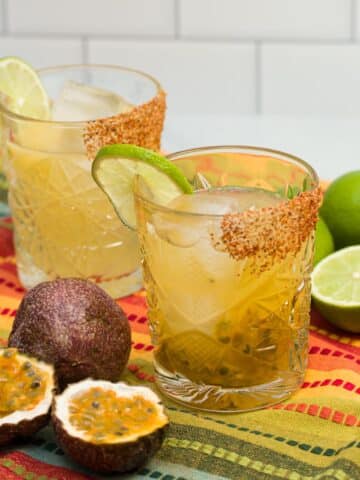
This easy ice cream-free peanut butter banana milkshake recipe (with an optional shot of whiskey) is topped with peanut butter and maple-infused whipped cream and crispy bacon.
This dreamy milkshake recipe is a twist on a fantastically decadent "Jimmy Carter Milkshake" that I had at The Rookery in Macon, Georgia. It was made with banana ice cream, peanut butter, and bacon.
I was inspired to create a healthier version of this milkshake without using any ice cream. And while I was at it, I figured it'd be fun to make a boozy option as well.
Because, well... peanut butter whiskey is a delicious thing, and you can pair peanut butter with whiskey on your own without buying a special bottle.
I'll be showing you two different ways to make this peanut butter shake. Feel free to go light and skip the toppings, or go all in.
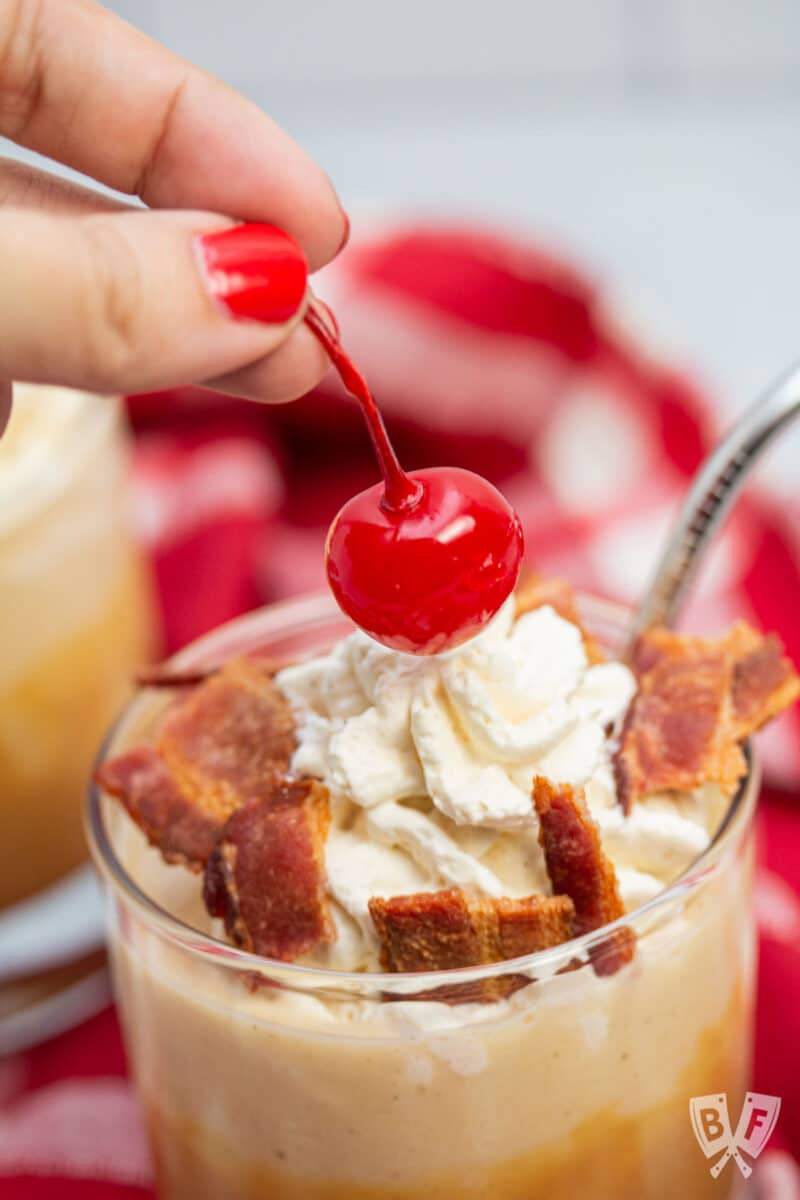
I'm talking bacon, whipped cream made with peanut butter powder, and a maraschino cherry (or 3) up top.
Whichever path you choose, the results will be fan-freakin'-tastic!
Jump To:
- 🥜 Peanut harvest recap
- 🧡 Why we love this recipe
- 📝 Ingredients
- 🥓 How to cook bacon in the microwave
- 🍦 How to make a milkshake without ice cream
- 🥤Dressing up your milkshake
- 🥣 How to use a whipped cream dispenser
- 📖 Recipe
🥜 Peanut harvest tour recap
I traveled to Georgia with my friends at the Georgia Peanut Commission and Southern Peanut Growers for their annual Peanut Harvest Tour.
On the trip, I learned a ton about what goes into one of my very favorite ingredients. I also gained an all-new appreciation for peanut farmers, scientists, and the peanut industry as a whole.
We had a jam-packed schedule full of farms, fun, and food. If you want to read a bit more about what we did during the trip, check out the Instagram recap posts I did for each of the 3 days.
Day One:
Day Two:
Day Three:
OK, let's get onto the milkshakes!
🧡 Why we love this recipe
- Frozen bananas have an incredibly creamy texture when blended, allowing you to make this peanut butter milkshake without any ice cream!
- This recipe comes together quickly with only a few ingredients.
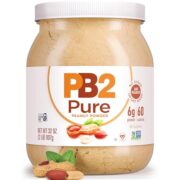
- Peanut butter powder adds a boost of peanutty flavor to both the milkshake base and the whipped cream.
- The addition of crispy bacon and maple syrup makes this treat wonderfully sweet-and-salty.
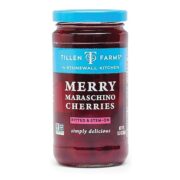
- You can keep it classic with a maraschino cherry for a soda fountain feel or get fancy with a shot of something boozy (peanut butter goes great with whiskey, bourbon, or rum) and add some Amarena cherries or Luxardo cherries on a cocktail pick for a more grown-up treat.
- Since we're using a blender, this recipe is easily scalable to make as many or as few peanut butter banana milkshakes as you'd like.
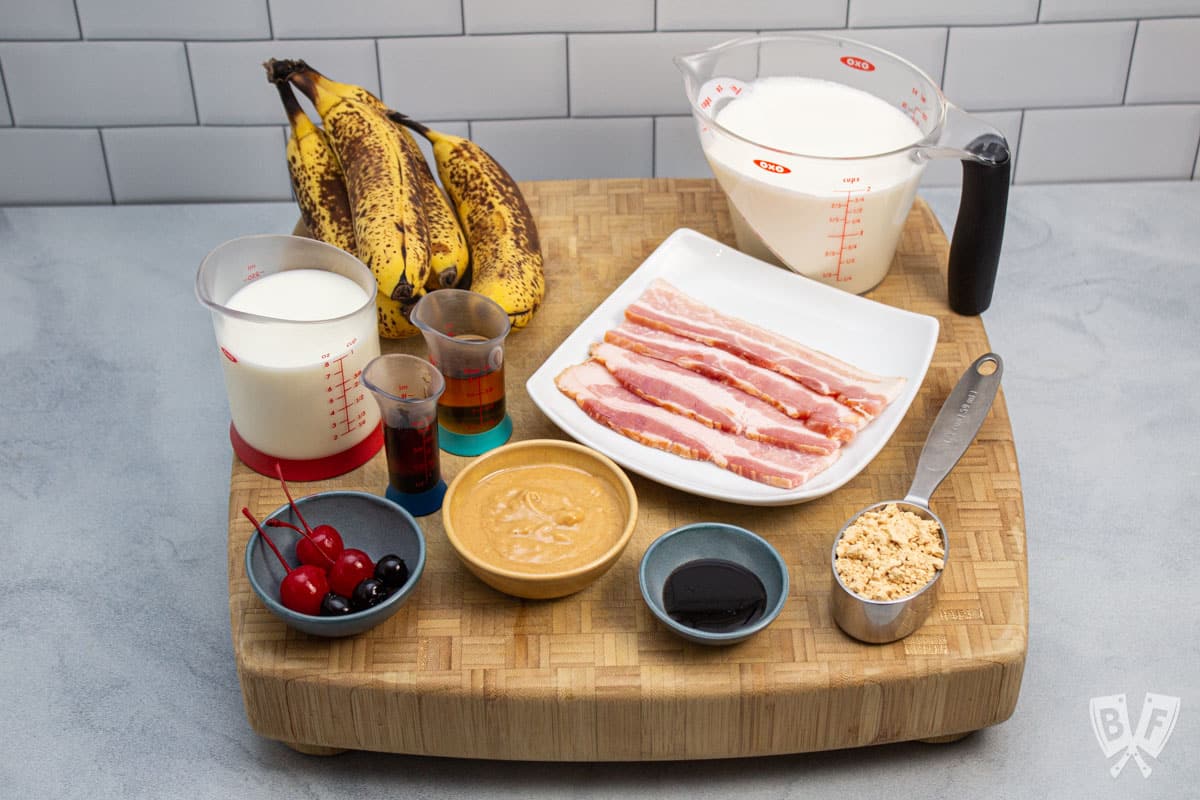
📝 Ingredients
Here's everything you need to make these peanut butter banana milkshakes.
The first 4 ingredients are all you need if you want to forego the toppings. And it's absolutely delicious without any toppings!
But if you're feeling extra, go for the full shebang (see recipe card below for ingredient amounts and full directions):
- Bananas
- Vanilla bean paste (or vanilla extract)
- Milk (your favorite dairy or plant-based variety)
- Peanut butter powder
- Heavy cream
- Maple syrup
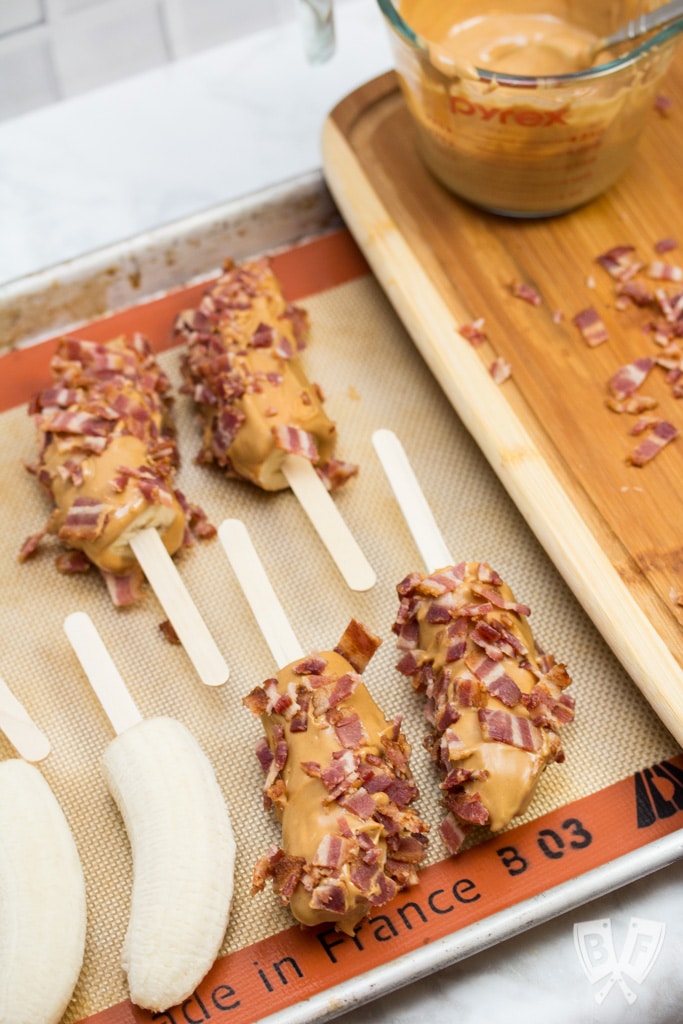
- Bacon
- Peanut butter (you can even make it from the powder!)
- Maraschino cherries (or Amarena cherries / Luxardo cherries if you're feeling fancy!)
- Whiskey, bourbon, or rum (optional for a boozy milkshake)
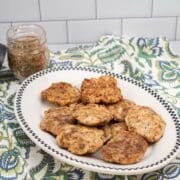
🥓 How to cook bacon in the microwave
This recipe uses bacon which can be found in your grocery store's meat department.
Cooking bacon doesn't need to be fussy or take a lot of time. In fact, when I need a quick slice or two I don't want to mess with frying it in a skillet or baking it in the oven.
Enter: the microwave.
Microwaving bacon sounds like it wouldn't be a great idea, but trust me, it works beautifully!
You can use this method for both regular and thick-cut bacon.
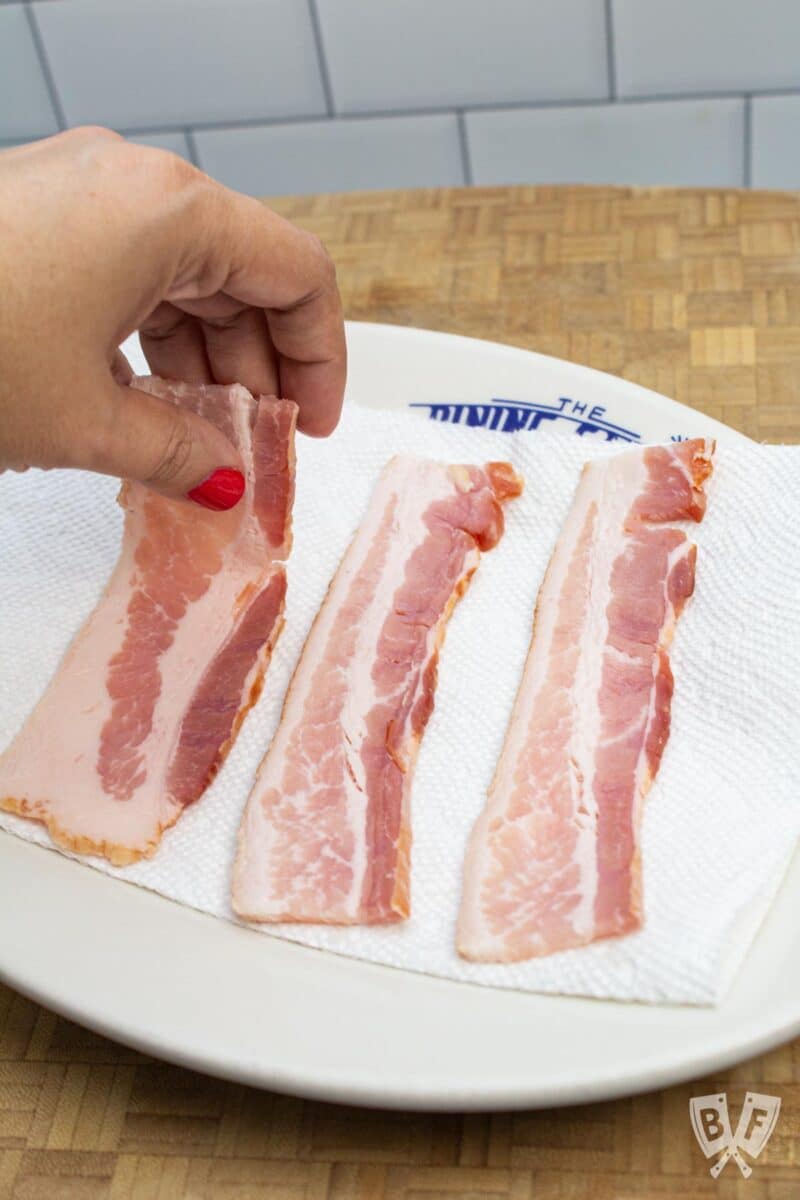
I usually cut the slices of bacon in half with kitchen scissors so they aren't as long, but you don't need to do that. It works well if you have an oblong plate like I do here.
You can also add a second layer of bacon onto the plate if you want to cook more at once. It'll take longer to cook, but it's doable!
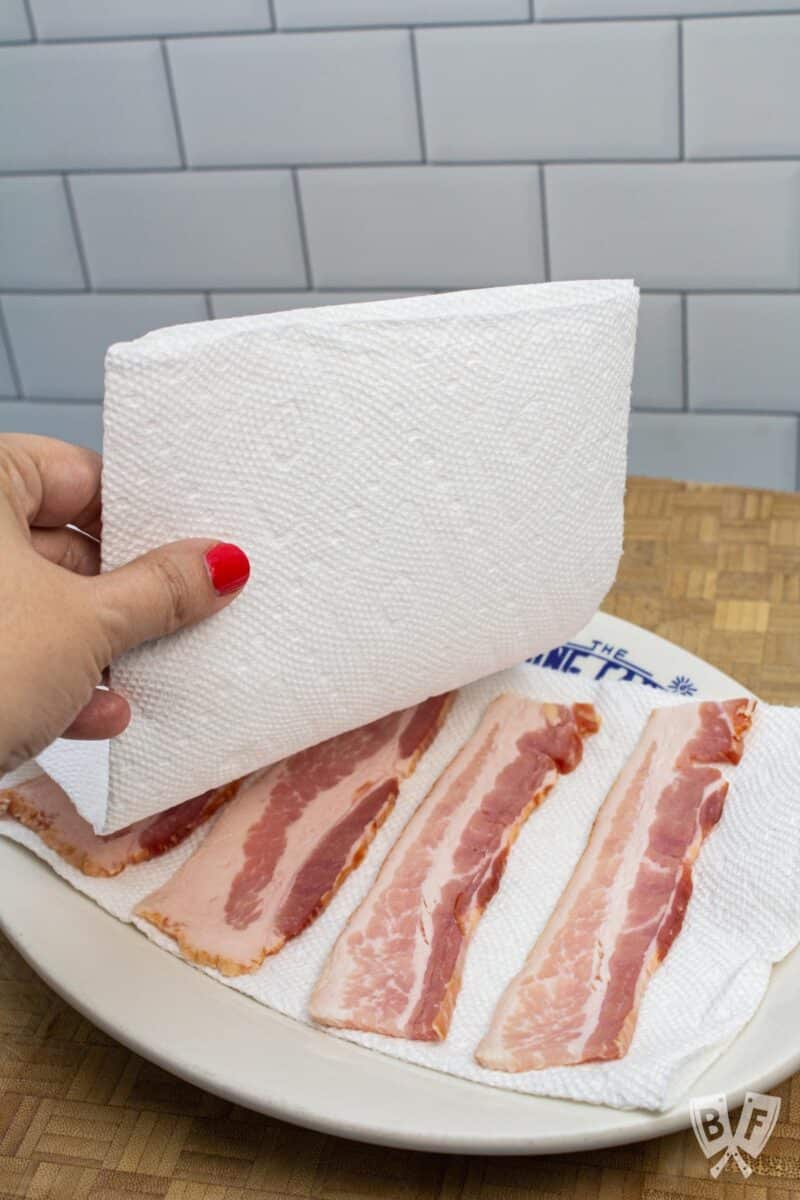
Just be sure to put a double layer of paper towels in between each layer of bacon.
Ensure that each slice of bacon has a little space and isn't overlapping another slice. The top layer should be another double layer of paper towels.
The paper towels absorb the grease as the bacon cooks and help prevent splattering in your microwave.

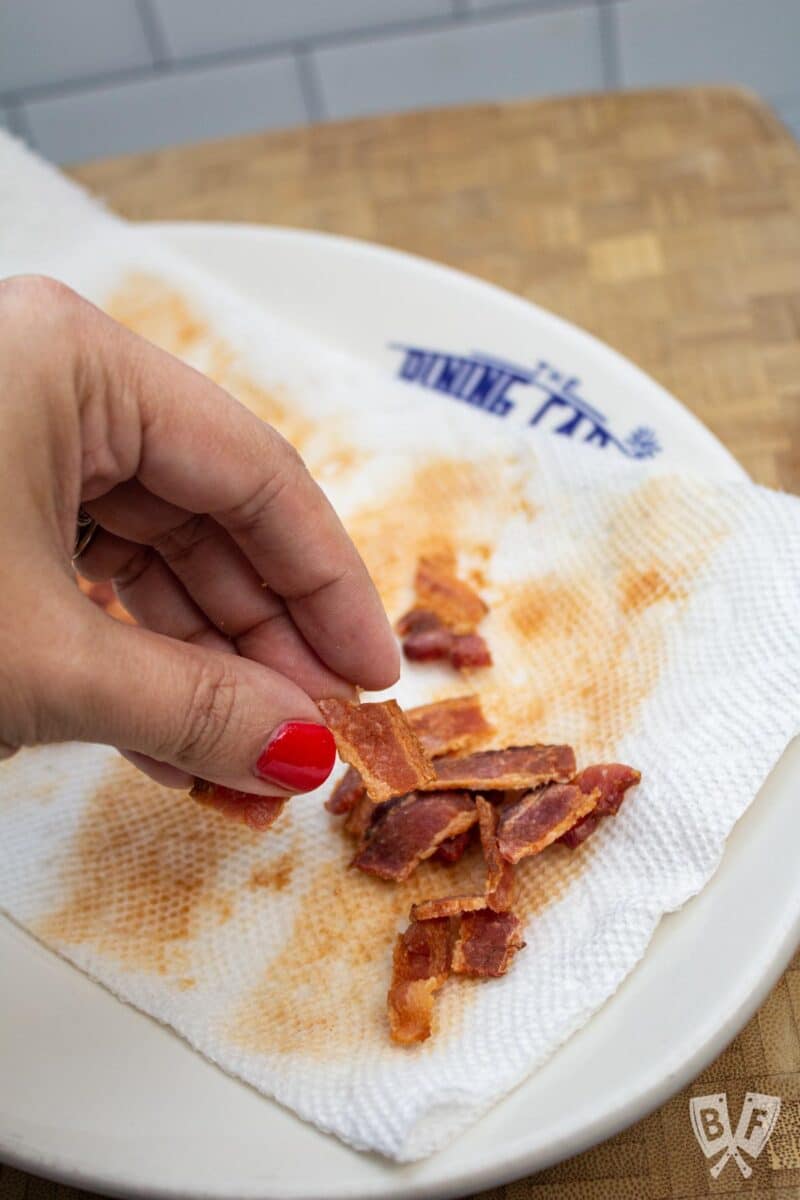
I like to start with 2 minutes for regular bacon, and 3 minutes for thick-cut. Just take a peek when the time is up and if it's not as crispy as you'd like, add another 30 seconds at a time until it is.
If you're doing two layers of bacon, check on each layer and take out any pieces that look like they're cooking faster than the rest so they don't burn. It'll likely take closer to 6 minutes for a double layer, but keep checking on it to make sure it doesn't overcook.
Once cooked, carefully remove the plate from your microwave. Gently peel back the grease-soaked paper towels.
From here, feel free to crumble them into pieces or leave them whole, depending on how you plan to use them.
For my family, I'll often just bring the plate to the breakfast table, and we'll peel back the layers of paper towels as we work our way through the bacon.
Cooked bacon can be stored in a sealed container in your refrigerator for future use. It'll keep well for several days.
I often store mine in a stasher bag, as it takes up minimal shelf space.
Paper towels are compostable, so you can dispose of them in your home compost bin if you have one.
🍦 How to make a milkshake without ice cream
The key to making a milkshake without ice cream is to use frozen bananas. They take on the texture of ice cream so perfectly when blended.
There was a trend going around for a while called "nice cream" or "nana ice cream" that used frozen bananas in this way.
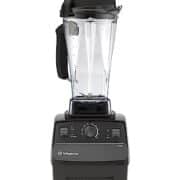
If you have a really powerful blender, such as a Vitamix, you don't even have to break your bananas into pieces when freezing them. You may need to use the tamper/mixing rod to help work the frozen bananas into the blades.
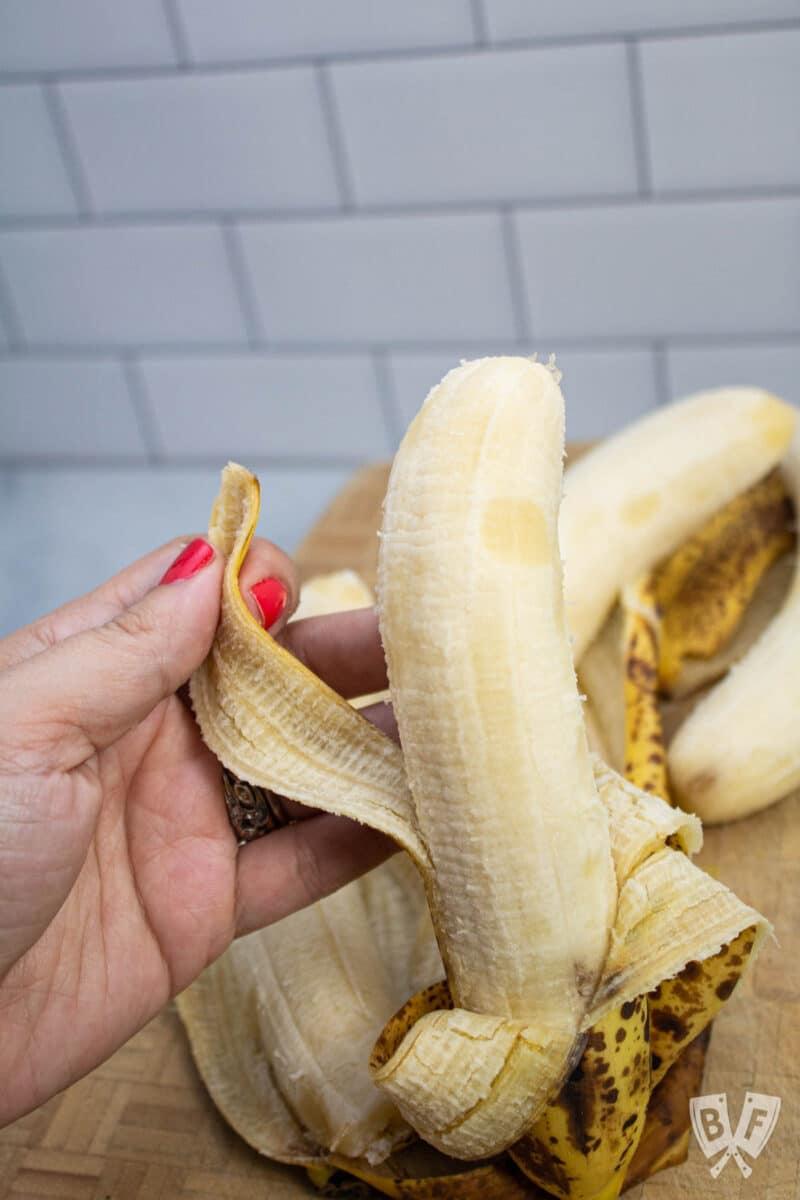
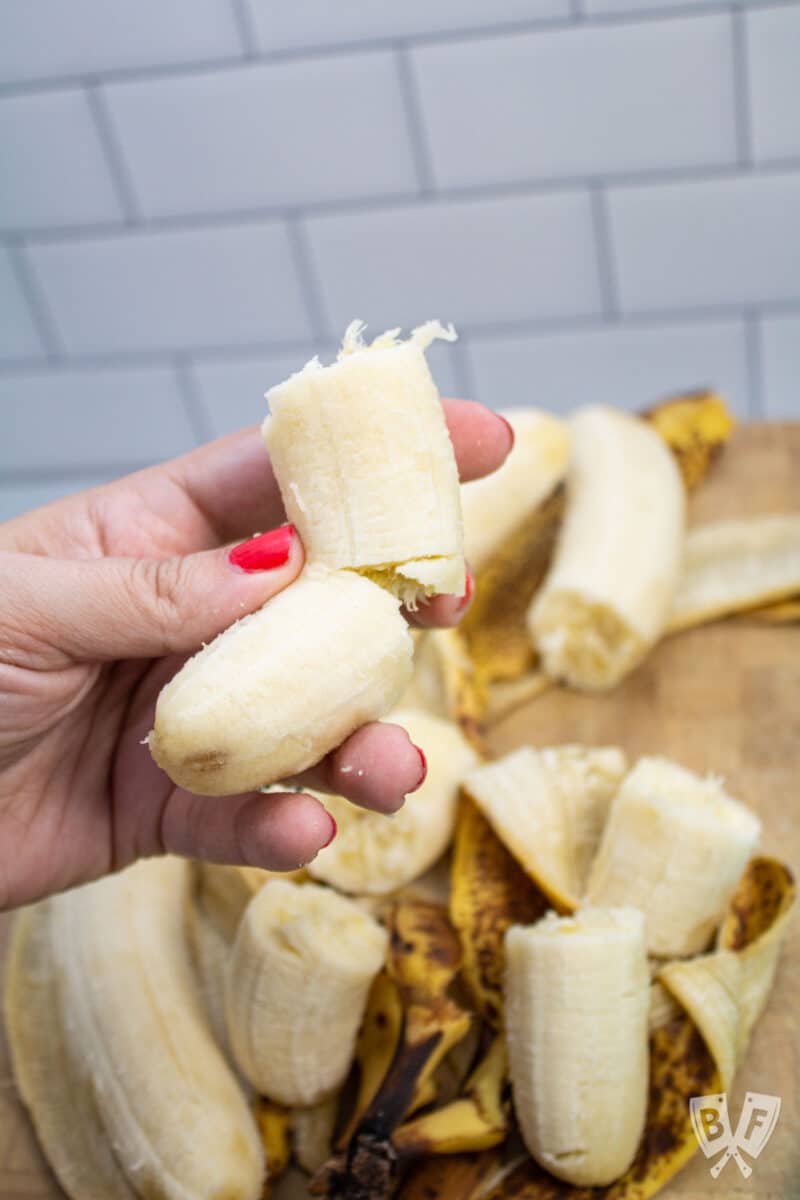
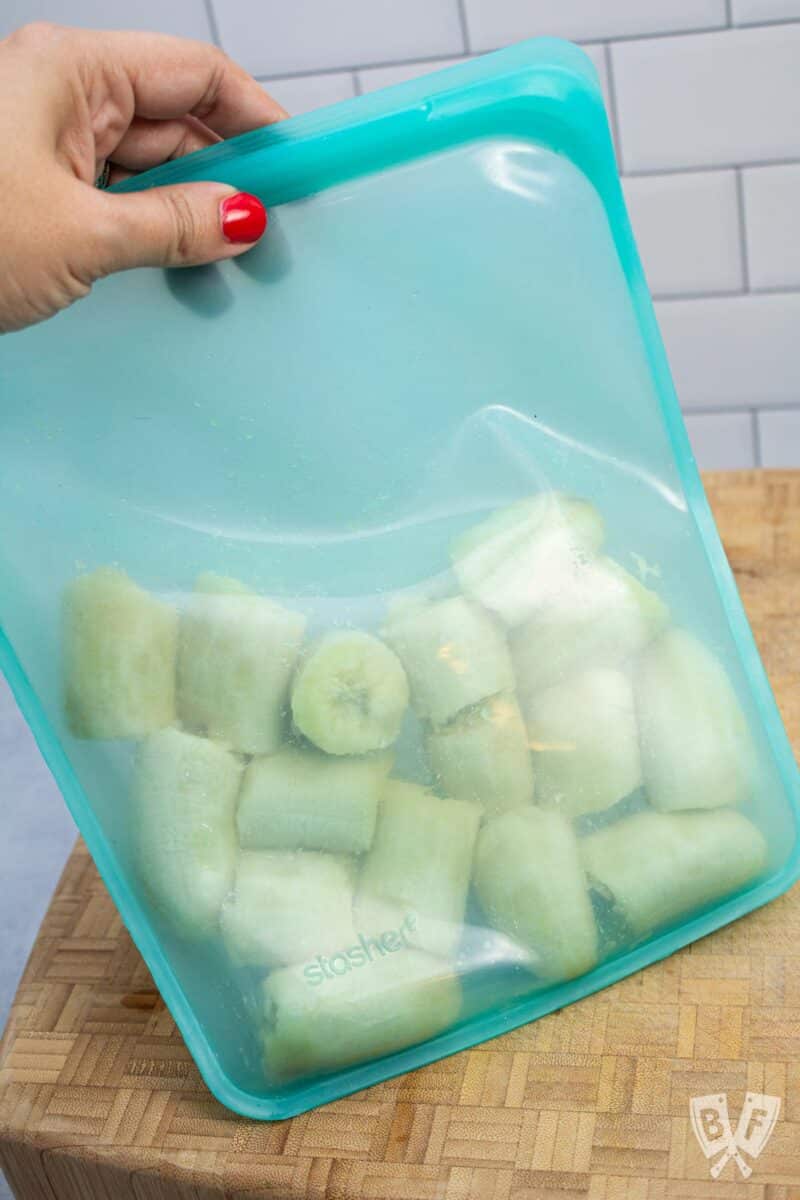
I like to peel the bananas, break them into about 4 pieces each, and put them in a freezer-safe storage bag (like a stasher bag). I'll squeeze the air out of the bag, then put it in the freezer until the bananas are frozen solid.
Let them freeze for at least an hour before blending. This is a great use for really ripe bananas - just keep adding them to a bag in your freezer so you always have them on hand!
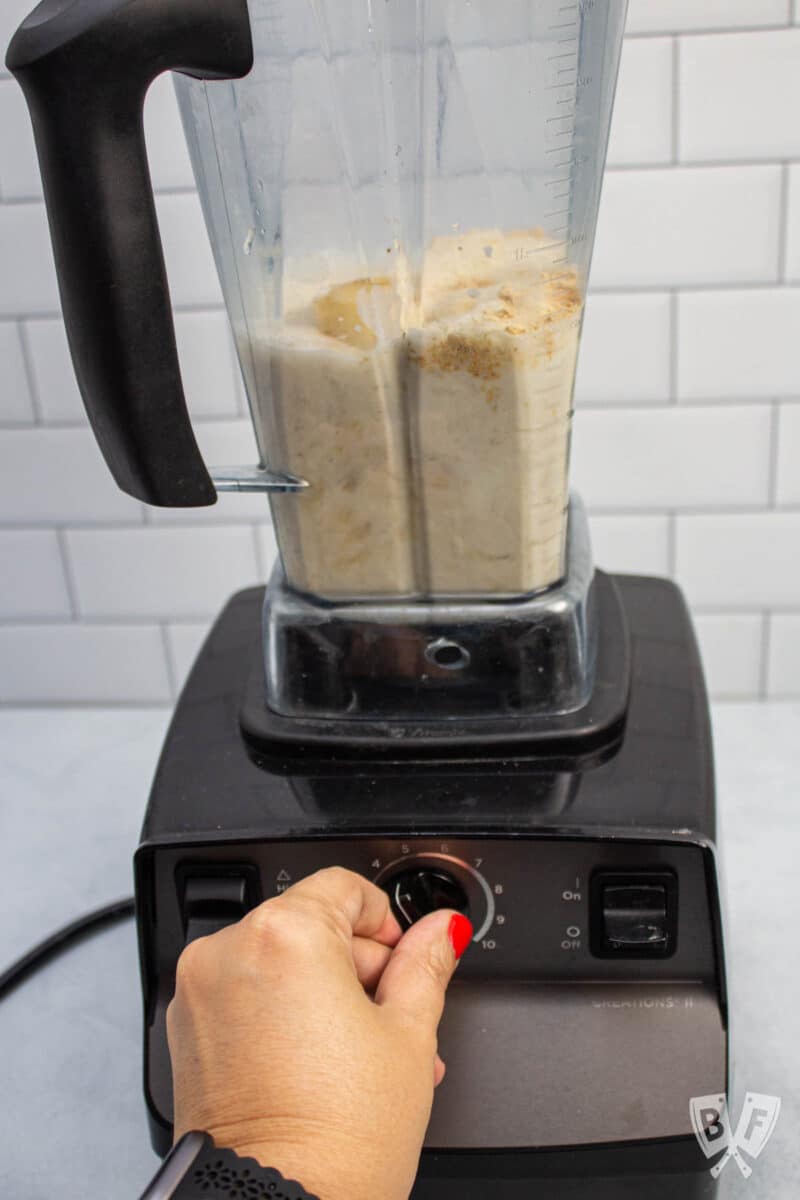
Now let's make this milkshake with no ice cream! Since the bananas are pretty solid, you'll need to loosen things up with your milk of choice.
I used regular milk here (since I'm going for whipped heavy cream on top) but you could use your favorite plant-based milk to make this a vegan banana milkshake.
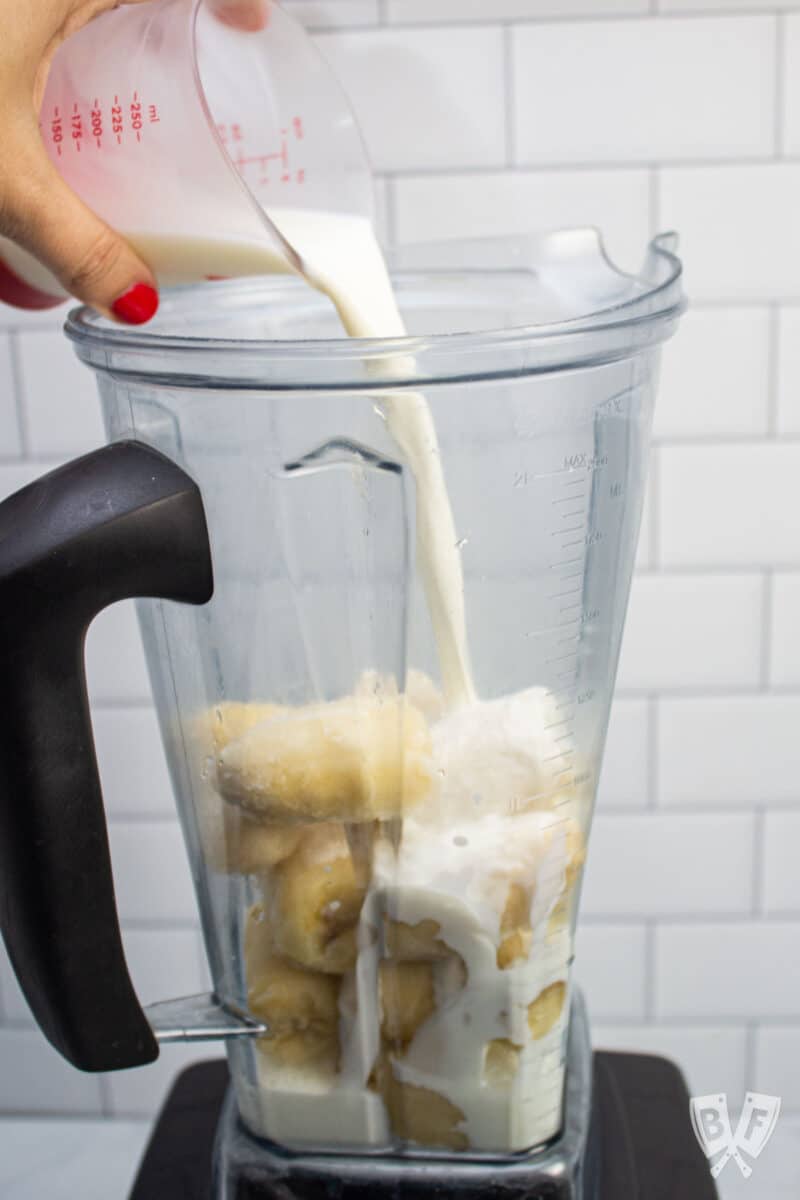
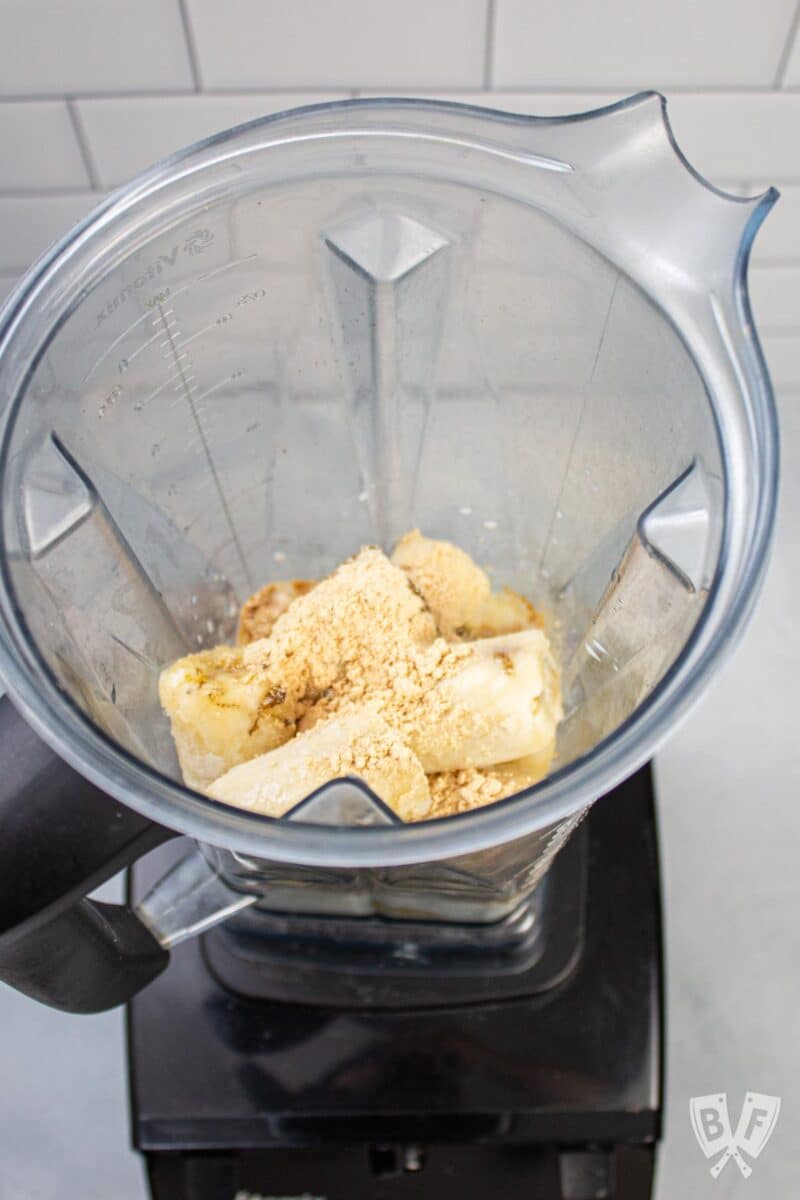
- Add your frozen bananas to the blender.
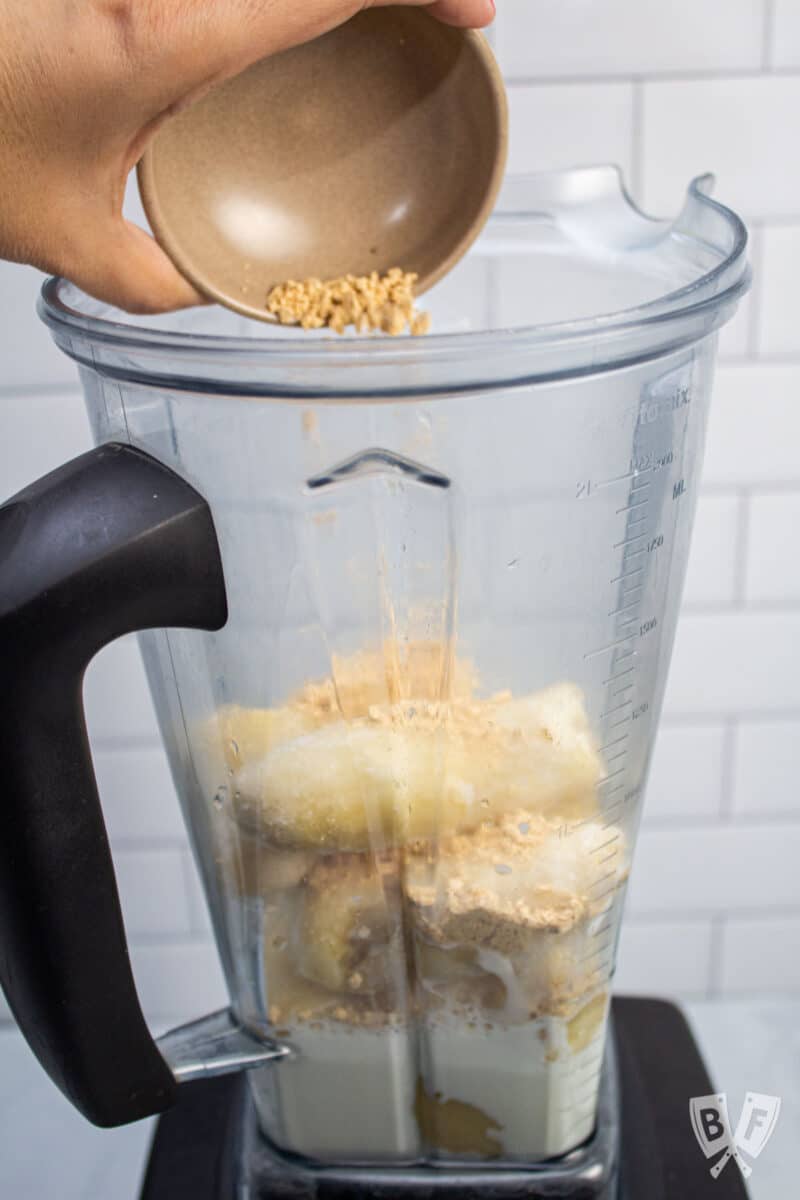
- Pour in your milk of choice, then add peanut butter powder and vanilla bean paste.
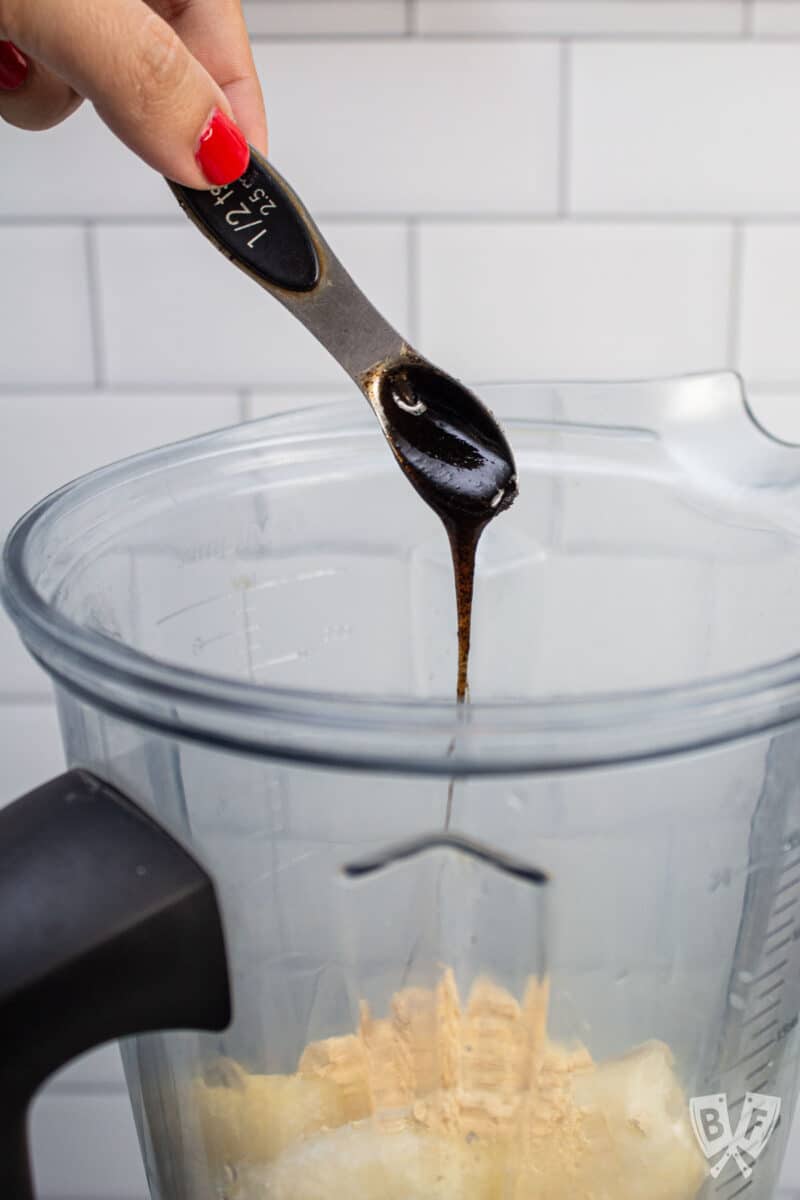
- If you're making a whiskey milkshake, add in one ounce of whiskey per serving.
- Blend on high, stopping and scraping down the edges if needed, until blended.
Feel free to use a scoop of regular peanut butter and vanilla extract if you don't have the powder or paste on hand. It'll still be delicious!
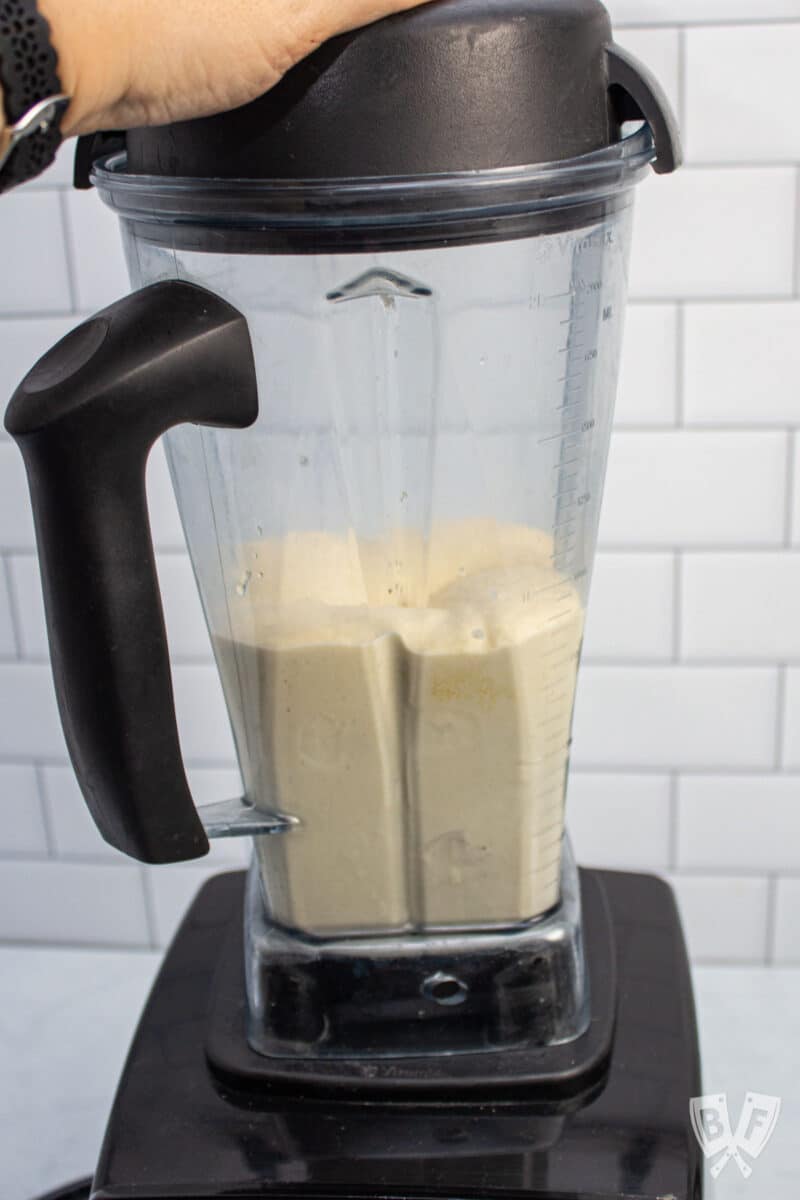
If your mixture is too thick, add another splash of milk. If it's too thin, you can add more frozen banana pieces or a few ice cubes to help thicken it.
See recipe card below for full instructions.
🥤Dressing up your milkshake
This ice cream-free milkshake is great on its own, but adding some fun finishing touches really makes it something special.
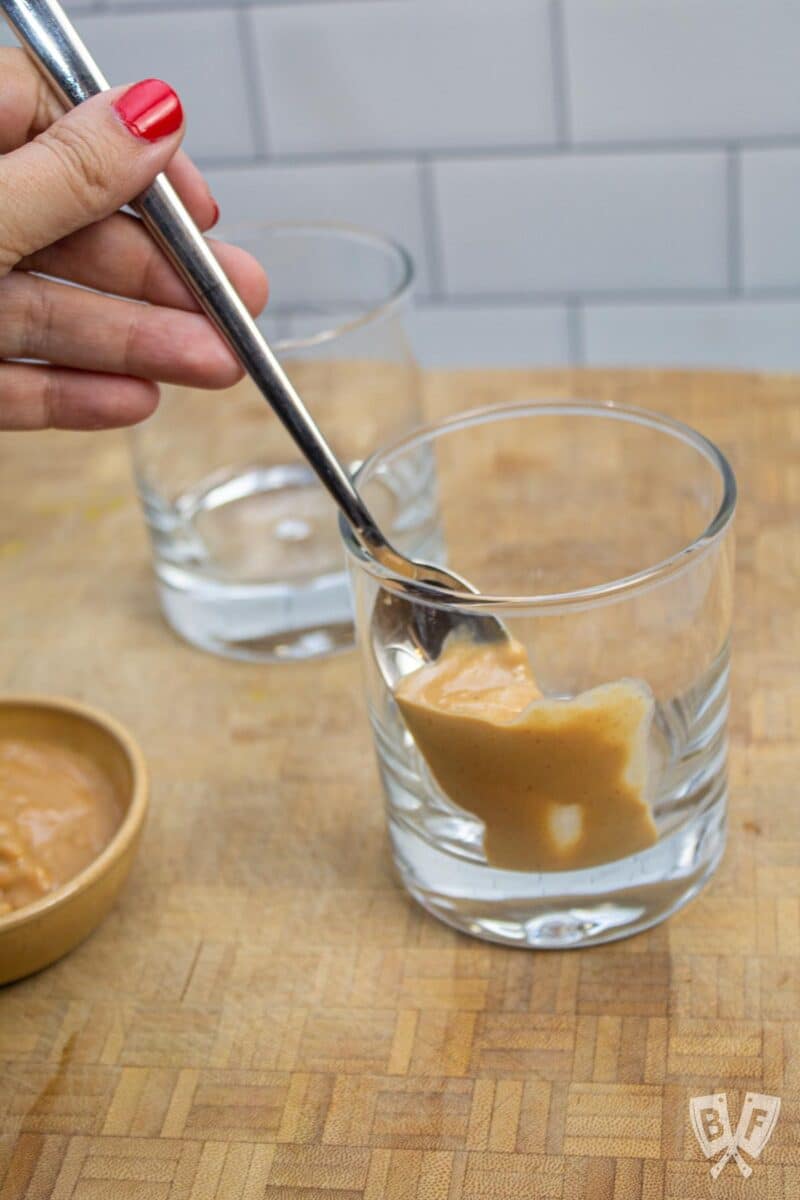
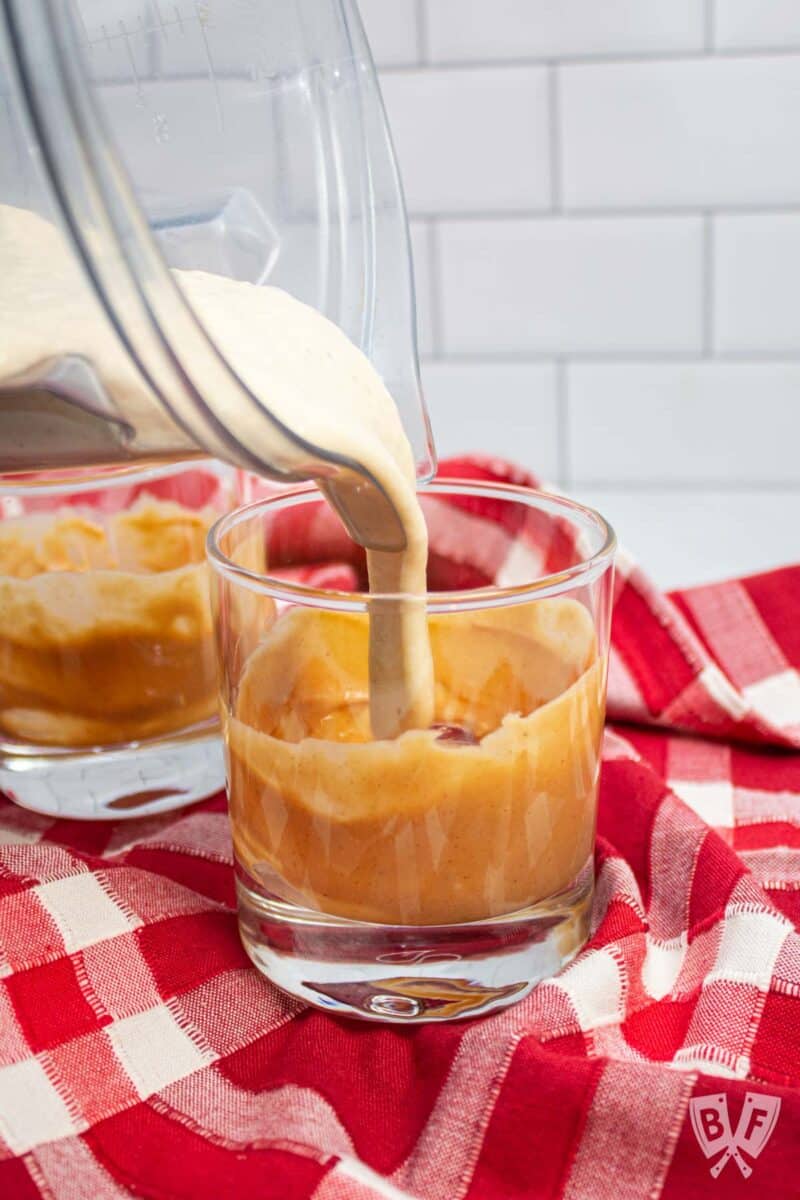
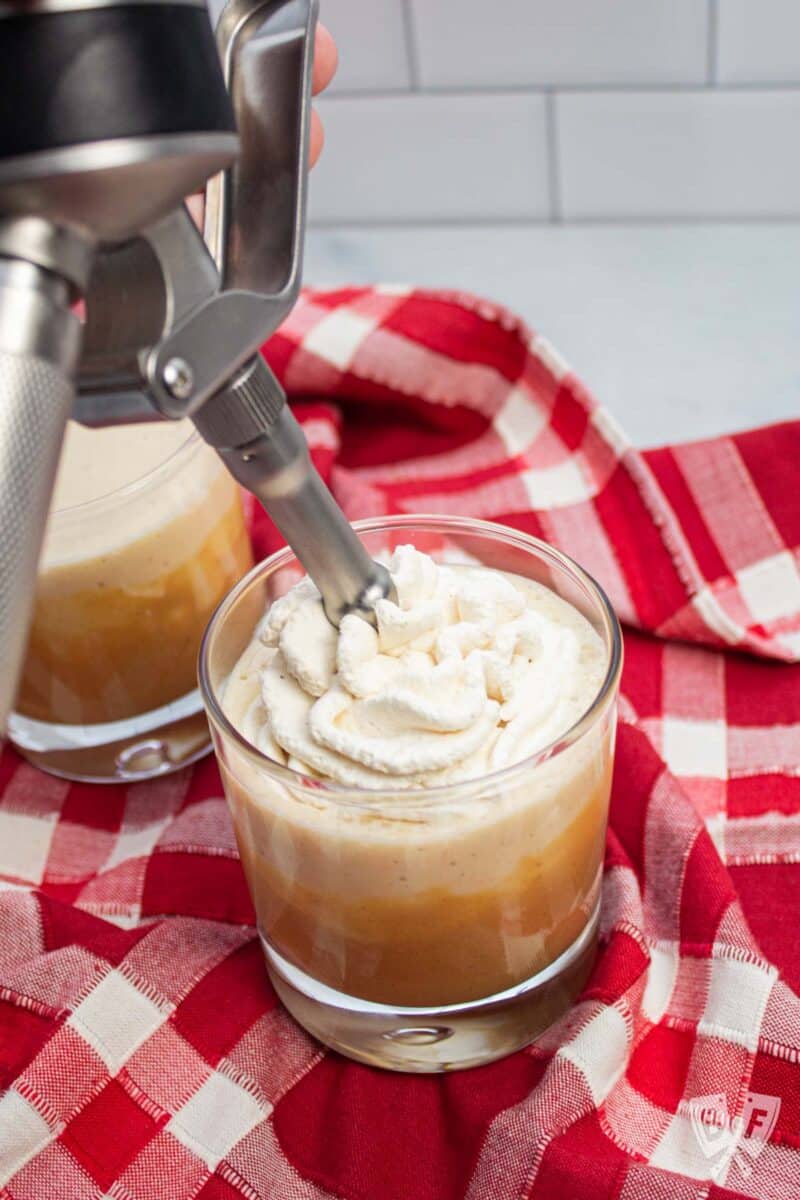
I like to pour this shake into peanut butter-lined glasses and top it with whipped cream, bacon, and maraschino cherries.
And when it comes to whipped cream, I gave this one a little extra oomph, thanks to peanut butter powder, maple syrup, and vanilla bean paste. They take it to the next level and really finish it off beautifully.
Homemade whipped cream
There are a few ways to make your own homemade whipped cream. They range from most labor-intensive to least.
You can absolutely use a chilled bowl and a whisk to make whipped cream by hand. It takes a lot of elbow grease, but it can be done.
The most accessible method is to use a chilled bowl and a hand mixer. This does the job much quicker but still does take a little bit of time. Nowhere near as much time as a whisk, but time nonetheless.
🥣 How to use a whipped cream dispenser
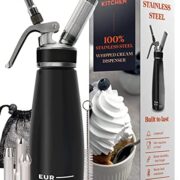
If making whipped cream at home is something you do often, you may want to consider investing in a whipped cream dispenser.
I used something similar while working at a coffee shop post-college. My husband bought one for me for Christmas a while back, and I had to re-learn how to use it since it had been a while.
So if you find yourself in the same boat, this will hopefully help you learn how to use a whipped cream dispenser at home!
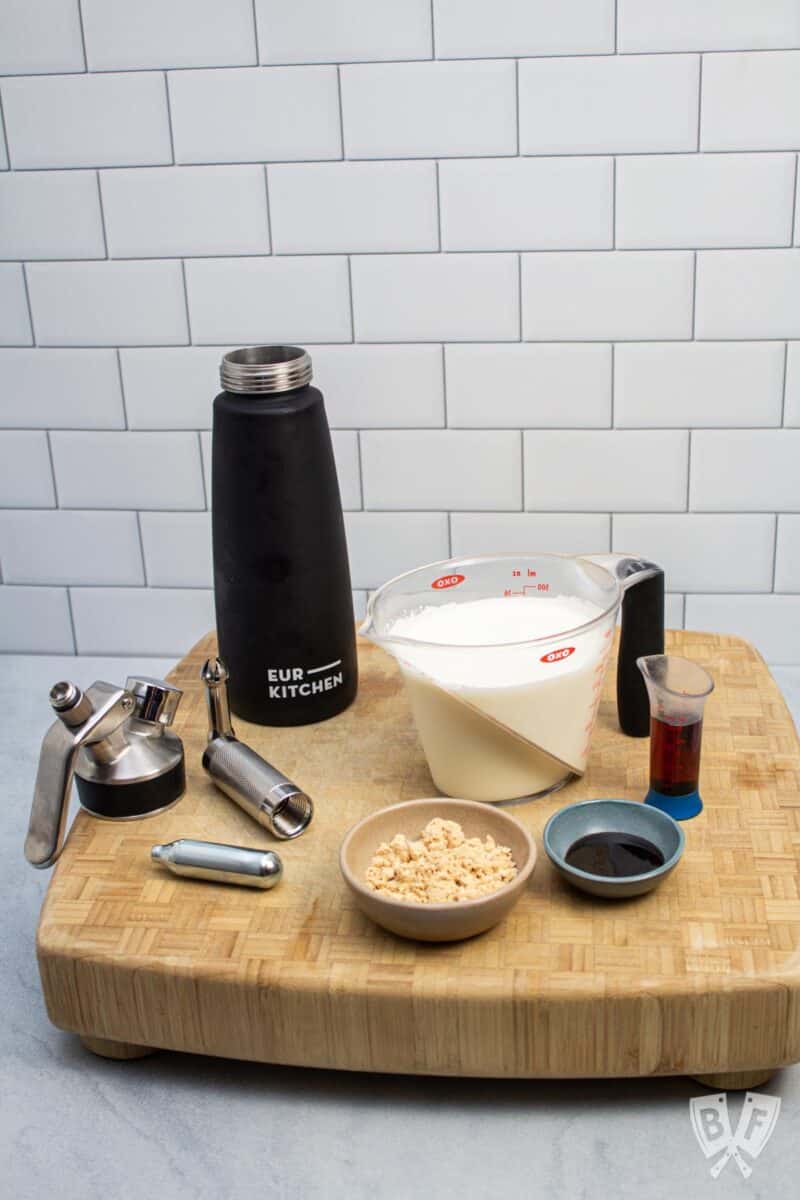
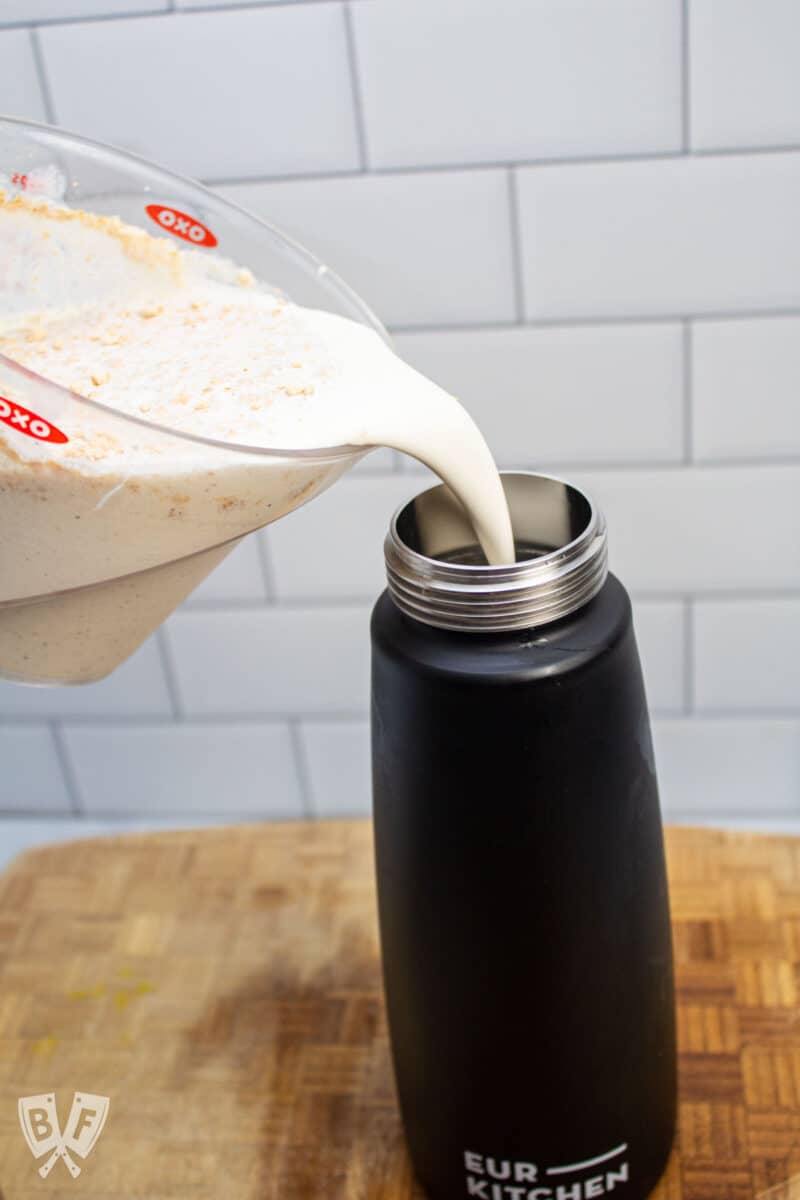
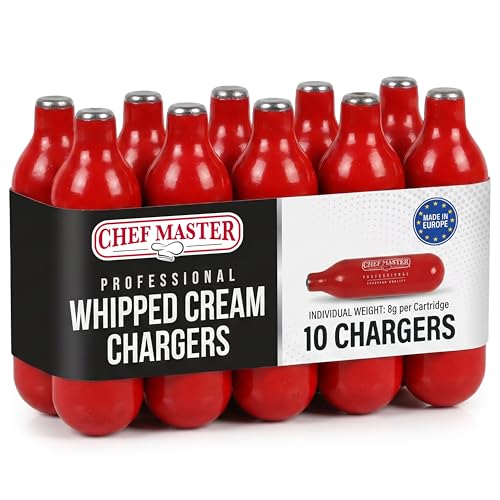
All it is, basically, is a container that you pour your ingredients into, then "charge" with nitrous oxide.
You'll need to buy those N2O chargers separately, but your dispenser should come with a charger holder that you'll use to screw it into the top. This punctures the cartridge and releases the gas into your dispenser.
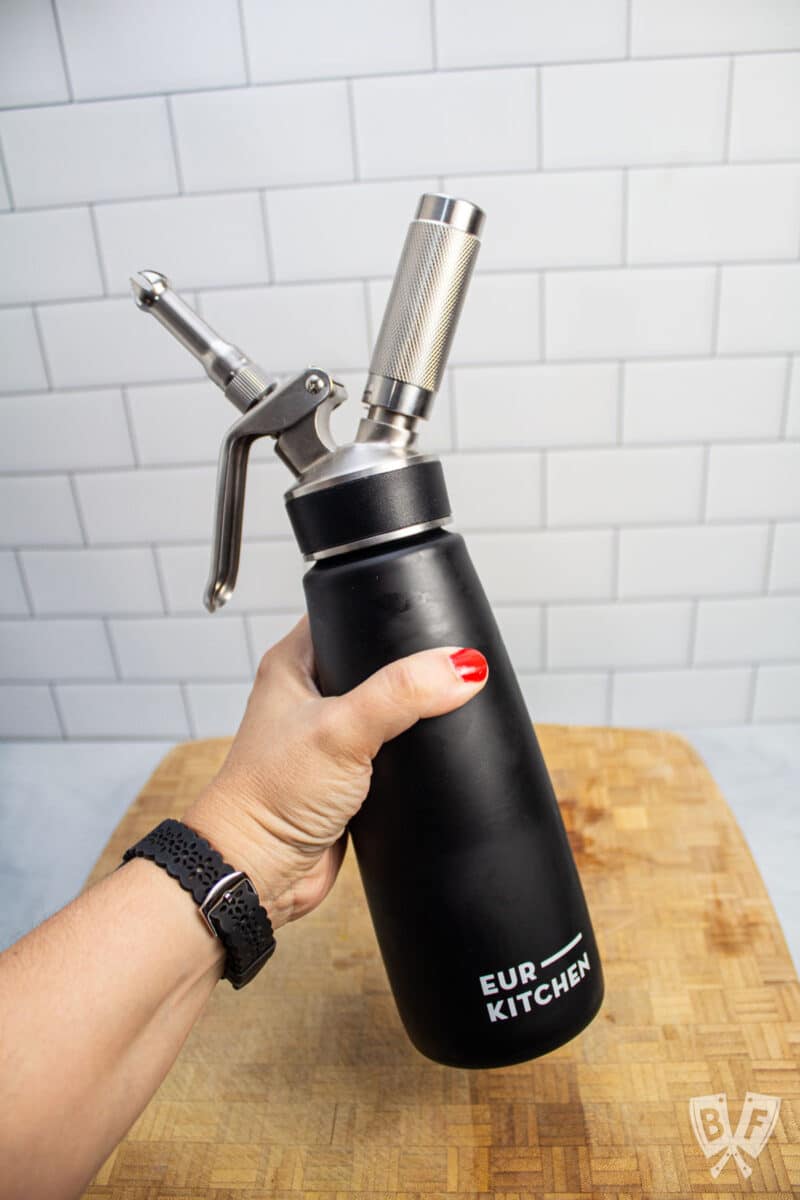
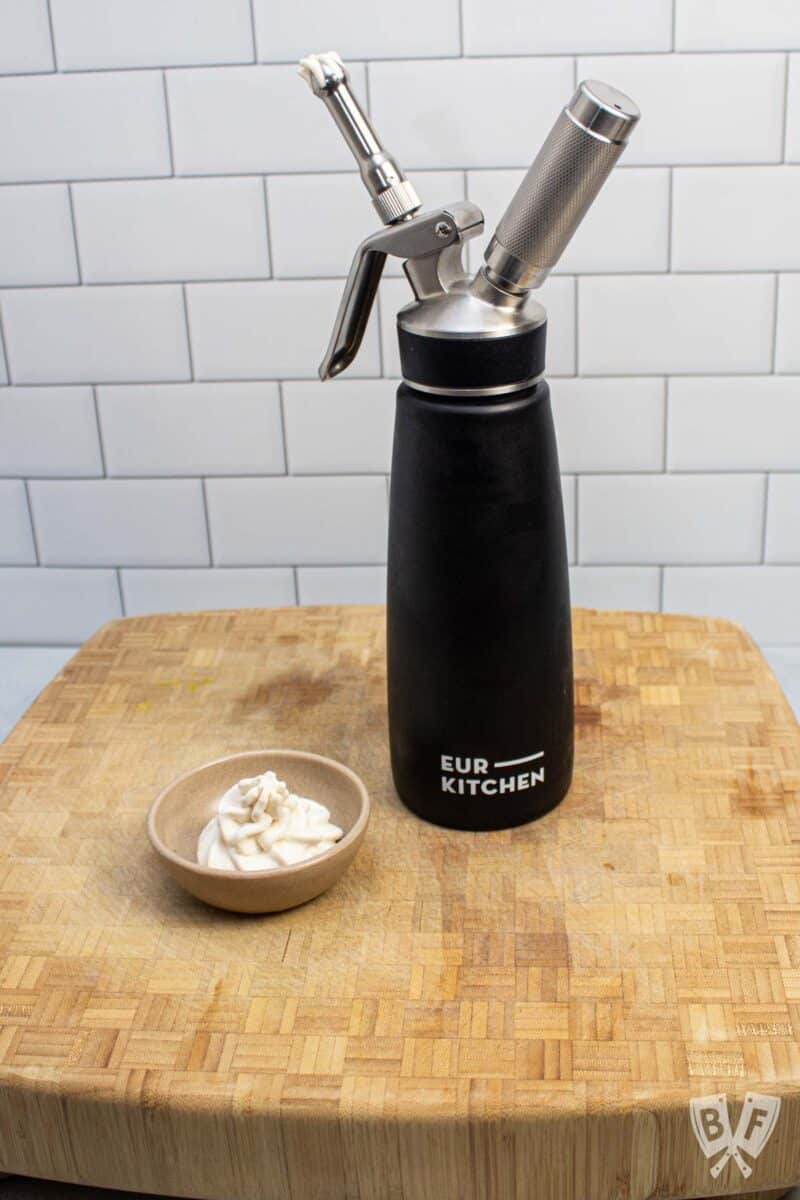
After your dispenser is charged, shake it a few times. Invert the dispenser with the decorating tip facing down, and squeeze the lever to dispense fluffy, delicious whipped cream with minimal effort.
Depending on what brand you buy, you may need to squeeze and release it a few times to get it to dispense.
Each N2O cartridge will charge one batch of whipped cream, so you'll need a new one each time you want to use the dispenser.
You don't have to use all of the whipped cream right away. The dispenser can hang out in the fridge for several days and still be fine.

Here are a few extra tips for successfully using a whipped cream dispenser:
- Chill the dispenser well. A cold whipped cream dispenser will make the process go easier. I like to put the base of it in the fridge for at least 30 minutes ahead of time.
- Make sure your ingredients are chilled, too! Whether you're using heavy cream or coconut cream, having the ingredients well chilled is key.
- Feel free to add additional ingredients to your cream, but stir or whisk them together before adding them to the dispenser. If any of the items are clumpy, they may clog the nozzle.
- Don't overfill your dispenser. The instructions should tell you what the capacity is, which will ensure there's enough room for the N2O to charge the liquid. My dispenser has a 1-pint (2-cup) capacity.
- Be sure everything is sealed well before inserting your N2O cartridge.
- When you're done using the dispenser, invert it over the sink and squeeze the handle until all of the gas has been released before unscrewing the lid.
- Clean the nozzles well to ensure there are no obstructions when trying to dispense future batches of whipped cream.
There are lots of fun things that you can do when making homemade whipped cream. Try a basic batch first, and then branch out and see what you can come up with!
Still hungry? You may also like...
Doing some online shopping? Check out my Amazon shop page for recommendations!
📖 Recipe
Peanut Butter Banana Milkshake with Bacon (without Ice Cream!)
Instructions
- Make the whipped cream: In a large bowl (preferably chilled), combine 1 ¾ cups whipped cream, 2 tablespoons peanut butter powder, 1 tablespoon maple syrup, and ½ teaspoon vanilla bean paste. Whip together using a hand mixer, stand mixer, or whisk, until peaks form. You can also do this with a whipped cream dispenser - see post above for instructions.
- Make the milkshakes: To a blender, add frozen bananas, 1 teaspoon vanilla bean paste, 2 cups milk, ¼ cup peanut butter powder, and whiskey, bourbon, or rum (if using). Blend on high, stopping and scraping down the edges if needed, until blended.
- To serve: Drizzle 1 tablespoon of peanut butter inside each serving glass. Divide milkshake mixture between glasses, then top with whipped cream, bacon pieces, and cherries as desired.
Notes
- If your milkshake mixture is too thick, add another splash of milk. If it's too thin, you can add more frozen banana pieces or a few ice cubes to help thicken it.
- Inspired by the Jimmy Carter milkshake at The Rookery in Macon, Georgia.
- Note that nutrition calculation for this recipe uses reduced fat milk and does not include whipped cream, alcohol, or garnishes.

Comments
No Comments