Big Flavors from a Tiny Kitchen

menu icon
go to homepage
  • Recipes
  • About
  • Events
  • Contact
  • Subscribe
    • Facebook
    • Instagram
    • Pinterest
  • subscribe
    search icon
    Homepage link
    • Recipes
    • About
    • Events
    • Contact
    • Subscribe
    • Facebook
    • Instagram
    • Pinterest
  • ×
    Home » Recipes

    Roasted Spaghetti Squash and Kale #12WksWinterSquash

    January 6, 2014 by Ashley 2 Comments

    Roasted Spaghetti Squash and Kale

    With a house full of people who have been under the weather for the last few weeks, I fell off the 12 Weeks of Winter Squash bandwagon. But fear not! I made sure to get out of the house right before a snowstorm came through town, and picked up several different types of squash to work with for the next few weeks.

    Roasted Spaghetti Squash and Kale

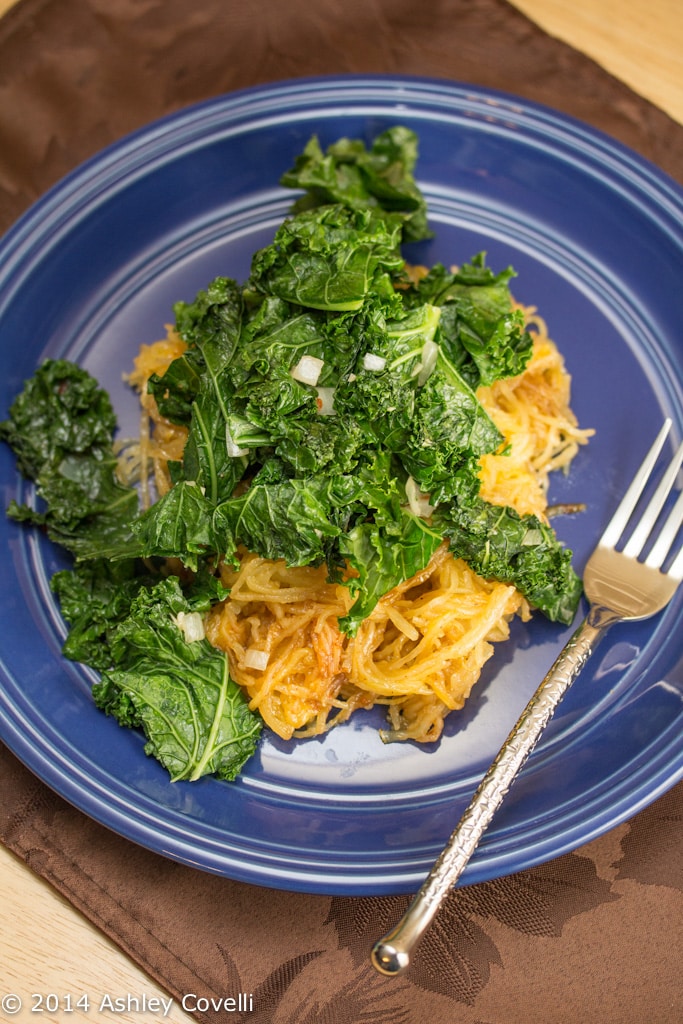
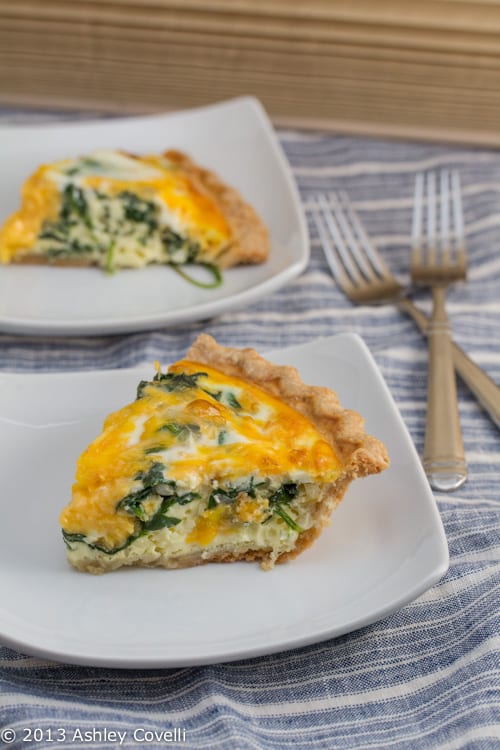
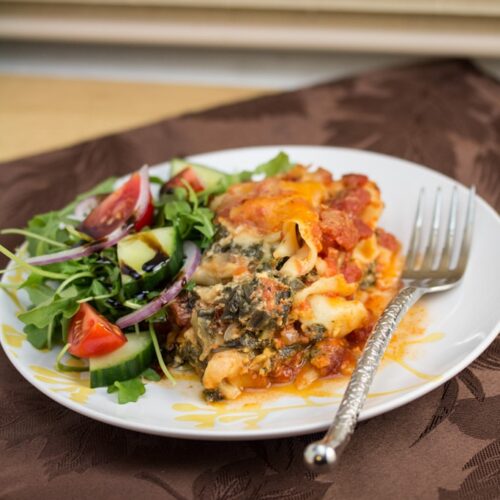
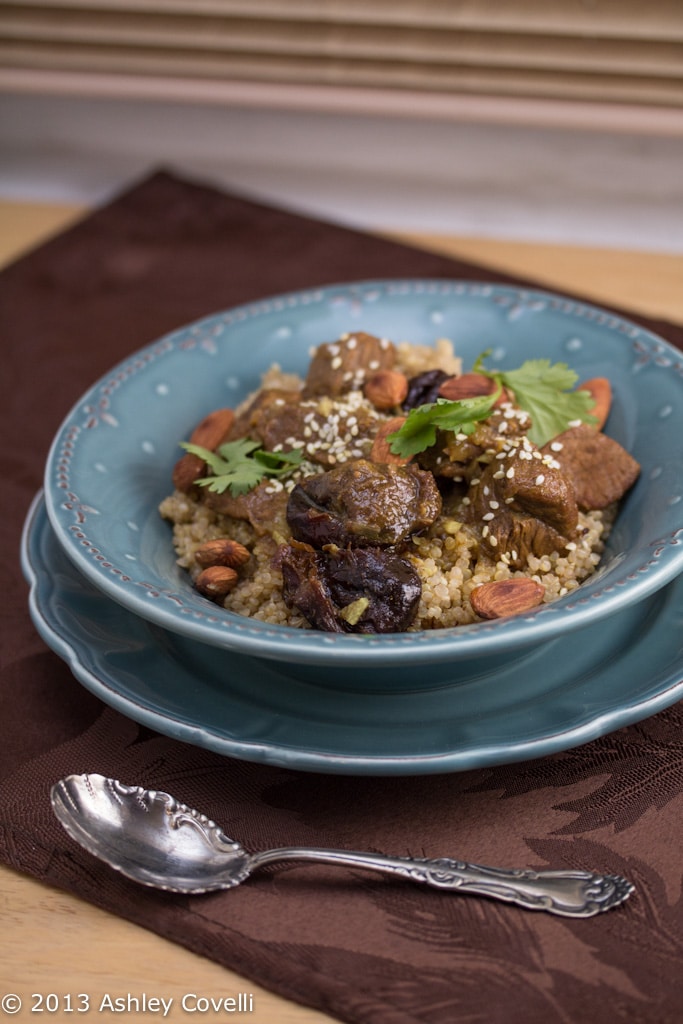
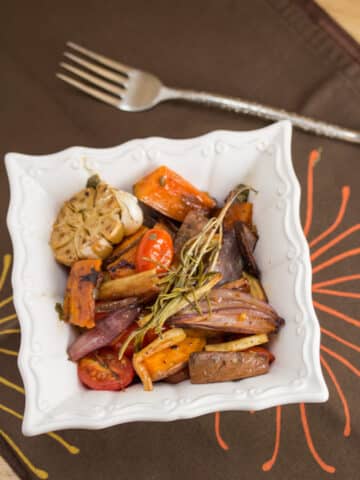
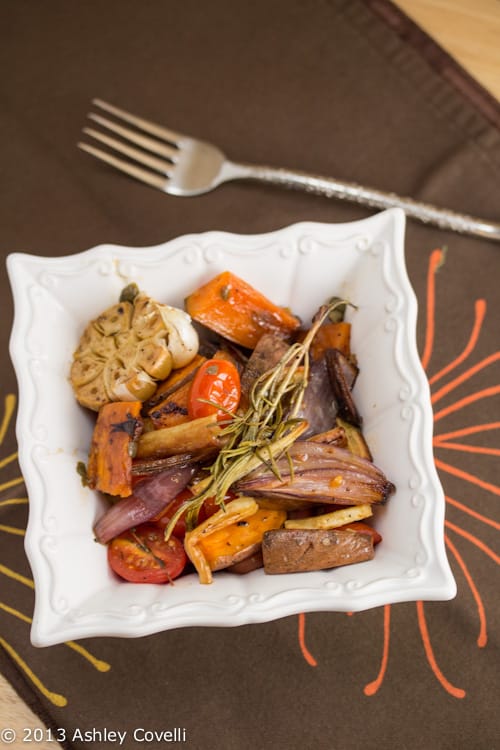
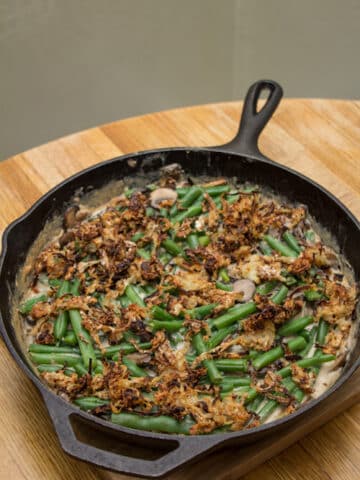
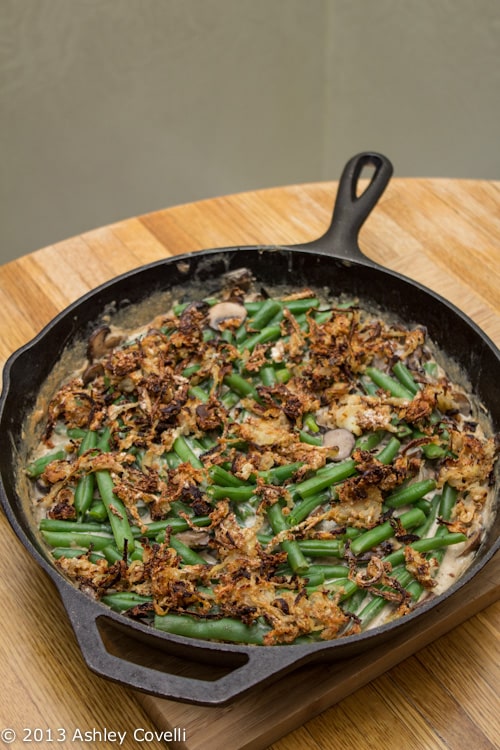
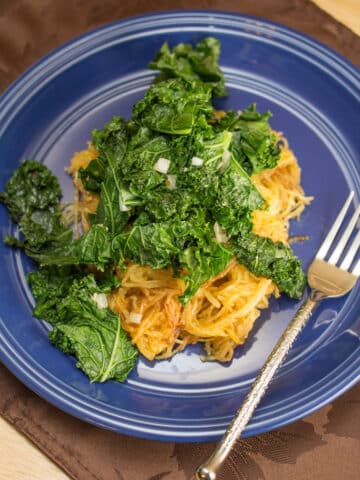
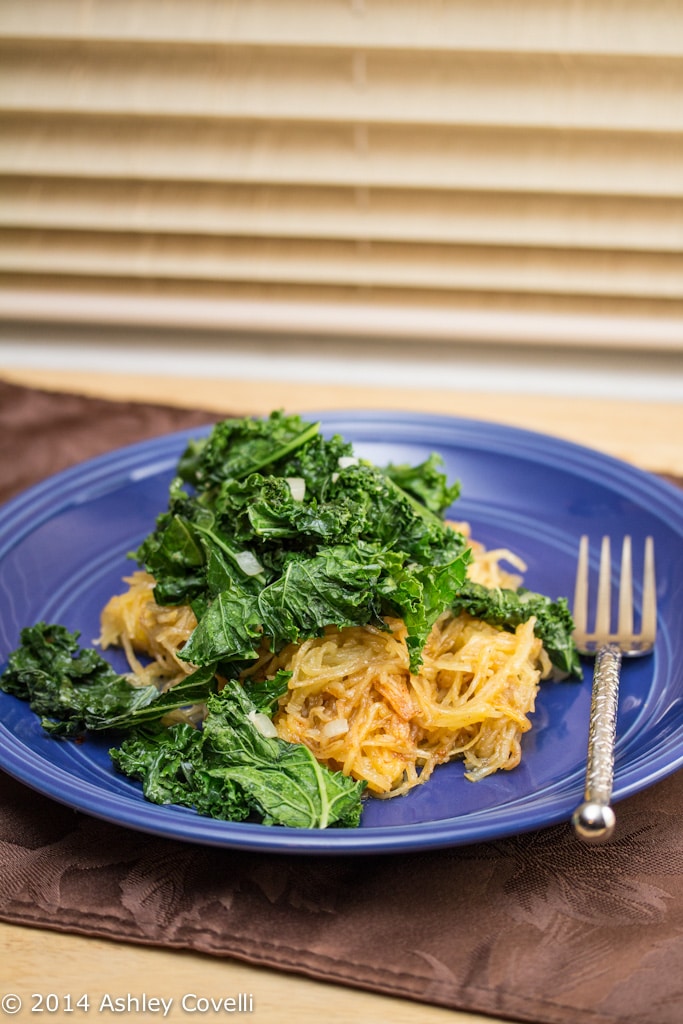
    This spaghetti squash recipe is just beautiful! I adapted the recipe below, since I added a few things because I misread the recipe to boost the flavor. The squash was creamy and delicious, and the sautéed kale on top was beautiful with it. I really liked the tang that the balsamic added. I didn't notice much heat at all from the red pepper flakes and chili powder, but the flavor was very nice, so I wouldn't leave them out. If you're looking for more of a kick, add more of these for sure.

    A few notes - the bunches of kale where I shop must be gigantic, because I only used part of one (enough to fill the skillet with a nice, big, heaping pile) and it was plenty. I didn't have any extra squash leftover.

    Also - if you follow the link to Ree's recipe below, she shows you how to make this dish, step-by-step. I noticed that she was scraping the "spaghetti" out of the squash in the opposite direction that I usually do, and it makes it much more spaghetti-like. I always thought you were supposed to scrape down the length of the squash, but that tends to make it flake apart and get kind of mushy. Scraping across in the other direction yields nice, long strands of carb free "pasta". Beautiful!

    Roasted Spaghetti Squash and Kale

    Check out the roundup below for more delicious winter squash recipes. And, as always, if you've made something with winter squash this week, feel free to add it to the group! 10 weeks down - only 2 more to go! Too bad winter won't be gone after only 2 more weeks. I'm over this frigid weather already 😉

    Roasted Spaghetti Squash and Kale
    Adapted from The Pioneer Woman

    Prep Time: 5 Minutes
    Cook Time: 1 Hour
    Difficulty: Easy
    Servings: 4-8, depending on the size of your squash

    1 whole Spaghetti Squash
    Olive Oil
    Salt And Pepper
    2 bunches Kale, Stalks Removed And Torn Into Pieces
    ½ whole Onion, Diced
    2 cloves garlic, minced
    Pinch of red pepper flakes
    ½ teaspoon Chili Powder
    1 tablespoon Balsamic Vinegar

    Preheat the oven to 350 degrees.

    With a sharp knife, VERY CAREFULLY cut the spaghetti squash in half lengthwise. (Stick the knife into the center of the squash, then cut down. Again---be careful!) Scoop out the seeds and pulp in the center and discard. Place the squash, cut side up, on a large baking sheet. Rub a little olive oil over the cut surface, then place the pan in the oven for 1 hour or until a fork is easily inserted into the squash.

    While the squash is cooking, saute the kale: Heat 1 tablespoon olive oil in a large skillet over medium-high heat. Add the onion and garlic to the pan and cook for 3 to 4 minutes, or until starting to turn color. Throw in the kale, sprinkle in some salt, pepper and red pepper flakes, and stir to sauté until the onions are golden about the kale is partly cooked, about 5 minutes. Set aside.

    When the squash is cooked, use a fork to scrape the stringy squash out of the shell. Add the squash to a bowl. Mix together 1 tablespoon olive oil with the balsamic vinegar. Drizzle it over the squash, sprinkle with salt and pepper, and add the chili powder. Toss to combine.

    Add the squash to individual bowls, then top with a good amount of sautéed kale. You will have squash left over! (Or, you can toss all the kale and half the squash together.)

    Big Flavors Rating: 4 Stars


    Behind BF Volume 2

    January 5, 2014 by Ashley 2 Comments

    Family making Turdilli & Chinudille together

    There has been a lot of baking going on in my tiny kitchen as of late. And I've had several "guest chefs" to give me a hand. It's always fun to see how many people we can squeeze into our kitchen (it's the best when all 6 members of my Supper Club are in there at once - you can barely turn around without bumping into someone or something!).

    My son, Ian, got to help out in the kitchen for the first time a few days after he turned 2, when we made this Perfect Pumpkin Pie for Thanksgiving.

    Let me tell you - it was a wonderful feeling to have my little guy in there with me. He was so excited to "help make-a piiiiiie!". I'm really looking forward to getting him in the kitchen with me more often as time goes by. Hopefully he'll enjoy cooking and baking, especially with (and for) his mama 😉

    Making Perfect Pumpkin Pie

    And for the record, I think that it was the best pumpkin pie to come out of this tiny kitchen. Same recipe I've been using for years, but it was made with extra love this time around!

    Did I mention that he only spilled a tiny bit of nutmeg? I was definitely expecting much more of a mess with a toddler in the kitchen!

    Making Perfect Pumpkin Pie

    The weekend before Christmas, I was (voluntarily) kicked out of the kitchen so that my husband, his father and his uncle Tony (who happens to own an amazing hang gliding/paragliding park in Upstate New York) could take over to make their annual batch of Turdilli & Chinudille. This is a fairly new tradition, and I love it even more now that my son got to help out!

    Dino allegedly bought too much Vermouth, so they ended up making a few Manhattans and drinking while they got to the business at hand.

    Dino's grandmother used to make these cookies for Christmas every year. They're more like a pie crust than a traditional cookie dough. The Chinudille are filled with a mixture of raisins, walnuts and grape jelly and folded up kind of like empanadas. The baked cookies are tossed in hot, local wildflower honey, brought to us lovingly every year by uncle Tony :).

    Making Turdilli & Chinudille

    On Christmas Eve Eve, I borrowed one of the neighbor kids to help me make a big batch of Ricotta Cookies. I like making these cookies every year not only because they're delicious, but also because it makes a ton of cookies, which is perfect for gift-giving.

    This is Thomas making cookies like a pro! It was nice having someone to teach a few things to in the kitchen. He was incredibly helpful, a super fast learner, and not-so-surprisingly, an exceptionally good QC partner-in-crime.

    Making Ricotta Cookies

    We had a lot of fun. He has two younger brothers who I'm going to have help me out sometime soon, too. They're such great kids!

    Making Ricotta Cookies

    Thomas even helped with cleanup ;). Needless to say, he enjoyed the cookies. They're one of my favorite recipes - nice and soft and fluffy. I bring a big tin of them to Dino's cousin's house for Christmas dinner every year, and they're always a huge hit.

    If you follow me on Instagram, you may have seen that I've also been doing a little baking of my own - mostly while my son is napping.

    Dutch Apple Pie

    For the Christmas dessert course, I made my very favorite Dutch Apple Pie. I think it turned out better than ever this time around. I got in and smashed the butter for the crumb topping a bit with my fingers this time, which seemed to help. I also baked it in the upper (smaller) oven, which meant that the topping was closer to the heating element, so it got nice and brown on top. It was beautiful and delicious.

    Last weekend, we visited some friends in Long Island. They were planning to make Beef Bourguignon. I haven't made this with beef before (add it to the list of things to try!), but I did make Mushroom Bourguignon way back in 2009, and it was delicious. I offered to bake some nice, crusty bread, perfect for sopping up all of that luscious sauce, and they didn't hesitate to take me up on that.

    I made the dough for the bread, and baked 2 loaves to bring with us the next morning. I sprinkled the dough with a little black sea salt right before baking. I let the rest of the dough sit in the fridge for a week, which made it turn to a beautiful sourdough, and baked 2 loaves for later use.

    My Favorite Garlic Bread

    This bread freezes really well. I tried it out a while back and took a loaf out to make My Favorite Garlic Bread, which turned out beautifully!

    Anyway - that's the baking madness that's been going on over here lately. Hope you're all enjoying 2014 thus far. What did you bake for the holidays?

    Tomatillo Pico de Gallo

    January 3, 2014 by Ashley Leave a Comment

    Tomatillo Pico de Gallo

    To go with our Cilantro and Lime Fish Tacos with Cilantro and Lime Crema for New Year's Eve, I made this pico de gallo. It's pretty easy to put together, but you need to toast some cumin seeds and grind them as well as clean and seed some tomatillos.

    Tomatillos are full of seeds, so buy more than you think you'll need. I used a grapefruit spoon to help me out.

    This was a tasty and refreshing topping for the tacos, and it was really good on top of the Cilantro-Lime Rice that I made to go alongside (recipe coming tomorrow!).

    Tomatillo Pico de Gallo

    Cilantro and Lime Fish Tacos with Cilantro and Lime Crema

    January 2, 2014 by Ashley 4 Comments

    Cilantro and Lime Fish Tacos with Cilantro and Lime Crema

    New Year's Eve 2013. The plan: Epic Taco Tuesday to finish off the year with some good friends. Lots of tasty, vegan dishes and libations were planned.

    New Year's Eve Eve 2013. The reality: Spent the night in the Emergency Room with my 2-year-old. There's a line in the baby books for "first ER visit", right?

    Right.

    Cilantro and Lime Fish Tacos with Cilantro and Lime Crema

    Everything is fine, but we had quite a scare, and with all of the hubbub and cooties and also a sick hubby, we decided to postpone our taco date with our friends. Once the dust settled a bit, I decided I still wanted to make at least some tacos, so I put together a few things to celebrate New Year's Eve. Dino even convinced me that we should fire up the grill for the last time of the year to make the aforementioned tacos.

    So while I definitely wasn't planning on using a grill at the end of December, spending all day and night in pajamas, and eating leftover Ricotta Cookies with Dino in the kitchen right before the clock struck midnight, it was kind of perfect.

    Except for all of the cooties.

    Cilantro and Lime Fish Tacos with Cilantro and Lime Crema

    And now... the tacos. They were wonderful! I had planned to grill them indoors on my cast iron grill pan, but Dino convinced me that it was worth firing up the gas grill. I'm glad he did - the flavor was wonderful! These tacos are light and refreshing, and made me think of summertime, even though it's near freezing here in New York right now. I was surprised how much flavor this quick marinade imparted into the fish (in my case, tilapia).

    I really liked the addition of the Tomatillo Pico de Gallo (recipe coming tomorrow!) and the Cilantro and Lime Crema was just awesome. Nice and tangy and creamy... it would be great on a lot of different types of tacos. And you know I'm down for trying lots-o-tacos in 2014.

    In my hurry to get dinner together, I totally forgot to add the shredded cabbage to these, but I most definitely will be putting it in with the leftovers.

    Hope 2014 treats everyone well!

    Cilantro and Lime Fish Tacos
    Closet Cooking

    Makes 4 servings

    Prep Time: 20 minutes
    Cook Time: 20 minutes
    Total Time: 40 minutes

    1 pound white fish such as tilapia, cod, etc.
    1 tablespoon oil
    1 lime, juice and zest
    1 jalapeño, finely diced
    1 clove garlic, chopped
    1 green onion, finely sliced
    1 handful cilantro, chopped
    ½ teaspoon cumin seeds, toasted and ground
    salt and pepper to taste
    8 (4 inch) corn tortillas
    1 batch tomatillo pico de gallo
    3 cups cabbage, shredded
    1 batch cilantro lime crema - see below
    2 large avocados, sliced

    Marinate the fish in the oil, lime juice and zest, jalapeño, garlic, green onion, cilantro, cumin, salt and pepper for 10-20 minutes.

    Grill the fish over medium-high heat until cooked, about 4-6 minutes per side. The fish will be cooked when it flakes easily and it is no longer translucent.

    Flake the fish and serve in tortillas garnished with your favourite toppings.

    Cilantro and Lime Crema

    Servings: makes ½ cup

    Prep Time: 5 minutes
    Cook Time: 0 minutes
    Total Time: 5 minutes

    ½ cup crema or sour cream
    1 green onion, sliced
    1 handful cilantro
    ½ lime, juice and zest
    ½ jalapeño pepper, seeded and diced (optional)

    Purée everything in a food processor.

    Big Flavors Rating: 4 Stars

    Falafel with Yogurt-Herb Sauce

    January 1, 2014 by Ashley 3 Comments

    Falafel in pita bread with toppings served with yogurt-herb sauce.

    Chickpea and herb patties are stuffed into pocket pitas for a tasty, plant-based sandwich. Delicious with a quick, tangy yogurt-herb sauce!

    It had been a while since I made falafel at home, and when Stonefire sent me some pita and flatbread to sample, I figured it was high time to get back to falafel-ing.

    I've revised the recipe a bit, since I do things a little differently from the original recipe. In doing so, I noticed that Just Braise is no longer online! I'm not sure what happened, but I want to make sure that the author knows that this recipe helped me find my love for falafel! So much so, that I can't order it out anywhere, because it's just not as good.

    Falafel with Yogurt-Herb Sauce

    Forming the falafel takes a bit of practice, but once you get it, it will become second nature. You need to press somewhat firmly so that the discs hold together when fried, but not so hard that they squish all over the place. Don't let it scare you!

    I didn't get mine quite as crispy on the outside as my husband likes this time around, because I'm a total wimp when it comes to getting oil hot enough. And the time he convinced me to deep-fry them... let's just say it wasn't pretty.

    Falafel with Yogurt-Herb Sauce

    Something new this time around was the pita bread that I used. Stonefire Authentic Flatbreads sent me some samples to try out, and let me tell you - my husband and I were both majorly impressed! We  sampled both the Original and Whole Grain Pita, and both were wonderful. They smelled awesome as soon as I opened the packages, and they really were nice and fluffy.

    I hadn't previously tried this brand, and I'm really glad that I was able to. I'm going to keep an eye out for it at my local supermarket now, because I've never been too thrilled with the other brands I've tried. This pita was hearty enough to hold lots of falafel, sauces and toppings without tearing, which was a pleasant surprise!

    Stonefire is a family owned company that's been baking up pita bread, naan and flatbread for over 40 years. They don't use any artificial preservatives, flavors or colors in their products, and offer both traditional and whole grain options. That means when you buy their products, you need to use them quickly, or go ahead and stash them in the freezer for later use. The freshness makes a huge difference!

    I already have some ideas for using the naan and flatbread that is now in my freezer. Stay tuned!

    *Note: I received promotional items to try out, but was in no other way compensated. As always, all opinions are 100% my own. If you have a product that you feel would be of interest to myself and my readers, you can submit information for review via my contact page.

    Top 10 Recipes of 2013

    December 31, 2013 by Ashley Leave a Comment

    Shredded Chicken Tacos

    I can't believe that 2013 is almost over already! It's been a delicious year in my tiny kitchen. I've made quite a few new recipes this year, as well as a few repeats.

    This year, I also created a lot of original recipes, and many of them turned out to be new favorites. A few even landed in the top 10! I'm looking forward to coming up with more in the coming years.

    To celebrate the end of the year, here's a look at the top 10 recipes, based on popularity with my readers:

    World Nutella Day: Nutella No Bake Cookies

    #10: Nutella No-Bake Cookies - It wouldn't be a "biggest hits" list without Nutella. Especially when said Nutella is combined with peanut butter and formed into easy and delicious no-bake cookies. These were amazing!

    Sokalbi Gui (Barbecued Beef Short Ribs)

    #9: Korean BBQ Party: Sokalbi Gui (Barbecued Beef Short Ribs) - I learned to make these beauties at a Korean cooking class last year, and have made them at home twice now. They are phenomenal, and definitely the highlight of any Korean BBQ party!

    Slow Cooker "Roasted" Beets

    #8: Slow Cooker "Roasted" Beets - Roasted beets are so delicious, but it can be annoying to have to heat up the kitchen to roast them. I thought I'd give "roasting" in the slow cooker a shot, and I'm so glad I did - these were perfect! They tasted just like oven-roasted beets. I've had a lot of friends and readers try these out, and they've all been extremely pleased with the results.

    Oi Bokkum Namul (Seasoned Cucumbers with Sesame Seeds)

    #7: Korean BBQ Party: Oi Bokkum Namul (Seasoned Cucumbers with Sesame Seeds) - One of the banchan that should go alongside any Korean BBQ menu.

    CrockPot Sweet and Spicy Salmon

    #6: CrockPot Sweet and Spicy Salmon - This recipe proves that occasionally, it's worth trying out something scary. Yes, I was afraid of what might happen to fish in a slow cooker, but I'm oh so glad I tried it out, because this was a surprise hit at the dinner table!

    Deviled Eggs

    #5: Deviled Eggs - A classic. The way Grandma taught me to make 'em.

    Roasted Okra

    #4: Roasted Okra - Simplicity is key here. I was so glad I took a chance when buying okra at the Farmers Market - it was an ingredient that had previously intimidated me. It was easy and absolutely delicious. I could eat this stuff like candy!

    Baby Spinach and Cheddar Quiche

    #3: Baby Spinach and Cheddar Quiche - A gorgeous, light and fluffy quiche that cooked up beautifully and wowed my quiche-loving husband. This would be easily adaptable to include other ingredients, too.

    Easy Breakfast Casserole

    #2: Easy Breakfast Casserole - Breakfast strikes again! This time, stuffing mix and ham and cheddar combine to make an incredibly flavorful casserole that was perfect for a potluck that I attended.

    Shredded Chicken Tacos

    #1: Shredded Chicken Tacos - I came up with this recipe while I was on a taco kick a while back, and it was a big hit at our dinner table. Apparently it was a hit with my readers, too, because it was in the top 10 almost constantly since I posted it. There's a great contrast of textures here, and it just looks bright and cheery, which is making me miss the warmer weather!

    Hope everyone has a safe and happy, healthy New Year's Eve. I will be staying home, taking care of my sick hubby and toddler. Hopefully loading up on homemade soup will get them back on their feet soon. Recipe coming soon!

    Was your favorite showcased here? Is there something that you haven't seen over on Big Flavors from a Tiny Kitchen that you'd like to see in the new year? Drop me a note in the comments - I'd love to hear your suggestions! 🙂

    Cheers!

    Candy Cane Bundt Cake

    December 30, 2013 by Ashley Leave a Comment

    Candy Cane Bundt Cake

    Occasionally, there are days where I have a lot of time to devote to making an elaborate, delicious desserts, like this Lemon and White Chocolate Mousse Trifle with Strawberries.

    And then there are days where a gussied up cake mix is just what the doctor ordered.

    Candy Cane Bundt Cake

    I got this recipe from my friend Felice's blog, All That's Left Are The Crumbs. She has loads of beautiful baked goods that I'm itchin' to try out, and this was the first.

    I brought it over to my in-laws' house for Christmas Eve, and it was a really big hit! It was light and fluffy, which was a great follow-up to the Feast of the Seven Fishes that my father-in-law prepared. It had a ribbon of minty, red cake in the middle that was really pretty, and there was just enough icing on top to bring it all together. Crushed candy canes made it look extra festive.

    Candy Cane Bundt Cake

    One note - be sure to pay attention when a recipe tells you to generously grease and flour a cake pan. I somehow missed that part, and mine came out in several pieces that I haphazardly smushed back together. It was still pretty, though. I love the idea of adding a colored portion of cake in the middle for a pretty surprise!

    Candy Cane Bundt Cake
    All That's Left Are The Crumbs (originally from tablespoon.com)

    Ingredients
    Cake:
    1 box white cake mix
    Water
    Vegetable oil
    Egg whites called for on cake mix box
    ½ teaspoon red food color
    ½ teaspoon peppermint extract

    White Icing:
    1 cup powdered sugar, sifted
    1 tablespoon milk or water
    ½ teaspoon vanilla, if desired

    Decoration:
    Crushed candy canes or crushed hard peppermint candies, if desired

    Preparation
    Cake:
    - Heat oven to 350℉ (325°F for dark or nonstick pan).
    - Generously grease and flour 12-cup bundt pan.
    - Make cake batter as directed on box.
    - Pour about 2 cups batter into pan.
    - In small bowl, pour about ¾ cup batter; stir in food color and peppermint extract.
    - Carefully pour pink batter over white batter in pan.
    - Carefully pour remaining white batter over pink batter.
    - Bake and cool cake as directed on box.

    Icing:
    - In small bowl, mix white icing ingredients.
    - If necessary, stir in additional milk, 1 teaspoon at a time, until smooth and spreadable.
    - Spread over cake.
    - Sprinkle crushed candy on top.

    Big Flavors Rating: 4 Stars

    Stir-Fried Shrimp with Spicy Orange Sauce

    December 23, 2013 by Ashley Leave a Comment

    Stir-Fried Shrimp with Spicy Orange Sauce

    I'm all for easy weeknight meals. Especially with the level of toddler crankiness we've been dealing with as of late.

    Terrible twos... they are no joke. He's lucky he's such a cutie 😉

    Anyhow, this is a quick and easy weeknight meal that packs a lot of flavor. It's nice and spicy, yet sweet from the orange and honey.

    I served these shrimp on top of rice that I cooked in some veggie stock. I tossed a dried bay leaf and a pinch of kosher salt in the rice cooker with it and got on with dinner.

    Stir-Fried Shrimp with Spicy Orange Sauce

    I like keeping a bag of shrimp in the freezer, since they cook up so quickly. It's perfect weeknight meal material. My bag was only a pound, but I didn't bother cutting down the rest of the ingredients. It worked out great!

    Stir-Fried Shrimp with Spicy Orange Sauce
    Cooking Light August 2007

    Yield: 4 servings (serving size: ¾ cup)

    1 ½ pounds peeled and deveined large shrimp
    1 tablespoon cornstarch
    ¼ cup fresh orange juice
    2 tablespoons low-sodium soy sauce*
    2 tablespoons honey
    1 tablespoon rice wine vinegar
    1 tablespoon chile paste with garlic (such as sambal oelek)
    2 tablespoons canola oil
    1 tablespoon minced peeled fresh ginger
    3 garlic cloves, minced
    ⅓ cup chopped green onions

    Place shrimp in a medium bowl. Sprinkle with cornstarch; toss well to coat. Set aside.

    Combine juice, soy sauce, honey, vinegar, and chile paste, stirring with a whisk; set aside.

    Heat canola oil in a large nonstick skillet over medium-high heat. Add minced ginger and garlic to pan; stir-fry for 15 seconds or until fragrant. Add shrimp mixture; stir-fry for 3 minutes. Add juice mixture and onions; cook 2 minutes or until sauce thickens and shrimp are done, stirring frequently. Serve immediately.

    *Optional: use Gluten Free

    Amount per serving:
    Calories: 301
    Calories from fat: 30%
    Fat: 10g
    Saturated fat: 1.1g
    Monounsaturated fat: 4.6g
    Polyunsaturated fat: 3.2g
    Protein: 35.3g
    Carbohydrate: 16.8g
    Fiber: 0.5g
    Cholesterol: 259mg
    Iron: 4.4mg
    Sodium: 621mg
    Calcium: 103mg

    Big Flavors Rating: 4 Stars

    Behind BF Volume 1

    December 22, 2013 by Ashley 2 Comments

    Side view of a stack of cookbooks

    This is the first installment of a new feature here on Big Flavors from a Tiny Kitchen. Behind BF is a place to discuss things that have been going on behind the scenes in and around my tiny kitchen. Feel free to jump in and add your thoughts or questions in the comment section below.

    Christmas is almost here, so I thought I'd share just a few cookbooks that I own that I would definitely recommend for gift giving. You know, for those of you who like to put off shopping till the last minute wait until you find the perfect gift for the food lover in your life.

    Cookbook Recommendations

    1. My Calabria: Rustic Family Cooking from Italy's Undiscovered South by Rosetta Costantino w/ Janet Fletcher - My husband found this cookbook through Rosetta's blog, which is focused on the cuisine from the region of Italy that his family comes from. He got this book for me for Christmas back in 2010, and I have tried several recipes from it over the past few years. The Zucca Gialla con la Menta and Polpette di Melanzane in particular were really great and unique selections that my family really enjoyed.

    2. Plenty: Vibrant Vegetable Recipes from London's Ottolenghi by Yotam Ottolenghi - I picked this book up a few months ago, and it is hands down one of the most beautiful collections of recipes that I've seen. The food is bright and vibrant, and I ended up bookmarking almost the entire book, since all of the recipes sounded so good! So far, I've made the cover recipe, Eggplant with Buttermilk Sauce and also Roasted Parsnips and Sweet Potatoes with Caper Vinaigrette, and both were exceptional.

    3. Gifts Cooks Love by Sur la table - This book is a great resource for making edible, homemade gifts in your own kitchen. They have fun ideas for making themed baskets by pairing a few of their recipes together, along with some other items to round them out. They even give you ideas for what to write on the gift tags. Super cute stuff. I've made a few so far. One of our very favorite (and highly addictive) snacks, Chipotle Chile Candied Pecans came from this book, as well as this Bollywood Coconut Curry Popcorn Seasoning.

    4. It's All Good: Delicious, Easy Recipes That Will Make You Look Good and Feel Great by Gwyneth Paltrow - I was a bit hesitant to pick up a celebrity cookbook, but once I saw it at the store earlier this year, I decided to page through it and just had to buy it. The photography in this book is gorgeous, and there are a lot of recipes for various diets that are often seen as "restrictive". There are a few ingredients in some of these recipes that can be tricky to track down, but there are plenty of other options in there. I've made several recipes from this book already, and they have all been really good! My favorite is probably her Go-To Black Beans.

    5. 660 Curries by Raghavan Iyer - If I had to pick just one very favorite favorite cookbook, this would be the one. I checked it out from the library back in 2009 and asked for my own copy for Christmas after trying a handful of recipes. I have made quite a few tasty meals from the pages of this book, and there are so many more tasty curries on deck! One of my favorite parts of this book is the "Spice Blends and Pastes" section, which shows you how to make a lot of the curry blends and flavor bases that are used in many of the recipes throughout the book. There's such a wide array of recipes in here, and they vary from quick and easy to more elaborate. Probably one of the most impressive recipes I've made from this book is Flaky Griddle-Cooked Breads (Malabar Parantha).

    6. Last but certainly not least on my list is In a Persian Kitchen: Favorite Recipes from the Near East by Maideh Mazda. This cookbook is the only one on the list that doesn't feature photography. It's just a black and white collection of delicious recipes, originally published in the '70s. Being half-Persian, I am a big fan of Middle Eastern cuisine. This cookbook presents even the most elaborate Persian dishes in a straightforward manner so that they are easy to replicate at home. The Persian Meatloaf is one of our very favorite meals!

    Candy Cane Playdough

    Another awesome gift idea is something that one of my friends brought over this past week for my toddler. This homemade Candy Cane Playdough is absolutely adorable, and super festive. I love the addition of glitter in it. I was seriously floored when I saw it. I'm not sure what recipe my friend used, but I found this one online that looks like it would work. I haven't made homemade playdough since I was a kid, so I'm definitely interested in trying this out sometime!

    In other news, today is my Grandma's 93rd birthday! I have so many wonderful memories of cooking with her as a kid. One of my favorite things is that whenever I used to help her bake pies, she would make sure there was extra pie dough and filling so we could make a normal sized pie plus one or two mini pies just for me! It was so much fun, and really helped to kindle my love for cooking and baking. Now that my son is 2, I should try to find some mini pie pans so I can continue that tradition with him.

    Happy holidays, everyone, and happy cooking!

    Gourmet Mini Meatloaves

    December 21, 2013 by Ashley Leave a Comment

    Gourmet Mini Meatloaves

    Meatloaf is definitely something I never thought of as cute. Until now!

    These individual-sized meatloaves are great, because they're less messy and cook more quickly than the standard loaf-o-meat.

    I really liked the measuring cup method here, and think it would be interesting to try freezing them before cooking sometime to see how they hold up. It would be nice to have the majority of the work done ahead of time!

    Gourmet Mini Meatloaves

    These loaves are topped with a really sweet glaze - next time, I may reduce the amount of sugar in it. It was good, but pretty sweet. The 1-cup versions are very substantial. I may try it with a ½-cup measure next time.

    I served these with sweet peas and potato latkes topped with applesauce. It was a great, comfort food meal!

    Gourmet Mini Meatloaves

    Gourmet Mini Meatloaves
    Quick, Cheap Comfort Food: 100+ Fresh Recipes for Meals in a Hurry – Victoria Shearer

    Serves: 5 (1 mini-loaf per serving)
    Prep time: 20 minutes
    Cook time: 30 minutes

    2 teaspoons olive oil
    1 ⅓ cups chopped sweet onions, like Vidalia
    2 teaspoons minced garlic
    2 pounds ground beef or meatloaf mix (beef, pork, veal)
    2 cups fresh bread crumbs
    2 eggs, beaten
    ¼ cup snipped fresh flat-leaf parsley or 2 tablespoons dried
    2 tablespoons Worcestershire sauce
    ½ teaspoon hot sauce
    ½ dry mustard
    2 teaspoons salt
    ½ teaspoon black pepper
    ½ cup ketchup
    ½ cup sugar

    Early in the day or the day before: Heat olive oil in a medium nonstick skillet over medium heat. Add onions and garlic. Sauté for 1 ½ minutes. Remove from heat. Place in a large mixing bowl.

    Add ground beef, bread crumbs, and eggs. With clean hands mix until ingredients are well combined. Add parsley, Worcestershire sauce, hot sauce, dry mustard, salt, and pepper. Mix seasonings into meat mixture.

    Firmly pack the meatloaf mixture into a 1-cup measure, mounding top to form a dome. Slide a paring knife gently around the edges of the cup. Upend cup onto your hand so that meatloaf slides out. Then place loaf, flat side down, on a tray. Repeat with remaining mixture. (You can refrigerate meatloaves, covered, at this point for up to 24 hours or freeze until needed. Bring meatloaves to room temperature before baking.)

    To bake: Preheat oven to 400°F. Transfer meatloaves to the slotted tray of a broiler pan. Bake for 15 minutes. Meanwhile, place ketchup and sugar in a small saucepan over medium-low heat. Cook for 1 minute, stirring constantly, until sugar is dissolved. Spoon ketchup mixture over partially baked meatloaves. Bake meatloaves for 15 minutes more or until meat, when tested with a knife, is cooked through (155°F on instant-read thermometer).

    Note: These 1-cup meatloaves are hearty portions. If you have a ¾-cup measure, the mixture will form 6 mini-loaves, suitable for smaller appetites.

    Big Flavors Rating: 4 Stars

    Gingerdoodles

    December 20, 2013 by Ashley 4 Comments

    Gingerdoodles

    I wanted to make some festive cookies for a potluck this week, and when I saw these over on Cookie Madness, I  just knew I had to try them out.

    I haven't made our favorite Snickerdoodle recipe in quite some time, and the idea of twisting them up with ginger cookies just sounded fabulous. And it was!!

    The two types of dough together worked out so well. I love the depth of flavor that molasses adds to  cookies. Especially the dough. Not that I ate it raw or anything...

    These are fun to make - I used a small cookie scoop to get equal amounts of each dough, and rolled them together in my hands. It worked out great, and I was rewarded with a big batch of soft, chewy and absolutely delicious cookies. These will definitely be making a repeat appearance in my kitchen!

    Gingerdoodles

    Gingerdoodles
    Cookie Madness (Adapted from Land O'Lakes)

    A cross between a Snickerdoodle and a ginger cookie.

    Prep time: 10 mins
    Cook time: 8 mins
    Total time: 18 mins
    Serves: 48

    Ingredients
    1 ½ cups granulated sugar
    1 cup Land O Lakes® Butter, softened
    2 Land O Lakes® Eggs
    1 teaspoon vanilla
    2 ¾ cups (13.4 oz) all-purpose flour
    2 teaspoons cream of tartar
    1 ½ teaspoons ground cinnamon
    1 teaspoon baking soda
    ¼ teaspoon salt (or 1 teaspoon if using unsalted butter)
    Ginger Dough
    3 tablespoons mild molasses
    ¼ cup all-purpose flour
    ½ teaspoon ground ginger
    ½ teaspoon ground cloves
    For Rolling: ⅓ cup sugar

    1. Heat oven to 400°F. Line baking sheets with parchment paper; set aside.

    2. Beat the butter and sugar with an electric mixer until creamy. Add the eggs and vanilla and beat just until incorporated.

    3. In a separate bowl, stir together the flour, cream of tartar, cinnamon, baking soda and salt. Add the flour mixture to the butter mixture and stir until blended. Divide dough in half; place in separate bowls.

    4. Add molasses to one bowl of dough and stir until it’s mixed in. Combine ¼ cup flour, ginger and cloves and add to the molasses dough, stirring until well mixed
    5. Twist ¾-inch pieces of each dough together; roll into about 1 ¼-inch balls, creating a marbled effect. Roll balls in sugar.

    6. Place, 2 inches apart, onto prepared baking sheets. Bake 8-10 minutes or until edges are light golden brown. Cool 2 minutes on baking sheet; transfer to cooling rack.

    Big Flavors Rating: 5 Stars

    Curried Coconut-Butternut Squash Soup

    December 17, 2013 by Ashley 1 Comment

    Curried Coconut-Butternut Squash Soup

    Mark Bittman knows how to lure me in. He has an entire cookbook full of short and sweet recipes, broken down by season, that can be on your table in 20 minutes or less.

    Yes, please.

    This soup was the perfect accompaniment to some leftovers that I reheated on the day of  a snow storm. The recipe was incredibly easy to follow, and with the help of a pre-peeled and halved squash, came together in a snap.

    I used 4 cups of chicken stock and 1 cup of water, but I think this would be great with vegetable stock, too. I even think it could work with frozen, pre-cut squash. The coconut milk makes it creamy without actually adding any dairy. Definitely add a bit of salt and freshly cracked black pepper at the end to bring it all together. Even my two-year-old loved this. He was slurping it down and asking for more!

    Curried Coconut-Butternut Squash Soup

    Curried Coconut-Butternut Squash Soup
    Mark Bittman's Kitchen Express

    You can buy pre-peeled, precut squash, and just cut it down into quarter-inch pieces.

    Cook two cups of chopped squash in a few tablespoons of vegetable oil, along with a diced onion, a teaspoon of cumin, a half teaspoon of cinnamon, and a teaspoon of curry powder (or more to taste). Cook the vegetables and spices until the onion is soft, about three minutes. Add five cups of chicken broth of water and a cup of coconut milk; bring to a boil and cook for about six minutes or until the squash is tender and easily pierced with a knife. Serve the soup topped with fresh cilantro and crusty bread or a scoop of rice.

    Big Flavors Rating: 4 Stars

    Roasted Acorn Squash and Brussels Sprouts with Honey, Smoked Paprika, and Sage Salt #12WksWinterSquash

    December 16, 2013 by Ashley 1 Comment

    Roasted Acorn Squash and Brussels Sprouts with Honey, Smoked Paprika, and Sage Salt

    This side dish just screams winter comfort food. Never mind the fact that I almost screamed while attempting to cut an acorn squash into rings (no clue how you did that without losing a finger, Joanne!).  I made a few changes based on what I had on hand, and the fact that I could only manage to cut one piece into a ring before my life flashed before my eyes. Seriously... these acorn squash are pretty unwieldy!

    Anyhow, I cut the whole recipe in half, as I only had 1 acorn squash to roast. I cut it into ½-inch slices instead of rings, and put it on a baking sheet with the Brussels sprouts. I totally spaced and forgot to add fresh sage to my grocery list, so I added ½ teaspoon of dried, rubbed sage to the oil mixture. I didn't see an amount of oil, so I used around 4 tablespoons.

    Roasted Acorn Squash and Brussels Sprouts with Honey, Smoked Paprika, and Sage Salt

    This turned out seriously awesome! The squash is buttery and smooth, and the sprouts get nice and caramelized. I would have never thought to put smoked paprika with sage, and it works so very well! This is sweet and a bit salty and incredibly delicious. Not to mention I had no idea that the skin on acorn squash was edible. Bonus!

    I had a feeling it would be wonderful, since Joanne spoke so highly of it, and that girl really knows her winter squash ;). Speaking of which, this is my submission for week 7 of 12 Weeks of Winter Squash. As always, be sure to check out the roundup below, and feel free to add your own recipes if you've enjoyed any winter squash deliciousness this week.

    Roasted Acorn Squash and Brussels Sprouts with Honey, Smoked Paprika, and Sage Salt
    Eats Well with Others

    Yield: 6-8 servings
    Serving Size: ⅛th of recipe

    2 medium acorn squash, trimmed
    1 lb brussels sprouts, trimmed and halved
    4 teaspoon honey
    2 teaspoon smoked paprika
    1 teaspoon kosher salt
    4 large sage sprigs (about 16 leaves)
    2 teaspoon coarse sea salt

    1. Preheat the oven to 350. Slice the squash crosswise into ½-inch rings, scooping out the seeds from the center of each.

    2. In a small bowl, whisk together the oil, honey, paprika, and kosher salt. Arrange the squash on a large baking sheet lined with parchment paper and the brussels sprouts on a second baking sheet lined with parchment paper. Brush the honey/oil mix over the acorn squash slices and toss the brussels sprouts with the rest. Place the sage leaves in a small baking pan.

    3. Transfer all the pans to the oven. Roast the sage leaves until they are crisp, about 15 minutes. Set aside. Raise the oven temperature to 400. Continue roasting, turning the squash once midway through, for about 30 minutes.

    4. Transfer the squash and brussels sprouts to a platter. Crumble the sage in a small bowl and mix with the coarse sea salt. Sprinkle some of the sage salt over the veggies before serving.

    Big Flavors Rating: 5 Stars


    Slow Cooker Spinach Lasagna

    December 14, 2013 by Ashley 1 Comment

    Slow Cooker Spinach Lasagna

    Slow Cooker Spinach Lasagna

    Every time I see a pasta recipe for the slow cooker, I give it the side-eye. I mean, it just sounds like something that will turn into a big pile-o-mush. I finally gave in and tried one out (I mean, what if it was actually good?!).

    I even had the audacity to try this out on an evening when my Italian in-laws were going to be at our place for dinner.

    The nerve.

    Slow Cooker Spinach Lasagna

    I followed this recipe except that I forgot to drain the diced tomatoes, and my tomato paste had Italian seasoning in it.

    I don't have a big, oval slow cooker anymore, so I did a few more layers than what the recipe specified, making sure to end it with a layer of sauce on top.

    Covered in Parmesan cheese, because more cheese is always a good thing. Obviously.

    Slow Cooker Spinach Lasagna

    It took a bit of prep work to get it all assembled, but after that, I set the slow cooker for 5 hours and enjoyed the delicious aroma coming from my kitchen all afternoon.

    To my surprise, this actually turned out really well! The flavors were really nice, and the pasta wasn't overcooked.

    And it got thumbs up from the in-laws and my husband. Awesome!

    I served this with a simple salad of baby arugula, cucumber, tomato, red onion, aged balsamic and a good quality extra-virgin olive oil.

    Now that I know that I can make lasagna successfully in the slow cooker, I'm looking forward to trying out new ingredient combinations. Yum!

    Slow Cooker Spinach Lasagna


    Crunchy Coleslaw

    December 13, 2013 by Ashley 2 Comments

    Crunchy Coleslaw

    I frequent my local library more often now that I have a son. Sometimes, I wander up to the cookbook section to grab a cookbook, and almost always end up walking away with half a dozen.

    This week, one of the books I picked up had a recipe for a dish I have had before, but never tried making at home. I have to admit, the idea of pan-frying dry ramen noodles was pretty intriguing to me.

    I made a few changes here - I didn't have slivered almonds, so I just roughly chopped some, and I put them in the same pan with the ramen. Why dirty an extra skillet? It took a little longer to brown, but it was fine.

    This slaw turned out really well. Definitely nice and crunchy, as well as tangy from the vinegar. It was bright and colorful - a nice contrast to the gloomy weather we've been having lately.

    The recipe intro suggests an alternative method using broccoli slaw and chopped broccoli florets instead of the cabbage slaw and bell peppers, which sounds pretty good, too. I think it would also be tasty with some grilled chicken on top for a light lunch.

    Crunchy Coleslaw

    Crunchy Coleslaw
    Quick, Cheap Comfort Food: 100+ Fresh Recipes for Meals in a Hurry - Victoria Shearer

    Serves 6-8
    Prep time: 15-18 minutes

    1 package chicken-flavored ramen noodles
    ¼ cup slivered almonds
    ¼ cup sugar
    ¼ cup white vinegar
    ½ cup olive oil
    1 (16-ounce) package 3-color cabbage slaw mixture
    1 cup chopped red bell peppers
    5 scallions, chopped
    ½ cup roasted sunflower seeds

    Crush ramen noodles in package. Place almonds and ramen noodles (reserve seasoning packet) in 2 separate small skillets over medium-low heat. Toast the nuts and noodles, stirring occasionally, until lightly browned, about 5 minutes. Set aside.

    Meanwhile, place ramen noodle flavor packet, sugar, and vinegar in a small bowl. Whisk to combine. Slowly add olive oil, whisking constantly. Set aside until needed.

    Place slaw, bell peppers, and scallions in a large bowl. Add toasted noodles, almonds, and sunflower seeds. Toss to combine. Pour dressing over salad to taste. Toss until mixture is well coated with dressing.

    To prepare in advance: Combine noodles, almonds, and sunflower seeds in a small zipper bag and set aside at room temperature. Combine slaw, bell peppers and scallions in serving bowl; cover with plastic wrap; and refrigerate until needed. Prepare dressing and refrigerate in a covered container until needed. Just before serving, combine slaw mixture, noodle mixture, and dressing, and toss to combine. Double this recipe to feed a gang.

    Big Flavors Rating: 4 Stars

    Goat Cheese Sugar Cookies

    December 12, 2013 by Ashley 3 Comments

    Goat Cheese Sugar Cookies

    I remember the first time I tried goat cheese. I was hesitant to taste it because it sounded "different". "Weird", even.

    And then I took a bite...

    And I tried not to leap across the table and devour the entire party-sized portion all by myself.

    That was about a decade ago. Since then, it has been a top contender for my favorite cheese, and I've been doing my best to make up for lost time.

    So when I saw a cookie recipe that included goat cheese, I was immediately intrigued.

    Goat Cheese Sugar Cookies

    This is the second type of cookie that I picked out for our Supper Club's annual cookie/candy swap. (The first, Espresso-Chocolate Shortbread Cookies, were phenomenal!!).

    These were nice and soft, and beautifully festive from being rolled in nonpareil sprinkles. I really liked the contrast of the multi-colored against the white that I saw in the original post, so I did the same.

    These cookies are really tasty. They don't taste like goat cheese at all, which I knew going in to the kitchen. After trying them, I think that upping the amount of goat cheese would be a good way to get a little more of that tangy flavor into them, but I'd assume that the dry ingredients would have to be tweaked a bit to compensate for that.

    Either way, they were a hit! They were best while they were still fresh, and may even benefit from a super quick zap in the microwave before eating leftovers.

    Goat Cheese Sugar Cookies

    Goat Cheese Sugar Cookies
    Love & Olive Oil (Adapted from Cooks Illustrated)

    Yield: 36 cookies
    Total Time: 1 hour

    2 ½ cups unbleached all-purpose flour
    ½ teaspoon baking soda
    1 teaspoon baking powder
    ½ teaspoon salt
    1 ½ cups sugar
    ⅓ cup (3 ounces) soft goat cheese, room temperature
    6 tablespoons (¾ stick) unsalted butter, melted
    ¼ cup vegetable oil
    1 large egg
    2 tablespoons milk
    1 teaspoon vanilla extract
    nonpareil sprinkles or sanding sugar (optional)

    Preheat oven to 350 degrees F. Line a baking sheet with a silicone mat or parchment paper.

    In a bowl, whisk together flour, baking powder, baking soda, and salt. Set aside.

    Combine sugar, goat cheese, and melted butter in a large bowl and whisk until mixture forms a smooth paste (a few lumps are ok). Whisk in oil. Add egg, milk, and vanilla extract and stir until smooth. Fold in flour mixture until incorporated and no dry ingredients remain.

    Pour sprinkles or sugar into a small bowl. Dough will be soft, but should still be workable. If not, refrigerate it for 15 to 20 minutes until it is. Use a small cookie scoop to portion out about 1 tablespoon of dough, then roll in sprinkles/sugar to coat. Arrange on prepared baking sheet, leaving about 2 inches of space between each cookie.

    Bake for 10 to 12 minutes, until cookies are just set and slightly cracked. Cool on the baking sheet for 3 minutes, then transfer to a wire rack to cool completely. Store in an airtight container at room temperature for up to 1 week.

    Big Flavors Rating: 4 Stars

    Espresso-Chocolate Shortbread Cookies

    December 11, 2013 by Ashley 1 Comment

    Espresso-Chocolate Shortbread Cookies

    Now that it's officially Cookie Swap season, I picked a few new recipes to try out for our Supper Club's annual night out/cookie & candy exchange.

    This year, there were 6 different types of cookies. Each couple prepared 2 different recipes.

    Thank goodness for yoga pants.

    Espresso-Chocolate Shortbread Cookies

    I had pinned these cookies from Smitten Kitchen yeeeeears ago, and finally got around to whipping up a batch. This may have been the best smelling cookie dough I've ever encountered.

    Or I'm just hooked on the smell of espresso. And quality chocolate. And cookie dough.

    You get the point.

    These cookies were beyond fabulous! They're delicate yet rich, and have the perfect balance of bittersweet chocolate and espresso. It was hard not to QC half of the batch before we even headed out to dinner.

    I liked the method of rolling out the dough inside of a freezer bag, but my dough was too sticky to be able to lift the bag off to get rid of the creases. I tried, but it wasn't pretty...

    The shortbread dough was a bit tricky to cut evenly, so I got quite a range of sizes, despite my best efforts to measure the squares evenly and mark it before cutting. Math was never my strong suit.

    That just means 3 small cookies are the same as 1 big one, so you can totally eat more in one sitting, right?

    Make these cookies. On the double! Oooh... a double espresso with these would be a fantastic idea...

    Espresso-Chocolate Shortbread Cookies

    Espresso-Chocolate Shortbread Cookies
    Smitten Kitchen (Adapted from Baking: From My Home to Yours by Dorie Greenspan)

    Makes 42 cookies

    1 tablespoon instant espresso powder
    1 tablespoon boiling water
    2 sticks (8 ounces) unsalted butter, at room temperature
    ⅔ cup confectioners’ sugar
    ½ teaspoon pure vanilla extract
    2 cups all-purpose flour
    4 ounces bittersweet chocolate (plain, or a toffee variety), finely chopped, or ¾ cup store-bought mini chocolate chips
    Confectioners’ sugar, for dusting (optional)

    1. Dissolve the espresso in the boiling water, and set aside to cool to tepid.

    2. Working with a stand mixer, preferably fitted with a paddle attachment, or with a hand mixer in a large bowl, beat the butter and confectioners’ sugar together on medium speed for about 3 minutes, until the mixture is very smooth. Beat in the vanilla and espresso, then reduce the mixer speed to low and add the flour, mixing only until it disappears into the dough. Don’t work the dough much once the flour is incorporated. Fold in the chopped chocolate with a sturdy rubber spatula.

    3. Using the spatula, transfer the soft, sticky dough to a gallon-size zipper-lock plastic bag. Put the bag on a flat surface, leaving the top open, and roll the dough into a 9 x 10 ½ inch rectangle that’s ¼ inch thick. As you roll, turn the bag occasionally and lift the plastic from the dough so it doesn’t cause creases. When you get the right size and thickness, seal the bag, pressing out as much air as possible, and refrigerate the dough for at least 2 hours, or for up to 2 days.

    4. Position the racks to divide the oven into thirds and preheat the oven to 325 degrees F. Line two baking sheets with parchment or silicone mats.

    5. Put the plastic bag on a cutting board and slit it open. Turn the firm dough out onto the board (discard the bag) and, using a ruler as a guide and a sharp knife, cut the dough into 1 ½-inch squares. Transfer the squares to the baking sheets and carefully prick each one twice with a fork, gently pushing the tines through the cookies until they hit the sheet.

    6. Bake for 18 to 20 minutes, rotating the sheets from top to bottom and front to back at the midway point. The shortbreads will be very pale–they shouldn’t take on much color. Transfer the cookies to a rack.

    7. If you’d like, dust the cookies with confectioners’ sugar while they are still hot. Cool the cookies to room temperature before serving.

    Big Flavors Rating: 5 Stars

    Pressure Cooker Moroccan Lamb Tajine

    December 10, 2013 by Ashley 3 Comments

    Pressure Cooker Moroccan Lamb Tajine

    I have a confession to make: I got a pressure cooker in 2009. That year, I only used it 5 times. I didn't use it again until about a month ago, when I made this tasty Lamb Rogan Josh.

    That means it sat in the cabinet for just over 4 years before it saw the light of day again. Not exactly what I had in mind when I added it to my kitchen arsenal. Hats off to my husband for pestering me about this neglected item that was taking up precious cabinet space reminding me that this awesome tool was sitting in the cabinet, just begging to be used more often.

    After using it again last month, I remembered how easy it was to make comfort food dishes - ones that usually take hours and hours of simmering time - in way less time. Determined to use my pressure cooker more often, I decided to delve into the fragrant and exotic flavors of Morocco.

    Pressure Cooker Moroccan Lamb Tajine

    I love the idea of making a tajine in the pressure cooker. The lamb gets slathered with a wonderful spice paste that consists of cinnamon, turmeric, ginger and garlic.

    That's right - this dish smells great before it even hits the heat.

    While it steams away in the pressure cooker, dried plums (the word "prunes" just doesn't sound as appetizing) reconstitute in boiling water, and are added to the stew at the very end for plump bits of sweetness.

    I served this on top of some couscous cooked in vegetable stock. The toasted almonds on top added a lovely amount of crunch to this otherwise melt-in-your-mouth dish. I wasn't able to find already peeled almonds, so I just toasted them with the skins on. You know, because peeling almonds sounds like a form of Medieval kitchen torture to me.

    And it was great! A nice, piping hot bowl of comfort food made on a weeknight.

    Sorry, pressure cooker. Sorry I left you alone for so long. Let's make up for lost time now, k?

    Pressure Cooker Moroccan Lamb Tajine

    Pressure Cooker Moroccan Lamb Tajine
    Hip Pressure Cooking

    Prep time: 10 mins
    Cook time: 25 mins
    Total time: 35 mins
    Serves 4-6

    about 2.5 lbs or 1.2 kg lamb shoulder, cut into pieces
    1 teaspoon Cinnamon powder
    1 Tsp. Ginger powder
    1 Tsp. Turmeric powder
    1 Tsp. Cumin powder
    2 Garlic cloves, crushed
    2 Onions, roughly sliced
    10 oz or 300g Prunes, soaked (or a mix of Apricots and Dried Raisins)
    1 Bay Laurel Leaf
    1 cup or 250ml Vegetable Stock
    1 Cinnamon stick
    3 Tbsp. Honey
    1 teaspoon pepper
    salt
    3.5 oz or 100g Almonds, shelled, peeled and toasted
    Sesame Seeds
    Olive Oil

    Mix the ground cinnamon, turmeric, ginger, garlic with 2 spoons of olive oil to make a paste, cover the meat with this paste and set aside.

    Put the dried prunes in a bowl, and cover with boiling water cover and, set aside.

    In the preheated pressure cooker, with the lid off on medium heat, add two swirls of olive oil and onions and let them cook until softened (about 3 minutes). Pour out the onions, and set aside. Add the meat, and brown on all sides (about 10 minutes). Then, de-glaze the pressure cooker with the vegetable stock, ensuring to scrape the bottom well and incorporating any brown bits into the rest of the sauce. Then, add the onions, bay leaf and cinnamon stick

    Close and lock the lid and pressure cook for 25 minutes at high pressure. When time is up, open the pressure cooker with the natural release method - move the pressure cooker to a cool burner and wait for the pressure to come down on it's own (about 10 minutes)

    Add to the pressure cooker, with the lid off on medium heat, salt, rinsed and drained prunes, honey and reduce the liquid (about 5 minutes). Fish out the bay leaf and cinnamon stick.

    Sprinkle with toasted almonds and sesame seeds and serve.

    Big Flavors Rating: 4 Stars

    Spiced Butternut Squash Whiskey #12WksWinterSquash

    December 9, 2013 by Ashley 6 Comments

    Spiced Butternut Squash Whiskey

    A few days before Thanksgiving, Dino sent me a link to a really fun article with some offbeat cocktail ideas inspired by Turkey Day. We wanted to try a few of them out, and decided that this would be the first one. I'm not ready for turkey in my cocktail quite yet... Anyhow, the rosemary clove simple syrup is absolutely wonderful in this, and I can see a lot of potential for using it in other cocktails, too.

    We both really liked how the flavors worked together here, but I should have blended the squash and apple in the Vitamix to get it extra smooth, as the texture was a little different. This went great with a plate of leftovers from Thanksgiving, and the whiskey in this cocktail and the Bourbon Cranberry Sauce were great together 😉

    This is my submission for Week 6 of 12 Weeks of Winter Squash. I can't believe we're already halfway through! Check out more delicious recipes in the roundup below. And, as always, if you've made something delicious with winter squash this week, feel free to join in on the fun!

    Spiced Butternut Squash Whiskey

    Spiced Butternut Squash Whiskey
    Mallory's Kitchen via Mashable

    Ingredients: Whiskey, butternut squash purée, apple purée, rosemary clove simple syrup*, lemon, rosemary.

    Directions: Peel and chop half of a small butternut squash and half an apple into one-inch cubes. Place squash in a small pot and add enough water to cover it. Boil until tender.

    Strain out most of the water, reserving about ¼ cup. purée the squash and apple completely using either a standing blender or an immersion blender. Stir in 2 tsp. brown sugar and allow to cool completely.

    In a cocktail shaker, add 2 oz whiskey, one heaping teaspoon of butternut squash apple puree, 1 oz. rosemary clove simple syrup and 1 oz. lemon juice. Shake and strain into a saucer and garnish with a sprig of rosemary.

    *Rosemary Clove Simple Syrup: Combine 1 cup white sugar, 2 tablespoons brown sugar and 1 ¼ cups water in a saucepan. Add two to three sprigs of fresh rosemary and 1 tsp. whole cloves. Stir well, bring to a boil and turn down to a simmer. Simmer for 10 minutes, remove from heat and allow to cool. Strain out the rosemary and cloves and store in a glass bottle with a fresh sprig of rosemary.

    Big Flavors Rating: 4 Stars


    Favorite Holiday Baked Goods Roundup (Part 2)

    December 8, 2013 by Ashley Leave a Comment

    Holiday Baking 2013 Part 2

    Looking for a few more options to add to your holiday baking repertoire? I shared 6 of our favorites yesterday, and I figured another half-dozen was in order. These are some of our very favorite baked goods, and they're sure to be a hit this season. There's a pretty wide range of recipes in here - some are quick and easy, and some take a bit more time. I assure you, either route you take will be delicious!

    If you happen to be looking for inspiration in pie form, you can check out the roundup I did for Pi Day earlier this year.

    Holiday Baking 2013 Part 2

    1. Cinnamon Raisin Swirl Bread

    2. Starbucks Espresso Brownies

    3. Peanut Blossoms

    4. Pecan Butter Balls (Mexican Wedding Cookies)

    5. Naughty Rhubarb Scones

    6. Chocolate Cake S’mores Cookies

    Happy baking!

    Favorite Holiday Baked Goods Roundup (Part 1)

    December 7, 2013 by Ashley 3 Comments

    Holiday Baking 2013 Part 1

    Baking season is in full swing in my house. We have our annual Supper Club cookie and candy swap tomorrow, and it's always so fun to see what new recipes everyone chooses. Dino and I are trying two new ones for the event, and if they turn out half as good as they look, they'll be big hits! In the meantime, here are some of our favorite baked goods. One (or more!) of these would be a welcome addition to any holiday shindig.

    Holiday Baking 2013 Part 1

    1. Chocolate Peanut Butter Surprise Cookies

    2. Vanilla Bean Baked Donuts

    3. Grandma’s Christmas Cookies

    4. Vegan Mexican Hot Chocolate Snickerdoodles

    5. Ricotta Cookies

    6. One-Bowl Mocha Brownies

    Happy baking!

    Pork Asada Tacos with Tomatillo Salsa Verde

    December 6, 2013 by Ashley 4 Comments

    Pork Asada Tacos with Tomatillo Salsa Verde

    I'm going to go ahead and proclaim 2013 The Year of the Taco. We've enjoyed lots of different takes on tacos this year, both fresh from my tiny kitchen and out at restaurants from New York to Maryland and Indiana. There isn't much that I wouldn't want to taco-fy, and I'm looking forward to trying a lot more filling combos in the future. So when I saw these beautiful pork tacos pop up in my feed reader, I just had to try them out. They don't take a whole lot of time to prepare, and let me tell you - they are outstanding!

    My tomatillos took a lot longer than 5 minutes to char, but I made sure to wait for them to change colors, because the charred flavor is key for the salsa verde. Wow. I had no idea that was so easy to make at home - I don't know that I'll ever buy it again (after I use up whatever is in my pantry, of course). The avocado on top adds a nice bit of creaminess, and I think next time, I'll add some thinly sliced radishes for some peppery crunch. The seasoning on the pork is fantastic - there's a ton of flavor in the mix.

    Pork Asada Tacos with Tomatillo Salsa Verde

    This is a fantastic recipe that would be great for a dinner party. Pork tenderloin just melts in your mouth. I served the tacos with rice that was cooked with homemade veggie stock (made in the slow cooker from frozen veggie scraps that I had been saving up) instead of water, topped with black beans and chopped red onion. It was a beautiful dinner, and it was just as good for lunch again the next day!

    Also - just a reminder - you still have a week to enter the Simply Organic spice gift box giveaway. Check out this post for details.

    Pork Asada Tacos with Tomatillo Salsa Verde
    My Daily Morsel (Adapted from The Chew)

    Warm spice-rubbed pork and tomatillo salsa inside corn tortillas.

    Serves 6

    Prep Time: 30 min
    Cook Time: 30 min
    Total Time: 1 hr

    FOR THE SALSA
    4 large tomatillos, husks removed, rinsed, and halved
    1 lime, juiced
    2 garlic cloves, peeled
    1 jalapeño, seeded and chopped
    ½ teaspoon kosher salt
    ¼ cup diced yellow onion
    ⅓ cup chopped cilantro leaves

    FOR THE TACOS
    2 tablespoons olive oil
    2 tablespoons ground cumin
    2 tablespoons chili powder
    2 tablespoons kosher salt
    1 tablespoon ground coriander
    1 tablespoon garlic powder
    2 (1 pound) pork tenderloins

    12 corn tortillas
    1 avocado, peeled and diced
    1 lime, quartered

    FOR THE SALSA
    Preheat the broiler. Place the tomatillos, cut side down, on a small rimmed baking sheet. Broil for about 5 minutes, until charred all over. Remove from the oven and let cool slightly.

    Place the tomatillos, lime juice, garlic, jalapeño, and salt in the bowl of a food processor and pulse until smooth. Transfer to a small bowl and stir in the onion and cilantro. Chill in the refrigerator until ready to use.

    FOR THE TACOS
    Preheat the oven to 375°F. Heat the olive oil in a large ovenproof skillet over high heat.

    Stir together the cumin, chili powder, salt, coriander, and garlic powder in a small bowl. Rub all over the pork tenderloin. Add the pork to the pan and sear for about 2 minutes per side, until a golden brown crust forms. Transfer to the oven and cook for 15 to 20 minutes, until a meat thermometer inserted into the center of the pork registers 145°F. Transfer the pork to a cutting board and let rest for 10 minutes.

    To serve, cut the pork into ¼-inch thick slices. Arrange the pork in the tortillas and top with the salsa verde, avocado, and a squeeze of lime juice.

    Big Flavors Rating: 5 Stars

    Pork Tenderloin with Roasted Figs

    December 5, 2013 by Ashley 1 Comment

    Pork Tenderloin with Roasted Figs

    Pork Tenderloin with Roasted Figs

    Pork tenderloin sounds fancy, but it's a great cut of meat to work with on a busy weeknight! Fruit and pork pair so well together, and I've never roasted whole figs like this before. They were nice and soft and warm throughout, and added a nice sweetness to the savory pork. The dijon adds the perfect amount of tanginess to balance the dish out. This recipe was great because I put the marinade together early in the day, and when it was time for dinner, I just seared it, added the figs and rosemary sprigs and baked it for 20 minutes, and dinner was almost done. I only used one piece of pork tenderloin, but left the amounts on everything else (except the figs) the same as if I was making two. When I took the pork out, there was a decent amount of juice in the pan, so I brought it up to a boil when I added that last bit of balsamic to help thicken it a bit. It was simple and elegant. The reduced sauce was a great accent to the meat. I served it with some rice that I cooked in homemade vegetable broth (that I made out of leftover frozen veggie bits in the slow cooker yesterday) instead of water, topped with black beans and minced red onion. It was an awesome meal. It was soooo close to getting 5 stars, but since we don't give half stars, it sits at a 4. Dino wanted to give it 5, in case you're wondering. It'll be interesting to see what influence our toddler has on ratings in the future! Ha!

    Pork Tenderloin with Roasted Figs

    Pork Tenderloin with Roasted Figs
    Mom's Kitchen Handbook

    Makes 6 to 8 servings

    2 cloves garlic, minced
    1 teaspoon finely chopped fresh rosemary, plus 2 big sprigs
    1 tablespoon Dijon mustard
    2 teaspoons pure maple syrup
    ½ teaspoon salt, plus more to taste
    Black pepper
    2 1 to 1-1 /4 pound pork tenderloins
    1 tablespoon extra-virgin olive oil, divided
    1 basket fresh figs (about 16 figs)
    1 tablespoon balsamic vinegar, divided

    Preheat oven to 400 degrees.

    Remove pork from the refrigerator ½ hour before cooking.

    In a small bowl mix together the garlic, rosemary, Dijon mustard, maple syrup, salt, and a few healthy cracks of black pepper from a pepper grinder. Use your hands to coat the 2 tenderloins with the marinade. If you are marinating the pork a few hours ahead of time, wrap and refrigerate it until ½ hour before you are ready to cook.

    Heat 2 teaspoons of the oil over high heat in an oven-proof skillet large enough to comfortably accommodate both tenderloins. Add the meat to the pan and cook on all sides until nicely browned. This will take a few minutes per side.

    While the meat is browning, toss the figs in a medium bowl with the remaining 1 teaspoon of oil, 1 teaspoon of the balsamic vinegar and a pinch of salt. Once the meat is browned, add the figs to the pan, nestle the two rosemary sprigs in there and put in the oven.

    Cook until done. The time will vary depending on the thickness of the tenderloin and how you like your meat. Test for doneness by inserting an instant-read thermometer in the center of the thickest part of the tenderloin. For pinker tenderloin, remove it at 140 to 145 degrees degrees*. For more well done, cook it to 150 to 155 degrees. This will take 20 minutes, give or take a few.

    Remove the pan from the oven and transfer the meat to a carving board. Let it rest for at least five minutes. Cut the meat crosswise into ½-inch thick slices and arrange on a platter with the figs. Add the dripping from carving the meat to the pan along with the remaining 2 teaspoons of balsamic vinegar and stir it together. Drizzle these pan drippings over the meat and figs, season with more salt and fresh black pepper. Serve immediately.

    * The USDA recommends cooking pork to 145 degrees

    Big Flavors Rating: 4 Stars

    Roasted Parsnips and Sweet Potatoes with Caper Vinaigrette

    December 4, 2013 by Ashley 6 Comments

    Roasted Parsnips and Sweet Potatoes with Caper Vinaigrette

    I bought Plenty a while back, and this is the second recipe I've made from it. The first was Eggplant with Buttermilk Sauce, which was so good, that I had high hopes for my second recipe attempt. Let me tell you - this did NOT disappoint! Dino actually said, "this is the best vegetable dish I've ever eaten. EVER!" as he was eating his second helping of these beautiful roasted veggies. The parsnips got nice and caramelized from the long roasting time, and the sweet potatoes were nice and tender. The acidity from the tomatoes went perfectly, and tossing the caper vinaigrette on top at the end allows the hot veggies to absorb all of the salty, tangy goodness. It was phenomenal! I did notice that the recipe that I found already typed out online is a bit different from the way it's written in the cookbook (the one in my book uses lemon juice and maple syrup instead of white wine vinegar), so I'm tempted to try it out that way, too. I went by the one I saw online while I was cooking. I completely forgot to add the toasted sesame seeds at the end, but it was so perfect that I don't even know how it would have been better. We will definitely be having this dish again and again. It was outstanding!

    Roasted Parsnips and Sweet Potatoes with Caper Vinaigrette

    Roasted Parsnips and Sweet Potatoes with Caper Vinaigrette
    Plenty - Yotam Ottolenghi (via The Guardian)

    The addition of vinaigrette to freshly roasted vegetables gives them a freshness and juiciness they don't normally have; the acidity brings out new shades of flavour, too. The combinations are endless - try adding yam or salsify, or celeriac and beetroot. Furthermore, the dressing can easily take a sweet note, if you prefer - just omit the capers and add honey or maple syrup. Fold in some fresh herbs, such as basil or oregano, chopped at the last moment, and a little grated lemon zest to take it even further. Just try. Serves four.

    4 parsnips (around 700g in total)
    2 red onions
    90ml olive oil
    4 sprigs of thyme
    2 sprigs of rosemary
    1 head garlic, cut in half horizontally
    Salt and black pepper
    2 sweet potatoes (around 600g)
    20 cherry tomatoes, halved
    2 tablespoon white-wine vinegar
    2 tablespoon baby capers (or larger ones roughly chopped)
    1 teaspoon mustard
    1 tablespoon toasted sesame seeds

    Preheat the oven to 180C/350F/ gas mark 4. Peel the parsnips and cut them into two or three segments, depending on their lengths. Cut each piece lengthways into two or four - you want pieces that are roughly 5cm long and 1.5cm wide. Top and tail the onions, peel them and cut each into six wedges.

    Place the parsnips and onions in a large mixing bowl and add 60ml of olive oil, the thyme, rosemary, garlic, a teaspoon of salt and some pepper. Mix and spread out on a large roasting tin. Roast for 35 minutes.

    While the parsnips are cooking, top and tail the sweet potatoes. Cut them (with their skins) into two widthways and then cut each half into six wedges. Add the potatoes to the tray with the parsnips and onions, stir and return to the oven for another 35-45 minutes.

    Once all the vegetables are cooked through and golden brown, stir in the halved tomatoes and return to the oven for another 10 minutes.

    Whisk together the vinegar, capers, mustard, 30ml of oil and half a teaspoon of salt, and pour over the roasting vegetables the moment they come out of the oven. Stir, taste and adjust the seasoning as necessary. Scatter the sesame seeds over the top and serve straight from the tin.

    Big Flavors Rating: 5 Stars

    Motobaker Shares Tips for Shipping Baked Goods for the Holidays

    December 3, 2013 by Ashley Leave a Comment

    Christmas Cookie Boxes

    With the holiday season upon us, baked goods have been on my mind big time. I really enjoy baking, and I love sharing the goodness with friends and family. Shipping homemade goodies, on the other hand, has always intimidated me. I decided it would be great for me to get over this fear by asking my friend Kellen (who is a rockstar baker, and also has a fantastic baking/motorcycle blog called Motobaker) to give me some pro tips to make shipping homemade holiday treats something that I can take on with confidence. Check out this Q&A to learn more about how to share your culinary creations with less stress at any time of year! All photos courtesy Motobaker.

    motobaker
    Motobaker

    Ashley: How long have you been baking?
    Kellen:
    Pretty much for as long as I can remember! I started “helping” when I was still in a high chair, licking the beaters that were used to make whatever my mom was making. I moved up to helping stir ingredients, and finally to measuring and being in charge of my own recipes.

    A: How did you become interested in baking?
    K:
    It runs in the family. My mom baked a lot when I was a kid, and both of my grandmothers are excellent bakers and always would bake with us grandkids when we were little, so it was instilled in me very young. As I got older I fell in love with the chemistry of it, how it was so methodical, and how you can really create anything.

    A: What's your favorite thing to bake?
    K:
    I am not sure I could choose! I love baking for other people, so making other people’s ‘favorites’ is one of my favorite things. One of my personal favorites to eat is fruit tarts, so that would be one of my favorite things to make.

    A: Is there anything that you haven't baked that you want to try, or that intimidates you?
    K: Yes! Chocolate lava cakes, oh how I have tried, and oh how I have failed. I’ll get it one of these days.

    Christmas Cookie Boxes
    From top left: caramels, white chocolate macadamia nut rice crispy treats, snickerdoodles, shortbread, snickerdoodles, peppermint meringues

    A: What types of baked goods make the best gifts?
    K:
    Anything that tastes good, really! I prefer to give anything that can be individually wrapped or partially stored: cookies, bars, brownies, loaf cakes, miniature cakes, candies; as opposed to large layer cakes or something that the recipient has to eat right away. If you can find out what a persons favorite baked good is and make that, I think that makes the best gift. It shows you’ve taken the time to learn about their tastes and preferences, and then made them something from scratch. For me, it’s more personal and meaningful than a gift card or such.

    A: What types of baked goods are good for shipping?
    K: My favorites to ship, are brownies, bars, cookies and loaves. Brownies and loaves freeze really, really well and can be made in advance and frozen before shipping which helps keep them fresh. Cookies are pretty shelf-stable and generally ship well.

    A: What types of baked goods are not so good for shipping?
    K: Well, obviously anything that needs to be refrigerated! Also, anything that is fragile, I tried shipping meringues last year for Christmas, and that was a packing nightmare. Anything that has an exposed filling (like jam) or is frosted usually ends up a mess after being wrapped. However, as long as the filling or frosting doesn’t need to be refrigerated, you can always include in a separate jar with some “assembly” instructions.

    Black Forest Chocolate Cake Cookies
    Black Forest Chocolate Cake Cookies

    A: How far in advance should you bake something that you intend to ship? The same day? The day before?
    K:
    If you can freeze it – you can make it a few days to a month before. Brownies and loaves freeze exceptionally well (some believe that they are even better after freezing, actually). Anything that can’t or shouldn’t be frozen I try to bake the night before or day of shipping.

    A: How do you recommend that people package and ship baked goods?
    K: My general rule for nearly everything is twice wrapped in cling film and then once in foil. I always ship using boxes (no padded envelopes), and generally line the shipping box with crumpled paper, or popcorn or bubble wrap for more fragile items. I have always used USPS priority shipping, and ship on Mondays or Tuesdays to ensure the package gets to its destination in the minimal amount of time (not getting hung up on weekends). You can check shipping times and drop-off cutoff times on their website, which is very handy.

    Chipotle Cheddar Biscuits
    Chipotle Cheddar Biscuits

    A: I've heard that freezing items like quick breads prior to shipping can help preserve them while in transit. Do you recommend this method?
    K: Absolutely! Take them out of the freezer and pack them as close to shipping as you can. They will arrive fresh and thawed.

    A: Any creative packaging tips?
    K:
    I try to wrap things individually, and then in groups. For example, I’ll individually wrap brownies, and then wrap 8 of them together (two layers of four). It keeps them protected and easy for the recipient to freeze or give away any of the goods once they arrive. A final wrap with butcher paper and some colored ribbon also adds a nice professional touch to whatever you are sending, and makes it a bit more special and gift like.

    A: Any other tips for people who are new to shipping their baked goods?
    K: If you aren’t sure how something will ship do a test run with a friend or family member. I am sure if you ask around you will have no trouble finding willing participants to receive some baked goods. When it doubt, add more padding! The worst is spending hours baking something, packing it up and have it arrive as crumbs!

    Sweet & Salty
    Sweet & Salty

    A: Do you have a favorite recipe that lends itself to shipping that you wouldn't mind sharing with my readers?
    K: Absolutely! My favorite bakery in Brooklyn, Baked NYC, has three cookbooks out, the second of which features one of my all time favorite recipes, the Sweet & Salty Brownie. I’ve made these countless times, and have shipped them fresh and frozen. They always arrive in great condition and to much fanfare. They might seem like a lot of work, but you can make the caramel filling a day or so before making the brownies – and keep in mind these freeze exceptionally well, so you can make them when you have some free time and freeze until you are ready to ship.

    A: What type of baked goodies would YOU like to receive in the mail?
    K: Oh my gosh, anything really! Any probably something that freezes well so I wouldn’t feel pressured to eat them all in one sitting – I wouldn’t want anything to go to waste!

    Thanks so much to Kellen - hope this inspires you all to get out there and ship some homemade happiness this holiday season!

    Starbucks’ Pumpkin Scones #12WksWinterSquash

    December 2, 2013 by Ashley 8 Comments

    Starbucks' Pumpkin Scones

    Kicking off week 5 of our celebration of 12 Weeks of Winter Squash are these fabulous scones. I first made these two years ago, and I've been dreaming about them ever since. They're light and tender and fluffy and packed with delicious pumpkin flavor. I used 2% milk instead of half and half and they were just fine. Making a batch of these reminds me that I need to make scones more often. Yum! For more winter squash recipes, check out the roundup below the link. And if you make anything tasty with winter squash this week, feel free to join us!

    Starbucks' Pumpkin Scones

    Starbuck's Pumpkin Scones
    RecipeGirl.com (Adapted from Top Secret Recipes)

    Yield: 6 scones
    Prep Time: 30 min Cook Time: 15 min

    More tender and delicious than the original...

    SCONES:
    2 cups all-purpose flour
    ¾ cup granulated white sugar
    1 tablespoon baking powder
    ½ teaspoon salt
    ½ teaspoon ground cinnamon
    ½ teaspoon ground nutmeg
    ¼ teaspoon ground cloves
    ¼ teaspoon ground ginger
    ½ cup canned pure (unsweetened) pumpkin
    3 tablespoons half and half cream
    1 large egg
    6 tablespoons cold butter, cut into cubes

    PLAIN GLAZE:
    ½ cup powdered sugar (sifted)
    1 tablespoon milk (any kind)

    SPICED ICING:
    ¾ cup powdered sugar (sifted)
    1 to 2 tablespoons milk (any kind)
    ¼ teaspoon ground cinnamon
    ⅛ teaspoon ground nutmeg
    pinch of ground ginger
    pinch of ground cloves

    Directions:
    1. Preheat oven to 425°F. Spray baking sheet with cooking spray or line with parchment paper. Give it a light dusting of flour on top of that.

    2. In a large bowl, whisk together dry ingredients (through ginger).

    3. In a separate bowl, whisk together pumpkin, half and half and egg.

    4. Use a pastry cutter or two knives to cut butter into the dry ingredients. Continue cutting until the mixture resembles fine crumbs. (You may also use a food processor for this step. Pulse until the mixture resembles fine crumbs).

    5. Fold wet ingredients into dry ingredients, then form the dough into a ball. The dough will be wet, but if it seems super sticky... just go ahead and sprinkle a little more flour into the dough until it's easier to handle. Remember, you want it to be somewhat sticky, and that's okay- but you also don't want it to stick to the baking sheet. Pat out dough onto the lightly floured baking sheet and form it into a 1-inch thick rectangle that is about 9-inches long and 3-inches wide. Use a large knife or a pizza cutter to slice the dough twice through the width, making three equal squares. Cut through the three squares diagonally so that you have 6 triangular slices of dough. Gently pull the triangles apart, leaving about ½-inch space between each one.

    6. Bake 14 to 16 minutes on prepared baking sheet. Scones should begin to turn light brown.

    7. While scones are cooling, prepare plain glaze by whisking ingredients in a medium bowl. Mix until smooth.

    8. When scones are cool, use a knife to cut them apart and then pull them apart so that they are ready for glazing. Use a brush to paint a coating of the glaze over the top of each scone.

    9. As the white glaze firms up, prepare spiced icing by whisking the ingredients in another medium bowl until smooth. Drizzle this thicker icing over each scone (or brush it on) and allow the icing to dry before serving.

    Big Flavors Rating: 5 Stars

    Best Ever Green Bean Casserole

    December 1, 2013 by Ashley 2 Comments

    Best Ever Green Bean Casserole

    This year, I decided to defy Thanksgiving tradition by making a green bean casserole that did not include cream of anything soup. I usually try to avoid using that in meals, but I always made an exception for Thanksgiving. But no more - because this version was wonderful! It tastes nice and fresh and has a lot of texture from the green beans and the crispy onions on top. I used baby bella mushrooms for this, and made it up until the final 15 minutes of baking time, brought it over to my in-laws' house, and then finished it off in their oven. It was great! The key is to make sure you get some of the crispy onions in each and every bite. Major yumminess right there!

    Best Ever Green Bean Casserole

    Best Ever Green Bean Casserole
    Good Eats - Alton Brown

    Total Time: 1 hr 10 min
    Prep: 25 min
    Cook: 45 min
    Yield: 4 to 6 servings

    For the topping:
    2 medium onions, thinly sliced
    ¼ cup all-purpose flour
    2 tablespoons panko bread crumbs
    1 teaspoon kosher salt
    Nonstick cooking spray

    For beans and sauce:
    2 tablespoons plus 1 teaspoon kosher salt, divided
    1 pound fresh green beans, rinsed, trimmed and halved
    2 tablespoons unsalted butter
    12 ounces mushrooms, trimmed and cut into ½-inch pieces
    ½ teaspoon freshly ground black pepper
    2 cloves garlic, minced
    ¼ teaspoon freshly ground nutmeg
    2 tablespoons all-purpose flour
    1 cup chicken broth
    1 cup half-and-half

    Preheat the oven to 475 degrees F.

    Combine the onions, flour, panko and salt in a large mixing bowl and toss to combine. Coat a sheet pan with nonstick cooking spray and evenly spread the onions on the pan. Place the pan on the middle rack of the oven and bake until golden brown, approximately 30 minutes. Toss the onions 2 to 3 times during cooking. Once done, remove from the oven and set aside until ready to use. Turn the oven down to 400 degrees F.

    While the onions are cooking, prepare the beans. Bring a gallon of water and 2 tablespoons of salt to a boil in an 8-quart saucepan. Add the beans and blanch for 5 minutes. Drain in a colander and immediately plunge the beans into a large bowl of ice water to stop the cooking. Drain and set aside.

    Melt the butter in a 12-inch cast iron skillet set over medium-high heat. Add the mushrooms, 1 teaspoon salt and pepper and cook, stirring occasionally, until the mushrooms begin to give up some of their liquid, approximately 4 to 5 minutes. Add the garlic and nutmeg and continue to cook for another 1 to 2 minutes. Sprinkle the flour over the mixture and stir to combine. Cook for 1 minute. Add the broth and simmer for 1 minute. Decrease the heat to medium-low and add the half-and-half. Cook until the mixture thickens, stirring occasionally, approximately 6 to 8 minutes.

    Remove from the heat and stir in ¼ of the onions and all of the green beans. Top with the remaining onions. Place into the oven and bake until bubbly, approximately 15 minutes. Remove and serve immediately.

    Big Flavors Rating: 5 Stars

    Second Birthday Party: Thomas the Train Cupcakes

    November 27, 2013 by Ashley 2 Comments

    Thomas the Train Cupcakes

    Thomas the Train Cupcakes

    Over the weekend, we celebrated my son's second birthday. My husband made me promise not to cook all of the food for the party, but I couldn't resist adding just a few homemade items to the awesome spread that the caterers provided. One thing that I knew I had to make was another batch of these delightful cupcakes. I made them last year for his first birthday (in Elmo form!), and this year I adapted the colors and decorations to fit the Thomas the Train theme of his party.

    Thomas the Train Cupcakes

    I used Thomas cupcake wrappers and picks, and tinted the buttercream two different shades of blue. I put some blue food coloring into the entire batch of frosting and after I used half of it, added more food coloring to make the rest of the cupcakes a darker blue. I piped it on this time around using a pastry bag with a star tip (I was lucky enough to get a free one from ProCook a while back, and it's been a lot of fun to use!).

    Thomas the Train Cupcakes

    I doubled the below recipe and used an ice cream scoop to portion them out, and ended up with 42 cupcakes instead of 48. This cupcake recipe is so easy and delicious - I highly recommend it! The buttercream is the perfect accompaniment. The birthday boy absolutely loved them, and so did the guests at the party.

    Thomas the Train Cupcakes

    Amy Sedaris's Vanilla Cupcakes
    I Like You: Hospitality Under the Influence - Amy Sedaris

    yield: Makes 24 cupcakes

    1 ½ sticks unsalted butter
    1 ½ cups sugar
    2 eggs
    2 teaspoons pure vanilla extract
    2 ½ teaspoons baking powder
    ¼ teaspoon salt
    2 ½ cups flour
    1 ¼ cups milk

    Turn oven on to 375 degrees F.

    Put butter in mixer and beat at medium speed until somewhat smooth. Pour in sugar and beat well. Add 2 eggs. I like to crack the eggs on the side of the bowl while it is moving, which can be really stupid. I like to take chances. Yes, I have had to throw away my batter because I lost eggshells in the mix. Yes, it was a waste of food and yes, I know how expensive butter is, but what can I say? I'm a daredevil. Mix well. Add: vanilla, baking powder, salt, flour, and milk. Beat until it looks like it is supposed to and pour into individual baking cups, until they are about ⅔ full. Bake for 20 minutes or until golden brown. Should produce 24 cupcakes; I get 18 because I'm doing something wrong, although my cupcakes were voted second best in the city by New York Magazine.

    Frost with Amy Sedaris's Vanilla Buttercream Frosting.

    Amy Sedaris's Vanilla Buttercream Frosting
    I Like You: Hospitality Under the Influence - Amy Sedaris

    yield: Makes enough for 24 cupcakes

    1 box confectioners' sugar
    1 stick unsalted butter
    1 teaspoon pure vanilla extract*
    ¼ cup milk or light cream
    food coloring (optional)

    *Less than 1 teaspoon pure almond extract can be substituted.

    In a bowl combine: one box of confectioners' sugar, one stick of unsalted butter, one teaspoon of pure vanilla extract, and ¼ cup of milk or light cream and beat for a while. Really whip it, don't be afraid to get in there. I occasionally add food coloring and sometimes substitute pure almond extract for vanilla.
    If you do choose to add pure almond extract instead of vanilla, you're on your own. I don't know the measurement for it, but I do know it's less than the amount of vanilla you would add.

    Big Flavors Rating: 5 Stars

    Pumpkin Pie Spiced Belgian Waffles

    November 24, 2013 by Ashley 1 Comment

    Pumpkin Pie Spiced Belgian Waffles

    My parents are in town, so Dino made a big batch of these awesome Belgian waffles for breakfast. He took our favorite waffle recipe and added about a tablespoon of Pumpkin Pie Spice to the batter. These are great with bananas and maple syrup on top, or even smeared with Biscoff or Speculoos Cookie Butter. Yum!

    Pumpkin Pie Spiced Belgian Waffles

    Belgian Waffles
    Adapted From: allrecipes.com – Megan

    “Simple waffles made with flour, egg, butter and sugar.”

    Serving Size: 5

    2 cups all-purpose flour
    1 tablespoon pumpkin pie spice
    1 teaspoon salt
    4 teaspoons baking powder
    2 tablespoons white sugar
    2 eggs
    1 ½ cups warm milk
    ⅓ cup butter, melted
    1 teaspoon vanilla extract
    1 can vegetable oil spray

    Prep Time: 20 Minutes
    Cook Time: 15 Minutes

    1. In a large bowl, mix together flour, pumpkin pie spice, salt and baking powder; set aside.
    2. In a separate bowl, beat the eggs and sugar. Stir in the milk, butter and vanilla. Pour the milk mixture into the flour mixture; beat just until barely blended. Let stand for 10-20 minutes.
    3. Preheat waffle iron to desired temperature.
    4. Fully coat the iron with cooking spray. Ladle the batter into a preheated waffle iron. Cook the waffles until golden and crisp. Serve immediately.

    Big Flavors Rating: 5 Stars

    Gingerbread Cornbread

    November 19, 2013 by Ashley 4 Comments

    Gingerbread Cornbread

    Gingerbread Cornbread

    This recipe came up in my feed reader at the perfect time - I had both cornmeal and buttermilk that I needed to use up. I was going to make another batch of Sweet Corn Muffins, but when I saw this festive cornbread recipe from Alejandra over at Always Order Dessert, I knew that I had to try it out. I love using molasses in recipes, and don't do it often enough. Baking with it always makes the house smell fantastic. This cornbread comes together pretty quick, which makes it great for a weeknight dessert. It was wonderful - nice and moist and tender. We enjoyed it after an indulgent meal from a local rib joint. This was a big hit with my family, and my son couldn't get enough!

    Gingerbread Cornbread

    Gingerbread Cornbread
    Always Order Dessert

    Makes 12 squares

    1 cup yellow cornmeal
    1 cup all-purpose flour
    ¾ cup tightly packed dark brown sugar
    2 teaspoons baking powder
    1 teaspoon baking soda
    2 teaspoons ground ginger
    1 teaspoon ground cinnamon
    ⅛ teaspoon ground cloves
    1 teaspoon Kosher salt
    1 large egg, beaten
    ¼ cup molasses
    1 cup buttermilk
    1 tablespoon vanilla extract
    ⅓ cup vegetable or olive oil

    Preheat your oven to 400 degrees and position the rack right in the center. Butter and flour an 8" x 2" square baking pan and set aside.

    In a large bowl or base of a mixer, mix the cornmeal, flour, sugar, baking powder, baking soda, ginger, cinnamon, coves, and salt until evenly combined. Add the egg, molasses, buttermilk, vanilla, and olive, and mix until the batter is smooth and completely combined.

    Pour into the prepared baking pan and smooth out on top. Bake approximately 20 to 25 minutes, or until a tester inserted into the center comes out clean. Let cool 10 minutes in pan, then turn out onto a cooling rack.

    Big Flavors Rating: 4 Stars

    Thai Butternut Soup #12WksWinterSquash

    November 18, 2013 by Ashley 7 Comments

    Thai Butternut Soup

    For week 3 of 12 Weeks of Winter Squash, I'm sharing this Thai inspired take on creamy butternut squash soup. The addition of fish sauce here adds a nice depth of flavor, and the lime at the end is exactly what this soup needs. I used full fat coconut milk, and it was nice and creamy. If you have an immersion blender, use that here so you don't have to worry about blending the soup in batches. For more winter squash recipe inspiration, check out the roundup below. Enjoy!

    Thai Butternut Soup

    Thai Butternut Soup
    Cooking Light March 2013

    If you can't find frozen pureed squash, you can cook this soup with 4 cups cubed butternut squash. Just add 5 extra minutes to the cooking time in step 2.

    1 teaspoon canola oil
    1 cup chopped onion
    2 ½ teaspoons red curry paste
    1 ½ teaspoons minced fresh garlic
    1 teaspoon minced fresh ginger
    1 cup fat-free, lower-sodium chicken broth
    2 teaspoons brown sugar
    2 (12-ounce) packages frozen pureed butternut squash
    1 (14-ounce) can light coconut milk
    1 ½ teaspoons fish sauce
    ¼ teaspoon salt
    ½ cup chopped unsalted, dry-roasted peanuts
    ¼ cup cilantro leaves
    1 lime, cut into 8 wedges

    1. Heat a medium saucepan over medium-high heat. Add oil; swirl to coat. Add onion; sauté 3 minutes. Add curry paste, garlic, and ginger; sauté 45 seconds, stirring constantly.

    2. Add broth and next 5 ingredients (through salt); cover. Bring to a boil. Reduce heat, and simmer 5 minutes, stirring frequently. Place half of squash mixture in a blender. Remove center piece of blender lid (to allow steam to escape); secure blender lid on blender. Place a clean towel over opening in blender lid (to avoid splatters). Blend until smooth. Pour into a large bowl. Repeat procedure with remaining squash mixture. Spoon about 1 cup soup into each of 4 bowls; top with 2 tablespoons peanuts and 1 tablespoon cilantro. Serve with lime wedges.

    Big Flavors Rating: 4 Stars


    Corn Meal Mush

    November 16, 2013 by Ashley Leave a Comment

    Corn Meal Mush

    Corn Meal Mush

    Since I'm home with my son during the day now, I'm always on the lookout for new, quick and easy breakfast options. I saw this recipe on the back of my container of corn meal, and it looked like it would be perfect for a busy weekday. This came together really quickly, and the taste was surprisingly good! I flavored ours with milk and real maple syrup, but I think the savory option would be great as a side dish, too. You can use non-dairy milk/butter to keep if vegan if you'd like. It's a nice alternative to oatmeal or porridge. One note is that the longer it sits, the more likely it is to start getting a bit clumpy. It'll be interesting to see how the leftovers reheat. The package said it serves 8-10, but I'd say it's more like 4-5.

    Corn Meal Mush

    Corn Meal Mush
    Quaker Oats

    Serves 8-10

    4 Cups Water
    1 Teaspoon Salt
    1 Cup QUAKER® or AUNT JEMINA® Enriched Corn Meal

    Bring 3 cups of water to a boil. Combine the remaining 1 cup water, corn meal and salt; slowly pour into boiling water, stirring constantly. Cook until thickened, stirring frequently. Cover, continue cooking over low heat 5 minutes; stir. Serve hot with milk and syrup or with margarine, salt and pepper.

    Big Flavors Rating: 4 Stars

    Spaghetti con Polpette di Carne (Spaghetti and Meatballs)

    November 15, 2013 by Ashley 8 Comments

    Spaghetti con Polpette di Carne (Spaghetti and Meatballs)

    My husband rarely makes requests for dinner, so on the rare occasion that he does, I do my best to make it work. Of course, when he said he had a request for a "simple meal of spaghetti and meatballs", he started laughing, because he realized that I couldn't make just any spaghetti and meatballs, I had to make the best spaghetti and meatballs. I first made this dish back in 2010, and I can't believe I haven't made it since! It's incredibly flavorful, and can be adapted to be made with all one type of meat, or even meatloaf mix (veal/pork/beef). Lidia Bastianich is a master of Italian cooking, so it's no wonder that this is so delicious. Just a word of caution - if you use really good quality red pepper flakes, such as Penzeys, this will have quite a bit of kick, so you may want to ease back on the amount that you use if you don't want it to be too spicy. I also made some of My Favorite Garlic Bread, which was perfect for sopping up the delicious sauce. The sauce does reduce quite a bit while it cooks, so next time, I think I'll double it. This was a wonderful meal that was perfect for the cooler weather we've been having this week.

    Spaghetti con Polpette di Carne (Spaghetti and Meatballs)


    Spaghetti con Polpette di Carne (Spaghetti and Meatballs)

    Lidia's Italian-American Kitchen - Lidia Bastianich

    Makes 6 servings

    For the Sauce:
    Two 35-ounce cans Italian plum tomatoes, (preferably San Marzano) with
    their liquid
    ¼ cup extra virgin olive oil
    1 medium onion, chopped (about 1 cup)
    1 teaspoon crushed hot red pepper
    2 bay leaves
    Salt
    Freshly ground black pepper

    For the Meatballs:
    ½ pound ground pork
    ½ pound ground beef
    1 cup fine, dry bread crumbs
    ⅓ cup freshly grated Parmigiano-Reggiano cheese
    ¼ cup chopped fresh Italian parsley
    2 cloves garlic, peeled and chopped fine
    1 large egg
    1 teaspoon salt
    ¼ teaspoon freshly ground black pepper
    All-purpose flour
    ¼ cup olive oil
    ¼ cup vegetable oil

    1 pound spaghetti
    ⅔ cup freshly grated Parmigiano-Reggiano

    Pass the tomatoes and their liquid through a food mill fitted with the fine disc. Heat ¼ cup olive oil in a 4- to 5-quart pot over medium high heat. Stir in the onion and cook, stirring, until wilted, about 4 minutes. Pour in the tomatoes, crushed red pepper and bay leaves, and season lightly with salt and pepper. Bring to a boil, then lower the heat so the sauce is at a lively simmer. Cook, stirring occasionally, 30 minutes.

    Meanwhile, crumble the pork and beef into a mixing bowl. Sprinkle the bread crumbs, ⅓ cup grated cheese, the parsley, and garlic over the meat. Beat the egg with 1 teaspoon salt  and ½ teaspoon black pepper in a small bowl until blended. Pour over the meat mixture. Mix the ingredients with clean hands just until evenly blended. Don't overmix. Shape the meat mixture into 1-½ inch balls.

    Dredge the meatballs in the flour until lightly but evenly coated. Heat ¼ cup olive oil and the vegetable oil in a large, heavy skillet over medium-high heat. Slip as many meatballs into the skillet as will fit without crowding. Fry, turning as necessary, until golden brown on all sides, about 6 minutes. Adjust the heat as the meatballs cook to prevent them from overbrowning. Remove the meatballs, and repeat if necessary with the remaining meatballs.

    Add the browned meatballs to the tomato sauce and cook, stirring gently with a wooden spoon, until no trace of pink remains at the center of the meatballs, about 30 minutes.

    Stir the spaghetti into the boiling water. Return to a boil, stirring frequently. Cook the pasta, semi-covered, stirring occasionally, until done, about 8 minutes.

    Drain the pasta and return it to the pot. Spoon in about 2 cups of the tomato sauce, tossing well until the pasta is coated with sauce. Remove from the heat and toss in ⅔ cup grated cheese. Check the seasoning, and add salt and pepper if necessary. Serve the pasta in warm bowls or piled high on a large warm platter. Spoon a little more of the sauce over the pasta, and pass the remaining sauce separately. Pass the meatballs family-style in a bowl, or top the bowls or platter of spaghetti with them.

    Big Flavors Rating: 5 Stars

    Slow Cooker Black Bean Ragout on Roasted Sweet Potatoes

    November 14, 2013 by Ashley 6 Comments

    Slow Cooker Black Bean Ragout on Roasted Sweet Potatoes

    I don't use dried beans often enough. They're such a good bargain, and unlike canned beans, you can control the amount of sodium added. This meal was hearty enough to satisfy two omnivores, and the house smelled wonderful while dinner was cooking away all day. I used two 32-ounce containers of stock, which ended up being 8 cups instead of 10, and I think it was the perfect amount. This way, my slow cooker still had a little room at the top, and I didn't have to use a partial container. I waited until an hour before the beans were done to roast my potatoes, and made double (or maybe even triple) the amount of pickled onions, since we love onions with our black beans so much. The onions totally bring it all together. This proved to be a wonderful way to cook dried beans. They had tons of flavor from all of the spices, which I didn't completely expect. As a side note, my son was eating forkfuls of pickled onions out of the bowl. Weirdo. Ha!

    Slow Cooker Black Bean Ragout on Roasted Sweet Potatoes

    Slow Cooker Black Bean Ragout on Roasted Sweet Potatoes
    Eats Well With Others (Adapted from The Smitten Kitchen Cookbook)

    Yield: 6 servings

    Serving Size: ⅙th of recipe

    The ultimate set it and forget it meal, this slow cooker black bean ragout is hearty and delicious, especially served over roasted sweet potatoes!

    For the bean ragout
    1 large onion, finely chopped
    3 garlic cloves, minced
    1 tablespoon ground cumin
    ½ teaspoon dried oregano
    2 teaspoon smoked paprika
    1 lb dried black beans, soaked overnight
    1 dried chile
    2 tablespoon tomato paste
    2 teaspoon salt
    10 cups vegetable broth
    1 tablespoon lime juice
    4-6 sweet potatoes

    For the lime-pickled red onions
    2 tablespoon lime juice
    ¼ medium red onion, finely diced
    salt

    Heat oven to 400. Pierce sweet potatoes all over with a fork. Place on a parchment-lined baking sheet and roast until tender, 45-60 minutes.

    Put the onion, garlic, cumin, oregano, paprika, black beans, chile, tomato paste, salt, and vegetable broth in a 6 quart slow cooker. Cover and cook on high for 6 hours.

    To make the lime-pickled red onions, toss the red onion with the lime juice and a pinch of salt and let sit for 15 minutes.

    Cut a slit in the center of the sweet potatoes and fill with the black beans. Garnish with lime-pickled red onions and serve.

    Big Flavors Rating: 4 Stars

    Hearty Delicata Squash and Lentil Soup #12WksWinterSquash

    November 11, 2013 by Ashley 2 Comments

    Hearty Delicata Squash and Lentil Soup

    With the cooler weather we've been having here in New York, nothing has sounded more comforting than a nice, hearty bowl of soup.

    This one features delicata squash, along with a bunch of other veggies that I had on hand, as well as French lentils to bulk it up a bit. I used a combination of chicken broth and chicken soup base, since that's what I had on hand.

    The soup base really added a nice, rich flavor. You could do this with other flavors like beef or turkey, or even vegetable, which would keep it vegan-friendly.

    This soup really hit the spot, and it was perfect along with some of the No-Knead Bread that I made a while back. I kept the bread in the freezer and warmed it in the oven when the soup was ready, and it worked out beautifully!

    A nice, crusty bread like this is ideal to dunk into soup. Comfort food at its best! This is my submission for week two of 12 Weeks of Winter Squash. Check out the round up after the recipe below for even more deliciousness!

    Hearty Delicata Squash and Lentil Soup

    Lamb Rogan Josh

    November 9, 2013 by Ashley 1 Comment

    Lamb Rogan Josh

    This curry was exactly the excuse I needed to break out the pressure cooker again. It's been quite some time, and I think I forgot how easy it is to use! You can make curries and stews and things like this awesome lamb shank recipe that usually take hours to make in only a fraction of the time. It needs to marinate overnight, but I kind of liked having that part ready to go the next day when I went to cook it. I wasn't able to find lamb shoulder, so I substituted boneless leg meat and it worked out perfectly. It had a lot of flavor, and a nice, mild spice. All it needed was some salt at the end. I served this with Garlic Naan, which was the perfect thing to dip in the sauce, steamed basmati rice and some yogurt that I stirred chopped cucumber, dried mint and salt into. It was a nice, warm, comforting meal for a cool autumn evening.

    Lamb Rogan Josh

    Lamb Rogan Josh
    CD Kitchen

    2 pounds lean lamb shoulder, trimmed and cut into chunks
    ½ cup plain yogurt
    4 green cardamom pods
    1 small cinnamon stick OR ½ teaspoon ground cinnamon
    2 teaspoons paprika
    1 teaspoon turmeric
    1 teaspoon ground coriander
    1 teaspoon cumin
    ½ teaspoon cayenne pepper
    2 teaspoons garam masala
    2 cups canned tomatoes
    2 cloves garlic, peeled
    1 large onion, chopped
    1 piece (2-inch size) ginger root
    3 tablespoons vegetable oil
    1 cup water
    2 tablespoons chopped cilantro
    cilantro sprigs for garnish

    In a bowl or zippered plastic bag, toss lamb with yogurt. In a blender or spice grinder, pulverize whole cardamom and cinnamon. Add to lamb mixture with paprika, turmeric, coriander, cumin and cayenne. Cover and refrigerate overnight.

    In a food processor, combine garam masala, tomatoes, garlic, onions and ginger; puree until smooth.

    In a pressure cooker, heat oil over medium heat. Add tomato mixture and cook for 5 minutes. Stir in lamb and marinade. Stir in water.

    Lock the lid in place and bring cooker up to full pressure over medium-high heat. Reduce heat to medium-low, just to maintain even pressure, and cook for 20 minutes. Remove from heat and release pressure quickly. The lamb should be fork tender. If not, return to full pressure and cook for another 5 minutes. Release pressure quickly.

    Remove lid and bring to boil. Reduce heat and simmer curry until nicely thickened. Stir in cilantro just before serving. Garnish with cilantro sprigs.

    Big Flavors Rating: 4 Stars

    Garlic Naan

    November 9, 2013 by Ashley 3 Comments

    Garlic Naan

    I set out to make an Indian feast for dinner, and I wanted to make some naan to go with the Lamb Rogan Josh that I had planned. I've made Malabar Parantha in the past, but never naan. I picked this particular naan recipe for a few reasons. First of all, I had some buttermilk that I wanted to use up. Secondly, I've been following Jen's blog, Beantown Baker for yeeeeears now, and she loved this one. Also, I really love garlic and my mom gave me a pizza stone for my birthday, and I wanted to finally give it a try. Win/win/win/win! This takes a bit of time to come together, because it needs to rise, but it's totally worth it for any garlic lover. I think I rolled them a little too thick, but they were wonderful! They were great for sopping up the sauce from the curry. I even got a nice bread bubble on one of them from when it was baking. Yum!

    Garlic Naan

    Garlic Naan
    Beantown Baker adapted from The Joy of Cooking

    YIELD: 4

    ingredients:
    2 cups bread flour
    ½ teaspoon salt
    1 ⅛ teaspoons active dry yeast
    ¾ cup yogurt or buttermilk, at room temperature
    2 tablespoons butter, melted, or vegetable oil
    1 teaspoon to 1 tablespoon water, as needed

    2 tablespoon butter, melted
    6 cloves garlic, minced
    ¼ cup chopped cilantro

    4 cloves garlic, minced

    directions:
    Combine the bread flour, salt, and active dry yeast in a large bowl or the bowl of a heavy-duty mixer.

    Add the yogurt, butter, and water.

    Mix by hand or on low speed until a soft ball of dough is formed. Knead for about 10 minutes by hand or with the dough hook on low to medium speed, until the dough is smooth and elastic.

    Transfer the dough to an oiled bowl and turn it once to coat with oil. Cover with plastic wrap and let rise at room temperature for about 1 ½ hours. Set a rack in the lowest level of the oven and place a pizza or baking stone on the rack.

    Preheat the oven to 475°F for 45 minutes. (If you do not have a pizza or baking stone, preheat the oven, place an inverted baking sheet, preferably heavy-gauge, on the rack, and heat the baking sheet for 5 minutes.)

    Meanwhile, punch down the dough and divide equally into 4 pieces. Roll into balls, cover, and let rest for 10 minutes. While rising, combine the melted butter, garlic, and cilantro in a small bowl.

    Roll out each ball of dough on a floured surface to an oval about 8 to 10 inches long and ¼ inch thick. Brush the tops with the butter mixture.

    Sprinkle the top with more minced garlic.

    Place as many dough ovals as will fit without touching each other directly on the baking stone or sheet and bake until each oval is puffy and just beginning to turn golden, 6 to 7 minutes.

    Fold the naan in half, place in a cloth-lined basket, and keep covered. Bake the remaining dough. Serve warm.

    Big Flavors Rating: 4 Stars

    Greek Yogurt, Meyer Lemon Curd and Strawberry Parfait

    November 8, 2013 by Ashley 1 Comment

    Greek Yogurt, Meyer Lemon Curd and Strawberry Parfait

    Greek Yogurt, Meyer Lemon Curd and Strawberry Parfait

    The first thing I did with the Meyer lemon curd that I made was to eat half of it with a spoon make some simple and delicious parfaits. I put plain Greek yogurt in two bowls, topped them each with a healthy dollop of my homemade Meyer Lemon Curd and then sprinkled some chopped strawberries on top. It's also great with granola on top. It was quick, easy and delicious. This would be a great way to start (or end!) any day!

    Big Flavors Rating: 4 Stars

    Meyer Lemon Curd

    November 8, 2013 by Ashley 1 Comment

    Meyer Lemon Curd

    Meyer Lemon Curd

    I picked up some Meyer lemons a while back, and I thought that making lemon curd would be a great way to use a few of them. This stuff is awesome! It doesn't take too long to come together - I'd say mine took about 5 minutes after the butter melted for it to reach the correct temperature. Meyer lemons are sweeter than regular lemons, so you don't need to add as much sugar to make this sweet enough, which toooootally makes it healthier, right? 😉 This curd is rich and piquant and good enough to be eaten by the spoonful! Of course, I hope it makes it into a few other treats, too...

    Meyer Lemon Curd

    Meyer Lemon Curd
    Gourmet December 1999

    Makes about 1 ⅔ cups
    Total time: 20 min

    Good enough to eat by the spoonful, this curd can be used as a cake or tart filling or served with scones, muffins, or fresh fruit.

    3 to 4 Meyer lemons (about 1 pound)
    ½ cup sugar
    2 large eggs
    1 stick unsalted butter, cut into 4 pieces

    Finely grate enough zest from lemons to measure 2 teaspoons and squeeze enough juice to measure ½ cup. Whisk together zest, juice, sugar, and eggs in a metal bowl and add butter. Set bowl over a saucepan of simmering water and cook, whisking, until thickened and smooth and an instant-read thermometer registers 160°F, about 5 minutes. Force curd through a fine sieve set into another bowl. Serve warm or cover surface of curd with wax paper and cool completely.

    Cooks' notes:
    -Lemon curd keeps, covered and chilled, 1 week.
    -If substituting regular lemons, increase sugar to ¾ cup.

    Big Flavors Rating: 5 Stars

    Mixed Green Salad with Veggies, Blue Cheese and Aged Balsamic

    November 7, 2013 by Ashley 2 Comments

    Mixed Green Salad with Veggies, Blue Cheese and Aged Balsamic

    Mixed Green Salad with Veggies, Blue Cheese and Aged Balsamic

    I raided my kitchen to put together a nice salad for lunch - I topped some mixed greens with cucumber, grape tomatoes, baby bella mushrooms, yellow bell pepper, and sweet onion. I gave it a healthy sprinkle of blue cheese and drizzled on some aged balsamic and a good quality extra-virgin olive oil. A couple grinds of black pepper on top and it lunch was served. It was nice and crunchy and delicious.

    Big Flavors Rating: 4 Stars

    • « Previous Page
    • 1
    • …
    • 17
    • 18
    • 19
    • 20
    • 21
    • …
    • 35
    • Next Page »

    Hi, I'm Ashley and I’ve been writing about food & recipes here at Big Flavors from a Tiny Kitchen since 2006. I want to help you (yes, you!) gain confidence in the kitchen so you are excited to cook at home for yourself and your loved ones.

    More about me →

    Favorite Spring Recipes

    • Mayo-free Deviled Eggs
    • Middle Eastern Fattoush Salad with Homemade Pita Chips
    • Birthday Cake Confetti Pancakes with Sprinkles
    • Italian Cream Cheese and Ricotta Cheesecake
    • Garlicky Mushroom Ricotta Pizza with Wild Arugula + Aged Balsamic
    • Slow Cooker "Roasted" Beets
    • Honey Balsamic Roasted Carrots
    • Italian Ricotta Cookies
    • Rhubarb Custard Pie
    • Easy Instant Pot Herbed Potato Salad

    Mother's Day + Easter Brunch

    • Epic Brunch Board on a Budget
    • Baby Spinach and Cheddar Quiche Made with Fresh Spinach
    • Turkey Salad Tea Sandwiches with Dried Cherries
    • Great Grandma Maria Francesca Cardile's Italian Easter Cookies
    • Brie Waffle Bites
    • Challah French Toast
    • Creamsicle Smoothies
    • DM Bloody Mary
    • Turkey Scotch Eggs
    • The Herbalist

    Popular Now

    • Cast iron skillet full of chicken fajitas.
      Favorite Restaurant-Style Chicken Fajitas
    • Overhead view of spinach and cheddar quiche with forks.
      Baby Spinach and Cheddar Quiche Made with Fresh Spinach
    • Chicken and bell pepper stir-fry served over white rice.
      Chicken and Bell Pepper Stir-Fry
    • Serving dish of cooked shrimp garnished with chopped parsley.
      Quick and Easy Sautéed Shrimp
    • Overhead view of a dutch oven filled with sausages, peppers, and onions.
      Sausage and Peppers
    • Overhead view of assorted breakfast items displayed on a board.
      Epic Brunch Board on a Budget

    Footer

    ↑ back to top

    About

    • About Ashley
    • Press + Recognition
    • Events
    • Virtual Cooking Classes
    • Podcast
    • Contact
    • Privacy Policy

    Newsletter

    • Sign up to receive delicious recipes and exclusive content right to your inbox!

    As an Amazon Associate I earn from qualifying purchases at no added cost to you.

    ©2006–2026  BIG FLAVORS FROM A TINY KITCHEN LLC | ALL RIGHTS RESERVED

    *Third-party advertisers may collect or use non-personally identifiable information to serve you more relevant ads.