
This post may contain affiliate links, which won’t change your price but will share some commission.
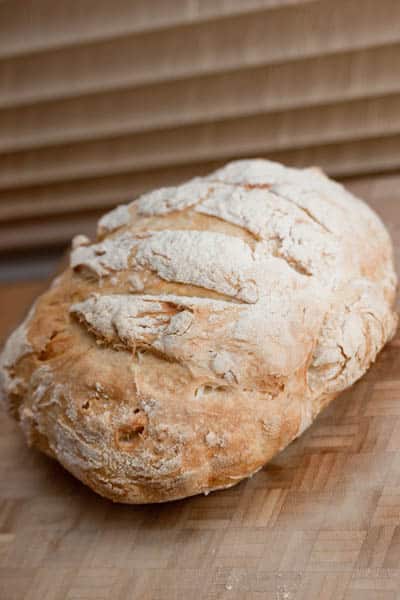
I wanted to make a fresh loaf of bread to go along with the beef stew, so I found this recipe on the King Arthur Flour site. This bread takes some time to rise, but otherwise involves minimal effort. It turned out fantastic, and I'm happy to have more dough in the fridge to make bread for a few more days. This was a big hit with my in-laws at dinner!
No-Knead Crusty White Bread
King Arthur Flour
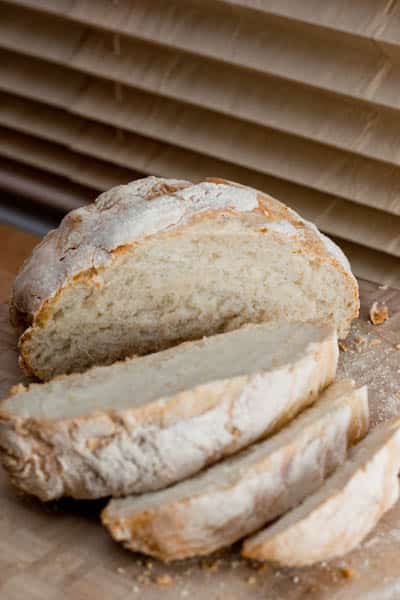
The most basic of all no-knead loaves, this is a wonderful way to get into yeast-bread baking. The easy stir-together dough rests in your refrigerator, developing flavor all the time, till you're ready to bake. About 90 minutes before you want to serve bread, grab a handful of dough, shape it, let it rise, then bake for 30 minutes. The result? Incredible, crusty artisan-style bread. If you're a first-time bread-baker, you'll never believe this bread came out of your own oven. if you're a seasoned yeastie, you'll love this recipe's simplicity.
Our thanks to Jeff Hertzberg and Zoë François, whose wonderful book, "Artisan Bread in Five Minutes a Day," is the inspiration for this recipe.
3 cups lukewarm water
6 ½ to 7 ½ cups King Arthur Unbleached All-Purpose Flour*
1 tablespoon salt
1 ½ tablespoons instant yeast
*The flour/liquid ratio is important in this recipe. If you measure flour by sprinkling it into your measuring cup, then gently sweeping off the excess, use 7 ½ cups. If you measure flour by dipping your cup into the canister, then sweeping off the excess, use 6 ½ cups. Most accurate of all, and guaranteed to give you the best results, if you measure flour by weight, use 32 ounces.
1) Combine all of the ingredients in a large mixing bowl, or a large (6-quart), food-safe plastic bucket. For first-timers, "lukewarm" means about 105°F, but don't stress over getting the temperatures exact here. Comfortably warm is fine; "OUCH, that's hot!" is not. Yeast is a living thing; treat it nicely.
2) Mix and stir everything together to make a very sticky, rough dough. If you have a stand mixer, beat at medium speed with the beater blade for 30 to 60 seconds. If you don't have a mixer, just stir-stir-stir with a big spoon or dough whisk till everything is combined.
3) Next, you're going to let the dough rise. If you've made the dough in a plastic bucket, you're all set - just let it stay there, covering the bucket with a lid or plastic wrap; a shower cap actually works well here. If you've made the dough in a bowl that's not at least 6-quart capacity, transfer it to a large bowl; it's going to rise a lot. There's no need to grease the bowl, though you can if you like; it makes it a bit easier to get the dough out when it's time to bake bread.
4) Cover the bowl or bucket, and let the dough rise at room temperature for 2 hours. Then refrigerate it for at least 2 hours, or for up to about 7 days. (If you're pressed for time, skip the room-temperature rise, and stick it right into the fridge). The longer you keep it in the fridge, the tangier it'll get; if you chill it for 7 days, it will taste like sourdough. Over the course of the first day or so, it'll rise, then fall. That's OK; that's what it's supposed to do.
5) When you're ready to make bread, sprinkle the top of the dough with flour; this will make it easier to grab a hunk. Grease your hands, and pull off about ¼ to ⅓ of the dough - a 14-ounce to 19-ounce piece, if you have a scale. It'll be about the size of a softball, or a large grapefruit.
6) Plop the sticky dough onto a floured work surface, and round it into a ball, or a longer log. Don't fuss around trying to make it perfect; just do the best you can.
7) Place the dough on a piece of parchment (if you're going to use a baking stone); or onto a lightly greased or parchment-lined baking sheet. Sift a light coating of flour over the top; this will help keep the dough moist as it rests before baking.
8) Let the dough rise for about 45 to 60 minutes. It won't appear to rise upwards that much; rather, it'll seem to settle and expand. Preheat your oven (and baking stone, if you're using one) to 450°F while the dough rests. Place a shallow pan on the lowest oven rack, and have 1 cup of hot water ready to go.
9) When you're ready to bake, take a sharp knife and slash the bread 2 or 3 times, making a cut about ½" deep. The bread may deflate a bit; that's OK, it'll pick right up in the hot oven.
10) Place the bread in the oven, and carefully pour the 1 cup hot water into the shallow pan on the rack beneath. It'll bubble and steam; close the oven door quickly.
11) Bake the bread for 25 to 35 minutes, until it's a deep, golden brown.
12) Remove the bread from the oven, and cool it on a rack. Store leftover bread in a plastic bag at room temperature.
13) Yield: 3 or 4 loaves, depending on size.
Big Flavors Rating: 5 Stars


lorhen82 says
That looks amazing!
Heather says
Love the bit about treating yeast nicely. 🙂
This is one totally amazing loaf of bread!
Medifast Coupons says
The picture of this bread is picture perfect. The recipe is so easy to follow that anyone can follow it.
Anonymous says
Made this for dinner tonight. New favorite bread recipe!
Jess Louks says
Finally found a recipe i'm comfortable with 🙂 question though can you make this dough into small bread rolls/dinner rolls?? I'm new to bread making so would you have to change oven temps and times by much? thank you 🙂
Ashley says
Jess - I don't see why not. I made some smaller loaves with it. I'm not sure on the temp/time though. I don't make bread often enough to be able to say. Good luck!!
Jess Louks says
Just a quick update made the bread this evening!! My new favourite so easy, quick and tastes brill...don't think I'll be using another recipe any time soon 🙂 thanks again! Will try the bread rolls next time and give you the temp/cooking time x
Joanne says
I rarely get a really awesome crust on my bread so I'll have to try this!
Allison says
It was so amazing and today officially, it's gone! It went perfect with the stew and you were spot on about how the sourdough comes out more as the days passed!!
Joanne says
Love that crusty outside!!