Big Flavors from a Tiny Kitchen

menu icon
go to homepage
  • Recipes
  • About
  • Events
  • Contact
  • Subscribe
    • Facebook
    • Instagram
    • Pinterest
  • subscribe
    search icon
    Homepage link
    • Recipes
    • About
    • Events
    • Contact
    • Subscribe
    • Facebook
    • Instagram
    • Pinterest
  • ×
    Home » Recipes

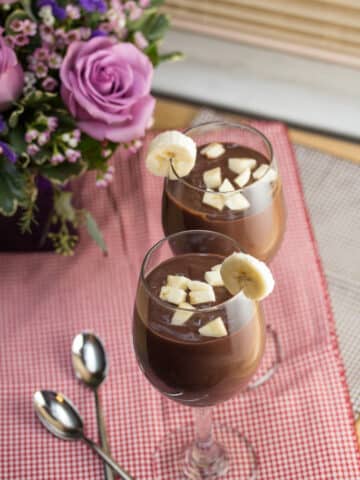
    Chocolate Banana Pudding

    February 26, 2014 by Ashley 3 Comments

    Chocolate Banana Pudding

    I saw this simple pudding recipe on TV a few weeks ago and immediately knew it would be a great Valentine's Day dessert. Because Valentine's Day is just an excuse to eat copious amounts of chocolate, right? This recipe was on an episode about lightened up desserts, too, so it was a win/win!
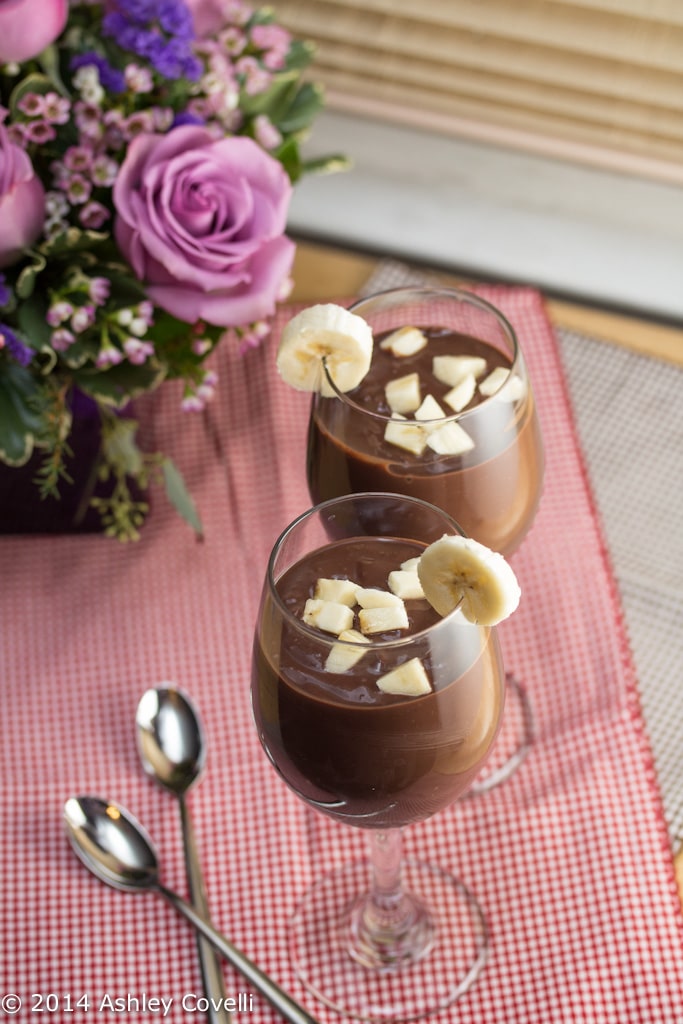
    Chocolate Banana Pudding

    This recipe is great because you can make it ahead of time and just stir the bananas in at the end.

    It makes 4 servings, unless you happened to have misread the recipe and assumed it was for 2.

    Ahem.
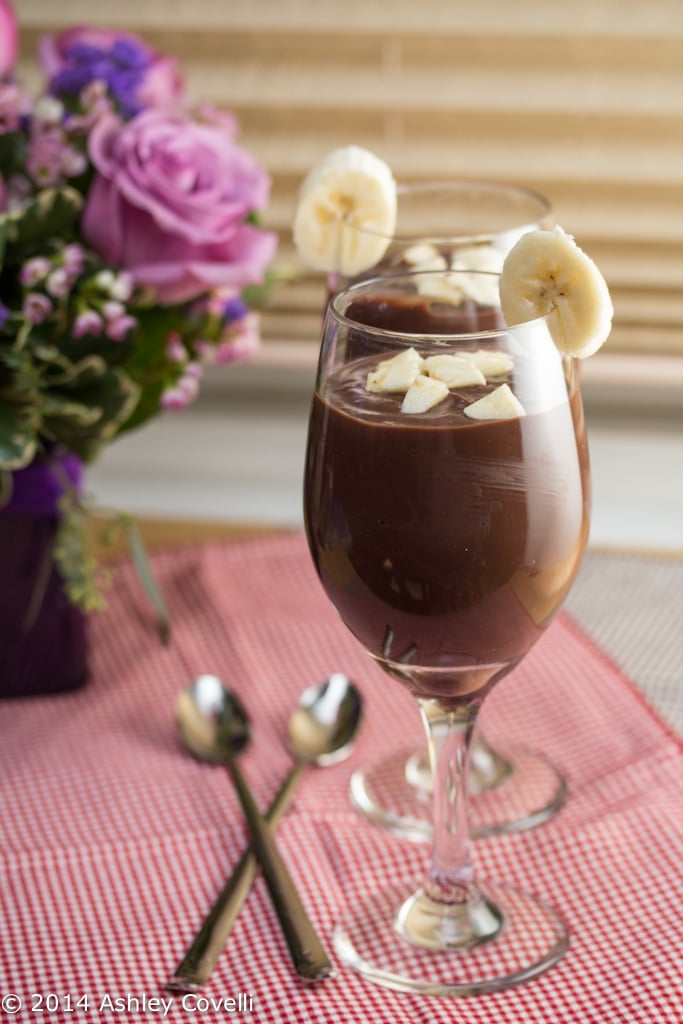
    Chocolate Banana Pudding

    This is rich, chocolatey and delicious, even though it only uses egg whites and cornstarch as thickeners. I even used low-fat milk.

    I loved the addition of the banana pieces. My pudding was a bit lumpy, but it was fine since the banana pieces were in there, too.

    Chocolate Banana Pudding
    Best Recipes Ever - Kary Osmond

    Servings: 4

    2-¼ cups (550 mL) milk
    ⅔ cup (150 mL) granulated sugar
    2 egg whites
    ⅓ cup (75 mL) unsweetened cocoa powder, sifted
    3 tablespoon (45 mL) cornstarch
    2 teaspoon (10 mL) vanilla
    1 banana, diced

    In medium-size heavy saucepan or double boiler over medium heat, combine 2 cups (500 mL) of the milk with sugar, stirring often, for about 5 minutes or just until bubbles form around edge of pan.

    Meanwhile, in bowl, whisk together remaining milk, egg whites, cocoa and cornstarch; gradually whisk in hot milk mixture. Pour into clean saucepan; cook over medium heat, stirring with wooden spoon, for about 10 minutes or until consistency of melted chocolate. Let cool slightly; stir in vanilla.

    Place plastic wrap directly on surface of pudding; refrigerate for at least 2 hours or until cold. (Pudding can be prepared to the point and refrigerated for up to 2 days.) Just before serving, dice banana and stir into pudding.

    Variation:

    Butterscotch Pudding: Omit cocoa powder and banana; reduce vanilla to 1 teaspoon (5 mL). In small saucepan over medium heat or in microwave at Medium (50%), heat 2 cups (500 mL) of the milk just until steaming. Set aside and keep warm.

    Meanwhile, in medium-size heavy saucepan, stir sugar with ¼ cup (50 mL) water over medium heat until dissolved. Bring to boil, brushing down sides of pan with pastry brush dipped In cold water.

    Cook, without stirring, for about 5 minutes or until deep golden. Remove from heat; vigorously whisk in hot milk in slow steady stream while mixture bubbles and foams. In glass measure or small bowl, whisk together remaining milk, egg whites and cornstarch. Whisk into hot milk mixture in slow steady stream.

    Cook over medium-low heat, stirring with wooden spoon, for about 8 minutes or until thickened. Stir in vanilla and 1 tablespoon (15 mL) butter. Refrigerate for at least 2 hours or until cold. (Pudding can be refrigerated for up to 2 days.)

    Nutritional Info:
    cal 285, pro 8 g, total fat 5 g, sat. fat 3 g, carb 56 g, fiber 3 g, chol 10 mg, sodium 152 mg, %RDI:, calcium 16%, iron 7%, vit A 7%, vit C 3%, folate 4%

    Big Flavors Rating: 4 Stars

    Mocha Chip Pancakes

    February 25, 2014 by Ashley 11 Comments

    Mocha Chip Pancakes

    Pancakes are always a big hit in my house. Breakfast, lunch, dinner, or any time in between. I just love that it's perfectly acceptable to eat a pile of cake and call it a meal.

    My husband usually makes big breakfasts on the weekends, but occasionally I'll step in and make something more involved than our usual go-to breakfast staples.

    So when Stonyfield reached out to me to come up with a pancake recipe to celebrate National Pancake Month, I was excited to get creative with it!

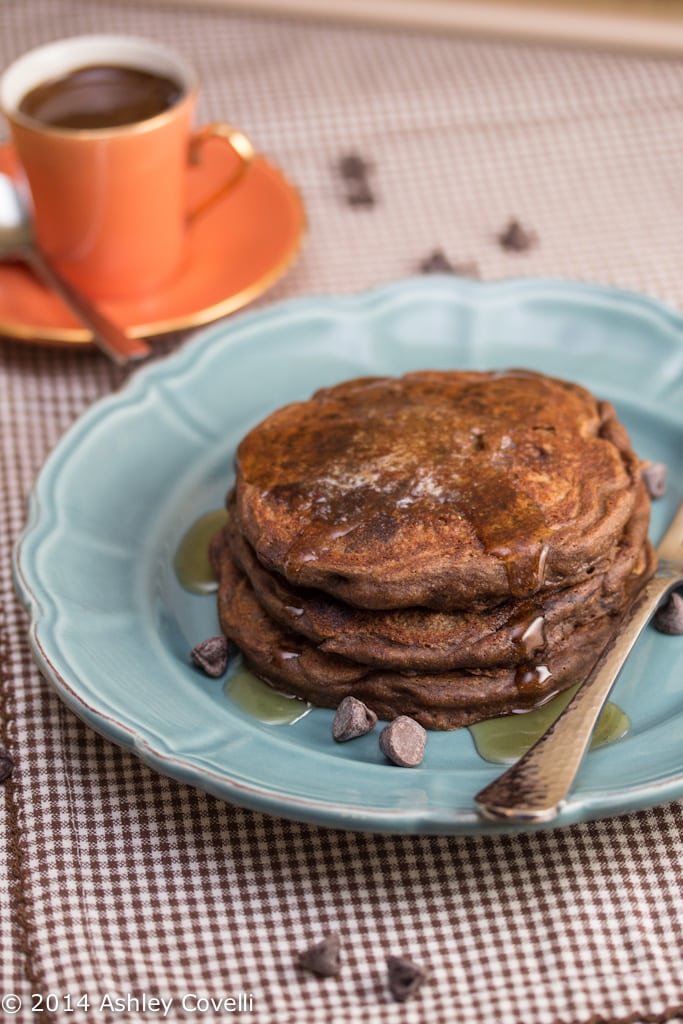
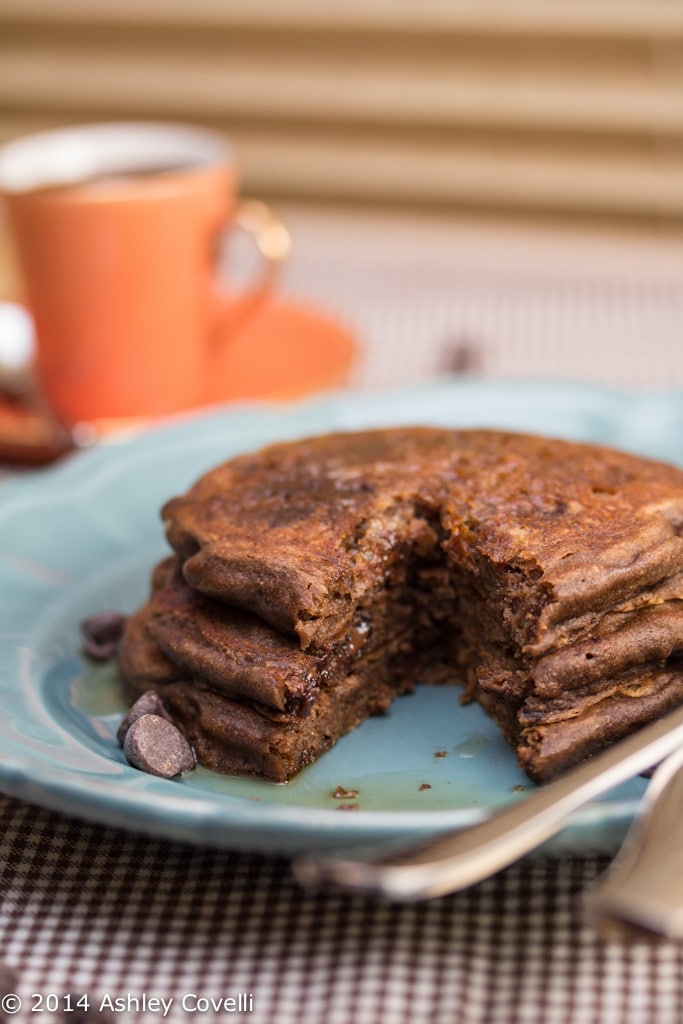
    Mocha chip pancakes on a plate with a cup of espresso served alongside.

    These chocolatey pancakes are made with a mix of fat-free yogurt and milk. I also swapped out half of the white flour for whole wheat. It gives them a nice texture and makes them healthier than your standard pancakes.

    But then I went and added espresso.

    And cocoa powder.

    And chocolate chips.

    Mocha chip pancakes on a plate with a cup of espresso served alongside.

    Go big or go home.

    These pancakes are absolutely wonderful. The bitterness of the espresso pairs so beautifully with the chocolate. The chocolate chips get all nice and melty inside

    and topped with a pat of butter and a drizzle of pure maple syrup, breakfast is served!

    Mocha Chip Pancakes

    Still hungry? You may also like...

    Two plates of gingerbread pancakes topped with peppermint whipped cream, crushed peppermint candies, and maple syrup.

    Gingerbread Pancakes with Homemade Peppermint Whipped Cream

    Stack of funfetti pancakes on a plate with a slice taken out of them.

    Birthday Cake Confetti Pancakes with Sprinkles

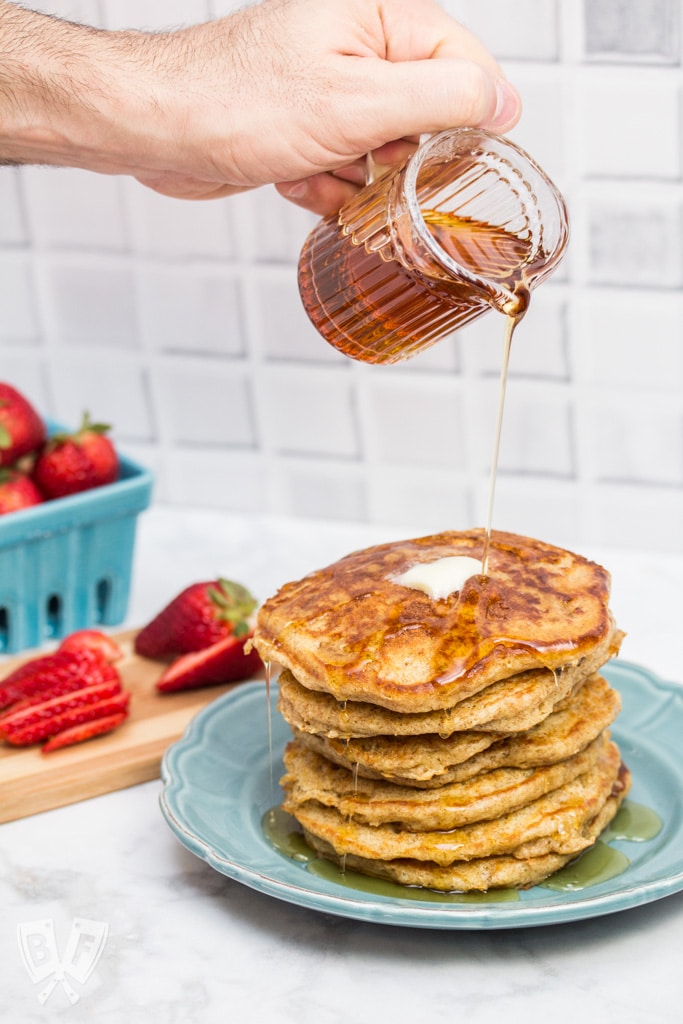
    Pouring syrup onto a stack of buttermilk pancakes

    Our Favorite Buttermilk Pancakess

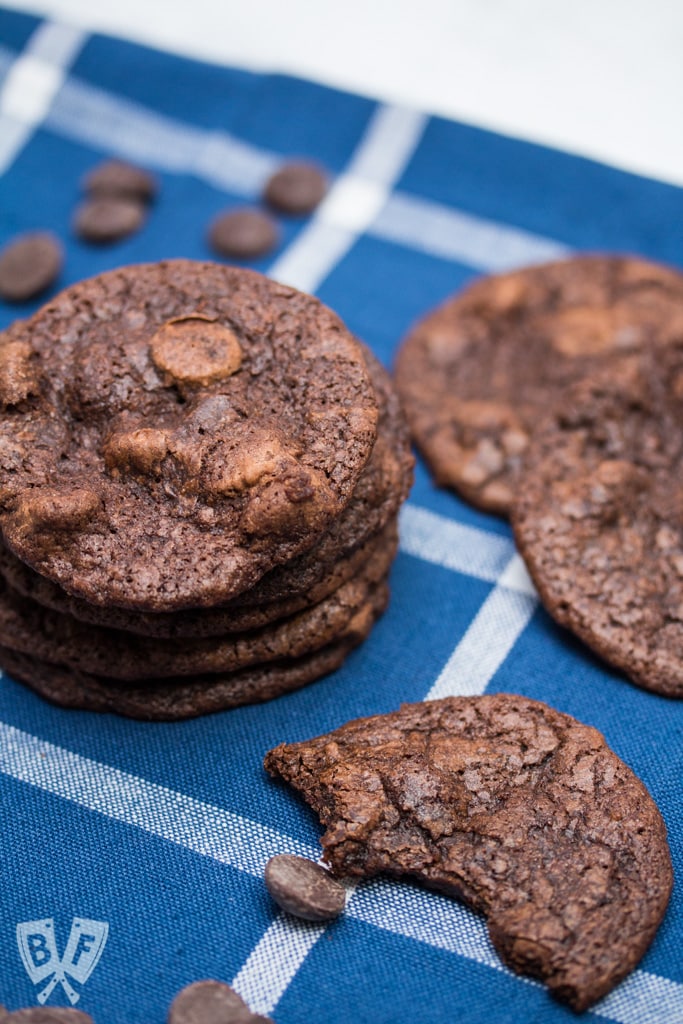
    Chocolate cookies and chocolate chips on a blue and white backdrop.

    Melt-in-Your-Mouth Buttermilk Chocolate Cookies

    📖 Recipe

    Mocha Chip Pancakes

    Mocha Chip Pancakes on a plate with a cup of espresso.
    Espresso and chocolate definitely belong on your breakfast plate. These mocha chip pancakes are a fun way to start any day!
    Big Flavors from a Tiny Kitchen – Ashley Covelli
    No ratings yet
    Print Recipe Pin Recipe
    Course: Breakfast
    Cuisine: American
    Prep Time 15 minutes mins
    Cook Time 15 minutes mins
    Total Time 30 minutes mins

    Ingredients
     

    • 2 tablespoons unsalted butter
    • 1 tablespoon raw sugar
    • ½ cup whole wheat flour
    • ½ cup all-purpose flour
    • 1 tablespoon Dutch process cocoa powder
    • 2 teaspoons baking powder
    • 1 teaspoon baking soda
    • ½ teaspoon salt
    • 1 ¼ cups reduced fat milk divided
    • 1 tablespoon instant espresso granules
    • ½ cup plain yogurt I used Stonyfield Organic Fat-Free
    • 1 large egg
    • ⅓ cup semi-sweet chocolate chips

    Instructions
     

    1. Melt butter in a small bowl. Stir in raw sugar and set aside to cool. 
    2. In a large bowl, whisk together flours, cocoa powder, baking powder, baking soda and salt. 
    3. Heat ½ cup of the milk in the microwave until warm (about 45 seconds - 1 minute). Stir in instant espresso granules until dissolved. Add the remaining ¾ cup of cold milk to cool down the mixture. Add yogurt and egg and whisk until well combined. 
    4. Add the wet ingredients to the dry and whisk until just barely combined - some lumps are perfectly fine, you just don't want to see streaks of powder here. Add in chocolate chips and stir gently to incorporate. Let stand for 5 minutes. 
    5. Preheat griddle to 375°F. Grease griddle with cooking spray. Use an ice cream scoop or small ladle to drop equal portions of batter onto the hot griddle. Cook until pancakes are covered with bubbles that begin to pop, and the edges are darkening slightly. Flip and continue to cook for another 2 minutes.

    Useful products:

    Dutch process cocoa powder

    Did you make this recipe?

    Leave a comment + star rating below to let people know how it was!

    Check out my latest posts...

    • Jar of homemade Italian seasoning blend.
      Italian Seasoning Blend
    • Bowl of tzatziki with olive oil drizzled over the top.
      Easy Homemade Tzatziki
    • Turkey sausage patties and a jar of breakfast sausage seasoning.
      Turkey Sausage Patties

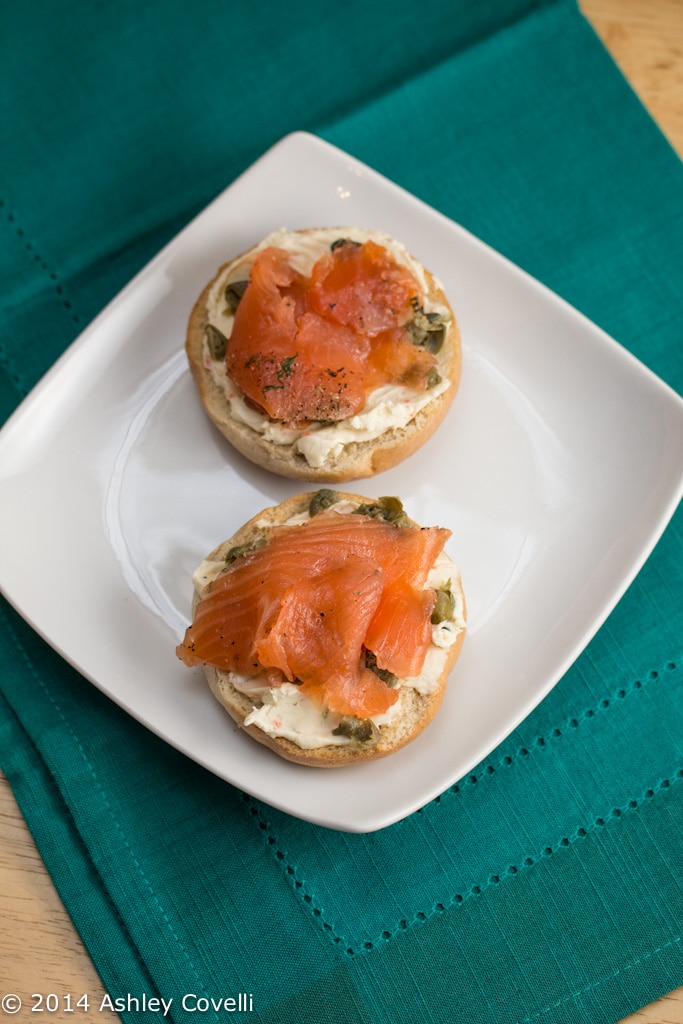
    Mini Bagels with Salmon Gravlaks, Veggie Cream Cheese and Capers

    February 24, 2014 by Ashley 2 Comments

    Mini Bagels with Salmon Gravlaks, Veggie Cream Cheese and Capers

    We had a bit of Salmon Gravlaks leftover in the fridge, and it made for a great spin on a bagel with a schmear.

    It was a great mini version of a classic New York breakfast.

    Mini Bagels with Salmon Gravlaks, Veggie Cream Cheese and Capers

    I toasted some mini bagels and smeared on some veggie cream cheese. I sprinkled on a couple of chopped capers and added a few slices of the gravlaks.

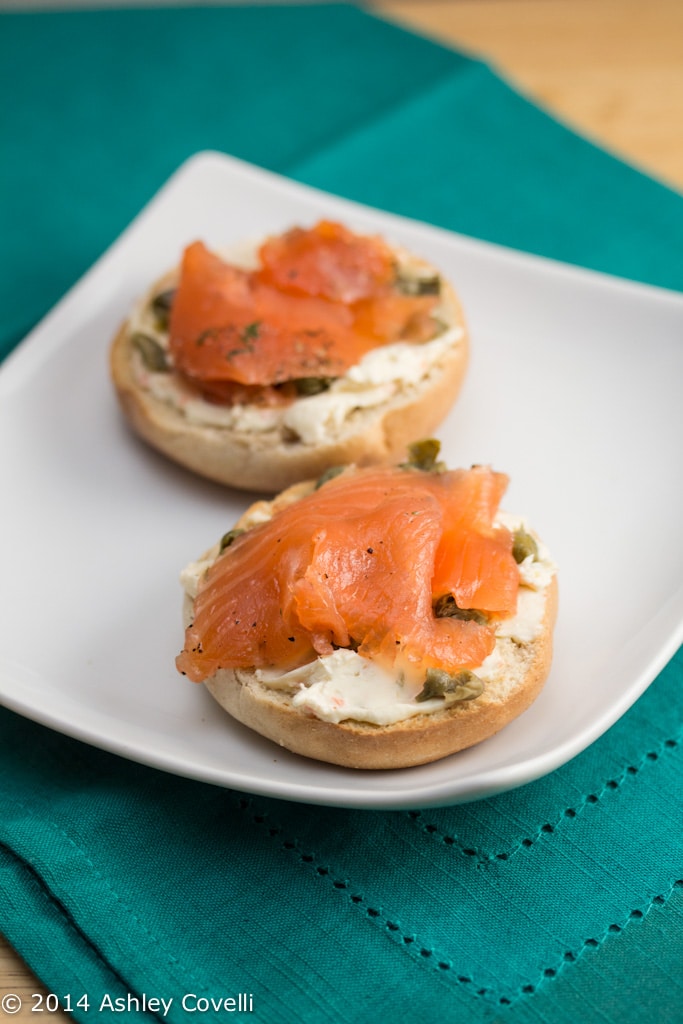
    Mini Bagels with Salmon Gravlaks, Veggie Cream Cheese and Capers

    It was a great, light breakfast, since it wasn't a full sized bagel with tons of cream cheese. This would be great with smoked salmon, too.

    Big Flavors Rating: 4 Stars

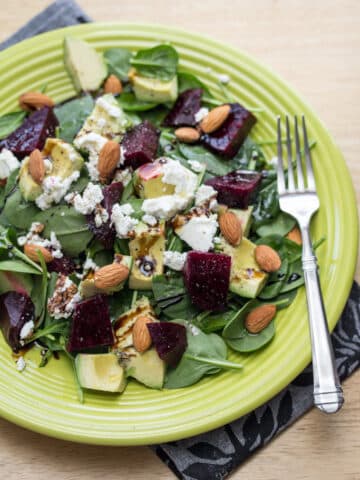
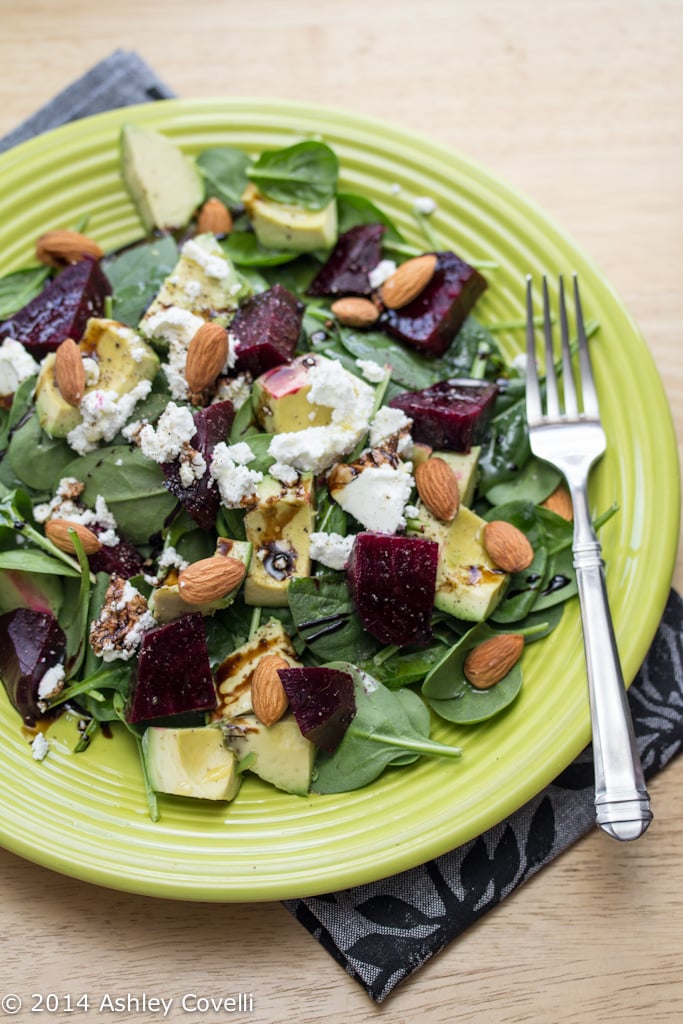
    Green and Red Salad with Goat Cheese and Raw Almonds

    February 23, 2014 by Ashley Leave a Comment

    Green and Red Salad with Goat Cheese and Raw Almonds

    I had some Slow Cooker "Roasted" Beets in the fridge, so I made this tasty and colorful salad for lunch.

    The plate was full of great flavors and textures, which is key for a great salad.

    Plus, you know, you can never go wrong with goat cheese 😉

    Green and Red Salad with Goat Cheese and Raw Almonds

    I put a hearty portion of baby spinach on a plate and topped it with sliced roasted beets, avocado, crumbled goat cheese and a handful of raw almonds. I sprinkled on some sea salt and freshly cracked black pepper and topped it with a drizzle of aged balsamic and a fancy extra-virgin olive oil.

    It made an outstanding lunch - one I'll definitely be making again!

    Big Flavors Rating: 5 Stars

    Margarita Donuts #NationalMargaritaDay

    February 22, 2014 by Ashley 30 Comments

    Margarita Donuts on a plate with lime wedges.

    For me, margaritas bring forth thoughts of warm summer weather and good times with friends. And those are all things that I could use more of lately!

    So when I was asked to join a group of bloggers in celebrating National Margarita Day, I headed over to the liquor cabinet to get geared up.

    Margarita Donuts

    There are all sorts of fun flavors of margaritas out there, but I thought it would be fun to do something really different.

    Something that would give you an excuse to consume tequila before 9am work as breakfast or dessert. Or both. We're in a judgement free zone here.

    These donuts have lime zest running through them, and they're glazed with a tequila and orange liqueur-laced icing.

    They're also baked instead of fried, and are made with half whole wheat flour, so they're essentially health food. Breakfast of champions, without a doubt.

    Margarita Donuts

    I like my margaritas on the rocks with a salted rim, so I decided to give each of these donuts a "salted rim" by sprinkling a pinch of sea salt on top of the glaze before it set. My husband loved that addition. What can I say, the tequila inspired me.

    Be sure not to over-mix your donut batter or they'll be tough and you'll end up needing a shot of tequila to wash them down. Now that would be a shame, wouldn't it? 😉

    Check out what everyone else contributed to this holiday celebration in the roundup after my recipe below. Cheers!

    📖 Recipe

    Margarita Donuts

    Overhead view of a plate of donuts with lime wedges on a green plate.
    These donuts have lime zest running through them, and they’re glazed with a tequila and orange liqueur-laced icing.
    Big Flavors from a Tiny Kitchen - Ashley Covelli
    No ratings yet
    Print Recipe Pin Recipe
    Servings: 6 Donuts

    Ingredients
     

    For the donuts:
    • 3 tablespoons unsalted butter melted
    • ½ cup whole wheat flour
    • ½ cup unbleached all-purpose flour
    • 1 teaspoon baking powder
    • ¼ teaspoon sea salt
    • Zest of 1 lime
    • ¼ cup sugar
    • 2 tablespoons honey
    • 1 large egg
    • ¼ teaspoon vanilla
    • ⅓ cup buttermilk
    For the glaze:
    • 1 teaspoons tequila
    • 2 teaspoons orange liqueur such as triple sec
    • 2 teaspoons freshly squeezed lime juice
    • Zest of 1 lime
    • ⅔ cup powdered sugar you may need a little more or less
    For garnish:
    • Sea salt

    Instructions
     

    For the donuts:
    1. Preheat oven to 400°F. Spray a donut pan with non-stick cooking spray and set aside.
    2. Melt butter in a small bowl and set aside to cool. Meanwhile, whisk together flours, baking powder, salt, and lime zest in a large bowl. Set aside.
    3. Whisk sugar, honey, egg, and vanilla into the cooled butter until well combined. Whisk in buttermilk. Pour wet ingredients into dry ingredients and whisk until just combined, being careful not to over-mix.
    4. Pour batter into a piping bag (or zip-top plastic bag with a corner snipped off) and pipe evenly into the pan.
    5. Bake donuts for 7 minutes. Allow to cool 1 minute before turning pan over to remove donuts onto a cooling rack. Let them cool completely – about 15-20 minutes.
    For the glaze:
    1. Once the donuts are cool, in a flat-bottomed bowl, whisk together tequila, orange liqueur, lime juice and zest until evenly combined. Slowly whisk in powdered sugar, one tablespoon at a time, until smooth. If glaze is too thick, add another splash of tequila. If it is too thin, add in a little more powdered sugar.
    2. Dip the donuts into the glaze, rocking back and forth to evenly coat them on one side, and place back on the cooling rack, iced side up. Repeat if desired, for a thicker coating. Sprinkle the top of each donut with a pinch of sea salt while the glaze is still wet.
    3. Allow glaze to set, about 20 minutes. Serve straight up, down the hatch.

    Did you make this recipe?

    Leave a comment + star rating below to let people know how it was!

    Need more margarita action? Check out the roundup below to see what the other National Margarita Day participants came up with. I'd like to think of it as a to-do list of sorts. Bottoms up!!

    Margaritas:

    • Blackberry Margarita from Cooking for My Peace of Mind
    • Chili Lime Margarita from Curious Cuisiniere
    • Frozen Mango Margarita from Noshing with the Nolands
    • Lilikoi Margarita with Li Hung Mui from The Little Ferraro Kitchen
    • Margaritas Gone Wild from Delaware Girl Eats
    • Mixed Berry Margarita from Kudos Kitchen By Renee
    • Mom's Wicked Margarita from Desserts Required
    • Pomegranate Margarita from Daily Dish Recipes
    • Spicy Raspberry Frozen Margarita from The Weekend Gourmet
    • Tamarind Margaritas from All Roads Lead to the Kitchen
    • The Great Grapefruit Margarita from La Cocina de Leslie
    • Tim G's Margarita from Sidewalk Shoes

    Margarita Bites:

    • Baked Margarita Chicken Wings from Healthy. Delicious.
    • Margarita Cake with Sugar Cookie Crust from Gotta Get Baked
    • Margarita Cheesecake Bars from Hezzi-D's Books and Cooks
    • Margarita Cupcakes from The Foodie Army Wife
    • Margarita Donuts from Big Flavors from a Tiny Kitchen
    • Strawberry Margarita Sweet Rolls from The Dutch Baker's Daughter

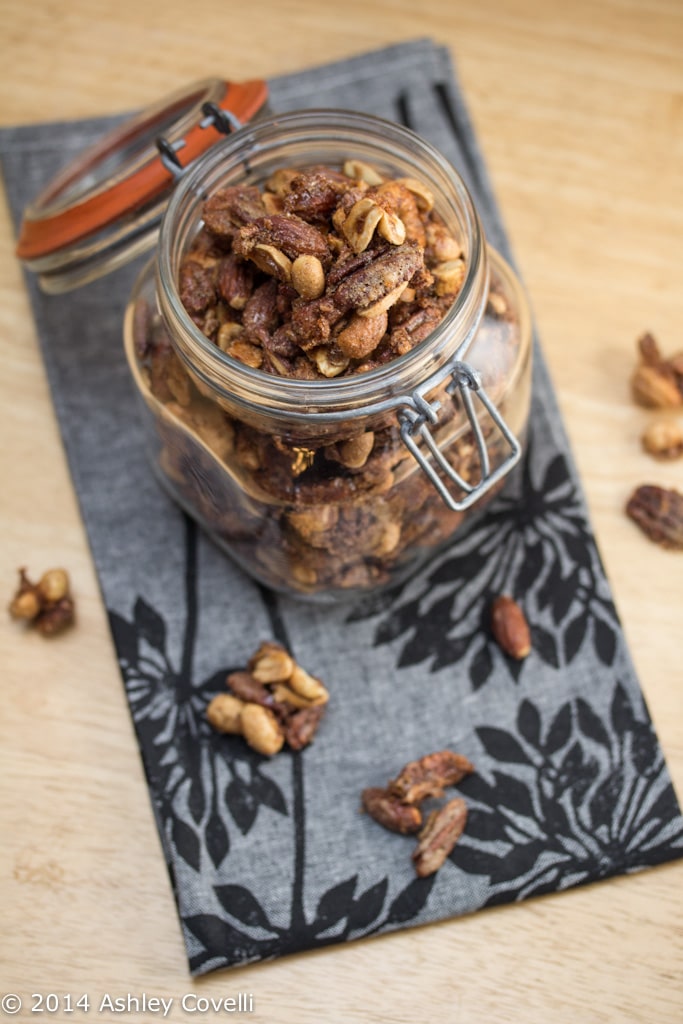
    Coffee Sugar and Spice Nuts

    February 21, 2014 by Ashley 1 Comment

    Coffee Sugar and Spice Nuts

    One of the great things about having a toddler in the house is that snack time is totally a thing.

    Like, a legit thing.

    No longer are my random, mid-day cheese and fruit plates random - they serve a purpose. And now that my son is 2, he loves helping me out in the kitchen, so snack time is even more fun because he helps make the food he's eating!

    Coffee Sugar and Spice Nuts

    I saw this nut recipe on TV last week and thought it looked like a great snack, and much less involved than my go-to spiced nut recipe. It was also a great way to use up a bunch of assorted partial bags of nuts that I had hanging out in the freezer.

    This was really easy to put together, and my son loved helping out! I used a mix of pecans, peanuts and walnuts. This particular recipe makes very sticky snacks, so chew with caution! I kind of love having a jar of these on the counter for whenever a snack attack strikes.

    Coffee Sugar and Spice Nuts

    Coffee Sugar and Spice Nuts
    Best Recipes Ever - Kary Osmond

    1 egg white
    1 tablespoon (15 mL) water
    3 cups (750 mL) unsalted mixed nuts
    ½ cup (125 mL) granulated sugar
    ¾ teaspoon (4 mL) cinnamon
    ¾ teaspoon (4 mL) instant espresso powder
    ½ teaspoon (2 mL) salt
    1 pinch ground nutmeg

    In bowl and using fork, beat egg white with water until foamy; add nuts, stirring to coat.

    Combine sugar, cinnamon, espresso powder, salt and nutmeg; sprinkle over egg white mixture and stir to coat.

    Spread on parchment paper-lined or lightly greased baking sheet.

    Bake in 275 degrees F (140 degrees C) oven until nuts are toasted, about 1 hour. Using wooden spoon, break up clumps. Let cool completely on pan on rack.

    Servings: 30 2 tablespoon (25 mL)

    Big Flavors Rating: 4 Stars

    Alton's Hot Cocoa Mix

    February 19, 2014 by Ashley 4 Comments

    Alton's Hot Cocoa Mix

    My favorite hot cocoa mix recipe is one that I got from my 6th grade US History teacher. It's soooo good, but it makes a ton, and has some ingredients that I don't necessarily like to use anymore.

    So I went on a mission to find a new one that I could make, in smaller batches, to help combat this nasty, cold weather we've been having.

    Alton's Hot Cocoa Mix

    This hot cocoa mix is really tasty. It's very rich and chocolatey, but it didn't quite beat out my favorite. I'm still on the lookout for my new go-to cocoa mix, but this is a wonderful option that doesn't take a whole lot of ingredients.

    Hot Cocoa Mix
    Good Eats - Alton Brown

    Total Time: 5 min
    Yield: 5 ½ cups dry mix

    2 cups powdered sugar
    1 cup cocoa (Dutch-process preferred)
    2 ½ cups powdered milk
    1 teaspoon salt
    2 teaspoons cornstarch
    1 pinch cayenne pepper, or more to taste
    Hot water

    Combine all ingredients in a mixing bowl and incorporate evenly. In a small pot, heat 4 to 6 cups of water.

    Fill your mug half full with the mixture and pour in hot water. Stir to combine. Seal the rest in an airtight container, keeps indefinitely in the pantry. This also works great with warm milk.

    Big Flavors Rating: 4 Stars

    Green and Orange Smoothie

    February 18, 2014 by Ashley 1 Comment

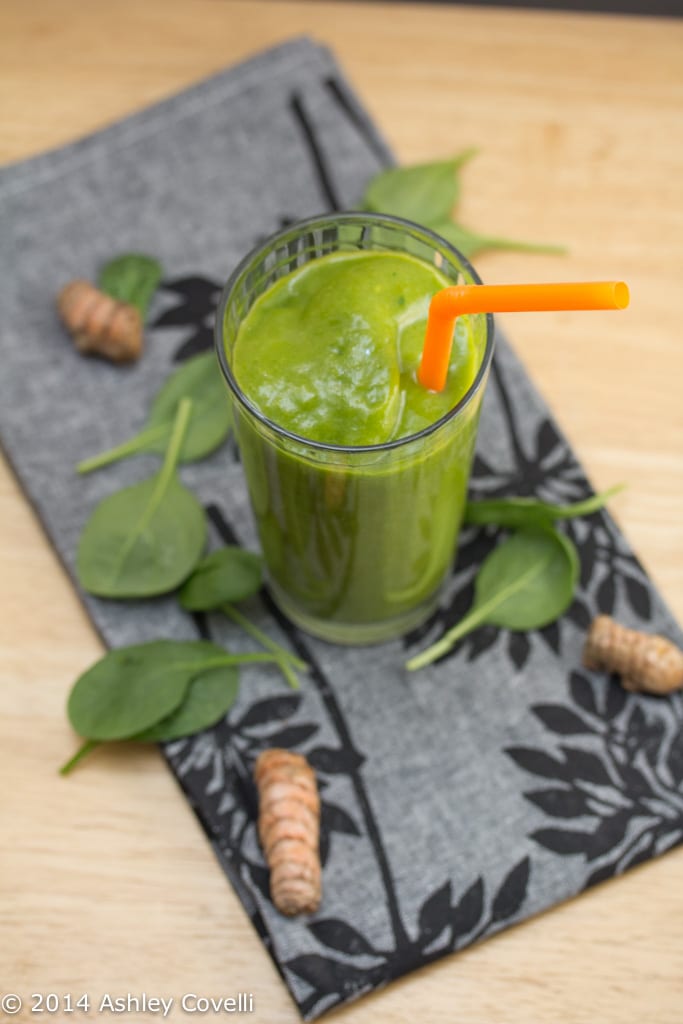
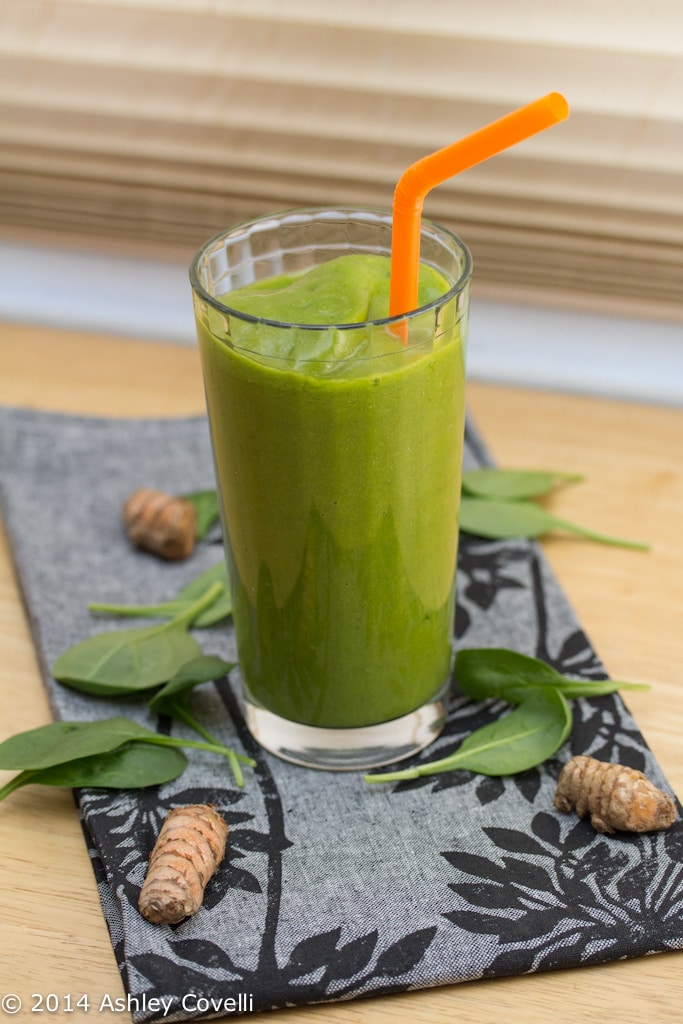
    Green and Orange Smoothie

    It has been way too long since I've made a smoothie. I blame the horrid winter weather we've been having for the last few months.

    I mean, there are only so many "polar vortices" that one can take before willing warmer weather to come back to the East Coast in the form of cold, blended beverages. Rum optional.

    Also - "vortices" is the plural of "vortex". I kind of love/hate that.

    Green and Orange Smoothie

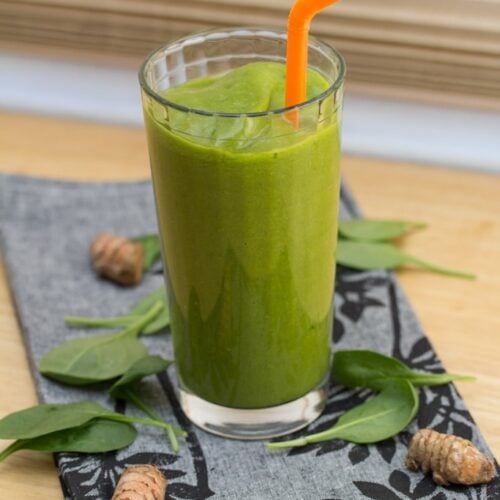
    Anyway, this smoothie was my first trip back to the land of post-workout blended greens, and it was delicious! I packed it with nutrients, vitamins and antioxidants by adding leafy green baby spinach, fresh turmeric, orange, apple, mango and coconut water. So much goodness!

    It was a really interesting flavor combination - fresh turmeric added a lovely spicy note that really set it apart from other smoothies I've made. The health benefits of turmeric are so immense, and I love having the option to use it fresh instead of only ground.

    This smoothie totally hit the spot. The sun may have even peeked through the clouds just a little extra because of my efforts, but I'm not holding my breath. My toddler absolutely loved it, too, so that's a bonus!

    Green and Orange Smoothie

    📖 Recipe

    Green and Orange Smoothie

    Green and Orange Smoothie
    Big Flavors from a Tiny Kitchen - Ashley Covelli
    No ratings yet
    Print Recipe Pin Recipe
    Servings: 2 Servings
    Course: Beverage

    Ingredients
     

    • 2 cups frozen mango chunks
    • Coconut water
    • 2 cups lightly packed baby spinach
    • 1 small orange
    • 1 small green apple
    • 1 tablespoon fresh turmeric about 3 inches, peeled

    Instructions
     

    1. Place mango in a liquid measuring cup. Pour coconut water over top until the liquid level reaches 2 cups. Place in blender along with remaining ingredients and blend until smooth.

    Did you make this recipe?

    Leave a comment + star rating below to let people know how it was!

    Salmon Gravlaks with Cucumber Jelly

    February 17, 2014 by Ashley Leave a Comment

    Salmon Gravlaks with Cucumber Jelly

    For our Supper Club's Ingredient Grab Bag, I picked gelatin. I needed to make something other than a dessert with it, so I chose a recipe for homemade salt-cured fish with a cucumber-dill jelly.

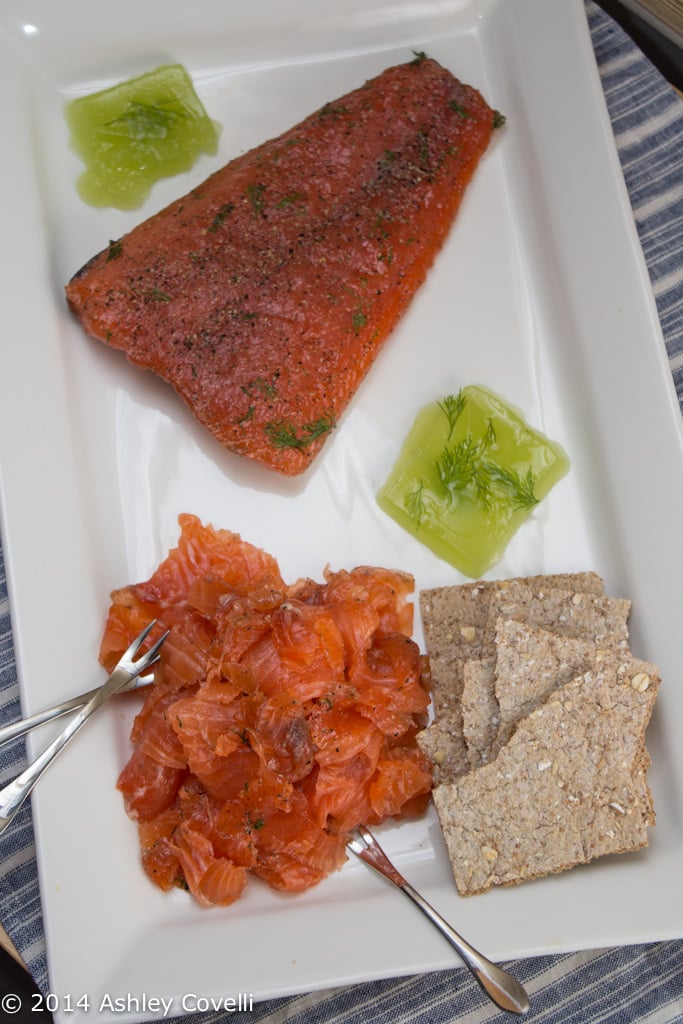
    I couldn't find Arctic char like the recipe called for, so I subbed salmon which worked out beautifully! I was able to slice the cured fish paper thin with a fillet knife, which was perfect.

    Salmon Gravlaks with Cucumber Jelly

    But the jelly. Oh, the jelly. It didn't set for me. My ingredient challenge kinda fell short. It tasted great, but it pretty much ended up being a bowl of cucumber flavored jiggly mush. The two pieces in the photo were the only bits I could get to hold any shape at all. I had much better luck with agar-agar when I made Coconut Jelly a while back.

    All in all, this tasted great, and I love the idea of the jelly, but it just didn't work out. I'd totally make just the gravlaks part on its own again though - it was fantastic!

    Arctic Char Gravlaks with Cucumber Jelly
    Gourmet August 2005

    Yield: Makes 6 first-course servings
    Active time: 30 min
    Total time: 1 ½ days (includes curing fish)

    Gravlaks — fish cured with salt, sugar, and dill — is usually made with salmon, but we like the milder flavor of arctic char for this particular dish.

    Keep in mind before starting to cure your fish that you will need to turn it every 12 hours for a total of 36 hours.
    ingredients

    For gravlaks
    1 (1 ¼-lb) center-cut piece arctic char fillet with skin, pin bones removed
    ½ cup sugar
    ¼ cup kosher salt
    1 tablespoon coarsely ground black pepper
    3 cups coarsely chopped fresh dill (from 2 large bunches)

    For cucumber jelly
    3 seedless cucumbers (usually plastic-wrapped; 3 lb total)
    ¾ teaspoon table salt
    2 teaspoons unflavored gelatin (from 1 envelope)
    1 tablespoon distilled white vinegar
    1 tablespoon tiny fresh dill fronds
    Accompaniment: thin Scandinavian crispbread such as Kavli

    Make gravlaks:
    Pat fish dry, then transfer, skin side up, to a large sheet of plastic wrap. Stir together sugar, salt, and pepper, then rub 3 tablespoons of mixture onto skin of fish. Turn fish over and thickly coat with remaining sugar mixture, then pack dill on top.
    Wrap fish tightly in 2 or 3 layers of plastic wrap (to prevent leakage; salt mixture will liquefy as fish cures) and transfer to a large shallow baking pan. Put another baking pan or a cutting board on top of fish and weight down with 3 or 4 full cans (about 3 lb total). Let fish cure, chilled, turning wrapped fillet over roughly every 12 hours and then replacing weight, for 36 hours total.

    Make jelly while fish is curing:
    Peel cucumbers, making sure to remove all green (for a clearer jelly), then halve lengthwise and core. Coarsely chop cucumbers and purée in a food processor until smooth, then drain in a large fine-mesh sieve set over a bowl, pressing hard on solids to extract 2 cups liquid. Discard solids.
    Stir together salt and ½ cup cucumber liquid in a small saucepan and sprinkle with gelatin. Let stand 1 minute to soften, then heat over moderate heat, stirring, just until gelatin is dissolved, about 2 minutes. Cool mixture to room temperature, then stir into remaining 1 ½ cups cucumber liquid along with vinegar. Pour mixture into an 8-inch square glass baking dish and sprinkle with dill fronds, pressing gently to submerge. Chill, covered, until set, at least 8 hours.

    To serve:
    Unwrap gravlaks, discarding liquid, and gently scrape off dill. Transfer gravlaks, skin side down, to a cutting board. Holding a very sharp long thin-bladed knife at a 30-degree angle, cut gravlaks across the grain into very thin slices, being careful not to cut through skin. Discard skin.
    Cut jelly into 6 pieces and divide among 6 plates with a metal spatula. Serve with several slices of gravlaks.

    Cooks' notes:
    • Cured gravlaks can be drained, scraped, and wrapped in clean plastic wrap, then chilled up to 5 days.
    • Jelly can be chilled up to 4 days

    Big Flavors Rating: 4 Stars
    Beef Rendang

    February 17, 2014 by Ashley 2 Comments

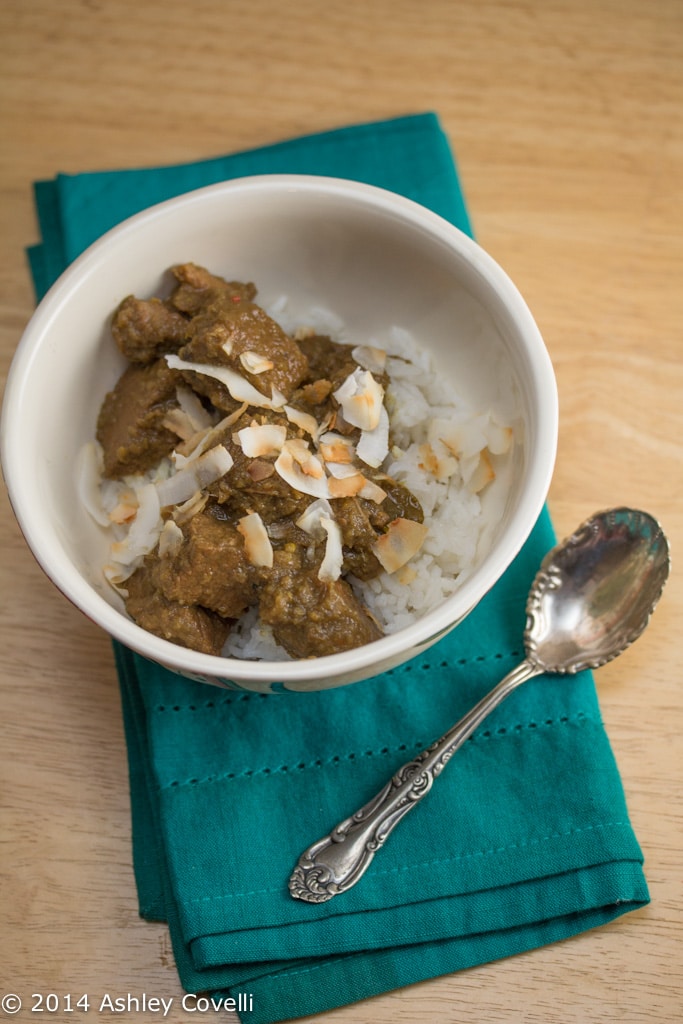
    Beef Rendang

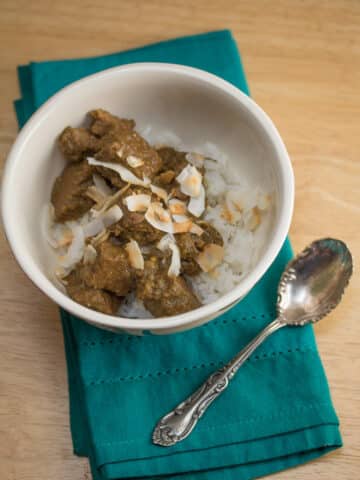
    Curry isn't always pretty, but it can pack in flavor like few other dishes on Earth! We chose this curry for our Supper Club dinner. The theme was "Ingredient Grab Bag", and Dino picked galangal.

    This dish uses a good amount of galangal along with lots of other exotic aromatics in a paste that coats the beef and cooks away on the stovetop for a few hours until you're left with an incredibly thick and flavorful curry.

    Beef Rendang

    It takes quite a bit of work at the beginning to get everything prepped, but once it's all in the pot, you just stir occasionally.

    I really like the addition of toasted coconut flakes on top. This dish wowed our Supper Club. It was unlike any dish we had ever tried before. I highly recommend giving this one a shot!

    Beef Rendang
    BBC Food

    A rich South-East Asian curry made with coconut milk and melting tender beef. Serve with jasmine rice and steamed greens.

    Less than 30 mins preparation time
    Over 2 hours cooking time
    Serves 6

    2 lemongrass stalks, dry outer leaves removed, roughly chopped
    3 medium-sized red onions, quartered
    6 garlic cloves, peeled
    25g/1oz fresh root ginger, peeled and roughly chopped
    75g/2½oz chunk galangal, peeled and roughly chopped
    3 plump red chillies, roughly chopped without deseeding
    3 tablespoon sunflower oil
    2 teaspoon ground cumin
    1 tablespoon ground coriander
    1 teaspoon ground turmeric
    1.5kg/3lb 5oz beef chuck steak (or any good braising beef), trimmed and cut into 3cm/1¼in cubes
    400ml/14fl oz can coconut milk
    4 fresh kaffir lime leaves
    1 cinnamon stick
    1 tablespoon soft light brown sugar or palm sugar
    2 teaspoon tamarind paste or freshly squeezed juice of 1 lime
    2 tablespoon dark soy sauce*
    2 teaspoon flaked sea salt, plus extra to season
    ground black pepper
    toasted coconut flakes, to serve (optional)

    In a food processor combine the lemongrass, onions, garlic, ginger, galangal and chillies. Blend to a fine paste (you may need to remove the lid and push the mixture down a couple of times with spatula until the right consistency is reached).

    Heat the sunflower oil in a large flame-proof casserole and fry the paste gently for 3-4 minutes, stirring constantly. Add the cumin, coriander and turmeric and cook for two minutes.

    Add the beef to the pan and stir to coat in the paste and spices. Cook for five minutes, stirring constantly until the meat is very lightly coloured all over. Pour the coconut milk and 400ml/14fl oz cold water into the casserole. Add the lime leaves, cinnamon stick, sugar, tamarind paste or lime juice, soy sauce and salt and bring to a simmer.

    Reduce the heat and leave to gently simmer uncovered for about 2½-3 hours, or until the meat is meltingly tender and the sauce is very thick, glossy and rich. Stir the beef occasionally towards the beginning of the cooking time then more often as the coconut milk reduces. You don’t want the sauce to stick. Season to taste with more salt and freshly ground black pepper.

    Spoon the curry into warm serving dishes, pick out the kaffir lime leaves and cinnamon stick, and sprinkle with the toasted coconut, if using.

    *Optional: use Gluten Free

    Big Flavors Rating: 5 Stars

    Roasted Beets with Goat Cheese and Dill

    February 16, 2014 by Ashley Leave a Comment

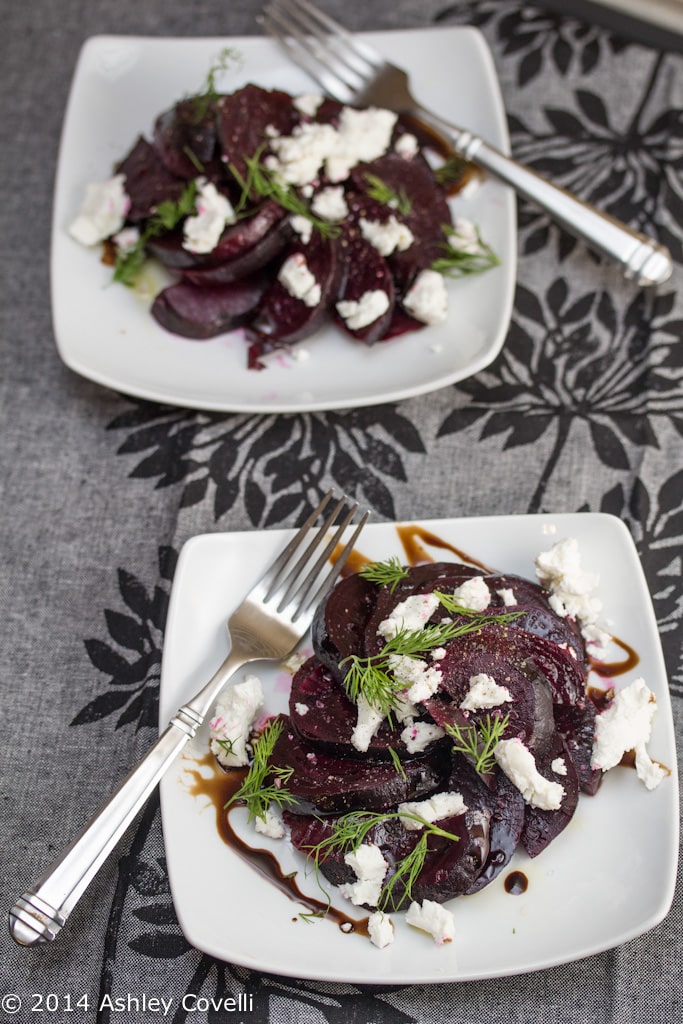
    Roasted Beets with Goat Cheese and Dill

    Remember when I figured out how to roast beets without making a big mess or heating up the kitchen by wrapping them in foil and popping them into the slow cooker?

    Yeah, I've been doing that a lot lately.

    Roasted Beets with Goat Cheese and Dill

    This time, I put about 8 of them in the slow cooker, and it worked out beautifully.

    Beets. For. Days.

    Roasted Beets with Goat Cheese and Dill

    This salad is a simple and delicious way to use roasted beets. I sliced some of the chilled beets and piled them onto two plates. I topped them with crumbled goat cheese, some fresh dill fronds, sea salt and freshly cracked black pepper. I drizzled some aged balsamic and a really nice extra virgin olive oil over top.

    It was absolutely delicious. I love the earthiness of beets paired with tangy goat cheese. I normally use parsley, but I happened to have some fresh dill in the fridge, and it was wonderfully delicate with this salad. I'd definitely make it again!

    Big Flavors Rating: 4 Stars
    Roasted Sesame-Ginger Soy Dipping Sauce

    February 13, 2014 by Ashley Leave a Comment

    Roasted Sesame-Ginger Soy Dipping Sauce

    Dumplings are a big hit around my house. I have plans to make some of my own soon, but in the meantime, I'll settle for frozen.

    These pork and veggie potstickers were great, but I wanted to make a quick dipping sauce for them. I mean, half the fun of eating dumplings is dipping them, right? So I put this together and it was great! I normally would add sliced green onion at the end, but I was out, so I used roasted sesame seeds and it was really tasty.

    Roasted Sesame-Ginger Soy Dipping Sauce

    📖 Recipe

    Roasted Sesame-Ginger Soy Dipping Sauce

    Roasted Sesame-Ginger Soy Dipping Sauce
    Big Flavors from a Tiny Kitchen - Ashley Covelli
    No ratings yet
    Print Recipe Pin Recipe
    Course: Condiments
    Cuisine: Asian

    Ingredients
     

    • ¼ cup low sodium soy sauce*
    • ½ teaspoon sugar
    • 1 teaspoon freshly grated ginger
    • 1 teaspoon roasted sesame seeds

    Instructions
     

    1. Combine all ingredients.

    Notes

    *Optional: use Gluten Free

    Did you make this recipe?

    Leave a comment + star rating below to let people know how it was!

    Deviled Fried Chicken

    February 12, 2014 by Ashley 1 Comment

    Deviled Fried Chicken

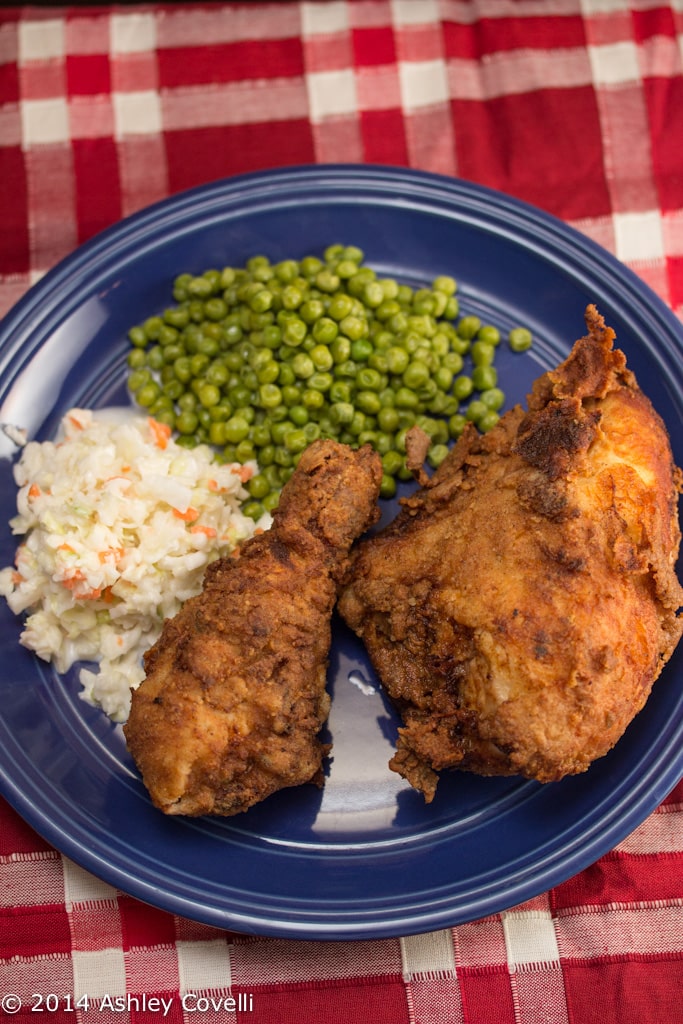
    I had a plan, and that plan was to make some killer fried chicken for my husband for dinner. He looooooves chicken, especially fried, but I was always too much of a wimp to deep fry it at home.

    Well, that finally changed. And this recipe is knock-your-socks-off phenomenal. I can't recommend it highly enough!

    Deviled Fried Chicken

    You throw the marinade for this chicken together a day or 2 before you want to cook it, and then toss it in a spiced flour mixture and let it sit for an hour before frying it up and digging in. I didn't have onion powder with green onion and parsley, so I threw in some minced chives and dried parsley and it worked out just right.

    It was beautifully crispy on the outside and moist and juicy on the inside. It had a bit of a kick from the cayenne, and went perfectly with some cole slaw and peas. Next time I make this, I hopefully won't have a super annoying cold and I'll be able to make some Southern Buttermilk Biscuits to go with it. Yum.

    This dish will totally score you brownie points with whoever you make it for. Guaranteed!

    Deviled Fried Chicken
    Bon Appétit August 1998

    Serves 4

    Deviled is a southern term for a dish that is highly seasoned. To make life easier, have the butcher cut up the chicken, and use a small chicken — around three pounds — so that it will cook through quickly. If you're cutting it yourself, start by going along both sides of the backbone with kitchen shears or a large knife. Once the backbone has been removed, cut the chicken into eight pieces (two breasts, wings, legs and thighs); include the top third of each breast with the wings for a more generous serving. The chicken needs to marinate for at least a day, so plan accordingly.

    2 cups buttermilk
    ¼ cup Dijon mustard
    2 tablespoons onion powder with green onion and parsley
    5 teaspoons salt
    4 teaspoons dry mustard
    4 teaspoons cayenne pepper
    2 ½ teaspoons ground black pepper
    1 3- to 3 ¼-pound fryer chicken, backbone removed, chicken cut into 8 pieces, skinned (except wings)
    3 cups all purpose flour
    1 tablespoon baking powder
    1 tablespoon garlic powder
    5 cups (or more) peanut oil (for frying)

    In 1-gallon resealable plastic bag, mix buttermilk, Dijon mustard, 1 tablespoon onion powder, 1 teaspoon salt, 1 teaspoon dry mustard, 1 teaspoon cayenne and 1 teaspoon black pepper. Add chicken pieces. Seal bag, eliminating air. Turn bag to coat chicken evenly. Refrigerate at least 1 day and up to 2 days, turning plastic bag occasionally.

    Whisk flour, baking powder, garlic powder, remaining 1 tablespoon onion powder, 4 teaspoons salt, 3 teaspoons dry mustard, 3 teaspoons cayenne and 1 ½ teaspoons black pepper in 13 x 9 x 2-inch glass dish. With marinade still clinging to chicken pieces (do not shake off excess), add chicken to flour mixture; turn to coat thickly. Let chicken stand in flour mixture for 1 hour, turning chicken occasionally to recoat with flour mixture.

    Pour oil to depth of 1 ¼ inches into deep 10- to 11-inch-diameter pot. Attach deep-fry thermometer. Heat oil over medium-high heat to 350°F. Add 4 pieces of chicken, skinned side down, to oil. Reduce heat to medium-low and fry 5 minutes, adjusting heat to maintain oil temperature between 280°F and 300°F (oil should bubble constantly around chicken). Using wooden spoons, turn chicken over. Fry 7 minutes. Turn chicken over again. Fry until deep golden brown and cooked through, about 3 minutes longer. Using same spoons, transfer chicken to large rack set on baking sheet.

    Reheat oil to 350°F. Repeat frying with remaining 4 pieces of chicken. Serve chicken warm or at room temperature within 2 hours, or chill up to 1 day and serve cold.

    Big Flavors Rating: 5 Stars

    The Simplest and Best Shrimp Dish

    February 11, 2014 by Ashley Leave a Comment

    The Simplest and Best Shrimp Dish

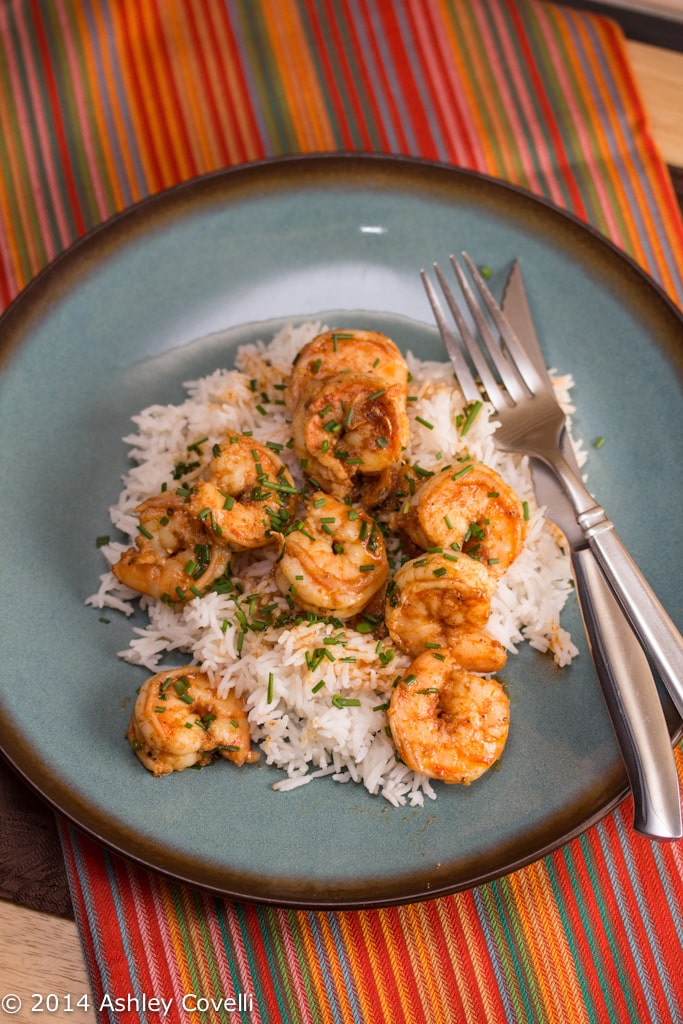
    This is a great, easy weeknight shrimp recipe that packs a lot of flavor. In Bittman's app, there are directions for making Shrimp Scampi, Shrimp with Spicy Orange Flavor, and Garlic Shrimp with Tomatoes and Cilantro as well - all starting with this basic recipe.

    I used smoked Spanish paprika instead of hot since I wasn't in the mood for spicy that night, and it was wonderful. The garlic and paprika infuse the oil and the shrimp, and it works beautifully over rice for a simple weeknight meal. I was out of parsley, but I had chives leftover from my Buffalo-Blue Cheese Dip, so I garnished with those. It was a really nice, flavorful meal.

    The Simplest and Best Shrimp Dish

    The Simplest and Best Shrimp Dish
    Mark Bittman (via the How to Cook Everything app)

    ⅓ cup extra virgin olive oil, or more as needed
    3 or 4 big cloves garlic, cut into slivers
    About 1 ½ pounds shrimp, 20 to 30 per pound, peeled, rinsed, and dried
    Salt and freshly ground black pepper
    1 teaspoon ground cumin
    1 ½ teaspoons hot paprika
    Chopped fresh parsley leaves for garnish

    Warm the olive oil in a large, broad ovenproof skillet or heatproof baking pan over low heat. There should be enough olive oil to cover the bottom of the pan; don't skimp. Add the garlic and cook until it turns golden, a few minutes.

    Raise the heat to medium‐high and add the shrimp, some salt and pepper, the cumin, and the paprika. Stir to blend and continue to cook, shaking the pan once or twice and turning the shrimp once or twice, until they are pink all over and the mixture is bubbly, 5 to 10 minutes. Garnish and serve immediately.

    Big Flavors Rating: 4 Stars
    Buttermilk-Blue Cheese Dip

    February 11, 2014 by Ashley 2 Comments

    Buttermilk-Blue Cheese Dip

    We had a really low-key Superbowl Sunday this year. My in-laws came over with wings and dessert, and I made an appetizer.

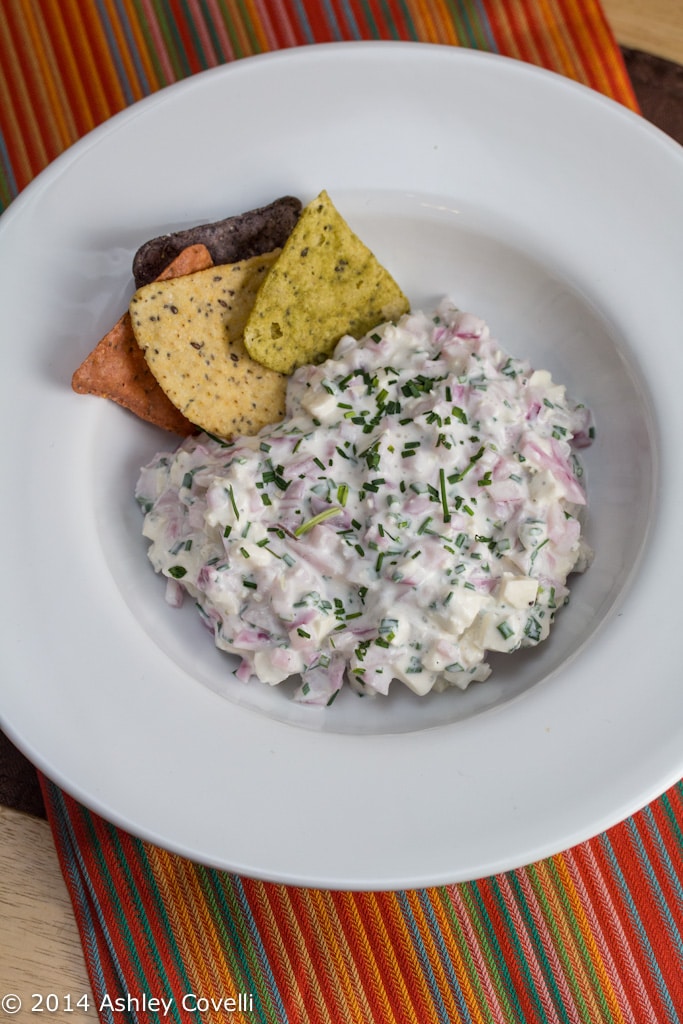
    This was nice and different from most party dips. The pickled red onion was a great addition to the dip. My only issue with it is that I had a wedge of Danish blue cheese that I chopped up, and since it wasn't crumbled, it was a bit too chunky and kind of difficult to scoop up. But it still tasted great!

    Buttermilk-Blue Cheese Dip

    We dipped a variety of Late July chips and celery sticks into this, and it was delicious.

    Buttermilk-Blue Cheese Dip
    Bon Appétit February 2012

    Yield: Makes about 1 cup
    Active time: 15 minutes
    Total time: 1 ¼ hours

    Pickled red onion adds crunch and punch. Serve with crudités.

    5 tablespoons finely chopped red onion
    ¼ cup white wine vinegar
    1 teaspoon sugar
    Pinch of kosher salt plus more
    ¼ cup buttermilk
    ¼ cup sour cream
    2 tablespoons chopped fresh chives
    ½ cup crumbled blue cheese
    Freshly ground black pepper

    Place onion in a small heatproof bowl. Bring vinegar, sugar, salt, and ¼ cup water to a boil. Pour over onion; stir to coat. Cover; let pickle in the refrigerator for at least 1 hour.

    Whisk buttermilk, sour cream, and chives in a medium bowl until smooth. Stir in blue cheese. Drain pickled onion and stir into dip. Season with salt and pepper. DO AHEAD: Can be made 3 days ahead. Cover dip and refrigerate.

    Big Flavors Rating: 4 Stars
    Seared Scallops with Warm Tuscan Beans

    February 10, 2014 by Ashley Leave a Comment

    Seared Scallops with Warm Tuscan Beans

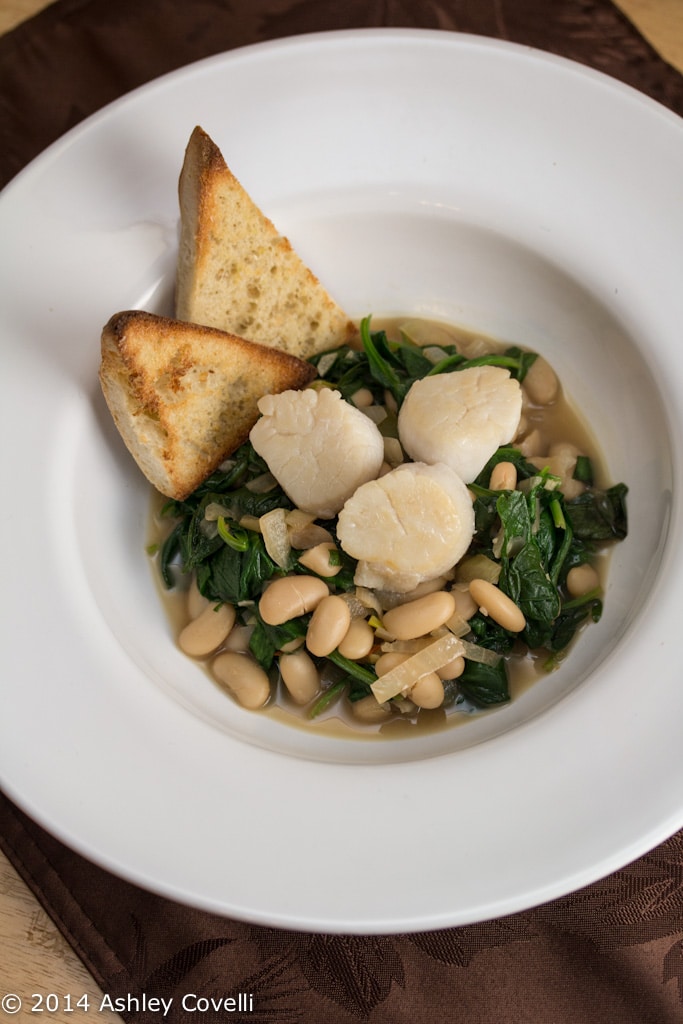
    This warm, steamy, bowl of comfort food is perfect for a cold winter evening. The basil at the end adds the perfect amount of freshness to this dish. Paired with a few pieces of crusty bread that are toasted and rubbed with garlic clove, this is a great meal.

    Seared Scallops with Warm Tuscan Beans

    The only issue I had was that my scallops must have still been a little frozen in the center, and I wasn't able to get a good sear on them since liquid was coming out into the pan (even though I patted them dry). There aren't too many things more disappointing than a rubbery, overcooked scallop, so I went ahead and took them out of the skillet when they were cooked through properly instead of worrying about that beautiful sear. And hey - it still tasted wonderful!

    Seared Scallops with Warm Tuscan Beans
    Cooking Light March 2009

    Pair this one-dish seared scallops meal with a side of garlic bread. It's perfect for sopping up every last drop of the delicious sauce.

    Yield: 4 servings (serving size: about 4 ounces scallops and ¾ cup bean mixture)

    2 tablespoons olive oil, divided
    1 ½ pounds sea scallops
    ¼ teaspoon salt
    1 cup prechopped onion
    ⅛ teaspoon crushed red pepper
    2 garlic cloves, minced
    ¼ cup dry white wine
    1 cup fat-free, less-sodium chicken broth
    1 (19-ounce) can cannellini beans or other white beans, rinsed and drained
    1 (6-ounce) package fresh baby spinach
    2 tablespoons chopped fresh basil

    1. Heat 1 tablespoon oil in a large nonstick skillet over medium-high heat. Sprinkle scallops evenly with salt. Add scallops to pan; cook 2 minutes on each side or until done. Remove scallops from pan; keep warm.

    2. Add remaining 1 tablespoon oil and onion to pan; sauté 2 minutes. Add pepper and garlic; cook 20 seconds, stirring constantly. Stir in wine; cook 1 minute or until most of liquid evaporates. Stir in broth and beans; cook 2 minutes. Add spinach; cook 1 minute or until spinach wilts. Remove from heat; stir in basil.
    Grilled garlic bread is great for dipping into the brothy beans. Heat a grill pan over medium heat. Brush 1 tablespoon olive oil evenly over 4 (1-ounce) slices French bread. Add bread to pan; cook 2 minutes on each side or until lightly browned. Rub one side of each bread slice with cut sides of a halved garlic clove.

    Amount per serving:
    Calories: 314
    Fat: 8.7g
    Saturated fat: 1.2g
    Monounsaturated fat: 5.1g
    Polyunsaturated fat: 1.8g
    Protein: 33.7g
    Carbohydrate: 24.8g
    Fiber: 6.1g
    Cholesterol: 56mg
    Iron: 3.2mg
    Sodium: 781mg
    Calcium: 112mg

    Big Flavors Rating: 4 Stars

    Aubergine with Chickpeas

    February 10, 2014 by Ashley Leave a Comment

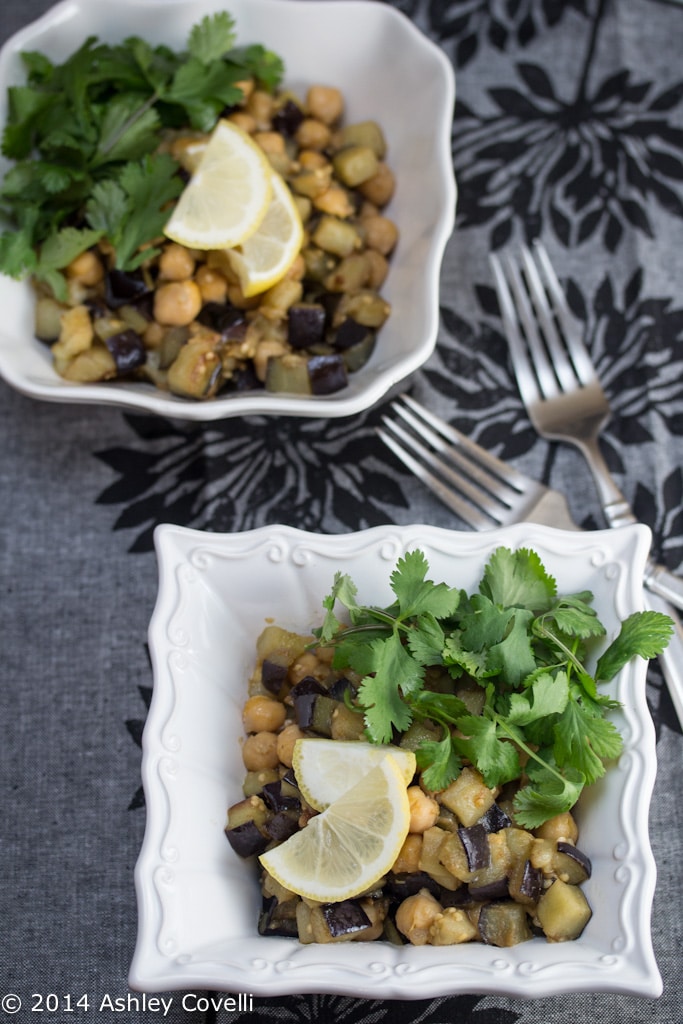
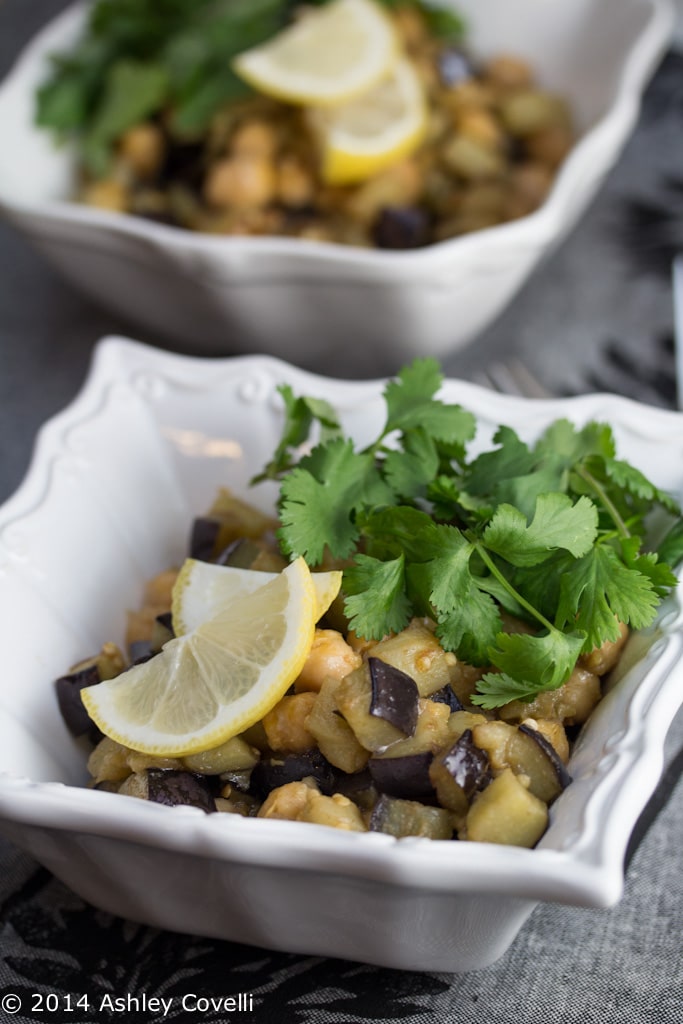
    Aubergine with Chickpeas

    We needed another quick and easy meal, and this eggplant and chickpea dish was just that.

    The eggplant got nice and buttery, and the lemon added brightness at the end. I ended up adding some salt and pepper as well, which helped enhance the flavors.

    Aubergine with Chickpeas

    I meant to add some crumbled goat cheese at the end (one of the suggested variations in the cookbook) but I totally forgot.

    This dish was great leftover the next day over some steamed basmati rice. It would also make a nice side dish if you had something else you'd like to serve alongside as a main course.

    Aubergine with Chickpeas

    Aubergine with Chickpeas
    5 Ingredients 10 Minutes: Delicious, Healthy Recipes for Tired and Hungry Cooks – Jules Clancy

    Serves 2

    1 large aubergine, diced into 1 ½ cm cubes
    400g can chickpeas, drained
    2 teaspoons ground coriander
    1-2 tablespoons lemon juice
    small bunch fresh coriander, leaves picked

    1. Heat a generous amount of olive oil in a large frying pan.

    2. Cook aubergine chunks over a medium-high heat, covered. Stir every few minutes until aubergine is super soft and a little golden.

    3. Add chickpeas and ground coriander and stir through until chickpeas are warm.

    4. Remove from heat and add 1 tablespoon lemon juice.

    5. Taste and season, using extra lemon juice if you think it needs it.

    6. Scatter over coriander leaves.

    Big Flavors Rating: 4 Stars

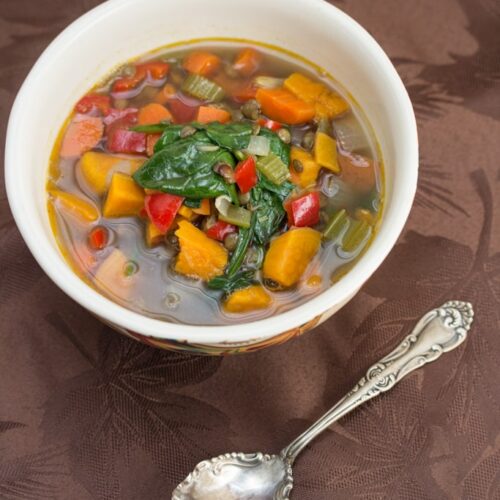
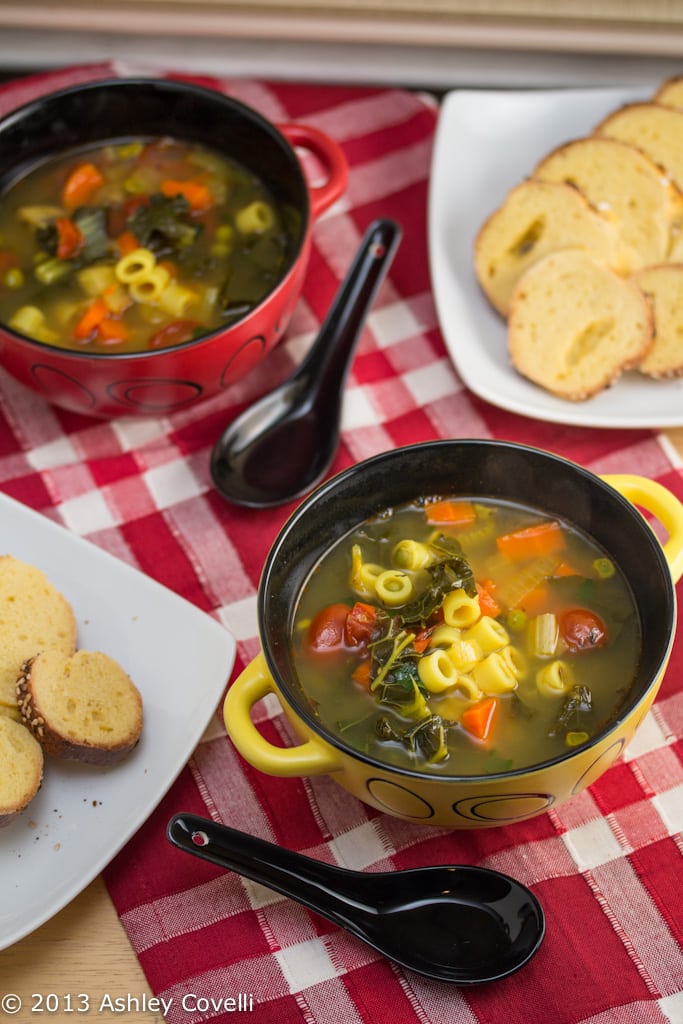
    Hearty Winter Soup with Lentils

    February 9, 2014 by Ashley Leave a Comment

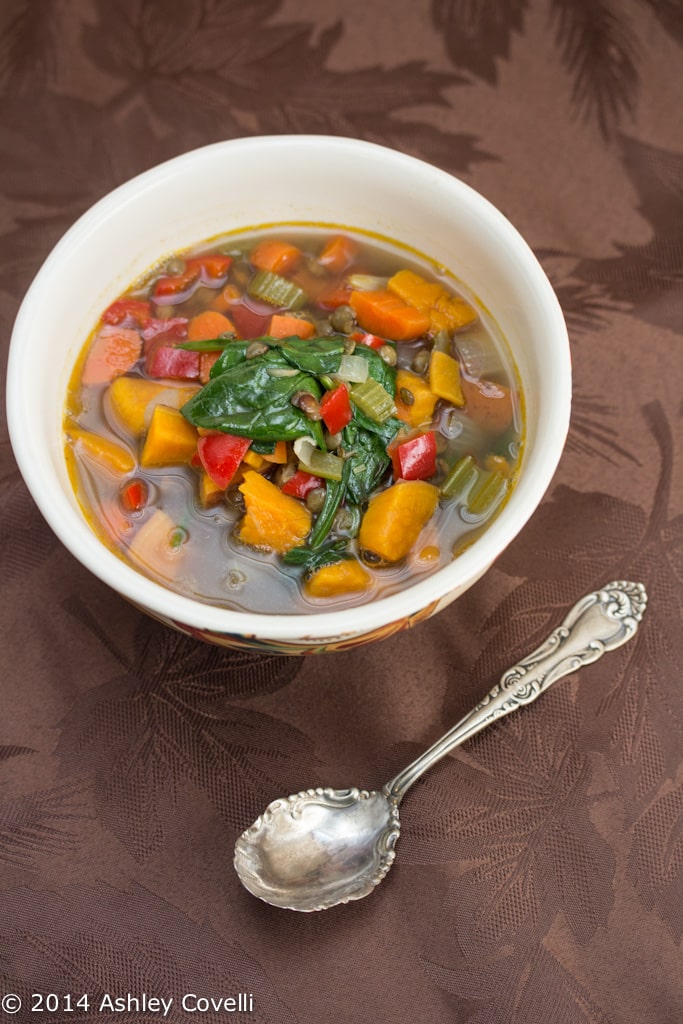
    Hearty Winter Soup with Lentils

    Boost your immune system with a colorful bowl of this hearty, veggie-packed soup. Can be made with chicken or vegetable soup base.

    Hearty Winter Soup with Lentils

    This winter has been the worst! I'm not even talking about all the snow storms, ice-covered cars, blizzards, sub-zero temperatures, etc.

    I'm talking cooties. Big-time cooties. Invading my house constantly. My poor 2-year-old has been sick off and on since Thanksgiving… and so have my husband and I. Argh!!

    So that means soup. Lots of soup. I've been making big batches of soup occasionally to try to help get extra vitamins into all of us, as well as to have leftovers to eat all week.

    I made this soup a few weeks ago and am just now getting around to writing about it. It was a really nice combo of veggies, and it was hearty enough to fill us up after one bowl.

    Hearty Winter Soup with Lentils

    I used a chicken stock concentrate since chicken soup is so revered for its healing qualities, but you could definitely use a vegetable soup base if you want to keep this meat-free.

    If you have a Parmesan rind hanging out, drop a small piece in the soup - it adds a nice salty richness that's great in this soup.

    Still hungry? You may also like...

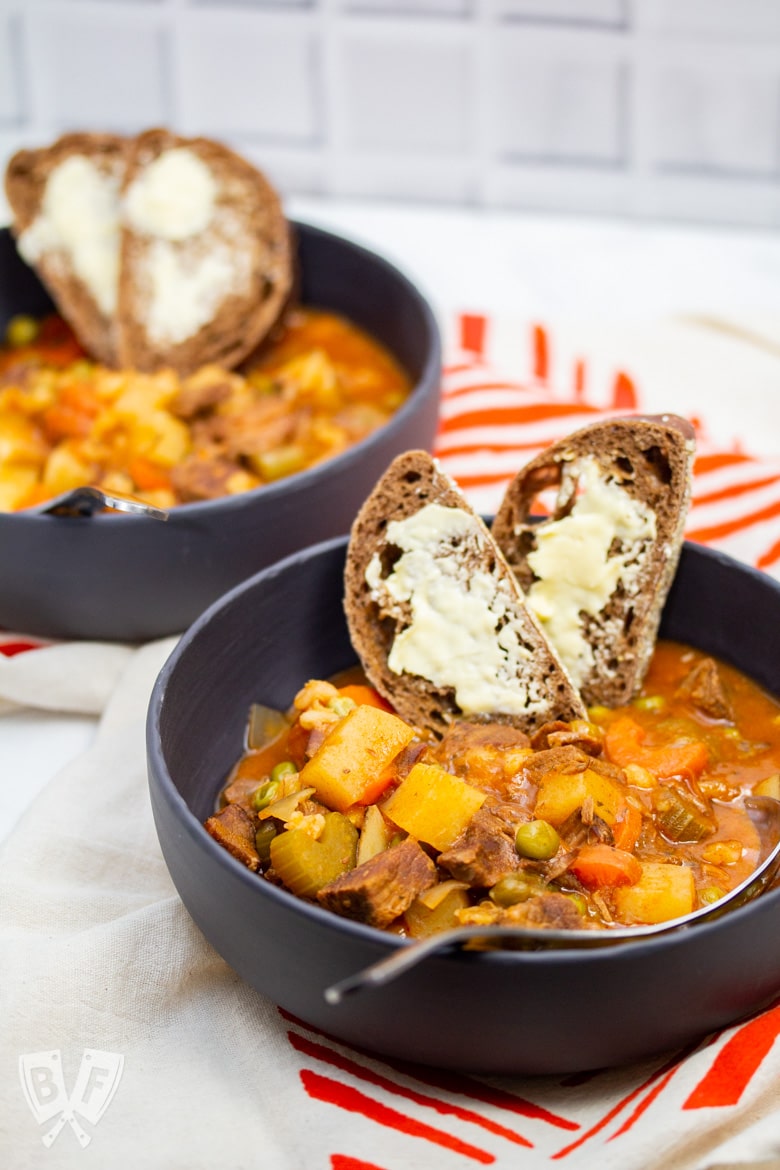
    Overhead view of 2 bowls of beef stew with bread and butter.
    Grandpa Henderson's Beef Stew
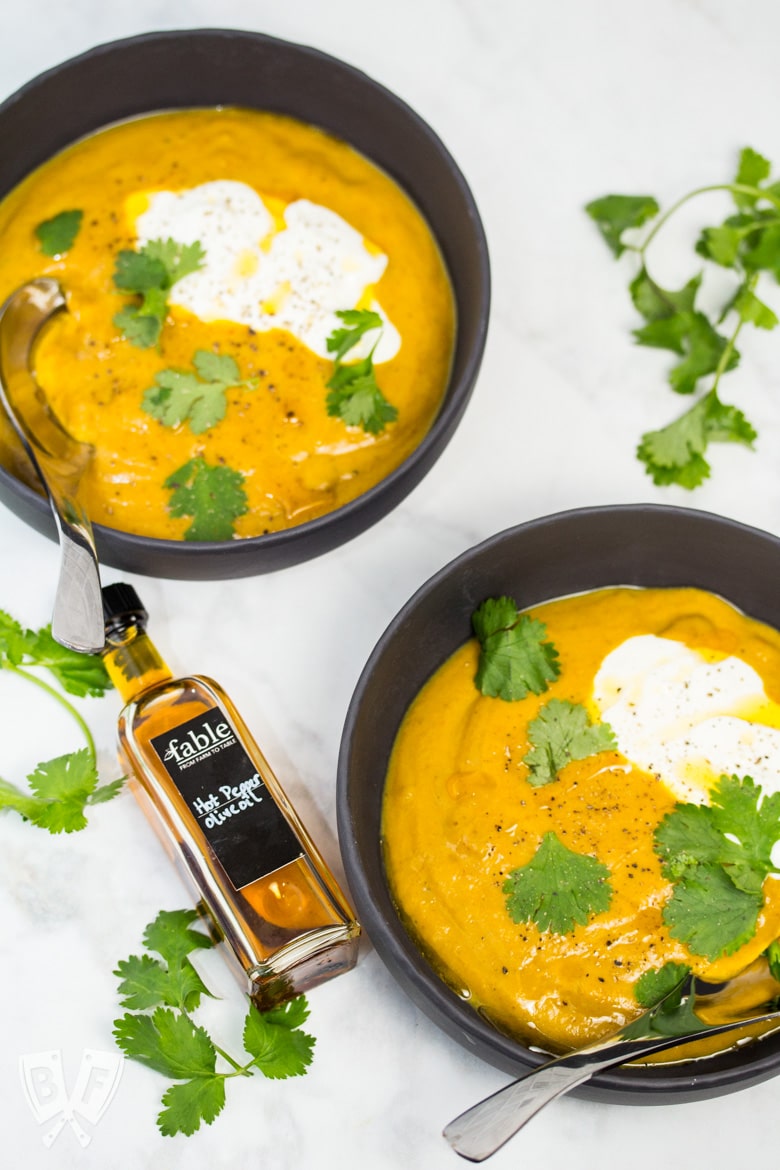
    Overhead view of 2 bowls of curried pumpkin soup with cilantro leaves, sour cream, and a bottle of chili oil.
    Curried Pumpkin Soup
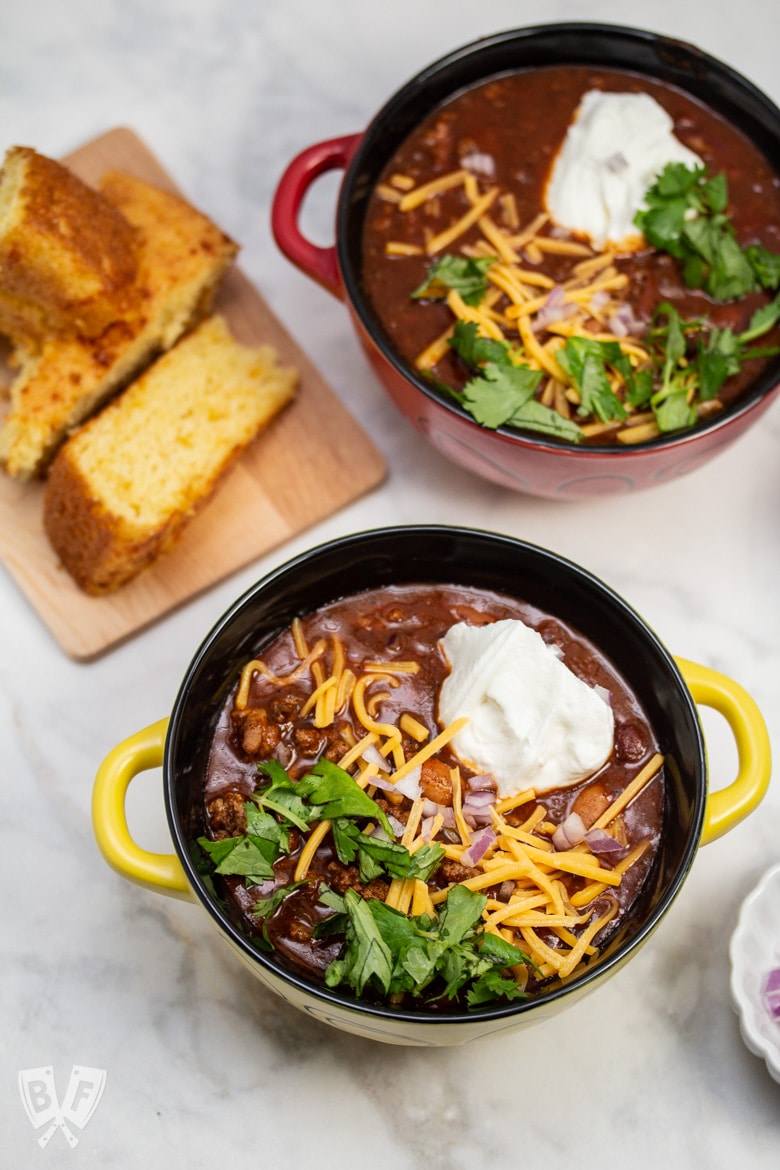
    Overhead shot of 2 bowls of spicy turkey three-bean chili with cornbread.
    Spicy Turkey Three-Bean Chili
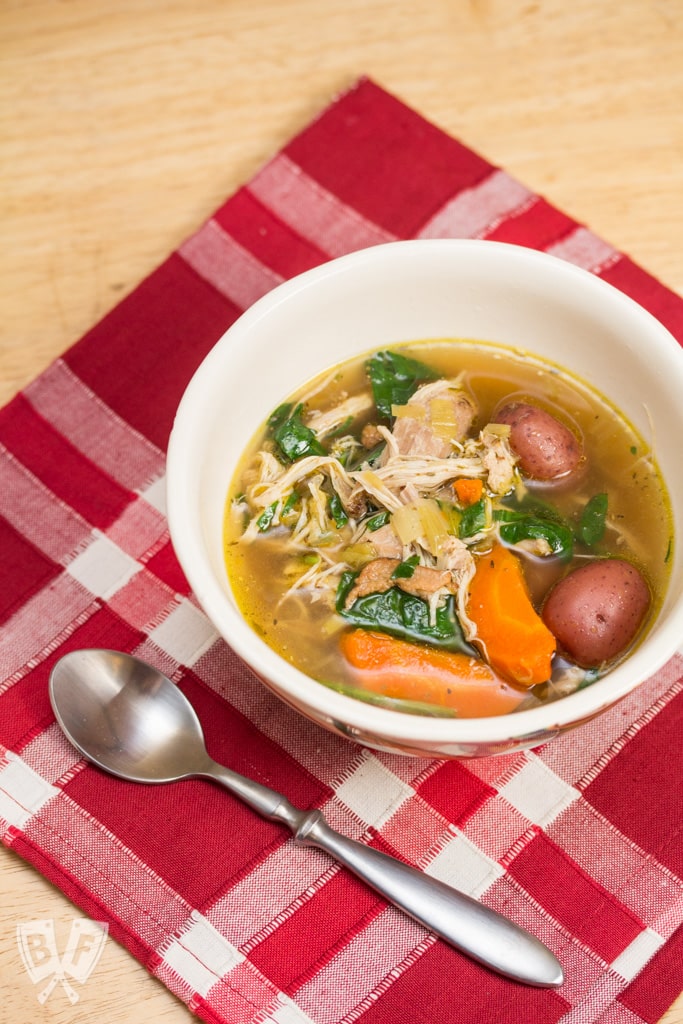
    Bowl of Instant Pot Chicken, Bacon, and Potato Soup with a spoon.
    Instant Pot Chicken, Bacon, and Potato Soup

    Doing some online shopping? Check out my Amazon shop page for recommendations!

    📖 Recipe

    Hearty Winter Soup with Lentils

    Hearty Winter Soup with Lentils
    Boost your immune system with a colorful bowl of this hearty, veggie-packed soup. Can be made with chicken or vegetable soup base.
    Big Flavors from a Tiny Kitchen - Ashley Covelli
    No ratings yet
    Print Recipe Pin Recipe
    Servings: 6 Servings
    Course: Soup
    Cuisine: American
    Prep Time 10 minutes mins
    Cook Time 35 minutes mins
    Total Time 45 minutes mins

    Ingredients
     

    • 2 tablespoons olive oil
    • 1 small yellow onion chopped (about 1 ¼ cups)
    • 2 cloves garlic minced
    • 3 carrots sliced (about 1 ½ cups)
    • 2 stalks celery diced (about ¾ cup)
    • 1 red bell pepper diced (about 1 ¼ cup)
    • Kosher salt and freshly cracked black pepper to taste
    • 1 dried bay leaf
    • 3 sprigs fresh thyme
    • 1 tablespoon chicken stock concentrate
    • 6 cups water
    • 2 cups sweet potatoes chopped
    • 1 cup French green lentils
    • Small piece Parmesan rind about 2 inches square, optional
    • 2 cups baby spinach lightly packed

    Instructions
     

    1. Heat oil in a large stockpot over moderate heat. Add onion, garlic, carrots, celery, and bell pepper and stir. Season with salt and pepper and stir until the veggies start to soften.
    2. Add sweet potatoes, bay leaf, thyme, soup base, and water, and bring to a boil.
    3. Add lentils and Parmesan rind and reduce heat. Simmer until sweet potatoes are fork-tender, about 20 minutes. Stir in spinach and continue to simmer for an additional 5 minutes.
    4. Remove bay leaf, thyme sprigs, and Parmesan rind. Taste for seasoning and adjust if necessary.
    5. Serve warm, preferably with some nice, crusty bread for soaking up all of the goodness.

    Notes

    *Can substitute other flavors of stock concentrate such as beef or vegetable.

    Useful products:

    French green lentils
    chicken stock concentrate
    bay leaves

    Did you make this recipe?

    Leave a comment + star rating below to let people know how it was!

    Check out my latest posts...

    • Jar of homemade Italian seasoning blend.
      Italian Seasoning Blend
    • Bowl of tzatziki with olive oil drizzled over the top.
      Easy Homemade Tzatziki
    • Turkey sausage patties and a jar of breakfast sausage seasoning.
      Turkey Sausage Patties

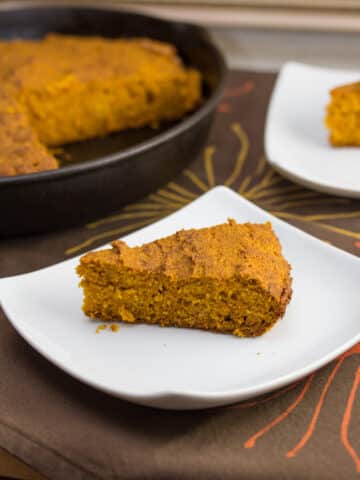
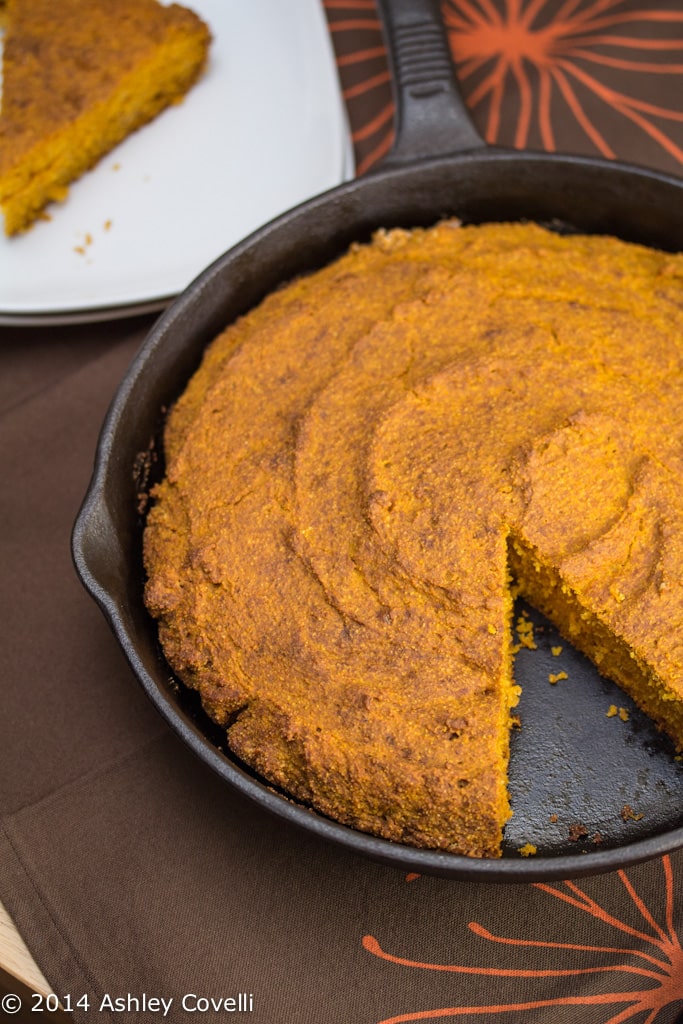
    Pumpkin Corn Bread

    February 8, 2014 by Ashley 4 Comments

    Pumpkin Corn Bread

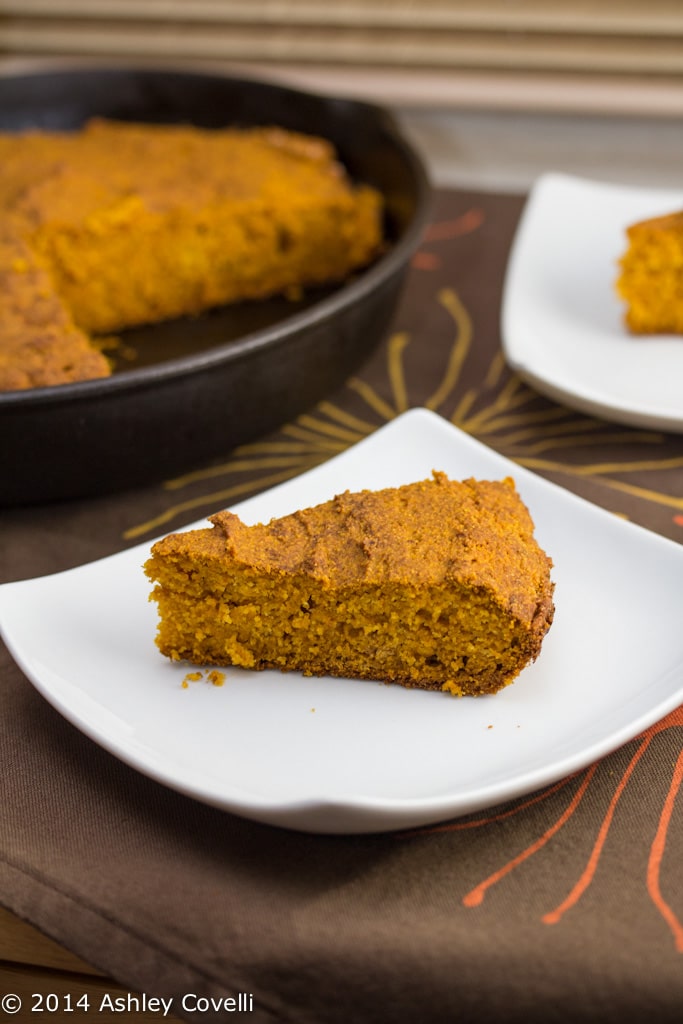
    This corn bread recipe came from an adorable little book of pumpkin recipes that my husband picked up for me for Christmas. This recipe sounded great, and we love corn bread, so I figured it'd be tasty.

    Pumpkin Corn Bread

    Well... it was OK. It wasn't very moist, but we did end up slathering it with some honey butter, which helped out quite a bit. It just didn't have a whole lot of flavor.

    I think it would be good as the base for a corn bread dressing maybe, but it just didn't really work too well for us on its own.

    I'm still looking forward to trying out some other recipes from this book - there are a lot of interesting ideas in there!

    Pumpkin Corn Bread

    Pumpkin Corn Bread
    The Great Little Pumpkin Cookbook - Michael Krondl

    ⅓ cup corn oil
    1 cup all-purpose flour
    1 cup cornmeal
    1 ¼ teaspoons baking soda
    ½ teaspoon salt
    1 cup pumpkin purée
    ½ cup buttermilk
    2 eggs
    2 tablespoons brown sugar

    Brush the inside of a 9- to 10-inch cast-iron skillet with 1 tablespoon of the oil. Place in the oven, then set the oven temperature to 425°F.

    In a large bowl, sift together the flour, cornmeal, baking soda, and salt. In a separate bowl, combine the pumpkin, buttermilk, remaining oil, eggs and brown sugar. Then stir the dry ingredients into the wet until just combined.

    Remove the skillet from the oven, pour in the batter, return to the oven, and bake 30 to 40 minutes, until the center is firm. Serve warm in wedges.

    Serves 8 to 10

    Big Flavors Rating: 3 Stars

    Broccoli and Green Curry Soup

    February 6, 2014 by Ashley 1 Comment

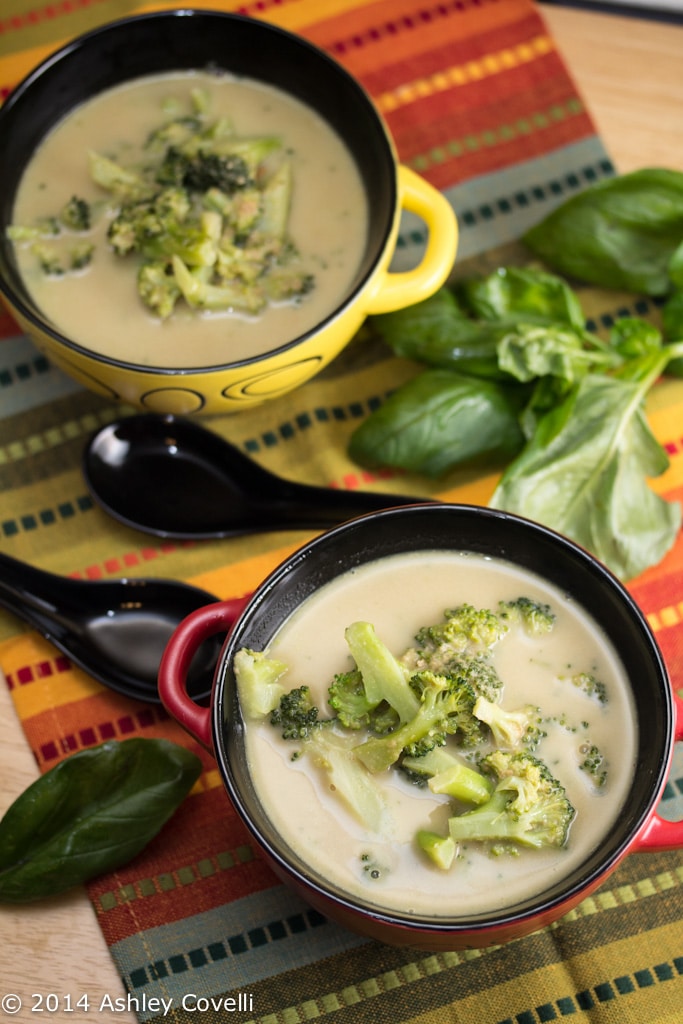
    Broccoli and Green Curry Soup

    This isn't your standard creamy broccoli soup. Nope - this one is laced with green curry paste, coconut milk and peanut butter for a wonderful bowl of Thai-inspired comfort food.

    This is another quick and delicious meal that has a lot of room for variations. I highly recommend adding some torn basil (Thai or regular) at the end for a bit of brightness. In the cookbook, Jules also lists several other delicious variations, and I'd be happy to try them all out!

    Broccoli and Green Curry Soup

    Broccoli and Green Curry Soup
    5 Ingredients 10 Minutes: Delicious, Healthy Recipes for Tired and Hungry Cooks – Jules Clancy

    Serves 2

    250ml coconut milk
    3-4 tablespoons green curry paste
    2 heads broccoli, chopped into tiny trees
    2-3 tablespoons peanut butter

    1. Heat a large saucepan on a high heat. Add a few tablespoons of cream from the top of the coconut milk or some oil. Stir-fry the curry paste for 15-30 seconds or until you notice the aroma. Be careful not to burn.

    2. Quickly add 2 cups water and the coconut milk. Bring to a simmer.

    3. Add broccoli. Bring back to a simmer and cook uncovered for 7-8 minutes or until the broccoli is tender.

    4. Remove from the heat. Stir in the peanut butter. Taste and season with a little salt or sugar.

    Big Flavors Rating: 4 Stars

    Mushroom 'Steaks'

    February 1, 2014 by Ashley 2 Comments

    Mushroom 'Steaks'

    Jules Clancy's cookbook has been saving my life this week. I love that it really is just 5 ingredients and 10 minutes of time invested in dinner prep, and we end up having something delicious on the table.

    The tagline of her book (Delicious, Healthy Recipes for Tired and Hungry Cooks) has never been more appropriate for us than it has been this week.

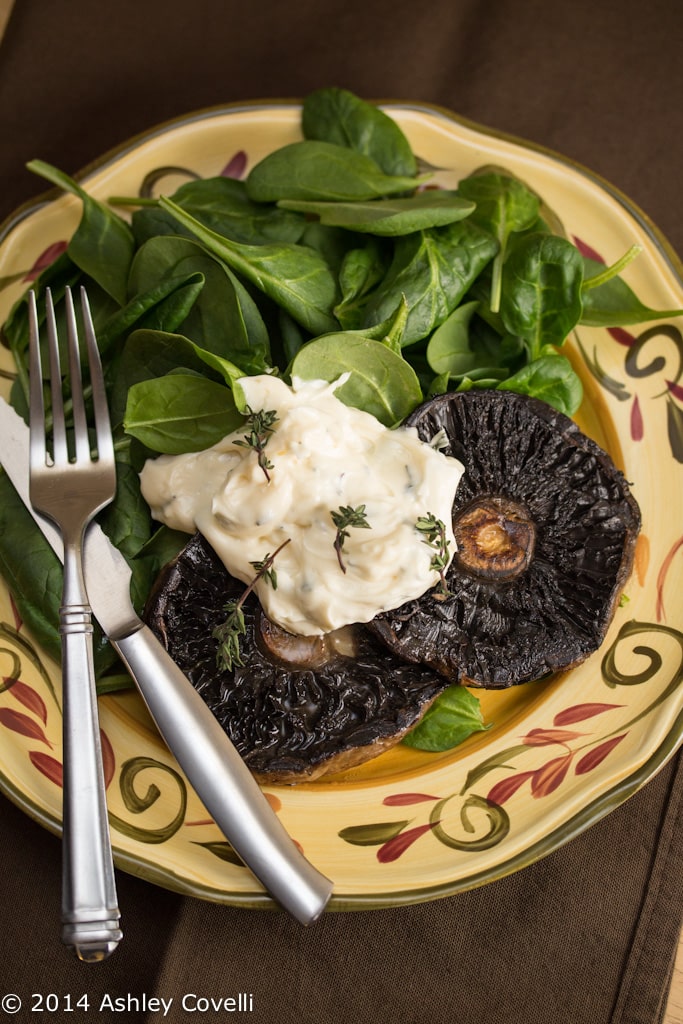
    This dish delivered on flavor BIG TIME. I know we just had some outstanding steaks, but this meat-free option was fabulous! The sauce had tons of flavor that went beautifully with the seared mushrooms and greens.

    Mushroom 'Steaks'

    The house got pretty smoky while these were frying, but it was totally worth it. This was a delicious and filling meal. Jules has a lot of fun options in her book for variations on this dish as well. I highly, HIGHLY recommend picking up a copy of your own!

    Mushroom 'Steaks'
    5 Ingredients 10 Minutes: Delicious, Healthy Recipes for Tired and Hungry Cooks – Jules Clancy

    Serves 2

    4 large portobello or field mushrooms
    1 clove garlic, very finely chopped
    small bunch thyme, leaves picked
    4-6 tablespoons mayonnaise*
    2 large handfuls baby spinach

    1. Heat a large frying pan on a very high heat.

    2. Trim mushroom stalks and add to the pan with a little olive oil. Sear mushrooms for about 8 minutes, turning every 2 minutes.

    3. Meanwhile, finely chop garlic and stir with the thyme into the mayo.

    4. Serve mushies with a good dose of salt and pepper and with mayo and leaves on the side.

    *Optional: use vegan

    Big Flavors Rating: 5 Stars

    Cast Iron Strip Steak with Danish Blue Cheese

    January 31, 2014 by Ashley Leave a Comment

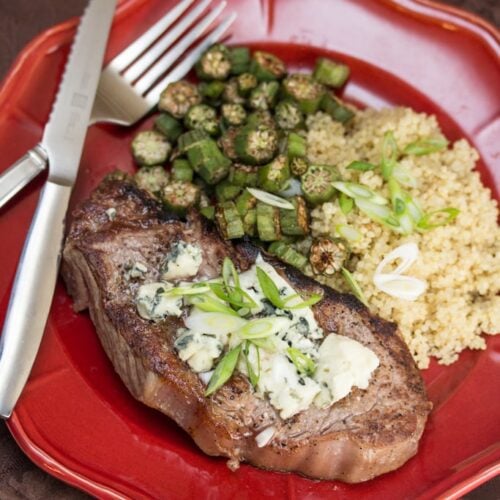
    Cast Iron Strip Steak with Danish Blue Cheese

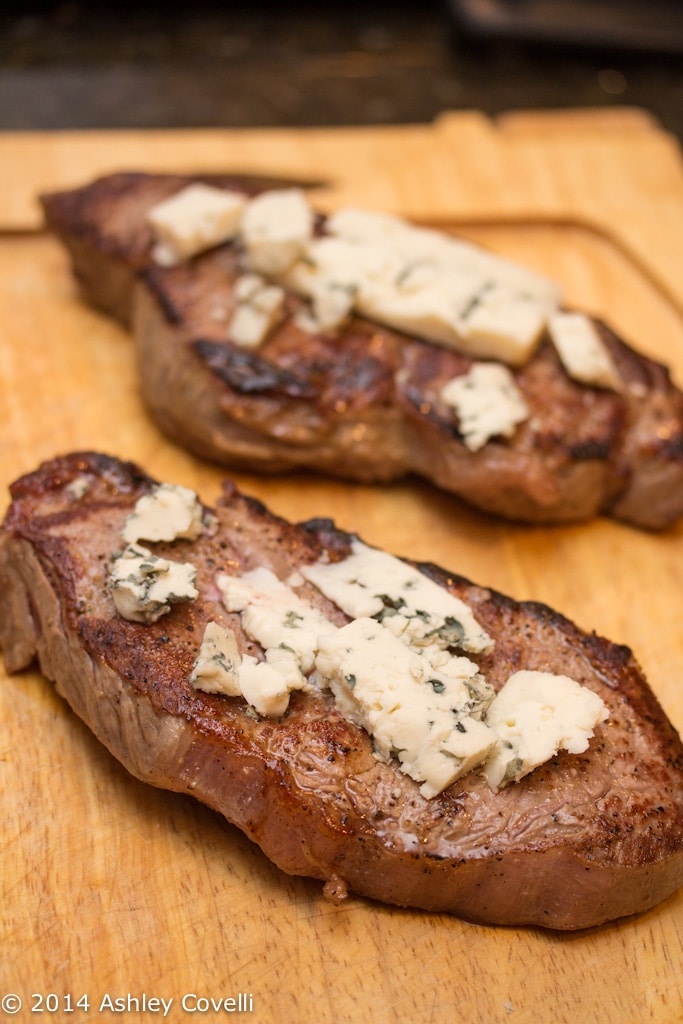
    I found some beautiful organic strip steaks a while back, and stashed them in the freezer until inspiration struck. And then I came across a gorgeous wedge of Danish blue cheese and I knew that melty cheese on top of steak needed to happen, and soon!

    Cast Iron Strip Steak with Danish Blue Cheese

    Luckily, I convinced Dino to help me out with cooking the steaks, since high heat cast iron cooking intimidates me a bit. He was glad to do it, and he even helped write up some awesome instructions for how to cook delicious steaks using his method.

    This method produces a lot of smoke, but don't be afraid - it's well worth it!

    Cast Iron Strip Steak with Danish Blue Cheese

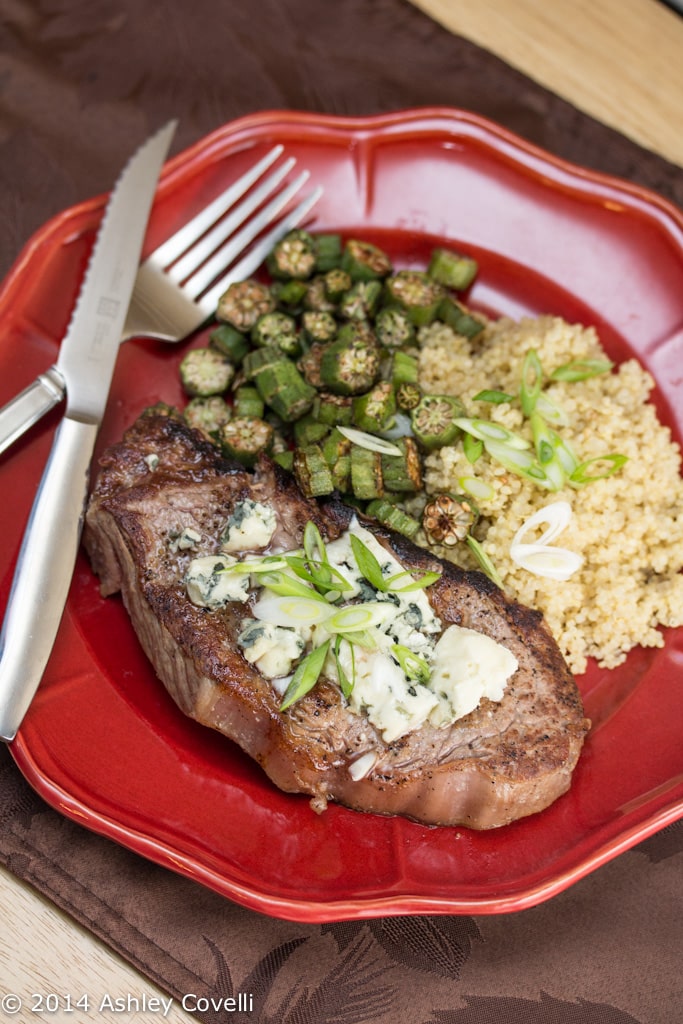
    These turned out so.freaking.fantastically. Wow! The saltiness of the cheese on top was beautiful with the beef. They were perfectly medium rare, and we savored every single bite.

    I served these with some couscous that I cooked in the rice cooker, and a batch of Roasted Okra that I popped in the oven while the meat was resting.

    It was a phenomenal meal.

    📖 Recipe

    Cast Iron Strip Steak with Danish Blue Cheese

    Cast Iron Strip Steak with Danish Blue Cheese
    For best results, use a well-seasoned cast iron skillet with a cover. If you don't have one, you'll need a skillet and cover that can handle a trip to the oven.
    Big Flavors from a Tiny Kitchen - Ashley Covelli
    No ratings yet
    Print Recipe Pin Recipe
    Course: Main Dish
    Cuisine: American

    Ingredients
     

    • Strip steaks 1-2" thickness
    • 1 tablespoon unsalted butter per steak
    • Kosher salt & freshly cracked black pepper
    • Garlic powder
    • Cayenne pepper
    • 1 tablespoon crumbled blue cheese per steak
    • 1 green onion thinly sliced, for garnish (optional)

    Instructions
     

    1. Heat the cast iron skillet over high heat.
    2. Preheat an oven to 450°F.
    3. Pat the steaks dry using paper towels.
    4. Season both sides generously with salt, some pepper, and a pinch each of garlic powder and cayenne pepper.
    5. The pan is ready when a few drops of water quickly evaporate on its surface - drop the steaks right onto the pan, do not use oil or butter.
    6. After 2 minutes, flip the steaks over in place.
    7. After 2 minutes, add a dollop of butter to the center of each steak (roughly 1 tablespoon), cover the pan, and put in the oven.
    8. Cook the steaks for 2 minutes in the oven.
    9. Remove the pan, open the cover and use the finger test (or use a thermometer) to determine if they need more cook time.
    10. If steaks are ready, remove them immediately from the pan and set them on a plate or cutting board. Top with blue cheese and allow to rest, tented with foil, for at least 10 minutes. If more cook time is needed, cover the pan again and return it to the oven for 1-minute intervals.
    11. Garnish with green onions and serve. Enjoy!

    Notes

    Once you start this process you will need to be involved from start to finish- do not walk away or attempt to prepare another dish!
    Check out the finger test over at Simply Recipes if you'd like to know how to test meat's doneness with this method.
    Cooking temperatures for beef:
    • 120-130 °F (50-55 °C) Internal: Rare
    • 130-140 °F (55-60 °C) Internal: Medium-Rare
    • 140-150 °F (60-65 °C) Internal: Medium
    • 150-165 °F (65-75 °C) Internal: Well-Done

    Did you make this recipe?

    Leave a comment + star rating below to let people know how it was!

    Salame Pepato and Caper Pizza

    January 29, 2014 by Ashley 1 Comment

    Salame Pepato and Caper Pizza

    For Christmas, I gave Dino a killer assortment of salami from Boccalone. Each flavor was fantastic on its own, shaved paper thin.

    A few nights ago, I decided to try putting some of the Salame Pepato and on top of a pizza for a quick and easy meal. It was a beautiful thing.

    Salame Pepato and Caper Pizza

    I took a pre-made pizza crust, spread on a thin layer of pizza sauce (luckily, Stonefire's Italian Thin Pizza Crust comes with sauce, too!), topped it with about a cup of shredded mozzarella cheese, some slices of the Salame Pepato, and a tablespoon of chopped capers.

    I baked it at 450°F for about 10 minutes, and dinner was done.

    It was delicious - salty, crispy, cheesy... lots of my favorite things!

    Big Flavors Rating: 4 Stars

    Green, Blue and Red Winter Salad

    January 28, 2014 by Ashley 1 Comment

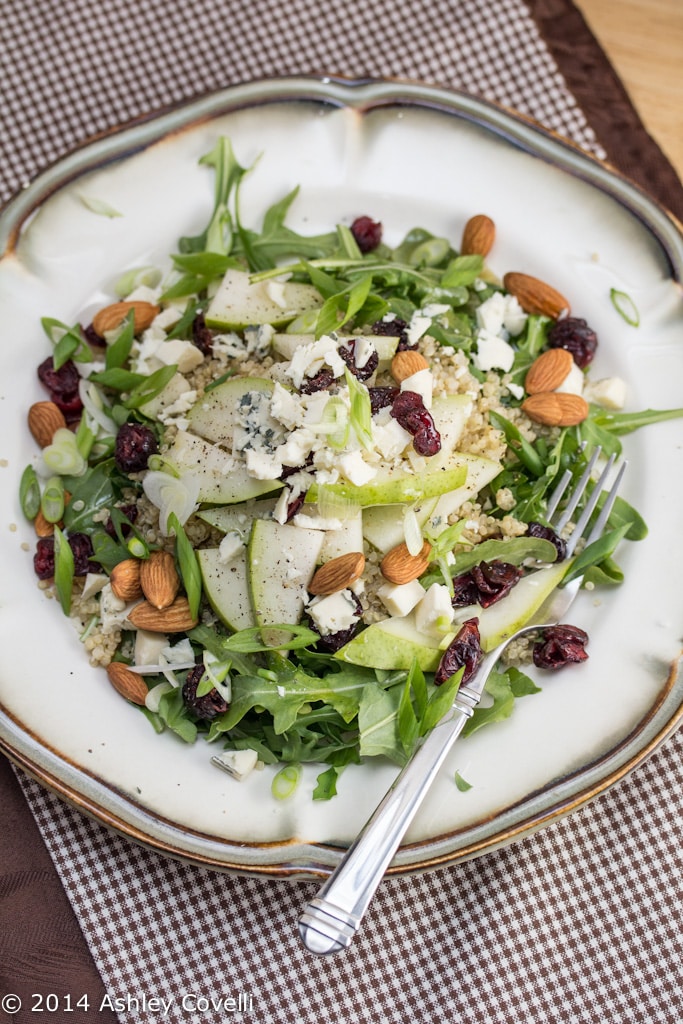
    Green, Blue and Red Winter Salad

    I've been attempting to mix things up with my lunch routine lately. Leftovers can get boring, and I don't always feel like cooking something new.

    I decided that I need to start working on having a well stocked supply of goodies in the house to make more interesting salads. This one was absolutely awesome. It hit all of my favorite notes - sweet, salty, crunchy, tangy... CHEESE.

    Because, you know, the cheese note is the best of all notes.

    Green, Blue and Red Winter Salad

    To make this salad, I piled a hearty amount of baby arugula on a plate and topped it with some leftover couscous, sliced pear, raw almonds, a sliced green onion, crumbled Danish blue cheese and dried cranberries. I drizzled it with a really good extra virgin olive oil and some white wine vinegar, sprinkled some sea salt on top and added a few grinds of black pepper.

    It totally rocked my world. I loved the addition of grains to greens, and there were just enough ingredients on this beauty to keep me from getting bored without being over the top. I'll definitely be making this one again!

    Big Flavors Rating: 5 Stars

    Honey Banana Poppy Seed Muffins

    January 27, 2014 by Ashley 3 Comments

    Honey Banana Poppy Seed Muffins

    One of the things that I love about having a toddler at home is that I have what seems like a constant supply of bananas hanging out in the kitchen.

    Which means that if I time it just right... I can make these banana muffins pretty much any time I like.

    I also may or may not have been channeling the Wicked Witch of the West to get the poppy seeds to get the aforementioned toddler to sleep.

    Poppies... Poppies. Poppies will put them to sleep. Sleeeeep. Now they'll sleeeeep!

    Honey Banana Poppy Seed Muffins

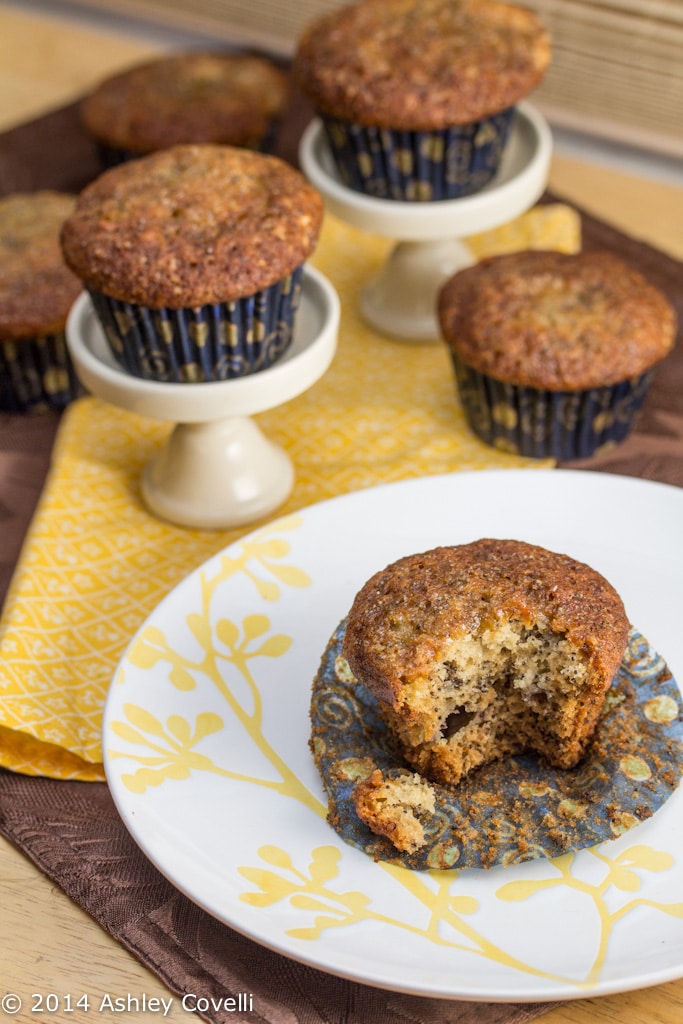
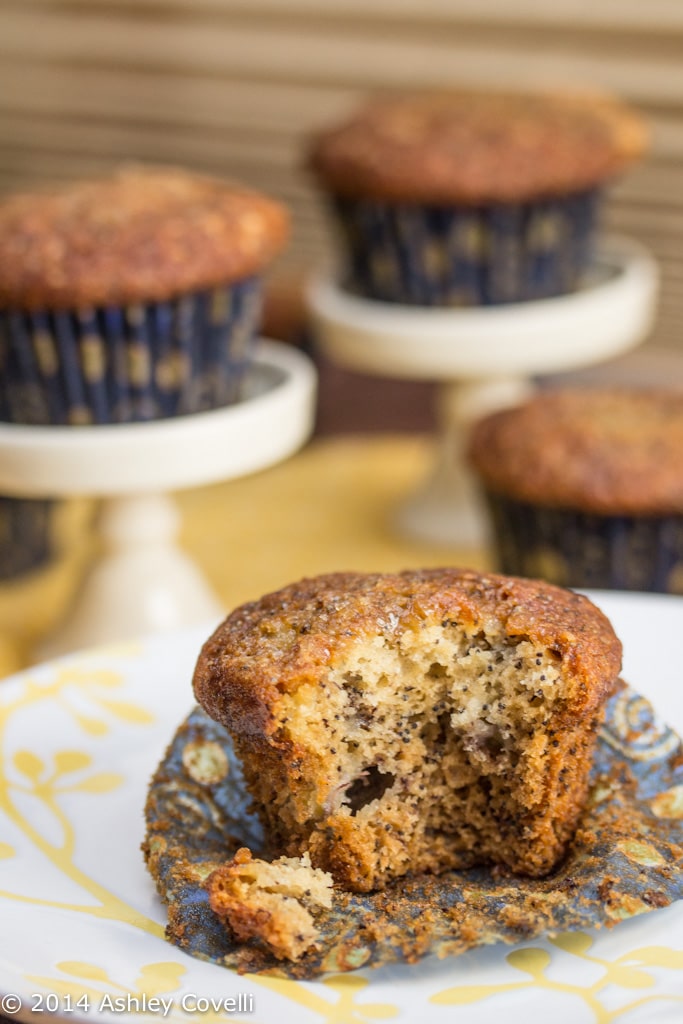
    Sleep regression and opiates aside, these muffins were phenomenal! Seriously. They were nice and tender and ever so slightly crunchy from the poppy seeds inside, along with a sprinkling of raw sugar on top. Wowza.

    They may have been consumed for both breakfast AND dinner every day until we ran out.

    This recipe is pretty easy to put together, and you're rewarded with outstanding muffins. They don't stay too crispy after they sit in an airtight container overnight, but they're still absolutely delicious. I only got 13 muffins out of this recipe, and I measured exactly ⅓ cup in each muffin liner. Some of them did overflow a bit, so I'd probably go with a little less next time.

    And there most certainly will be a next time!

    Honey Banana Poppy Seed Muffins

    Honey Banana Poppy Seed Muffins
    The Crepes of Wrath

    Prep time: 15 mins
    Cook time: 25 mins
    Total time: 40 mins
    Serves: 18-20 muffins

    1 ½ cups all-purpose flour
    1 cup granulated sugar
    1 teaspoon baking soda
    ½ teaspoon kosher salt
    3 large bananas, very ripe and mashed (about 1 cup)
    ⅓ cup vegetable oil
    ¼ cup whole milk or buttermilk
    ¼ cup honey
    2 large eggs, room temperature
    2 tablespoons poppy seeds
    raw sugar, for sprinkling (optional)

    Preheat your oven to 350 degrees F. Line and/or grease 18-20 muffin cups and set aside.

    In a large bowl, whisk together your flour, sugar, baking soda, and salt. Set aside. In another large bowl, beat together the mashed bananas, vegetable oil, milk or buttermilk, honey, and eggs.

    Add the dry ingredients into the wet ingredients and mix until just moistened. Fold in the poppy seeds. Place about ⅓ cup of batter into each muffin cup (don’t overfill the cups, definitely do less than ⅓ than a heaping ⅓ cup) and sprinkle with raw sugar, if you like. Bake for 20-25 minutes, until golden and set. Allow to cool slightly before removing from the pans and serving. These will keep well at room temperature in an airtight container for up to 5 days.

    Big Flavors Rating: 5 Stars

    Malted Egg Cream

    January 24, 2014 by Ashley 8 Comments

    Malted Egg Cream

    When I first moved to New York (almost 10 years ago now!), I got hooked on diner food. Especially during the wee hours of the morning after a long night of bar-hopping, concert going, and all of the other fun things that recent college grads do.

    Occasionally, Dino (a native New Yorker) would order something that would catch me completely off guard - something that sounded so weird that I would just stare at him, not sure if I heard him right. Half of the time, I figured he was ordering things just to get a reaction out of me. Like the time he ordered a Happy Waitress (from our not-so-happy waitress!), which I didn't realize was just an open-faced grilled cheese sandwich with tomato and bacon with a side of fries.

    Another one of the new-to-me items was an egg cream. I had no idea he was talking about a beverage when he ordered it. Chocolate and vanilla carbonated beverages didn't sound good to me at all! This was back before I kicked my Pepsi addiction so I just couldn't fathom the idea of drinking seltzer that wasn't loaded with high fructose corn syrup and caramel coloring.

    Malted Egg Cream

    My, how the times have changed. We have since slowed down immensely on our diner outings, and when we do go, it's usually at a time that resembles a "normal" meal time. We also make some of the things that we used to like ordering from diners at home now.

    Like this malted egg cream. I like it as a nice, light way to end a meal. It has the richness of a malt without all the heaviness of a full glass of milk. Dino makes mine with regular milk and his with soy milk - the soy milk does tend to separate a bit from the carbonation, but it still tastes good.

    I'm a total convert now, and I like having my own soda jerk at home. Ha!

    To make a standard egg cream you would normally fill the glass half-way with seltzer, add some flavored syrup, then add the milk while stirring like a mad scientist. This order of things minimizes overflow. But since we’re adding a malt powder to this version of the drink, we need to make sure the powder gets an opportunity to fully dissolve. To do that we must reverse the order. There’s a good chance you’ll make a mess, but if you love egg creams it should be worth it.

    📖 Recipe

    Malted Egg Cream

    Malted Egg Cream
    Trust me,  you'll love this diner staple! I'd never heard of it either, but now I'm a convert.
    Big Flavors from a Tiny Kitchen - Dino Covelli
    5 from 2 votes
    Print Recipe Pin Recipe
    Servings: 1 serving
    Course: Drink
    Cuisine: American
    Prep Time 5 minutes mins
    Total Time 5 minutes mins

    Ingredients
     

    • 2 tablespoons Ovaltine or your favorite sweetened malted milk powder
    • 4 ounces milk
    • 4 ounces seltzer*

    Instructions
     

    1. Pour the milk into a tall glass.
    2. Add the Ovaltine and stir until completely blended.
    3. Gently and slowly pour in the seltzer while stirring vigorously- bringing the foam up to the top of the glass.
    4. Pop in a straw and enjoy!

    Notes

    *Freshly made seltzer works best, or a freshly opened bottle will do- the more carbonation, the better.

    Did you make this recipe?

    Leave a comment + star rating below to let people know how it was!

    Juicy Cornish Game Hens

    January 21, 2014 by Ashley 1 Comment

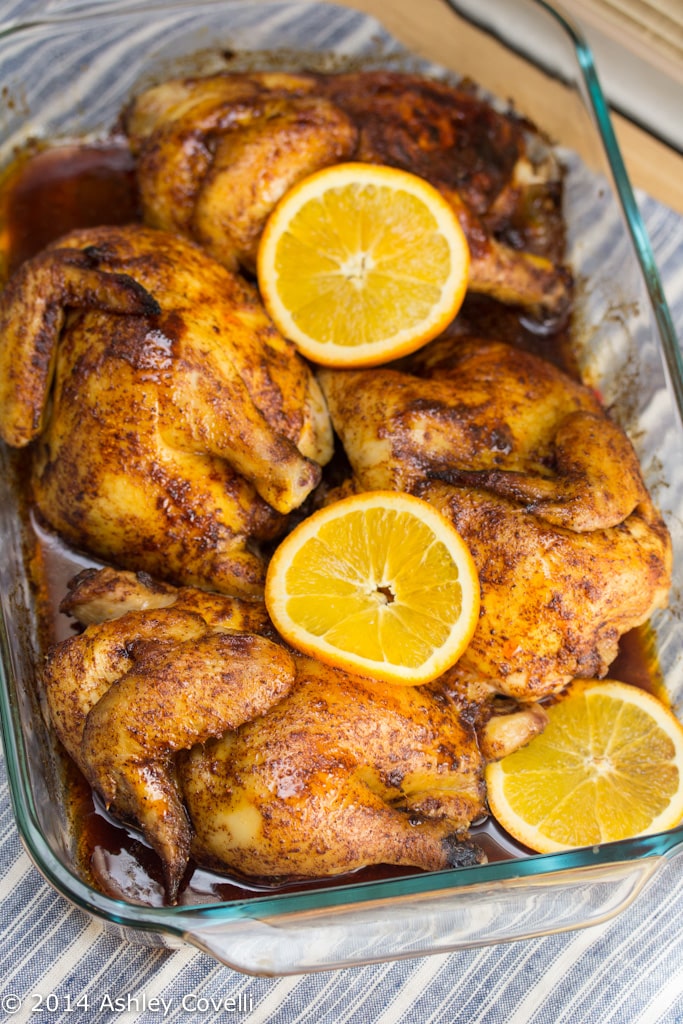
    Juicy Cornish Game Hens

    Truth be told, the one surefire way to get to my husband's heart is to pretty simple: roast a whole bird.

    Doesn't matter what type of bird, he's an equal opportunity fowl-eater. See the end of this post from 2009 for Exhibit A.

    We always keep it classy, obviously 😉

    Juicy Cornish Game Hens

    I've only cooked with Cornish Hens twice before, as they're sometimes difficult to come by. I prefer chicken or turkey, but I know that Dino absolutely loves these adorable little game hens.

    So when I found a pack of them on sale, I knew I had to snatch 'em up and get cookin'!

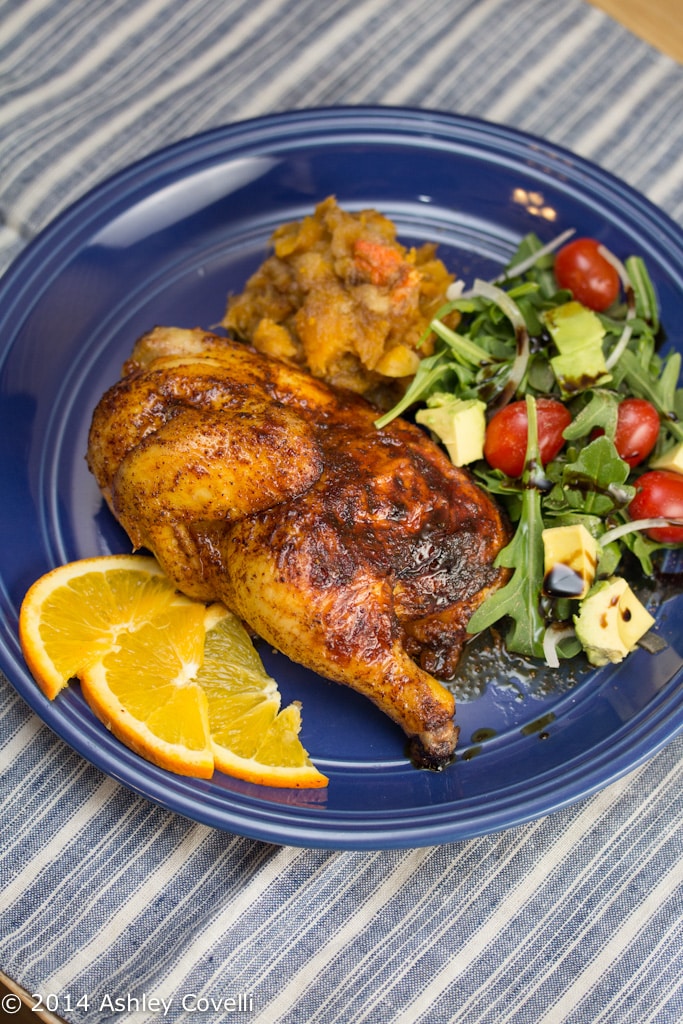
    This recipe was really easy to put together. The hardest part is cutting the hens in half. The spiced honey butter was incredibly flavorful, and the meat was nice and juicy. He absolutely loved this meal! I served it with Cinnamon Roasted Butternut Squash and a baby arugula salad.

    Juicy Cornish Game Hens

    Juicy Cornish Game Hens
    Food.com - Chuck in Killbuck

    Total Time: 1 hr
    Prep Time: 15 min
    Cook Time: 45 min
    Servings: 4

    4 tablespoons butter
    3 tablespoons honey
    4 teaspoons chili powder
    1 tablespoon orange juice
    2 Cornish hens, halved
    salt and pepper, to taste

    1. Preheat oven to 350°F.
    2. Melt butter and stir in honey and chili powder; mixing well.
    3. Stir in orange juice, salt and pepper and remove from heat.
    4. Cut each hen into two halves.
    5. Rinse well and pat dry with paper towels.
    6. Place hens in baking dish, skin side down, and place in oven for 6-8 minutes.
    7. Turn hens over and baste generously with all of the mixture.
    8. Bake for approximately 45 minutes or until well browned.

    Big Flavors Rating: 4 Stars
    Cinnamon Roasted Butternut Squash Mash #12WksWinterSquash

    January 20, 2014 by Ashley 2 Comments

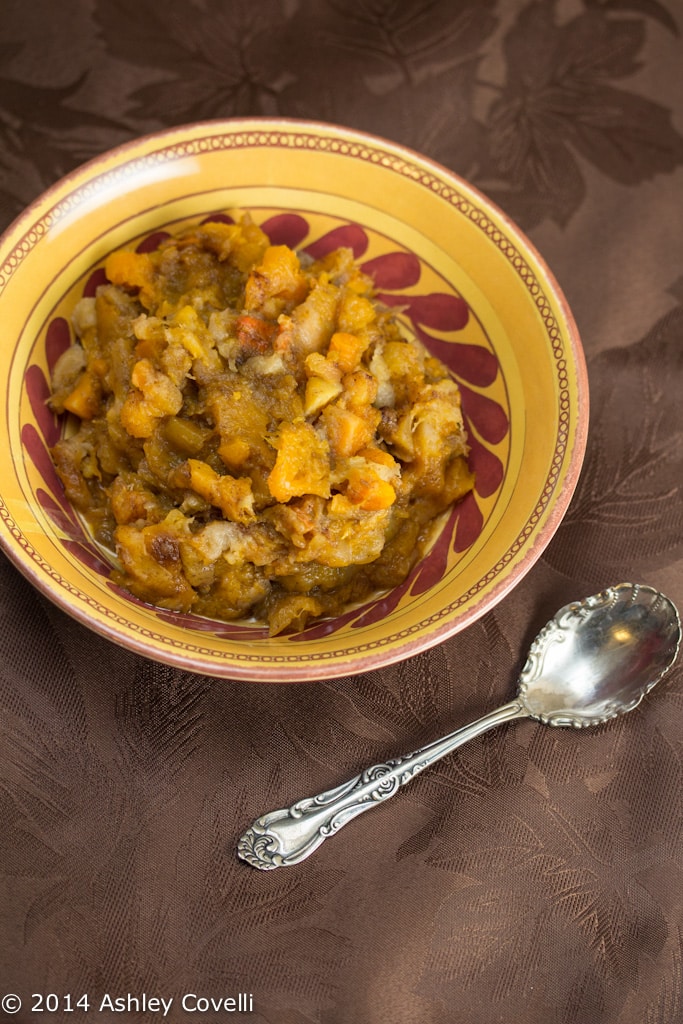
    Cinnamon Roasted Butternut Squash Mash

    I can't believe it's already the last week in our celebration of 12 Weeks of Winter Squash! It's been a great  run, and there has been a lot of deliciousness posted by a wonderful group of bloggers. I'm honored to have been included!

    I had a bit of a squash mishap this week - let's just say that my fresh butternut squash cubes were freakishly slimy a bit past their prime - so I substituted frozen. I figured that roasting them wouldn't necessarily work out too well. When I took them out to turn them, they just kind of collapsed into a big pile-o-mush, so I figured I'd just smash them together a bit more and call it a mash.

    Cinnamon Roasted Butternut Squash Mash

    It worked out fine - I would have preferred them to be nice and golden on the edges, but this mash tasted great! The sweetness of the squash is wonderful, and there's a tiny bit of heat from the cayenne.

    Be sure to click through to Inspired Taste to see some great tips on cutting butternut squash. They can be tricky, which is why I usually buy them already cut. I just don't have the patience for them sometimes!

    I'll definitely try this out again sometime with fresh squash. Check out the roundup after the recipe below for more winter squash fun. And yes, I've already started a petition for 12 Weeks of Summer Squash 😉

    Cinnamon Roasted Butternut Squash
    Inspired Taste

    Prep time: 15 minutes
    Cook time: 45 minutes
    Total time: 1 hour

    Yield: 4 (1 cup) servings

    1 large butternut squash, peeled, seeded and cut into 1-inch cubes (about 3 pounds or 8 cups, cubed)
    2 tablespoons olive oil
    2 tablespoons brown sugar
    ½ teaspoon ground cinnamon
    1 teaspoon kosher salt
    Dash cayenne, optional

    Prepare Squash: Heat oven to 425º F and line two large baking sheets with aluminum foil.

    Toss squash cubes with olive oil, brown sugar, cinnamon, salt and the cayenne until well coated. Tumble coated squash onto baking sheets and spread into one layer. Try not to crowd them too much or else they will not brown.

    Roast Squash: Roast squash, turning once and rotating pans once, until edges are lightly browned and centers are tender; 40 to 45 minutes. (Since ovens can often run hotter than you have heated them to, check the squash every so often to make sure they are not roasting quicker than expected).

    Big Flavors Rating: 4 Stars


    Linguine with Tomato and Summer Squash Sauce

    January 19, 2014 by Ashley 3 Comments

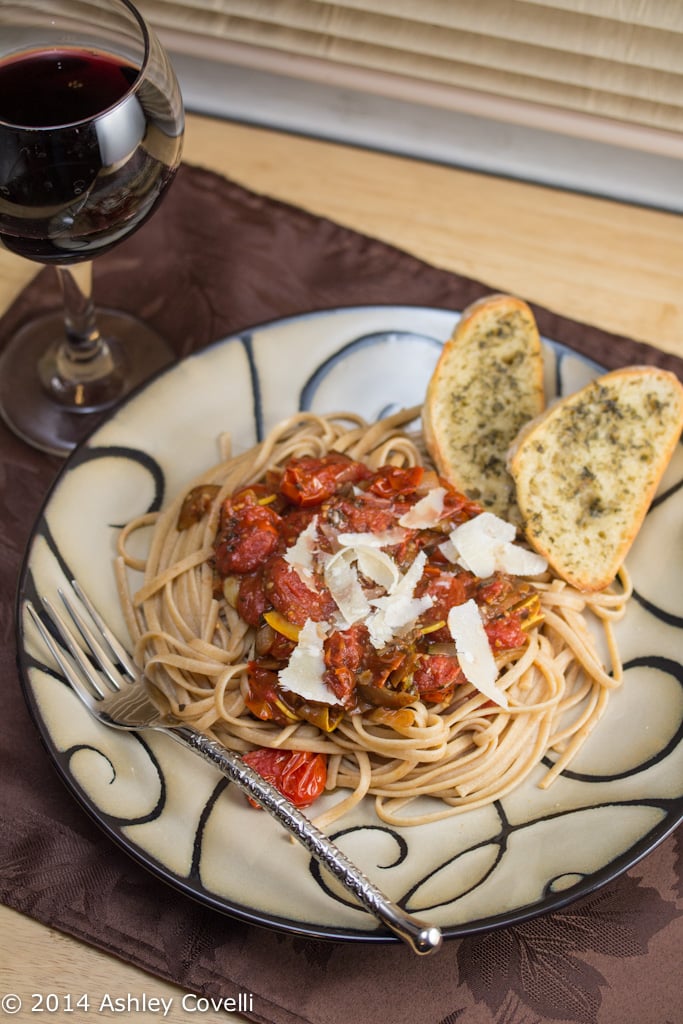
    Linguine with Tomato and Summer Squash Sauce

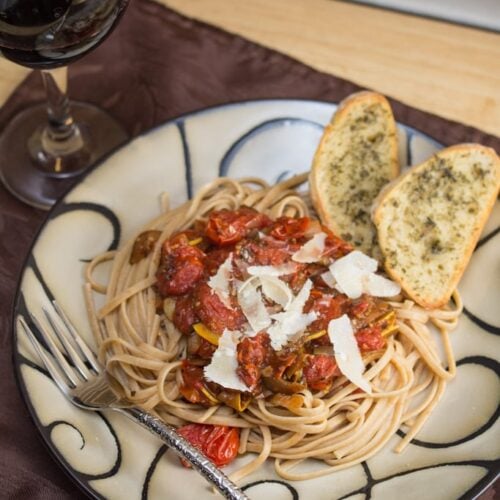
    We had a bit of thinly sliced zucchini and yellow squash leftover from when we made Ratatouille, and I thought it would be great simmered in with some grape tomatoes for a nice pasta dinner.

    The sauce turned out wonderfully! It was a bit sweet from the tiny tomatoes, tangy from the balsamic, and had a little kick from the red pepper flakes. It went especially well with a batch of My Favorite Garlic Bread and a glass of red wine. It was most definitely Italian husband approved 🙂

    Linguine with Tomato and Summer Squash Sauce

    📖 Recipe

    Linguine with Tomato and Summer Squash Sauce

    Linguine with Tomato and Summer Squash Sauce
    Big Flavors from a Tiny Kitchen - Ashley Covelli
    No ratings yet
    Print Recipe Pin Recipe
    Servings: 4 Servings
    Course: Main Dish
    Cuisine: Italian

    Ingredients
     

    • 2 tablespoons extra virgin olive oil
    • 1 medium yellow onion diced
    • 3 cloves garlic minced
    • 1 teaspoon dried oregano
    • 1 teaspoon dried basil
    • 1 teaspoon dried parsley
    • 1 teaspoon dried savory
    • Pinch of red pepper flakes
    • 4 cups grape or cherry tomatoes
    • ½ cup zucchini quartered and thinly sliced
    • ½ cup yellow squash quartered and thinly sliced
    • Kosher salt and freshly cracked black pepper to taste
    • ⅓ cup balsamic vinegar
    For serving:
    • 12 ounces cooked whole grain linguine*
    • Freshly grated Parmesan cheese optional, but highly encouraged!

    Instructions
     

    1. Heat oil in a large, non-stick skillet over moderate heat. Add onion and garlic and sauté until tender. Add oregano, basil, parsley, savory and pepper flakes and stir to combine. Cook for 30 seconds, until fragrant. Add tomatoes, zucchini and squash and season with salt and pepper. Stir well and let cook for a few minutes. Add balsamic vinegar and stir.
    2. While the sauce is reducing, cook linguine according to package instructions, making sure to reserve a bit of the pasta water.
    3. As the sauce reduces, the tomatoes will start to pop and melt down into the pan. You can help them on their way a bit by pressing gently (and carefully so you don't squirt molten hot tomato juice anywhere!) down with the back of your spoon/spatula. If you find that the sauce is a bit thick, add in a ladleful of the starchy pasta water, and continue to cook.
    4. The sauce is ready when the tomatoes have all burst and everything holds together. Feel free to reduce it further if you like a thicker sauce, or add more pasta water to think it out if you'd like. It should take 30-45 minutes total.
    5. Stir a bit of the sauce into the drained pasta, to keep it from sticking together. Serve linguine with a healthy dose of sauce on top. Garnish with Parmesan cheese and enjoy!

    Notes

    *Optional: use Gluten Free

    Did you make this recipe?

    Leave a comment + star rating below to let people know how it was!

    Herb Rubbed Roast Pork Tenderloin

    January 18, 2014 by Ashley 2 Comments

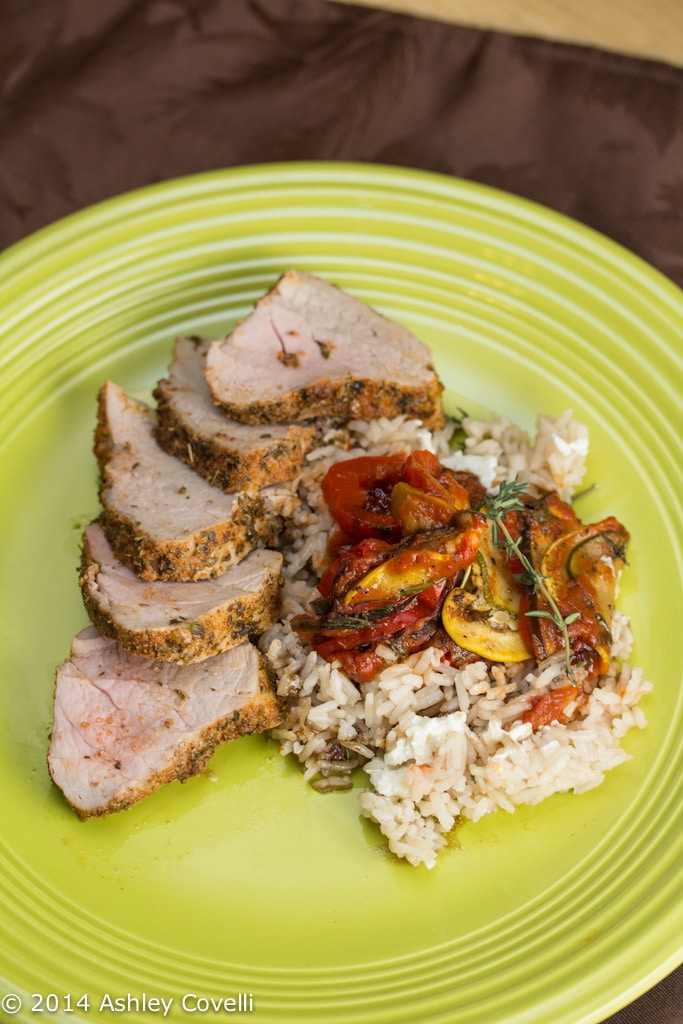
    Plate of herb rubbed roast pork tenderloin with ratatouille and rice.

    My in-laws were coming over for dinner, so I wanted to make something fairly simple to go alongside our second batch of Ratatouille.

    I decided that pork tenderloin would be the way to go, and came up with a spice rub/sear/roast method, similar to the one used for these Pork Asada Tacos with Tomatillo Salsa Verde that I made a while back.

    It's great because it's a simple way to impart a lot of flavor into a quick-cooking, juicy piece of meat.

    Plate of herb rubbed roast pork tenderloin with ratatouille and rice.

    Pork tenderloin is such a versatile ingredient! Some of our very favorite recipes utilize it, like this balsamic marinated pork tenderloin, this pan-roasted pork tenderloin with balsamic tomatoes, these peanut noodles with roasted pork tenderloin + honeyed oranges, and this breaded pork tenderloin with lemon caper sauce.

    🐖 Ingredient Spotlight: Pork Tenderloin

    This recipe uses pork tenderloin which can be found in your grocery store located in the meat department.

    Pork tenderloin is an incredibly versatile ingredient. It cooks quickly and can be prepared in a variety of ways.

    Some of our favorite cooking methods for pork tenderloin include roasting, grilling, breading and frying, pan-searing (then transferring to the oven to roast and cook through), and sous vide cooking (then finishing it off by searing it in a hot skillet or on the grill).

    Note that pork tenderloin is a different cut of meat than pork loin. You can read more about the difference between pork tenderloin and pork loin over on this post on allrecipes.

    Pork tenderloin is most often sold in a package that has 2 pieces of pork tenderloin wrapped up together. Typically each piece of pork tenderloin weighs roughly 1 pound, so the packages are usually 2-ish pounds in total.

    Depending on how you plan to use it, you may want to opt for one that's been already marinated. Most grocery stores sell a variety of flavors of pre-marinated pork tenderloin.

    Be sure that if you're using pork tenderloin in a recipe like the one on this page you get one that's not already in a marinade. (If you're looking for a fantastic marinated pork tenderloin recipe, my balsamic marinated pork tenderloin has been a longtime favorite).

    Personal temperature and texture preferences vary, but the FDA recommends cooking pork to at least 145°F.

    Pork tenderloin is juicy and delicious when it's still a little pink inside.

    I know, that whole, "pork - the other white meat" campaign from the '80s made it confusing to think of pork as something that is OK to serve at a variety of temperatures.

    But much like steak, the flavor and texture are best when it's not completely cooked through. It can help to think of pork more like beef than poultry.

    Some of our favorite pork tenderloin recipes are:

    • Coffee-Marinated Grilled Pork
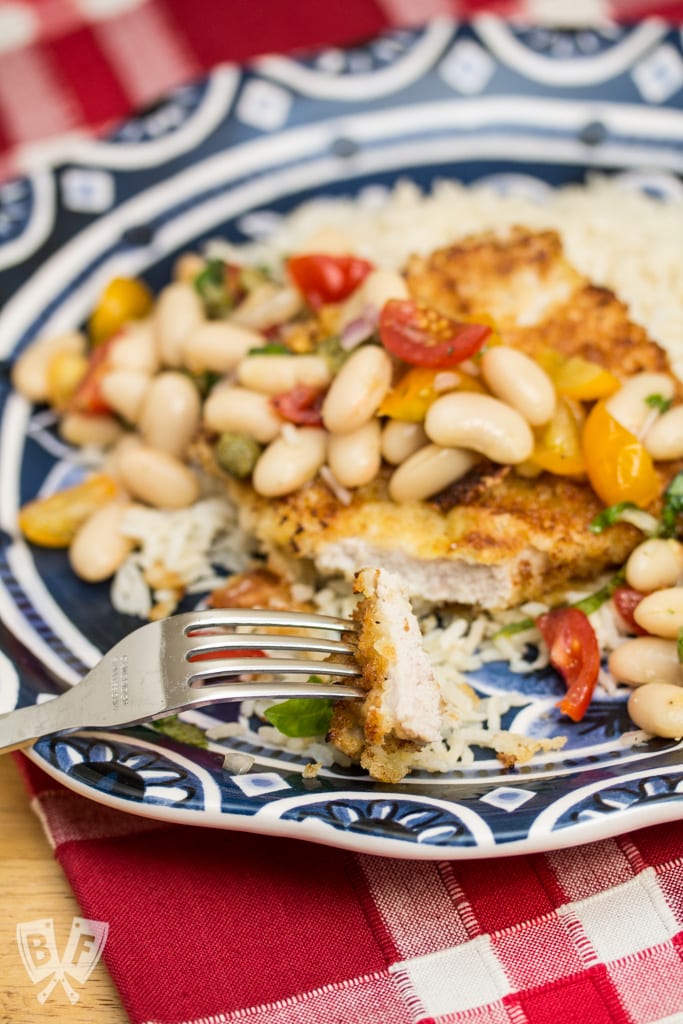
    • Breaded Pork Tenderloin with Lemon Caper Sauce
    • Herb Rubbed Roast Pork Tenderloin
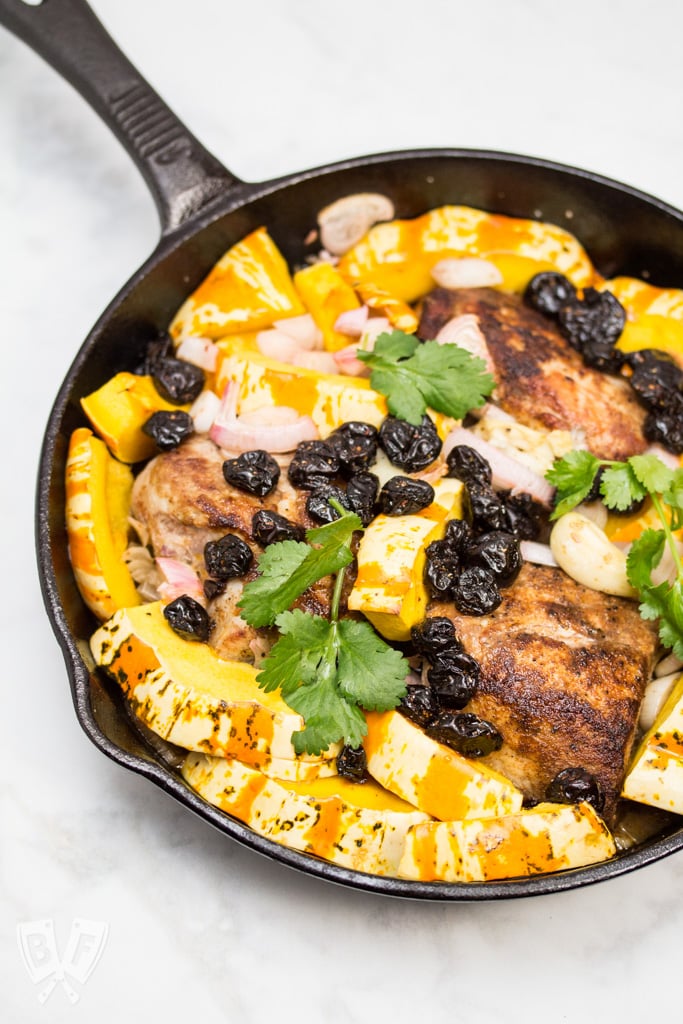
    • Latin-Spiced Pork + Squash Skillet with Chili Lime Cherries
    • Pan-roasted Pork Tenderloin with Balsamic Tomatoes
    • Pan Roasted Pork Tenderloin with Fairy Tale Eggplant & Tomatoes
    • Peanut Noodles with Roasted Pork Tenderloin + Honeyed Oranges
    • Pork Tenderloin Sliders
    • Pork Tenderloin with Pears and Shallots
    • Roast Pork Tenderloin with Mustard Maple Sauce

    The pork was a big hit - the combination of herbs and spices was wonderful. It had just a little bit of kick at the end, perfect for this cold weather we've been having lately!

    It was really good the first night, but unfortunately didn't reheat too well a few days later, even though I did it in the oven.

    The flavor just wasn't there after day 1. That happens a lot with pork. Ah well.

    One note - you may want to slice each tenderloin in half, if that helps it fit easier into your skillet. I did that and had 4 nice pieces.

    Still hungry? You may also like...

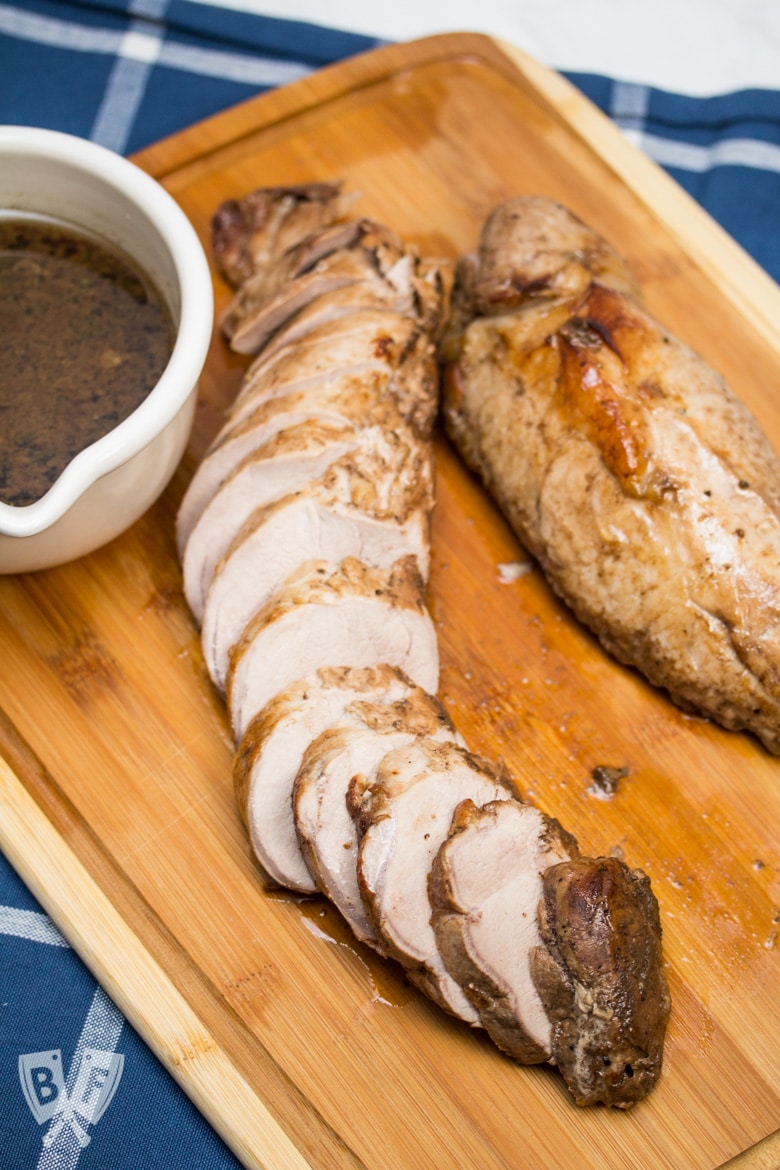
    Overhead view Balsamic Marinated Pork Tenderloin carved on a cutting board.
    Balsamic Marinated Pork Tenderloin
    Overhead view of a cast iron skillet with spiced pork tenderloin, squash, and dried cherries.
    Latin-Spiced Pork + Squash Skillet with Chili Lime Cherries
    Plate of Pork Scallopini with White Bean-Tomato Salad with a fork holding a bite.
    Pork Scallopini with White Bean-Tomato Salad
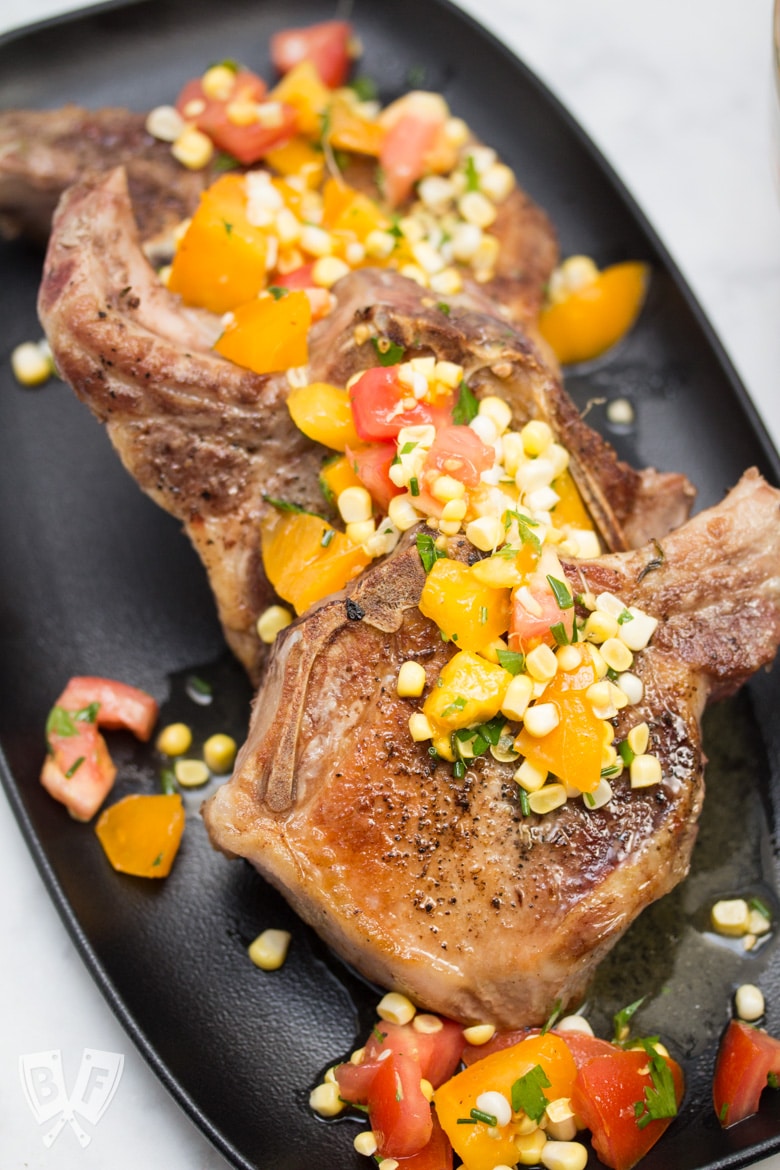
    Platter of Sous Vide Double Cut Pork Chops with Raw Summer Corn & Tomato Salad.
    Sous Vide Double Cut Pork Chops with Raw Summer Corn & Tomato Salad

    Doing some online shopping? Check out my Amazon shop page for recommendations!

    📖 Recipe

    Herb Rubbed Roast Pork Tenderloin

    Plate of herb rubbed roast pork tenderloin with ratatouille and rice.
    Big Flavors from a Tiny Kitchen - Ashley Covelli
    No ratings yet
    Print Recipe Pin Recipe
    Servings: 4 -6 Servings
    Course: Main Dish
    Cuisine: American
    Prep Time 5 minutes mins
    Cook Time 20 minutes mins
    Total Time 25 minutes mins

    Ingredients
     

    For the Spice Rub:
    • 1 tablespoon kosher salt
    • 1 tablespoon garlic powder
    • 1 tablespoon dried parsley
    • 1 tablespoon dried oregano
    • 2 teaspoons ground paprika
    • 1 teaspoon dried savory
    • 1 teaspoon mustard powder
    • ½ teaspoon ground white pepper
    For the Pork:
    • 2 pieces pork tenderloin about 2 - 2 ½ pounds total, trimmed
    • 2 tablespoons olive oil

    Instructions
     

    1. Preheat oven to 375°F. Combine spice rub ingredients (kosher salt through white pepper) in a small bowl. Rub spice mixture all over pork.
    2. Heat oil in a large, oven-proof skillet over medium-high heat. Sear pork until nicely brown all over, about 2 minutes per side.
    3. Transfer skillet to preheated oven and bake until the internal temperature of the pork reaches 145°F, about 15-20 minutes.
    4. Once pork is finished, remove from oven and let rest for 10 minutes before slicing. Enjoy!

    Notes

    You may want to slice each tenderloin in half, if that helps it fit easier into your skillet. I did that and had 4 nice pieces.

    Useful products:

    garlic powder
    dried oregano

    Did you make this recipe?

    Leave a comment + star rating below to let people know how it was!

    Check out my latest posts...

    • Jar of homemade Italian seasoning blend.
      Italian Seasoning Blend
    • Bowl of tzatziki with olive oil drizzled over the top.
      Easy Homemade Tzatziki
    • Turkey sausage patties and a jar of breakfast sausage seasoning.
      Turkey Sausage Patties

    Ratatouille’s Ratatouille

    January 15, 2014 by Ashley 3 Comments

    Ratatouille’s Ratatouille

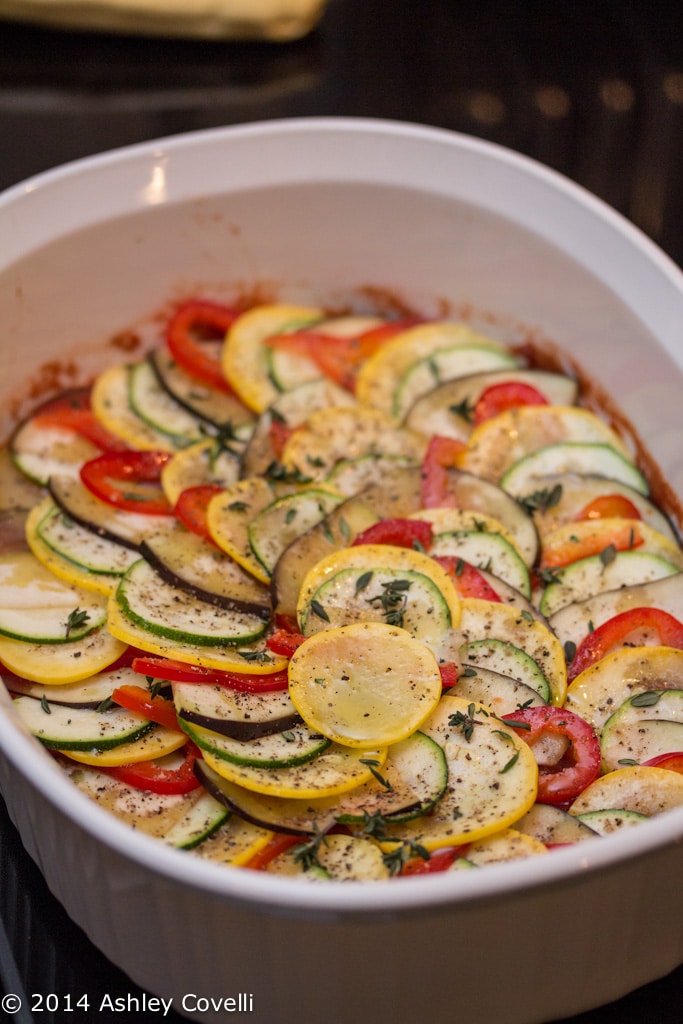
    For our second dish for this month's Layered/Stacked Supper Club event, Dino picked Smitten Kitchen's spin on the classic Ratatouille, as it was presented in the animated film of the same name.

    I think he just wanted an excuse to use the mandoline again 😉

    Ratatouille’s Ratatouille

    This ended up taking longer than it should have, because the eggplant wasn't cooperating with our aforementioned mandoline. I didn't think the bell pepper would be easily cut that way, but didn't realize that the eggplant would give him trouble, too.

    So he ended up cutting it all by hand.

    Editor's note: ALWAYS use a hand guard with a mandoline. They are insanely sharp and nobody wants to lose a finger in the kitchen!

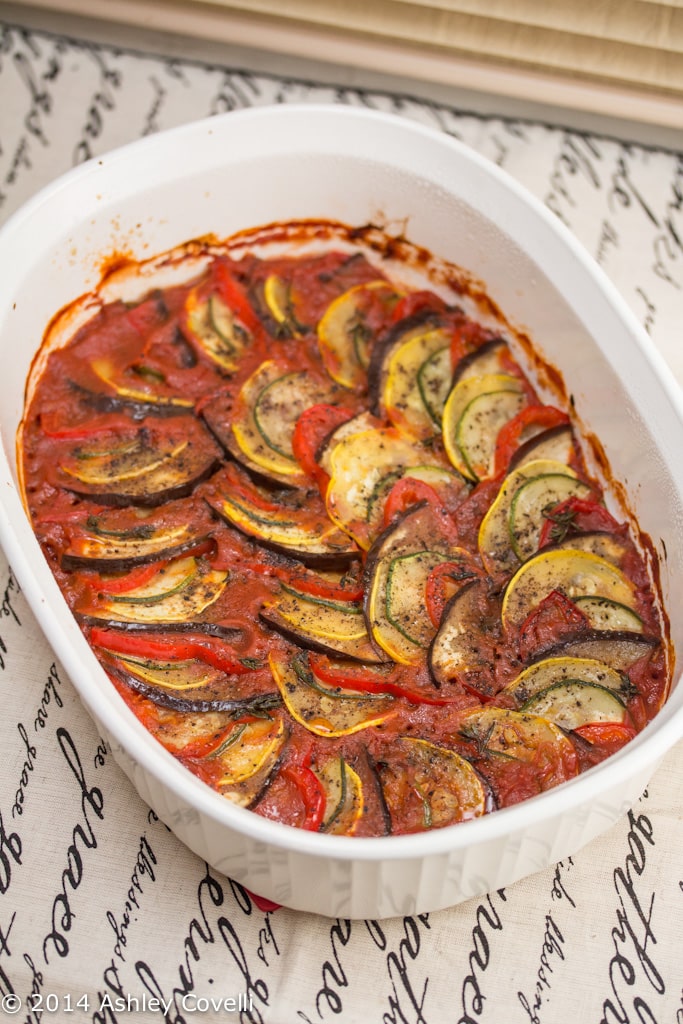
    Ratatouille’s Ratatouille

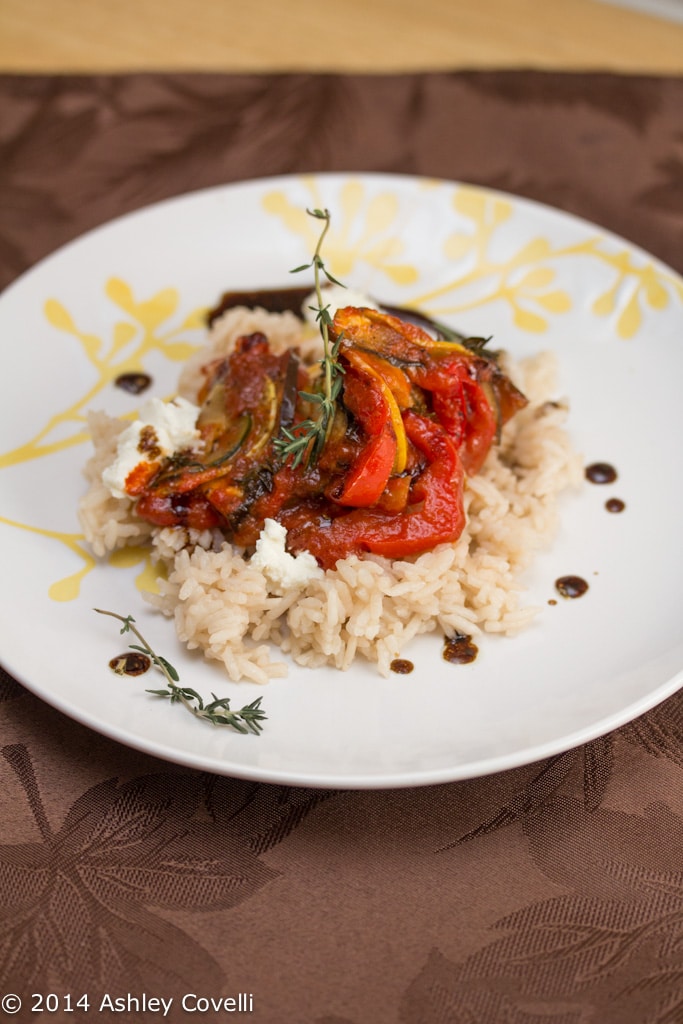
    The ratatouille smelled divine the entire time it was in the oven. The flavors meld together beautifully while it cooks, and you are rewarded with a dish that is so much more than the sum of its parts. It's rich and luxurious - easily one of the best vegetable dishes we've ever had!

    In fact, we liked this so much that I ended up making a second batch of it with the leftover sliced veggies the next day. My in-laws came over and we devoured the entire thing in record time. That time, I served it over rice that I cooked with homemade slow cooker vegetable stock.

    Dino noticed that some people enjoyed this with goat cheese, some with vinaigrette (a la Thomas Keller), so naturally, we used BOTH. But feel free to omit the goat cheese if you want to keep this vegan.

    Ratatouille’s Ratatouille

    For the vinaigrette, he mixed equal parts of aged balsamic and extra virgin olive oil and seasoned it with salt and pepper, some herbes de Provence and fresh thyme. The acidity paired beautifully with the ratatouille.

    Ratatouille’s Ratatouille
    As envisioned by Smitten Kitchen

    ½ onion, finely chopped
    2 garlic cloves, very thinly sliced
    1 cup tomato puree (such as Pomi)
    2 tablespoons olive oil, divided
    1 small eggplant (my store sells these “Italian Eggplant” that are less than half the size of regular ones; it worked perfectly)
    1 smallish zucchini
    1 smallish yellow squash
    1 longish red bell pepper
    Few sprigs fresh thyme
    Salt and pepper
    Few tablespoons soft goat cheese, for serving

    Preheat oven to 375 degrees F.

    Pour tomato puree into bottom of an oval baking dish, approximately 10 inches across the long way. Drop the sliced garlic cloves and chopped onion into the sauce, stir in one tablespoon of the olive oil and season the sauce generously with salt and pepper.

    Trim the ends off the eggplant, zucchini and yellow squash. As carefully as you can, trim the ends off the red pepper and remove the core, leaving the edges intact, like a tube.

    On a mandoline, adjustable-blade slicer or with a very sharp knife, cut the eggplant, zucchini, yellow squash and red pepper into very thin slices, approximately 1/16-inch thick.

    Atop the tomato sauce, arrange slices of prepared vegetables concentrically from the outer edge to the inside of the baking dish, overlapping so just a smidgen of each flat surface is visible, alternating vegetables. You may have a handful leftover that do not fit.

    Drizzle the remaining tablespoon olive oil over the vegetables and season them generously with salt and pepper. Remove the leaves from the thyme sprigs with your fingertips, running them down the stem. Sprinkle the fresh thyme over the dish.

    Cover dish with a piece of parchment paper cut to fit inside. (Tricky, I know, but the hardest thing about this.)

    Bake for approximately 45 to 55 minutes, until vegetables have released their liquid and are clearly cooked, but with some structure left so they are not totally limp. They should not be brown at the edges, and you should see that the tomato sauce is bubbling up around them.

    Serve with a dab of soft goat cheese on top, alone, or with some crusty French bread, atop polenta, couscous, or your choice of grain.

    Big Flavors Rating: 5 Stars

    Cranberry Orange Trifle with Candied Walnuts

    January 15, 2014 by Ashley 2 Comments

    Cranberry Orange Trifle with Candied Walnuts

    This month, our Supper Club theme was Layered/Stacked. As soon as we picked the theme, I knew I wanted to make a trifle. When I was seeking out a recipe, most that I found were layers of store-bought cake, Cool Whip, candy bars, etc.

    I really wanted to try something a little more homemade this month, since I've been taking it easy(ish) for the last few events.

    Enter THIS beauty:

    Cranberry Orange Trifle with Candied Walnuts

    There are four components to this stunning dessert, and they're all homemade: buttermilk pound cake, cranberry compote, candied walnuts and an orange mascarpone cream.

    Each component is delicious, and can  be prepared ahead of time, which makes the task of assembling the finished product a lot less intimidating.

    Cranberry Orange Trifle with Candied Walnuts

    The flavors go beautifully together, and the crunchy, candied nuts on top are a perfect contrast to all of the other smooth, creamy layers. I most definitely made the "adult" version, which includes extra orange liqueur brushed over the cubes of cake. I used Triple Sec, because it's what I had on hand, and it worked out perfectly.

    I did have a little trouble with my pound cake drooping in the middle after it came out of the oven. I guess it wasn't totally cooked - even though the skewer came out clean when I tested it. Good thing it was getting cut into little cubes, right? 😉

    Cranberry Orange Trifle with Candied Walnuts

    This was a HUGE hit with my Supper Club, and also for our babysitter, since I had one left over to give to her after she spent the evening watching my toddler.

    This is the perfect way to end any dinner party - beautiful and impressive!

    Cranberry Orange Trifle with Candied Walnuts
    TasteFood

    While there are several components to this trifle, each one may be prepared in advance, and each one is stand alone good, so feel free to use them on their own. Serve in a trifle bowl or individual goblets. Makes 8-10 servings.

    For the buttermilk pound cake:
    1 ½ cups all-purpose flour
    ½ teaspoon baking soda
    ½ teaspoon salt
    1 ½ cups granulated sugar
    ½ cup unsalted butter, room temperature
    3 large eggs, room temperature
    1 teaspoon vanilla
    ½ cup buttermilk

    Preheat oven to 325 F. (170 C.) Butter a 9-by-5 inch loaf pan. Line bottom with parchment; butter parchment. Whisk flour, baking soda and salt together in a bowl; set aside.

    Beat sugar and butter in bowl of electric mixer until light and fluffy, 3 minutes. Add eggs, one at a time, beating after each addition. Stir in vanilla. Add half of the flour, then the buttermilk, then the remaining flour, mixing well to combine after each addition. Pour into loaf pan. Bake in oven until wooden skewer inserted in center comes clean, about 55 minutes. Transfer to rack and cool 10 minutes. Invert cake onto rack and cool completely. Pound cake may be prepared up to 2 days in advance. Wrap with plastic and refrigerate until use.

    For the cranberry compote:
    12 ounces cranberries, fresh or frozen
    ¾ cup granulated sugar
    ½ cup freshly squeezed orange juice
    ½ teaspoon ground cinnamon

    Combine all of the ingredients in a medium saucepan over medium heat. Cook, stirring occasionally, until cranberries pop and release juices. Remove from heat and cool completely. Refrigerate, covered, for up to 4 days.

    For the candied walnuts:
    1 ½ cups walnut halves
    ½ cup sugar
    ½ teaspoon salt
    ½ teaspoon ground cinnamon

    Preheat oven to 350 F. Arrange walnuts on a baking tray. Bake in oven 10 minutes. Remove from oven. Heat sugar over medium heat in a small saucepan. As soon as it begins to dissolve, stir with a wooden spoon until sugar is liquid and amber colored. Add walnuts and stir to coat. Add salt and cinnamon. Remove from heat and pour walnuts onto a baking tray lined with parchment or silpac sheet. Allow to cool completely. Break into pieces. Store at room temperature in an air-tight container for up to 1 week.

    For the orange mascarpone cream:
    2 cups heavy cream, chilled
    8 ounces mascarpone cheese, chilled
    2 tablespoons granulated sugar
    1 tablespoon finely grated orange zest
    1 tablespoon Gran Marnier or Cointreau
    1 teaspoon vanilla extract

    Combine cream and mascarpone in bowl of electric mixer. Beat until traces of whisk are visible. Add remaining ingredients and continue to beat until peaks form. Refrigerate until use. (May be made 4 hours in advance.)

    Assemble the trifle:
    Reserve a few whole cranberries from the compote for garnish. Pour a thin layer of cranberry compote into the bottom of the trifle dish or individual glasses. Cut the pound cake in ¾ inch cubes. Arrange a layer of pound cake over the compote. Top with a layer of cream. Sprinkle with a few of the nuts. Repeat layering process, finishing with a layer of cream and nuts. Garnish with reserved cranberries and finely grated orange zest. Serve immediately or refrigerate, covered up to 24 hours before serving.

    Optional: Brush each layer of pound cake with Cointreau or Gran Marnier for an adult version of this dessert.

    Big Flavors Rating: 5 Stars

    Grapefruit Risotto with Seared Scallops

    January 14, 2014 by Ashley 1 Comment

    Grapefruit Risotto with Seared Scallops

    Love at first sight. That's what happened when I saw one of the most gorgeous cookbooks ever a few weeks ago. It's all about breakfast (for dinner!) and I didn't even realize until I got home with it that it was from a blog that I've been following for years now - Love & Olive Oil.

    I had to stop flagging recipes to try out, because honestly I would happily eat every single thing in this book! I decided to make something not traditionally associated with breakfast for my first choice - a scallop risotto.

    Grapefruit Risotto with Seared Scallops

    This risotto was absolutely beautiful! It was nice and tart from the grapefruit, incredibly creamy, and had just the right amount of thyme as an accent. The scallops - I made 3 for each of us - were cooked to perfection, and went so, so well with the risotto. Two scallops actually would have been perfect - I had a bit of risotto leftover, but it was great for lunch the next day!

    I can't wait to try more recipes from this book - there are so many in there that I'm excited about. There's a nice mix of recipes, too, not all traditionally "breakfast-y". The photography and layout of the book is stunning - I was really impressed with it! It would make a great gift, too.

    Grapefruit Risotto with Seared Scallops
    Breakfast for Dinner - Lindsay Landis & Taylor Hackbarth

    Makes 2 servings
    Total time: 50 minutes

    For Risotto:
    3 tablespoons unsalted butter, divided
    1 large shallot, minced (about ⅓ cup)
    1 cup arborio rice
    ¼ cup white wine
    1 cup freshly squeezed grapefruit juice (from 1 large grapefruit)
    1 teaspoon fresh thyme, minced
    Salt and black pepper, to taste
    ½ grapefruit, peeled and segmented

    For Scallops:
    4 large scallops (about ½ pound)
    Pinch salt and pepper
    1 tablespoon unsalted butter

    1. Bring 4 cups water to a simmer. Reduce heat; cover to keep warm.

    2. In a large skillet, melt 2 tablespoons of the butter over medium-high heat. Stir in shallots and cook until translucent, about 2 minutes. Add rice and stir until fragrant and coated with fat, about 2 minutes more. Add wine and stir until completely absorbed.

    3. Add grapefruit juice and simmer until fully absorbed, stirring constantly. Add warm water, ½ cup at  a time, and stir constantly; wait until water is fully absorbed before adding the next ½ cup. Continue adding water and stirring until rice is  tender and creamy, about 25 minutes. You may not need all the water; 3 cups or so may be sufficient. Stir in thyme, the remaining 1 tablespoon butter, and salt and pepper to taste, followed by grapefruit segments. Transfer to serving bowls.

    4. Pat scallops completely dry; season with salt and pepper. Heat butter in a large nonstick skillet over medium-high heat until it is melted and the foam subsides. Add scallops and sear for 1 to 1 ½ minutes per side, or until golden brown. Arrange scallops on top of risotto and serve.

    Big Flavors Rating: 5 Stars

    Slow Cooker Indian Chickpea Curry

    January 14, 2014 by Ashley 2 Comments

    Slow Cooker Indian Chickpea Curry

    I'm always on the lookout for new dishes to prepare using my slow cooker. A lot of times, slow cooker meals are fairly heavy, but not this time!

    This chickpea curry was simple and delicious! The recipe has notes for making it with dried or canned chickpeas (I used canned), and also for cooking it in the slow cooker, pressure cooker or even on the stovetop. Talk about options!

    Slow Cooker Indian Chickpea Curry

    We really liked the flavors of this dish. It was warm and aromatic, and went great with some steamed basmati and garlic naan. I also added some plain yogurt to the side, because I tend to like the way it cools off most curries (temperature-wise, and also heat-wise if it's a spicy curry).

    To make the garlic naan, I just melted a few tablespoons of butter, stirred in a few cloves of minced garlic and baked it at 400°F until warm and slightly crispy. It was awesome! I wanted to add some cilantro, but mine wasn't looking so great, so I'll do it again soon and post an official recipe.

    Oh, and speaking of naan - you still have a few days to enter my Stonefire giveaway - check out the details at the end of this post.

    Slow Cooker Indian Chickpea Curry

    Crockpot Chickpea Curry
    Savvy Vegetarian

    Total Prep & Cook Time: 6 Hr 10 Min

    6 Servings

    Ingredients:
    2 tablespoon organic cooking oil
    1 onion, diced
    2 cloves garlic, minced (substitute asafoetida if desired)
    1 inch ginger, peeled and grated
    1 teaspoon cumin
    1 teaspoon coriander
    1 teaspoon turmeric
    1 teaspoon salt
    3 cups cooked chickpeas (2 15 oz. cans chickpeas). If using canned beans, reserve the liquid to add to the pot.
    Optional: 1 can diced tomatoes
    ½ teaspoon garam masala
    Salt to taste

    Directions:
    Cooking Chickpeas:
    If you are using dried chickpeas, soak 1 cup of chickpeas for 12 hours. Change the soak water once while soaking or soak them in the fridge. Discard the soak water and rinse beans before adding to the crockpot.

    Crockpot Cooking: Add soaked chickpeas to the crockpot. Add water to just cover the beans and cook on low for 8 hours
    Stovetop Cooking: Add chickpeas and water to just cover the beans to a large saucepan, bring to a boil, skim the foam, cover and cook on low for 2 hours.

    Pressure Cooking: Add chickpeas and water to just cover the beans to a 4 - 6 quart cooker. Bring to a boil, skim the foam, lock the lid, bring up to full pressure, reduce heat to simmer and cook for 12 minutes. All pressure to come down slowly. Beans should be soft. If they are still a bit crunchy, bring back to full pressure for 3 more minutes.

    Making Chickpea Curry in the Crockpot:
    If you have cooked your beans in the crockpot, drain off excess cooking water from the beans. The water should barely cover the beans.

    In a heavy stainless steel or cast iron pan, heat oil and sauté onions, ginger, and garlic for 5 minutes. Add spices and sauté another minute.

    Add onion mixture to the cooked beans in the crockpot with the optional tomatoes.

    Cook on low in the crockpot up to 6 hours, or until the beans are very soft*. Before serving, add garam masala and salt.

    *Note: When using canned beans, don't drain the beans. Add the beans PLUS liquid to the cooking pot. They won't need 8 hours of cooking though, 2 - 4 hours should do it. And you can cook it on high.

    Recipe Tips:
    If you don't have a crockpot or slow cooker, you can make this recipe on the stove in a covered saucepan in 30 minutes, starting with cooked beans. Saute the veg and spices in the cooking pot, then add beans, optional tomatoes, and water to just cover the beans.

    Try adding other veggies, like carrots or bell peppers. Saute with the onion and garlic.

    Add a chopped up jalapeño or some cayenne to give your chickpeas a kick. Saute with onion, garlic and spices.

    Note: The actual time spent prepping or cooking is 10 - 15 minutes. The long soaking and cooking of dried chick peas, plus the slow cooker time, takes two days, but if you use canned chick peas, you can do a quick prep in the morning and eat in the evening. That's the beauty of slow cooking!

    Nutrition Data Per Serving, 113g: 180 cal, 24g carb, 7g fat, 399mg sodium, 7g fiber, 7g protein, low Saturated Fat & Cholesterol, good source Folate and Manganese. Estimated glycemic load 10

    Big Flavors Rating: 4 Stars
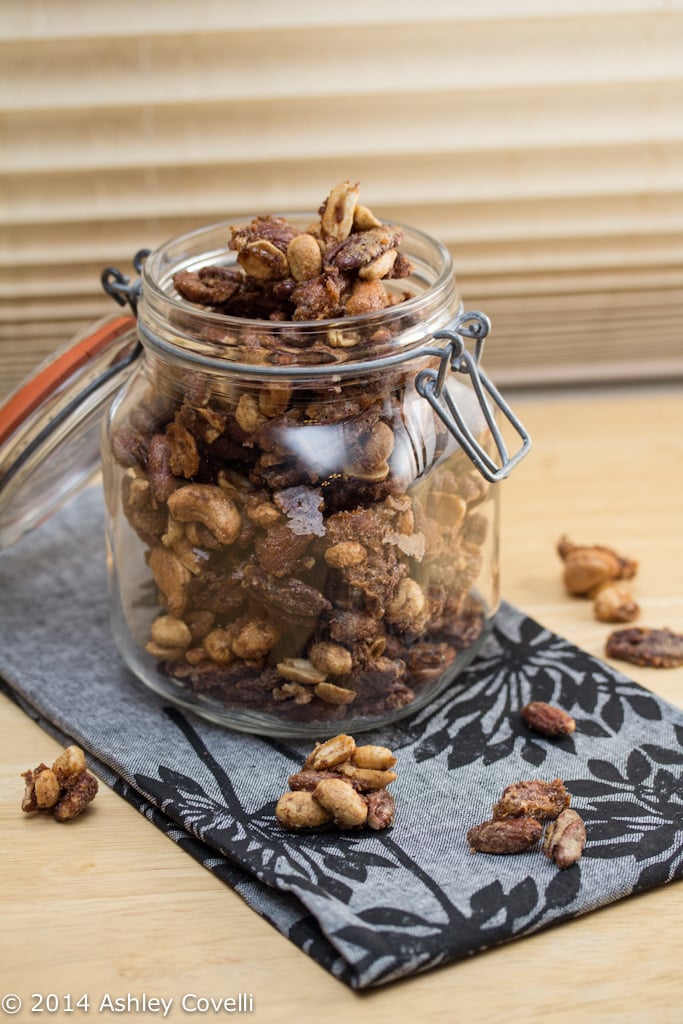
    Eggs and Toast with Bacon and Caramelized Onion Jam

    January 13, 2014 by Ashley Leave a Comment

    Eggs and Toast with Bacon and Caramelized Onion Jam

    I thought it would be fun to use some of my Bacon and Caramelized Onion Jam to make a breakfast dish (although I could eat the Bacon and Caramelized Onion Jam Naan Pizza with Gorgonzola and Apples at any time of day!), so I came up with this variation of eggs with toast and bacon.

    Eggs and Toast with Bacon and Caramelized Onion Jam

    I took a few slices of my No-Knead Crusty White Bread and toasted them in the oven. I topped them with a healthy smear of warmed Bacon and Caramelized Onion Jam, sunny side up eggs and some sliced green onions.

    I seasoned them with kosher salt, freshly cracked black pepper and some tomato powder.

    Eggs and Toast with Bacon and Caramelized Onion Jam

    The homemade bread really held up nicely to this dish. Nice and crusty and perfect for soaking up the runny egg yolk. Yum!

    Big Flavors Rating: 4 Stars

    Roasted Kabocha and Eggplant Tacos with Poblano Crema

    January 13, 2014 by Ashley 11 Comments

    A plate of Roasted Kabocha and Eggplant Tacos with Poblano Crema and lime wedges.

    There's no need to peel the squash for these vegetarian tacos - just scrub it clean! You can even save the seeds and roast them for a tasty snack later.

    Roasted Kabocha and Eggplant Tacos with Poblano Crema

    I was walking through the produce aisle with my son last week, and he was asking what the different kinds of squash were. When I saw kabocha, I told him I had never cooked with it before, so I decided to pick one up to use for week 11 of 12 Weeks of Winter Squash.

    And then, taco inspiration struck...

    Roasted Kabocha and Eggplant Tacos with Poblano Crema

    ...and it was absolutely delicious!

    The kabocha was nice and creamy, and the blend of spices worked out perfectly. I really liked slathering on the roasted poblano crema, which added a nice mild smoky flavor.

    We topped them with shredded cabbage, a little hot sauce (we like Cholula), and a squeeze of lime juice. I've never been so satisfied with a meat-free taco!

    I may or may not have eaten four of these beauties right off the bat. I will most definitely be making these again!

    Looking for more ways to celebrate Taco Tuesday? Check out some of our favorite recipes:

    • Roasted Sweet Potato and Black Bean Tacos with Cilantro Chimichurri
    • Slow Cooker Chipotle Pork Tacos with Avocado + Chipotle Cremas
    • Spiced Chickpea Tacos with Cilantro-Peach Relish
    • Our Favorite Chicken Fajitas
    • Tofu & Black Bean Taco Boats with Jicama Mango Salsa
    • Mandarin Chipotle Pork Tacos
    • Taco Salad with Homemade Chipotle Ranch Dressing
    • Margarita Bars
    • Mango, Jicama + Black Bean Salsa
    • Our Favorite Steak Fajitas
    • Tequila-Lime Shrimp Tacos
    • Power-Packed Tacos
    • Taco Salad
    • Slow Cooker Shredded Green Chile Chicken
    • Shredded Chicken Tacos
    • Tuna Tostada with Avocado Dressing + Chipotle Sour Cream

    Doing some online shopping? Check out my Amazon Shop page for recommendations!

    Recipe for Roasted Kabocha and Eggplant Tacos with Poblano Crema

    If you try out this recipe, please come back and give it a star rating and comment below. It helps other people find my recipes, and I'd love to know what you think of it!

    📖 Recipe

    Roasted Kabocha and Eggplant Tacos with Poblano Crema

    Roasted Kabocha and Eggplant Tacos with Poblano Crema
    There's no need to peel the squash for these vegetarian tacos - just scrub it clean! You can even save the seeds and roast them for a tasty snack later.
    Big Flavors from a Tiny Kitchen - Ashley Covelli
    No ratings yet
    Print Recipe Pin Recipe
    Servings: 4 -6
    Course: Tacos
    Cuisine: Mexican
    Prep Time 10 minutes mins
    Cook Time 35 minutes mins
    Total Time 45 minutes mins

    Ingredients
     

    For Poblano Crema:
    • 1 poblano pepper
    • 1 cup sour cream can substitute vegan, if desired
    • ⅓ cup cilantro chopped
    • 1 lime zested
    • 1 tablespoon lime juice
    • Kosher salt to taste
    For taco filling:
    • 1 kabocha squash cut into large dice (about 5 cups total)
    • 1 large eggplant cut into large dice (about 5 cups total)
    • 3 cloves garlic peeled and smashed
    • 4 tablespoons extra virgin olive oil
    • 1 ½ tablespoons dried oregano
    • 1 teaspoon paprika
    • 1 teaspoon ground cumin
    • Kosher salt and freshly cracked black pepper to taste
    For serving:
    • Corn tortillas warmed
    • Shredded cabbage or cole slaw mix
    • Lime wedges
    • Hot sauce optional

    Instructions
     

    1. Preheat broiler to high heat. Place poblano pepper on a broiler pan and cook, turning occasionally, until black and blistered all over. Remove from oven and place the pepper in a glass bowl. Cover bowl tightly with plastic wrap and set aside until cool.
    2. Reduce oven to 400°F. Place squash, eggplant and garlic in a large bowl. Drizzle oil on top and sprinkle on the oregano, paprika, cumin, salt and pepper. Toss well to combine and pour onto a large, rimmed baking sheet.
    3. Roast for 15 minutes, stir, and roast for another 10 minutes, or until all of the veggies are tender.
    4. While the veggies are roasting, make the crema. Remove the poblano from the bowl. Peel off the blistered skin and discard. Remove the stem and seeds and roughly chop the flesh. Place flesh into the bowl of a food processor along with sour cream, cilantro, lime zest and juice and a pinch of salt. Purée until smooth.
    5. To assemble the tacos, spread a little of the crema on warmed tortillas. Top with kabocha and eggplant mixture, some shredded cabbage, a drizzle of hot sauce and a squeeze of lime juice. Enjoy!

    Did you make this recipe?

    Leave a comment + star rating below to let people know how it was!

    Bacon and Caramelized Onion Jam Naan Pizza with Gorgonzola and Apples

    January 10, 2014 by Ashley 8 Comments

    Bacon and Caramelized Onion Jam Naan Pizza with Gorgonzola and Apples

    Guys... I think it finally happened. I came up with the tastiest thing to ever come out of my tiny kitchen.

    And you bet your you-know-what that it included a healthy smearing my Bacon and Caramelized Onion Jam.

    Bacon and Caramelized Onion Jam Naan Pizza with Gorgonzola and Apples

    And melty gorgonzola, because... do I really ever need a reason to throw cheese on something?

    Plus some apples and green onions, you know, to round it out and give it a fresh, crisp topping.

    It. Was. Perfection.

    Bacon and Caramelized Onion Jam Naan Pizza with Gorgonzola and Apples

    When I first got samples from Stonefire, this is what I dreamt up to make to try out their naan. It turned out even better than I had hoped - it was out of this world delicious! I don't think Dino or I spoke one word that wasn't just various groans of sweet, bacon-y, cheesy, food ecstasy until the entire pizza was gone.

    It was that good.

    Needless to say, I highly recommend you make this pizza. It would be a great dinner party appetizer, or, if you aren't into sharing, just inhale it while binge-watching shows on Netflix. I fully support you in your efforts.

    Psst - If you're looking for another fun way to enjoy bacon in a sweet-and-salty recipe, this ice cream-free peanut butter banana milkshake with bacon has tons of flavor!

    Bacon and Caramelized Onion Jam Naan Pizza with Gorgonzola and Apples

    📖 Recipe

    Bacon and Caramelized Onion Jam Naan Pizza with Gorgonzola and Apples

    Bacon and Caramelized Onion Jam Naan Pizza with Gorgonzola and Apples
    Big Flavors from a Tiny Kitchen - Ashley Covelli
    No ratings yet
    Print Recipe Pin Recipe
    Servings: 1
    Course: Pizza
    Cuisine: American
    Prep Time 5 minutes mins
    Cook Time 10 minutes mins
    Total Time 15 minutes mins

    Ingredients
     

    • 1 piece naan
    • ⅓ cup Bacon and Caramelized Onion Jam
    • 1 ½ tablespoons crumbled gorgonzola cheese
    • ¼ green apple thinly sliced
    • 1 green onion thinly sliced

    Instructions
     

    1. Preheat oven to 400°F.
    2. Place naan on a baking sheet. Spread bacon and caramelized onion jam all over the naan, leaving about half an inch all the way around the edges for the crust. Sprinkle gorgonzola over the jam. Bake until the cheese starts to melt and the edges of the naan get crispy, about 10 minutes.
    3. Remove from oven and sprinkle apples and green onions over top. Slice and serve. Enjoy!

    Did you make this recipe?

    Leave a comment + star rating below to let people know how it was!

    And now, for the giveaway! I reached out to my friends over at Stonefire and asked if they'd be willing to do a giveaway for my readers. Their bread is really, really tasty (you can see what I thought of the pita bread on my Falafel with Yogurt-Herb Sauce post) and all-natural. They've agreed to give FIVE coupons, each good for a free Stonefire product to a few lucky readers.

    First prize will be THREE coupons, and second prize will be TWO. To enter to win, leave a comment below telling me your favorite way to use either pita, naan or pizza crust at home. The contest will close on Friday, January 17, 2014 at 12 noon (Eastern Standard Time). Winners will be chosen via random.org and will be contacted via email to get mailing information. Good luck, everyone!

    UPDATE – The winners have been selected via random.org – CONGRATS to Brenda and Felice!

    Bacon and Caramelized Onion Jam

    January 9, 2014 by Ashley 3 Comments

    Bacon and Caramelized Onion Jam

    Spreadable bacon has got to be one of mankind's greatest innovations. I've taken it to the next level by lacing it with sweet, caramelized onions and maple syrup.

    Bacon and Caramelized Onion Jam

    Let's just say, the house smelled phenomenal while this jam was in the works. When I picked Dino up from the train station, he thought I smelled like meatloaf. I asked him, "Oh, do you mean BACON AND CARAMELIZED ONION JAM?" and he responded with a noise that was reminiscent of Homer Simpson drooling over donuts.

    This jam turned out way better than I had anticipated. It's the perfect balance of sweet and salty. I had big plans for using some of it with naan (post to come tomorrow!) and was glad to have enough leftover to eat it straight out of the jar be able to try out a few other things, too.

    This was a huge hit, and I highly recommend making it!

    Bacon and Caramelized Onion Jam

    Looking for recipes to use up your bacon jam? My Bacon and Caramelized Onion Jam Naan Pizza with Gorgonzola and Apples is a fantastic option!

    📖 Recipe

    Bacon and Caramelized Onion Jam

    Bacon and Caramelized Onion Jam
    Big Flavors from a Tiny Kitchen - Ashley Covelli
    No ratings yet
    Print Recipe Pin Recipe
    Course: Condiment
    Cuisine: American

    Ingredients
     

    • 8 ounces bacon I used hickory smoked, uncured from Applegate, chopped into ½-inch pieces
    • 1-3 tablespoons extra-virgin olive oil as needed
    • 2 ½ cups thinly sliced yellow onion about 4 medium
    • 3 cloves garlic minced
    • 2 tablespoons apple cider vinegar
    • 2 tablespoons pure maple syrup
    • ½ cup water divided
    • ¼ teaspoon Worcestershire sauce
    • Freshly cracked black pepper to taste

    Instructions
     

    1. Cook bacon in a large skillet over moderate heat. If your bacon isn't creating much fat and the skillet seems dry after a few minutes, add a tablespoon or so of olive oil. Once the bacon is crispy, use a slotted spoon to remove it to a small bowl, reserving drippings in the pan.
    2. Next, remove all but 2 tablespoons of bacon drippings from the pan. If you don't have 2 tablespoons left, add more oil to compensate. Place over medium-low heat, and add onions and garlic. Cook, stirring occasionally, until the onions are nice and caramelized and brown all over - give it about 20-30 minutes.
    3. Add the bacon back to the pan along with the vinegar, maple syrup, ¼ cup of water, Worcestershire sauce and pepper. Stir, making sure to scrape the bottom of the pan well to remove all of the browned bits. Cook until the liquid is almost completely absorbed, and add the remaining ¼ cup water. Once the liquid has almost fully cooked out, remove from heat. Place the contents of the pan into a food processor and pulse several times until it reaches a smooth yet slightly chunky consistency.

    Notes

    You can keep the jam in a glass container in the refrigerator for about a week, if it lasts that long! When using after refrigerating, it's best to heat it up for a few seconds in the microwave first, since the bacon fat hardens when chilled.

    Did you make this recipe?

    Leave a comment + star rating below to let people know how it was!

    Overnight Asparagus Mushroom Strata #KraftyCooking

    January 8, 2014 by Ashley 1 Comment

    Overnight Asparagus Mushroom Strata

    A nasty blizzard was headed our way, so I figured a breakfast casserole was in order. You know, because deliciously melty, cheesy breakfasts make everything better. Right?

    So I spent about 20 minutes before bedtime sautéing the mushrooms, toasting English muffins, and chopping veggies. I put everything together and popped the casserole into the fridge until morning.

    Overnight Asparagus Mushroom Strata

    I love that this casserole has the bread component in it already - no need to make toast to go with it! Do yourself a favor and toast all 5 muffins at once in the oven instead of in batches in the toaster. It makes it go much quicker.

    In the morning, all I did was take it out of the fridge, preheat the oven, make a big pot of coffee, top the casserole with more cheese, and pop it in the oven. The house smelled great while it was cooking!

    I really loved the mix of veggies and cheese in this casserole. Any blend of cheeses would be nice here - I ended up using a mix of Cracker Barrel Extra Sharp Cheddar and Baby Swiss.  I also used multi-grain English muffins, and they held up nicely - I was surprised that they weren't soggy after soaking all night!

    This is definitely the type of recipe that's easily adaptable to your family's tastes. It's great because it makes a lot, and I even popped a few pieces in the freezer to try reheating at a later date - I'll report back on how that works out.

    Overnight Asparagus Mushroom Strata

    Overnight Asparagus Mushroom Strata
    Allrecipes - Shandeen

    Prep: 25 min
    Cook: 45 min
    Ready In: 9 hr 15 min
    Makes: 8 Servings

    2 teaspoons butter, or as needed
    1 ¾ cups sliced crimini mushrooms
    5 English muffins, split and toasted
    1 cup shredded Colby-Monterey Jack cheese
    1 pound fresh asparagus, trimmed and cut into 1-inch pieces
    ½ cup chopped red bell pepper
    ½ onion, finely chopped
    8 eggs
    2 cups milk
    1 teaspoon salt
    1 teaspoon dry mustard powder
    ¼ teaspoon ground black pepper
    1 cup shredded Colby-Monterey Jack cheese

    Melt the butter in a skillet over medium heat, and cook and stir the mushrooms until their liquid has mostly evaporated and the mushrooms are beginning to brown, about 10 minutes. Set the mushrooms aside.

    Grease a 9x13 inch baking dish, and arrange 8 muffin halves, cut sides up, in the bottom of the dish. Stuff pieces of remaining muffins into the spaces between the halves. Spread 1 cup of Colby-Monterey Jack cheese over the muffins in a layer, and distribute the asparagus pieces, mushrooms, red pepper, and onion over the cheese.

    Whisk together eggs, milk, salt, dry mustard, and black pepper in a bowl, and pour the egg mixture over the muffins and vegetables. Cover the dish, and refrigerate overnight.

    The next day, preheat oven to 375 degrees F (190 degrees C).

    Remove the casserole from the refrigerator and let stand for 30 minutes. Spread 1 cup of Colby-Monterey Jack cheese in a layer over the casserole.

    Bake in the preheated oven until a knife inserted near the edge comes out clean, 40 to 45 minutes. Let stand 5 to 10 minutes before cutting into squares.

    Big Flavors Rating: 4 Stars

    Note: KraftyCooking is a joint effort by a lot of bloggers/cheese enthusiasts who enjoy Kraft products, including Cracker Barrel cheese. I was in no way compensated for this post. Cheese lovers, unite! 🙂

    Hearty, Restorative Vegetable Soup with Ditali

    January 7, 2014 by Ashley 1 Comment

    Hearty, Restorative Vegetable Soup with Ditali

    Back when we first met, my husband said he didn't like soup. I believe his exact words were, "...it tastes like someone took a perfectly good meal, and then threw hot water on it".

    Riiiiight.

    Not to be deterred, I went from only making things like my grandpa's beef stew and spicy, meaty, three bean chili to lighter soups on occasion. What can I say, I like proving him wrong encouraging him to enjoy new things.

    Hearty, Restorative Vegetable Soup with Ditali

    This soup is hearty and delicious, and full of nutrients. I wanted to load up on "good stuff" since we've been in the middle of a nasty streak of bad health in the house as of late. I love keeping chicken soup base on hand, because it adds such a rich, wonderful flavor to dishes. Plus, chicken soup is supposed to be great when you're sick, right? I"m sure this would also be good with vegetable soup base if you want to avoid animal products.

    I added pasta at the end for bulk, but also because my son loves eating pasta. Ditali worked really well here, but any small pasta would be fine. Of course, ditali lends itself nicely to being worn on toddler fingers, but that may or may not be a concern in your house 🙂

    📖 Recipe

    Hearty, Restorative Vegetable Soup with Ditali

    Hearty, Restorative Vegetable Soup with Ditali
    Big Flavors from a Tiny Kitchen - Ashley Covelli
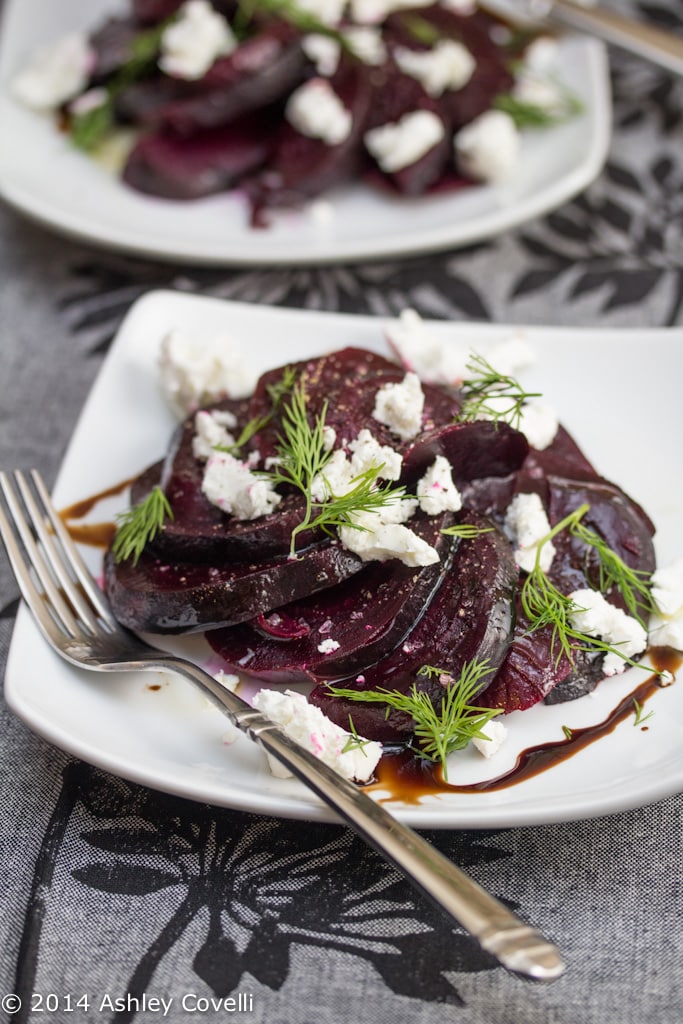
    No ratings yet

    Print Recipe Pin Recipe
    Course: Soups & Stews

    Ingredients
     

    • 2 tablespoons extra virgin olive oil
    • 3 cloves garlic minced
    • 2 medium yellow onions about 2 cups total, chopped
    • 3 large carrots chopped
    • 4-5 stalks celery about 2 cups total, chopped
    • Kosher salt and freshly cracked black pepper to taste
    • 2 cups sliced mushrooms
    • 2 cups grape tomatoes halved
    • 3 ½ tablespoons Penzeys Chicken Soup Base and Seasoning or vegetable, if preferred
    • 2 dried bay leaves
    • 1 tablespoon freshly grated ginger
    • 1 teaspoon dried thyme
    • 1 teaspoon dried marjoram
    • 1 teaspoon dried turmeric
    • 14 cups water
    • 2 cups tightly packed kale, roughly chopped
    • 2 cups frozen peas
    • 1 ½ cups ditali or other small pasta
    • ½ cup parsley chopped

    Instructions
     

    1. Heat oil in a large stock pot over moderate heat. Add garlic, onions, carrots and celery. Season with salt and pepper and sauté until the veggies begin to soften. Add mushrooms and tomatoes followed by the chicken soup base and stir well. Add bay leaves, ginger, thyme, marjoram and turmeric and stir well to combine. Add water and bring to a boil, stirring occasionally.
    2. Once water begins to boil, add kale and peas and stir to combine. Taste for seasoning and add more salt and pepper if needed. Reduce heat and allow the soup to simmer for 10 minutes, stirring occasionally.
    3. Bring soup up to a boil and add the pasta. Cook according to package directions. Once pasta is al dente, stir in parsley, do one last check for seasoning, adjusting if necessary, and serve.

    Did you make this recipe?

    Leave a comment + star rating below to let people know how it was!
    • « Previous Page
    • 1
    • …
    • 16
    • 17
    • 18
    • 19
    • 20
    • …
    • 35
    • Next Page »

    Hi, I'm Ashley and I’ve been writing about food & recipes here at Big Flavors from a Tiny Kitchen since 2006. I want to help you (yes, you!) gain confidence in the kitchen so you are excited to cook at home for yourself and your loved ones.
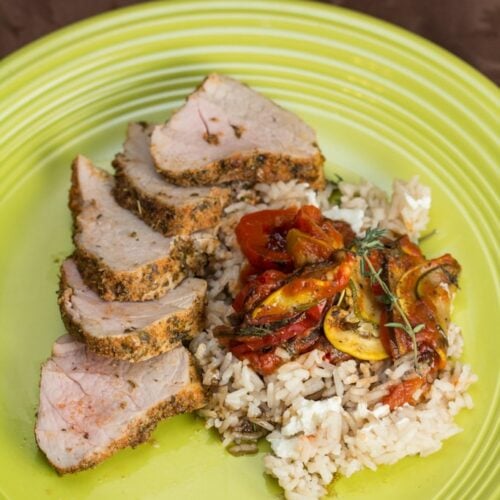
    More about me →

    Favorite Spring Recipes
    • Mayo-free Deviled Eggs
    • Middle Eastern Fattoush Salad with Homemade Pita Chips
    • Birthday Cake Confetti Pancakes with Sprinkles
    • Italian Cream Cheese and Ricotta Cheesecake
    • Garlicky Mushroom Ricotta Pizza with Wild Arugula + Aged Balsamic
    • Slow Cooker "Roasted" Beets
    • Honey Balsamic Roasted Carrots
    • Italian Ricotta Cookies
    • Rhubarb Custard Pie
    • Easy Instant Pot Herbed Potato Salad

    Mother's Day + Easter Brunch

    • Epic Brunch Board on a Budget
    • Baby Spinach and Cheddar Quiche Made with Fresh Spinach
    • Turkey Salad Tea Sandwiches with Dried Cherries
    • Great Grandma Maria Francesca Cardile's Italian Easter Cookies
    • Brie Waffle Bites
    • Challah French Toast
    • Creamsicle Smoothies
    • DM Bloody Mary
    • Turkey Scotch Eggs
    • The Herbalist

    Popular Now

    • Cast iron skillet full of chicken fajitas.
      Favorite Restaurant-Style Chicken Fajitas
    • Overhead view of spinach and cheddar quiche with forks.
      Baby Spinach and Cheddar Quiche Made with Fresh Spinach
    • Chicken and bell pepper stir-fry served over white rice.
      Chicken and Bell Pepper Stir-Fry
    • Serving dish of cooked shrimp garnished with chopped parsley.
      Quick and Easy Sautéed Shrimp
    • Overhead view of a dutch oven filled with sausages, peppers, and onions.
      Sausage and Peppers
    • Overhead view of assorted breakfast items displayed on a board.
      Epic Brunch Board on a Budget

    Footer

    ↑ back to top

    About

    • About Ashley
    • Press + Recognition
    • Events
    • Virtual Cooking Classes
    • Podcast
    • Contact
    • Privacy Policy

    Newsletter

    • Sign up to receive delicious recipes and exclusive content right to your inbox!

    As an Amazon Associate I earn from qualifying purchases at no added cost to you.

    ©2006–2026  BIG FLAVORS FROM A TINY KITCHEN LLC | ALL RIGHTS RESERVED

    *Third-party advertisers may collect or use non-personally identifiable information to serve you more relevant ads.

    Rate This Recipe

    Your vote:


    A rating is required
    A name is required
    An email is required