Big Flavors from a Tiny Kitchen

menu icon
go to homepage
  • Recipes
  • About
  • Events
  • Contact
  • Subscribe
    • Facebook
    • Instagram
    • Pinterest
  • subscribe
    search icon
    Homepage link
    • Recipes
    • About
    • Events
    • Contact
    • Subscribe
    • Facebook
    • Instagram
    • Pinterest
  • ×
    Home » Recipes

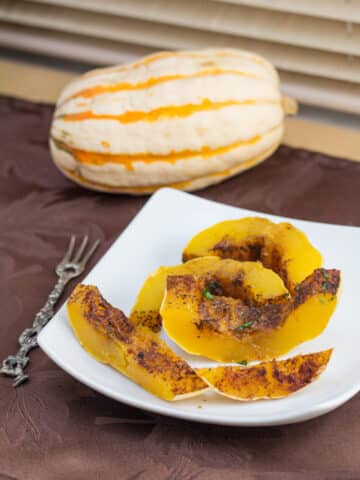
    Sweet and Spicy Baked Delicata Squash

    November 4, 2013 by Ashley 4 Comments

    Sweet and Spicy Baked Delicata Squash

    A few ingredients and a little time in the oven make for a simple and delicious way to use this creamy, dreamy winter squash.

    Have you tried delicata squash? When I saw these striped beauties at the Farmers Market, I just couldn't resist picking up a couple.

    This variety of squash is wonderful because you can eat the skin! Delicata has a wonderfully creamy texture, and the flavor is mild enough to take on any spice combination you can dream up.
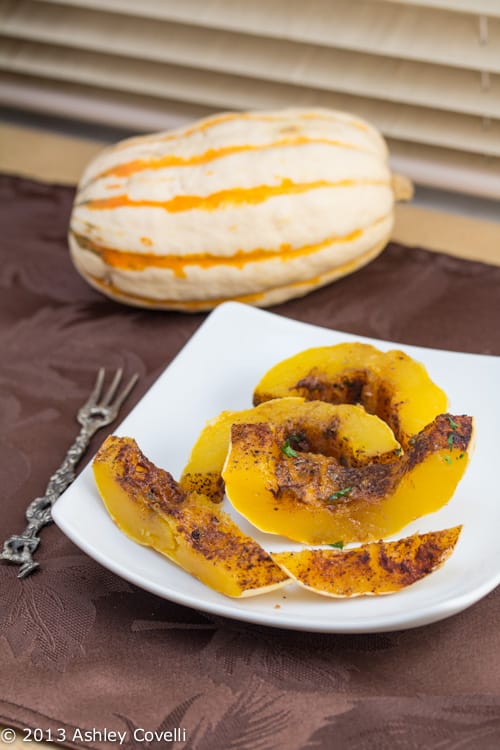
    Sweet and Spicy Baked Delicata Squash

    This recipe is really simple to put together, and was a hit at our dinner table.

    Sweet and spicy is one of my favorite flavor combinations. I served this on the side of these Crispy Lemon-Herb Turkey Cutlets.

    Enjoy!
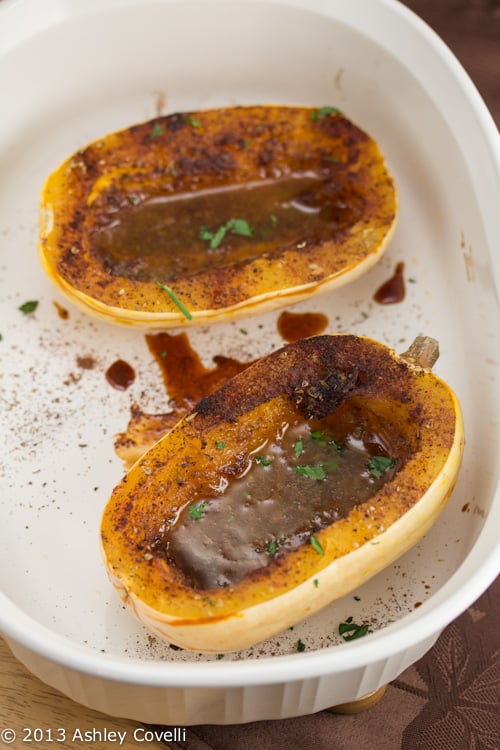
    Sweet and Spicy Baked Delicata Squash

    📖 Recipe

    Sweet and Spicy Baked Delicata Squash
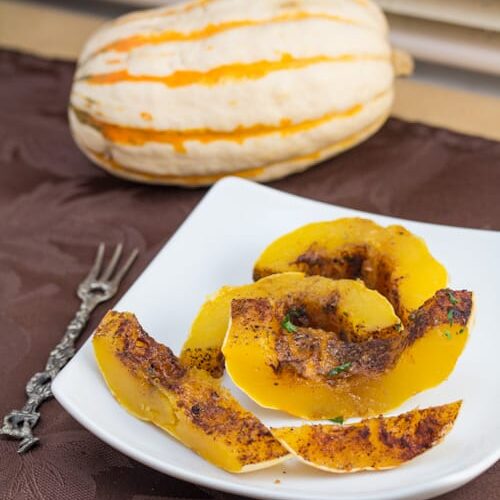
    Sweet and Spicy Baked Delicata Squash
    A few ingredients and a little time in the oven make for a simple and delicious way to use this creamy, dreamy winter squash.
    Big Flavors from a Tiny Kitchen - Ashley Covelli
    No ratings yet
    Print Recipe Pin Recipe
    Servings: 4 Servings
    Course: Side Dish
    Cuisine: American
    Prep Time 5 minutes mins
    Cook Time 45 minutes mins
    Total Time 50 minutes mins

    Ingredients
     

    • 1 delicata squash scrubbed clean
    • ¼ teaspoon ground cinnamon
    • ¼ teaspoon chili powder
    • ¼ teaspoon ground cumin
    • ¼ teaspoon dried oregano
    • 2 tablespoons butter or butter substitute, if vegan
    • 2 tablespoons honey or maple syrup, if vegan
    • Parsley chopped, for garnish (optional)

    Instructions
     

    1. Preheat oven to 375°F. Spray the bottom of a baking dish with cooking spray. Cut the squash in half lengthwise and scrape out the seeds.
    2. Place the squash halves in the baking dish, cut-side up. Sprinkle each half with cinnamon, chili powder, cumin and oregano (⅛ teaspoon on each half). Put a tablespoon of butter into each squash half and drizzle some honey over each half.
    3. Cover the baking dish with aluminum foil and bake until the squash is fork-tender (around 45 minutes, depending on the size of your squash).
    4. Carefully remove foil and take the squash out of the pan. Slice to serve.

    Did you make this recipe?

    Leave a comment + star rating below to let people know how it was!

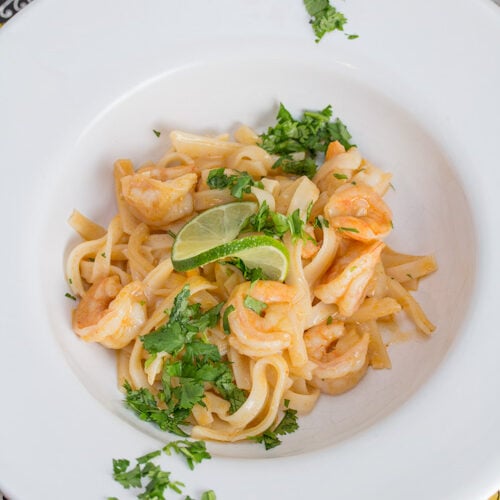
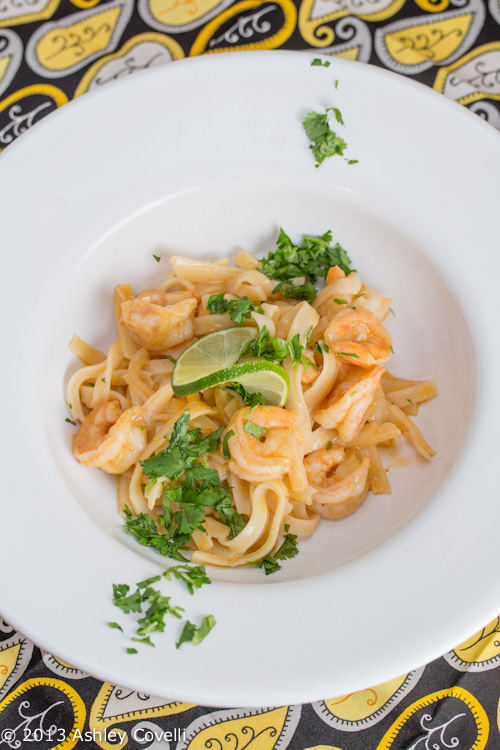
    Thai Shrimp “Alfredo”

    November 3, 2013 by Ashley Leave a Comment

    Thai Shrimp "Alfredo"

    This dish is a fun way to eat a typically heavy Italian pasta dish without the guilt! Plus it's dairy-free and gluten-free. I love Thai flavors, and they play together really well here.

    I had some cooked rice noodles leftover from when I made Pho last weekend, so I decided to try to put something together to use them up. I've really been working on getting better at using up leftovers and not being wasteful. It's not only better for our bank account, but it makes me have to be creative and sometimes, like tonight, it really pays off! I had some shrimp in the freezer, so I thought it would be fun to try out a Thai spin on Fettuccine Alfredo.

    My husband is lactose intolerant, so this was a nice, light, dairy-free, gluten-free version of a classically heavy pasta dish. It was pretty easy to put together, and it turned out awesome! The shrimp were tender and the noodles were coated in a creamy, sweet and subtly spicy sauce. You could definitely add more curry paste (or even some Sriracha at the end) to make this spicier. The brightness of fresh lime juice on top and sprinkling of cilantro really brought it together. I was really happy with how well this turned out - it will definitely be a go-to quick and easy weeknight dinner for us from now on!

    This time around, I used lite coconut milk, and I don't think it was quite as good as the first time I made it, but it's definitely healthier, so choose whatever you think is best for your family. We topped our servings with a little tamari and chile garlic sauce, and it really added a nice bit of heat at the end. You could always use more curry paste, too, but I wanted to keep it mild enough for my son to be able to enjoy it.

    Thai Shrimp "Alfredo"

    📖 Recipe

    Thai Shrimp "Alfredo"

    Thai Shrimp "Alfredo"
    Big Flavors from a Tiny Kitchen - Ashley Covelli
    No ratings yet
    Print Recipe Pin Recipe

    Ingredients
     

    • 2 tablespoons vegetable oil
    • 2 cloves garlic minced
    • ½ small yellow onion thinly sliced (about 2 tablespoons)
    • 1 tablespoon red curry paste
    • 1 teaspoon fish sauce
    • 1 tablespoon low sodium soy sauce*
    • 1 tablespoon freshly squeezed lime juice
    • 1 pound large shrimp peeled and deveined
    • 13.5 ounce can unsweetened coconut milk
    • ½ pound cooked rice noodles
    • Kosher salt to taste
    • Cilantro chopped, for garnish
    • Lime wedges for garnish

    Instructions
     

    1. Heat oil in a large nonstick skillet over medium heat. Add garlic and onion and sauté until fragrant. Add curry paste, fish sauce, soy sauce and lime juice and cook until the curry paste softens fully and coats the garlic and onion.
    2. Add shrimp and sauté until they are almost cooked through. Pour in coconut milk and stir. Add noodles and continue to cook, stirring occasionally, until the shrimp is fully cooked and the sauce and noodles are heated through.
    3. Season with salt and serve with cilantro and lime on top.

    Notes

    *Optional: use Gluten Free

    Did you make this recipe?

    Leave a comment + star rating below to let people know how it was!

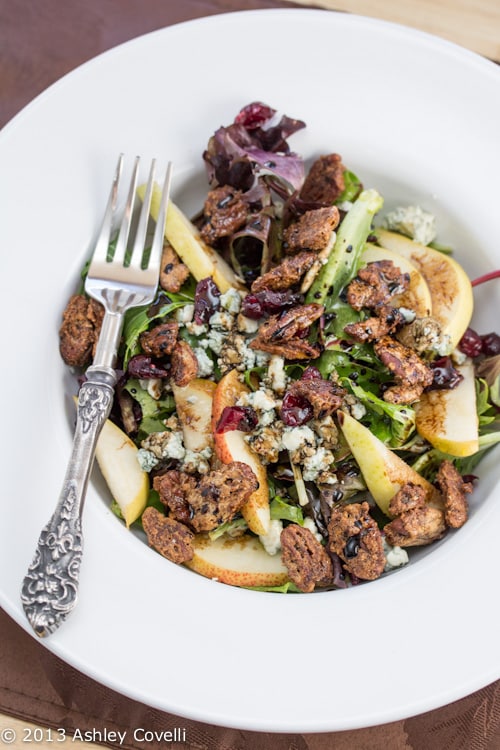
    Chipotle Chile Candied Pecan, Dried Cranberry, and Crumbled Blue Cheese Salad

    October 31, 2013 by Ashley 1 Comment

    Chipotle Chile Candied Pecan, Dried Cranberry, and Crumbled Blue Cheese Salad

    If you can manage to save a handful of these awesome Chipotle Chile Candied Pecans, this is the perfect way to use them. This salad has everything that I love, all in one place! Crisp apples or pears, creamy blue cheese, tangy aged balsamic, sweet dried cranberries and a generous sprinkle of these highly addictive candied pecans. I absolutely love this salad, and if I hadn't stress-eaten snacked on the rest of the batch of pecans already, I would have had this for lunch all week!

    Chipotle Chile Candied Pecan, Dried Cranberry, and Crumbled Blue Cheese Salad

    Chipotle Chile Candied Pecan, Dried Cranberry, and Crumbled Blue Cheese Salad
    Gifts Cooks Love - Sur La Table

    Combine a handful of these candied pecans, along with ¼ cup of sweetened dried cranberries and ½ cup blue cheese, with 8 cups of loosely packed mesclun greens. Toss with your favorite vinaigrette and serve Add thin slices of crisp apples or ripe pears, if desired.

    Big Flavors Rating: 5 Stars

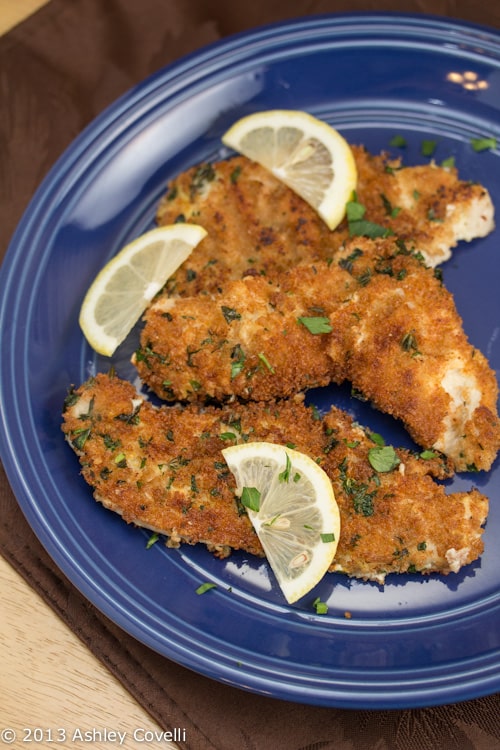
    Crispy Lemon-Herb Turkey Cutlets

    October 28, 2013 by Ashley 3 Comments

    Crispy Lemon-Herb Turkey Cutlets

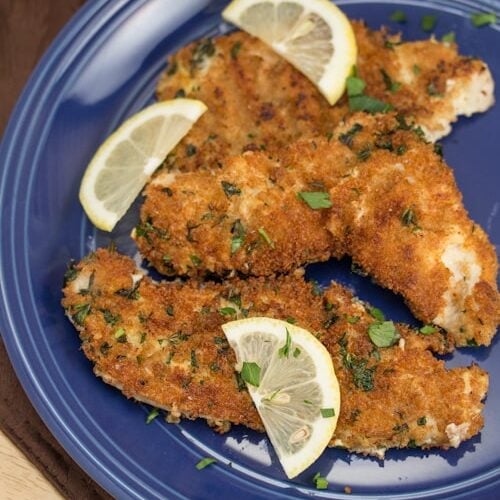
    Whole wheat panko adds crunch to these citrus and herb-studded cutlets.

    Crispy Lemon-Herb Turkey Cutlets

    Usually, when I'm cooking with turkey, it's ground turkey. I can't always find cutlets, so when I saw them at the store this week, I figured I'd do something simple with them for dinner one night. This was a quick way to enjoy turkey with a crispy panko coating that was studded with lemon zest and fresh herbs. Sage would also be great here. The squeeze of lemon on top at the end is key, so don't leave that out!

    📖 Recipe

    Crispy Lemon-Herb Turkey Cutlets

    Crispy Lemon-Herb Turkey Cutlets
    Whole wheat panko adds crunch to these citrus and herb-studded cutlets.
    Big Flavors from a Tiny Kitchen - Ashley Covelli
    No ratings yet
    Print Recipe Pin Recipe
    Servings: 4 Servings
    Course: Main Course
    Cuisine: Italian
    Prep Time 10 minutes mins
    Cook Time 10 minutes mins
    Total Time 20 minutes mins

    Ingredients
     

    • 4 turkey breast cutlets
    • ½ cup whole wheat panko breadcrumbs
    • 1 lemon zested and then cut into wedges
    • 1 tablespoon parsley chopped
    • 4 sprigs thyme leaves stripped
    • ½ cup flour
    • ¼ teaspoon garlic powder
    • Kosher salt and freshly cracked black pepper to taste
    • 1 egg
    • 2-4 tablespoons olive oil

    Instructions
     

    1. Take the turkey cutlets out of the fridge for a few minutes to take the chill off. Set up 3 shallow dishes. In the first, put the flour, garlic powder, salt and pepper. In the next, whisk the egg with a splash of water. In the third, mix the panko, lemon zest, parsley and thyme.
    2. Heat oil in a large, non-stick skillet over moderate heat. Pat the turkey cutlets dry with a paper towel. Take a cutlet and coat both sides in the flour mixture. Shake off any excess, and then dip it into the egg to coat. Again, shake off any excess. Press cutlet down into the panko mixture and coat well. Repeat with remaining cutlets.
    3. Fry each cutlet in the heated oil until crispy and nicely browned on both sides, and the meat is cooked through. Remove to a paper towel lined plate to soak up any excess oil. Sprinkle with a little more salt while still hot. Serve, squeezing a lemon wedge over the top of each cutlet before digging in. Enjoy!

    Did you make this recipe?

    Leave a comment + star rating below to let people know how it was!

    Chipotle Chile Candied Pecans

    October 28, 2013 by Ashley 1 Comment

    Chipotle Chile Candied Pecans

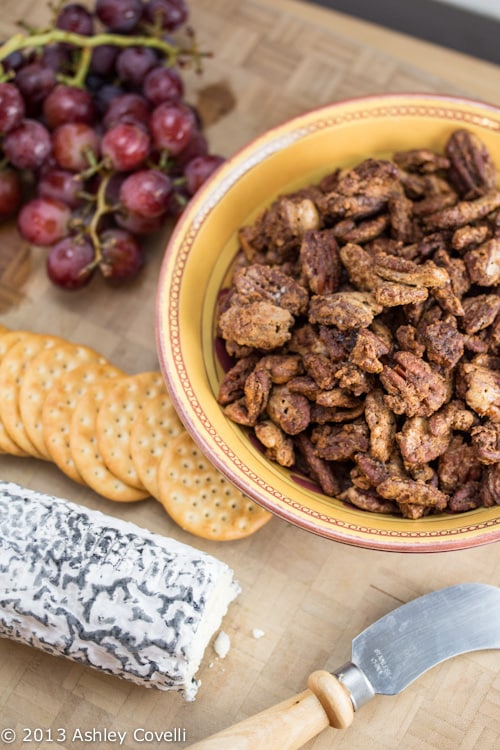
    It takes quite a bit of effort to make a batch of these beauties, which is probably a good thing, or I would have made them more than one other time. Seriously... these will disappear so quickly! These candied pecans are the perfect snack food - they're sweet, spicy, salty and crunchy. They're great on their own, on a cheese platter or in the salad recommended below. They aren't too spicy, but they definitely have a kick. My toddler wanted to try one, so I let him eat a tiny piece, and he kept saying, "more cookie!!" - ha! I once again lined my cookie sheet with a Silpat, which made things easier, but it's pretty messy to clean up. Totally worth it though.

    Chipotle Chile Candied Pecans

    Chipotle Chile Candied Pecans
    Gifts Cooks Love - Sur La Table

    Prep Time: 20 minutes
    Active Bake Time: about 1 ¼ hours, stirring every 15 minutes
    Makes 1 pound nuts, portioned into four (¼-pound) packages

    ½ cup (1 stick) unsalted butter
    1 teaspoon ground chipotle chile powder
    1 cup packed light brown sugar
    1 teaspoon pure vanilla extract
    2 large egg whites, at room temperature
    ¾ teaspoon kosher or sea salt
    1 pound large or jumbo pecan halves

    Large Rimmed Nonstick Baking Sheet, Measuring Cups and Spoons, Small Bowl, Stand Mixer with Whip Attachment or Hand Mixer, Rubber Spatula

    1. Position a rack in the center of the oven. Preheat the oven to 300°F. Have ready a large rimmed baking sheet, preferably nonstick for easier cleanup.

    2. Melt the butter on the baking sheet in the oven. Be careful not to let the butter brown. Set aside.

    3. Combine the chile powder and brown sugar in a small bowl. Pour the vanilla over the brown sugar. Set aside.

    4. In the bowl of a stand mixer fitted with the whisk attachment, beat the egg whites on medium speed until foamy. Add ¼ teaspoon of salt and beat on medium-high speed until soft peaks form. Add the sugar mixture 2 tablespoons at a time, beating on high speed to form a strong, shiny meringue. Remove the bowl from the mixer and use a rubber spatula to gently fold in the nuts until they are well coated.

    5. Gently tip the rimmed baking sheet so the butter coats the bottom of the pan. Using a rubber spatula, spread the nuts over the butter, without stirring, to form an even layer without deflating the meringue.

    6. Bake the nuts for 20 minutes. Remove them from the oven and stir the nuts with a spatula, moving the nuts at the center of the pan to the edges and the nuts at the edges closer to the center. Return the pan to the oven, bake the nuts for 15 minutes longer, and stir them again. Sprinkle the nuts with the remaining ½ teaspoon of salt.

    7. Continue baking, stirring every 15 minutes, until the nuts are separated, have absorbed all the butter and glisten, and are beautifully browned, 45 minutes to 1 hour longer.

    8. Immediately turn the nuts out onto a counter lined with a long sheet of aluminum foil, spread them out, and let cool completely.

    Recipe card: Create a card to package with gift

    Chipotle Chie Candied Pecan, Dried Cranberry, and Crumbled Blue Cheese Salad
    Combine a handful of these candied pecans, along with ¼ cup of sweetened dried cranberries and ½ cup blue cheese, with 8 cups of loosely packed mesclun greens. Toss with your favorite vinaigrette and serve Add thin slices of crisp apples or ripe pears, if desired.

    Storing: Store in a tightly covered tin or covered glass container. The nuts will keep for up to 3 weeks.

    Chipotle Chile Candied Pecan, Dried Cranberry, and Crumbled Blue Cheese Salad

    Big Flavors Rating: 5 Stars

    Roasted Roach Dip (Walnut Dip with Garlic)

    October 27, 2013 by Ashley 1 Comment

    Roasted Roach Dip (Walnut Dip with Garlic)

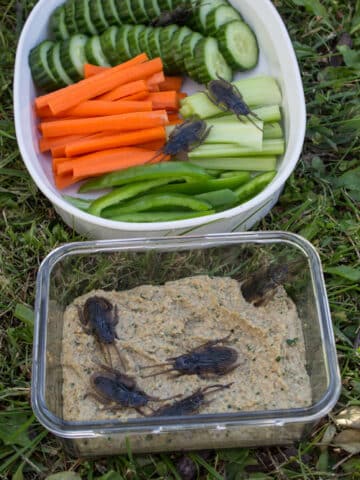
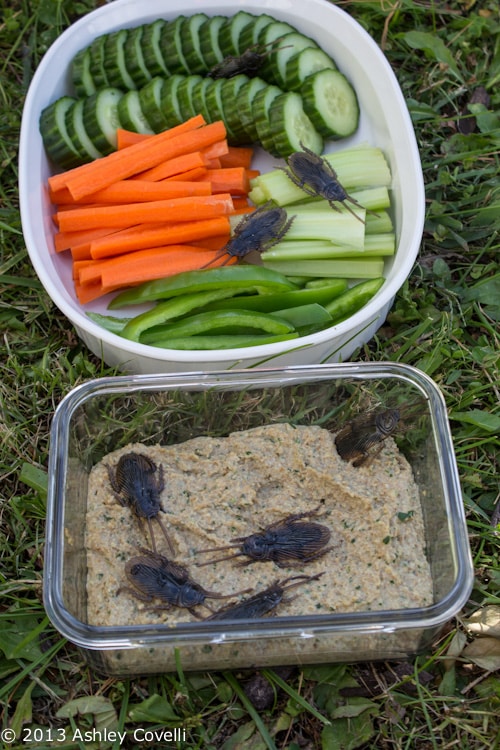
    Our second offering for the Halloween themed Supper Club get together was this dip, which tasted really great! This was a really fun way to do something gross for Halloween. Who knew bugs could taste so good? 😉 It was nice and garlicky (go lighter on the garlic if you aren't a big fan), and kind of reminded us of Muhammara. According to the site I found this on, it gets darker (thus, more "cockroachy") the longer it sits in the fridge. I found the plastic cockroaches at the dollar store, and they were a HUGE hit! The kids had a blast playing with them, sneaking them onto people's plates, etc. It felt funny labeling this as "vegan", but really... no bugs were harmed in the making of this dip.

    Roasted Roach Dip (Walnut Dip with Garlic)

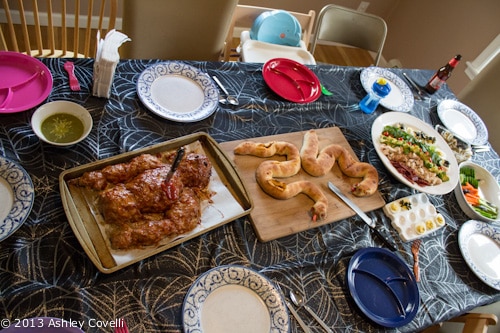
    Here's a shot of the whole table from our gathering. Lots of creepy goodies!

    Halloween Supper Club Table

    Roasted Roach Dip (Walnut Dip with Garlic)
    Divine Dinner Party

    Ingredients:
    3 slices of whole wheat bread, well toasted
    ¼ C. walnut pieces
    4 cloves of garlic, coarsely chopped
    2 tbsp. freshly squeezed lemon juice
    1 tbsp. extra virgin olive oil
    ¾ C. water
    2 tbsp. fresh parsley, chopped
    salt and pepper, to taste

    Instructions: 1. In food processor (or by hand), crumble the toast into fine crumbs.

    2. In food processor or blender, combine walnuts, garlic, and crumbs until all is finely ground.

    3. Add lemon, oil, and parsley. Process until smooth. Add water as needed until desired consistency.

    4. Add salt and pepper to taste.

    5. This is one of those gross recipes for Halloween that's easy to make ahead of time. As it sits in the fridge, it gets a little darker-- a good thing for cockroach puree. The parsley may darken a bit and begin to look like bits of "cockroach skin".

    6. Serve up in a bowl labeled "Cockroach Puree," "Roasted Roach Dip," etc.

    Big Flavors Rating: 4 Stars

    Vampire and Zombie Pumpkin Cake Doughnuts

    October 27, 2013 by Ashley 3 Comments

    Vampire and Zombie Pumpkin Cake Doughnuts

    Vampire and Zombie Pumpkin Cake Doughnuts

    Halloween is almost here, and for this month's Supper Club dinner, our theme was Spooky Food. I found this recipe for baked pumpkin donuts and decided to turn them into vampires and zombies with some fake teeth from the dollar store and gel icing. They were a HUGE hit with the kids AND grown-ups.

    Vampire Pumpkin Cake Doughnuts

    I only have one donut pan, and this ended up making 22 donuts for me instead of 12, which was awesome, but it took forever! The donuts themselves were very easy to put together, and they were nice and moist and pumpkin-y. I used some of the homemade Pumpkin Pie Spice that I had in the kitchen, which worked out perfectly. Happy Halloween, everyone!

    Zombie Pumpkin Cake Doughnuts

    Pumpkin Cake Doughnuts
    King Arthur Flour

    Hands-on time: 15 mins. to 20 mins.
    Baking time: 15 mins. to 18 mins.
    Total time: 30 mins. to 38 mins.

    Doughnuts:
    ½ cup vegetable oil
    3 large eggs
    1 ½ cups granulated sugar
    1 ½ cups pumpkin purée (canned pumpkin)
    1 ½ teaspoons pumpkin pie spice, or ¾ teaspoon ground cinnamon plus heaping ¼ teaspoon each ground nutmeg and ground ginger
    1 ½ teaspoons salt
    1 ½ teaspoons baking powder
    1 ¾ cups + 2 tablespoons King Arthur Unbleached All-Purpose Flour*
    *See tips, below, to substitute King Arthur Unbleached Self-Rising Flour.

    Coating:
    3 tablespoons cinnamon-sugar

    1) Preheat the oven to 350°F. Lightly grease two standard doughnut pans. If you don't have doughnut pans, you can bake these in a standard muffin tin; they just won't be doughnuts.

    2) Beat together the oil, eggs, sugar, pumpkin, spices, salt, and baking powder until smooth.

    3) Add the flour, stirring just until smooth.

    4) Fill the wells of the doughnut pans about ¾ full; use a scant ¼ cup of batter in each well. If you're making muffins, fill each well about ¾ full; the recipe makes about 15, so you'll need to bake in two batches (unless you have two muffin pans).

    5) Bake the doughnuts for 15 to 18 minutes, or until a cake tester inserted into the center of one comes out clean. If you're making muffins, they'll need to bake for 23 to 25 minutes.

    6) Remove the doughnuts from the oven, and after about 5 minutes, loosen their edges, and transfer them to a rack to cool.

    7) While the doughnuts are still warm (but no longer fragile), gently shake them in a bag with the cinnamon-sugar. If you've made muffins, sprinkle their tops heavily with cinnamon-sugar.

    8) Cool completely, and store (not wrapped tight) at room temperature for several days.

    Yield: 12 doughnuts or 15 muffins.

    Tips from our bakers:
    Want to make these doughnuts with King Arthur Unbleached Self-Rising Flour? Reduce the salt to ½ teaspoon; omit the baking powder, and substitute 2 cups (8 ounces) self-rising flour for the all-purpose flour. Bake the doughnuts for about 18 minutes.

    Don't wrap leftover doughnuts tightly in plastic; they'll become soggy. If you're not going to consume all of the doughnuts at one sitting, add the final coating of cinnamon-sugar only to those you'll eat; store the rest, without their sugar, on a plate covered with a cake cover; or in a plastic bag that's not fastened shut. Add cinnamon-sugar coating just before serving.

    Big Flavors Rating: 4 Stars

    Lobster Etouffee

    October 22, 2013 by Ashley 3 Comments

    Lobster Etouffee

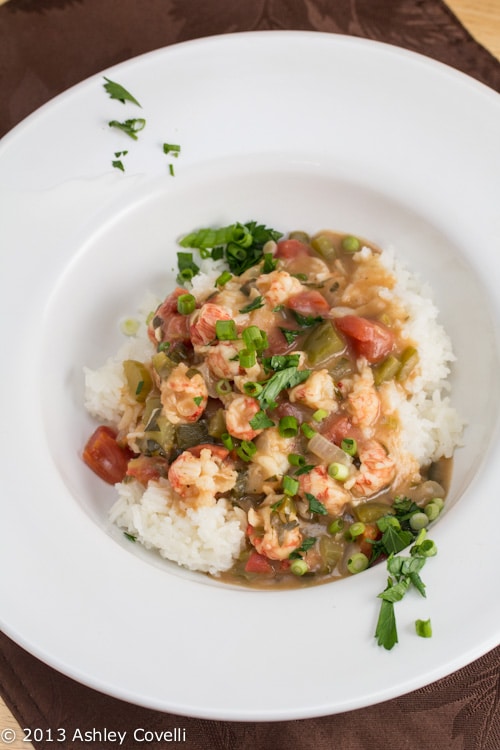
    I picked up a bag of frozen langostinos a few weeks ago, and wasn't exactly sure what I was going to do with them. I was going to do a scampi type dish, but then I came across this recipe over on Foodiecrush. It takes some time, but it's so worth it. The roux takes a bit to get nice color, and it's key to make sure you get it to that point to ensure great flavor in the final dish. I wasn't clear if the bay leaves in the ingredients were supposed to go into the pot with everything, or if they were for the rice (she mentions that she served it over rice that had been cooked with 2 bay leaves in the water for extra flavor), so I just put them in with the rice. This was a nice, warm, spicy bowl of comfort food that really hit the spot on a chilly autumn evening. I need to try cooking Cajun food more often!

    Lobster Etouffee

    Lobster Etouffee
    Foodiecrush (adapted from Paula Deen and Emeril Lagassee)

    ¼ cup oil
    ¼ cup butter plus 4 tablespoons butter reserved
    ½ cup flour, plus extra flour as needed to form a paste
    1 ½ cup chopped yellow onion
    1 cup chopped celery
    ½ cup chopped green bell pepper
    3 garlic cloves, minced
    2 bay leaves
    ½ teaspoon black pepper
    ½ teaspoon white pepper
    ½ teaspoon cayenne pepper or to taste
    1 teaspoon Cajun seasoning or to taste
    3-5 dashes hot sauce or to taste
    1 8-ounce jar clam juice
    1 14.5-ounce can diced tomatoes
    3 cups chicken stock
    1 teaspoon salt
    1 pound or 4 cups langostinos (can substitute crawfish or shrimp)
    ½ cup minced green onions, plus extra for garnish
    ½ cup minced fresh parsley leaves

    1. To make the roux, melt butter with oil in a large heavy saucepan over low heat. Whisk flour into the oil to form a paste and cooking over low heat and whisk continuously, until the mixture turns a caramel color and gives off a nutty aroma, about 15 to 20 minutes.

    2. Add the onion, green pepper, celery, and garlic and cook over low heat until the vegetables are limp, about 5 minutes.

    3. Add the black pepper, white pepper, cayenne pepper, Cajun seasoning, green onions, parsley, and hot sauce to taste. Add clam juice, chicken broth, tomatoes with their juice and salt to taste. Bring to a boil, reduce the heat to low and simmer for 10 to 15 minutes until mixture thickens.

    4. Add lobster meat and cook for 3-5 minutes careful not to overcook. Remove from heat and add the 4 tablespoons reserved butter and stir to melt. Garnish with the green onions, parsley and serve over steamed rice.

    Big Flavors Rating: 4 Stars

    Muhammara - Roasted Red Pepper Dip

    October 19, 2013 by Ashley 3 Comments

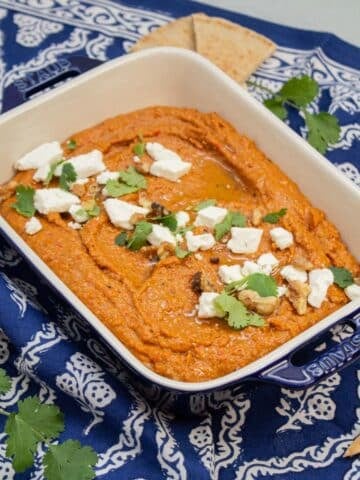
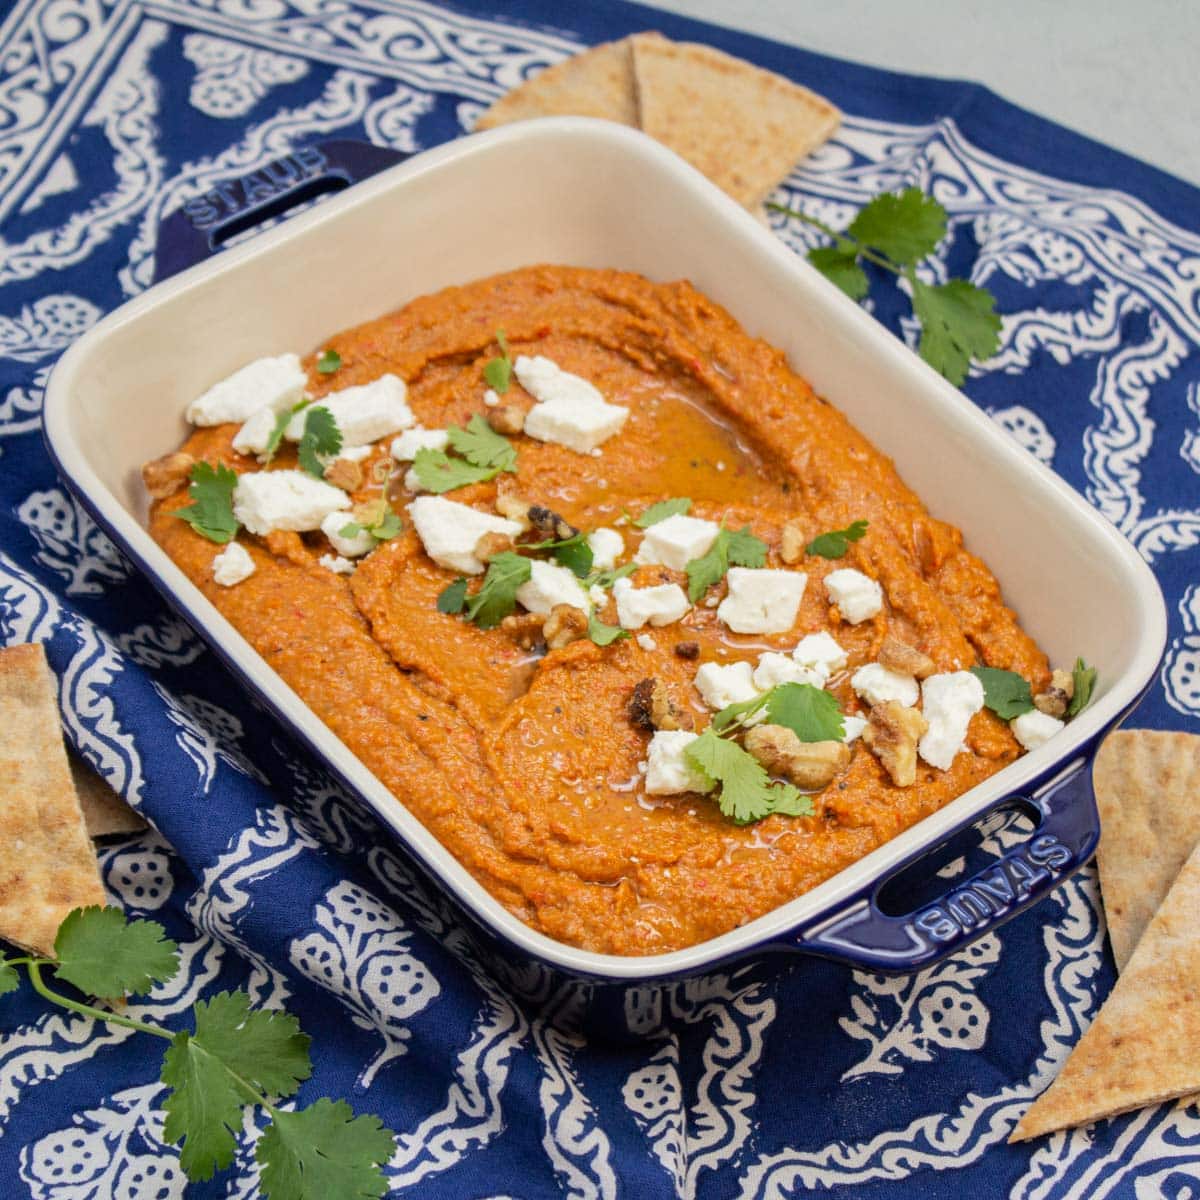
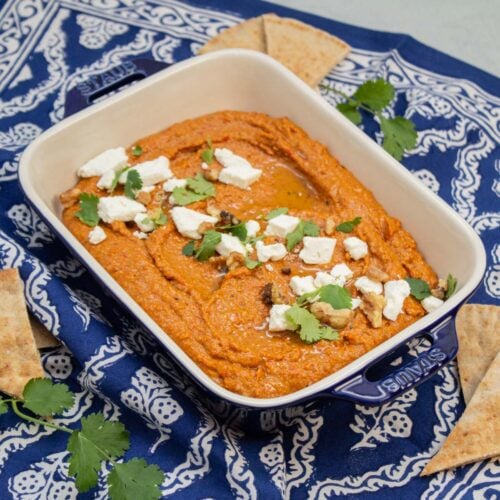
    Muhammara garnished with feta cheese, cilantro, and walnuts with pita bread alongside.

    This garlicky Middle Eastern roasted red pepper dip is made with walnuts, breadcrumbs, and pomegranate molasses for a big flavor payoff with only a handful of ingredients. It makes a vibrant, flavorful addition to any appetizer spread served with pita bread for dipping.

    Muhammara garnished with feta cheese, cilantro, and walnuts with pita bread alongside.

    I've been making this tasty dip for well over a decade now. It's a nice way to change up your traditional dip selection (not that I don't love a good homemade hummus or layered taco dip) and add a pop of color to your table.

    Whether you're serving this as part of a Middle Eastern dinner spread, an addition to a selection of game day appetizers, or just on its own as a snack, this recipe has you covered!

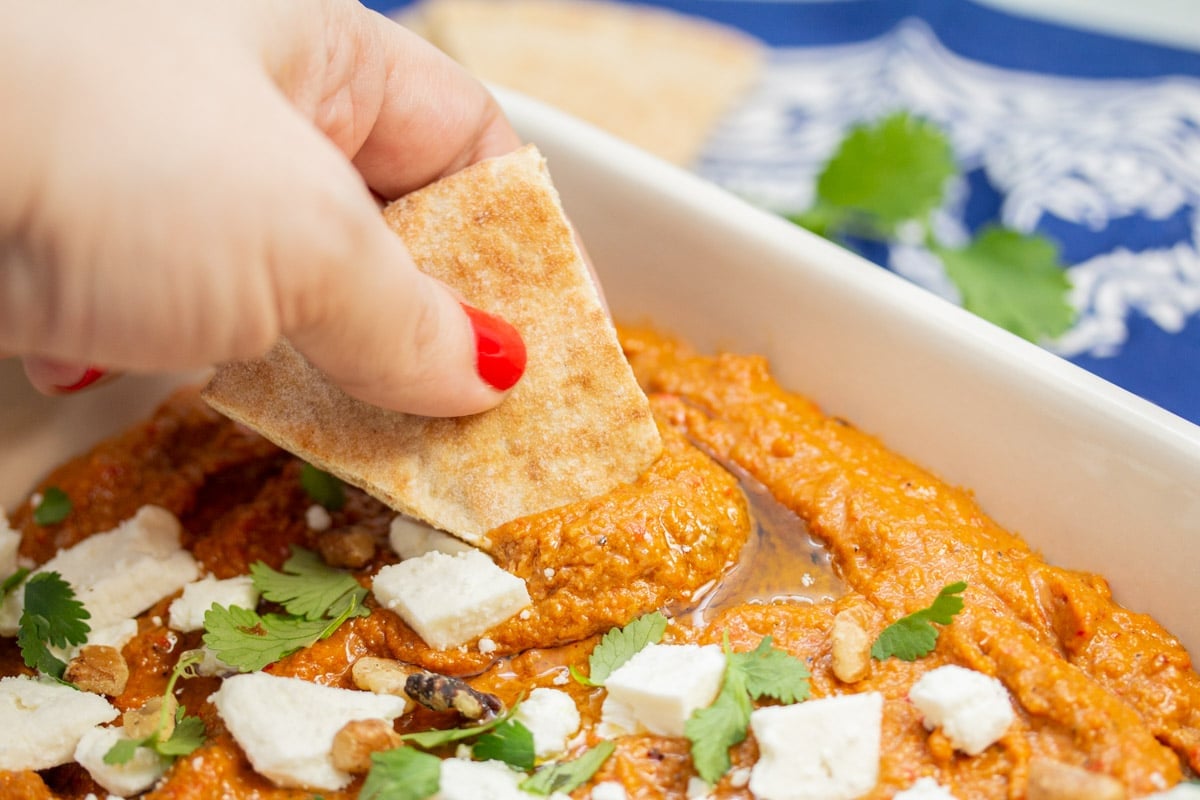
    Scooping muhammara from a serving dish with a piece of pita bread.
    [feast_advanced_jump_to]

    🧡 Why we love this recipe

    • Just look at that vibrant color!
    • It's different from a lot of traditional dips that are served at parties.
    • You can easily adjust the amount of garlic to give it more or less of a "kick".
    • It's easy to make in advance - just be sure to bring it down to room temperature before serving so it's nice and smooth.

    📝 Ingredients

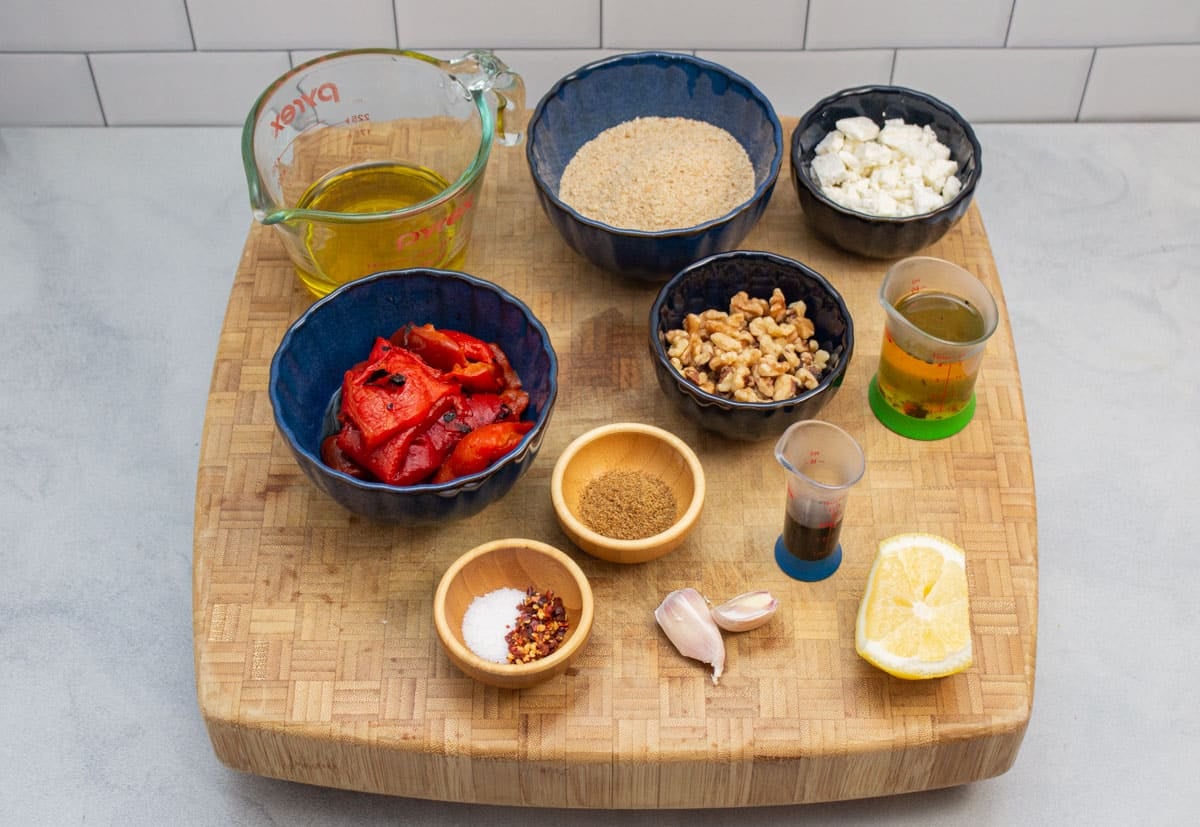
    Here's everything you need to make this muhammara dip (see recipe card below for ingredient amounts and full directions):

    Ingredients ready to make muhammara (a Middle Eastern roasted red pepper dip).
    • Garlic - use anywhere from 2 - 4 cloves!
    • Kosher salt - you'll smash this with the garlic to make a paste
    • Jarred roasted red peppers - both the peppers and some of the liquid from the jar will go into this dip
    • Breadcrumbs
    • Walnuts - feel free to toast them if you'd like. I've made it both ways and don't find that it makes a significant difference.
    • Fresh lemon juice
    • Pomegranate molasses
    • Ground cumin
    • Dried red pepper flakes
    • Extra-virgin olive oil - this goes both in the dip and optionally on top for garnish
    • Garnish suggestions - mix and match your favorites:
      • Crumbled feta (omit to keep this vegan)
      • Chopped walnuts
      • Fresh cilantro or parsley
      • Pomegranate arils
    • Pita triangles or flatbread for serving

    ♥️ Ingredient spotlight: pomegranate molasses

    This recipe uses pomegranate molasses which is a bottled thick, tangy, reduced pomegranate juice. Some brands sell a pomegranate syrup that's also able to be used in this recipe. Don't use grenadine, which is a thinner, sweeter product used in beverages, most famously the Shirley Temple.

    Pomegranate molasses can sometimes be tricky to find in grocery stores in the U.S. but it's readily available at Middle Eastern markets, many health food stores, or online.

    I love using pomegranate molasses to add a richness of flavor to muhammara (roasted red pepper dip), mixed into yogurt for a pop of tartness, or as a way to boost the pomegranate tomato jam in Persian lamb burgers.

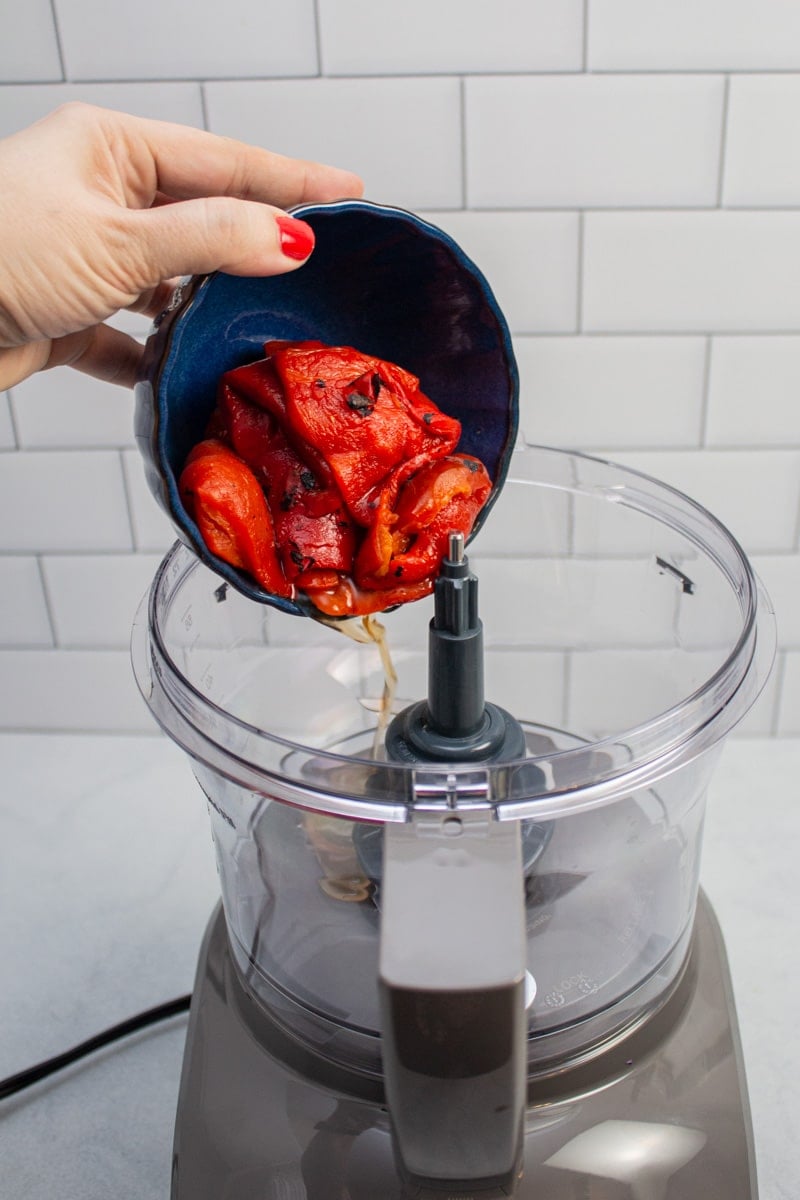
    Adding roasted red peppers to a food processor to make muhammara.
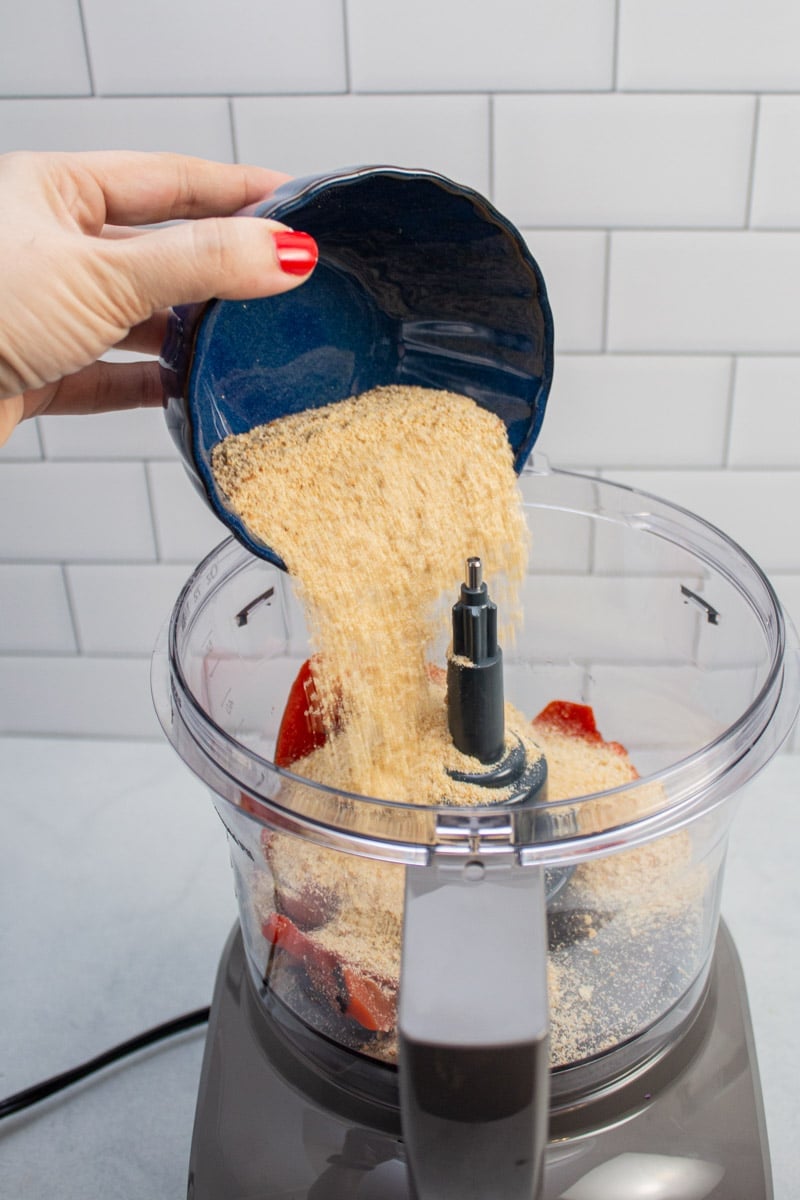
    Adding breadcrumbs to a food processor with roasted red peppers.
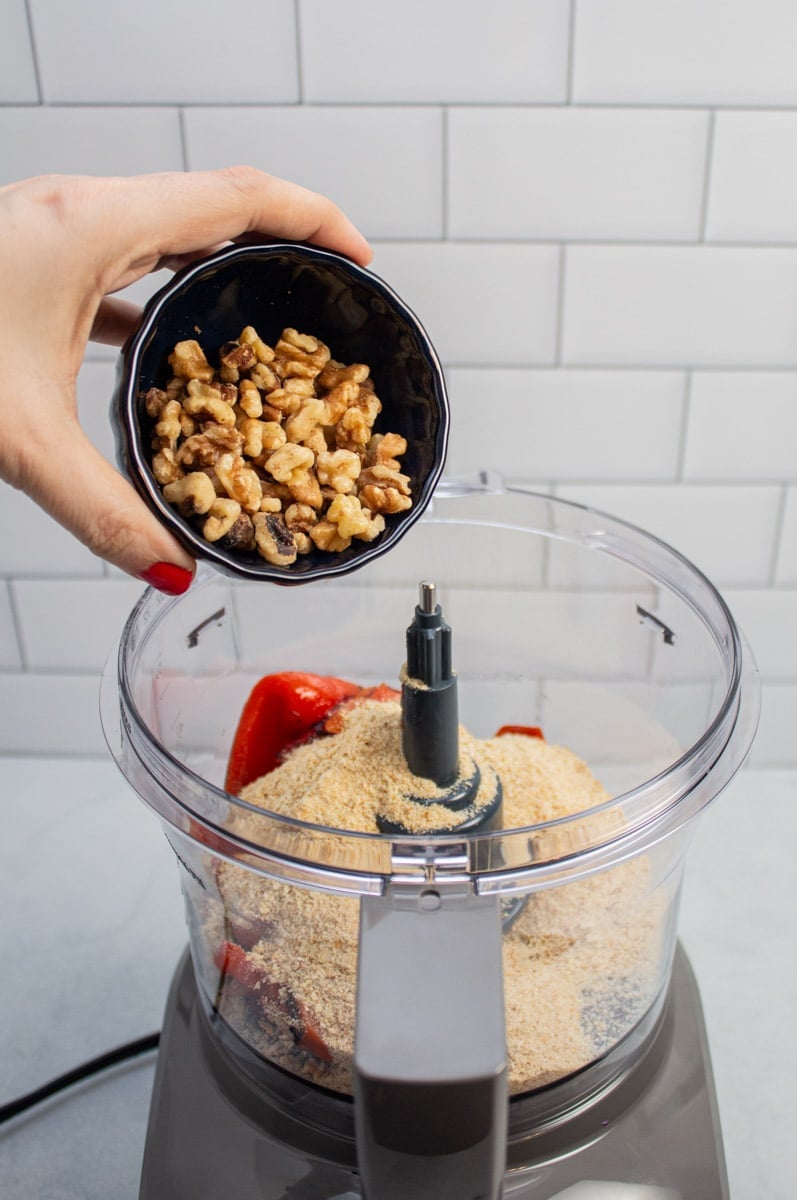
    Adding walnuts to a food processor with breadcrumbs and roasted red peppers.

    ✅ How to make this recipe

    1. Smash garlic and salt into a paste and add to yogurt.
      Roughly chop the garlic cloves. Sprinkle the salt on top of the garlic. Using the flat side of your knife, smash, scrape, and chop the garlic until it forms a paste.
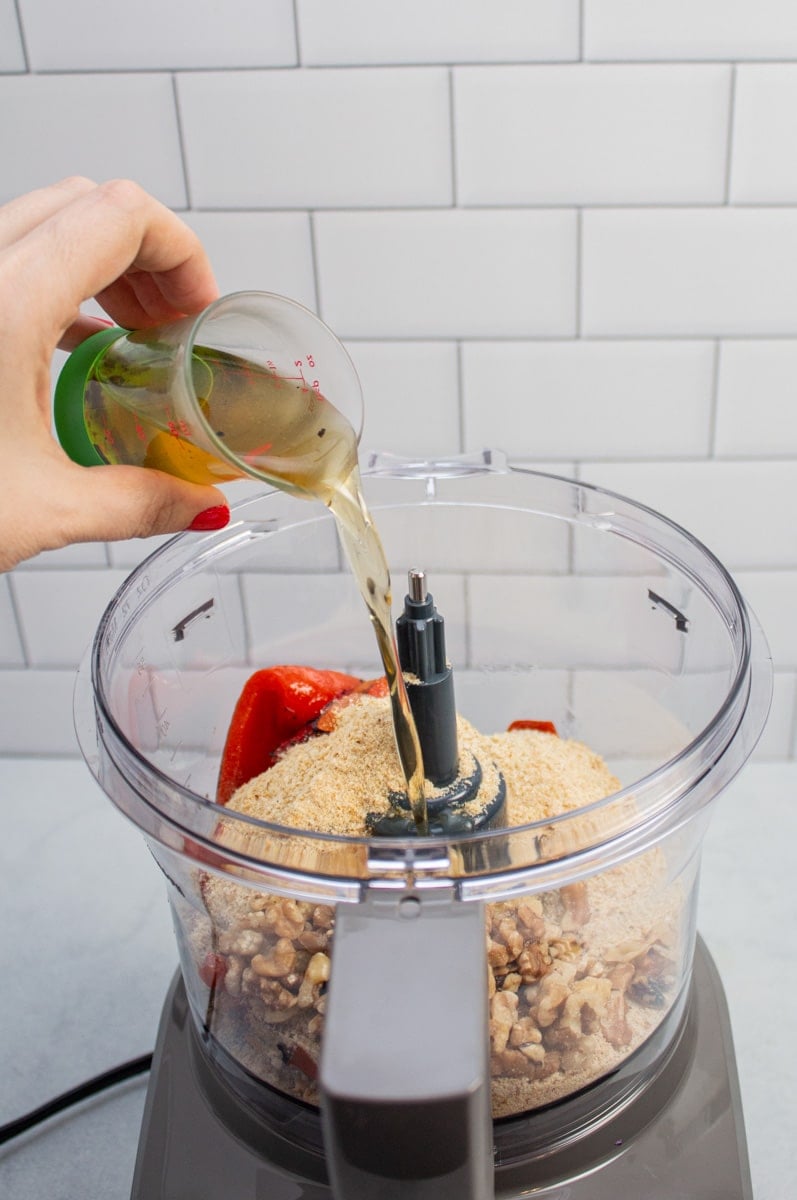
    2. To the bowl of a food processor, add the drained peppers, breadcrumbs, walnuts, ¼ cup of the reserved liquid from the jar of roasted peppers, garlic paste, lemon juice, pomegranate molasses, ground cumin, and red pepper flakes. Purée until smooth, scraping the sides of the bowl occasionally to make sure it's evenly blended.
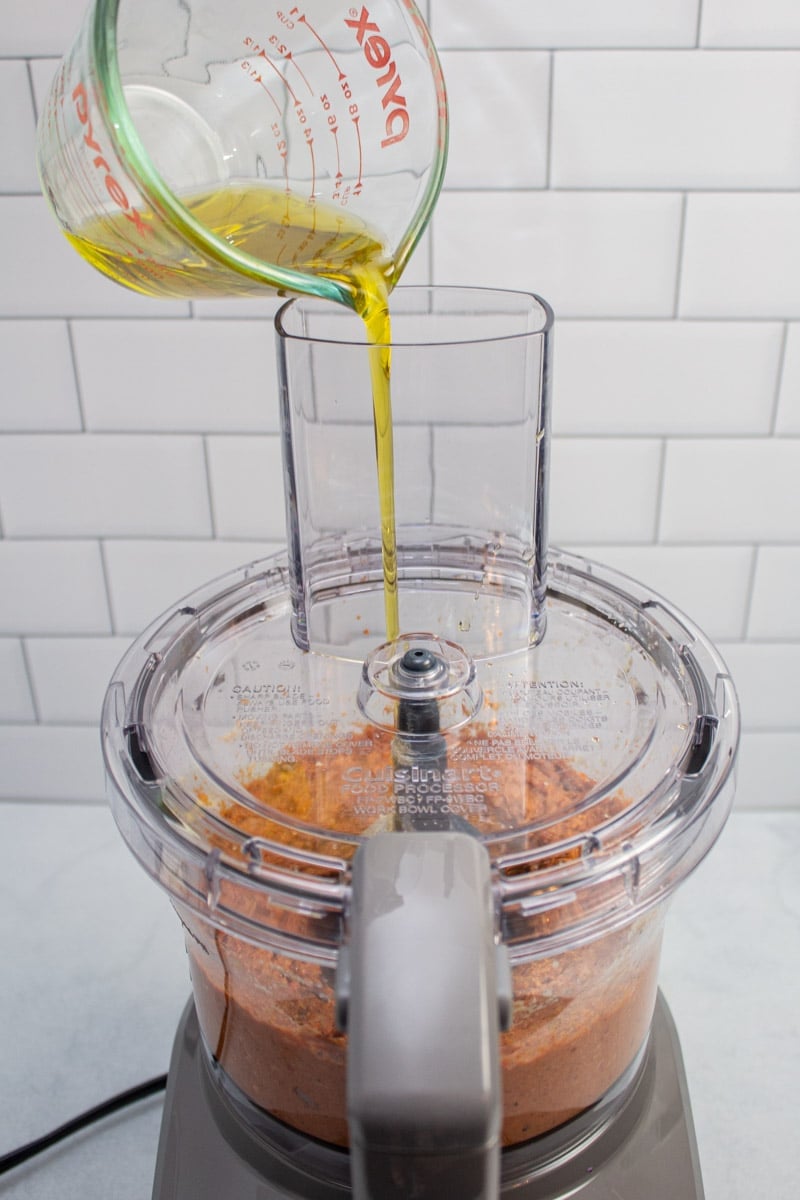
    3. Remove the pusher from the feed chute and turn the motor on. With the motor running, add the oil gradually until it reaches your desired consistency. If it's too thick, you can add more oil or more liquid from the roasted red pepper jar.
    4. Transfer to a serving dish and garnish with additional olive oil, feta cheese, chopped walnuts, as desired. drizzle with a little more olive oil and sprinkle on some feta. Serve at room temperature with pita for dipping.

    See recipe card below for full instructions.

    Adding liquid from a jar of roasted red peppers to a food processor with ingredients to make muhammara.
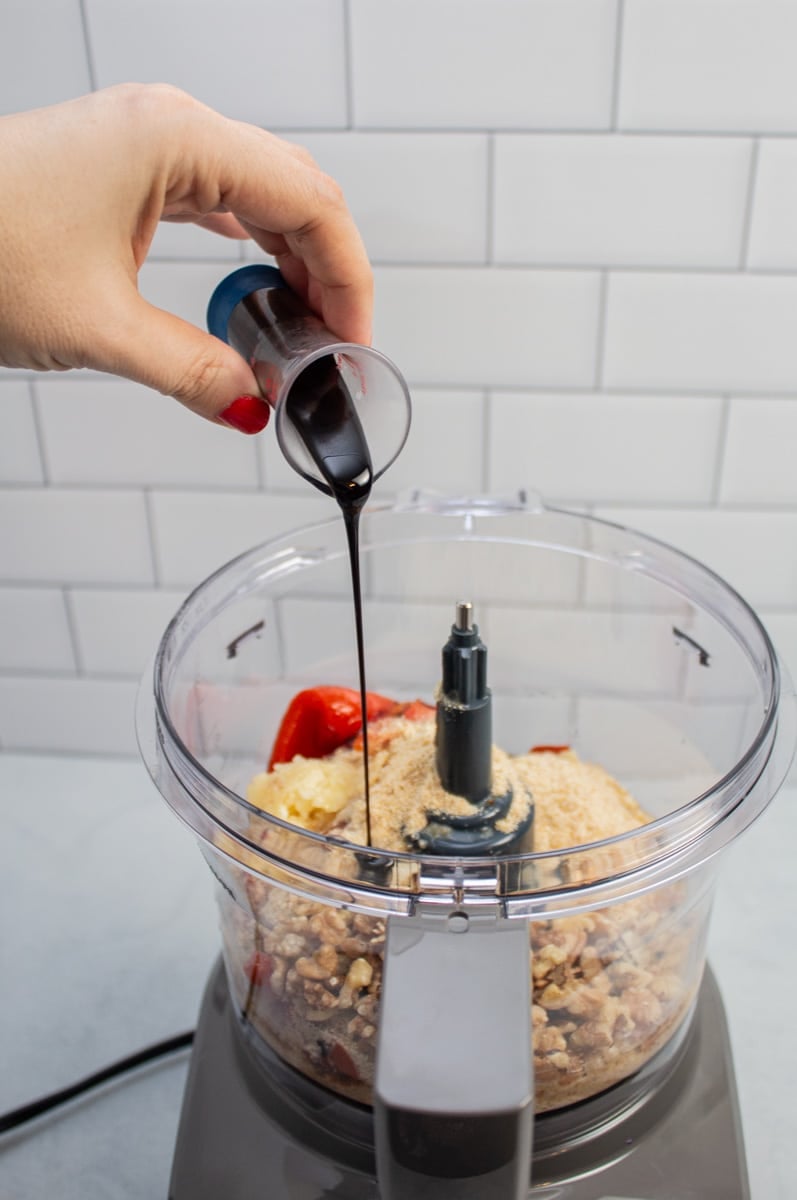
    Adding pomegranate molasses to a food processor with ingredients to make muhammara.

    📌 Tips

    Back when I first started making this recipe, I'd use ¾ cup of extra-virgin olive oil. A few years ago, I decided to see if I could swap part of the oil out to make it just a little less calorie-dense.

    Since the jar of roasted peppers has liquid in it, I figured that would be a perfect substitute to still thin the dip out without adding excess oil.

    Drizzling olive oil into a food processor of muhammara.

    Feel free to use more or less of the oil/liquid, depending on your preference here. You want it to be thin enough at room temperature to be able to spread it or scoop it up with pita bread or pita chips.

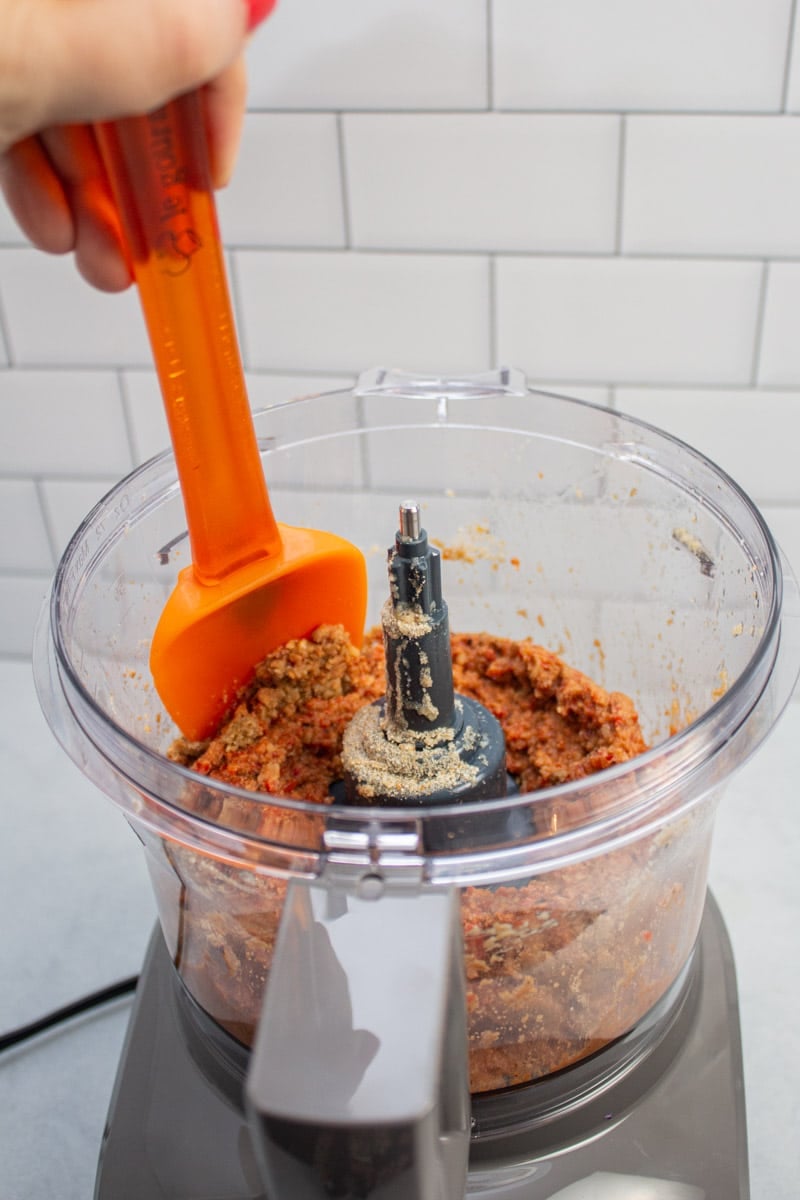
    Be sure to scrape down the sides of your food processor to ensure that your dip is evenly blended.

    Scraping down the edges of a food processor bowl full of muhammara.
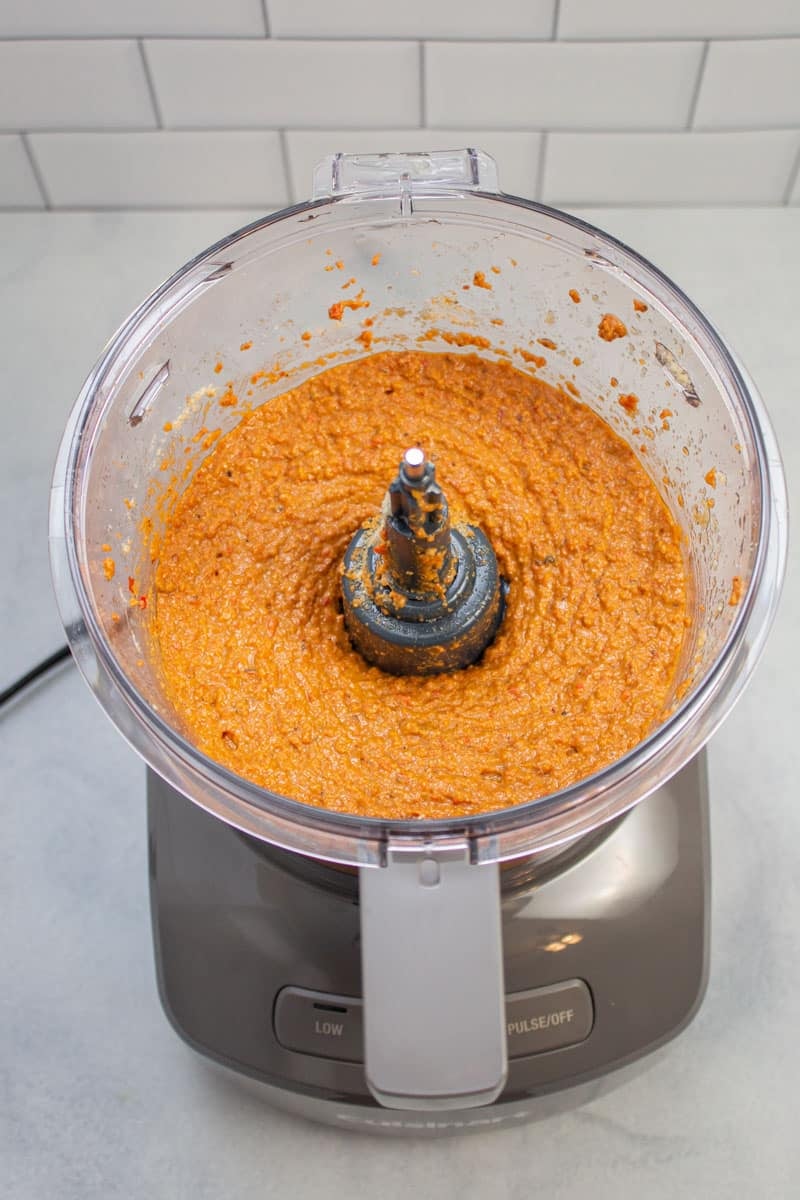
    Muhammara (roasted red pepper dip) ingredients pureed together in a food processor.

    The vibrant color of this dip is so gorgeous that it doesn't really need any garnishes. I do like to add an extra drizzle of extra-virgin olive oil on top before serving, and some chunks of feta cheese.

    You can also sprinkle on some additional walnuts, fresh herbs (cilantro and parsley are both great options), or pomegranate arils. A sprinkling of ground sumac would also be nice.

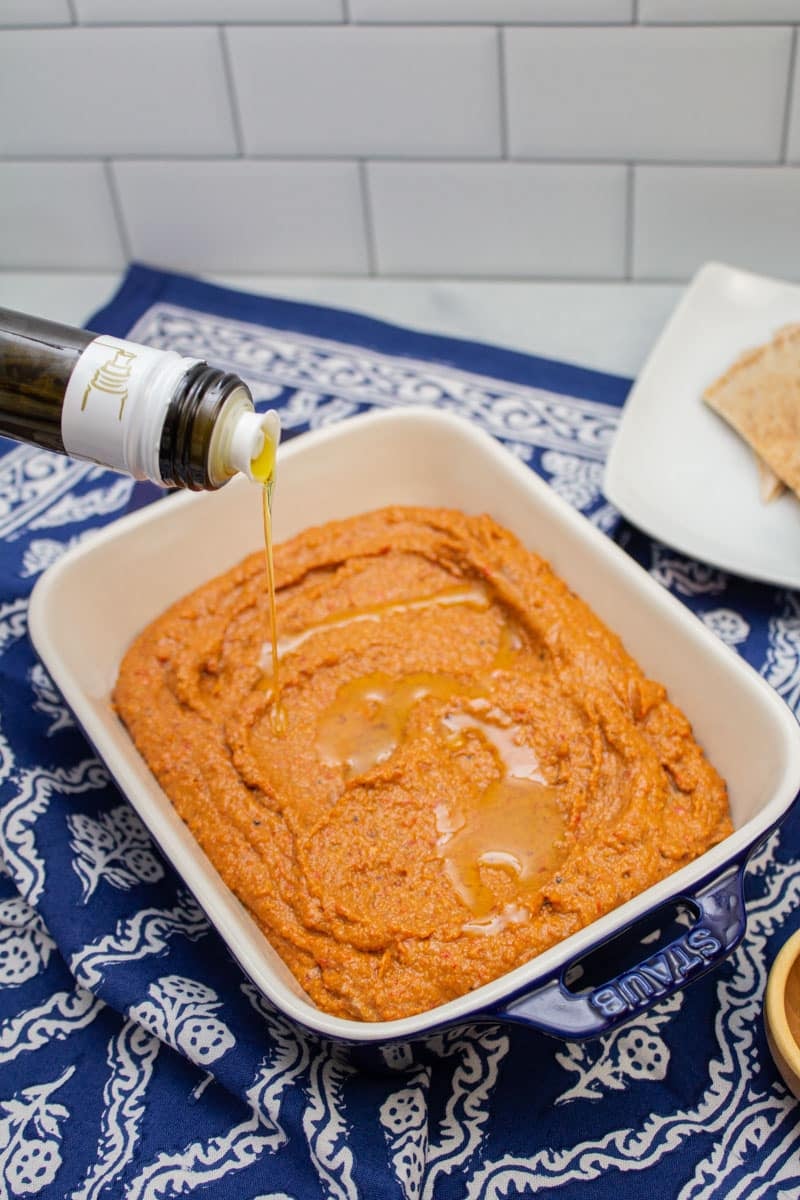
    Drizzling olive oil over the top of a serving dish of muhammara.
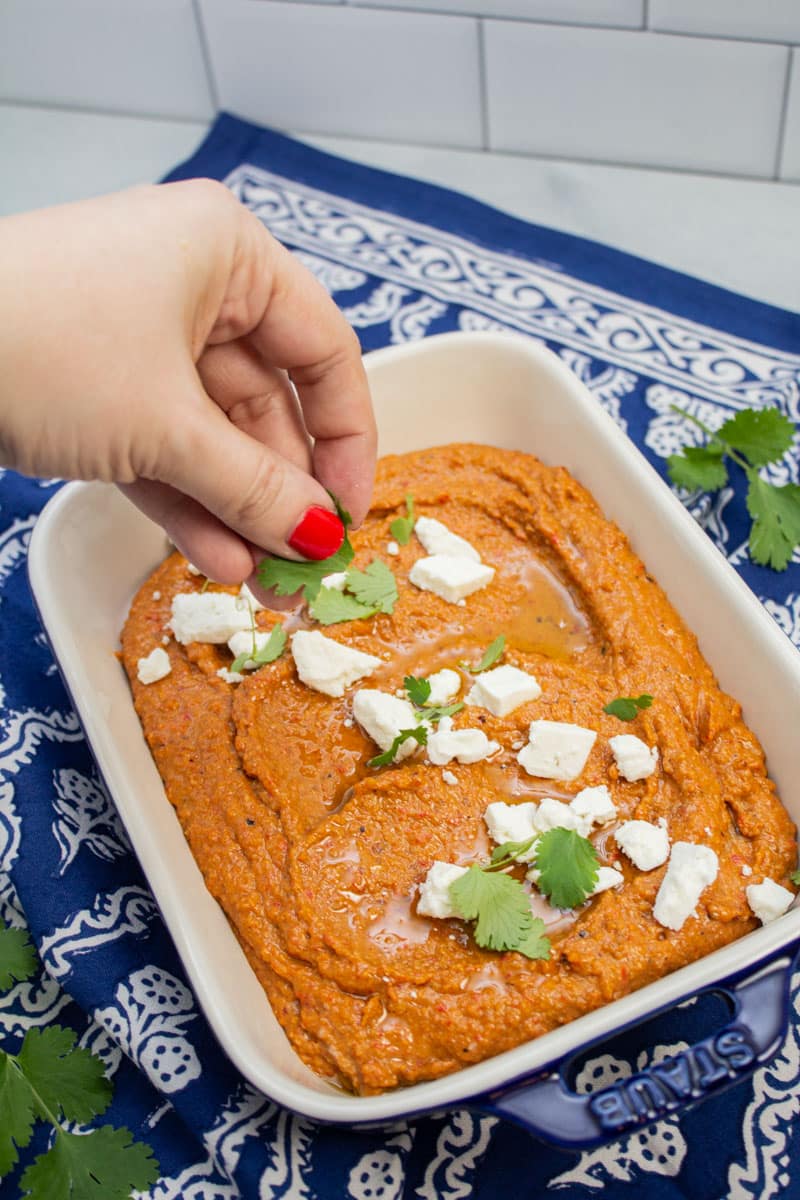
    Garnishing muhammara with cilantro leaves.
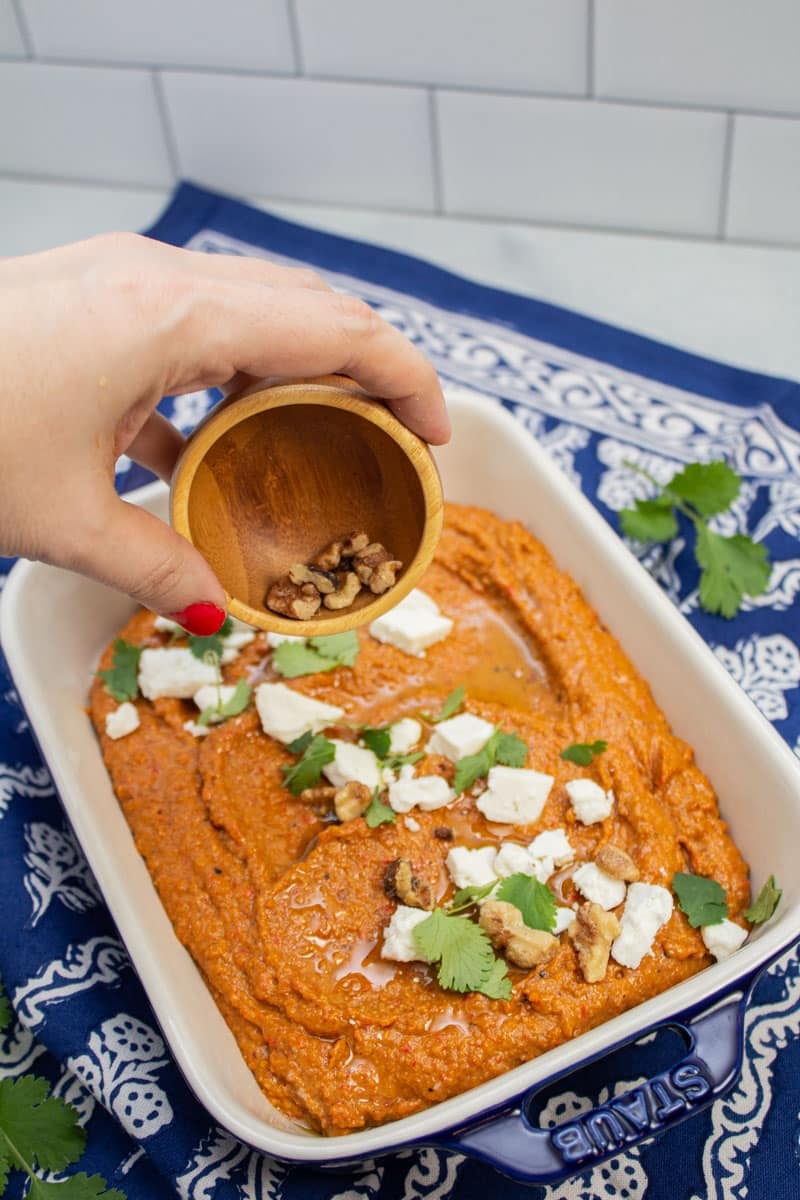
    Garnishing muhammara with chopped walnuts.

    If you're taking your muhammara out of the refrigerator, be sure to let it sit out for a bit to reach room temperature before serving. This helps it get that smooth texture again, since the refrigerator will make the oil in the dip solidify a bit.

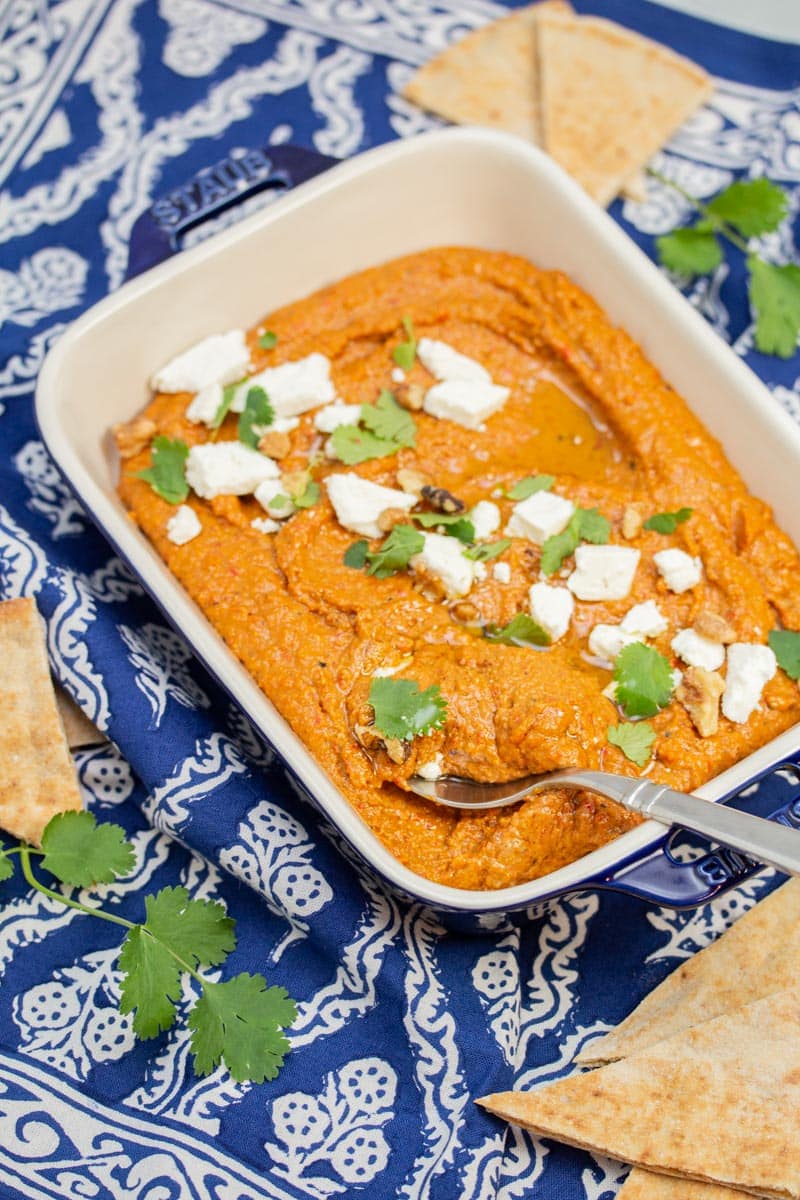
    Muhammara garnished with feta cheese, cilantro, and walnuts with pita bread alongside.

    💡 What to serve with muhammara

    This roasted red pepper dip is wonderful alongside so many different Middle Eastern dishes. Try pairing it with some of these recipes:

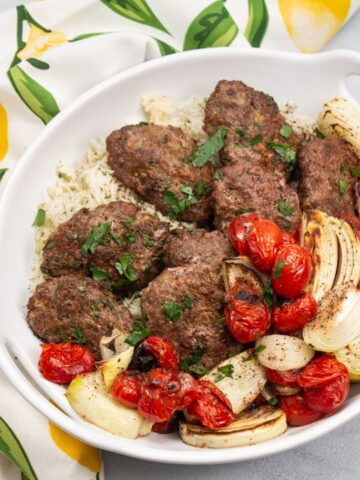
    • Overhead view of a platter of kebab with onions and tomatoes.
      Broiler Kebab Sheet Pan Meal
    • Bowl of fattoush salad with serving utensils.
      Middle Eastern Fattoush Salad with Homemade Pita Chips
    • Plate with Persian meatloaf with rice and accompaniments.
      Persian Meatloaf
    • Falafel in pita bread with toppings served with yogurt-herb sauce.
      Falafel with Yogurt-Herb Sauce
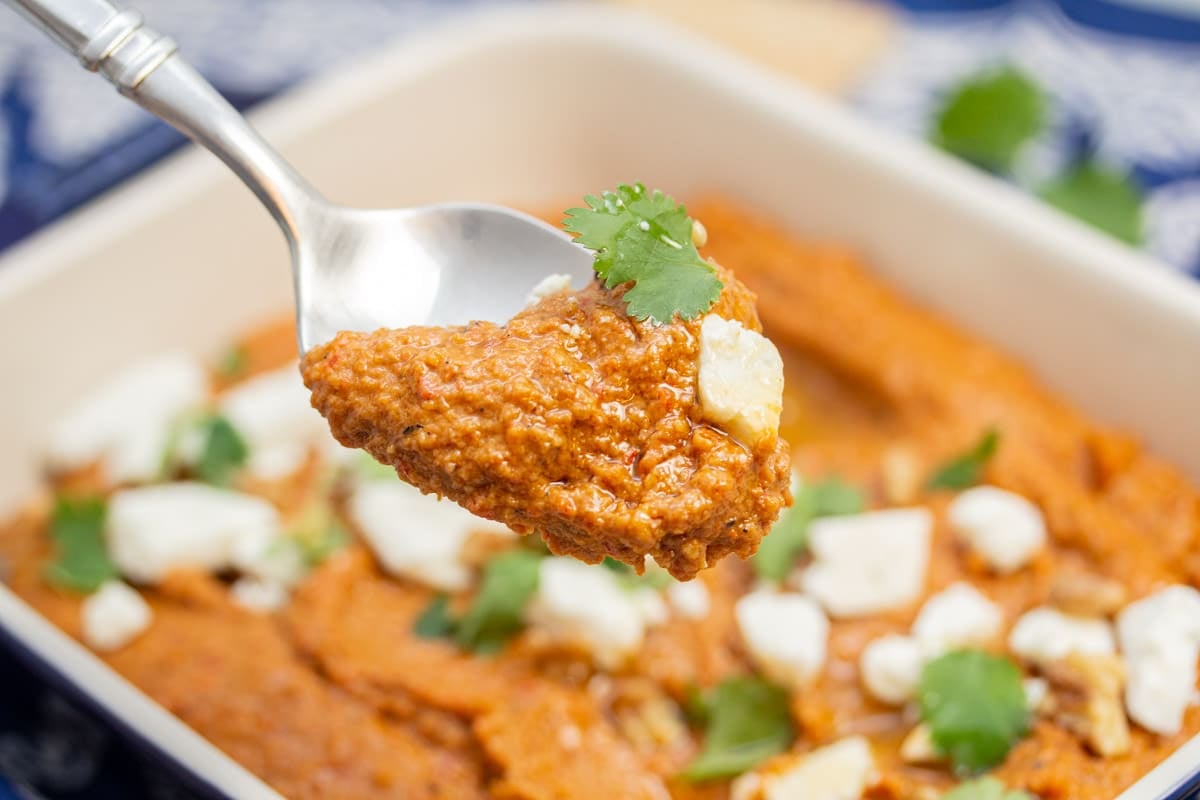
    Scooping a spoonful of muhammara from a serving dish.

    🍽️ Still hungry? You may also like...

    Looking for some more ways to get your dip on? Here are some favorites:

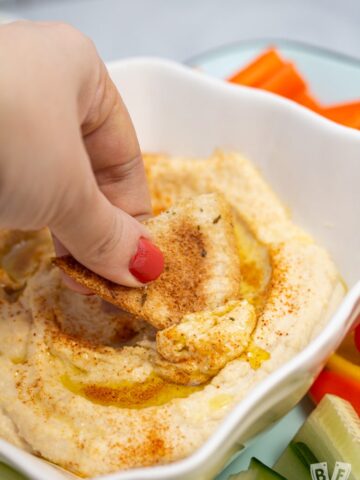
    • Pita chip scooping up hummus.
      Easy Classic Hummus Using Canned Chickpeas
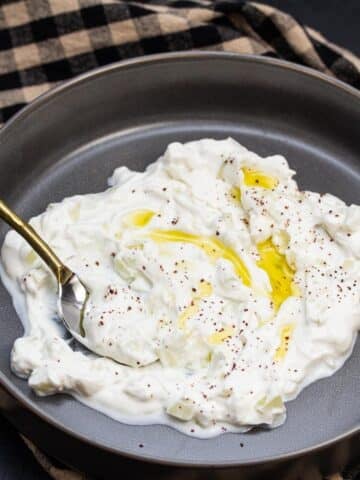
    • Bowl of tzatziki with olive oil drizzled over the top.
      Easy Homemade Tzatziki
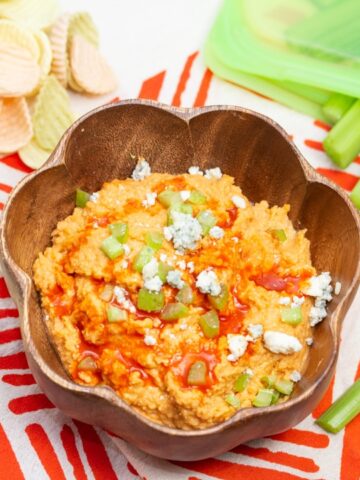
    • Bowl of buffalo chickpea dip with celery sticks and veggie chips
      Buffalo Chickpea Dip
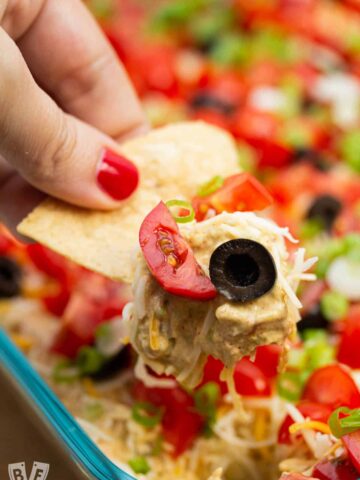
    • Scooping layered taco dip onto a tortilla chip.
      Layered Taco Dip with Refried Beans

    Doing some online shopping? Check out my Amazon shop page for recommendations!

    📖 Recipe

    Muhammara - Roasted Red Pepper Dip

    Muhammara garnished with feta cheese, cilantro, and walnuts with pita bread alongside.
    This garlicky Middle Eastern roasted red pepper dip is made with walnuts, breadcrumbs, and pomegranate molasses for a big flavor payoff with only a handful of ingredients. It makes a vibrant, flavorful addition to any appetizer spread served with pita bread for dipping.
    Big Flavors from a Tiny Kitchen - Ashley Covelli (adapted from Gourmet December 1993)
    5 from 1 vote
    Print Recipe Pin Recipe
    Servings: 6 -8 Servings
    Course: Appetizer
    Cuisine: Middle Eastern
    Prep Time 10 minutes mins
    Total Time 10 minutes mins

    Ingredients
     

    • 2 to 4 cloves garlic
    • ½ teaspoon kosher salt
    • 7 ounce jar roasted red peppers (drained, liquid reserved)
    • ⅔ cup breadcrumbs
    • ⅓ cup roughly chopped walnuts
    • 1 tablespoon fresh lemon juice
    • 2 teaspoons pomegranate molasses
    • 1 teaspoon ground cumin
    • ½ teaspoon dried red pepper flakes
    • ½ cup extra-virgin olive oil
    For garnish (optional - mix and match your favorites):
    • Extra-virgin olive oil
    • Crumbled feta omit to keep this vegan
    • Chopped walnuts
    • Fresh cilantro or parsley
    • Pomegranate arils
    For serving:
    • Pita triangles or flatbread

    Instructions
     

    1. Roughly chop the garlic cloves. Sprinkle the salt on top of the garlic. Using the flat side of your knife, smash, scrape, and chop the garlic until it forms a paste. 
    2. To the bowl of a food processor, add the drained peppers, breadcrumbs, walnuts, ¼ cup of the reserved liquid from the jar of roasted peppers, garlic paste, lemon juice, pomegranate molasses, ground cumin, and red pepper flakes. Purée until smooth, scraping the sides of the bowl occasionally to make sure it's evenly blended.
    3. Remove the pusher from the feed chute and turn the motor on. With the motor running, add the oil gradually until it reaches your desired consistency. If it's too thick, you can add more oil or more liquid from the roasted red pepper jar.
    4. Transfer to a serving dish and garnish with additional olive oil, feta cheese, chopped walnuts, as desired. drizzle with a little more olive oil and sprinkle on some feta. Serve at room temperature with pita for dipping.

    Notes

    Makes about 1 ¾ cups dip.
    Cover and store leftovers in the refrigerator. Be sure to bring it back to room temperature before serving again.

    Useful products:

    food processor
    chef's knife
    pomegranate molasses
    pomegranate syrup

    Nutrition information

    Nutrition Facts
    Muhammara - Roasted Red Pepper Dip
    Amount per Serving
    Calories
    262
    % Daily Value*
    Fat
     
    23
    g
    35
    %
    Saturated Fat
     
    3
    g
    19
    %
    Polyunsaturated Fat
     
    5
    g
    Monounsaturated Fat
     
    14
    g
    Sodium
     
    738
    mg
    32
    %
    Potassium
     
    116
    mg
    3
    %
    Carbohydrates
     
    12
    g
    4
    %
    Fiber
     
    1
    g
    4
    %
    Sugar
     
    2
    g
    2
    %
    Protein
     
    3
    g
    6
    %
    Vitamin A
     
    227
    IU
    5
    %
    Vitamin C
     
    17
    mg
    21
    %
    Calcium
     
    48
    mg
    5
    %
    Iron
     
    1
    mg
    6
    %
    * Percent Daily Values are based on a 2000 calorie diet.
    Did you make this recipe?

    Leave a comment + star rating below to let people know how it was!

    Tilapia with Za’atar and Meyer Lemon

    October 17, 2013 by Ashley Leave a Comment

    Tilapia with Za’atar and Meyer Lemon

    Tilapia with Za’atar and Meyer Lemon

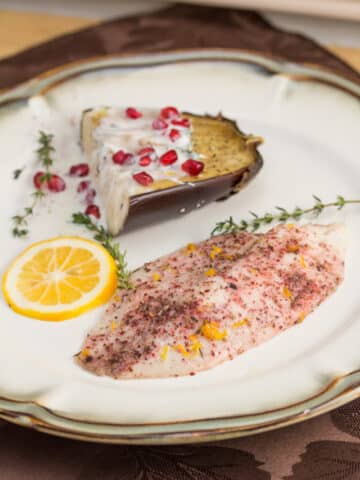
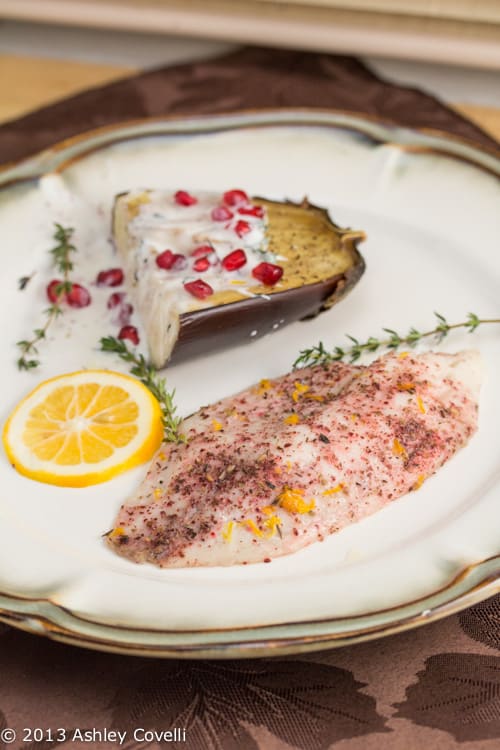
    I wanted to make a quick main dish to go with the Eggplant with Buttermilk Sauce. I decided to take a couple of tilapia fillets, placed them in a baking dish that I sprayed with olive oil, sprinkled some of the homemade za'atar that I made earlier in the evening, and a little Meyer lemon zest on top of the fish. I baked them at 400°F for 10-12 minutes, until they were just cooked through and flaked easily with a fork. Once they were out of the oven and on our plates, I squeezed a Meyer lemon wedge over each fillet. It was really simple to put together, and tasted great!

    Big Flavors Rating: 4 Stars

    Eggplant with Buttermilk Sauce

    October 17, 2013 by Ashley 1 Comment

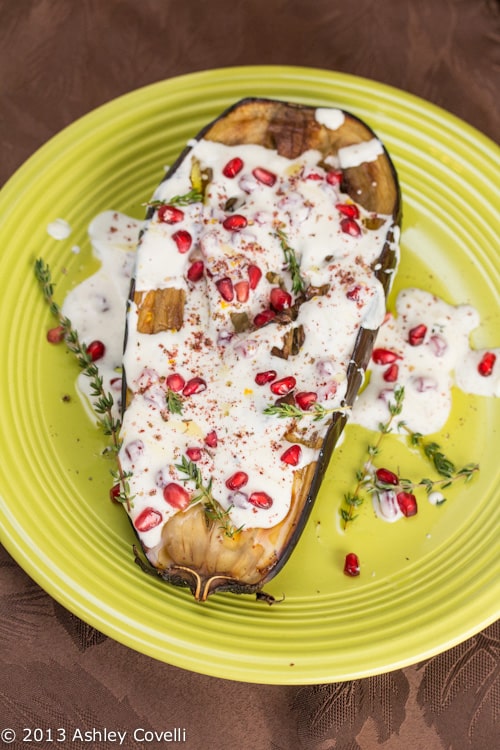
    Eggplant with Buttermilk Sauce

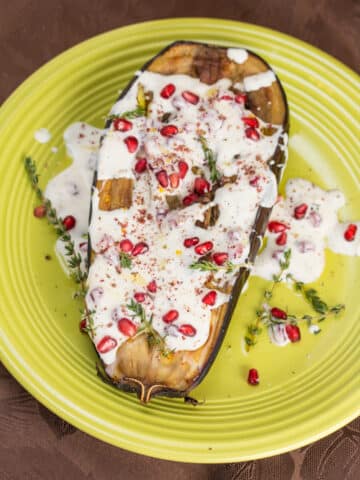
    I've been drooling over my latest cookbook purchase for a few weeks now, and when I saw pomegranate arils at the store, I knew that it was the perfect time to make the beautiful cover recipe. I don't take a whole lot of shortcuts in the kitchen, but not having to whack a pomegranate for the garnish of this recipe was way too tempting. This dish has such wonderful flavor - rich, smoky eggplant that just melts in your mouth, along with a creamy yogurt and buttermilk sauce, topped with tangy pomegranate. Wowza. It was great! I didn't have lemon thyme, so I used regular thyme and at the end, added a little bit of grated lemon zest. It was perfect. One major note here - the smallest eggplant I could find was pretty big, and it just would.not.cook. So I ended up cranking the oven to 350°F and cooking it for MUCH longer than suggested. I wanted that soft, creamy, smoky eggplant flavor, and it did not happen quickly. I think this would be nice to do with some baby eggplant, as it would come together a lot faster, and would be a cute appetizer. This is the dish that I made some homemade za'atar to go with, and it worked out really well!

    Eggplant with Buttermilk Sauce

    Eggplant with Buttermilk Sauce
    Plenty - Yotam Ottolenghi

    Makes 4 as a starter

    2 large and long eggplants
    ⅓ cup olive oil
    1 ½ teaspoon lemon thyme leaves, plus a few whole sprigs to garnish
    Maldon sea salt and black pepper
    1 pomegranate
    1 teaspoon za'atar
    Sauce:
    9 tablespoon buttermilk
    ½ cup Greek yogurt
    1 ½ tablespoon olive oil, plus a drizzle to finish
    1 small garlic clove, crushed
    Pinch of salt

    Preheat the oven to 200°F. Cut the eggplants in half lengthways, cutting straight through the green stalk (the stalk is for the look; don't eat it). Use a small sharp knife to make three or four parallel incisions in the cut side of each eggplant half, without cutting through to the skin. Repeat at a 45-degree angle to get a diamond-shaped pattern.

    Place the eggplant halves, cut-side up, on a baking sheet lined with parchment paper. Brush them with olive oil—keep on brushing until all of the oil has been absorbed by the flesh. Sprinkle with the lemon thyme leaves and some salt and pepper. Roast for 35 to 40 minutes, at which point the flesh should be soft, flavorful and nicely browned. Remove from the oven and allow to cool down completely.

    While the eggplants are in the oven, cut the pomegranate into two horizontally. Hold one half over a bowl, with the cut side against your palm, and use the back of a wooden spoon or a rolling pin to gently knock on the pomegranate skin. Continue beating with increasing power until the seeds start coming out naturally and falling through your fingers into the bowl. Once all are there, sift through the seeds to remove any bits of white skin or membrane.

    To make the sauce. Whisk together all of the ingredients. Taste for seasoning, then keep cold until needed.

    To serve, spoon plenty of buttermilk sauce over the eggplant halves without covering the stalks. Sprinkle za'atar and plenty of pomegranate seeds on top and garnish with lemon thyme. Finish with a drizzle of olive oil.

    Big Flavors Rating: 5 Stars

    Za'atar

    October 17, 2013 by Ashley 1 Comment

    Za'atar

    Za'atar

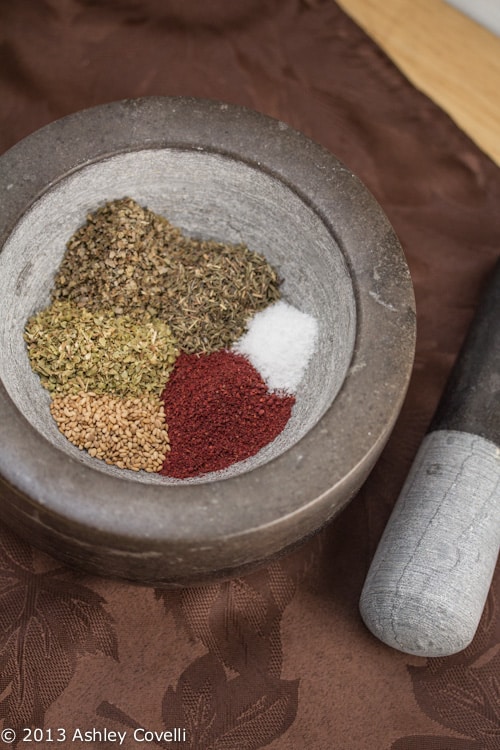
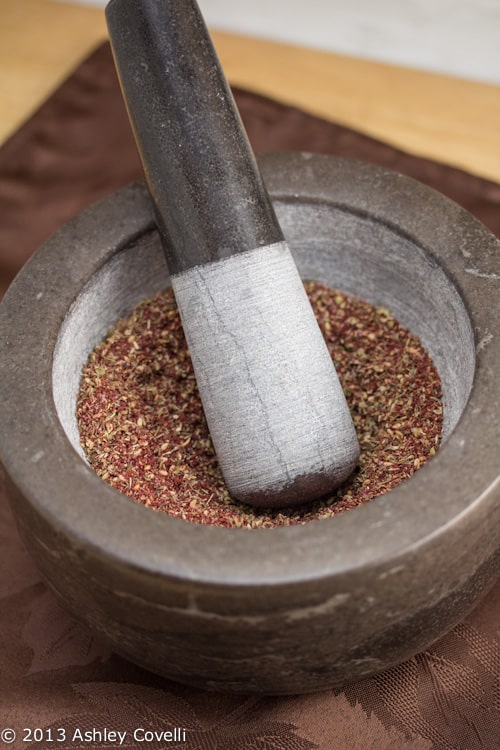
    I was planning to make a side dish tonight that called for Za'atar, which is a Middle Eastern spice mixture that I didn't have on hand. I was planning to substitute sumac, but then I figured I might as well see if I could find a recipe to make my own blend. I'm so glad I looked, because this recipe from Saad Fayed was really simple and resulted in a beautiful spice mixture. I even ended up using some on tilapia fillets tonight as well. I still have a bunch that I'll be using in more dishes soon!

    Za'atar

    Za'atar
    About.com - Saad Fayed

    Total Time: 5 minutes

    ¼ cup sumac
    2 tablespoons thyme
    1 tablespoon roasted sesame seeds
    2 tablespoons marjoram
    2 tablespoons oregano
    1 teaspoon coarse salt

    Grind the sesame seeds in food processor or with mortar and pestle. Add remaining ingredients and mix well.

    Store za'atar in a cool, dark place in a plastic zip bag or in an airtight container. When stored properly, za'atar can be used from 3-6 months.

    Big Flavors Rating: 4 Stars

    Creamy Kale Salad

    October 12, 2013 by Ashley 1 Comment

    Creamy Kale Salad

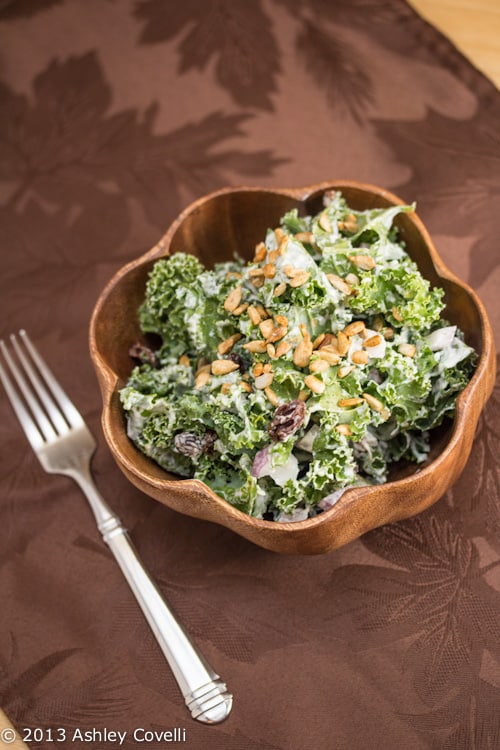
    I've been using lots of kale lately, and I'm always on the lookout for more ways to use it. This salad is great because it uses things that I usually have on hand, and can be made 2 hours ahead of time, or even the night before! And it holds up pretty well in the fridge for a few days since kale is so hearty. I use a lemon juicer instead of just squeezing it with my hands, so I only used the juice of half, which worked perfectly. I've found in the past that if there's no specific measurement for lemon juice other than a number of lemons, it's safer to cut it in half and add more if needed when using a juicer/reamer. When you're ready to dive into this salad, just sprinkle some sunflower seeds on top and you're all set. I had roasted sunflower seeds in the freezer, so that's what I used. It adds a great bit of crunch to the salad, and the raisins get nice and plump from their time marinating in the dressing. This is definitely a good recipe to have in your kitchen arsenal.

    Creamy Kale Salad

    Creamy Kale Salad
    Allrecipes - QueenDump&Pour

    4 cups chopped kale (ribs removed)
    ¼ cup chopped red onion
    3 tablespoons raisins
    ½ cup plain Greek-style yogurt
    ¼ cup mayonnaise
    2 teaspoons sugar
    1 lemon, zested and juiced
    3 tablespoons sunflower seeds

    Mix kale, red onion, and raisins in a large bowl.

    Whisk yogurt, mayonnaise, sugar, lemon zest, and lemon juice together in a bowl; pour over the kale mixture and toss to coat. Refrigerate 2 hours to overnight. Sprinkle sunflower seeds over the salad and toss to serve.

    Nutritional Information:
    Servings Per Recipe: 8
    Amount Per Serving
    Calories: 96
    Sodium: 65.2mg
    Carbohydrates: 10.7g
    Protein: 2.3g
    Fat: 6.0g
    Cholesterol: 3.5mg
    Dietary Fiber: 1.6g

    Big Flavors Rating: 4 Stars

    Peanut Blossoms

    October 9, 2013 by Ashley 1 Comment

    Peanut Blossoms

    Every few months, I like to bake cookies to give to some of the medical professionals who helped me through a really rough time a few years ago. I figure it's the least I can do to show my appreciation. I also wanted to give a few to some of the neighbor kids who have been playing with my son a lot lately, because they're the sweetest little boys, and who doesn't love homemade cookies?! So I needed to find a recipe that made a LOT of cookies. This one fit the bill, even though I only got 5 dozen out of it (the recipe says it makes 7 dozen). I've eaten peanut blossoms for years, but had never made them before. They're basically just peanut butter cookies that you bake, and then as soon as they come out of the oven, you press a Hershey's Kiss down into the center. The candy melts down onto the hot cookies to kind of glue it down, and once they cool, they re-solidify and are ready to devour. I decided to use a mix of milk chocolate, dark chocolate and Hugs, since I had picked up a few bags on sale a while back. These were a big hit! There's just something about these cookies that are sure to bring smiles to whoever eats them 🙂

    Peanut Blossoms

    Peanut Blossoms II
    Allrecipes - Rosemarie Magee

    Makes 7 dozen

    1 cup shortening
    1 cup peanut butter
    1 cup packed brown sugar
    1 cup white sugar
    2 eggs
    ¼ cup milk
    2 teaspoons vanilla extract
    3 ½ cups all-purpose flour
    2 teaspoons baking soda
    1 teaspoon salt
    ½ cup white sugar for decoration
    2 (9 ounce) bags milk chocolate candy kisses, unwrapped

    Preheat oven to 375 degrees F (190 degrees C). Grease cookie sheets.

    In a large bowl, cream together the shortening, peanut butter, brown sugar, and 1 cup white sugar until smooth. Beat in the eggs one at a time, and stir in the milk and vanilla. Combine the flour, baking soda, and salt; stir into the peanut butter mixture until well blended. Shape tablespoonfuls of dough into balls, and roll in remaining white sugar. Place cookies 2 inches apart on the prepared cookie sheets.

    Bake for 10 to 12 minutes in the preheated oven. Remove from oven, and immediately press a chocolate kiss into each cookie. Allow to cool completely; the kiss will harden as it cools.

    Big Flavors Rating: 4 Stars

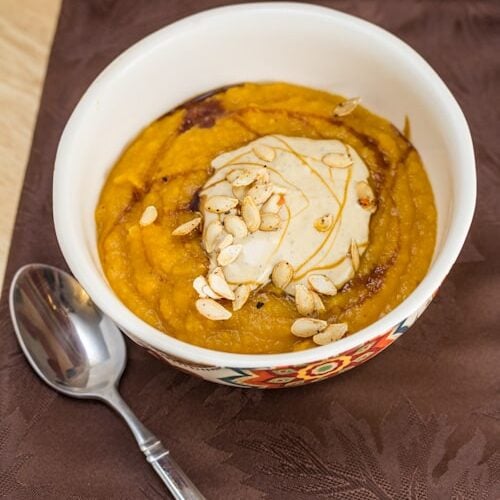
    Roasted Butternut Squash Bisque with Sweet Sage Yogurt

    October 7, 2013 by Ashley 1 Comment

    Roasted Butternut Squash Bisque with Sweet Sage Yogurt

    There are so many beautiful varieties of squash popping up at the Farmers Market lately. I love that I know which farms they each came from, and that they don't contain any pesticides or GMOs.

    I picked up a bunch of different types to cook with this week, and the first thing that came to mind was making a roasted butternut squash soup.

    I love trying to repurpose things that I'd normally be throwing away, so in an effort to waste less, I decided to try out roasting the seeds, too.

    Roasted Butternut Squash Bisque with Sweet Sage Yogurt

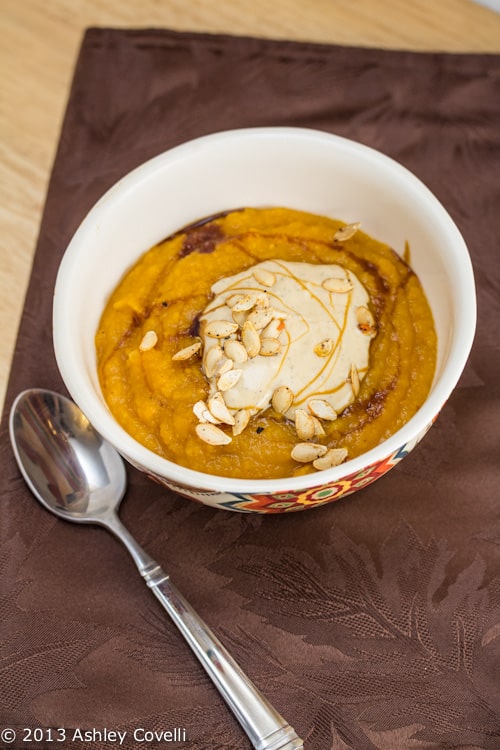
    Roasted pumpkin seeds are so great, so why not butternut squash seeds? They turned out beautifully, and added a really nice texture to the top of the soup. Plus, they were awesome to snack on while the soup was coming together.

    I also put together a sweetened, herbed yogurt sauce to give the soup something creamy and cool on top. It was full of fall flavors - this would be perfect for a Thanksgiving meal!

    I also used homemade slow cooker vegetable stock that I made out of leftover veggie bits a while back. All in all, this was a really nice, warming autumn soup with lots of rich flavors that really hit the spot tonight.

    📖 Recipe

    Roasted Butternut Squash Bisque with Sweet Sage Yogurt

    Roasted Butternut Squash Bisque with Sweet Sage Yogurt
    Big Flavors from a Tiny Kitchen - Ashley Covelli
    No ratings yet
    Print Recipe Pin Recipe
    Course: Soups & Stews
    Cuisine: American

    Ingredients
     

    • 1 large organic butternut squash around 3 pounds
    • 2 tablespoons extra-virgin olive oil
    • Sea salt and freshly cracked black pepper
    • 1 tablespoon butter
    • 1 small yellow onion chopped
    • 1 clove garlic minced
    • 2 - 4 cups of vegetable stock
    For the yogurt:
    • 1 cup plain low-fat yogurt (such as Stonyfield Organic)
    • 1 ½ teaspoons dried rubbed sage
    • ½ teaspoon freshly grated nutmeg
    • ⅛ teaspoon ground cloves
    • 2 teaspoons molasses plus more for garnish

    Instructions
     

    1. Preheat oven to 400°F. Cut squash in half lengthwise and remove the seeds and pulp to a small bowl. Add some water to the bowl and use that to help you pull the seeds out of the pulp. Place the seeds onto a baking sheet, and while they're still wet, season with sea salt and pepper. Toss to combine and spread them into a single layer.
    2. Drizzle oil onto another baking sheet or roasting pan and place the squash, cut side down on the oil. Place both trays in the oven and bake for 5 minutes. Pull the sheet with the seeds out and stir them, spreading them back into a single layer, and return to the oven for another 5 minutes. Check to see if the seeds are crunchy when you bite into them. Mine took 10 minutes total, and they were perfect. Remove the seeds from the oven and let them cool while the squash finishes roasting.
    3. Bake the squash for another 30 minutes, or until tender when pierced with a knife. Remove from the oven and when cool to the touch, scoop the flesh out of the skin with a spoon.
    4. Melt butter in a large stock pot on the stovetop. Add onions and garlic, season with salt and pepper and sauté until softened. Add the roasted squash and 2 cups of vegetable stock and heat through, stirring and breaking the squash up with your spoon as it simmers.
    5. Using an immersion blender, purée the soup until smooth, adding more vegetable stock as needed until it reaches your desired consistency. Taste for seasoning and adjust if necessary. (Note - you can also blend this in batches in a blender, just make sure to open the vent on the lid and cover it with a kitchen towel so the steam can escape while it comes together).
    6. Mix the yogurt, sage, nutmeg, cloves and molasses in a bowl.
    7. To serve, ladle soup into bowls and top each with a dollop of yogurt, some of the roasted seeds, and an extra drizzle of molasses. Enjoy!

    Did you make this recipe?

    Leave a comment + star rating below to let people know how it was!

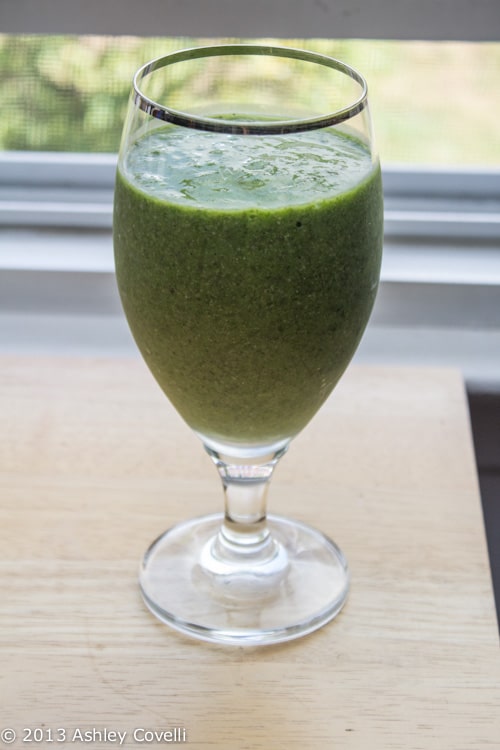
    Mango, Banana, Chia Kale Smoothie

    October 5, 2013 by Ashley 2 Comments

    Mango, Banana, Chia Kale Smoothie

    After a morning yoga session and trip to the Farmers Market, I decided that I was overdue for a kale-filled smoothie. This one really hit the spot - the mango and banana made it perfectly sweet without any additional honey, sugar, or agave nectar, and the chia seeds give this green beauty a big boost of omega-3, antioxidants, fiber and vitamins. If you don't have frozen mango, you can throw a handful of ice in there to bring it all together.

    Mango, Banana, Chia Kale Smoothie

    📖 Recipe

    Mango, Banana, Chia Kale Smoothie

    Mango, Banana, Chia Kale Smoothie
    Ashley
    No ratings yet
    Print Recipe Pin Recipe
    Course: Smoothies
    Cuisine: American

    Ingredients
     

    • 1 cup frozen mango chunks
    • 1 banana
    • 2 cups lightly packed kale, roughly chopped
    • 2 cups cold water
    • 2 tablespoons chia seeds

    Instructions
     

    1. Place ingredients in a blender and blend until smooth. Enjoy!

    Did you make this recipe?

    Leave a comment + star rating below to let people know how it was!

    Pan-Seared Pork Tenderloin with Sautéed Kale

    October 3, 2013 by Ashley Leave a Comment

    Pan-Seared Pork Tenderloin with Sautéed Kale

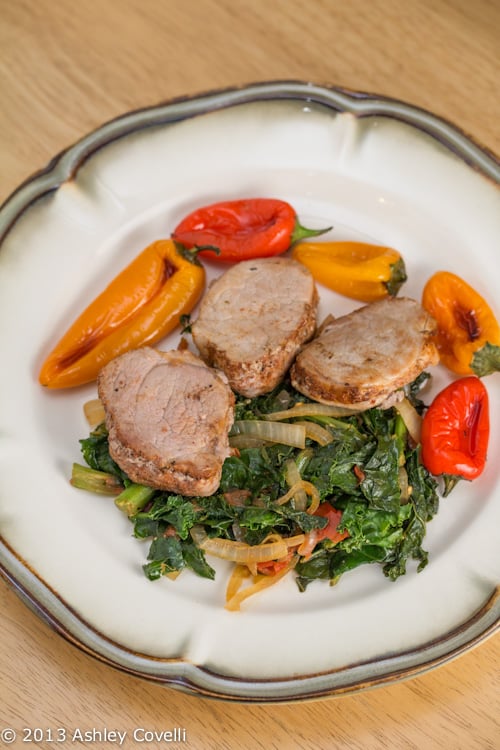
    I had a piece of pork tenderloin leftover from when I made Spiced Pork with Bourbon Reduction Sauce, and I needed to use it up, but didn't want to spend a lot of time in the kitchen. I decided to use a similar method this time around, where you rub a spice blend on the tenderloin and then slice it into pieces and quickly fry it. I also had a bunch of kale to use, so I wilted it down in the same pan after I took the pork out, and it turned out really tasty! I served it with some mini bell peppers that I roasted simply with some olive oil, salt and pepper. The flavors went together really well, and the smokiness from the spice rub was wonderful!

    Pan-Seared Pork Tenderloin with Sautéed Kale

    I took 1 pound of pork tenderloin and rubbed Penzeys BBQ 3001 all over the outside. I then sliced it crosswise into 12 medallions. I sprayed a large, non-stick with some extra-virgin olive oil and when the pan was hot, I seared the pork for a few minutes on each side, until it was cooked through but still beautifully moist. I removed the pork to a plate and covered it so the pork would stay warm while I cooked the kale.

    I put about a tablespoon of extra-virgin olive oil in the pan and added ½ of a large onion that I had thinly sliced, along with a clove of garlic that I had minced. I added 2 small chopped tomatoes and stirred it all together, seasoning it with kosher salt and freshly cracked black pepper. Once the onions were soft and the tomatoes were starting to melt down, I added a couple big handfuls of chopped kale and stirred it around until it was coated with the tomato and onion mixture. I added a good splash of apple cider vinegar, a few dashes of Worcestershire sauce and seasoned it with some more salt and pepper. I let this sauté, stirring occasionally, until the kale had cooked down and was nice and tender.

    I put a pile of kale on each plate, topped it with a few pork medallions and placed several roasted mini bell peppers on the side.

    Big Flavors Rating: 4 Stars

    Massaged Kale Salad with Orange, Avocado, Toasted Hazelnuts and Goat Cheese

    October 3, 2013 by Ashley 3 Comments

    Massaged Kale Salad with Orange, Avocado, Toasted Hazelnut and Goat Cheese

    Massaged Kale Salad with Orange, Avocado, Toasted Hazelnuts and Goat Cheese

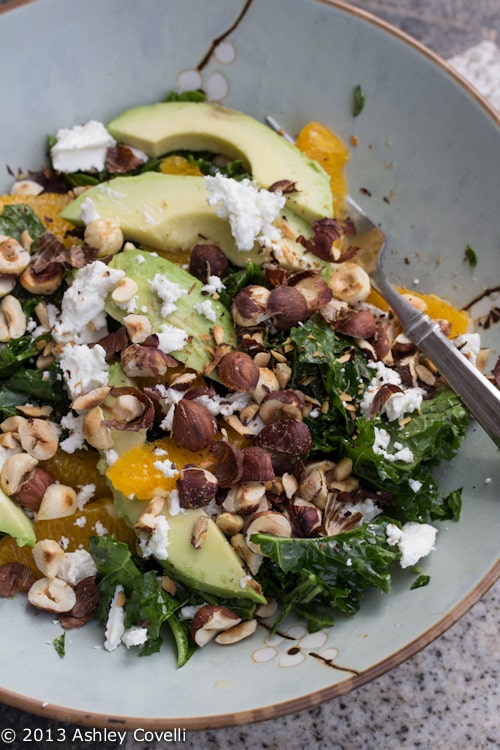
    For the last few days, I had it in my head that I wanted to make a kale salad with toasted hazelnuts on top. I looked around the kitchen to see what else I had to use, and this is what I came up with.

    I started by supreming an orange and then squeezed the juice from the leftover membrane into a salad bowl. I threw a few big handfuls of chopped kale on top of the juice, drizzled some really nice extra-virgin olive oil on top and massaged the leaves until they softened and melted down a bit.

    I topped it with the orange pieces, sliced avocado, some chopped, toasted hazelnuts and crumbled goat cheese. I sprinkled a little sea salt and a few cracks of black pepper, and dug in.

    It was great! I loved the combination of textures, and it was a nice change of pace from the typical salads I make.

    Big Flavors Rating: 4 Stars

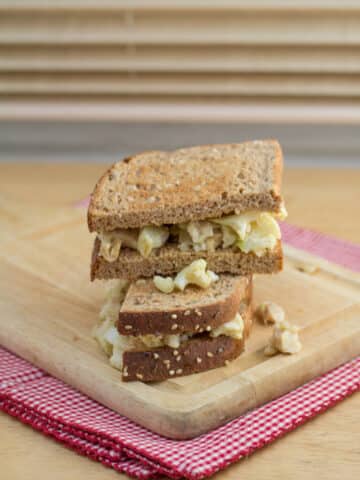
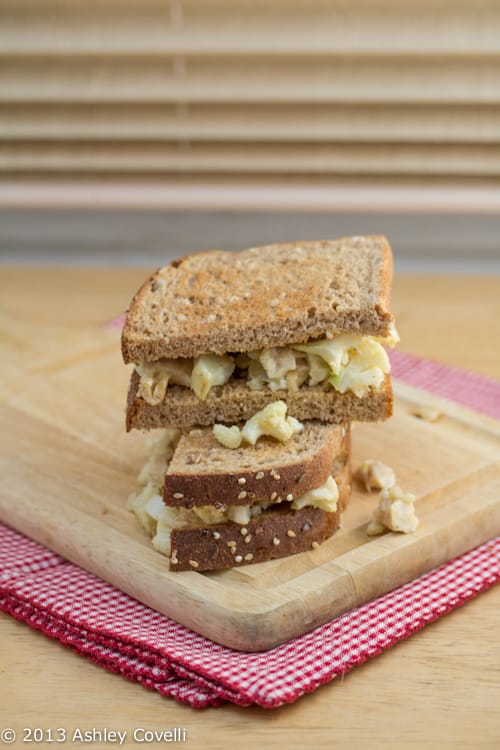
    Chicken and Curried Cauliflower Salad Sandwiches

    October 1, 2013 by Ashley Leave a Comment

    Chicken and Curried Cauliflower Salad Sandwiches

    If you follow me on Instagram, you may have seen that I bookmarked this recipe a while back. I checked out this book from the library and this was the first recipe I bookmarked. I initially thought the book was going to be mostly meat-free recipes with a few meaty ones mixed in, but it turns out that it's more like recipes that use a little bit of meat instead of large amounts, and then there are other ingredients to bulk the recipes up. This recipe tasted really great, but there  was something off with the quantities, and also maybe I didn't cut the cauliflower small enough, and maybe my head of cauliflower was larger than what was called for. Next time, I'd double the mayonnaise part, and then really chop up the cauliflower - maybe even in the food processor. Again, the flavor was wonderful, but it just wasn't executed quite right.

    Chicken and Curried Cauliflower Salad Sandwiches

    Chicken and Curried Cauliflower Salad Sandwiches
    Almost Meatless - Joy Manning & Tara Mataraza Desmond

    Serves 4 to 6

    1 medium head cauliflower, chopped into 2-inch pieces (about 6 cups)
    1 tablespoon plus 1 teaspoon canola oil
    1 teaspoon hot curry powder
    Kosher salt and freshly ground black pepper
    1 (1-pound) bone-in, skin-on chicken breast

    Mayonnaise
    1 egg yolk
    1 ½ teaspoons white wine vinegar
    ⅛ teaspoon salt
    3 grinds black pepper
    ¼ teaspoon mustard
    ½ cup canola oil
    2 scallions, white and green parts, sliced very thin
    ½ teaspoon hot curry powder
    2 tablespoons grated onion

    ⅓ cup salted roasted cashews, coarsely chopped
    ⅓ cup golden raisins
    Toasted slices rye, pumpernickel, or other brown bread

    To prepare the cauliflower and chicken, arrange 2 racks in the oven and preheat to 400°F. Toss the cauliflower with the 1 tablespoon oil, curry powder, and ¼ teaspoon salt in a bowl, and arrange in a single layer on a rimmed baking sheet or in a glass baking dish. Put the chicken in a roasting pan or on a rimmed baking sheet, brush with remaining 1 teaspoon oil, and season with salt and pepper. Transfer both to the oven, one on each rack. Roast the cauliflower for 20 minutes. Remove from the oven and let cool. Let the chicken roast for an additional 10 to 15 minutes (30 to 35 minutes total), until a meat thermometer registers 160°F. Remove from the oven and cool.

    To make the mayonnaise, whisk the egg yolk with the vinegar, salt, pepper, and mustard in a bowl. When well combined, begin adding the oil very slowly, a few drops at a time, until about a quarter of the oil has formed a smooth emulsion with the yolk. Add the remaining oil in a slow, steady stream, whisking constantly. To this half-cup of basic mayo, add the scallions, curry powder, and the grated onion. Taste for seasoning and adjust as needed, and refrigerate until ready to use.

    To prepare and serve the salad, when the chicken is cool, remove and discard the skin, cut the meat from the bone, and dice it into ½-inch pieces. Give the cauliflower a rough chop so the pieces are no more than ½ inch. In a large bowl, combine the chicken, cauliflower, mayo, cashews, and raisins and toss until well mixed. Taste for seasoning, adding more salt, pepper, or curry if you like. Scoop the salad onto toasted bread and enjoy.

    Tip: When making the mayo, pouring the oil from a measuring cup with a spout or squeeze bottle makes it easier to control the flow.

    Big Flavors Rating: 4 Stars

    Caramelized Onion Dip + Weelicious Lunches Review

    October 1, 2013 by Ashley 9 Comments

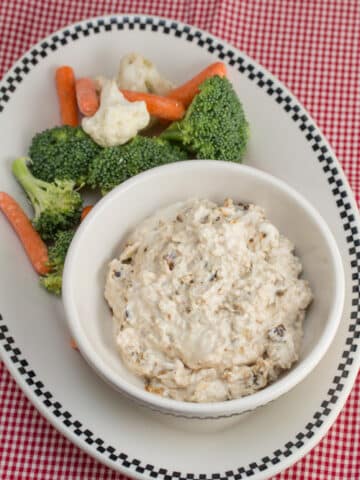
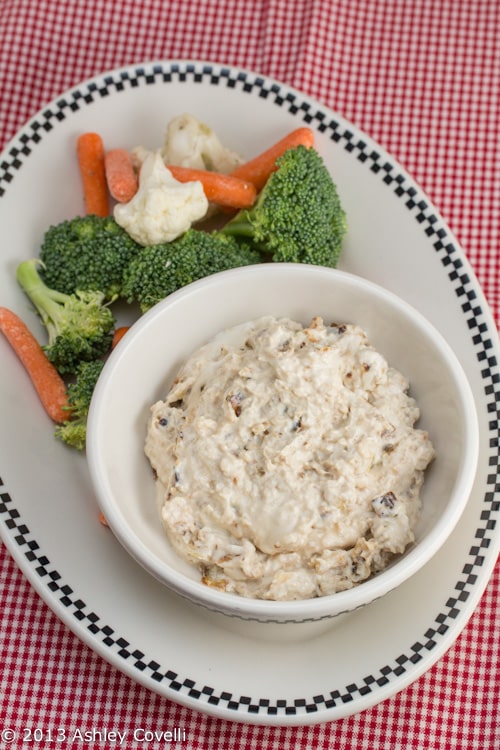
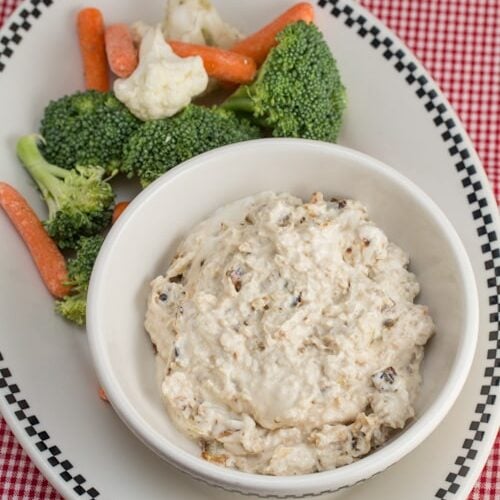
    Caramelized onion dip in a bowl with fresh veggies alongside.

    A simple appetizer that tastes like French onion soup but without the guilt! Plus a review of the Weelicious Lunches cookbook.

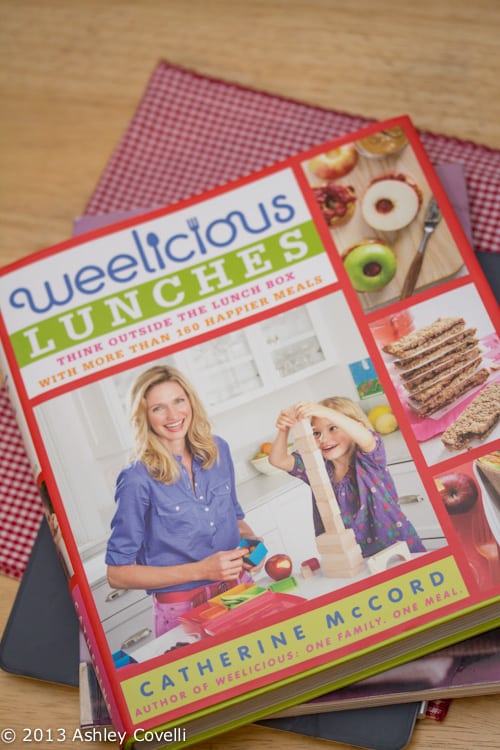
    I have been following Catherine McCord's site, Weelicious, for quite some time now. She always has such colorful, interesting recipes for kid-friendly food.

    In her newest cookbook, Weelicious Lunches, she focuses on easy, healthy and fun lunch ideas, made with fresh, organic ingredients, which is something that's very important to me and my family.

    This book is full of tips on how to get even so-called "picky" eaters to enjoy healthy food.

    There are lots of strategies included for packing school lunches that will satisfy all of your child's senses, thus encouraging them to be more adventurous with what they choose to eat.

    She includes a lot of recipes that feature Greek yogurt, which is something that both she and I agree is a pantry staple. I always have it on hand - you can do so much with it, in both sweet and savory applications.

    There are so many drool-worthy recipes in this book that are sure to make the whole family happy.

    Weelicious Lunches

    I have lots of recipes bookmarked already, but I chose this Caramelized Onion Dip first because it looked nice and easy for a busy weeknight, only had a few ingredients, and was something that would appeal to my toddler's love for dipping food into different sauces.

    This recipe was absolutely fantastic! It was very easy to put together, and the end result almost tasted like rich, French onion soup, but without any of the guilt!

    Caramelized Onion Dip

    My only complaint about it, other than the fact that next time I'll double or triple the quantities for the 3 of us, is that in my experience, it never takes only 15 minutes to caramelize onions.

    So make sure you give yourself plenty of time to let them cook down and get nice and sweet.

    I served this dip with raw broccoli, cauliflower, and baby carrots alongside some Chicken and Curried Cauliflower Salad Sandwiches.

    Caramelized Onion Dip

    📖 Recipe

    Caramelized Onion Dip

    Caramelized onion dip in a bowl with fresh veggies alongside.
    A simple appetizer that tastes like French onion soup but without the guilt!
    Weelicious Lunches – Catherine McCord
    No ratings yet
    Print Recipe Pin Recipe
    Servings: 4 Servings
    Course: Appetizer
    Cuisine: American
    Prep Time 5 minutes mins
    Cook Time 15 minutes mins
    Total Time 20 minutes mins

    Ingredients
     

    • 2 tablespoons olive oil
    • 1 large white onion chopped
    • 1 large clove garlic chopped
    • ½ cup plain Greek yogurt
    • ½ teaspoon salt

    Instructions
     

    1. Heat the oil in a sauté pan over low to medium heat. Add the onions and garlic, and cook for 15 minutes, stirring occasionally, until the onions are soft, golden, and slightly mellowed. Set the onions aside to cool.2. Place all the ingredients in the bowl of a food processor and pulse to finely chop and combine.3. Chill and serve.

    Notes

    Optional Accompaniments: celery, radishes, sugar snap peas, carrots, crackers, or pita chips

    Did you make this recipe?

    Leave a comment + star rating below to let people know how it was!

    And now, for the giveaway! Stonyfield has teamed up with Weelicious to offer my readers a chance to win a free copy of Weelicious Lunches plus a variety of Stonyfield coupons (valued at $30). All you need to do to win is leave a comment below telling me your favorite way to enjoy Greek yogurt. The contest will close on Tuesday, October 15, 2013 at 12 noon (Eastern Standard Time). Winner will be chosen via random.org and will be contacted via email to get mailing information. Good luck, everyone!

    *Note: I received promotional items, but all opinions are 100% my own.

    UPDATE - The winner has been selected via random.org - CONGRATS to Shelly!

    World Vegetarian Day Recipe Roundup

    October 1, 2013 by Ashley 1 Comment

    World Vegetarian Day Roundup

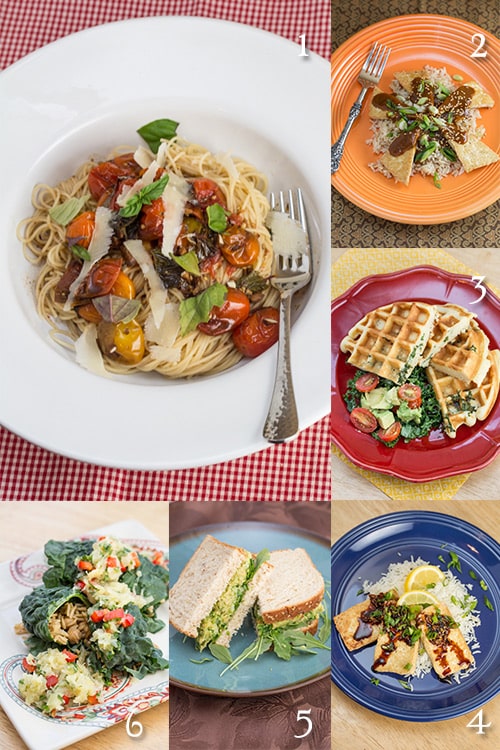
    In honor of World Vegetarian Day, here are some of my family's favorite meat-free dishes to come out of our tiny kitchen. What are your favorite vegetarian dishes?

    World Vegetarian Day Roundup

    1. Balsamic Roasted Grape Tomatoes Over Angel Hair

    2. Tofu Triangles in Creamy Nut Butter Sauce with Scallions

    3. Tahini Kale Stuffed Belgian Waffles with Avocado Tomato Salad

    4. Pan-fried Tofu with Dark Sweet Soy Sauce

    5. Smashed Chickpea & Avocado Salad Sandwich

    6. Rice and Chickpea Kale Rolls with Pineapple Salsa

    Enjoy!

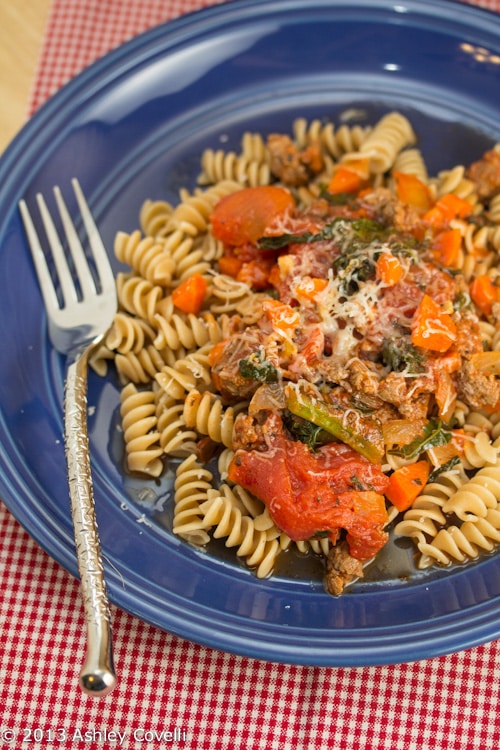
    Rotini with Beefy Kale Ragù

    September 26, 2013 by Ashley 2 Comments

    Rotini with Beefy Kale Ragù

    This pasta sauce recipe is a great way to use up vegetables that are hanging out in your fridge that's very flexible. Total comfort food!

    Rotini with Kale Ragù

    I had half a pound of ground beef leftover from when I made Hoisin Cocktail Meatballs last weekend. I figured I might as well make a pasta sauce with that and some of the other veggies I had hanging out in the fridge. This combination turned out really well! I wilted a few big handfuls of chopped kale into the other veggies before adding the tomatoes, and it was great.

    I waited until after Dino tried it and said it was really good to mention that I may have done something totally un-Italian - I used Worcestershire sauce. It really added a nice depth of flavor that worked nicely with the other flavors here. I served this over some whole grain rotini, but any type of pasta would be fine. Freshly grated Parmesan melts down on top for the perfect finale.

    📖 Recipe

    Rotini with Beefy Kale Ragù

    Rotini with Beefy Kale Ragù
    This pasta sauce recipe is a great way to use up vegetables that are hanging out in your fridge that's very flexible. Total comfort food!
    Big Flavors from a Tiny Kitchen - Ashley Covelli
    No ratings yet
    Print Recipe Pin Recipe
    Servings: 4 -6 Servings
    Course: Pasta
    Cuisine: Italian
    Prep Time 10 minutes mins
    Cook Time 20 minutes mins
    Total Time 30 minutes mins

    Ingredients
     

    • ½ pound lean ground beef
    • 1 small yellow onion diced
    • 2 cloves garlic minced
    • 2 carrots diced
    • 1 stalk celery diced
    • Kosher salt and freshly cracked black pepper to taste
    • 1 teaspoon Worcestershire sauce
    • 1 tablespoon dried Italian seasoning
    • 2 big handfuls chopped kale about 2 cups
    • 28 ounce can whole peeled San Marzano tomatoes
    • 14 ounces water
    • 1 pound cooked rotini or other pasta*
    • Freshly grated Parmesan cheese for serving

    Instructions
     

    1. Heat a large, non-stick skillet over moderate heat. Add ground beef and cook, breaking the meat into smaller pieces with a spoon or spatula, until almost cooked through. Drain fat if necessary and add onion, garlic, carrots and celery. Season with salt and pepper. Sauté until the veggies are starting to soften. Add Worcestershire and Italian seasoning and stir to combine. Add kale and stir until it wilts down into the veggies.
    2. Add the tomatoes and break them into pieces with your spoon or spatula. Pour water into the tomato can until it comes up about halfway and pour that into the skillet – this way you get the residual tomato juice from the sides of the can while adding water.
    3. Bring the sauce up to a boil, and then reduce the heat and let it simmer while you cook your pasta. Once the ragú reaches your desired consistency, remove from heat. Taste for seasoning and adjust if necessary.
    4. Serve ragú on top of cooked pasta. Garnish with a healthy dose of freshly grated Parmesan cheese. Enjoy!

    Notes

    *Optional: use Gluten Free

    Did you make this recipe?

    Leave a comment + star rating below to let people know how it was!

    Bulgogi Style Tofu

    September 23, 2013 by Ashley 5 Comments

    Bulgogi Style Tofu

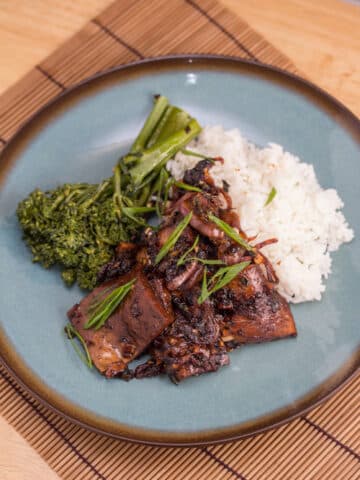
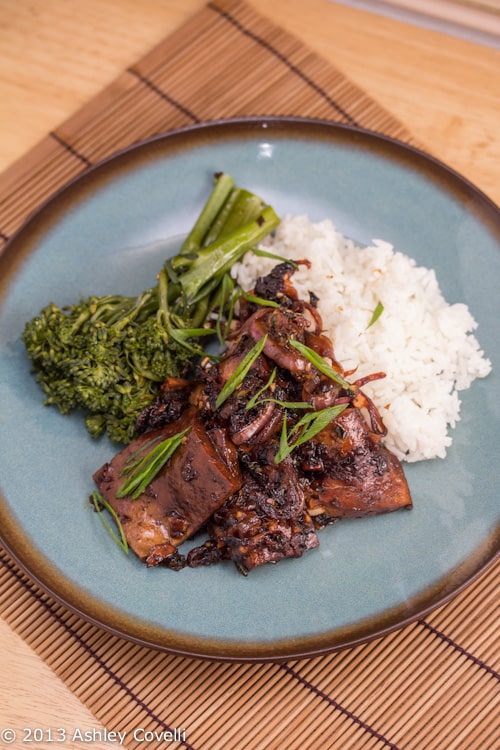
    I've had this recipe bookmarked for quite a while now, and finally got around to making it. The 8 (or more!) hour long marinating process imparts a ton of flavor, and then that flavor gets cooked down into t tasty sauce while the tofu cooks. It's really strong, so it definitely needs to be eaten over rice to balance it out. I used extra firm tofu, since I couldn't find the brand recommended in the original recipe (not even at HMart!), and it was pretty delicate and tricky to flip without tearing the pieces. I also used peanut oil in lieu of sesame oil for cooking it, as in my experience, sesame oil is not a good oil to fry with. I think next time, I'd fry the tofu in a little oil, in two batches, and THEN pour the marinade in the pan with all of the tofu and let it bubble and cook down to coat the tofu. I think I'd get a little better browning on the tofu that way. This was a really nice way to enjoy a meat-free Korean BBQ dish. If you happen to be looking for some awesome Sokalbi Gui (Korean BBQ Beef Short Ribs), this recipe is our favorite. I served this tofu with steamed white rice and broccolini.

    Bulgogi Style Tofu

    Bulgogi Style Tofu
    Allyson Kramer

    One 16 oz block extra firm, very dense tofu (see recommended brand below)
    4 green onions, chopped (use white part too!)
    3 cloves garlic, minced
    ½ average sized onion, sliced
    1 heaping teaspoon fresh grated ginger
    ⅔ cup wheat free tamari or soy sauce
    4 tablespoon toasted sesame oil
    6 tablespoon organic sugar
    1 teaspoon black pepper
    1 teaspoon crushed red pepper flakes
    4 tablespoon mirin
    2 tablespoon rice vinegar
    ¼ cup shredded pear, skin and all

    First, make sure your tofu is very well drained. Wrap it up in towels and press between two plates with something heavy on top to get all that water out. I pressed mine for well over an hour. A Tofu Xpress would work great here. I also used the [Twin Oaks] brand of tofu (found at Whole Foods)… which is super dense and just perfect for this recipe. If you can’t find this particular brand, just try and get the densest brick of tofu you can find, as the density makes it easier to slice very thinly. Freezing the tofu after draining is also an option if you’re working with a flimsier tofu.

    Once it has drained for a good long time, slice the block in half. Then, make thin slices to the tofu to resemble little tofu steaks. Arrange them in a deepish dish where they will be able to soak up lots of marinade. Then cover the tofu slices with your chopped onions, green onions, ginger and garlic.

    In medium sized bowl, combine the tamari, sesame oil, sugar, black pepper, mirin, rice vinegar, red pepper flakes and shredded pear. Stir really well to complete mix all ingredients together. Pour over tofu and veggies. Cover and place into the refrigerator. Let marinate at least 8 hours. It’s really great to do this overnight… a little longer than 8 hours wont hurt anything. In fact, it may even help!

    After 8 hours has passed, separate the tofu strips from the marinade. Reserve the veggies and sauce for cooking. Heat up a cast iron skillet (or other handy dandy pan) over medium heat and drizzle with some sesame oil. When your skillet is nice and hot, place the strips into the pan in an even layer so that there is adequate room for them to fry up. When you place the tofu in the pan, it should sizzle. (I cooked my tofu in two batches). Pour enough of the marinade onto the tofu just to cover… make sure some of those veggies get in there too!

    Let cook until most of the marinade has reduced, and the bottoms of the tofu slices are nice and caramely brown. Flip over tofu strips and cook until other side turns brown. Continue to cook until all tofu has transformed into delicious Korean bulgogi tofu.

    That’s it!

    Serve over rice.

    Big Flavors Rating: 4 Stars

    Coconut Jelly

    September 22, 2013 by Ashley 44 Comments

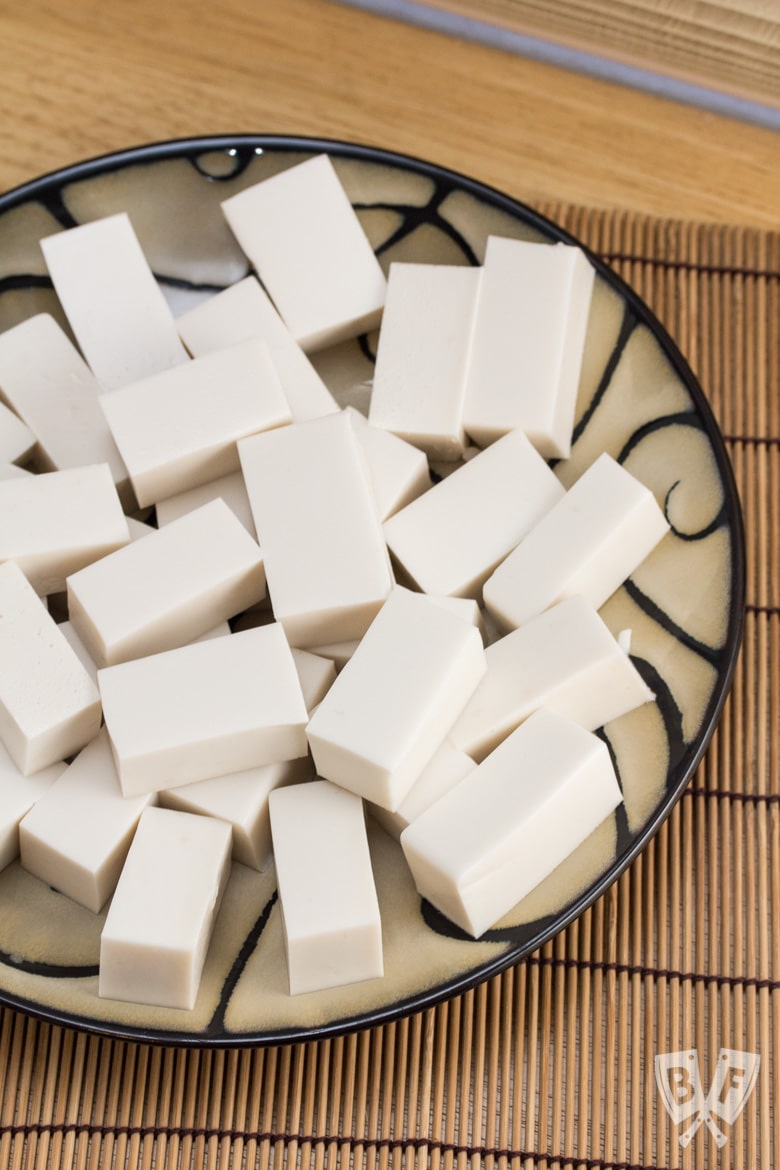
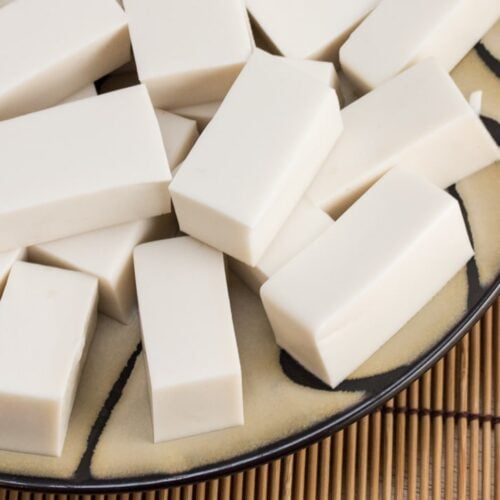
    Overhead shot of a plate with rectangles of white coconut jelly.

    A silky smooth, slightly sweet way to end any dim sum party! These luxuriously smooth treats take only 5 ingredients and 10 minutes on the stovetop, then just stash them in the fridge until party time!

    Overhead shot of a plate with rectangles of white coconut jelly.

    For the finale of our Dim Sum party, I made some these creamy, dreamy bits of awesomeness.

    I got this recipe from the Dim Sum class I took at ICE. Some of the other people in class had made these, and I really liked them.

    The only thing that bugged me was that the instructor said she didn't like rose water, so she didn't have us put it in the jelly.

    I happen to really enjoy rose water, so I was excited to try these out in my own kitchen.

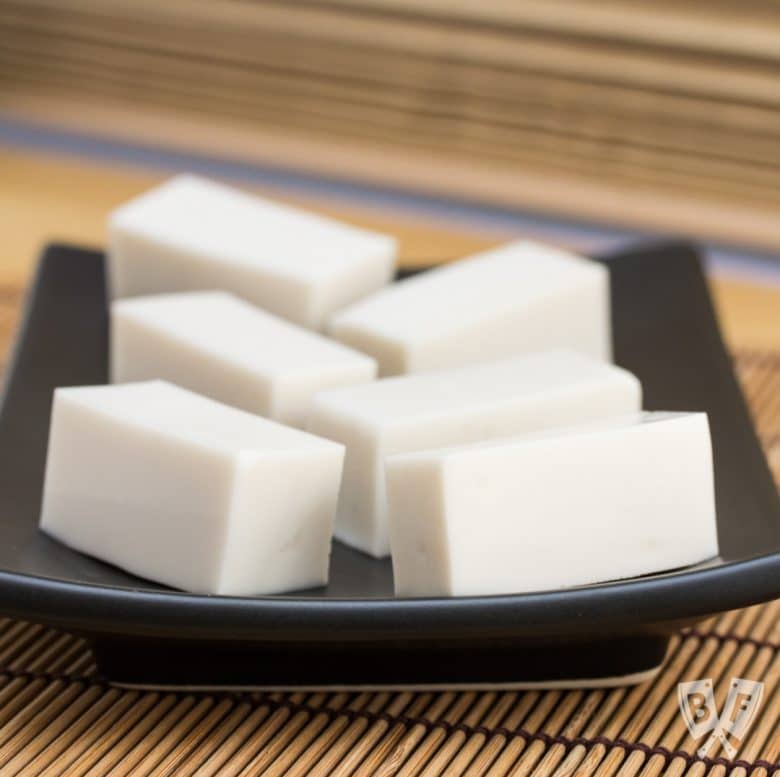
    Black plate with rectangular pieces of coconut jelly.

    These beauties are stark white, and perfectly smooth, thanks to a dose of agar-agar powder.

    It was my first time using it, and it really made them set up nice and firm. This is really easy to put together, and there aren't a lot of ingredients.

    The coconut cream is the stuff that's over in the mixed drink aisle of the store (I used Coco López).

    These are finger food desserts, and it's incredible to see how well they hold up when they sit out at room temperature.

    I have all sorts of ideas for things to make with the rest of my bottle of agar-agar!

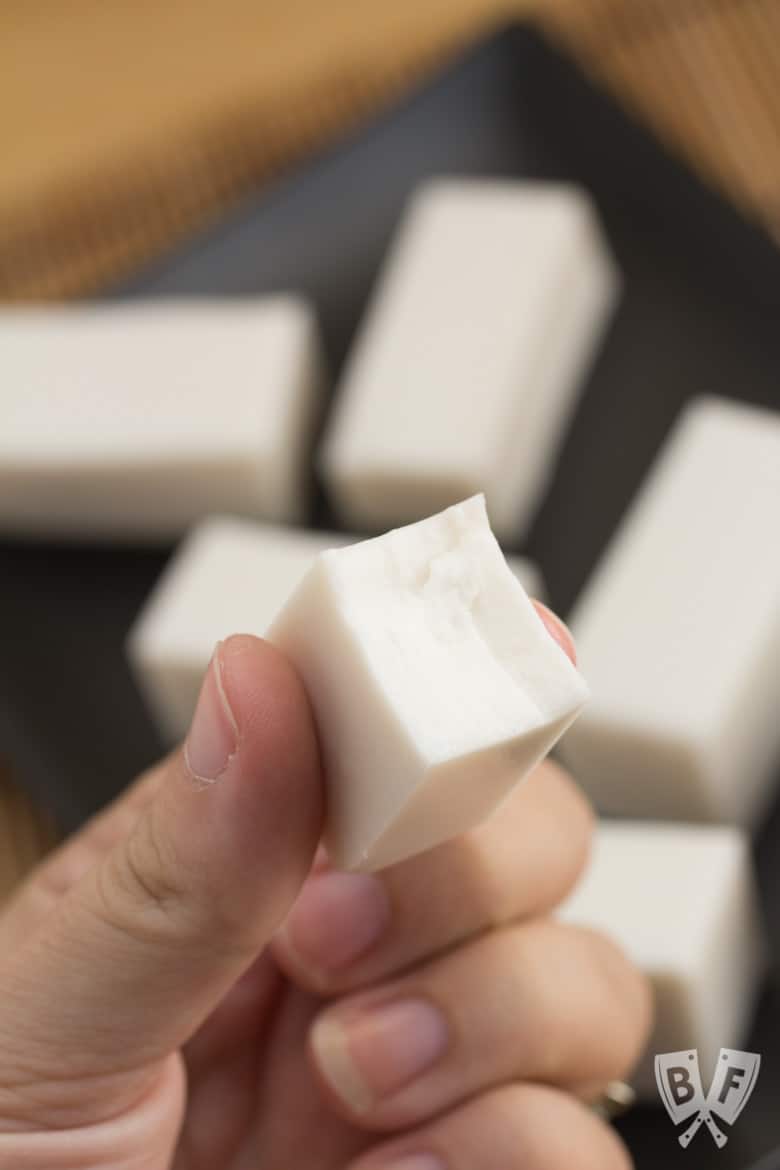
    A hand holding a white piece of coconut jelly with a bite taken out of it and full pieces in the background.

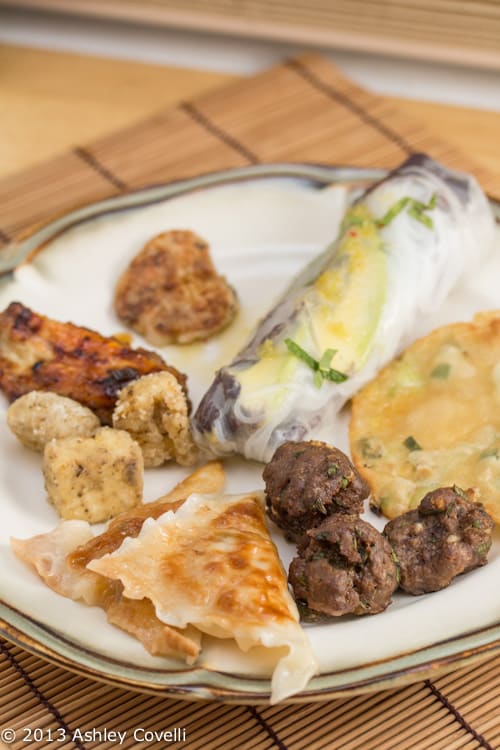
    Here's a shot of the rest of the meal (minus some awesome homemade fortune cookies!), including the Hoisin Cocktail Meatballs and Shrimp Dumplings.

    Supper Club Dim Sum

    Looking for more dessert recipes? Check out some of our favorites:

    • Rich Cocoa Brownie Bites
    • Elvis-Style Frozen Bananas
    • Sweet + Salty Dark Chocolate Clusters
    • 5-Ingredient Samoa Cereal Bowls
    • Orange Scented Cannoli Dip
    • Double Chocolate Chip Cookies with Vanilla Icing
    • Dessert Nachos with Fresh Baked Cinnamon Tortilla Chips
    • Tolon's Strawberry Basil Shortcake
    • Cranberry Orange Snickerdoodles
    • Bourbon Bacon Pecan Pie with a Whole Wheat Crust
    • Chocolate Cream Pie with Orange Zested Whipped Cream
    • Great Grandma Francesca Cardile's Cookies
    • Triple-Chocolate Pumpkin Pie
    • Ricotta Cookies
    • Grandma's Christmas Cookies

    Recipe for Coconut Jelly

    📖 Recipe

    Coconut Jelly

    Overhead shot of a plate with rectangles of white coconut jelly.
    A silky smooth, slightly sweet way to end any dim sum party! These luxuriously smooth treats take only 5 ingredients and 10 minutes on the stovetop, then just stash them in the fridge until party time!
    Big Flavors from a Tiny Kitchen - Ashley Covelli (adapted from Encyclopedia of Asian Food)
    4 from 4 votes
    Print Recipe Pin Recipe
    Servings: 64 (1-inch) pieces
    Course: Dessert
    Cuisine: Chinese
    Cook Time 10 minutes mins
    Total Time 3 hours hrs 10 minutes mins

    Ingredients
     

    • 2 (15-ounce) cans full fat unsweetened coconut milk
    • 2 tablespoons agar agar powder, see notes
    • 6 tablespoons granulated sugar
    • 1 cup canned coconut cream, such as Coco Lopez
    • ¾ teaspoon rose water

    Instructions
     

    1. Pour the coconut milk into a medium saucepan. Sprinkle the agar-agar powder over the top, add sugar, and whisk to combine. Simmer for 10 minutes, whisking occasionally. Remove from heat and stir in the coconut cream and rose water.
    2. Transfer the mixture to an 8×8 square pan, cover with foil, and refrigerate until set - at least 3 hours, up to overnight.
    3. Run a knife around the edges of the pan and turn it out onto a cutting board. Cut into diamonds, squares, or rectangles and serve cold.

    Notes

    • Recipe adapted from Encyclopedia of Asian Food by Charmaine Solomon
    • If using agar flakes, triple the amount used to 6 tablespoons.

    Useful products:

    agar agar
    coconut cream
    coconut milk

    Nutrition information

    Nutrition Facts
    Coconut Jelly
    Amount per Serving
    Calories
    48
    % Daily Value*
    Fat
     
    4
    g
    6
    %
    Saturated Fat
     
    4
    g
    25
    %
    Polyunsaturated Fat
     
    0.05
    g
    Monounsaturated Fat
     
    0.2
    g
    Sodium
     
    2
    mg
    0
    %
    Potassium
     
    49
    mg
    1
    %
    Carbohydrates
     
    2
    g
    1
    %
    Fiber
     
    0.4
    g
    2
    %
    Sugar
     
    2
    g
    2
    %
    Protein
     
    0.5
    g
    1
    %
    Vitamin C
     
    0.5
    mg
    1
    %
    Calcium
     
    4
    mg
    0
    %
    Iron
     
    0.3
    mg
    2
    %
    * Percent Daily Values are based on a 2000 calorie diet.
    Did you make this recipe?

    Leave a comment + star rating below to let people know how it was!

    Supper Club: Shrimp Dumplings

    September 22, 2013 by Ashley Leave a Comment

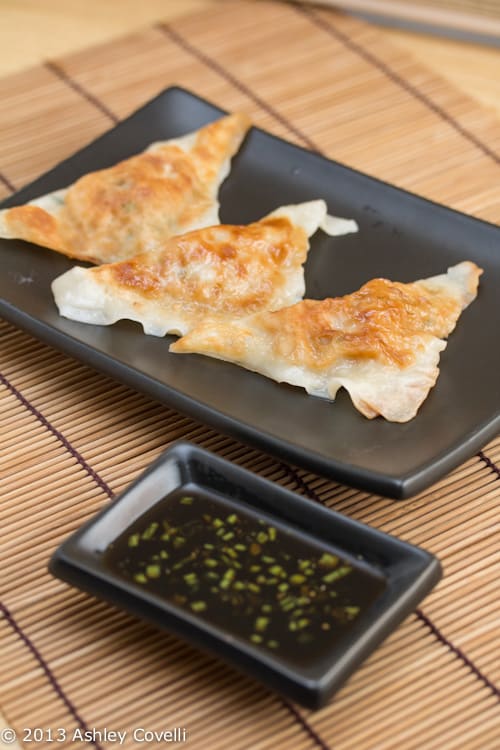
    Shrimp Dumplings

    These shrimp dumplings were a bit of a hassle to put together, even though we made the filling early in the day. We doubled the recipe, but it made a TON of dumplings. We had to cook them in batches, which ended up taking quite a bit of time, too. Luckily, they were delicious! They definitely need the dipping sauce, so don't forget to make that. The flavor of the filling is wonderful, and you get a nice bit of crunch from the water chestnuts.

    Shrimp Dumplings

    Shrimp Dumplings
    Gourmet January 1999

    Serves 2

    ½ pound shrimp (about 8 large)
    ½ cup drained canned water chestnuts
    2 scallions
    1 large egg white
    1 tablespoon grated peeled fresh gingerroot
    3 tablespoons soy sauce
    14 won ton wrappers, thawed if frozen
    ½ teaspoon sugar
    2 tablespoons vegetable oil
    ¾ cup boiling-hot water

    Peel shrimp and, if desired, devein. In a food processor purée 3 shrimp. Rinse and drain water chestnuts. Finely chop water chestnuts and remaining shrimp. Finely chop scallion greens, reserving white parts for another use. Lightly beat egg white and put 1 tablespoon in a bowl. Stir in puréed and chopped shrimp, water chestnuts, about two thirds each of scallion greens and gingerroot, and 1 tablespoon soy sauce.

    Put 7 won ton wrappers on a dry surface, keeping remaining wrappers in package, and lightly brush edges with water. Mound about 1 tablespoon filling in center of each wrapper. Fold each wrapper over filling to form a triangle. Press down around filling to force out excess air and seal edges well. Make additional dumplings with remaining wrappers and filling in same manner.

    In a small bowl stir together sugar and remaining scallion greens, gingerroot, and soy sauce to make dipping sauce.

    In a 12-inch nonstick skillet heat oil over moderately high heat until hot but not smoking and brown dumplings on both sides, about 3 minutes total. Add boiling-hot water to skillet and cook, covered, 5 minutes. Serve dumplings with sauce.

    Big Flavors Rating: 5 Stars

    Supper Club: Hoisin Cocktail Meatballs

    September 22, 2013 by Ashley Leave a Comment

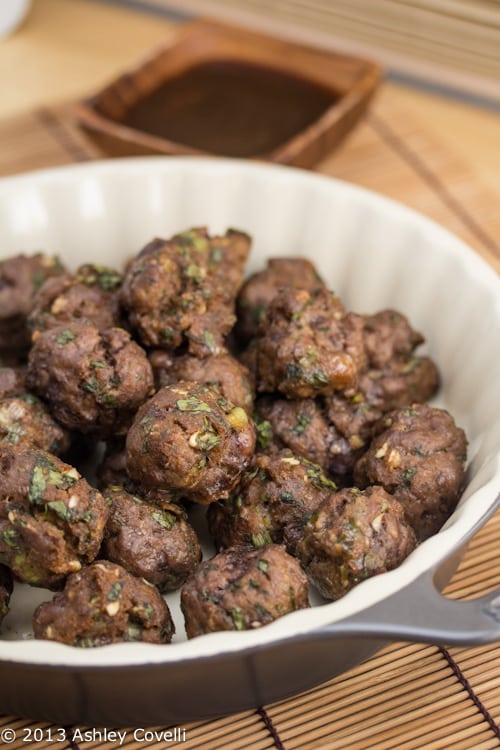
    Hoisin Cocktail Meatballs

    This month's Supper Club theme was Dim Sum. I had taken a Dim Sum class over at the Institute of Culinary Education a little while back, so two of the recipes that I chose for our event were from that class.

    These hoisin meatballs are incredibly moist and flavorful, and the dipping sauce is perfect alongside. I mixed everything together in a bowl in the morning, and then covered it and left it in the fridge until we were ready to cook for the evening, and it worked out great.

    These would be great for any dinner party, don't limit it to Dim Sum!

    Hoisin Cocktail Meatballs

    Hoisin Cocktail Meatballs
    Taste of Home

    TOTAL TIME: Prep: 20 min. Bake: 20 min.
    Yield: 32 appetizers.

    Meatballs
    2 tablespoons hoisin sauce
    1 tablespoon reduced-sodium soy sauce
    1 teaspoon sesame oil
    ¼ cup dry bread crumbs
    3 tablespoons chopped green onions
    3 tablespoons minced fresh parsley
    2 garlic cloves, minced
    1 teaspoon minced fresh gingerroot
    1-½ pounds 90% Lean Ground Beef

    Sauce
    ¼ cup rice vinegar
    ¼ cup hoisin sauce
    2 tablespoons water
    2 tablespoons sesame oil
    2 tablespoons reduced-sodium soy sauce
    1 tablespoon honey
    2 garlic cloves, minced
    1 teaspoon minced fresh gingerroot

    1. In a large bowl, combine the first eight ingredients. Crumble beef over mixture and mix well.

    2. Shape into 32 meatballs. Place in a 13-in. x 9-in. baking dish coated with cooking spray. Bake, uncovered, at 350° for 20-25 minutes or until meat is no longer pink.

    3. Meanwhile, in a small saucepan, combine the sauce ingredients; heat through. Serve with meatballs.

    Big Flavors Rating: 5 Stars

    End of Summer Penne Primavera

    September 17, 2013 by Ashley 1 Comment

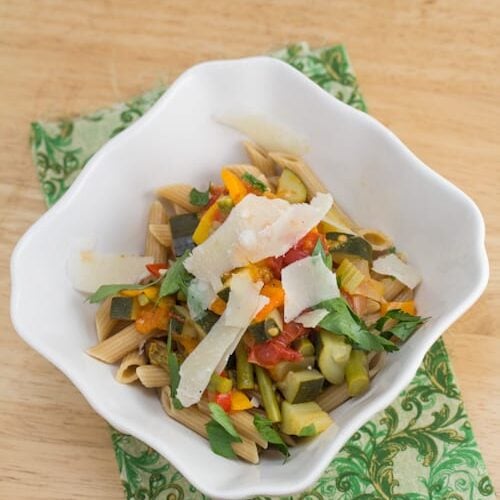
    End of Summer Penne Primavera

    My father-in-law gave me a bunch of beautiful tomatoes from his garden, and they were >thisclose< to being too ripe. This pasta was a way for me to use up those tomatoes plus a bunch of beautiful produce that was hanging out in my kitchen, all at once. It was simple enough to put together, because I just kind of chopped things and dropped them into the pan as I went. I really liked how colorful this dish was, and some nice, fat strips of Parmesan right on top added a great bit of salty, creamy goodness.

    End of Summer Penne Primavera

    📖 Recipe

    End of Summer Penne Primavera

    End of Summer Penne Primavera
    Big Flavors from a Tiny Kitchen - Ashley Covelli
    No ratings yet
    Print Recipe Pin Recipe
    Course: Main Dish
    Cuisine: Italian

    Ingredients
     

    • 2 tablespoons extra-virgin olive oil
    • ½ small sweet onion diced
    • 1 small shallot diced
    • 2 cloves garlic minced
    • 1 stalk celery diced
    • 4 mini bell peppers diced
    • 2 zucchini diced
    • 1 bunch asparagus trimmed and chopped into 1-inch pieces
    • 7 large tomatoes diced
    • 1 dried bay leaf
    • 1 ½ cups vegetable stock
    • Kosher salt and freshly cracked black pepper to taste
    • Cooked whole wheat penne*
    • Chopped parsley for garnish
    • Parmesan shavings for garnish (omit to keep it vegan)

    Instructions
     

    1. Heat oil in a large, non-stick skillet over moderate heat. Add ingredients, through tomatoes, and season to taste with salt and pepper. Sauté for a few minutes and add the bay leaf and vegetable stock. Check for seasoning and adjust if necessary. Simmer for a few minutes, until the sauce cooks down and thickens a bit.
    2. Serve over cooked penne, garnishing with parsley and Parmesan. Enjoy!

    Notes

    *Optional: use Gluten Free

    Did you make this recipe?

    Leave a comment + star rating below to let people know how it was!

    Peanut Butter and Jelly Granola Bars

    September 17, 2013 by Ashley 1 Comment

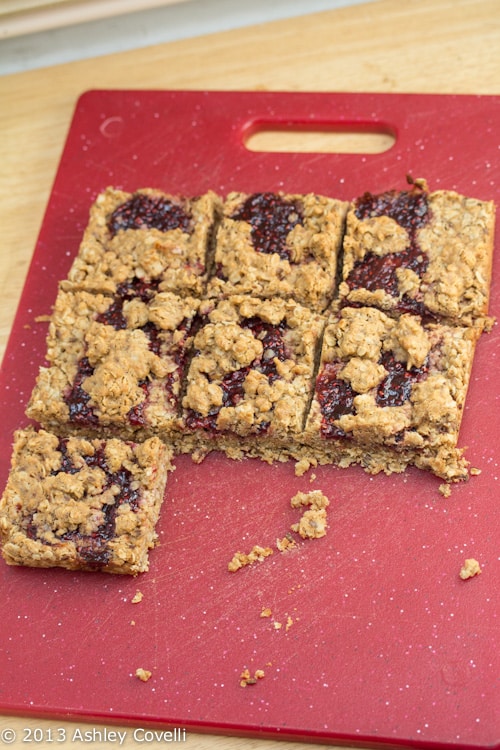
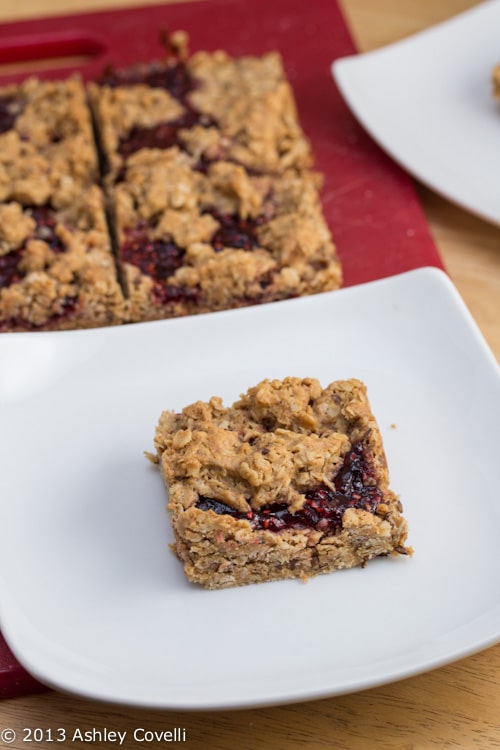
    Peanut Butter and Jelly Granola Bars

    Peanut Butter and Jelly Granola Bars

    I've never attempted making my own granola bars, but it's been on my list for quite some time now. When I came across this recipe a few days ago, I knew it was the one for me! I had all of the ingredients on hand, and I'm a big fan of PB&J. These were surprisingly easy to put together, and they turned out so well! They were nice and crunchy on the bottom, and there's just the right amount of jam to accent the peanut butter. Plus, there's oatmeal and flax seeds in there, so they're totally healthy, right? 😉

    Peanut Butter and Jelly Granola Bars

    Peanut Butter and Jelly Granola Bars
    Yummy Mummy Kitchen via Culinary Covers

    Yield: 9 servings Prep Time: 10 min Cook Time: 20 min

    2 cups rolled oats
    ⅓ cup all-purpose flour
    2 tablespoons flaxseeds
    ½ cup lightly packed brown sugar
    ½ cup butter, melted
    ¾ cup peanut butter
    ⅓ cup raspberry jam

    1. Preheat the oven to 350F. Place a 12-inch square of parchment paper over an 8-inch square baking dish and press it down onto the bottom and up the sides of the dish.

    2. In a large bowl, stir together the oats, flour, flaxseeds, and brown sugar. Stir in the melted butter and peanut butter. Press the oat mixture into the prepared baking dish, reserving ½ cup for topping. Spoon 4 lines of jam across the top of the oat mixture. Sprinkle the remaining ½ cup of oat mixture over the jam.

    3. Bake for 20 minutes, or until slightly browned and firm.

    4. Cool completely, at least 1 hour. Cut into squares.

    Big Flavors Rating: 4 Stars

    Taco Salad

    September 13, 2013 by Ashley 1 Comment

    Taco Salad

    I love taco salad, but I hadn't made it for quite a while. When I got this month's taco seasoning freebie from Penzeys, I took a look at what I had on hand and decided that taco salad was most definitely in order. I love making my own taco seasoning blend in big batches, but I don't always have enough on hand, so this was perfect. One note though - this blend contains lactose, which I would have NEVER thought to check for, but a friend pointed it out, because she is lactose intolerant and was bummed to not be able to use the seasoning. You've been warned! Penzeys has instructions for making a taco dip, too, which sounds pretty tasty.

    Taco Salad

    All I did to make this taco salad was cook a pound of ground beef, drain off the fat, and then follow the directions on the jar (except I put the seasoning right on the meat and stir, then add the water): mix 4 TB. Taco Seasoning with 6 oz. cool water, add to 1 lb. browned, drained ground beef or cooked chicken or beans. Simmer 10 minutes until the sauce starts to thicken. Let cool a bit before serving.

    I have a particular order that I like assembling my taco salad in, because I like the cheese to melt a bit down onto the meat, and I like keeping the coldest ingredients on top. So I broke up some tortilla chips in my hands, scattered some of the taco meat on top, sprinkled some shredded cheese on top of that (I used a Mexican blend), then topped that with some hot sauce, halved grape tomatoes, sliced red onions, leftover grilled corn, romaine lettuce, chunks of avocado and a dollop of sour cream. It was great! Total comfort food in my book!

    Big Flavors Rating: 5 Stars

    Grilled Nutella and Banana Sandwich

    September 12, 2013 by Ashley 2 Comments

    Grilled Nutella and Banana Sandwich

    I made this sandwich when a late-night sweet tooth craving struck, and I started thinking... I made this in the style of a grilled cheese sandwich. But it's not really grilled, it's more pan-fried. But if I called it a fried sandwich, I'd picture something like what you'd get at a state fair, breaded and deep-fried. This version is ever so slightly healthier than that - ha! Any way you look at it, this was DELICIOUS, and totally hit the spot.

    Grilled Nutella and Banana Sandwich

    All I did to make 2 sandwiches was slather the insides of 4 pieces of bread with Nutella. I sliced one banana in half lengthwise, and then each half into thin strips, and loaded up one side of each sandwich with them. Then, I closed the sandwich together, Nutella-side in. I melted some butter in a large, non-stick skillet over moderate heat. I threw the sandwiches in there and cooked them on one side until they got nice and brown, and then flipped them over and cooked the other side. I threw a little more butter in there when I flipped them, because the pan was starting to dry out. When I make grilled cheese sandwiches, I butter the outsides of the bread instead of melting butter in the pan, but I wanted to give it a try this way, and it worked out really well. The sandwiches were nice and melty and delicious, and a sprinkling of powdered sugar at the end finished it off perfectly. YUM.

    Big Flavors Rating: 5 Stars

    Quick Chesapeake Bay Salmon

    September 12, 2013 by Ashley 1 Comment

    Quick Chesapeake Bay Salmon

    Quick Chesapeake Bay Salmon

    We had a bunch of leftover side dishes in the fridge, so I decided to simply season some salmon fillets and fry them quickly on the stovetop. I sprinkled each fillet with some of Penzeys Chesapeake Bay Seasoning (or you could use Old Bay) and seared them in a little olive oil in a hot skillet. It was quick and easy and a little squeeze of lemon at the end brought it all together. I served this salmon with leftover quinoa, Balsamic-Roasted Brussels Sprouts with Pine Nuts and Parmesan, Green Beans with Garlicky Shiitakes, and No-Fuss Sweet and Spicy Carrot Salad.
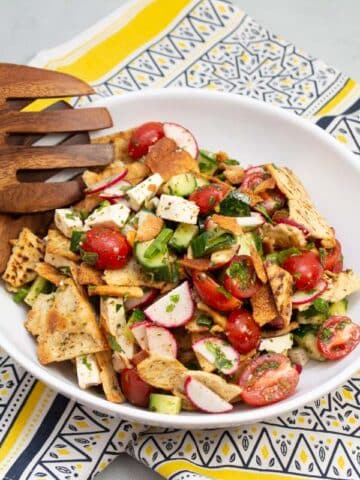
    Smoky Shrimp with Charred Corn Salsa

    September 12, 2013 by Ashley Leave a Comment

    Smoky Shrimp with Charred Corn Salsa

    I've always loved corn on the cob. I mean, I grew up in Indiana with an aunt and uncle who had a farm with the best sweet corn on Earth, so how could I not?

    Lately, I've been asking Dino to throw a few extra cobs on the grill any time he fires it up so that I have some delicious, smoky grilled corn to use for the next few days. This dish was one great way to use leftover grilled corn.

    Smoky Shrimp with Charred Corn Salsa

    I tossed a few ingredients together to make a salsa while the shrimp marinated, and then it got to hang out while I cooked the shrimp. We really liked the flavors in this dish, and the salsa was the perfect accompaniment.
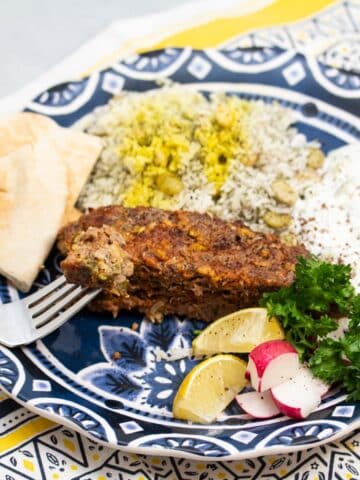
    I served this on top of quinoa, but it would be great over rice or in taco shells or lettuce wraps, too! You can substitute regular cooked corn if you don't want to fire up the grill, but you will miss out some really nice charred flavor.
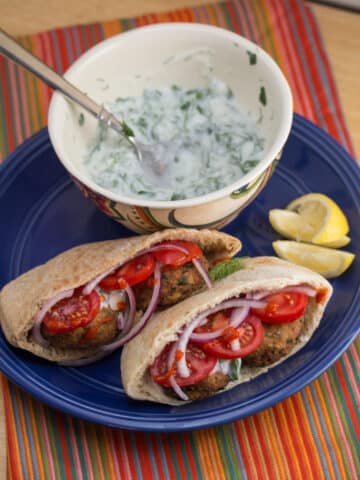
    📖 Recipe

    Smoky Shrimp with Charred Corn Salsa

    Smoky Shrimp with Charred Corn Salsa
    Big Flavors from a Tiny Kitchen - Ashley Covelli
    No ratings yet
    Print Recipe Pin Recipe
    Course: Main Dish

    Ingredients
     

    For the shrimp:
    • 1 pound large shrimp peeled and deveined (I used Argentinean red shrimp)
    • 3 tablespoons extra-virgin olive oil
    • 2 cloves garlic minced
    • 1 teaspoon smoked Spanish paprika
    • ½ teaspoon ground cumin
    • ½ teaspoon dried oregano
    • Kosher salt and freshly cracked black pepper to taste
    For the salsa:
    • Kernels from 3 ears of grilled corn
    • 1 cup grape or cherry tomatoes halved
    • ¼ cup sweet onion finely diced
    • 4 mini bell peppers yellow, red and/or orange, finely diced (or sub ½ a full-sized bell pepper)
    • 1 tablespoon white wine vinegar
    • 2 tablespoons extra-virgin olive oil
    • 1 tablespoon lemon juice
    To serve
    • Cooked quinoa rice, taco shells or lettuce
    • Parsley for garnish

    Instructions
     

    1. Mix all of the ingredients for the shrimp in a large bowl, cover and put in the refrigerator for 30 minutes. While that marinates, mix all of the salsa ingredients in a large bowl.
    2. Heat a large, non-stick skillet over moderate heat. Add the contents of the shrimp bowl and cook, stirring occasionally, until shrimp are pink and just cooked through. It should only take a few minutes.
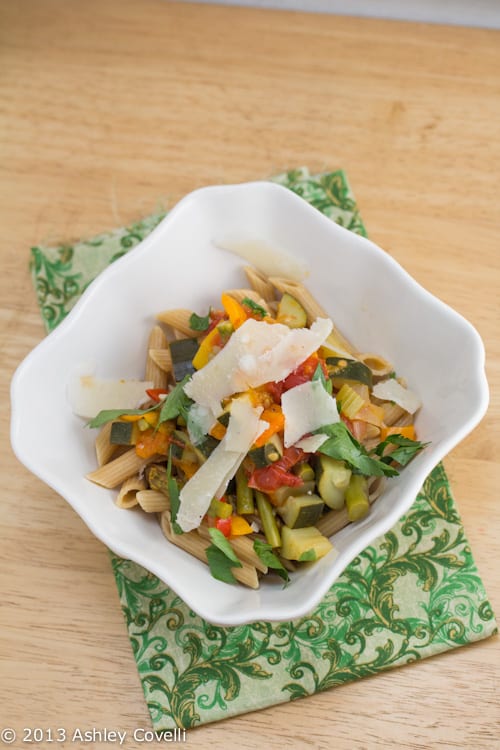
    3. To serve, place shrimp on top of cooked quinoa or rice and top with salsa. This would also be great in tacos or lettuce wraps. Enjoy!

    Did you make this recipe?

    Leave a comment + star rating below to let people know how it was!

    Spice-Crusted Tofu

    September 10, 2013 by Ashley 1 Comment

    Spice-Crusted Tofu

    This is one of our favorite tofu dishes, and I haven't made it in a few years. It's perfect for a busy weeknight, because it comes together pretty quickly, and the toasted pine nuts sprinkled over top give it a nice bit of crunch. This time around, I accidentally used half-sharp paprika and it was MAJORLY spicy. Oops! I served this with No-Fuss Sweet and Spicy Carrot Salad and Balsamic-Roasted Brussels Sprouts with Pine Nuts and Parmesan.

    Spice-Crusted Tofu

    Spice-Crusted Tofu
    Eating Well Spring 2004

    3 tablespoons pine nuts
    1 tablespoon paprika
    1 teaspoon ground cumin
    1 teaspoon ground coriander
    ½ teaspoon coarse kosher salt, or to taste
    Freshly ground pepper to taste
    1 14-ounce package extra-firm tofu
    3 tablespoons boiling water
    2 tablespoons lemon juice
    4 teaspoons honey
    1 tablespoon extra-virgin olive oil

    1. Toast pine nuts in a small dry skillet over medium-low heat, stirring constantly, until golden and fragrant, 2 to 3 minutes. Transfer to a bowl to cool.
    2. Mix paprika, cumin, coriander, salt and pepper in a small bowl. Drain tofu and pat dry with paper towels. Cut crosswise into 8 ½-inch-thick slices. Dredge the tofu liberally with the spice mixture, coating all sides. Mix boiling water, lemon juice and honey in a small bowl.
    3. Heat oil in a large nonstick skillet over medium-high heat; swirl to coat the bottom. Add tofu and cook on one side until brown and crusty, 4 to 5 minutes; flip and cook for another 3 minutes. Add the honey mixture to the pan (it will bubble up and evaporate very quickly) and shake to coat the tofu. Serve immediately, sprinkled with the toasted pine nuts.

    Makes 4 servings.

    Nutritional notes:
    Per serving: 206 calories; 15 g fat (2 g sat, 4 g mono); 0 mg cholesterol; 10 g carbohydrate; 12 g protein; 2 g fiber; 248 mg sodium.

    Big Flavors Rating: 5 Stars

    Balsamic-Roasted Brussels Sprouts with Pine Nuts and Parmesan

    September 10, 2013 by Ashley 2 Comments

    Balsamic-Roasted Brussels Sprouts with Pine Nuts and Parmesan

    These crispy, flavorful skewers were a HUGE hit at the dinner table, and it's a good thing, because let me tell you... threading Brussels sprouts onto skewers was something I will never do again a test of patience, to say the very least.

    These were highly addictive, and went perfectly with the rest of tonight's dinner. I already had to toast pine nuts for the Spice-Crusted Tofu, so I just toasted some extra to chop and put on top of these beauties.

    I loved the way the Parmesan melted down slightly on top of the veggies, and the crispy outer edges were just awesome.

    I'll definitely make this again, but I may outsource the skewering or just forego that altogether next time around.

    Balsamic-Roasted Brussels Sprouts with Pine Nuts and Parmesan

    Balsamic-Roasted Brussels Sprouts with Pine Nuts and Parmesan
    Jerry James Stone

    1 pound of Brussels sprouts
    ⅛ cup pine nuts, finely diced
    Balsamic vinegar
    Olive oil
    Parmesan cheese

    1. Trim and peel away the outer leaves of each Brussels sprout and then half them.

    2. Slide the Brussels sprout halves onto the skewers, about six to eight halves per skewer.

    3. Line a baking dish with parchment paper and places the skewers halved-side up.

    4. Drizzle olive oil and balsamic vinegar over each skewer, trying to “fill up” the Brussels sprouts.

    5. Bake the skewers at 400 degrees for about 30 minutes until they are cooked and crispy.

    6. Plate the skewers on a serving tray and cover them with shaved Parmesan and the pine nuts.

    Big Flavors Rating: 5 Stars

    No-Fuss Sweet and Spicy Carrot Salad

    September 10, 2013 by Ashley Leave a Comment

    No-Fuss Sweet and Spicy Carrot Salad

    When I saw this recipe in my feed reader, I knew it sounded like a great way to use up the rest of the big bag of carrots I had hanging out in the fridge. It was really easy and tasted great! I boiled my carrots and then used that water to thin out the sauce for the Spice-Crusted Tofu that I made as the main course.

    No-Fuss Sweet and Spicy Carrot Salad

    No-Fuss Sweet and Spicy Carrot Salad
    Swiss Miss in the Kitchen

    Here's what you need (for 2 huge carrot lovers, inspired by Cooking Weekends)

    8 large carrots (peeled and sliced)

    For the dressing:
    4 tablespoon olive oil
    1 tablespoon lemon juice
    1 tablespoon balsamic vinegar
    coarse sea salt
    pinch of chili powder
    1 teaspoon maple syrup
    some fresh parsley

    Steam or cook the carrots until soft but still firm. Allow to cool a little bit and mix with the dressing. Serve on room temperature and enjoy!!

    Big Flavors Rating: 4 Stars

    Green Beans with Garlicky Shiitakes

    September 9, 2013 by Ashley Leave a Comment

    Green Beans with Garlicky Shiitakes

    When in doubt, make a side dish full of veggies and garlic! This was really easy to put together and very flavorful. I really liked the salty, creamy addition of fresh Parmesan at the end, and the meatiness of the shiitakes worked great with the beans. My only note is that there was a lot of liquid, which I tried to simmer down a bit. I'd probably use less vegetable stock next time - maybe only ¼ cup.

    Green Beans with Garlicky Shiitakes

    Green Beans with Garlicky Shiitakes
    Veggie by Season (adapted from Brown Dog Cafe)

    Serves 4 as a side

    1 lb. green beans or haricot verts, trimmed
    1 tbsp. butter
    4 large garlic cloves, smashed and chopped
    6-8 oz. shiitake mushrooms
    Kosher salt and black pepper
    1 c. vegetable stock
    Parmesan cheese, for garnish

    Bring a large pot of water to a boil, salt and drop in green beans.

    Cook to al dente, then drain and rinse in cold water to preserve color and crisp.

    In a large saute' pan over medium heat, melt butter and add garlic and mushrooms.

    Saute' for 5-7 minutes, until mushrooms begin to brown and garlic is soft - do not let garlic burn!

    Add green beans and stock, cover and bring to a simmer, remove from heat.

    Pour green beans into a serving dish, top with grated parmesan cheese.

    Big Flavors Rating: 4 Stars

    Savory Broiled Tofu

    September 9, 2013 by Ashley Leave a Comment

    Savory Broiled Tofu

    I made this simple tofu dish for dinner again tonight, and it was great! Just like last time, I broiled it for quite a bit longer than suggested, and there weren't too many crispy edges, but it tasted good. The sauce would be great reduced and poured over some crispy pan-fried tofu as well. The convenience of how quickly it comes together makes it worth broiling, since I can have something else going on the stovetop while it's in the oven. I threw some mini bell peppers on the tray with the tofu when it went into the oven again this time, and served it alongside Green Beans with Garlicky Shiitakes.

    Savory Broiled Tofu

    Savory Broiled Tofu
    It’s All Good – Gwyneth Paltrow

    Serves 4

    Protein-Packed

    ¼ cup soy sauce*
    2 tablespoons raw honey
    2 tablespoons extra virgin olive oil
    2 teaspoons toasted sesame oil
    2 small garlic cloves, finely minced
    A 14-ounce box firm tofu, drained and cut into ½-inch cubes

    Set your oven rack up close to your broiler and preheat the broiler to high.

    Whisk together the soy sauce, honey, oils, and garlic in a mixing bowl. Add the tofu to the bowl and gently stir to coat it with the mixture. Transfer the tofu to a baking sheet and pour over it whatever liquid remains in the bowl. Broil, stirring now and then, until the tofu is browned and has a few crispy edges, just 4 to 5 minutes total, depending on the heat of your broiler.

    Big Flavors Rating: 4 Stars

    *Optional: use Gluten Free

    Spicy Baby Bok Choy Sauté

    September 5, 2013 by Ashley Leave a Comment

    Spicy Baby Bok Choy Sauté

    This side dish is pretty quick to put together, and it has a lot of flavor. The package of baby bok choy I picked up was only around 6 ounces, and it cooked down a lot, so I was left with too much of the sauce for the amount of greens that I had, and it was pretty salty.

    I adjusted the recipe below, because I think it would have been a lot better with more bok choy to bulk it up. It was great over rice next to some of our leftover Spatchcocked Roast Chicken.

    Spicy Baby Bok Choy Sauté

    📖 Recipe

    Spicy Baby Bok Choy Sauté

    Spicy Baby Bok Choy Sauté
    Big Flavors from a Tiny Kitchen - Ashley Covelli
    No ratings yet
    Print Recipe Pin Recipe
    Course: Side Dish
    Cuisine: Asian

    Ingredients
     

    • 1 tablespoon peanut oil
    • 1 clove garlic minced
    • 1 small shallot thinly sliced
    • 1 teaspoon freshly grated ginger
    • 1 pound baby bok choy trimmed and chopped crosswise into 1-inch pieces
    • 1 teaspoon fish sauce
    • 1 teaspoon chile garlic sauce
    • 1 tablespoon low sodium soy sauce*
    • 1 tablespoon unseasoned rice vinegar

    Instructions
     

    1. Heat peanut oil in a large, non-stick skillet over moderate heat. Add garlic, shallot and ginger and sauté until soft.
    2. Add bok choy and remaining ingredients and sauté until the greens have cooked down to your liking, stirring occasionally.

    Notes

    *Optional: use Gluten Free

    Did you make this recipe?

    Leave a comment + star rating below to let people know how it was!

    Yellow Doll Watermelon and Burrata Caprese Salad

    September 5, 2013 by Ashley 1 Comment

    Yellow Doll Watermelon and Burrata Caprese Salad

    Yellow Doll Watermelon and Burrata Caprese Salad

    I picked up a yellow doll watermelon from the Farmers Market last weekend, and was excited to try it. It was really tasty - nice and sweet, but FULL of seeds. Maybe I've just had too many seedless watermelons lately and I forgot how full they were, but wow. It made it a little tricky to cut up for my son.

    Yellow Doll Watermelon and Burrata Caprese Salad

    Anyway, I was inspired to make a twist on a classic Caprese salad by using that, along with a beautiful orangey-yellow tomato from my father-in-law's garden and some deliciously creamy Burrata cheese. I put them on a plate and sprinkled it with coarse sea salt, a drizzle of really nice extra-virgin olive oil, aged balsamic, and some basil from my garden. It was a great way to start the meal!

    Big Flavors Rating: 4 Stars

    Spatchcocked Roast Chicken

    September 4, 2013 by Ashley 1 Comment

    Spatchcocked Roast Chicken

    Spatchcocked Roast Chicken

    One of the things that has been on my kitchen to-do list for quite some time was to spatchcock a chicken (which, until recently, I thought was spatchcook. Oops!). My husband loves roast chicken, so being able to get one cooked in less time was intriguing to me. In order to cut the backbone out of the chicken, you need a pair of kitchen shears, which I recently got from Procook. This made the job really easy, as they cut right through the bones with no trouble at all. I definitely expected it to be more of a struggle, but the shape and strength of the blades made it easy for me!

    Spatchcocked Roast Chicken

    The chicken ended up being super juicy and very flavorful from the compound butter (which I just now realize that I forgot to add the mustard to!). I'd like to try cooking it at a higher temperature for a shorter amount of time, the way we do with Thomas Keller's roast chicken recipe, as that always turns out perfectly for us, with minimal effort. The pan juices were fantastic - we sopped them up with the homemade Southern Buttermilk Biscuits that I made earlier in the day.

    Spatchcocked Roast Chicken

    Vegetarians, avert your eyes. Things are about to get real over here. Here are a few shots that Dino took of me removing the backbone of the chicken. I felt simultaneously grossed out and like a total badass for being able to do this on my own. I cook with meat frequently, but something about cutting through bone is just more... gruesome than your normal kitchen tasks. I'm glad I gave it a go, and I saved the backbone to make chicken stock soon, so that should be pretty awesome!

    Spatchcocked Roast Chicken

    Spatchcocked Roast Chicken

    Spatchcocked Roast Chicken

    *Note: I received promotional items, but all opinions are 100% my own.

    Spatchcocked Roast Chicken
    Food52

    Serves 4 to 6

    • 4 tablespoons softened butter
    • Zest of one lemon
    • 2 fat cloves garlic, minced
    • ½ teaspoon thyme leaves, roughly chopped
    • 1½ teaspoons Dijon mustard
    • Salt and freshly ground black pepper
    • 1 4-lb. organic chicken

    1. In a small bowl, combine the butter, lemon zest, garlic, thyme, mustard, a teaspoon of salt and some pepper. Set aside.

    2. Remove the gizzards from the chicken and discard. Pat the chicken dry with paper towels and set it on a cutting board. Flip it onto its breast and using sturdy kitchen shears, remove the backbone by cutting carefully down each side of the bone, starting at the tail end of the bird. The entire inside of the chicken should be exposed when you’re finished.

    3. Sprinkle the cavity thoroughly with salt and pepper, and then flip the chicken over so that it lies flat. Trim any excess deposits of fat from around the cavity, and gently slide your fingers under the skin and ease it away from the meat, around both sides of the breast and both legs. Carefully smear the compound butter underneath the skin all over the meat, being careful not to break the skin. Reserve about a tablespoon of the butter, and then spread that evenly over the skin, followed by a generous sprinkling of salt and pepper.

    4. Lay the chicken in a shallow roasting pan just large enough to accommodate it and put in the refrigerator for an hour or two (this will help the skin crisp more when you cook it).

    5. When you’re ready to make dinner, heat the oven to 425 degrees and remove the chicken from the fridge. Roast for 20 minutes, then baste and decrease heat to 375. Cook for another 15 to 20 minutes, basting once again in the middle, until cooked. Let the chicken sit for a few minutes before carving; serve with the pan juices and some crusty bread or roasted potatoes for sopping them up.

    Big Flavors Rating: 5 Stars

    • « Previous Page
    • 1
    • …
    • 18
    • 19
    • 20
    • 21
    • 22
    • …
    • 35
    • Next Page »

    Hi, I'm Ashley and I’ve been writing about food & recipes here at Big Flavors from a Tiny Kitchen since 2006. I want to help you (yes, you!) gain confidence in the kitchen so you are excited to cook at home for yourself and your loved ones.

    More about me →

    Favorite Spring Recipes

    • Mayo-free Deviled Eggs
    • Middle Eastern Fattoush Salad with Homemade Pita Chips
    • Birthday Cake Confetti Pancakes with Sprinkles
    • Italian Cream Cheese and Ricotta Cheesecake
    • Garlicky Mushroom Ricotta Pizza with Wild Arugula + Aged Balsamic
    • Slow Cooker "Roasted" Beets
    • Honey Balsamic Roasted Carrots
    • Italian Ricotta Cookies
    • Rhubarb Custard Pie
    • Easy Instant Pot Herbed Potato Salad

    Mother's Day + Easter Brunch

    • Epic Brunch Board on a Budget
    • Baby Spinach and Cheddar Quiche Made with Fresh Spinach
    • Turkey Salad Tea Sandwiches with Dried Cherries
    • Great Grandma Maria Francesca Cardile's Italian Easter Cookies
    • Brie Waffle Bites
    • Challah French Toast
    • Creamsicle Smoothies
    • DM Bloody Mary
    • Turkey Scotch Eggs
    • The Herbalist

    Popular Now

    • Cast iron skillet full of chicken fajitas.
      Favorite Restaurant-Style Chicken Fajitas
    • Overhead view of spinach and cheddar quiche with forks.
      Baby Spinach and Cheddar Quiche Made with Fresh Spinach
    • Chicken and bell pepper stir-fry served over white rice.
      Chicken and Bell Pepper Stir-Fry
    • Serving dish of cooked shrimp garnished with chopped parsley.
      Quick and Easy Sautéed Shrimp
    • Overhead view of a dutch oven filled with sausages, peppers, and onions.
      Sausage and Peppers
    • Overhead view of assorted breakfast items displayed on a board.
      Epic Brunch Board on a Budget

    Footer

    ↑ back to top

    About

    • About Ashley
    • Press + Recognition
    • Events
    • Virtual Cooking Classes
    • Podcast
    • Contact
    • Privacy Policy

    Newsletter

    • Sign up to receive delicious recipes and exclusive content right to your inbox!

    As an Amazon Associate I earn from qualifying purchases at no added cost to you.

    ©2006–2026  BIG FLAVORS FROM A TINY KITCHEN LLC | ALL RIGHTS RESERVED

    *Third-party advertisers may collect or use non-personally identifiable information to serve you more relevant ads.

    Rate This Recipe

    Your vote:


    A rating is required
    A name is required
    An email is required