Big Flavors from a Tiny Kitchen

menu icon
go to homepage
  • Recipes
  • About
  • Events
  • Contact
  • Subscribe
    • Facebook
    • Instagram
    • Pinterest
  • subscribe
    search icon
    Homepage link
    • Recipes
    • About
    • Events
    • Contact
    • Subscribe
    • Facebook
    • Instagram
    • Pinterest
  • ×
    Home » Recipes

    Behind BF Volume 5

    May 17, 2014 by Ashley 1 Comment

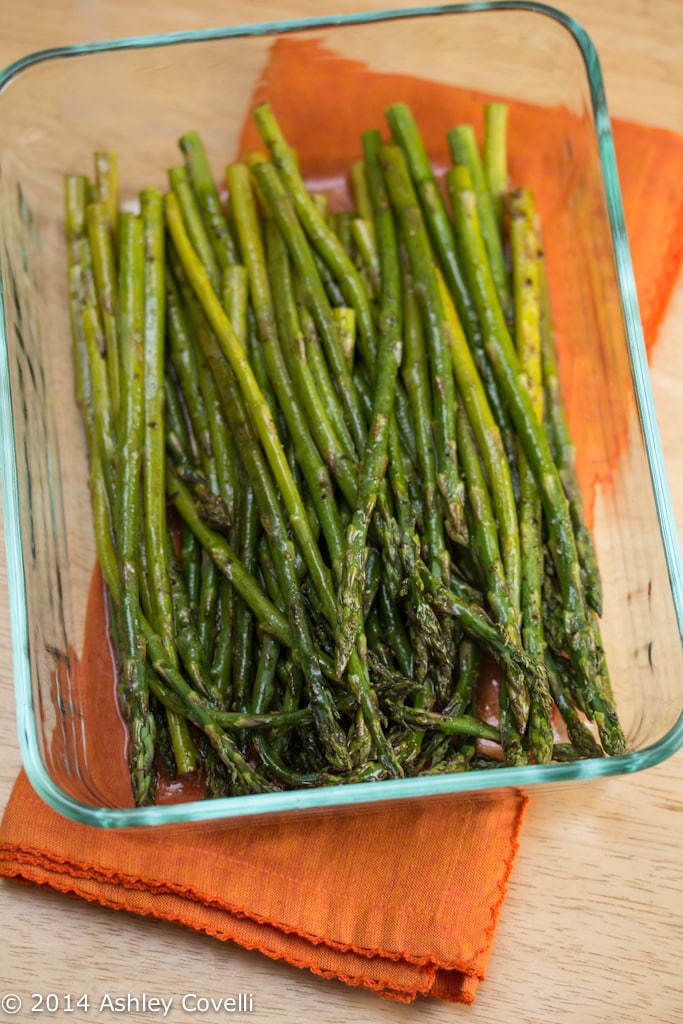
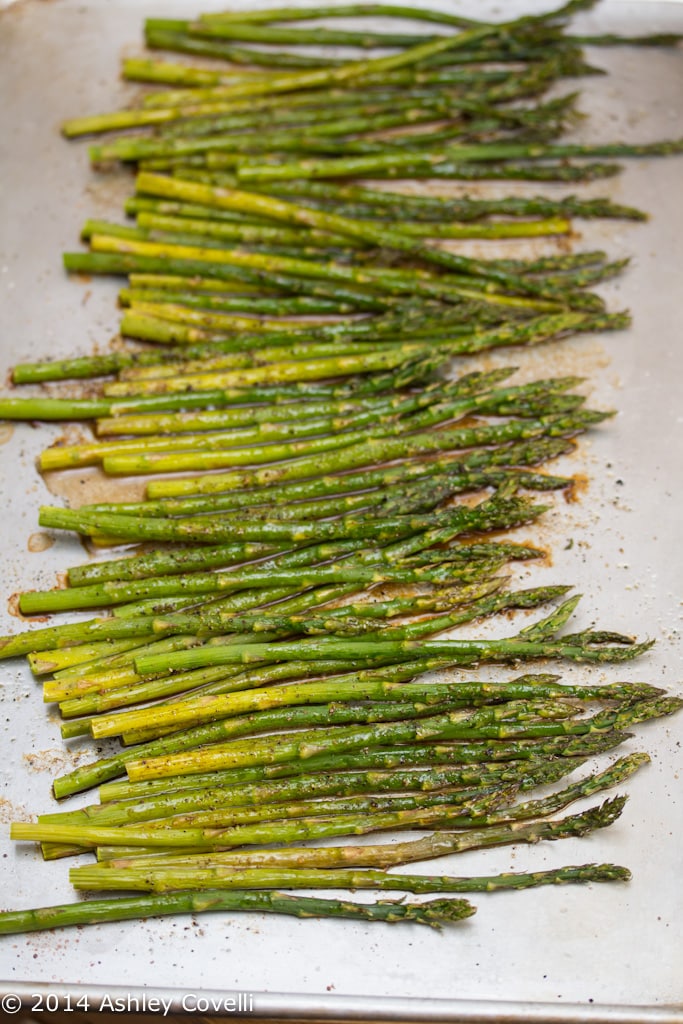
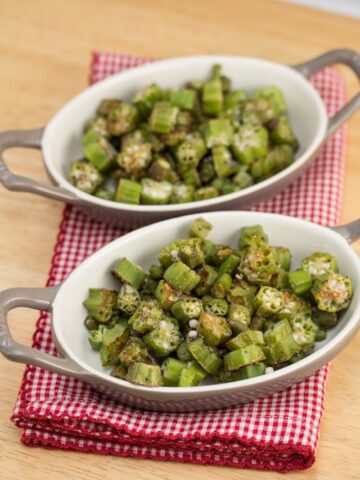
    Roasted Okra: Just 3 pantry staples turn fresh okra into a deliciously golden, nutty side dish or snack. This roasted okra recipe is simple, quick, and delicious.

    A lot has been going on behind-the-scenes in and around my tiny kitchen as of late. I was interviewed by Becky over at Hudson + Daughter for the first installment in her new series featuring female makers, writers, artists and other creative entrepreneurs. Check it out here.

    A few weeks ago, there was an unfortunate kitchen mishap that resulted in us ordering a new range for the kitchen. While I will miss my beloved (Woah) Black Betty, I am pleased to announce that her replacement, Black Mamba, arrived safely early Wednesday evening.

    I haven't given her a good workout yet, but I do need to bake another batch of Starbucks Espresso Brownies to ship off to the winner of the virtual bake sale to cure cancer that was hosted by Joanne over at Eats Well With Others. I still can't believe that my kitchen was semi-out-of-commission when I needed to bake these beauties!
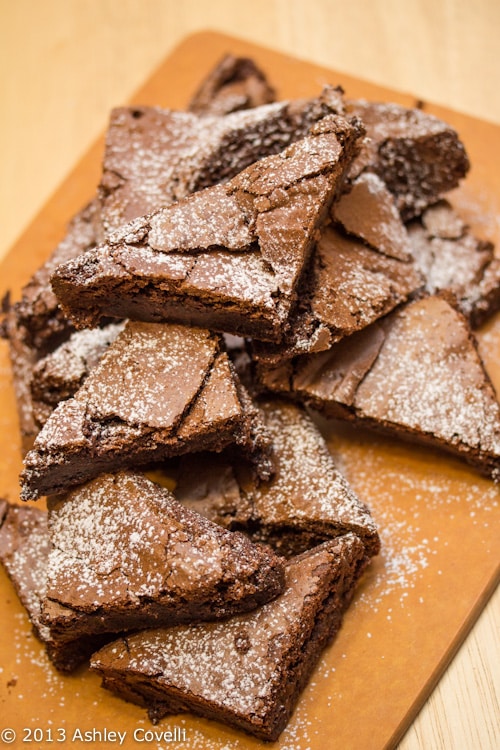
    Starbucks Espresso Brownies

    I may have to bake an extra batch, you know, for QC purposes since I'll be working with a new oven and all. This is purely scientific. I'm sure Joanne would be in full support of this decision!

    This past week, I was finally able to get my garden planted with the help of my son. He had a lot of fun digging in the soil and "giving the plants a drink". He has been happy to water them every day since we planted them, although it has been pretty rainy here in New York for the last few days.

    He's at a really fun age for all of this stuff. Last year he was able to help with watering a bit, but mostly just ate every.single.tomato that I grew. Ha! He's definitely my kid!

    So far, we have planted sweet mint, German thyme, sweet basil, purple basil, Thai basil, 2 flat-leaf parsley plants, 2 grape tomato plants, a yellow pear tomato plant and a Husky cherry red tomato plant. We added marigolds in between the tomatoes.

    I also have some radish, lettuce and carrot seeds that I'd like to get in containers this year. I did a little miscalculation, so I need to buy another container or 2 to get those started.
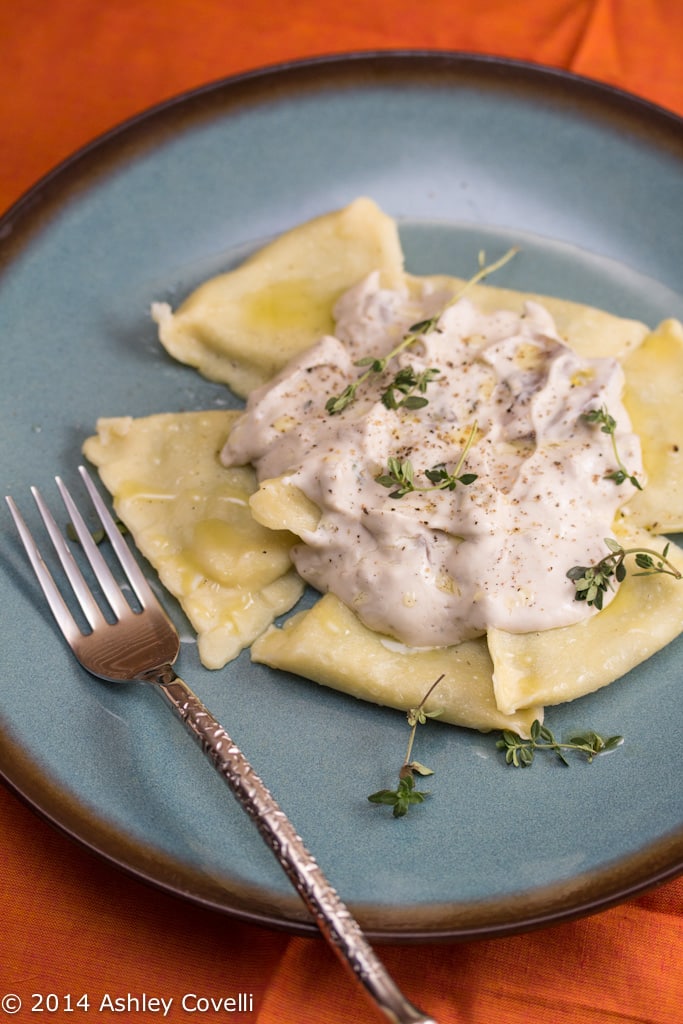
    Ravioli with Mushroom and Thyme Cashew Cream Sauce

    I also made this Ravioli with Mushroom and Thyme Cashew Cream Sauce a while back, but I didn't take good enough notes to be able post it on the blog, so I'm going to give it another try sometime soon. I got some beautiful butternut squash ravioli from Trader Joe's that I hope to use with it. It's a great, dairy-free spin on Alfredo sauce. Yum!

    For Mother's Day, we continued our annual tradition of Dino and his dad making Crepes with Fresh Fruit and Crème Fraîche for brunch. Adding a bit of Nutella and banana is key.

    I jokingly mentioned mimosas while they were prepping the crepes, and my father-in-law ran downstairs and came back up with his arms full of bottles of champagne and Prosecco. Twist my arm, why don't ya? 😉
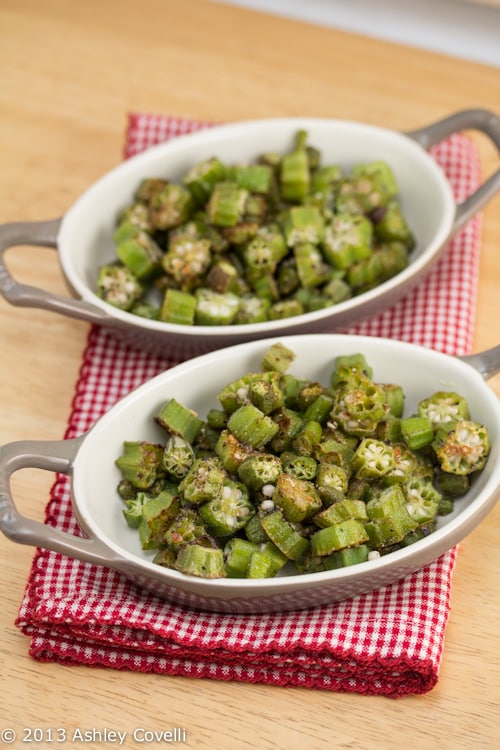
    Roasted Okra

    I made another batch of this fabulous (and simple!) Roasted Okra, which I have now decided to bump up to a 5 star rating. It was insanely addictive the first time around, and this time, we gobbled it all up again (and I doubled the recipe both times I made it, so that has to say something!):

    I also have been enjoying the Spring box from MARY's Secret Ingredients. The Neuske's Smoked Landjaeger is insanely addictive. I lived in Wisconsin for 10 years and never tried this stuff until another decade had passed and I was living in New York. Ha! It kind of tastes like hominy to me, which is odd, but I love it!

    I also used the Pineapple Habanero Jerk BBQ Bath Brine for a whole organic chicken. I brined the chicken for a few hours and Dino fired up the charcoal grill to cook it. I found a really great method for grilling a whole chicken over on Serious Eats, and that's what we did. It made for a delicious Mother's Day dinner!

    I served it with grilled corn on the cob. I may or may not have eaten 3 entire cobs. What can I say, I'm originally from Indiana and I love me some corn!

    Since he had the grill fired up, I asked Dino to grill up a pack of Applegate Natural Uncured Hot Dogs (my new fave!) so I could pop them in the fridge and reheat them the next day to make something from the newest issue of Cooking Light. They have an entire section on hot dog toppers for less than 100 calories, and this beauty was absolutely delicious! I'm looking forward to trying out some more of those ideas during grilling season. Yum!

    Chocolate Chip Peanut Butter Oatmeal Bites

    May 16, 2014 by Ashley 7 Comments

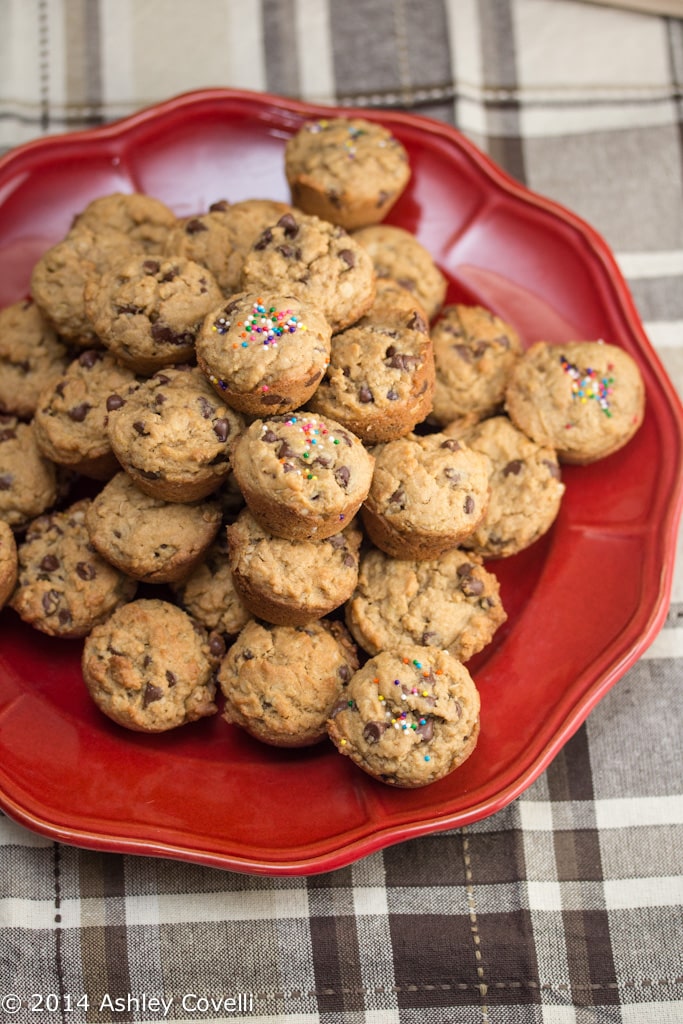
    Chocolate Chip Peanut Butter Oatmeal Bites

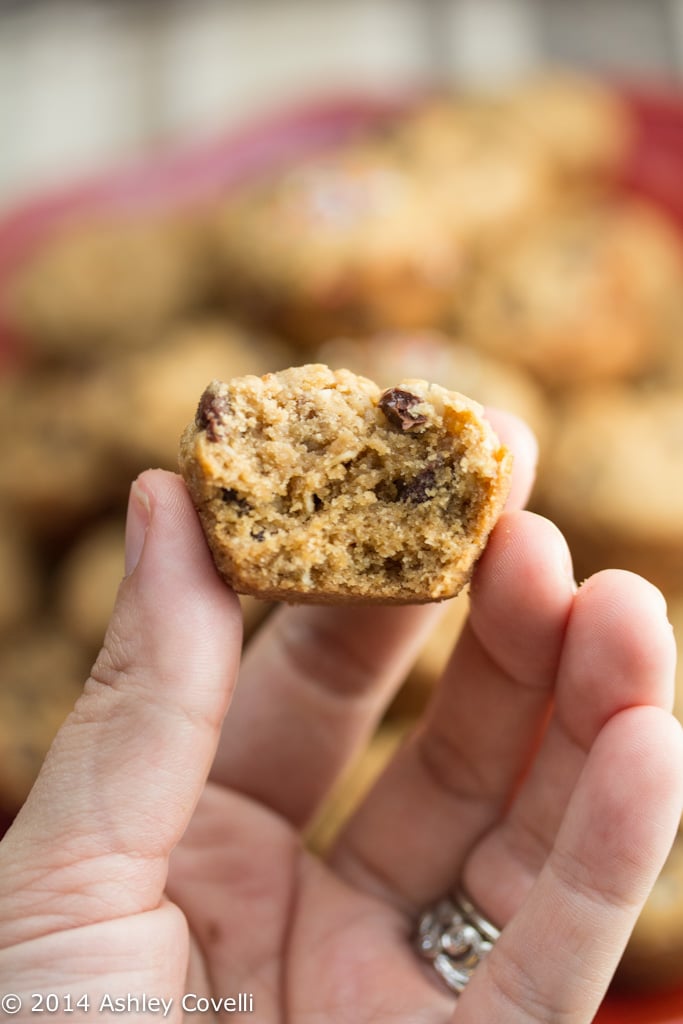
    I wanted to do some baking with my budding sous chef last week, and these mini chocolate chip cookie/muffins were just the thing to get us in the kitchen.

    My family really enjoyed the combo of chocolate chips (I used mini), peanut butter and oatmeal. It's like the best of all of the cookie worlds.

    Chocolate Chip Peanut Butter Oatmeal Bites

    Of course, my 2-year-old thought we should add sprinkles, because SPRINKLES. And who am I to deny such a logical request? So I pressed some into a few of the bites before they headed into the oven.

    Chocolate Chip Peanut Butter Oatmeal Bites

    These turned out great, and are dangerously addictive. I mean, one is just a bite, right?

    For me, this made about 3 dozen "bites". It was the perfect amount to have some at home and give some to the neighbor kids to enjoy. And my little sous chef had a blast helping to make these, although he still refuses to wear the adorable apron I got him a while back.

    Maybe next time.

    Chocolate Chip Peanut Butter Oatmeal Bites

    Chocolate Chip Peanut Butter Oatmeal Bites
    The View from Great Island

    Yield: 2 dozen+

    ½ cup (1 stick) unsalted butter, at room temperature
    ¾ cup brown sugar, packed
    ½ cup peanut butter
    1 tablespoon vanilla bean paste (or vanilla extract)
    1 large egg
    1 ⅓ cup flour
    ½ cup old fashioned oats
    1 teaspoon baking soda
    1 cup chocolate chips

    Set oven to 375F

    Grease and flour 2 mini muffin pans (or use paper liners)

    Cream the butter, sugar, and peanut butter together until smooth. Beat in the egg and vanilla.

    Mix in the flour, baking soda and oats.

    Fold in the chocolate chips.

    Fill the muffin cups almost full with a scoop of dough. I use my 1 ½ inch scoop to make it easy.

    Bake for about 12-15 minutes until risen and lightly browned.

    Cool completely in the pan, on a rack before attempting to remove the cookies from the pan. Run a small blunt knife around the edge of the cookies to loosen them if necessary.

    NOTES:
    You can use chunky peanut butter, or almond butter if you like.

    Big Flavors Rating: 4 Stars

    Easy Meatloaf

    May 15, 2014 by Ashley 6 Comments

    Easy Meatloaf

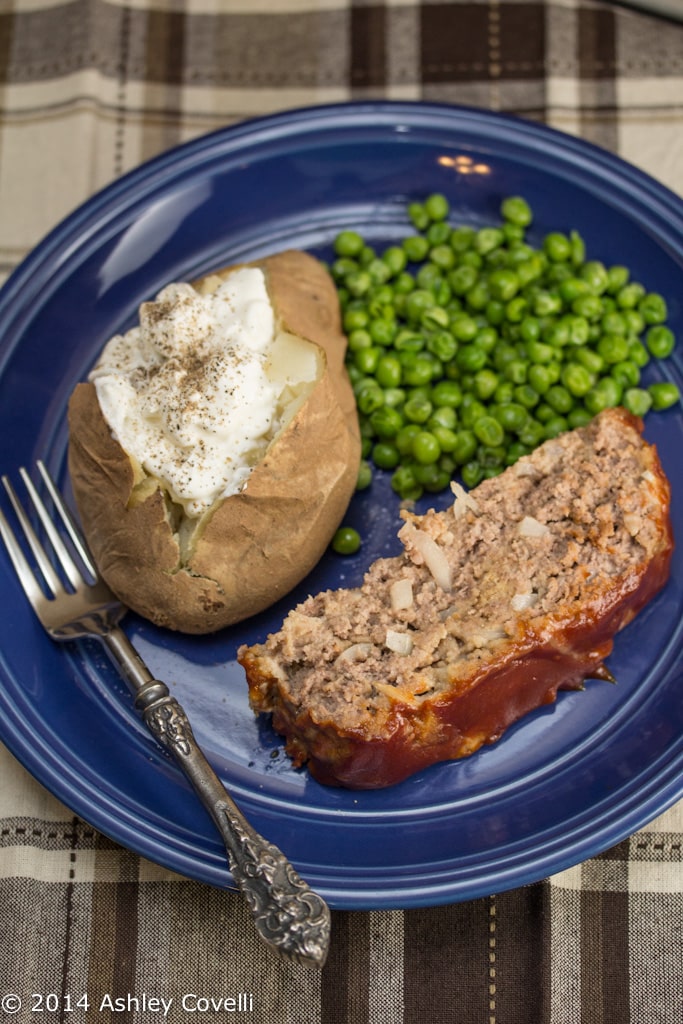
    I've made a few different meatloaf recipes over the years in my tiny kitchen. Our favorite has always been Persian Meatloaf, but this one may just be our new favorite.

    It's simple to put together, and the combination of ketchup, mustard and brown sugar gives it a sweet and tangy glaze that is absolutely delicious.

    Easy Meatloaf

    I opted to bake this in a baking dish, as I find that meatloaves are less greasy and get nice and caramelized all around when they aren't in a loaf pan. It was incredibly moist and reheated well for the next few days. Definitely a keeper!

    Easy Meatloaf
    Allrecipes - Janet Caldwell

    Prep: 10 minutes
    Cook: 1 hour
    Ready In: 1 hour 10 minutes
    Serves: 8

    "This is a very easy and no fail recipe for meatloaf. It won't take long to make at all, and it's quite good!"

    1 ½ pounds ground beef
    1 egg
    1 onion, chopped
    1 cup milk
    1 cup dried bread crumbs*
    salt and pepper to taste
    2 tablespoons brown sugar
    2 tablespoons prepared mustard
    ⅓ cup ketchup

    Preheat oven to 350 degrees F (175 degrees C).

    In a large bowl, combine the beef, egg, onion, milk and bread OR cracker crumbs. Season with salt and pepper to taste and place in a lightly greased 5x9 inch loaf pan, OR form into a loaf and place in a lightly greased 9x13 inch baking dish.

    In a separate small bowl, combine the brown sugar, mustard and ketchup. Mix well and pour over the meatloaf.

    Bake at 350 degrees F (175 degrees C) for 1 hour.

    *Optional: use Gluten Free

    Big Flavors Rating: 5 Stars

    Hot Fudge Sundaes

    May 11, 2014 by Ashley 3 Comments

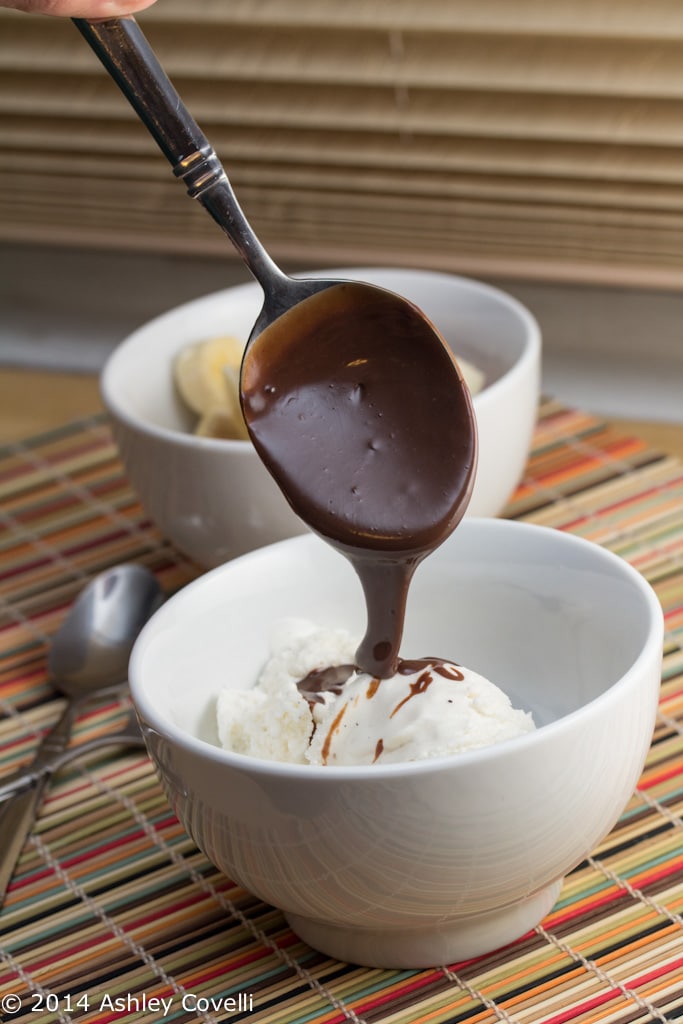
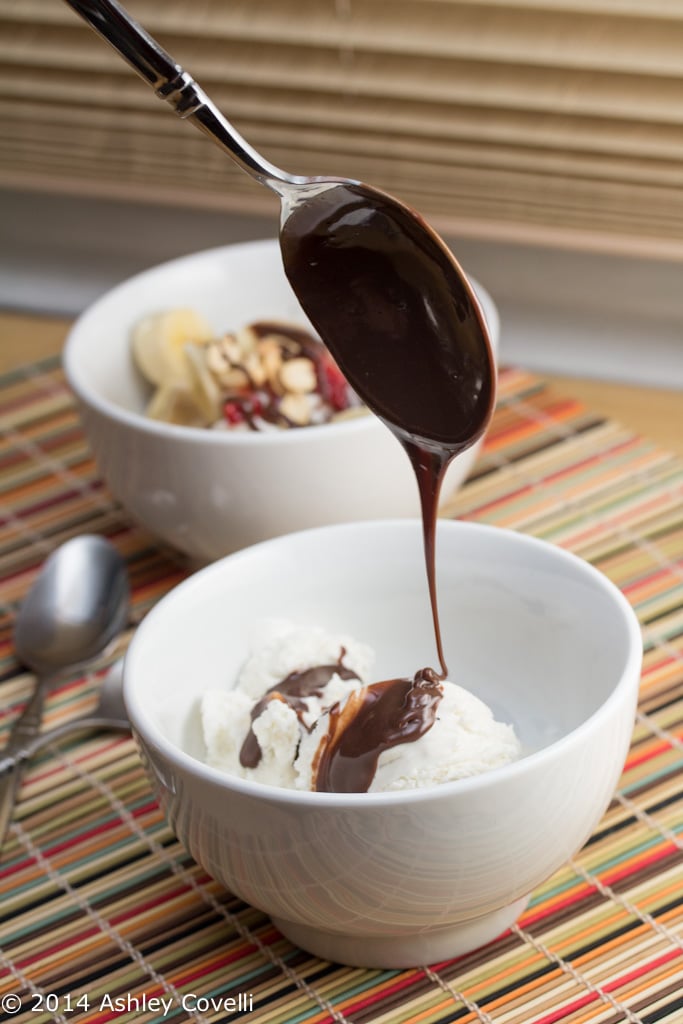
    Hot Fudge Sundaes

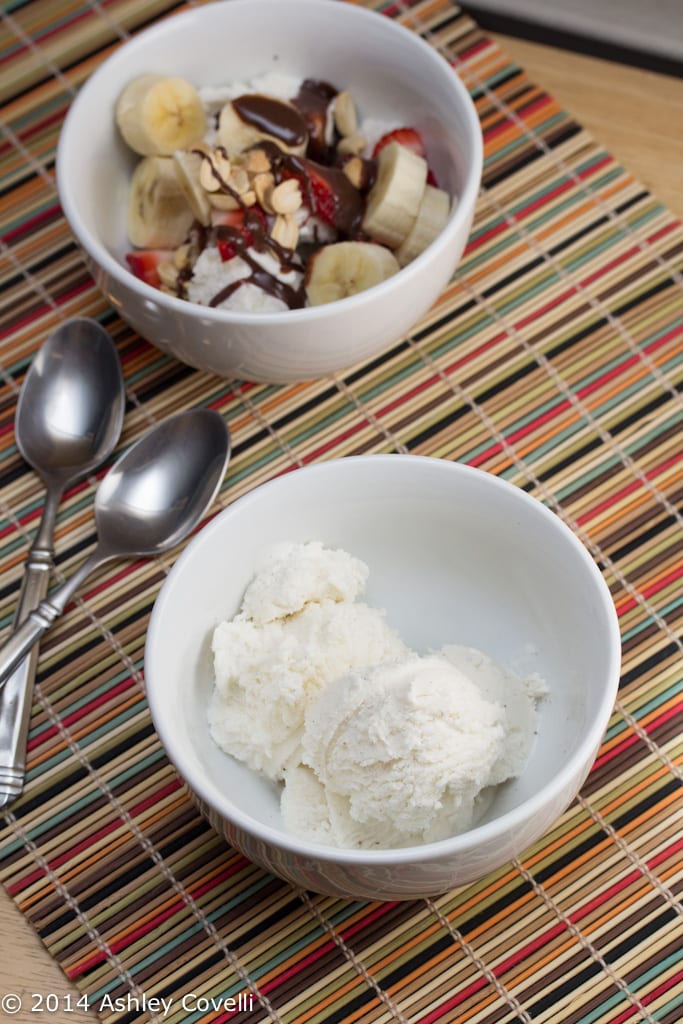
    Some nights, you just want a big ol' ice cream sundae. And no sundae is complete without rich, luxurious hot fudge.

    Take note.

    Hot Fudge Sundaes

    I like keeping my hot fudge sundaes fairly straightforward. Vanilla bean ice cream. Fruit. Definitely bananas. Perhaps some freeze-dried strawberries and raspberries. A sprinkle of peanuts, if I'm feelin' fancy.

    And lots of piping hot fudge.

    Hot Fudge Sundaes

    I wanted to make the hot fudge recipe that my mom used to make when I was a kid, but I couldn't find the right chocolate when I was at the store at 11pm with a major chocolate craving a completely reasonable hour. So I improvised a bit, and was happy with the results.

    Was it as good as the stuff I grew up with?

    No.

    But was it totally delicious in my moment of desparation?

    You betcha!

    Hot Fudge Sundaes

    Hot Fudge
    Big Flavors from a Tiny Kitchen (adapted from Mom)

    1 (14-ounce) can sweetened condensed milk
    2 ounces unsweetened chocolate (I used 100% cacao Ghirardelli)
    1 tablespoon milk
    1 tablespoon unsalted butter
    1 teaspoon vanilla
    ¼ teaspoon sea salt

    Place condensed milk, chocolate and milk in a medium saucepan over medium-low heat. Allow to melt, stirring frequently, until the mixture turns smooth and glossy (this will take several minutes). Remove from heat, stir in butter, vanilla and salt.

    Big Flavors Rating: 4 Stars

    Baked Tilapia with Garlic-Thyme Crust

    May 10, 2014 by Ashley 1 Comment

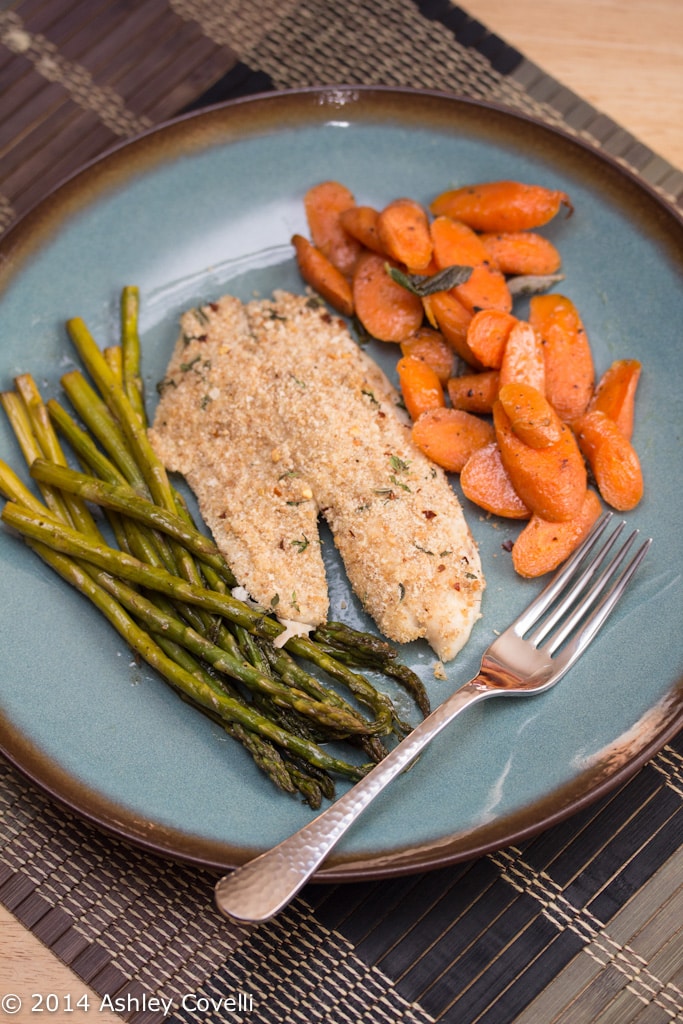
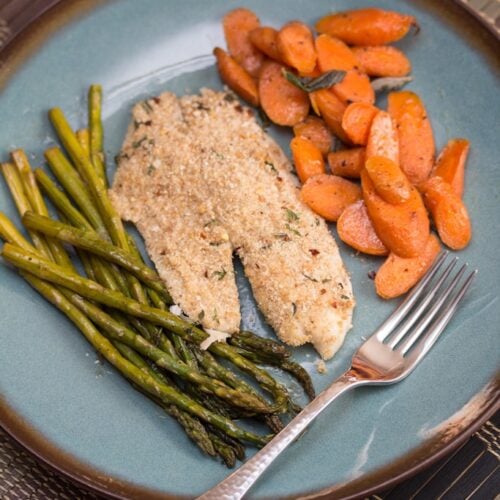
    Baked Tilapia with Garlic-Thyme Crust

    I made this a few days after Easter as a simple main to serve with the leftover veggie side dishes I made. It was quick, simple and tasty!

    I wanted to use Panko, but I was out, so I used regular breadcrumbs. I think the Panko would have added a welcome crunch to this dish. But it gets major points for being quick and easy. Yet another great use for that giant bag of tilapia I have hanging out in the freezer!

    Baked Tilapia with Garlic-Thyme Crust

    📖 Recipe

    Baked Tilapia with Garlic-Thyme Crust

    Baked Tilapia with Garlic-Thyme Crust
    Big Flavors from a Tiny Kitchen - Ashley Covelli
    No ratings yet
    Print Recipe Pin Recipe
    Course: Seafood

    Ingredients
     

    • 4 boneless tilapia fillets
    • ⅓ cup unseasoned bread crumbs regular or Panko*
    • 1 teaspoon fresh thyme leaves stripped from the stems
    • 1 teaspoon system-ui, 'system-ui', 'Segoe UI', Helvetica, Arial, sans-serif, 'Apple Color Emoji', 'Segoe UI Emoji', 'Segoe UI Symbol';font-size: 19px;letter-spacing: 0.5px" href="https://www.amazon.com/Simply-Organic-Certified-3-64-Ounce-Container/dp/B00MHTEUXA?crid=3SJUW68YMON5R&dchild=1&keywords=garlic+powder&qid=1632347445&sprefix=garlic+powder%2Chpc%2C158&sr=8-13&linkCode=li2&tag=bigflafroatin-20&linkId=6660cdc938b600bb56dbb35cc466cf16&language=en_US&ref_=as_li_ss_il" target="_blank" rel="nofollow noopener" data-tasty-links-append-disclosure="">garlic powder
    • ¼ teaspoon system-ui, 'system-ui', 'Segoe UI', Helvetica, Arial, sans-serif, 'Apple Color Emoji', 'Segoe UI Emoji', 'Segoe UI Symbol';font-size: 19px;letter-spacing: 0.5px" href="https://www.amazon.com/Frontier-Peppers-Crushed-1-2-Ounce-Bottle/dp/B0001M11BE/ref=as_li_ss_il?dchild=1&keywords=red+pepper+flakes&qid=1590511769&sr=8-10&linkCode=li2&tag=bigflafroatin-20&linkId=6ff1acf5f0c36a8990541946b0c8d4ad&language=en_US" target="_blank" rel="nofollow noopener" data-tasty-links-append-disclosure="">red pepper flakes
    • ¼ teaspoon system-ui, 'system-ui', 'Segoe UI', Helvetica, Arial, sans-serif, 'Apple Color Emoji', 'Segoe UI Emoji', 'Segoe UI Symbol';font-size: 19px;letter-spacing: 0.5px" href="https://www.amazon.com/Morton-Coarse-Kosher-Salt-lbs/dp/B06XPN2785/ref=as_li_ss_il?crid=165UXS82M5JM1&dchild=1&keywords=morton+kosher+salt+coarse&qid=1590096093&sprefix=morton+koshe,aps,143&sr=8-2&linkCode=li3&tag=bigflafroatin-20&linkId=e4241a89cadfe0f3f57ca978e5c5e871&language=en_US" target="_blank" rel="nofollow noopener" data-tasty-links-append-disclosure="">kosher salt
    • ⅛ teaspoon freshly system-ui, 'system-ui', 'Segoe UI', Helvetica, Arial, sans-serif, 'Apple Color Emoji', 'Segoe UI Emoji', 'Segoe UI Symbol';font-size: 19px;letter-spacing: 0.5px" href="https://www.amazon.com/Amazon-Brand-Ground-Pepper-Ounces/dp/B07QY25R7M?keywords=ground+black+pepper&qid=1649428451&sprefix=ground+bla%2Caps%2C60&sr=8-24&linkCode=li2&tag=bigflafroatin-20&linkId=e87b154c0c6b32fc2a330dfcc5659d87&language=en_US&ref_=as_li_ss_il" target="_blank" rel="nofollow noopener" data-tasty-links-append-disclosure="">ground black pepper
    • 2 teaspoons low fat system-ui, 'system-ui', 'Segoe UI', Helvetica, Arial, sans-serif, 'Apple Color Emoji', 'Segoe UI Emoji', 'Segoe UI Symbol';font-size: 19px;letter-spacing: 0.5px" href="https://www.amazon.com/Hellmanns-Real-Mayonnaise-Squeeze-count/dp/B01H07E286?dchild=1&keywords=mayonnaise&qid=1624042887&sr=8-6&linkCode=li2&tag=bigflafroatin-20&linkId=56fbbf41c28ed7480a18ffe07d414869&language=en_US&ref_=as_li_ss_il" target="_blank" rel="nofollow noopener" data-tasty-links-append-disclosure="">mayonnaise

    Instructions
     

    1. Preheat oven to 400°F. Line a sheet pan with a baking rack and spray lightly with oil or non-stick cooking spray.
    2. Pat the tilapia fillets dry. On a plate, mix together bread crumbs, thyme, garlic powder, red pepper flakes, salt and pepper.
    3. Spread ½ teaspoon of mayonnaise on one side of each piece of tilapia. Invert each piece onto the breadcrumb mixture, press firmly, and place on the prepared baking rack, breadcrumb-side up. Repeat with remaining fillets.
    4. Bake for 15-20 minutes, until the fish flakes easily with a fork.

    Notes

    *Optional: use Gluten Free

    Did you make this recipe?

    Leave a comment + star rating below to let people know how it was!

    Zucchini Frittata

    May 9, 2014 by Ashley 1 Comment

    Zucchini Frittata

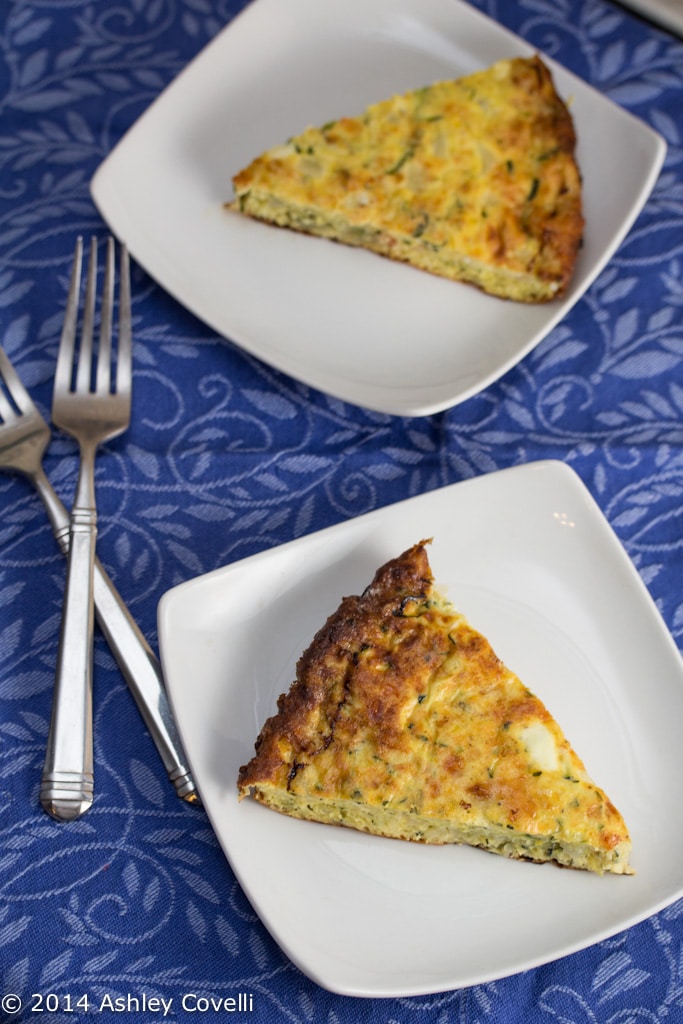
    This, friends, is the last thing I cooked on my beloved stovetop before it was brutally murdered accidentally broken. Let's just say that something fell in the kitchen, shattered the glass, and the parts have been discontinued.

    Moment of silence.

    Zucchini Frittata

    So now that I've ordered an entirely new range, I'm working on catching up on some old posts. You know, of things that were cooked before we lost our venerated kitchen appliance.

    I think I need another moment of silence. And a cocktail or three.

    Zucchini Frittata

    RIP (Woah) Black Betty. 2009-2014. You were loved and adored by all.

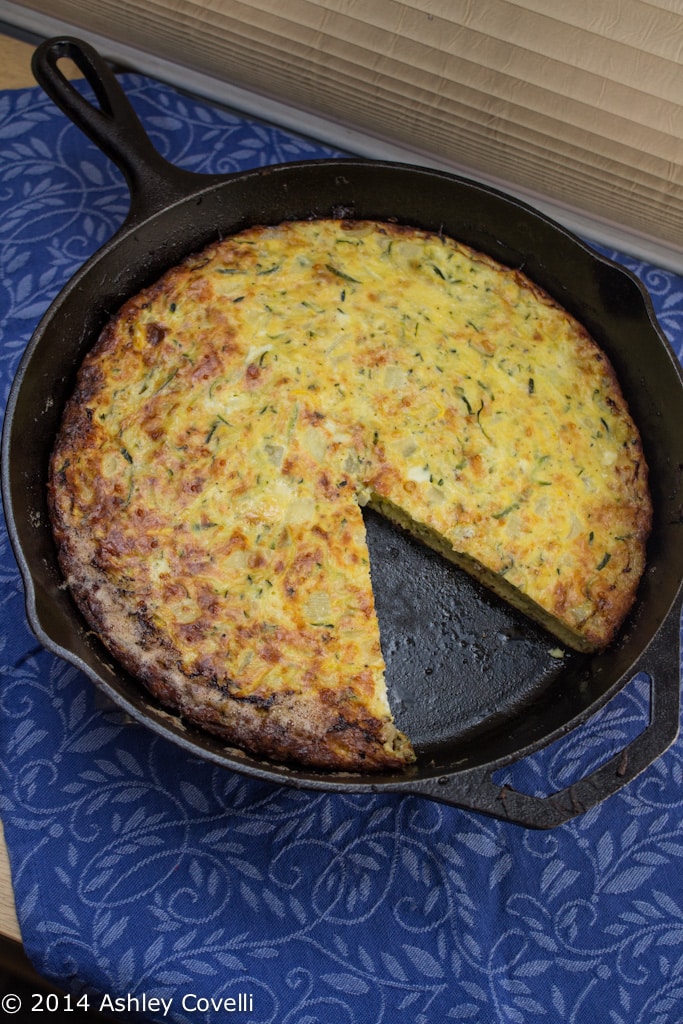
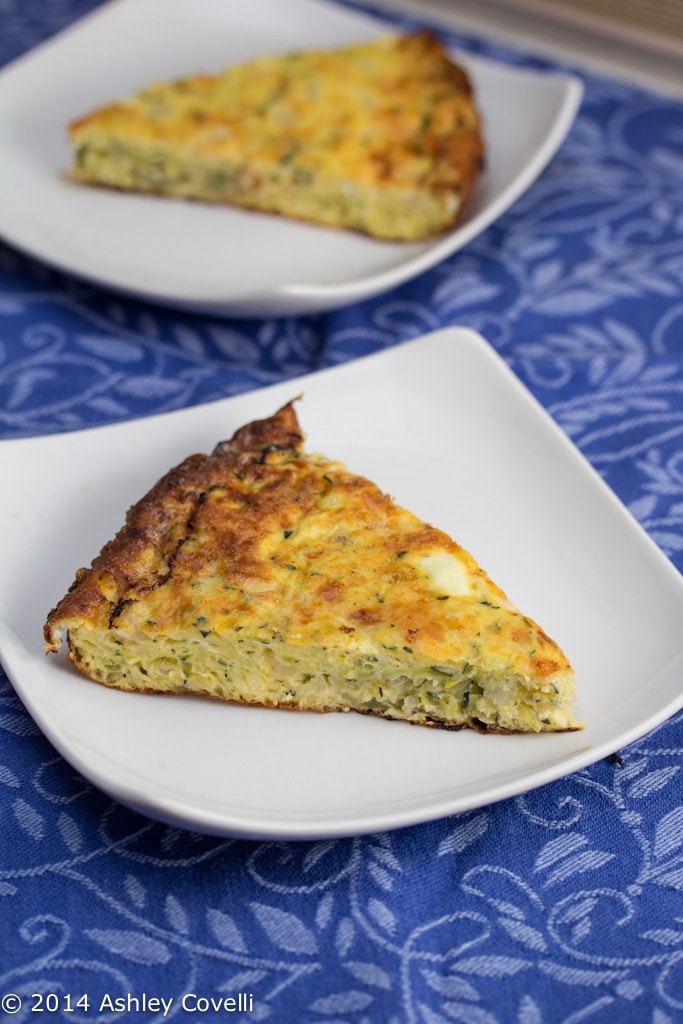
    Anyhow, don't let all this talk of slain appliances discourage you from trying this gorgeous frittata. The texture was absolutely perfect! It's chocked full of zucchini and Parmesan cheese, and with a little flour in there to thicken up all the eggs, it was a knockout.

    I sautéed the veggies in the same cast iron skillet that I used to bake it, emptied it out and wiped it gently with a paper towel, added more oil and poured the egg/zucchini mixture back in there. Because I hate creating extra dishes for my beloved live-in dishwasher. 😉

    Make sure to note that you 'll need to salt and strain/press your zucchini for an hour before you even get going on this beauty, so make sure you give yourself plenty of time.

    Zucchini Frittata

    Zucchini Frittata
    King Arthur Flour

    Hands-on time: 10 mins. to 20 mins.
    Baking time: 20 mins. to 25 mins.
    Total time: 1 hrs 50 mins. to 3 hrs 10 mins.
    Yield: 8 to 10 servings

    2 pounds zucchini/summer squash (about 2 zucchini and 1 summer squash), grated
    ½ teaspoon salt
    1 large sweet onion, peeled and diced
    1 ½ cups freshly grated Parmesan cheese
    8 large eggs
    2 tablespoons King Arthur Unbleached All-Purpose Flour

    1) Stir the salt into the grated squash. Place the squash in a colander, weigh it down, and let it drain for an hour or so.

    2) Combine the drained squash and onion. Fry in 2 tablespoons olive oil in a large skillet until soft, about 20 minutes; the vegetables will greatly diminish in volume. Season to taste with additional salt, if desired, and pepper.

    3) Preheat the oven to 400°F.

    4) In a large bowl, whisk together the cheese, eggs, and flour.

    5) Add the cooked squash, drained of any liquid if necessary. Stir to combine.

    6) Drizzle 1 tablespoon olive oil into a 9" or 10" cast iron skillet, and heat the skillet on the stovetop until the oil is very hot.

    7) Spread the vegetable mixture evenly in the pan. Bake the frittata for about 20 to 25 minutes, until it's light golden brown on top.

    8) Remove from the oven, and serve hot, in wedges.

    tips from our bakers:
    If you're counting calories, fat grams, or cholesterol, this is a great place to use an egg substitute. One 15-ounce carton is perfect for this recipe.

    Big Flavors Rating: 4 Stars

    Israeli Couscous Salad with Smoked Paprika, Tomatoes, and Mozzarella

    May 8, 2014 by Ashley 2 Comments

    Israeli Couscous Salad with Smoked Paprika, Tomatoes, and Mozzarella

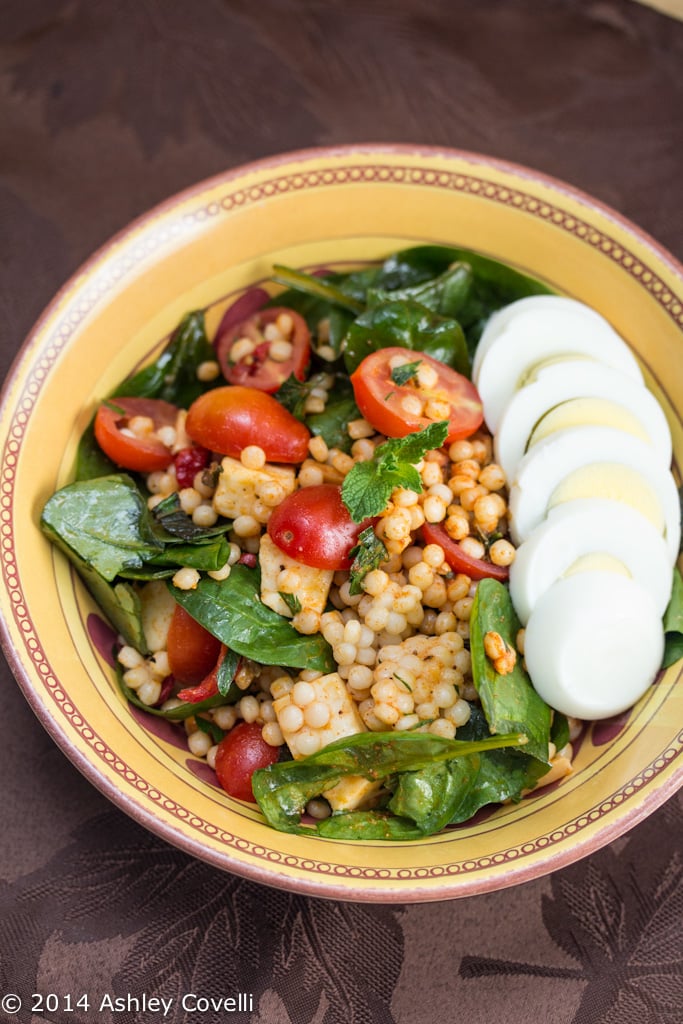
    This colorful  salad made for a simple, make-ahead dinner a few weeks ago. Things have been hectic at home, and I needed something that I could make during my toddler's nap time that we could all enjoy in the evening.

    This salad was nice and fresh. The smoked paprika in the background was wonderful. I couldn't find fresh basil at the store that week, so I used mint, and it was nice and different.

    Israeli Couscous Salad with Smoked Paprika, Tomatoes, and Mozzarella

    This would be great served with some grilled salmon or chicken. I topped each serving with a sliced, hard-boiled egg to make it more filling. My son loved slicing up the Easter eggs that he colored for that part 🙂

    Israeli Couscous Salad with Smoked Paprika, Tomatoes, and Mozzarella
    A Hint of Honey (adapted from Food Network)

    1 Tbsp. extra virgin olive oil
    1 ⅓ cups (8 oz.) Israeli couscous, also known as pearl couscous or maftoul (whole wheat if you can find it)*
    generous pinch salt
    2 cups packed baby spinach leaves, chopped
    12 oz. grape or cherry tomatoes, halved
    8 oz. fresh mozzarella, cubed (or 4 oz. feta, crumbled)
    1 cup jarred roasted red peppers, drained and diced
    ⅓ cup sliced or slivered almonds, toasted
    ¼ cup fresh flat-leaf parsley, chopped
    3 Tbsp. fresh basil, chopped (or fresh mint)
    ⅓ cup extra virgin olive oil
    2 Tbsp. white balsamic vinegar
    1 ½ tsp. smoked paprika
    ½ tsp. kosher salt
    ¼ tsp. freshly ground black pepper

    1. To make the coucous, heat the oil over medium-high heat in a large saucepan. Cook the couscous, stirring frequently, until golden, 4 to 5 minutes. Add 2 cups water and the salt and bring to a boil. Reduce the heat to medium-low. Cover and simmer until the couscous is just tender and the liquid is absorbed, 9 to 10 minutes. Set aside to cool.

    2. To make the dressing, whisk the oil, vinegar, paprika, salt and pepper in a small bowl until smooth.

    3. Mix together the spinach, tomatoes, cheese, peppers, parsley, almonds and basil in a large bowl. Add the couscous and the dressing. Toss until all the ingredients are coated. Season to taste with additional salt and freshly ground black pepper, if needed. Transfer to a large serving bowl and serve. (Can be prepared ahead of time and served chilled.)

    Serves 6-8.

    *Optional: use Gluten Free

    Big Flavors Rating: 4 Stars

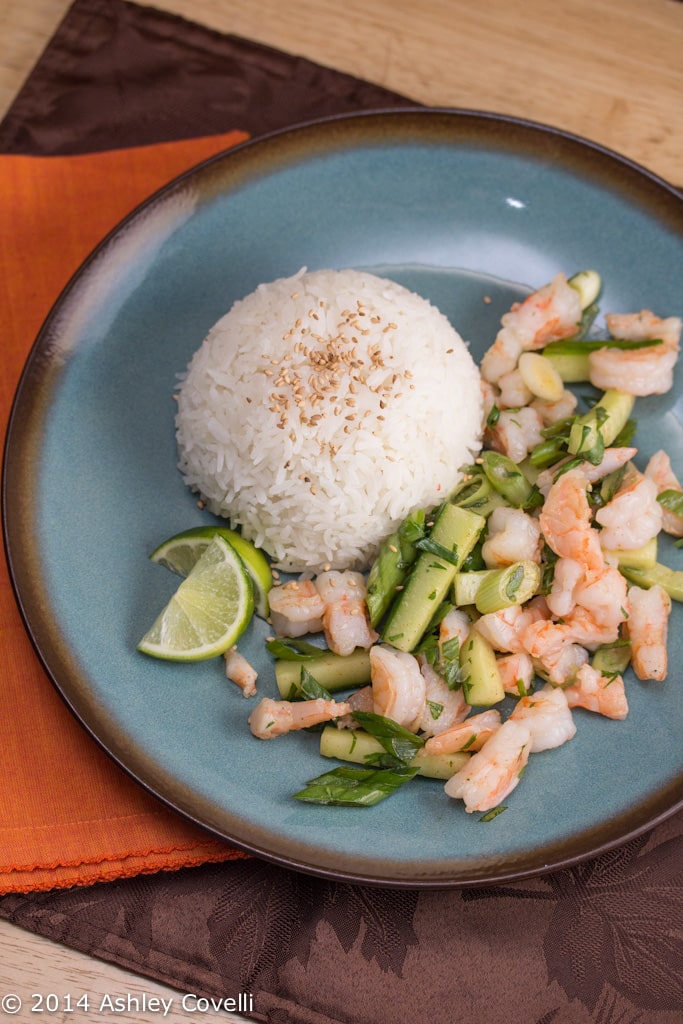
    Burmese Shrimp Salad

    May 7, 2014 by Ashley Leave a Comment

    Burmese Shrimp Salad

    I bookmarked this recipe from a beautiful Burmese cookbook a while back, and recently got around to making it. It was simple to prepare, and very light and refreshing.

    I used cayenne pepper instead of a fresh chile, and didn't find that it needed any more salt at the end. I loved the contrast of the crunchy cucumbers with the tender shrimp.

    Burmese Shrimp Salad

    I served it with some steamed jasmine rice, topped with toasted sesame seeds to make it a meal. It was just the right amount of food for the 2 of us.

    Shrimp Salad
    Burma: Rivers of Flavor - Naomi Duguid (via Asia Society)

    This shrimp salad makes an enticing appetizer. The shrimp are briefly fried and then dressed with minced chiles, chopped scallions, and a blend of fish sauce and lime juice. Cucumber gives a refreshing crunch.

    2 tablespoons peanut oil or Shallot Oil
    About 1 pound medium to large shrimp, peeled, deveined, and rinsed
    3 scallions, halved lengthwise and thinly sliced
    ½ medium English cucumber
    2 tablespoons chopped coriander
    1 green or red cayenne chile, minced, or ¼ to ½ teaspoon Red Chile Powder
    1 teaspoon fish sauce
    About 2 tablespoons fresh lime juice
    Salt (optional)

    Place a wok or large skillet over medium-high heat. Add the oil, then toss in the shrimp and stir-fry just until they turn pink, a minute or two.

    Transfer the shrimp to a cutting board. Slice on the diagonal and place in a shallow bowl. Add the scallions.

    Cut the cucumber into 11/2-inch lengths and slice each length into julienne (you should have a scant cup). Add the cucumber, coriander, and chile to the shrimp and toss lightly. Add the fish sauce and lime juice and toss to mix well. Taste and add a little salt if you wish, then toss and serve immediately.

    Big Flavors Rating: 4 Stars

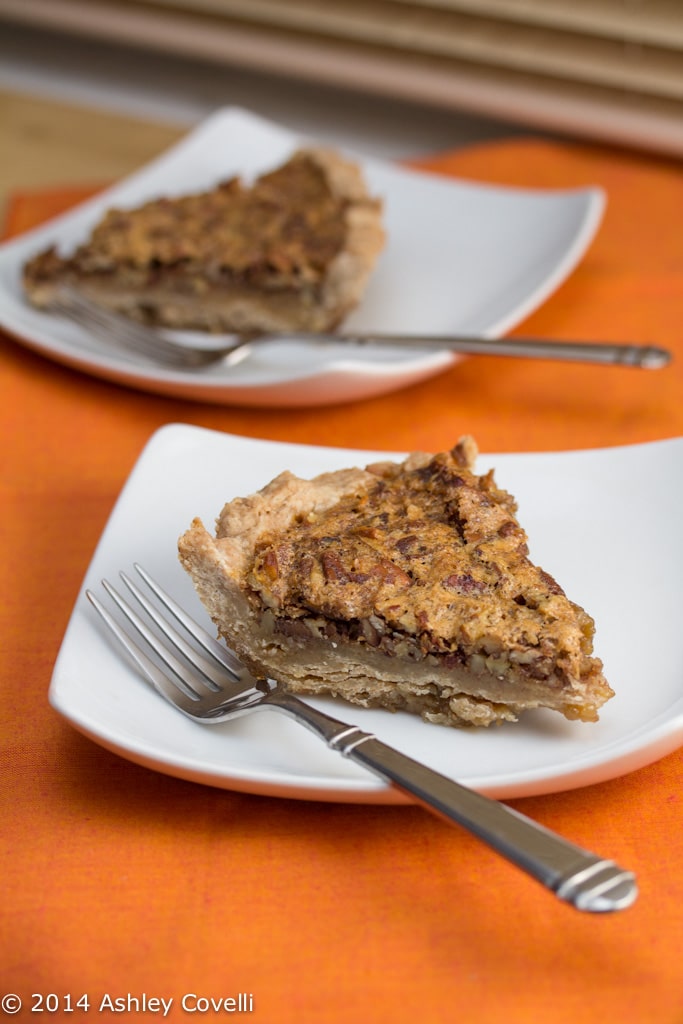
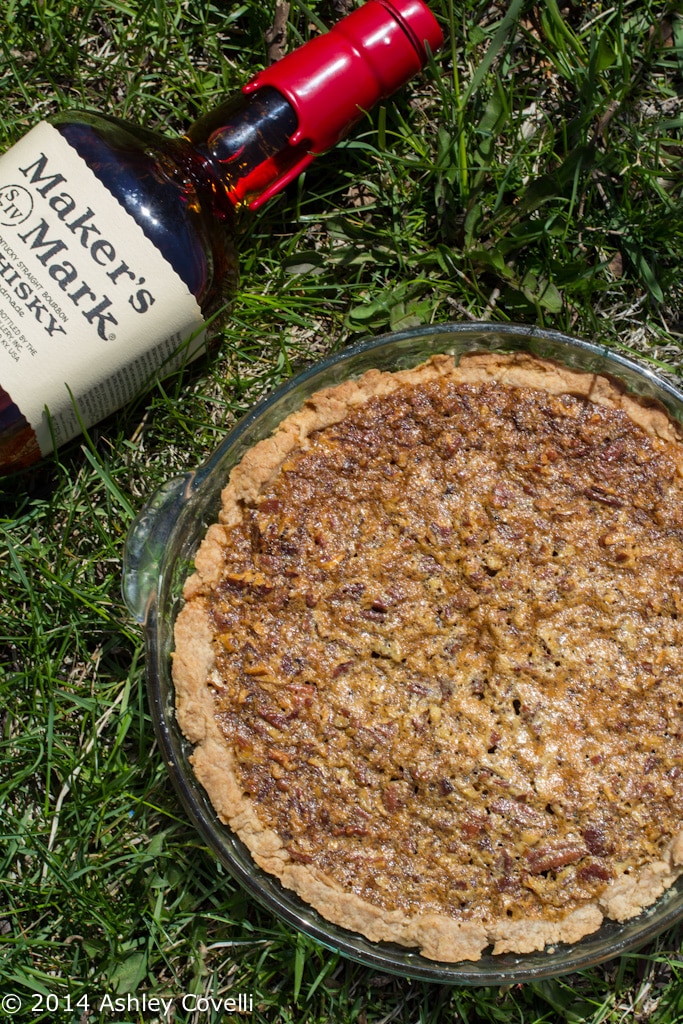
    Bourbon Bacon Pecan Pie with a Whole Wheat Crust

    April 30, 2014 by Ashley 11 Comments

    Bourbon Bacon Pecan Pie with a Whole Wheat Crust

    I enjoy experimenting with recipes that sound like they’re tiptoeing the line of sanity. Throwing words like “bourbon” and “bacon” next to “pie” could be absolutely insane. Or insanely delicious.

    I was banking on the latter when I decided to make this beauty from Teeny’s Tour of Pie and serve it to my Italian in-laws for Easter dessert.

    What can I say, I’m a risk-taker like that. I'm not much of a gambler when it comes to money. But gambling in the kitchen is definitely my style.

    Bourbon Bacon Pecan Pie with a Whole Wheat Crust

    This pie was fantastic! I love that it isn't quite as over-the-top sweet as most pecan pies that I've had in the past. And that's a good thing, because my husband absolutely adores pecan pie.

    The bacon isn't super noticeable here, but it adds a nice bit of saltiness to the sweet filling. The perfume of bourbon is definitely something I could get used to in my after dinner treats.

    The whole wheat crust was really nice here, too. Mine was a bit dry, and I was worried that it wasn't going to work out. I just kneaded it a little more before rolling it out and it worked out fine.

    I still have the other half of that dough in the freezer, since it makes enough for two crusts. Making pie another day is going to be that much easier!

    Bourbon Bacon Pecan Pie with a Whole Wheat Crust

    Bourbon Bacon Pecan Pie
    Teeny’s Tour of Pie – Teeny Lamothe

    Prep time: 30 minutes
    Bake time: 50 to 60 minutes
    Total time: 1 hour 30 minutes
    Makes: one 9-inch single-crust pie (6 to 8 slices) or four 5-inch single crust pies

    6 tablespoons (¾ stick) unsalted butter, at room temperature
    1 cup packed light brown sugar
    3 large eggs
    ½ teaspoon salt
    1 teaspoon pure vanilla extract
    ¾ cup dark corn syrup
    2 tablespoons bourbon
    4 strips bacon, well cooked and roughly chopped
    1 disk dough from Whole Wheat Crust (recipe follows)
    Up to 3 tablespoons all-purpose loud, for rolling out the crust

    1. Preheat the oven to 350°F with a rack in the middle position.

    2. Whisk together the butter and sugar with a wire whisk in a large mixing bowl until the mixture is light and fluffy. Add the eggs, one at a time, mixing after each addition. Add the salt, vanilla, corn syrup, and bourbon and whisk unit everything is fully incorporated. Stir in the bacon and 1 cup of the chopped pecans. Set aside.

    3. Prepare the crust: Place the dough on a floured work surface and with a floured rolling pin, roll it into a rough 11-inch circle about ⅛ inch thick. Lay the crust into a 9-inch pie dish, gently press it in, and trim any excess dough from the edge with a paring knife, being sure to leave a ¾-inch overhang. Tuck the overhanging dough under itself and crimp. Place the lined pie dish on a rimmed baking sheet.

    4. Arrange the remaining ½ cup of pecans in a layer on the bottom of the pie shell. Give the filling one last stir, in case anything has settled to the bottom. Pour the filling over the pecans and bake until the crust and the pecans are golden brown and the middle of the pie no longer wobbles, 50 to 60 minutes. Let cool at room temperature until the filling is set, at least 45 minutes, before serving.

    Bourbon Bacon Pecan Pie will keep for 4 to 5 days, covered, on the countertop.

    Whole Wheat Crust

    Prep time:15 minutes
    Chill time: 1 hour, ideally overnight
    Total time: 1 hour 15 minutes
    Makes: one 9-inch double crust, four 5-inch double crusts, or eight 5-inch single crusts

    1 ½ cups all-purpose flour
    1 cup white whole wheat or whole wheat flour
    2 teaspoons salt
    2 tablespoons granulated sugar
    ¾ cup (1 ½ sticks) cold unsalted butter, cut into small pieces
    ¼ cup (4 tablespoons) cold vegetable shortening
    ¼ cup (4 tablespoons) cold vodka
    ½ cup (8 tablespoons) cold water, plus extra as needed

    1. In a large bowl, stir together the flour, salt, and sugar until everything is thoroughly combined. Add the butter and shortening and cut the mixture together using a pastry cutter until it forms small pea-size crumbs coated in flour.

    2. Pour the vodka evenly over the dry ingredients, a few tablespoons at a time, using a rubber spatula to press the dough together. Similarly, add the water, and continue to press the dough together to form a large ball. The dough should be fairly wet and sticky; if for some reason it seems particularly dry, add a little extra ice water a tablespoon at a time until everything comes together easily. (Be careful to work the dough as little as possible; otherwise the crust may be tough.)

    3. Divide the dough into two equal balls, press each into a disk, wrap each in plastic, and refrigerate for at least an hour or up to 2 days before rolling out.

    Big Flavors Rating: 5 Stars

    Teenys Tour of Pie Cover

    And now, for the giveaway! Workman Publishing sent me an extra copy of Teeny's Tour of Pie to give away to one of my readers. To enter to win, leave a comment below telling me your favorite flavor of pie. The contest will close on Friday, May 9, 2014 at 12 noon (Eastern Standard Time). Winners will be chosen via random.org and will be contacted via email to get mailing information. Good luck, everyone!

    *Note: I received promotional items to try out, but was in no other way compensated. As always, all opinions are 100% my own. If you have a product that you feel would be of interest to myself and my readers, you can submit information for review via my contact page.

    UPDATE – The winner has been selected via random.org – CONGRATS to Ashley B!

    Pan-Roasted Pork Tenderloin with Balsamic Tomatoes

    April 29, 2014 by Ashley 4 Comments

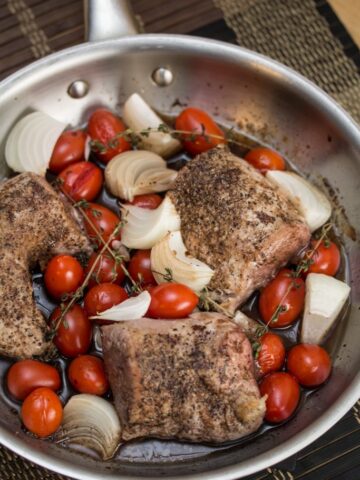
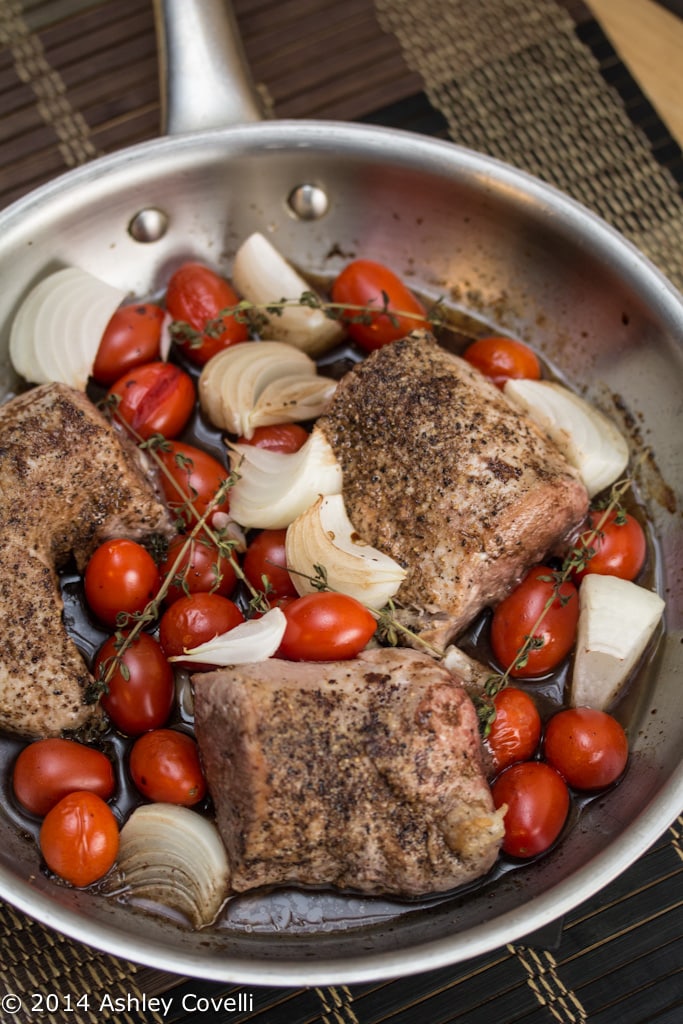
    Pan-Roasted Pork Tenderloin with Balsamic Tomatoes

    Pork tenderloin is one of my go-to simple-yet-versatile mains. One of my favorite ways to cook it is to sear it on the stovetop, toss in some flavorings and pop it in the oven.

    Pan-Roasted Pork Tenderloin with Balsamic Tomatoes

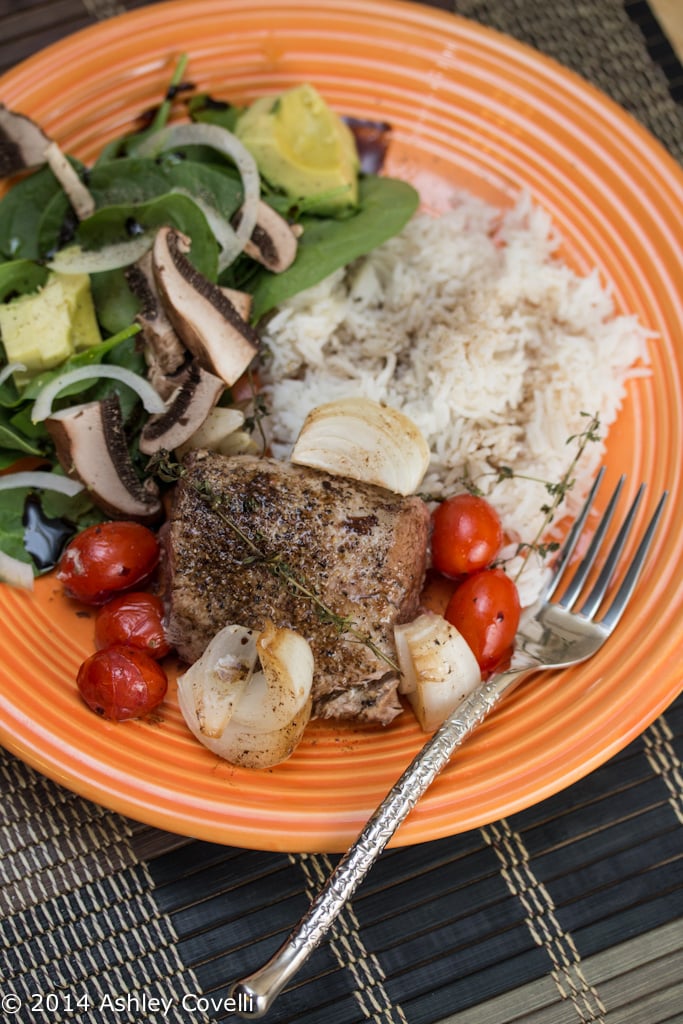
    This combination was great - the tangy sauce that was left in the pan was perfect drizzled over rice that I served alongside. The pork was nice and juicy, and the tomatoes and onions were infused with the flavor of balsamic and fresh thyme.

    This recipe could be easily doubled if you need to feed a crowd as long as you have a large enough pan.

    Pork tenderloin is such a versatile ingredient! Some of our very favorite recipes utilize it, like this balsamic marinated pork tenderloin, these peanut noodles with roasted pork tenderloin + honeyed oranges, and this breaded pork tenderloin with lemon caper sauce.

    Pan-Roasted Pork Tenderloin with Balsamic Tomatoes

    📖 Recipe

    Pan-Roasted Pork Tenderloin with Balsamic Tomatoes

    Pan-Roasted Pork Tenderloin with Balsamic Tomatoes
    Pork tenderloin is one of my go-to simple-yet-versatile mains. One of my favorite ways to cook it is to sear it on the stovetop, toss in some flavorings and pop it in the oven.
    Big Flavors from a Tiny Kitchen - Ashley Covelli
    No ratings yet
    Print Recipe Pin Recipe
    Servings: 3 servings
    Course: Main Dish
    Cuisine: American
    Prep Time 15 minutes mins
    Cook Time 30 minutes mins
    Total Time 45 minutes mins

    Ingredients
     

    • 2 tablespoons extra-virgin olive oil
    • 1 pound pork tenderloin
    • ½ teaspoon kosher salt
    • ¼ teaspoon freshly cracked black pepper
    • 2 cloves garlic smashed
    • 1 small yellow onion cut into 8 wedges
    • 1 cup grape tomatoes
    • 5 sprigs fresh thyme
    • 2 tablespoons balsamic vinegar

    Instructions
     

    1. Preheat oven to 375°F. Heat oil over medium-high heat in a medium-sized, oven-proof skillet.
    2. Pat pork tenderloin dry, cut into 3 equal portions and season with salt and pepper. Add pork pieces to the pan and sear until brown. Flip to sear the other side. Once golden, add the garlic, onion, tomatoes, thyme and balsamic to the pan. Place pan in the oven and cook for 15-20 minutes, until the internal temperature reaches 145°F.
    3. Remove the pork from the oven and allow to sit for 10 minutes before serving. Serve as is, or slice each piece of pork into thin medallions. Drizzle pan juices over each serving - it's also great drizzled over rice served alongside. Enjoy!

    Did you make this recipe?

    Leave a comment + star rating below to let people know how it was!

    Asparagus with Balsamic Tomatoes and Goat Cheese

    April 26, 2014 by Ashley 1 Comment

    Asparagus with Balsamic Tomatoes

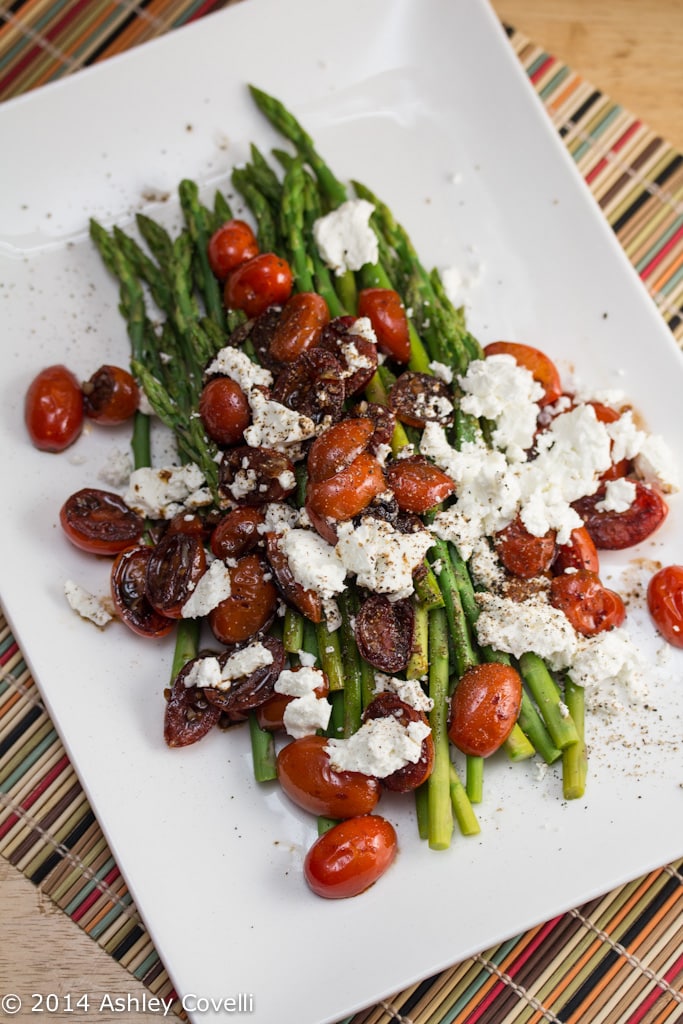
    This simple and colorful side dish is the perfect addition to any springtime meal. Plus, any time I can smother veggies in goat cheese, I'm totally on board!

    Tangy balsamic cooks down to glaze sweet grape tomatoes. It's a beautiful topping for perfectly tender asparagus. And if you're like me, you might add just a little extra goat cheese at the end 😉

    If you check out the link in the recipe below, they also have Raisin and Pine Nut, Sesame-Ginger Glazed and Lemon-Tarragon variations of this recipe. Yum!

    Asparagus with Balsamic Tomatoes

    Asparagus with Balsamic Tomatoes
    Cooking Light April 2011

    1 pound asparagus, trimmed
    2 teaspoons extra-virgin olive oil
    1 ½ cups halved grape tomatoes
    ½ teaspoon minced fresh garlic
    2 tablespoons balsamic vinegar
    ¼ teaspoon salt
    3 tablespoons crumbled goat cheese

    1. Cook asparagus in boiling water 2 minutes or until crisp-tender. Drain.

    2. Heat olive oil in a large skillet over medium-high heat. Add tomatoes and garlic; cook 5 minutes. Stir in vinegar; cook 3 minutes. Stir in salt. Arrange asparagus on a platter; top with tomato mixture. Sprinkle with cheese and pepper.

    Amount per serving
    Calories: 69
    Fat: 3.9g
    Saturated fat: 1.4g
    Monounsaturated fat: 2g
    Polyunsaturated fat: 0.3g
    Protein: 3g
    Carbohydrate: 6.5g
    Fiber: 2.1g
    Cholesterol: 4mg
    Iron: 1.6mg
    Sodium: 181mg
    Calcium: 45mg

    Big Flavors Rating: 4 Stars

    Peanut Butter Brownie Pie with a Pretzel Crust + Cookbook Review

    April 25, 2014 by Ashley 5 Comments

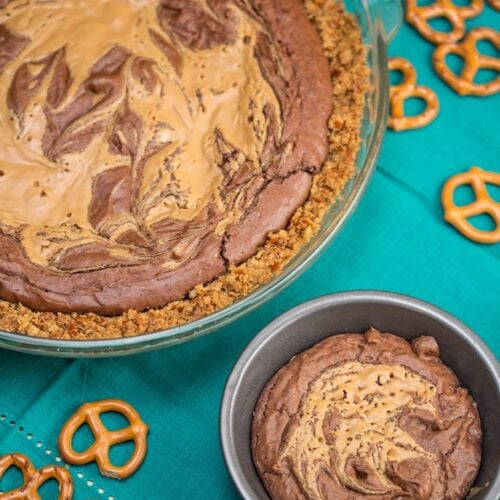
    Peanut Butter Brownie Pie with a Pretzel Crust

    Why choose between baking a batch of brownies or a pie when you can have BOTH?

    Especially when it's topped with an ooey gooey peanut butter swirl, all baked into a pretzel crust.

    Yeah. No contest.

    Peanut Butter Brownie Pie with a Pretzel Crust

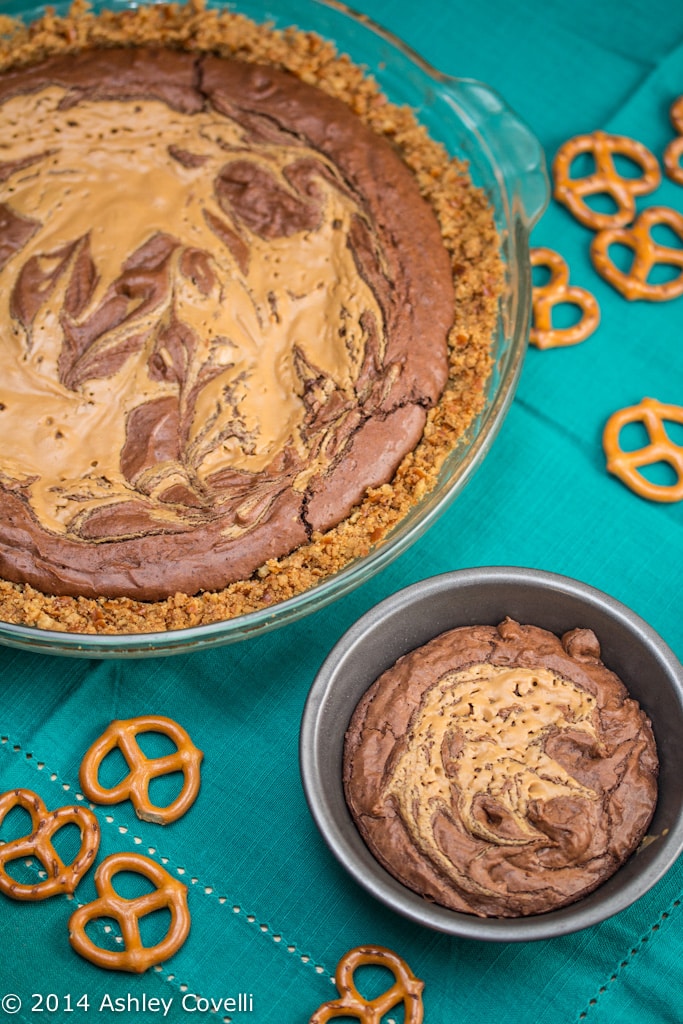
    This pie was fantastic. A nice, dense brownie base with the perfect amount of peanut butter swirled on top. My brownie batter was a little thick, so it was kind of tricky getting the peanut butter to swirl. But it turned out beautiful!

    Dino and I happily ate a slice of this decadent pie every night until there was nothing but crumbs left. The recipe made enough for me to make one full-sized brownie pie plus a little one (without crust) that my son absolutely loved! At first, he tried to pick the peanut butter out, but once he realized it was chocolate and peanut butter - he was in toddler dessert heaven!

    Peanut Butter Brownie Pie with a Pretzel Crust

    My crust was really crumbly - maybe I didn't grind my pretzels up fine enough. I used unsalted pretzels, since the recipe didn't state whether or not they should be salted, and I think a little salt would have been just fine here. Dino really liked it as is, so maybe just a little sprinkle of sea salt on the top next time so it doesn't get too salty.

    Make sure you give yourself plenty of time to make this pie. It's fairly labor intensive, and will leave you with a big pile of dishes to clean up. It's absolutely delicious though, so it's worth it in my opinion 🙂


    One of my favorite childhood memories is of baking pies with my grandma. She had a big pile of pie plates, plus a few smaller, kid-sized ones for me. She always made sure there was extra pie dough and filling so we could make one normal sized pie plus one or two mini pies just for me! It was so much fun, and really helped to kindle my love for cooking and baking.

    My husband absolutely loves pie (as witnessed by our favorite pie recipes and our annual celebration of pie on Pi Day). For Christmas last year, he tracked down a mini baking set so that our 2-year-old son could do some miniature baking with me in our tiny kitchen. It was incredibly thoughtful, and I was psyched to start a baking tradition with him.

    Teenys Tour of Pie Cover

    When I was asked to review a new cookbook dedicated entirely to pie (both regular sized and “teeny”) I knew it was kismet. Teeny’s Tour of Pie by Teeny Lamothe is a fantastic resource for all things pie. She had a similar childhood experience, baking tiny pies with her mother. As an adult, decided to spend a year traveling across America to do a “Tour of Pie” - essentially working as an intern in some of the country’s best pie shops to learn from the real pie pros.

    The book starts out with a section about the tools of the trade and gives beginner pie bakers the lowdown on what is truly necessary to start cranking fresh pies out of their very own kitchens. Next is a section on the elements of crust, complete with a variety of recipes to be used for the pies featured in the rest of the book. She also illustrates a variety of ways of crimping, venting and decorating crusts.

    Lamothe encourages baking with fresh, seasonal ingredients, so the rest of the book is broken up by season. There are a lot of unique combinations of ingredients within these pages, along with her perfected versions of the classics that everyone knows and loves. There are both sweet and savory pies, and I've bookmarked a lot of them to try out soon!

    Workman Publishing supplied me with 2 copies of the book (I’ll be giving one away next week - stay tuned!) & Food Lion sent over a box with some baking supplies to help get me started in the kitchen. You can also check out the Teeny Pies website if you want to see how to get pies straight from the source.

    Peanut Butter Brownie Pie with a Pretzel Crust


    📖 Recipe

    Peanut Butter Brownie Pie with a Pretzel Crust

    Peanut Butter Brownie Pie with a Pretzel Crust
    Why choose between baking a batch of brownies or a pie when you can have BOTH? Especially when it’s topped with an ooey gooey peanut butter swirl, all baked into a pretzel crust. Yeah. No contest.
    Teeny's Tour of Pie - Teeny Lamothe
    No ratings yet
    Print Recipe Pin Recipe
    Servings: 8 servings
    Course: Dessert
    Cuisine: American
    Prep Time 1 hour hr
    Cook Time 35 minutes mins
    Total Time 1 hour hr 35 minutes mins

    Ingredients
     

    • 1 ¼ cups pretzel crumbs from about 2 cups pretzels
    • ½ cup 1 stick unsalted butter, melted
    • 6 tablespoons ¾ stick unsalted butter
    • 6 ounces semisweet chocolate I use individually wrapped 1-ounce pieces
    • ½ cup creamy commercial peanut butter such as Skippy
    • ¼ cup unsweetened cocoa powder
    • 2 large eggs
    • 1 cup granulated sugar
    • 2 teaspoons pure vanilla extract
    • ¾ cup all-purpose flour
    • ¼ teaspoon baking powder
    • ¼ teaspoon salt

    Instructions
     

    1. Preheat the oven to 350°F with a rack in the middle position.
    2. Place the pretzel crumbs in a medium bowl. Pour the melted butter over them and mix with a spoon or rubber spatula until they are coated evenly and clump readily when pressed together.
    3. Spoon three quarters of the mixture into a 9-inch pie plate and, using your fingers, press the mixture up the side of the plate until you have a ¼-inch thick shell all the way around. Spoon the rest of the mixture into the center of the plate and press it to form the bottom of the shell, making sure the bottom and sides are joined.
    4. Bake until the shell is lightly browned, 5 to 7 minutes. Remove it from the oven and let it cool on a rack, then transfer it to the refrigerator and chill for at least 30 minutes before filling.
    5. Fill a medium saucepan with water, leaving a space of 2 to 3 inches at the top, and bring to a boil over medium-high heat.
    6. Place the butter, chocolate, and ¼ cup of the peanut butter in a large heatproof bowl (it would be big enough to sit on top of the saucepan and heat, stirring occasionally, until the butter, chocolate, and peanut butter have melted. Remove the bowl from the heat and whisk in the cocoa powder until smooth. Set the bowl aside to cool.
    7. Place the remaining ¼ cup peanut butter in a small saucepan over low heat and cook, stirring occasionally, until it's thinner and almost runny, 5 to 7 minutes. Remove from the heat and set aside.
    8. Whisk together the eggs, sugar, and vanilla in a large bowl. Slowly pour the cooled chocolate mixture into the egg mixture and whisk briskly until smooth.
    9. Stir together the flour, baking powder, and salt in a small bowl. Add to the brownie and stir until smooth.
    10. Pour the brownie batter into the pretzel crust, filling it to just below the very top. Spoon three or four small dollops of the melted peanut butter on top of the brownie batter and gently swirl it into the batter with a table knife or toothpick.
    11. Bake until a knife inserted 2 inches from the edge of the crust comes out clean, 35 to 40 minutes. Let cool before serving.

    Notes

    Peanut Butter Brownie Pie with a Pretzel Crust will keep for 2 to 3 days, covered, on the countertop.
    Reprinted with permission from Teeny’s Tour of Pie by Teeny Lamothe.

    Did you make this recipe?

    Leave a comment + star rating below to let people know how it was!

    *Note: I received promotional items to try out, but was in no other way compensated. As always, all opinions are 100% my own. If you have a product that you feel would be of interest to myself and my readers, you can submit information for review via my contact page.

    Sautéed Carrots with Sage

    April 24, 2014 by Ashley 2 Comments

    Sautéed Carrots with Sage

    This was the second side dish that I brought to Easter dinner with my in-laws. It was super simple, and went beautifully with the turkey and stuffing.

    These carrots are cooked in a blend of butter and oil and then cooked until just tender. A bit of fresh sage at the end livens this dish up and adds a splash of soft green color.

    Sautéed Carrots with Sage

    You could substitute dairy-free butter to make this a vegan side dish, fitting for any springtime dinner table!

    Sautéed Carrots with Sage
    Cooking Light November 2009

    1 teaspoon butter
    1 teaspoon olive oil
    1 ½ cups diagonally sliced carrot
    2 tablespoons water
    ⅛ teaspoon salt
    ⅛ teaspoon freshly ground black pepper
    2 teaspoons fresh small sage leaves

    1. Melt butter in a large nonstick skillet over medium heat. Add oil to pan; swirl to coat. Add carrot and 2 tablespoons water. Partially cover pan and cook 10 minutes or until carrots are almost tender. Add salt and pepper to pan; increase to medium-high heat. Cook 4 minutes or until carrots are tender and lightly browned, stirring frequently. Sprinkle with sage.

    Amount per serving
    Calories: 75
    Fat: 4.4g
    Saturated fat: 1.5g
    Monounsaturated fat: 2.2g
    Polyunsaturated fat: 0.4g
    Protein: 0.9g
    Carbohydrate: 9g
    Fiber: 2.6g
    Cholesterol: 5mg
    Iron: 0.3mg
    Sodium: 224mg
    Calcium: 35mg

    Big Flavors Rating: 4 Stars

    Baked Asparagus with Balsamic Butter Sauce

    April 23, 2014 by Ashley 2 Comments

    Baked Asparagus with Balsamic Butter Sauce

    This Easter, my father-in-law made turkey, so I decided to bring 2 simple side dishes and a decadent pie for dessert.

    The first side was this beautiful and tasty asparagus dish.

    Baked Asparagus with Balsamic Butter Sauce

    Asparagus is baked until tender and topped with melted butter that is infused with soy and balsamic. It's really easy, and if you use dairy-free butter, it can even be vegan.

    This is definitely a great, simple side dish that would be great with a variety of main courses.

    Baked Asparagus with Balsamic Butter Sauce

    Baked Asparagus with Balsamic Butter Sauce
    Allrecipes - CAE

    Prep: 10 m
    Cook: 12 m
    Ready In: 25 m
    Makes 4 Servings

    “This is a simple and delicious side dish. Fresh asparagus is baked until tender, and dressed with a blend of butter, soy sauce, and balsamic vinegar.”

    1 bunch fresh asparagus, trimmed
    cooking spray
    salt and pepper to taste
    2 tablespoons butter
    1 tablespoon soy sauce*
    1 teaspoon balsamic vinegar

    Preheat oven to 400 degrees F (200 degrees C).

    Arrange the asparagus on a baking sheet. Coat with cooking spray, and season with salt and pepper.

    Bake asparagus 12 minutes in the preheated oven, or until tender.

    Melt the butter in a saucepan over medium heat. Remove from heat, and stir in soy sauce and balsamic vinegar. Pour over the baked asparagus to serve.

    *Optional: use Gluten Free

    Big Flavors Rating: 4 Stars

    Cornmeal and Chia Seed Crusted Tilapia

    April 21, 2014 by Ashley Leave a Comment

    Cornmeal and Chia Seed Crusted Tilapia

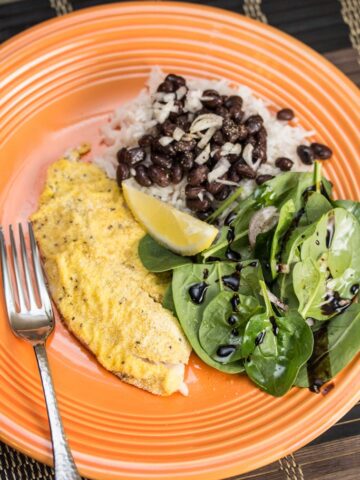
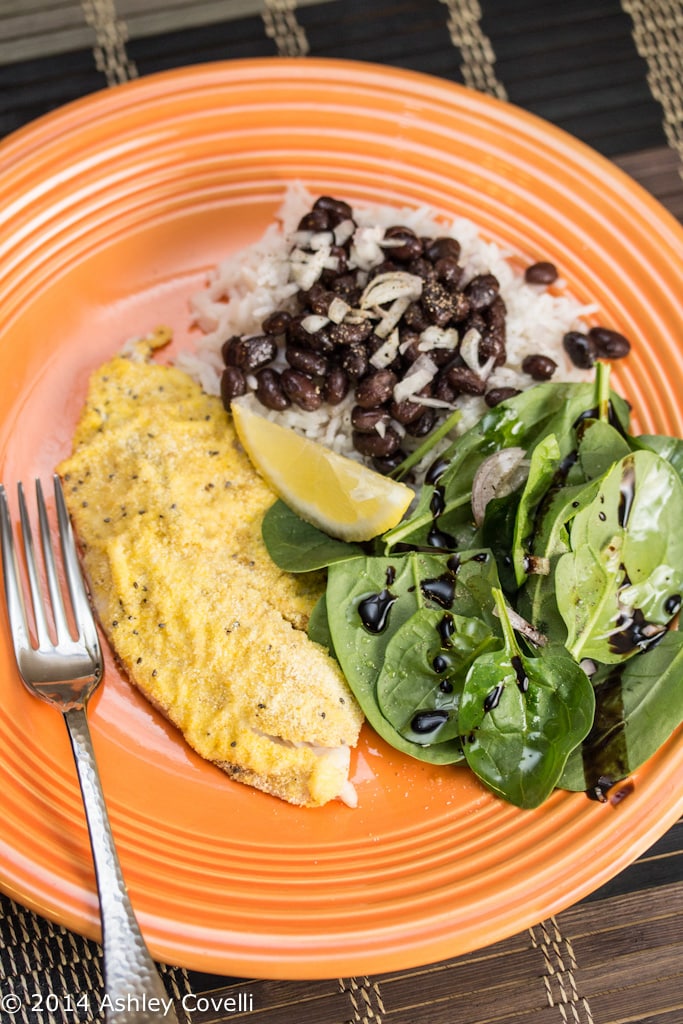
    Tilapia is such a versatile fish, and with this simple coating, it was on the dinner table in no time at all. This meal came together in 20 minutes flat. Perfect for a busy weeknight!

    Simply slather each piece of tilapia with a little low fat-mayo, dredge one side in a mix of cornmeal and chia seeds, and pop it into the oven. The chia added a nice bit of crunch to the crust, and the fish was beautifully tender and flaky.

    Cornmeal and Chia Seed Crusted Tilapia

    This method could be used with a lot of different spice blends. I'm anxious to experiment with it more. This is definitely a recipe worth repeating!

    I served this with lemon wedges and a little hot sauce for a little zing, along with a spinach salad and some black beans and rice

    Cornmeal & Chia Seed Crusted Tilapia
    Savoring the Thyme

    4 boneless tilapia fillets (1 pound total), patted dry
    A few dashes of Kosher salt and ground black pepper
    1.5 Tablespoons low-fat mayonnaise
    ¾ cup cornmeal
    ½ teaspoon chia seeds*
    ½ teaspoon garlic powder
    olive oil cooking spray

    1. Preheat the oven to 400 degrees Fahrenheit.

    2. On a plate, toss together the cornmeal, chia seeds, garlic powder, and a dash each of salt and pepper.

    3. Place a cooking rack onto a baking sheet, spray lightly with olive oil/non-stick cooking spray and set aside.

    4. Sprinkle some salt and pepper onto each piece of fish, followed by a smear some of the mayonnaise and then invert the fish into the cornmeal mixture. Press firmly and then flip the fish over and place onto the cooking rack.

    5. Bake for 15-20 minutes depending on the thickness of the fish.

    *Do not add more chia seeds or else you end up with an overly crunchy fish instead of one with a nice texture.

    Big Flavors Rating: 4 Stars

    Favorite Yogurt Recipes + Fueling My Daily Marathon

    April 20, 2014 by Ashley 1 Comment

    Favorite Yogurt Recipes

    Life with a toddler gets pretty hectic. It can be tricky to make sure that we're all eating healthily while we're on the go. It feels like a marathon trying to make it through the day sometimes, but it's a fun kind of exhaustion 🙂

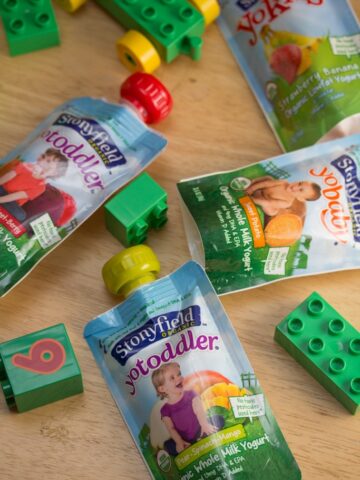
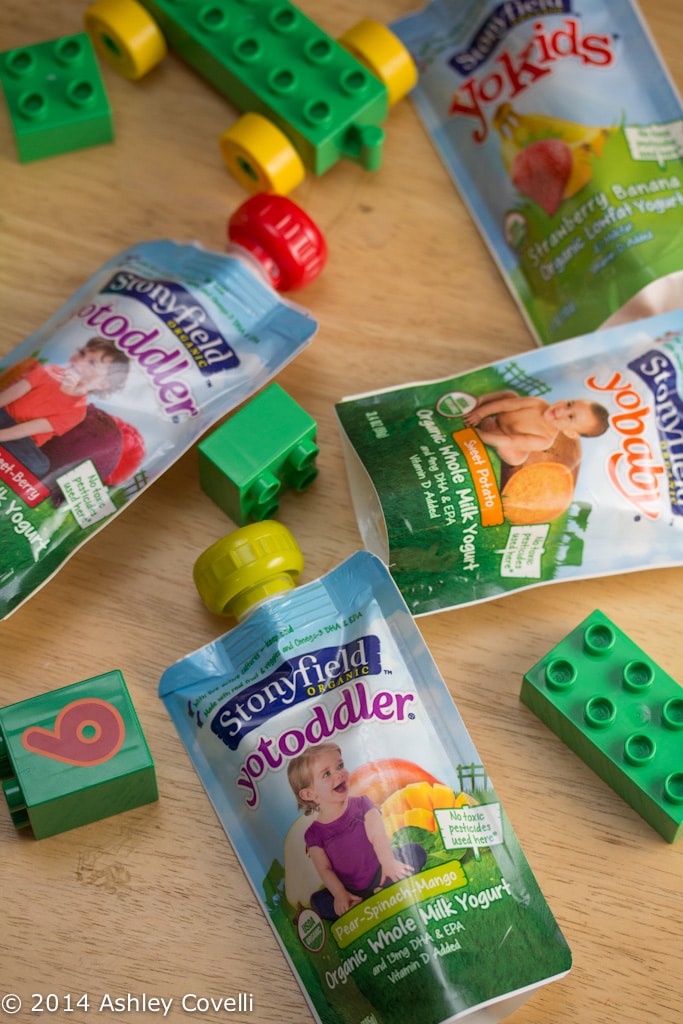
    One of my favorite breakfasts/snacks is a bowl of plain Greek yogurt with a drizzle of honey, granola, and fresh fruit on top. My son loves it too, and asks for it almost daily. I love that it's healthy, packed with protein, and most of all easy! If I'm running short on time, he loves the Stonyfield YoToddler Pouches. They're great on the go! I also love grabbing a cup of Stonyfield Greek if I need a little boost before a workout.

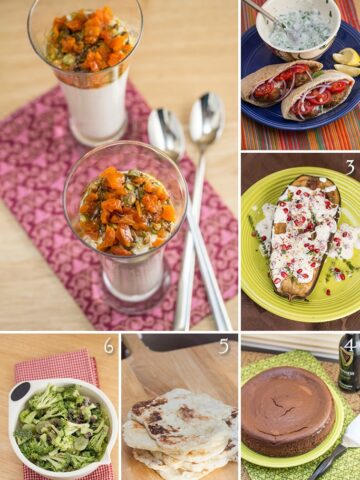
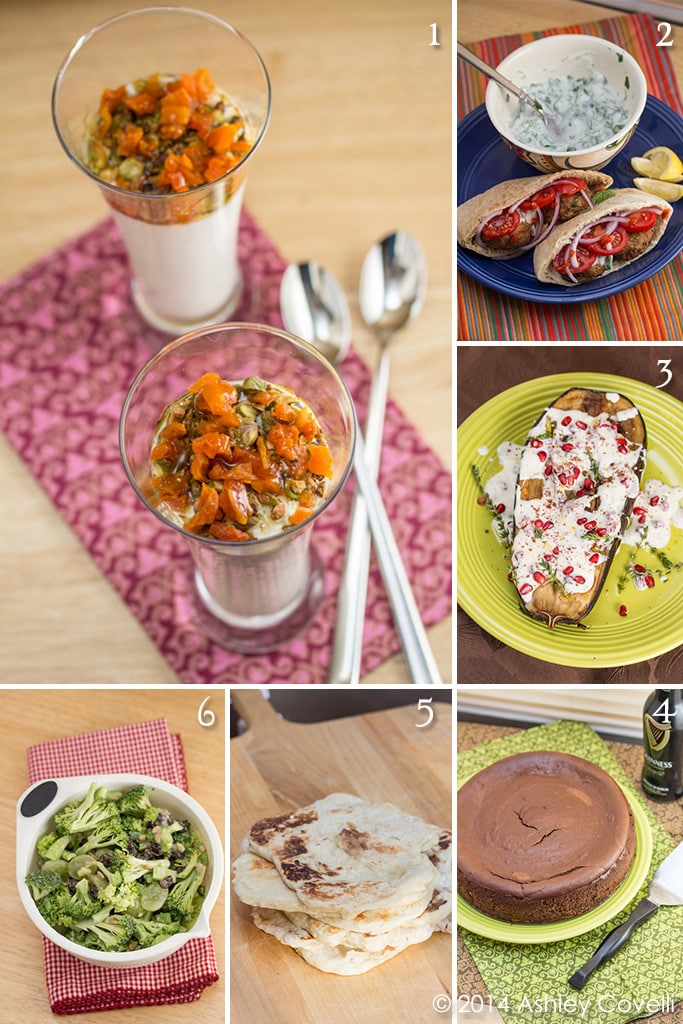
    Yogurt is such a versatile ingredient in the kitchen - I always have a few different types on hand. Here are a few of our favorite ways to use yogurt:

    Favorite Yogurt Recipes

    1. Persian Pudding

    2. Falafel with Yogurt-Herb Sauce

    3. Eggplant with Buttermilk Sauce

    4. Guinness Chocolate Cheesecake

    5. Bazlama (Turkish Flat Bread)

    6. Broccoli Salad

    You can see all of our 5 Star yogurt recipes here.


    Tomorrow morning marks the 118th Boston Marathon. I admire all of the people who put themselves out there, training for these types of events. It takes a ton of dedication. I took up running a few months ago, but am nowhere near being able to run an actual marathon. But I'll be cheering them on from the sidelines here in New York!

    This year, Stonyfield is the official yogurt sponsor of the Boston Marathon. They're sending 10 runners who just missed the cut off due to this year's large amount of sign ups. They'll be handing out hundreds of thousands of cups of organic yogurt on race day - to runners, their families, volunteers, etc.

    Stonyfield co-founder Gary Hirsherg says,

    Like the members of Team Stonyfield, we felt compelled to participate in this year's race to show our deep love and support for the city of Boston and New England community. We're so proud of our inspiring team and are excited to be working with the Boston Athletic Association to make this year's race a celebration of Boston's tremendous spirit and resiliency.

    They're also giving away a bunch of healthy living themed prizes including a year long gym membership on the day of the marathon - you can enter by posting on Twitter or Instagram using #StonyfieldSuperFan.

    *Note: I received product coupons for this post, but was in no other way compensated. As always, all opinions are 100% my own. If you have a product that you feel would be of interest to myself and my readers, you can submit information for review via my contact page.

    This post was created in partnership with Stonyfield. All opinions are my own.

    Quick Broiled Ginger Salmon

    April 19, 2014 by Ashley Leave a Comment

    Quick Broiled Ginger Salmon

    I'm always on the lookout for new salmon recipes, so when I saw this one over at Baked Bree, I knew it just had to be on the menu.

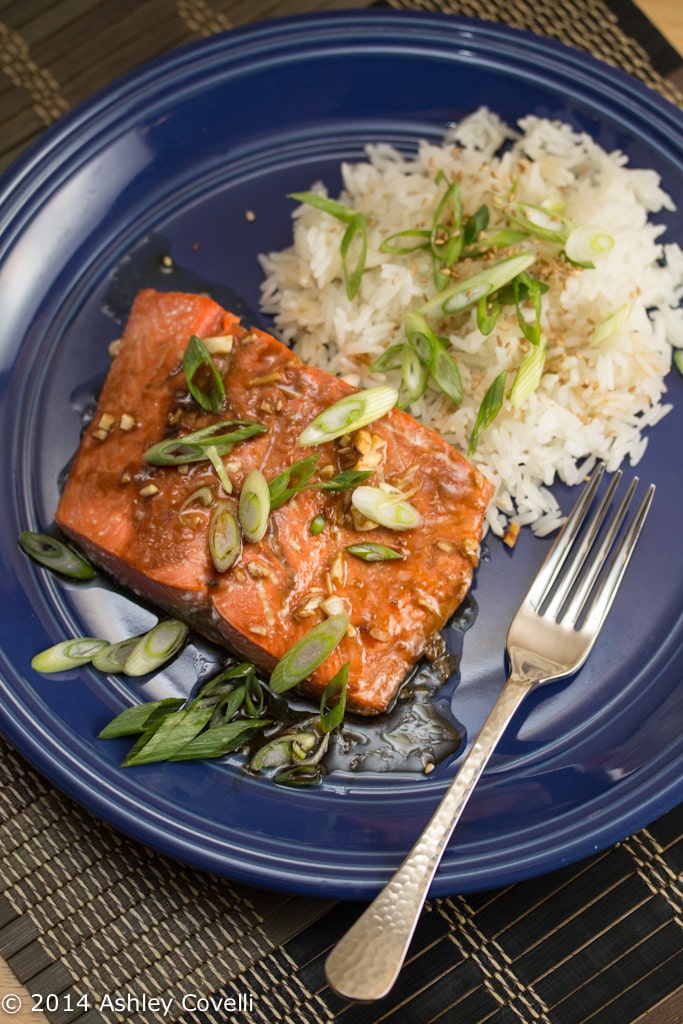
    A few ingredients, 30 minutes to marinate, and then a quick hit underneath the broiler, and dinner is ready! I served this with steamed Jasmine rice topped with some green onions, toasted sesame seeds and a drizzle of sesame oil.

    Quick Broiled Ginger Salmon

    It was a great, easy weeknight meal that Dino said he could eat every night.

    Quick Broiled Ginger Salmon
    Baked Bree

    2 – 4 pieces Coho Salmon
    2 Tablespoons soy sauce*
    1 Tablespoon olive oil
    2 Tablespoons brown sugar
    2 cloves garlic, minced
    2 teaspoons freshly grated ginger
    freshly ground pepper
    2 scallions

    Mix together soy sauce, olive oil, brown sugar, garlic, ginger, and black pepper. Put the salmon in a baking dish (make sure that it is safe for the broiler) and pour the marinade over. Let sit for 20 to 30 minutes.

    Preheat the broiler, and cook the salmon for 6 to 8 minutes. If you like yours more on the medium side, check it at about 4 minutes.

    Chop some scallions and scatter over top of salmon.

    *Optional: use Gluten Free

    Big Flavors Rating: 4 Stars

    White Bean and Roasted Mushroom Soup

    April 18, 2014 by Ashley 1 Comment

    White Bean and Roasted Mushroom Soup

    This herby, luxurious soup is great on a cold night, which, unfortunately we are still experiencing here on the East Coast in mid-April. Eew.

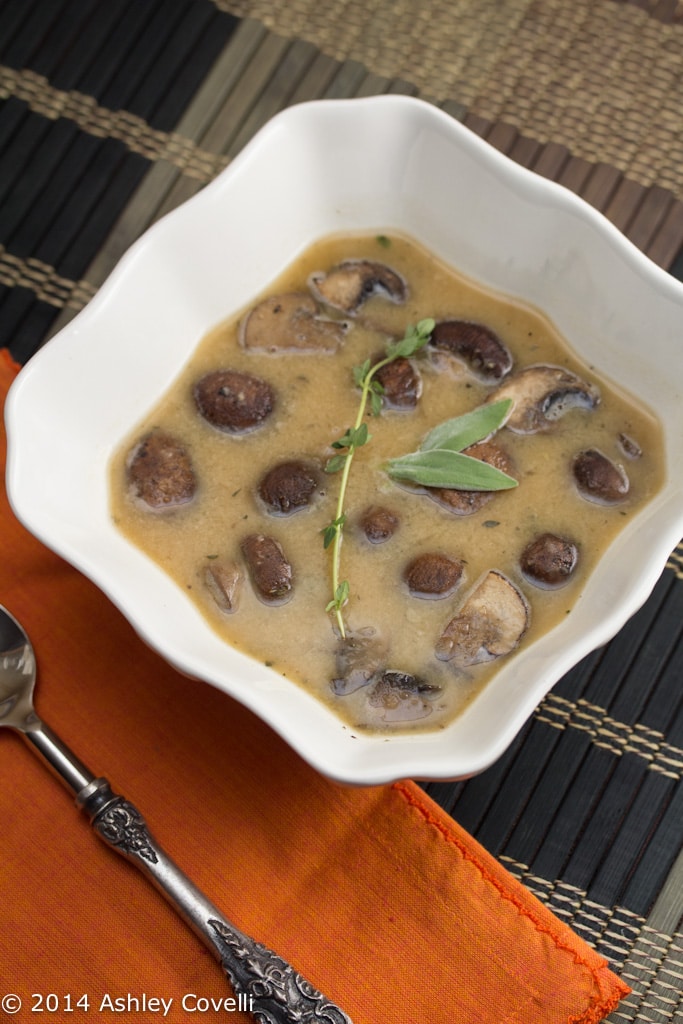
    A mix of mushrooms, onions, garlic and fresh herbs roast in the oven while the soup starts to simmer. Puréed beans thicken this soup and make it feel decadent without the addition of any cream or butter, which is wonderful, especially if you live with someone who is lactose intolerant. And it's healthier, too!

    White Bean and Roasted Mushroom Soup

    White Bean and Roasted Mushroom Soup
    She Wears Many Hats - Amy Johnson

    A satisfying soup, that uses a healthy pureed white bean and broth base instead of cream, so it can be enjoyed often, guilt-free.

    Makes about 8 servings.

    16 oz. mushrooms, halved or quartered
    2 large sweet onions, quartered
    3 garlic cloves, slightly crushed
    1-2 tablespoons olive oil
    1½ teaspoon salt, divided
    1½ teaspoon pepper, divided
    8-10 fresh sage leaves*
    8-10 stems + 1 tablespoon leaves fresh thyme*, divided
    48 oz. chicken broth (vegetable broth can be substituted for a vegetarian version)
    3 – 15 oz. cans white beans, not drained (I prefer cannellini beans)
    Additional salt and pepper for seasoning

    Preheat oven to 450°F.

    Toss mushrooms, garlic and onion in olive oil, 1 teaspoon salt, and 1 teaspoon pepper. (You may want to keep mushrooms separate on baking sheet for roasting, because you’ll have to separate later. So, separate now, or later.) Spread on baking sheet. Add sage leaves and stems of thyme. Roast in 450° F oven for 10 minutes, toss and roast for additional 15 minutes.

    While vegetables are roasting, add broth, beans, ½ teaspoon salt, ½ teaspoon pepper, and 1 tablespoon fresh thyme leaves to a large stock pot over medium heat and simmer.

    When vegetables are done roasting, let cool slightly. Separate mushrooms from other roasted vegetables (if not already separated).

    Retrieve 2 cups of the white beans, and 1 cup of broth from the stock pot, add to a blender along with the roasted onions, garlic and herbs. Cover and blend until smooth.

    Add pureed bean mixture back to stock pot, whisking in until smooth. Add roasted mushrooms to soup. Salt and pepper to taste.

    Warm over low heat until ready to serve.?*Dried herbs may be substituted for fresh. The rule of thumb is one part dried, to three parts fresh.

    Big Flavors Rating: 4 Stars

    Mexican Inspired Twice Baked Potatoes

    April 16, 2014 by Ashley 3 Comments

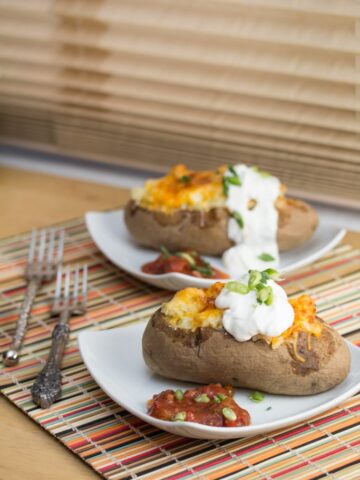
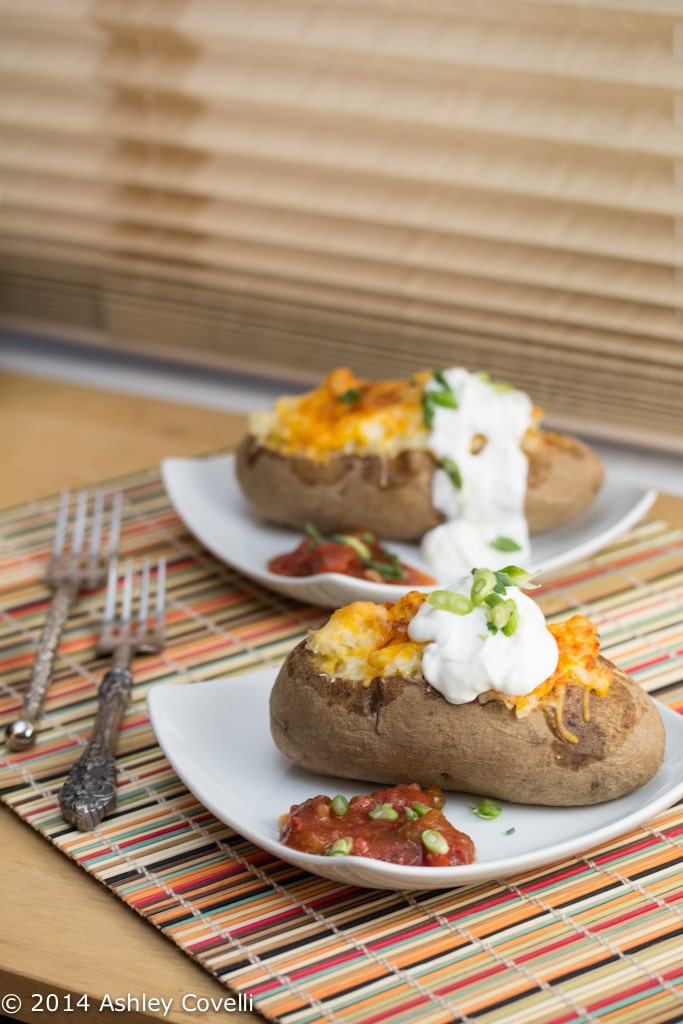
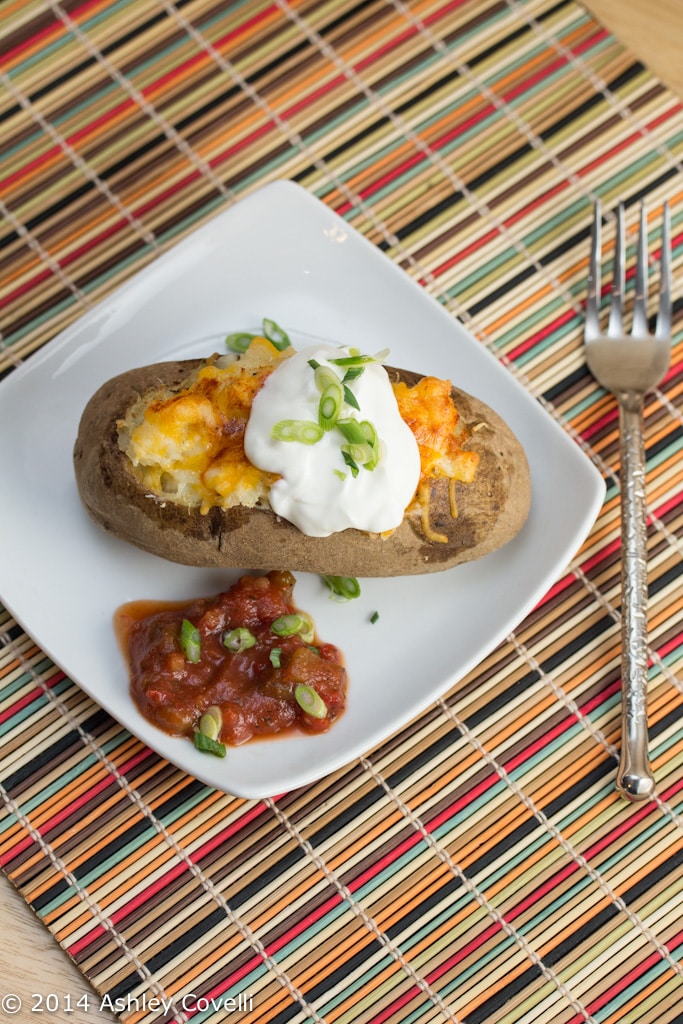
    Mexican Inspired Twice Baked Potatoes

    These stuffed baked potatoes were exactly the comfort food we needed in the middle of yet another snow storm a few weeks ago.

    Nothing says "warm up" like hot, cheesy baked potatoes topped with salsa.

    Mexican Inspired Twice Baked Potatoes

    I actually baked my potatoes the day before we ate them. The night I wanted to stuff them and bake them the second time, I scooped out the potato flesh and put it in a big bowl with the butter, microwaved it till warm, mashed in the rest of the ingredients and proceeded with the recipe as directed.

    It was great, because I didn't have to wait an entire hour for the potatoes to bake that day - just a little smashing and 15 minutes in the oven. Super simple!

    Also, don't be shy with the salt and pepper. I used reduced fat sour cream and cheese and it still tasted luxurious 🙂

    Mexican Inspired Twice Baked Potatoes


    📖 Recipe

    Mexican Inspired Twice Baked Potatoes

    Mexican Inspired Twice Baked Potatoes
    Nothing says “warm up” like hot, cheesy baked potatoes topped with salsa.
    Big Flavors from a Tiny Kitchen - Ashley Covelli
    No ratings yet
    Print Recipe Pin Recipe
    Servings: 4 servings
    Course: Main Dish
    Cuisine: Mexican
    Prep Time 10 minutes mins
    Cook Time 1 hour hr 15 minutes mins
    Total Time 1 hour hr 25 minutes mins

    Ingredients
     

    • 4 Russet potatoes scrubbed clean
    • 2 tablespoons butter
    • ¼ cup sour cream plus extra for garnish
    • ½ cup Mexican blend shredded cheese divided
    • 3 green onions thinly sliced, divided
    • Kosher salt and freshly cracked black pepper to taste
    • 1 teaspoon smoked paprika
    • Salsa for garnish

    Instructions
     

    1. Preheat oven to 400°F. Pierce each potato several times with a fork. Place on a baking sheet and bake for 1 hour. Remove from oven and let cool slightly.
    2. Slice the top off of each potato to make a canoe-like shape. Scoop the flesh out of each potato, leaving a thin wall (around ¼-inch) around the perimeter so the potatoes hold their shape. Place potato flesh (along with any that's left in the top piece of the skin that was sliced off) into a large bowl. Add butter, sour cream, ¼ cup of the cheese and 2 of the green onions. Season well with salt and pepper and smash it all together with a potato masher until well combined.
    3. Stuff the filling back into the potato skins. Pile a tablespoon of cheese on top of each potato and sprinkle with ¼ teaspoon smoked paprika. Place back into the oven and bake until the cheese melts and starts to brown (about 15 minutes).
    4. Garnish with additional sour cream, green onion and salsa. Enjoy!

    Did you make this recipe?

    Leave a comment + star rating below to let people know how it was!

    Behind BF Volume 4

    April 15, 2014 by Ashley Leave a Comment

    Ratatouille’s Ratatouille

    Several years ago, I decided to try to get myself to acquire a taste for ingredients that I thought I didn't like. I tried those alleged "gross" ingredients several times, in different preparations, and was able to find a way to appreciate most of them. Except for caraway seeds - that's one that I have not had any luck with, and have no desire to try further.

    There are several ingredients that are big on people's "dislike" lists, so I thought I'd share a few of my favorite recipes using some of the main offenders. Who knows, maybe they'll get someone out there to broaden their horizons and embrace an ingredient that they didn't previously enjoy.

    1. Eggplant - when we met, my husband told me he eats everything... except eggplant. The main culprit was the time that his parents had some eggplant parm in the fridge that he thought was chicken parm. So when he went in to eat it, he was expecting to bite into chicken texture, and was instead greeted with MUSH. So after we got our own place, I made it a goal to start cooking with eggplant, and to find some tasty things to convert my eggplant-hating husband. And it has been a raging success! No sad, soggy, bitter eggplant here!

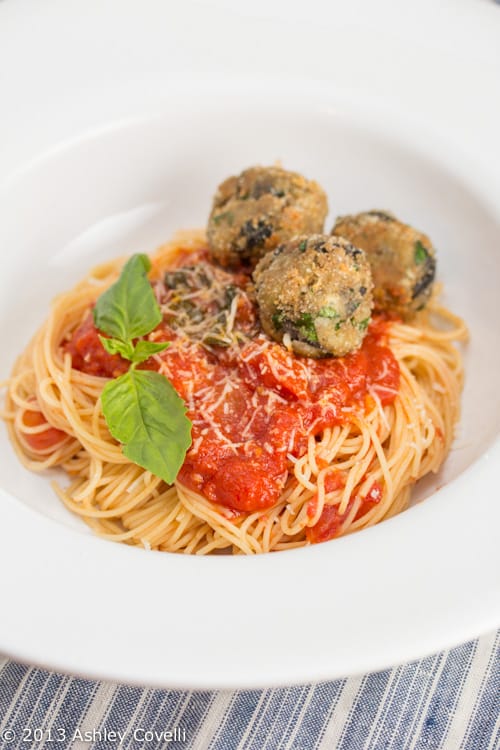
    Polpette di Melanzane (Crispy Eggplant Meatballs):

    Polpette di Melanzane (Crispy Eggplant Meatballs)

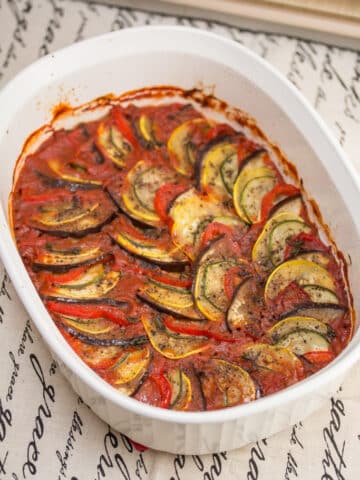
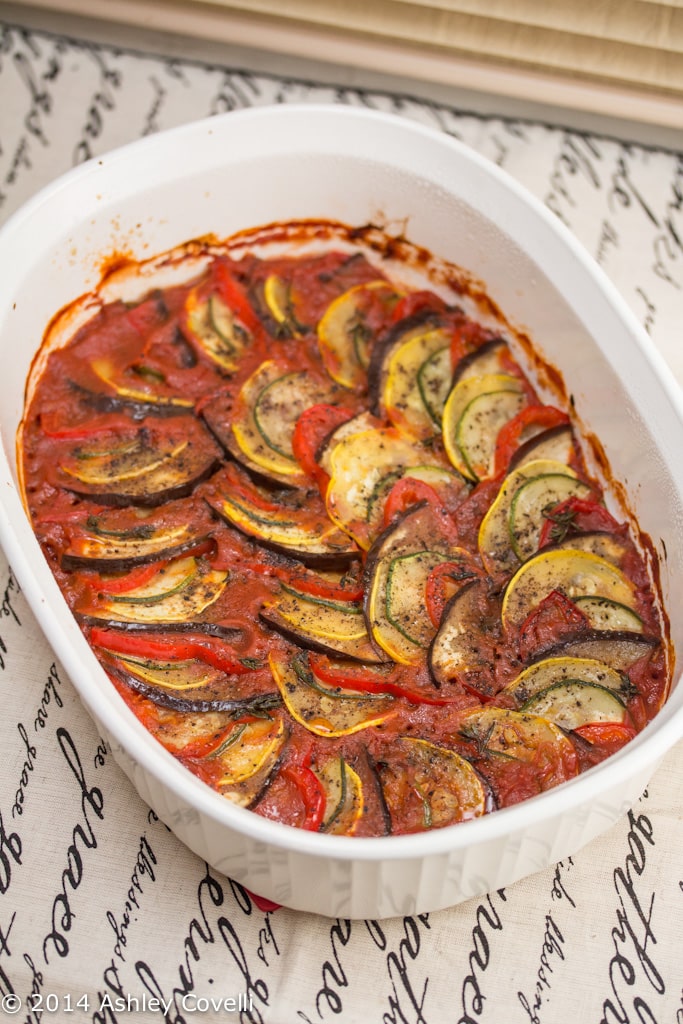
    Ratatouille’s Ratatouille:

    Ratatouille’s Ratatouille

    You can see all of our 5 Star eggplant recipes here.

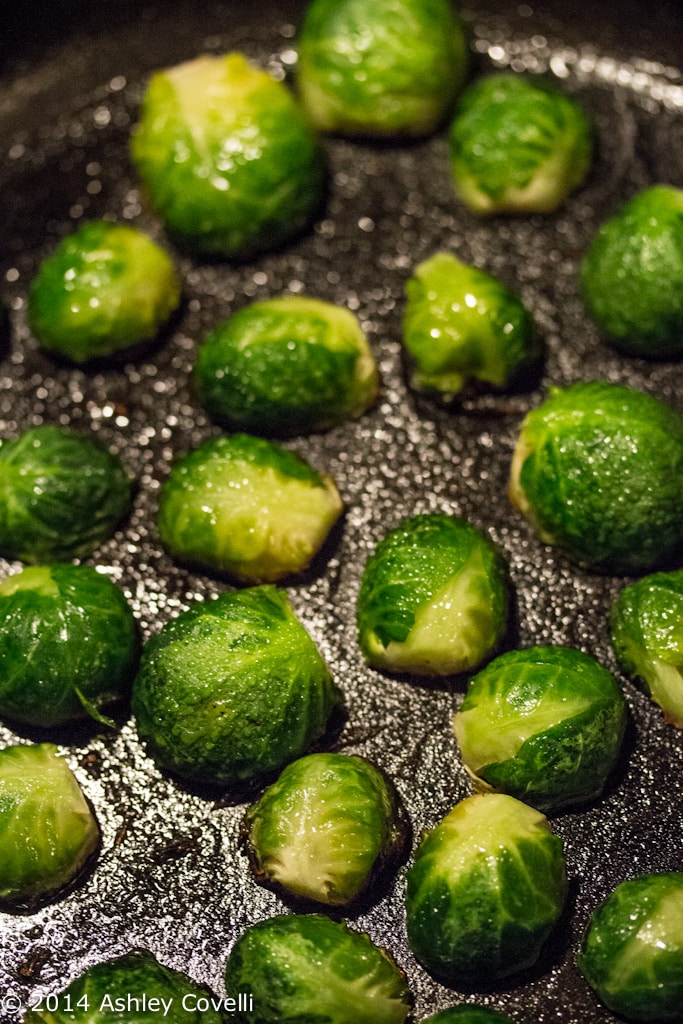
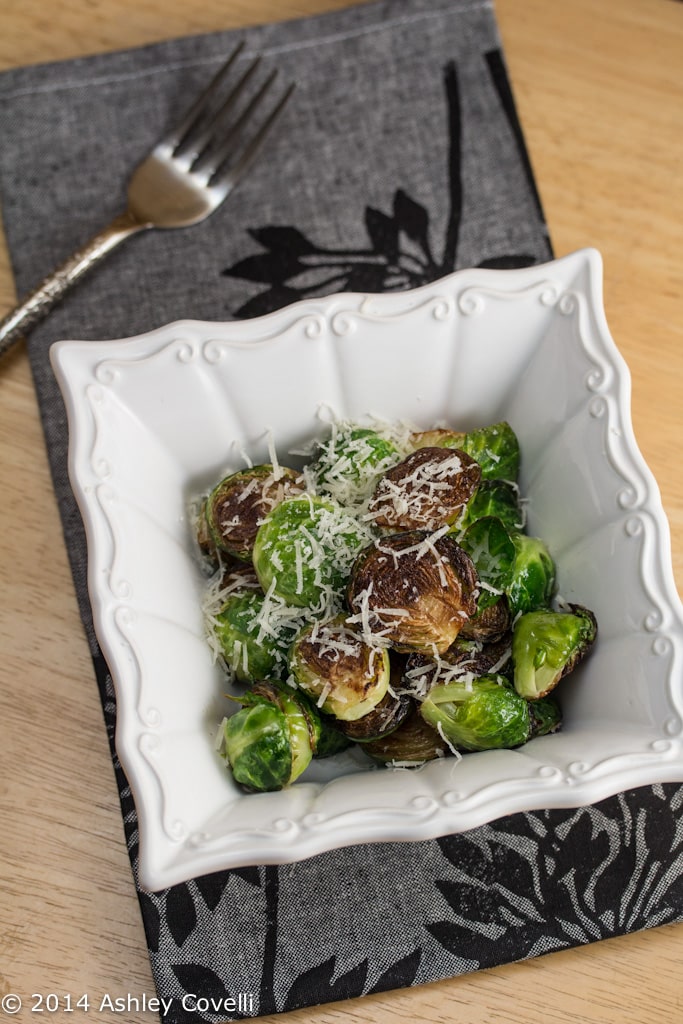
    2. Brussels Sprouts - people just love to hate on these adorable little veggies. Before I moved to New York, the only use I ever had for them was a frozen bag used to ice my sprained ankle one Thanksgiving at my aunt's house. Brussels sprouts don't have to be dull little mushballs. They are incredibly tasty when they get caramelized, and are even delicious raw!

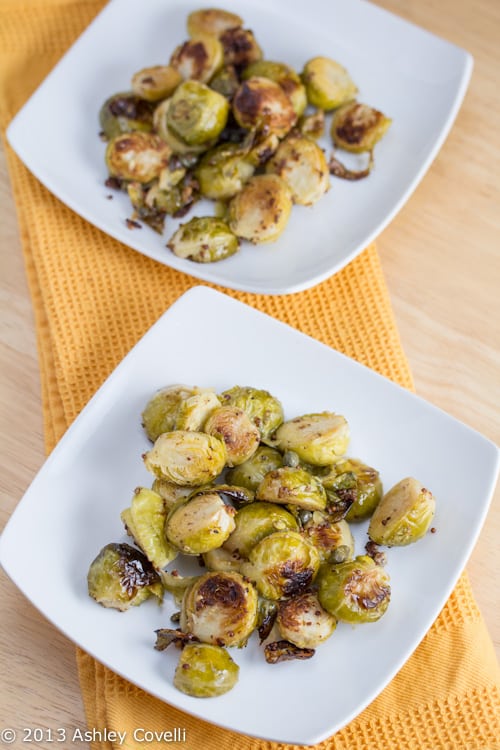
    Mustard Roasted Brussels Sprouts with Capers:

    Mustard Roasted Brussels Sprouts with Capers

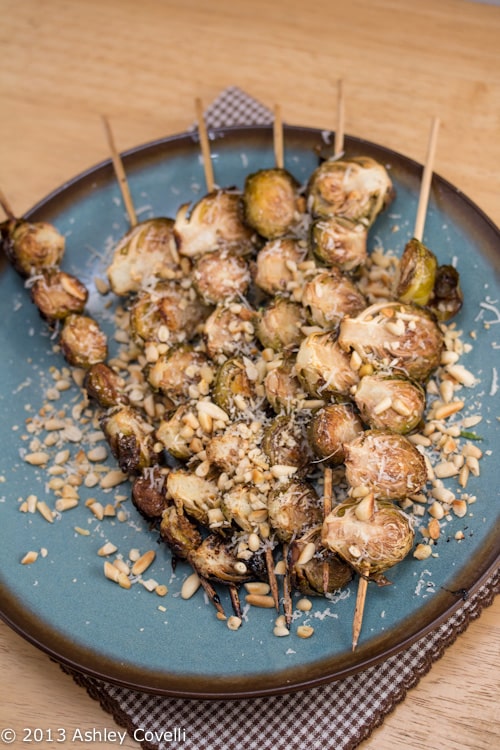
    Balsamic-Roasted Brussels Sprouts with Pine Nuts and Parmesan:

    Balsamic-Roasted Brussels Sprouts with Pine Nuts and Parmesan

    You can see all of our 5 Star Brussels sprouts recipes here.

    3. Tofu - I'm convinced that most people who claim to "hate" tofu simply haven't had it prepared well. If you purée it into a sauce, or fry it till the outer layer gets nice and crispy, it can be wonderful. Tofu is a fantastic meatless main course option, but is also good with meat mixed in. It's a blank canvas for flavors - the possibilities are endless!

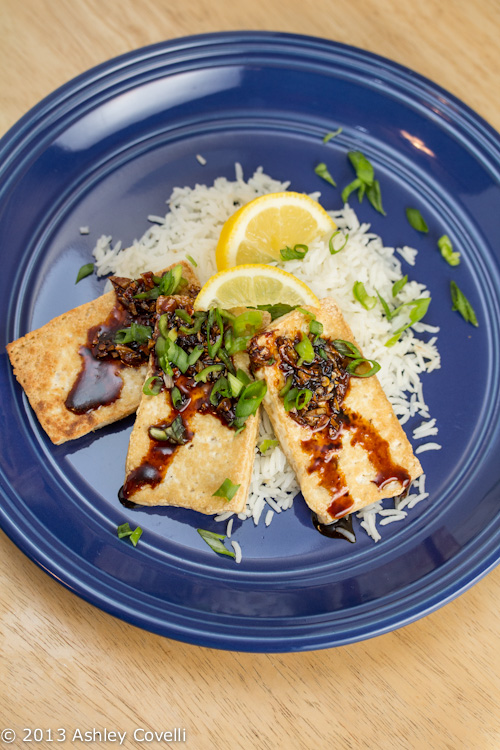
    Pan-fried Tofu with Dark Sweet Soy Sauce:

    Pan-fried Tofu with Dark Sweet Soy Sauce

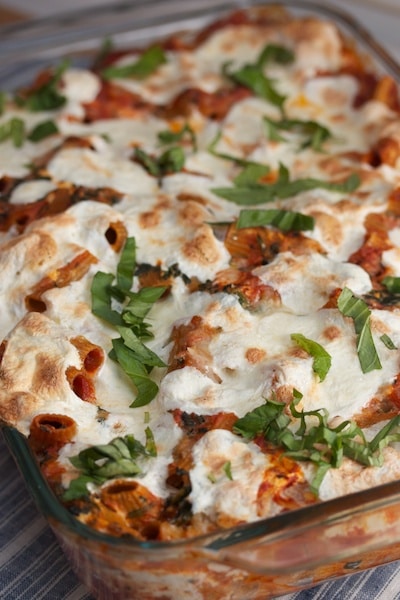
    Tofu Rigatoni Casserole:

    Tim and Liza Goodell’s Tofu Rigatoni Casserole

    You can see all of our 5 Star tofu recipes here.

    4. Seafood - growing up, I didn't like seafood. Or at least, I thought I didn't like seafood. After moving to the East Coast, I slowly started trying different seafood dishes, and to my surprise, I found that I actually enjoyed many of them. One of my favorite things to eat now is raw oysters. My teenage self would be shocked! Seafood shouldn't smell fishy, and you can buy quality frozen fish at most supermarkets now. I keep staples like shrimp, tilapia and scallops in the freezer so I can put together a beautiful seafood meal any day of the week.

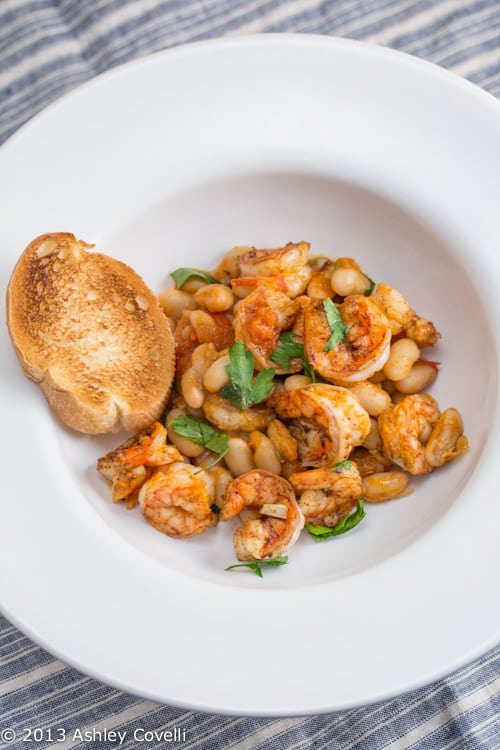
    Garlic Shrimp and White Beans:

    Garlic Shrimp and White Beans

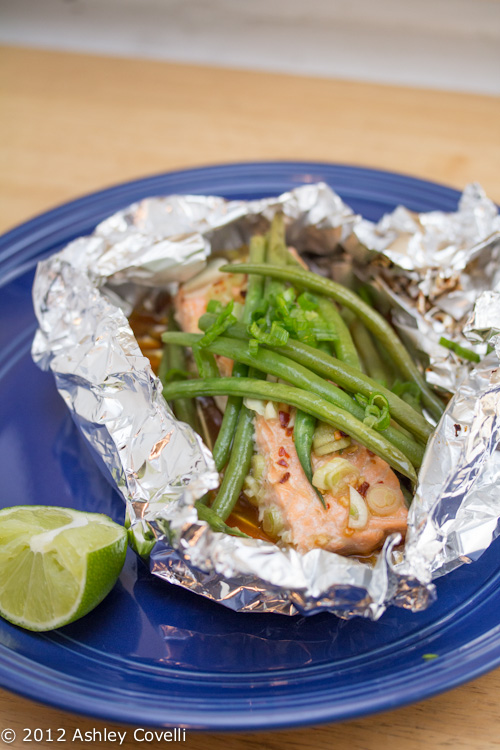
    Foil Packet Soy-Lime Salmon with Green Beans:

    Foil Packet Soy-Lime Salmon with Green Beans

    You can see all of our 5 Star seafood recipes here.

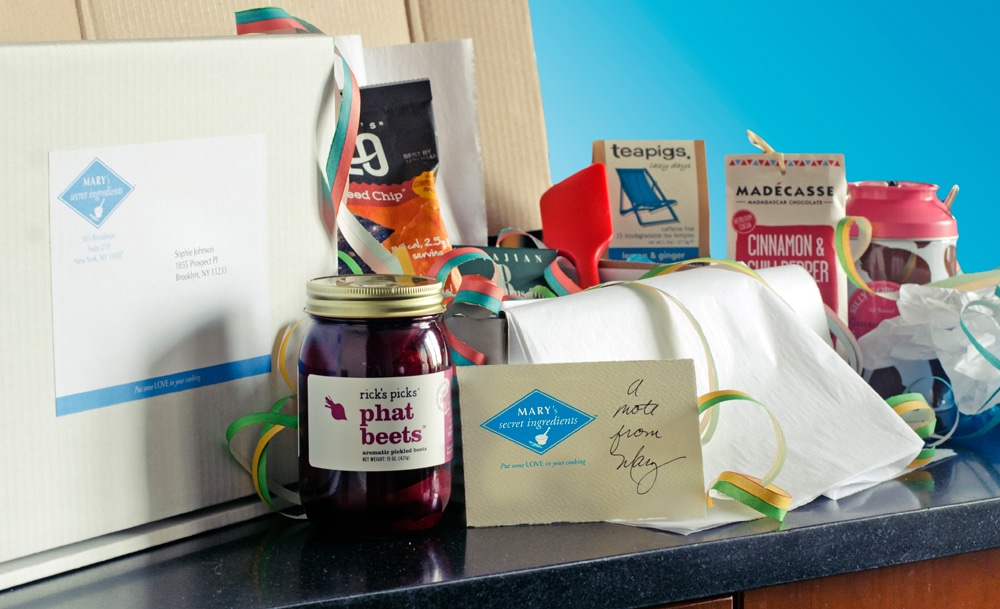
    Speaking of ingredients - Mary over at LOVE - the secret ingredient has launched a new, limited edition, seasonal culinary surprise box called MARY's secret ingredients. 100 boxes are available each season in 2014, filled with gourmet and artisanal ingredients to inspire you to get in the kitchen.

    Mary's secret ingredients

    This would be a great housewarming or bridal shower gift. And each ingredient will be featured in a recipe on her blog, so you don't have to worry about not having any idea what to do with a jar of something you've never cooked with before.

    Each box is only $25.95, and 10% of the annual profits are being donated to Feed the Children. I'm looking forward to getting a box full of springtime goodies! I'll be sure to report back once I get it to let you know what type of deliciousness I received 🙂

    *Note: I will be receiving a Spring box for sharing this product with my readers, but was in no other way compensated. As always, all opinions are 100% my own. If you have a product that you feel would be of interest to myself and my readers, you can submit information for review via my contact page.

    Bourbon Whipped Cream

    April 11, 2014 by Ashley Leave a Comment

    Bourbon Whipped Cream

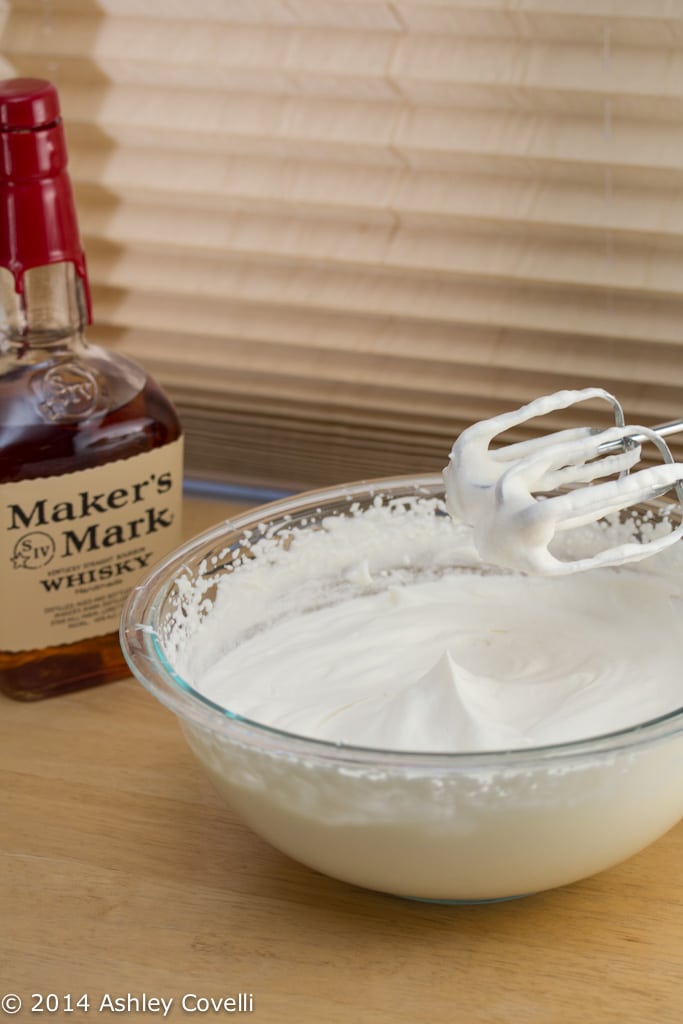
    When my Chocolate Whiskey Bundt Cake called for lightly sweetened whipped cream to go alongside, I did what any responsible person would do - I added bourbon to it!

    Bourbon Whipped Cream

    This whipped cream definitely packs a punch. If you want a more subtle flavor, start with 1 tablespoon of bourbon and see if you want to add another shot or three 😉

    Bourbon Whipped Cream

    📖 Recipe

    Bourbon Whipped Cream

    Bourbon Whipped Cream
    Big Flavors from a Tiny Kitchen - Ashley Covelli
    No ratings yet
    Print Recipe Pin Recipe
    Course: Condiments

    Ingredients
     

    • 2 cups 1 pint heavy whipping cream
    • 2 tablespoons granulated sugar
    • ½ teaspoon pure vanilla extract
    • 2 tablespoons premium bourbon I prefer Maker's Mark

    Instructions
     

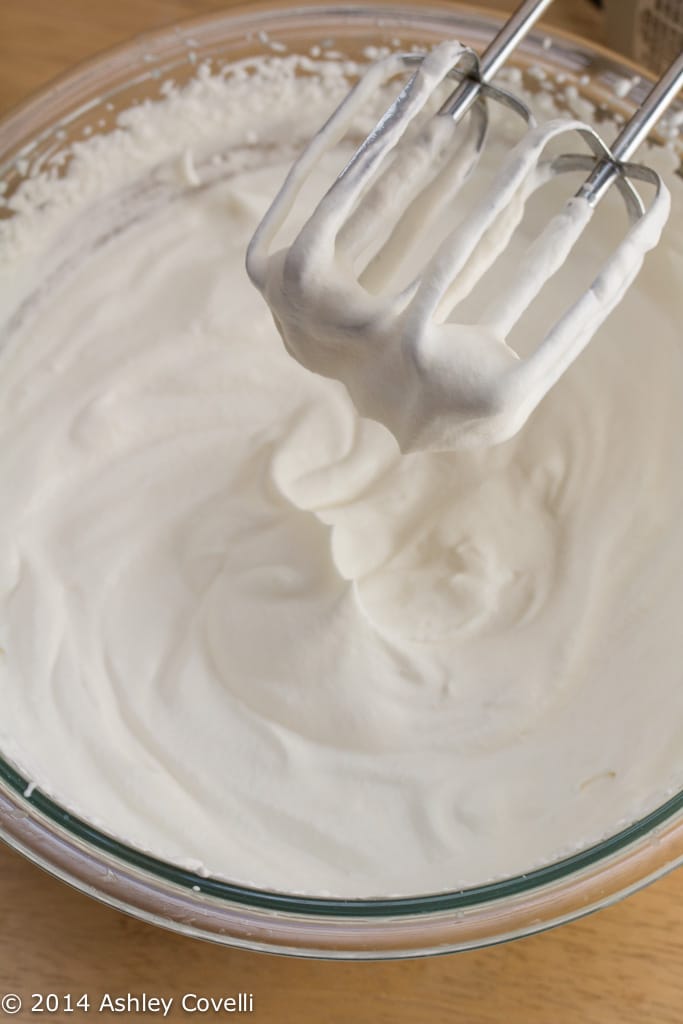
    1. Pour cream into a large bowl and whip with a hand mixer (or in the bowl of a stand mixer fitted with the whisk attachment) on medium-high speed. Once it starts to thicken, slowly add sugar until fully incorporated.
    2. Add vanilla and bourbon and whip until stiff peaks form, being careful not to over-mix (or you'll end up with bourbon butter, which actually sounds pretty good... I'll file that away for future use).
    3. Serve immediately.

    Did you make this recipe?

    Leave a comment + star rating below to let people know how it was!

    Chocolate Whiskey Bundt Cake

    April 11, 2014 by Ashley 3 Comments

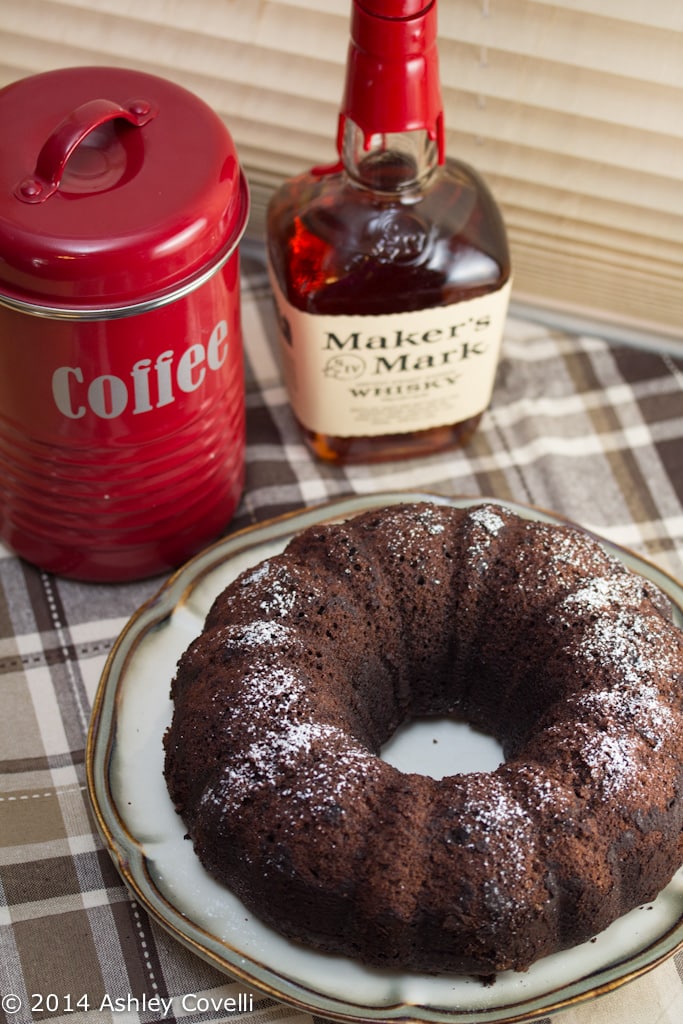
    Chocolate Whiskey Bundt Cake

    My Supper Club had to skip our traditional, potluck-style dinner last month, so we ended up combining that theme (Alcohol) with this month’s theme (Comfort Food). They kind of go hand-in-hand for a lot of us anyhow, so it worked out 😉

    This boozy bundt cake was rich, dense and chocolatey. You could easily serve smaller slices of it than most cakes, because it really packs a punch. I liked the way the coffee enhanced the chocolate and bourbon, too. Mmm…

    Chocolate Whiskey Bundt Cake

    I did make the cake a day ahead of time, which made the day of our dinner party much easier. The recipe suggested serving it with lightly sweetened whipped cream, so I made a bourbon-infused version which worked really well with it. I had a little trouble with the cake sticking to the top of the pan, but once the powdered sugar and whipped cream was on top, nobody noticed.

    Chocolate Whiskey Bundt Cake
    Gourmet September 2005

    Yield: Makes 12 to 14 servings

    Most of the alcohol in this cake cooks off, but a distinct whiskey flavor remains.

    1 cup unsweetened cocoa powder (not Dutch-process) plus 3 tablespoons for dusting pan
    1 ½ cups brewed coffee
    ½ cup American whiskey
    2 sticks (1 cup) unsalted butter, cut into 1-inch pieces
    2 cups sugar
    2 cups all-purpose flour
    1 ¼ teaspoons baking soda
    ½ teaspoon salt
    2 large eggs
    1 teaspoon vanilla

    Special equipment: a 10-inch bundt pan (3 ¼ inches deep; 3-qt capacity)
    Accompaniment: lightly sweetened whipped cream
    Garnish: confectioners sugar for dusting

    Put oven rack in middle position and preheat oven to 325°F. Butter bundt pan well, then dust with 3 tablespoons cocoa powder, knocking out excess.

    Heat coffee, whiskey, butter, and remaining cup cocoa powder in a 3-quart heavy saucepan over moderate heat, whisking, until butter is melted. Remove from heat, then add sugar and whisk until dissolved, about 1 minute. Transfer mixture to a large bowl and cool 5 minutes.

    While chocolate mixture cools, whisk together flour, baking soda, and salt in a bowl. Whisk together eggs and vanilla in a small bowl, then whisk into cooled chocolate mixture until combined well. Add flour mixture and whisk until just combined (batter will be thin and bubbly). Pour batter into bundt pan and bake until a wooden pick or skewer inserted in center comes out clean, 40 to 50 minutes.

    Cool cake completely in pan on a rack, about 2 hours. Loosen cake from pan using tip of a dinner knife, then invert rack over pan and turn cake out onto rack.

    Cooks' note:
    This cake improves in flavor if made at least 1 day ahead and kept, in a cake keeper or wrapped well in plastic wrap, at cool room temperature. It can be made up to 5 days ahead and chilled. Bring to room temperature before serving.

    Big Flavors Rating: 4 Stars

    Korean-Style Beef Tacos with Quick Pickled Cabbage

    April 10, 2014 by Ashley Leave a Comment

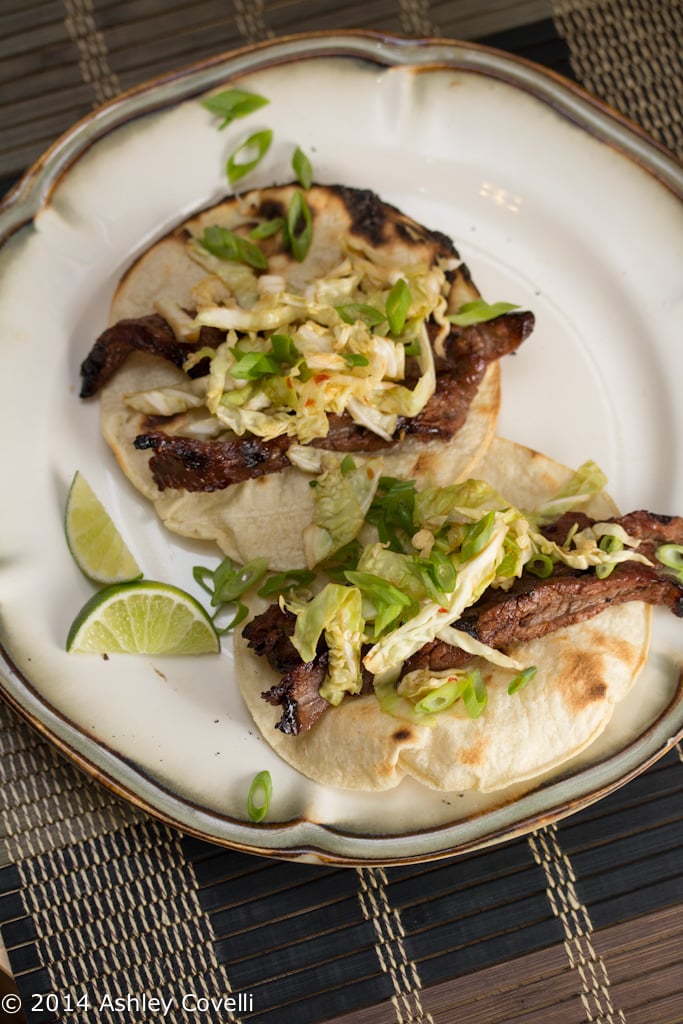
    Korean-Style Beef Tacos with Quick Pickled Cabbage

    My local Farmers Market recently got a new meat vendor, and they carry so many cuts of beef. I picked up a flank steak the last time I was there, and this taco recipe was the perfect thing to make with it!

    A simple marinade imparts wonderful flavor into the beef, and a quick kimchi-esque topping really kicks up the heat and adds a nice crunch.

    Korean-Style Beef Tacos with Quick Pickled Cabbage

    This was a great excuse to fire up the grill, and dinner was absolutely delicious. I didn’t serve it with any sides, but let’s just say that this only ended up feeding 2 of us. Ahem.

    Korean-Style Beef Tacos with Quick Pickled Cabbage

    Korean-Style Beef Tacos
    Cooking Light June 2012

    Serve with cooked rice tossed with a tablespoon of toasted sesame oil.

    Yield: Serves 4 (serving size: 2 tacos)
    Total: 1 Hour, 28 Minutes

    ⅓ cup sugar
    5 tablespoons lower-sodium soy sauce*
    1 ½ tablespoons chile paste (such as sambal oelek)
    1 tablespoon fresh lime juice
    1 tablespoon dark sesame oil
    4 garlic cloves, minced
    12 ounces flank steak, sliced against the grain into thin strips
    ⅛ teaspoon salt
    Cooking spray
    8 (6-inch) corn tortillas
    Quick Pickled Cabbage (recipe below)
    3 tablespoons sliced green onions

    1. Combine first 6 ingredients in a shallow dish. Add steak to dish; cover. Marinate in refrigerator for 1 hour, turning after 30 minutes.

    2. Preheat grill to medium-high heat.

    3. Remove steak from marinade, and discard marinade. Thread steak onto 8 (8-inch) skewers; sprinkle with salt. Place skewers on grill rack coated with cooking spray. Grill 2 minutes on each side or until desired degree of doneness. Grill tortillas 30 seconds on each side or until lightly charred; keep warm. Place 2 tortillas on each of 4 plates, and divide steak evenly among tortillas. Divide the Quick Pickled Cabbage evenly among tacos; sprinkle with onions.

    Quick Pickled Cabbage

    Yield: Serves 4 (serving size: ½ cup)

    3 cups chopped napa cabbage
    2 garlic cloves, crushed
    ½ cup rice vinegar
    2 tablespoons lower-sodium soy sauce*
    1 tablespoon sugar
    2 teaspoons chile paste

    Place cabbage in a medium bowl with garlic. Bring vinegar, soy sauce, sugar, and chile paste to a boil. Pour hot vinegar mixture over cabbage; toss. Let stand at least 30 minutes.

    *Optional: use Gluten Free

    Amount per serving:
    Calories: 270
    Fat: 6.3g
    Saturated fat: 1.6g
    Monounsaturated fat: 2g
    Polyunsaturated fat: 1.4g
    Protein: 18.1g
    Carbohydrate: 37.1g
    Fiber: 3g
    Cholesterol: 21mg
    Iron: 1.3mg
    Sodium: 568mg
    Calcium: 95mg

    Big Flavors Rating: 5 Stars

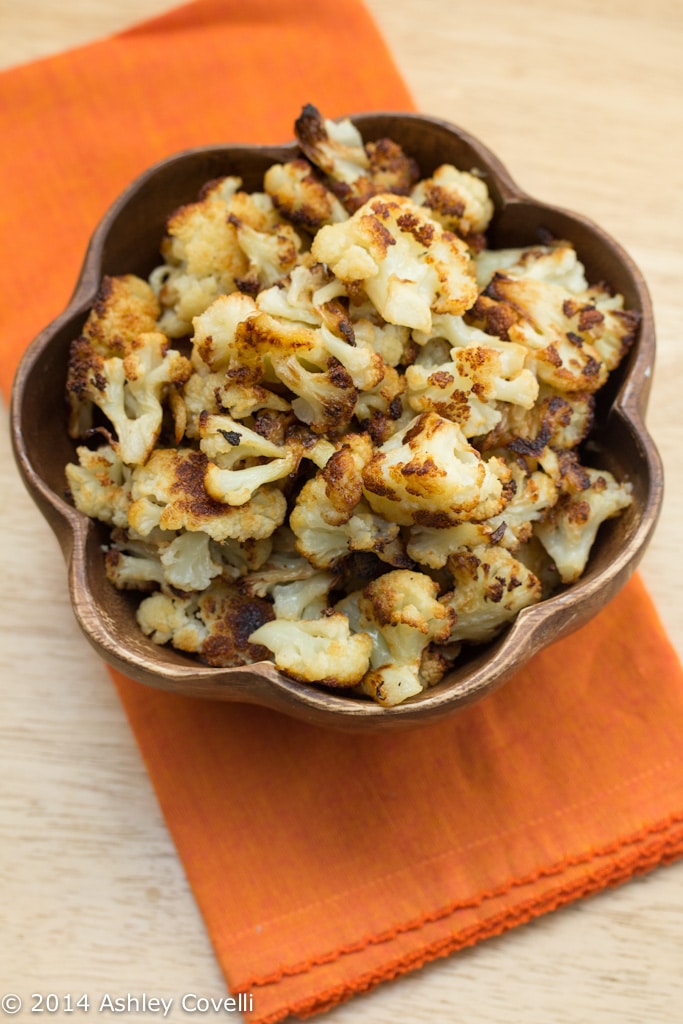
    Paleo Roasted Cauliflower "Popcorn"

    April 9, 2014 by Ashley 1 Comment

    Paleo Roasted Cauliflower "Popcorn"

    A friend of mine came over with her daughter for a morning play date last week, and I wanted to have something for us to snack on. She's a personal trainer who's smack dab in the middle of a 30-day Paleo challenge.

    So, in the middle of a hectic morning, I made a batch of this caramelized cauliflower goodness. It was a HUGE hit! Apparently she had been craving popcorn like mad lately, and this totally hit the spot.

    Don't be afraid to let your cauliflower get nice and brown - I could have even let it go a little longer than this. The brownest bits were the tastiest. I think it'll be fun to try spicing this up next time with some herbs/spices. Yum!

    Paleo Roasted Cauliflower "Popcorn"

    I haven't done a lot of Paleo recipes intentionally, but she's already challenged me to bring more to my blog. Stay tuned!

    Cauliflower Popcorn - Roasted Cauliflower
    Food.com - Julesong

    1 head cauliflower or 1 head equal amount of pre-cut commercially prepped cauliflower
    4 tablespoons olive oil
    1 teaspoon salt, to taste

    Preheat oven to 425 degrees.

    Trim the head of cauliflower, discarding the core and thick stems; cut florets into pieces about the size of ping-pong balls.

    In a large bowl, combine the olive oil and salt, whisk, then add the cauliflower pieces and toss thoroughly.

    Line a baking sheet with parchment for easy cleanup (you can skip that, if you don't have any) then spread the cauliflower pieces on the sheet and roast for 1 hour, turning 3 or 4 times, until most of each piece has turned golden brown. (The browner the cauliflower pieces turn, the more caramelization occurs and the sweeter they'll taste).

    Serve immediately and enjoy!

    Big Flavors Rating: 4 Stars

    Bulletproof Coffee

    April 5, 2014 by Ashley Leave a Comment

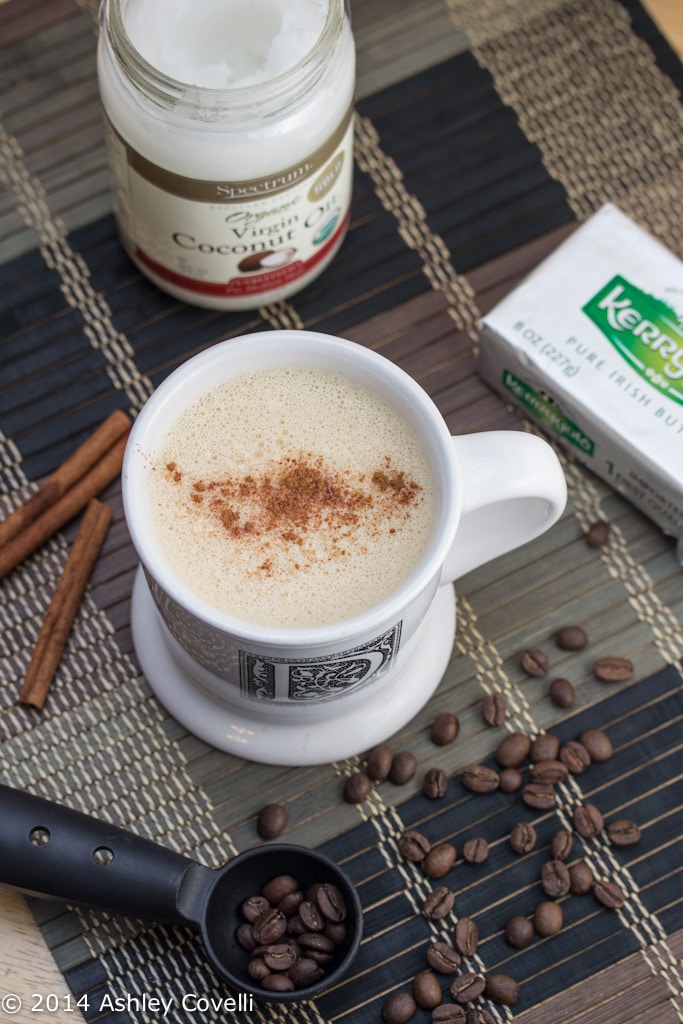
    Bulletproof Coffee

    Have you heard of Bulletproof Coffee? My friend (and partner in crime over at The Domestic Mixologist) Mara has been drinking a lot of it lately. When she raved about this butter-and-coconut-oil-infused pick-me-up, I knew needed to have it in my life!

    A lot of people like that it gives them energy without the typical caffeine crash, and that it suppresses their appetite. You can read all about it on the Bulletproof site.

    I've never been very affected by caffeine - I just really love the taste of good coffee. I typically add milk and sugar to mine, but this version doesn't need any additional sugar, which makes me feel even better about it. One of the things I liked best about it was that after every sip, I had a little coconut oil/butter residue on my lips, so it was like it had built-in lip gloss. Ha!

    Bulletproof Coffee

    It's imperative that you use grass-fed unsalted butter (such as Kerrygold) and high quality coffee beans. There are a few local roasters in my neighborhood that I like, but the goal is to get something fresh and free of toxins. I haven't tried the actual Bulletproof Upgraded coffee beans but definitely will try it with those one day.

    As with all of the coffee I make at home, I ground my beans right before brewing. It makes a huge difference in flavor! I use a lot less of the butter and coconut oil than what he calls for, and I like it just fine. Just go with whatever size your favorite coffee mug is and work up from there.

    📖 Recipe

    Bulletproof Coffee

    Bulletproof Coffee
    Big Flavors from a Tiny Kitchen - Ashley Covelli (adapted from Bulletproof)
    No ratings yet
    Print Recipe Pin Recipe
    Course: Beverage

    Ingredients
     

    • 1 mug 8-12 ounces freshly brewed coffee
    • 1 tablespoon grass-fed unsalted butter
    • 1 tablespoon coconut oil
    • system-ui, 'system-ui', 'Segoe UI', Helvetica, Arial, sans-serif, 'Apple Color Emoji', 'Segoe UI Emoji', 'Segoe UI Symbol';font-size: 19px;letter-spacing: 0.5px" href="https://www.amazon.com/Simply-Organic-Ground-Ceylon-Cinnamon/dp/B00ZK8YIXW/ref=as_li_ss_il?dchild=1&keywords=ground+cinnamon&qid=1590506681&sr=8-7&linkCode=li2&tag=bigflafroatin-20&linkId=65b05c9c2faf37feb9b7b022ae4e2eae&language=en_US" target="_blank" rel="nofollow noopener" data-tasty-links-append-disclosure="">Ground cinnamon, for garnish (optional)

    Instructions
     

    1. Add coffee, butter and coconut oil to a blender and blend on high for 20-30 seconds, until it gets nice and frothy, like a latte. Pour into a mug, garnish with cinnamon, if desired and enjoy!

    Notes

    You can pre-heat your blender by pouring some hot water in it while your coffee is brewing. I have a Vitamix, which keeps it pretty hot, so I skip this step.

    Did you make this recipe?

    Leave a comment + star rating below to let people know how it was!

    Brown Sugar Chewies (Bar Cookies)

    April 4, 2014 by Ashley 8 Comments

    Brown Sugar Chewies

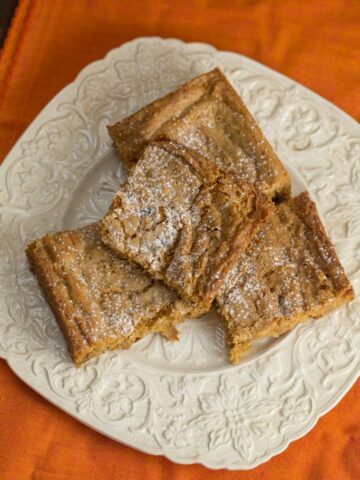
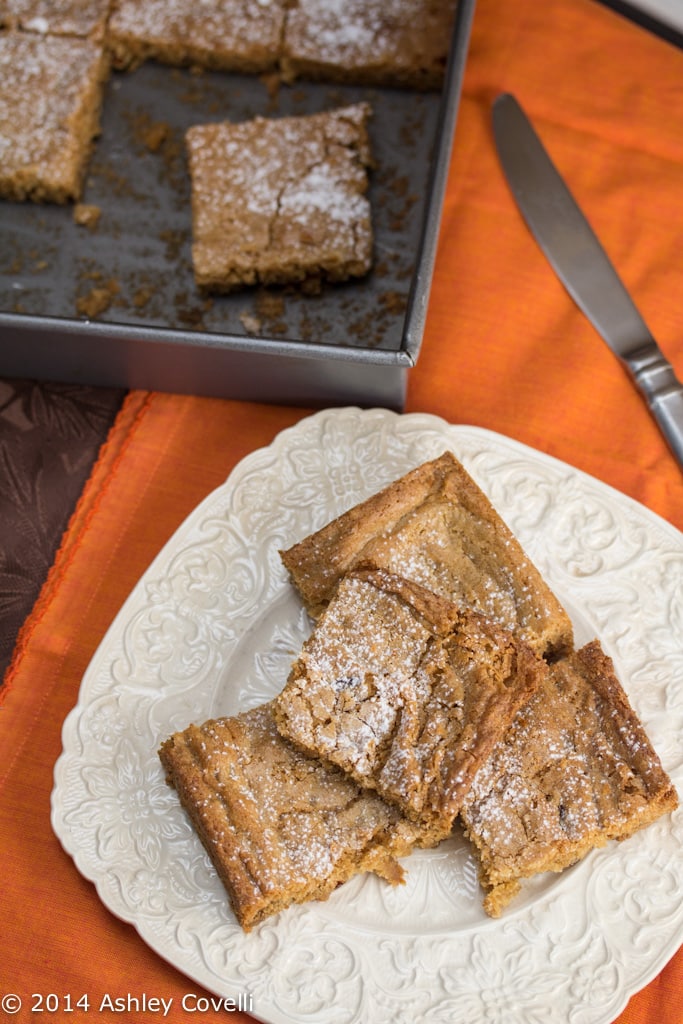
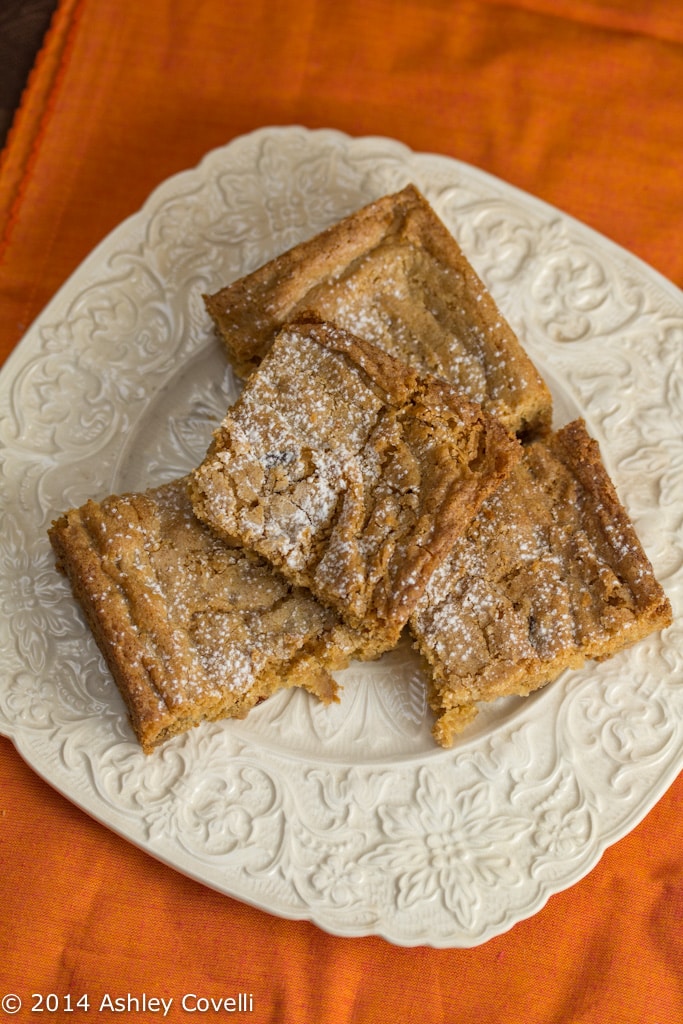
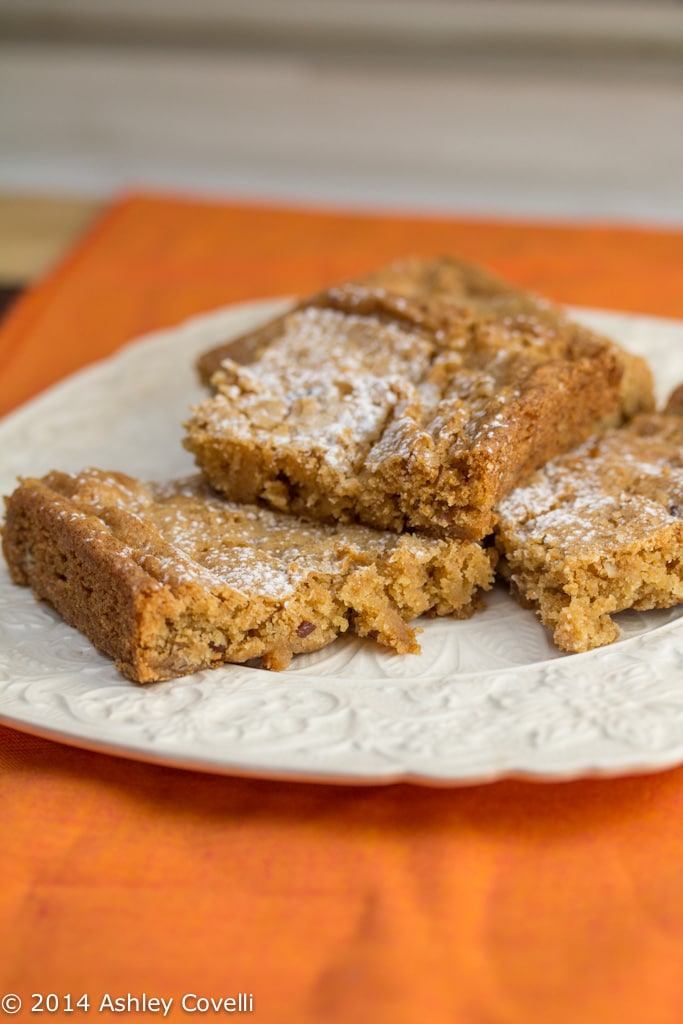
    I don't make bar cookies often enough. These were so simple to put together and completely delicious.

    And if you're impatient like me short on time, you don't even have to wait for the butter to soften, because you melt it instead. Awesome!

    Brown Sugar Chewies

    The word "chewies" really is the perfect thing to describe these beauties. They were soft and chewy and disappeared in a flash.

    Brown Sugar Chewies

    Seeing how easy these were to put together has me wanting to try new bar cookie recipes. Do you have any favorites? Share 'em in the comments below.

    Brown Sugar Chewies

    Brown Sugar Chewies
    Paula Deen

    Total Time: 30 min
    Prep: 5 min
    Cook: 25 min
    Yield: 9 servings

    ¼ cup butter
    1 cup packed light brown sugar
    1 egg, beaten
    ¾ cup all-purpose flour
    1 teaspoon baking powder
    ½ teaspoon vanilla extract
    ¼ cup chopped pecans
    Confectioners' sugar, for dusting

    Preheat oven to 350 degrees F. Spray an 8-inch square pan with vegetable oil cooking spray.

    In a small saucepan, melt the butter. Turn off the heat, add the brown sugar and stir until smooth. Stir in the egg. Stir together the flour and baking powder and stir into the brown sugar mixture. Stir in the vanilla and pecans. Pour the batter into the prepared pan and bake for 20 minutes. When cool, dust the top with a sifting of confectioners' sugar.

    Big Flavors Rating: 4 Stars

    Slow Cooker Enchiladas

    April 3, 2014 by Ashley 2 Comments

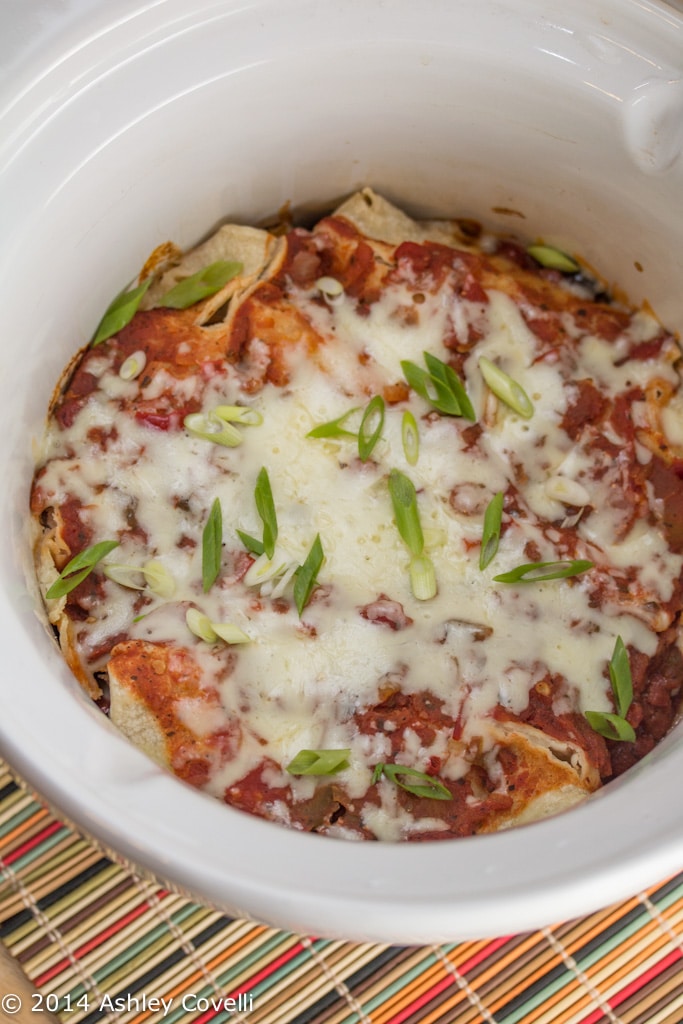
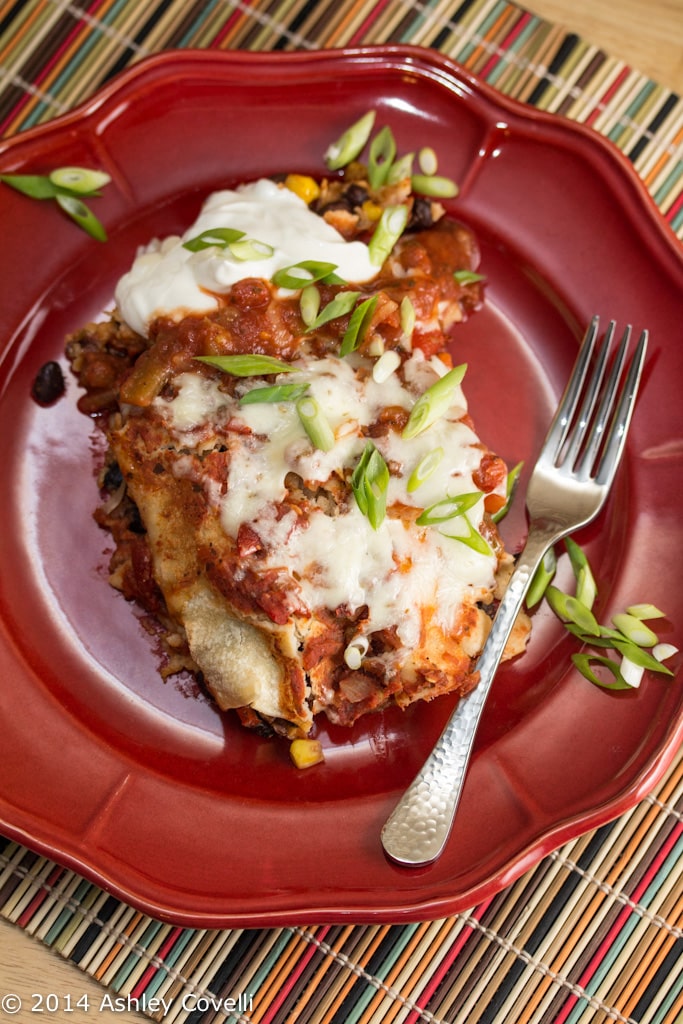
    Slow Cooker Enchiladas

    Historically, I’ve had bad luck when it comes to mixing tomatoes and beans in the slow cooker. One of the few meals we've given a 1 star rating to featured canned tomatoes and beans and cornmeal dumplings in the slow cooker. There have been so many others, that I had sworn off the bean-and-tomato slow cooker combo altogether.

    But, to quote Sue Ellen Crandell (played by Christina Applegate) in Don’t Tell Mom The Babysitter’s Dead, “the times, they are a-changin’”. This enchilada recipe was fantastic! It took a bit more work than I anticipated upfront (protip: if you’re using corn tortillas, warm them up a little first so they don’t crumble and fall apart while you’re rolling them), but it was oh so very worth it!

    Slow Cooker Enchiladas

    I was only able to fit 5 on each layer (so 10 total), and the top layer definitely comes out more in tact than the bottom layer, but they tasted wonderful! The cool sour cream and salsa at the end made for a perfect garnish. I used Newman's Own Medium Salsa and the flavor and heat level was perfect.

    This slow cooker meal (just like the Slow Cooker Spinach Lasagna) really surprised us in a good way. I'm definitely learning to be more adventurous with slow cooker meals.

    Slow Cooker Enchiladas

    Slow Cooker Enchiladas
    The Kitchn

    Serves 4-6
    ½ yellow onion, diced small
    ½ bell pepper, diced small (any color)
    1 16-ounce can black beans, drained and rinsed
    1 cup frozen corn
    2 teaspoons chili powder
    1 teaspoon cumin
    1 teaspoon salt
    1 ½ cups cheese, shredded and divided - we like monterey jack
    2 16-ounce jars of your favorite salsa
    12 6"-8" tortillas, flour or corn
    Optional: 1 cup leftover meat - chicken, pork, hamburger, or shredded beef

    In a medium bowl, mix together the onion, pepper, black beans, corn, spices, meat (if using), and just ½ cup of the cheese. Pour about a cup of salsa (half a jar) into the bottom of the slow cooker and spread it around evenly.

    Scoop about ⅓ cup into one of the tortillas, roll it up, and nestle it into the bottom of the crock pot. Repeat with the half of the remaining filling, rolling tortillas until the entire bottom of of the crock pot is filled. Spread another cup of salsa over this layer and sprinkle it with another ½ cup of cheese.

    Continue with the remaining filling and tortillas to create a second layer. Top with another cup of salsa, but reserve the remaining ½ cup of cheese for later. Place the lid on the slow cooker and cook on HIGH for 2-4 hours. In the last 15 minutes of cooking, sprinkle the leftover cheese over the top and let it melt.

    Serve the enchiladas with the remaining salsa. Leftovers will keep for up to a week in the refrigerator.

    Additional Notes:

    • You can cook the enchiladas for longer (6-8 hours on LOW), but we found that the tortillas in the middle start to get mushy while the ones touching the sides of the cooker get crispy. Still tasty, though!

    • To cook these enchiladas in the oven, layer the rolled tortillas in a 9x13 baking pan and cover with aluminum foil. Bake at 400° for 20 minutes. Uncover, sprinkle with cheese, and bake uncovered for an additional 5-10 minutes.

    • We haven't tried it, but we so reason why this recipe couldn't be doubled if your slow cooker is big enough. Just continue creating layers in the slow cooker and bake as usual.

    Big Flavors Rating: 4 Stars

    Lamb Fajitas

    March 30, 2014 by Ashley 5 Comments

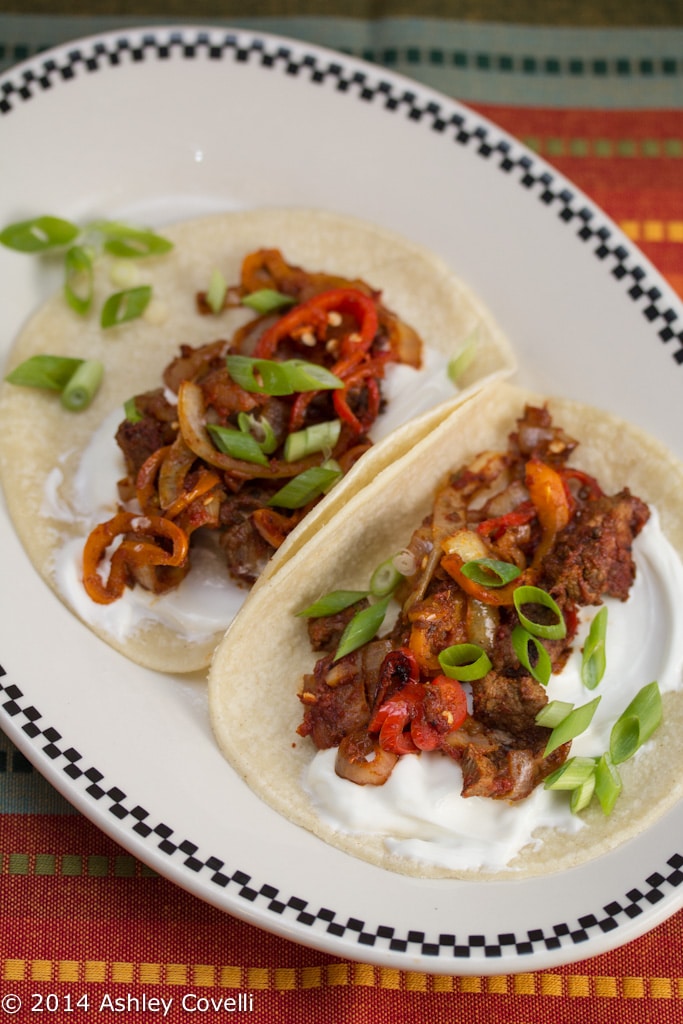
    Lamb Fajitas

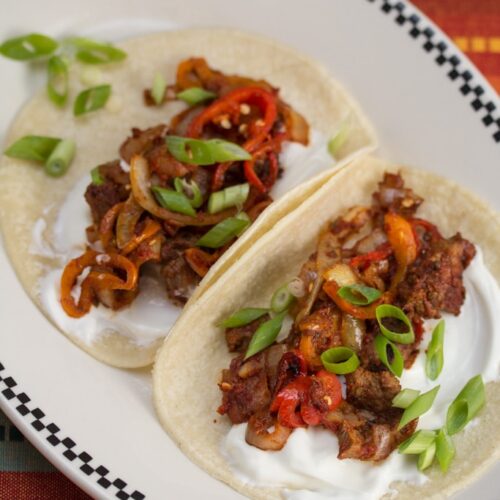
    When I made the Lamb Stir-Fry with Pomegranate and Yogurt, I bought a bigger piece of lamb than I needed, so I ended up coming up with this beauty to use up the last ½ pound.

    Since it wasn't a ton of meat, I stretched it with lots of onions and peppers and an awesome blend of herbs and spices. I cooked it all up in a cast iron skillet to give it an extra smokiness that was just perfect.

    Lamb Fajitas

    I used mini bell peppers, because that's what I had on hand, but this would also work with 1-2 regular bell peppers, very thinly sliced.

    This was a H-U-G-E hit at the dinner table. And the whole thing came together in about 20 minutes. Perfect for a busy weeknight.

    📖 Recipe

    Lamb Fajitas

    Lamb Fajitas
    Big Flavors from a Tiny Kitchen - Ashley Covelli
    No ratings yet
    Print Recipe Pin Recipe
    Course: Main Dish

    Ingredients
     

    • 1 tablespoon system-ui, 'system-ui', 'Segoe UI', Helvetica, Arial, sans-serif, 'Apple Color Emoji', 'Segoe UI Emoji', 'Segoe UI Symbol';font-size: 19px;letter-spacing: 0.5px" href="https://www.amazon.com/365-Whole-Foods-Market-Vegetable/dp/B081TR3WV1?crid=1JV8XKFW83PGO&keywords=vegetable+oil&qid=1657143660&sprefix=vegetable+oi%2Caps%2C116&sr=8-4&linkCode=li2&tag=bigflafroatin-20&linkId=59b1f30c58d868b67ac63c4ff0cfe124&language=en_US&ref_=as_li_ss_il" target="_blank" rel="nofollow noopener" data-tasty-links-append-disclosure="">vegetable oil
    • ½ pound boneless leg of lamb cut thinly against the grain
    • 2 cloves garlic minced
    • 1 large yellow onion halved and sliced
    • 1 teaspoon smoked Spanish paprika
    • 1 teaspoon system-ui, 'system-ui', 'Segoe UI', Helvetica, Arial, sans-serif, 'Apple Color Emoji', 'Segoe UI Emoji', 'Segoe UI Symbol';font-size: 19px;letter-spacing: 0.5px" href="https://www.amazon.com/365-Whole-Foods-Market-Seasoning/dp/B08CS1SFJP?crid=2Z9RUBIXHBAP9&keywords=chili+powder&qid=1649623239&sprefix=chili+powd%2Caps%2C236&sr=8-10&linkCode=li2&tag=bigflafroatin-20&linkId=79caa5279a8f40bd9ad486b7787aac3b&language=en_US&ref_=as_li_ss_il" target="_blank" rel="nofollow noopener" data-tasty-links-append-disclosure="">chili powder
    • 1 teaspoon system-ui, 'system-ui', 'Segoe UI', Helvetica, Arial, sans-serif, 'Apple Color Emoji', 'Segoe UI Emoji', 'Segoe UI Symbol';font-size: 19px;letter-spacing: 0.5px" href="https://www.amazon.com/McCormick-Gourmet-Natural-Mexican-Oregano/dp/B01LYZRM49/ref=as_li_ss_il?dchild=1&fpw=pantry&keywords=oregano&qid=1600958807&s=pantry&sr=8-34&linkCode=li2&tag=bigflafroatin-20&linkId=5b2a114aab14e4fd3f3de122ad37df25&language=en_US" target="_blank" rel="nofollow noopener" data-tasty-links-append-disclosure="">dried oregano
    • 1 teaspoon system-ui, 'system-ui', 'Segoe UI', Helvetica, Arial, sans-serif, 'Apple Color Emoji', 'Segoe UI Emoji', 'Segoe UI Symbol';font-size: 19px;letter-spacing: 0.5px" href="https://www.amazon.com/McCormick-Gourmet-Organic-Ground-Cumin/dp/B0029JU8SE/ref=as_li_ss_il?dchild=1&keywords=ground+cumin&qid=1590509049&sr=8-6&linkCode=li2&tag=bigflafroatin-20&linkId=86f723f45b4a535dbaef5b1270b0546c&language=en_US" target="_blank" rel="nofollow noopener" data-tasty-links-append-disclosure="">ground cumin
    • ½ teaspoon system-ui, 'system-ui', 'Segoe UI', Helvetica, Arial, sans-serif, 'Apple Color Emoji', 'Segoe UI Emoji', 'Segoe UI Symbol';font-size: 19px;letter-spacing: 0.5px" href="https://www.amazon.com/Simply-Organic-Coriander-2-29-oz/dp/B000WS1KI6?dchild=1&keywords=ground+coriander&qid=1620228137&sr=8-1&linkCode=li2&tag=bigflafroatin-20&linkId=d4d7dc4d74098dbd0ba0865900dc1e91&language=en_US&ref_=as_li_ss_il" target="_blank" rel="nofollow noopener" data-tasty-links-append-disclosure="">ground coriander
    • system-ui, 'system-ui', 'Segoe UI', Helvetica, Arial, sans-serif, 'Apple Color Emoji', 'Segoe UI Emoji', 'Segoe UI Symbol';font-size: 19px;letter-spacing: 0.5px" href="https://www.amazon.com/Morton-Coarse-Kosher-Salt-lbs/dp/B06XPN2785/ref=as_li_ss_il?crid=165UXS82M5JM1&dchild=1&keywords=morton+kosher+salt+coarse&qid=1590096093&sprefix=morton+koshe,aps,143&sr=8-2&linkCode=li3&tag=bigflafroatin-20&linkId=e4241a89cadfe0f3f57ca978e5c5e871&language=en_US" target="_blank" rel="nofollow noopener" data-tasty-links-append-disclosure="">Kosher salt and freshly cracked black pepper, to taste
    • 6 mini bell peppers sliced thinly into rings
    • 2 tablespoons system-ui, 'system-ui', 'Segoe UI', Helvetica, Arial, sans-serif, 'Apple Color Emoji', 'Segoe UI Emoji', 'Segoe UI Symbol';font-size: 19px;letter-spacing: 0.5px" href="https://www.amazon.com/Amore-Tomato-Paste-4-5-Pack/dp/B01GGWB6RG/ref=as_li_ss_il?keywords=tomato+paste&qid=1583421957&sr=8-8&linkCode=li2&tag=bigflafroatin-20&linkId=38c743943b4d645496d3dafa5d452946&language=en_US" target="_blank" rel="nofollow noopener" data-tasty-links-append-disclosure="">tomato paste
    • Corn tortillas warmed
    • Sour cream
    • Green onions thinly sliced, for garnish (optional, but encouraged!)

    Instructions
     

    1. In a large skillet, preferably cast iron, heat oil over medium-high heat. Add lamb, garlic and onion and let it all start to brown. Add paprika, chili powder, oregano, cumin, coriander, salt and pepper and stir well to combine.
    2. Once the onions have melted down and the lamb is nice and brown, add sliced peppers and tomato paste. Continue cooking, stirring to coat the mixture with tomato paste. Keep stirring until the peppers start to melt down into the mixture, and everything is heated through.
    3. To serve, pile some of the lamb/onion/pepper mixture into warmed tortillas. Add a dollop of sour cream and a sprinkling of green onions over top and dig in. Enjoy!

    Did you make this recipe?

    Leave a comment + star rating below to let people know how it was!

    Behind BF Volume 3 with a Stonyfield Review

    March 28, 2014 by Ashley 13 Comments

    Stonyfield YoBaby, YoToddler and YoKids Pouches Review + Giveaway

    I love trying out new recipes, but the last few weeks, we've been falling back on a lot of old favorites. Here are some of the recipes that have made at least one appearance here lately:

    Slow Cooker “Roasted” Beets

    Slow Cooker "Roasted" Beets

    Sausage and Peppers

    Sausage and Peppers

    Chicken Salad with Mayo (Mayonezli Tavuk Salatasi)

    Chicken Salad with Mayo (Mayonezli Tavuk Salatasi)

    Punjabi-Style Warming Spice Blend (Punjabi Garam Masala)

    Punjabi-Style Warming Spice Blend (Punjabi Garam Masala)

    Spicy Turkey Three-Bean Chili

    Spicy Turkey Three-Bean Chili

    Amy Sedaris’s Vanilla Cupcakes with Vanilla Buttercream Frosting (this time, they were for a friend's birthday, and I made them with purple frosting)

    Thomas the Train Cupcakes

    In the midst of all this fun, we were able to try out some new products from Stonyfield Organic. Their have a new line of YoBaby, YoToddler and YoKids refrigerated yogurt pouches. The pouches are available in 9 flavors and come in both fruit and fruit/veggie blends.

    I especially like the ones that have both fruit and veggies in them, as it's usually pretty easy to get kids to eat fruit, but veggies can be tricky. They're also organic and free of high fructose corn syrup and artificial flavors. This is a major issue with a lot of other yogurt brands out there. I won't name names, but you know who you are...

    Stonyfield YoBaby, YoToddler and YoKids Pouches Review + Giveaway

    My son's immediate review was, "it's vewy, vewy cold!". He loves yogurt, and he loves the pouches of fruits and veggies as a snack, but those pouches are usually room temperature. He then proceeded to eat 2 entire pouches and demand ask politely for a 3rd.

    This is a much less messy way to let my little guy eat yogurt, and I love that he can get a serving of veggies while enjoying his snack. You can also re-seal the pouches and pop 'em in the fridge if they aren't immediately scarfed down. It's great on-the-go, too!

    And now for the giveaway! Stonyfield is giving 10 pack of coupons to one of my readers to try these pouches for free. All you need to do to win is leave a comment below telling me your child's favorite snack. The contest will close on Monday, April 7, 2014 at 12 noon (Eastern Standard Time). Winner will be chosen via random.org and will be contacted via email to get mailing information. Good luck, everyone!

    I am honored to be a member of the Stonyfield Clean Plate Club. I received product or coupons for writing this post, but all opinions are my own.

    UPDATE – The winner has been selected via random.org – CONGRATS to Anu!

    Spiced Butternut Squash, Lentil, and Goat Cheese Salad

    March 26, 2014 by Ashley 1 Comment

    Spiced Butternut Squash, Lentil, and Goat Cheese Salad

    Spice roasted squash, fresh mint, French lentils and goat cheese are tossed with greens to make this salad anything but ordinary!

    This was a great light main course, and it was also nice leftover the next day alongside a baked potato. It would be wonderful with some grilled or roasted meat or tofu, too.

    Spiced Butternut Squash, Lentil, and Goat Cheese Salad

    I love adding grains to my greens, and lentils are a great alternative to that. This salad totally hit the spot, and I'm excited to add lentils to more salads in the future. Yum!
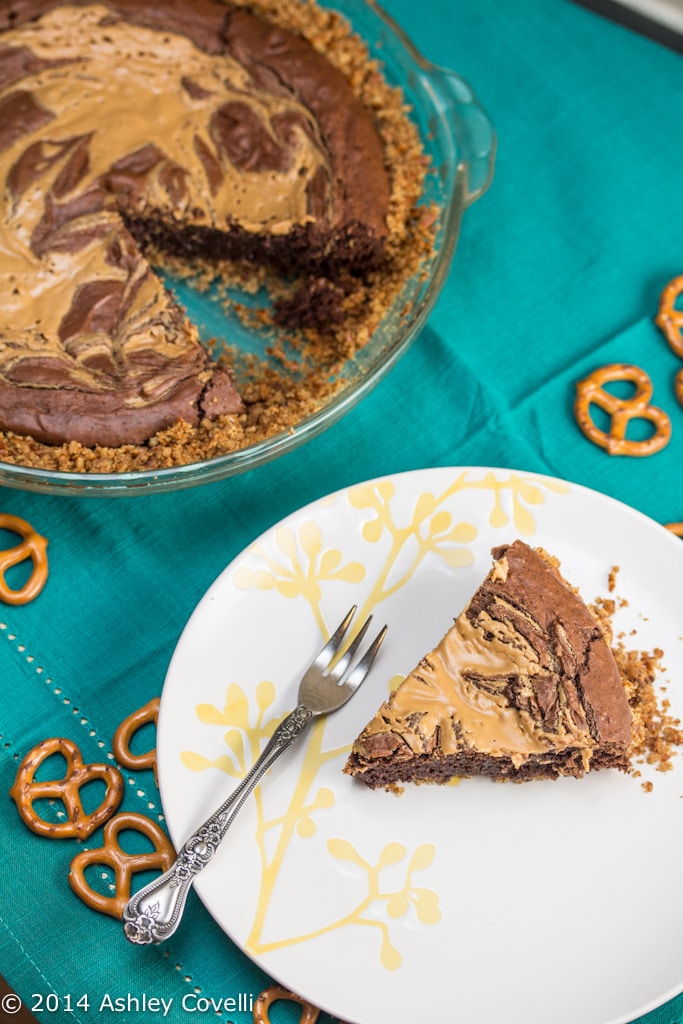
    Spiced Pumpkin, Lentil, and Goat Cheese Salad
    Bon Appétit October 2009

    This fall salad balances earthy, tangy, sweet, and creamy flavors.

    ¾ cup French green lentils*
    6 cups 1-inch pieces peeled seeded sugar pumpkin or butternut squash (from about one 2-pound whole pumpkin)
    3 tablespoons olive oil, divided
    1 teaspoon ground cumin
    1 teaspoon hot smoked Spanish paprika
    ½ teaspoon sea salt
    4 cups baby arugula
    1 cup soft goat cheese**, crumbled
    ¼ cup thinly sliced mint leaves
    1 tablespoon red wine vinegar

    Place lentils in small bowl. Cover with cold water and soak 10 minutes; drain.

    Cook lentils in boiling salted water until tender but firm, about 30 minutes. Drain lentils. Rinse under cold water, then drain.

    Preheat oven to 375°F. Place pumpkin in large bowl; toss with 2 tablespoons oil, cumin, paprika, and sea salt. Arrange pumpkin in single layer on baking sheet; roast 20 minutes. Turn pumpkin over. Roast until tender, 10 to 15 minutes. Cool.

    Combine lentils, pumpkin, and oil from baking sheet with arugula, half of goat cheese, mint, vinegar, annd 1 tablespoon oil. Season with salt and pepper. Divide among plates; sprinkle remaining goat cheese over.

    *Optional: use Fluten-Free
    **Optional: use Vegan

    Big Flavors Rating: 4 Stars

    Tomato-Glazed Portobello and Chickpeas with Cilantro-Lime Yogurt Sauce

    March 25, 2014 by Ashley 2 Comments

    Tomato-Glazed Portobello and Chickpeas with Cilantro-Lime Yogurt Sauce

    I had intended to make mushroom tacos a few weeks ago, but didn't have everything I needed on hand. So I thought burrito bowls would be fun. That's what I thought these were going to be back when I made them a whole month ago. Yeah... things have been hectic and I just now got around to typing this recipe up.

    Long story short, Dino basically forbade me to call these burrito bowls because they didn't meet enough of his burrito criteria. He has eaten more burritos than me, so I gave up and it took me quite some time to figure out just what to call these beauties.

    Tomato-Glazed Portobello and Chickpeas with Cilantro-Lime Yogurt Sauce

    The flavor is really great here - nice and rich, meaty mushrooms and chickpeas are satisfying, even for the most serious meat-eaters. Well, maybe not Ron Swanson, but other than that...

    The tomato sauce and spices from the marinade glaze the veggies really nicely, and the cooling yogurt sauce on top adds a great contrast to the rest of the dish. I served this over jasmine rice, but it would be great over quinoa, as a taco filling or even on top of a salad.

    So, even though it's not a burrito of any sort, it certainly was delicious, and apparently unlike anything either of us have eaten before. And we've eaten all sorts of interesting things, so that's saying something!
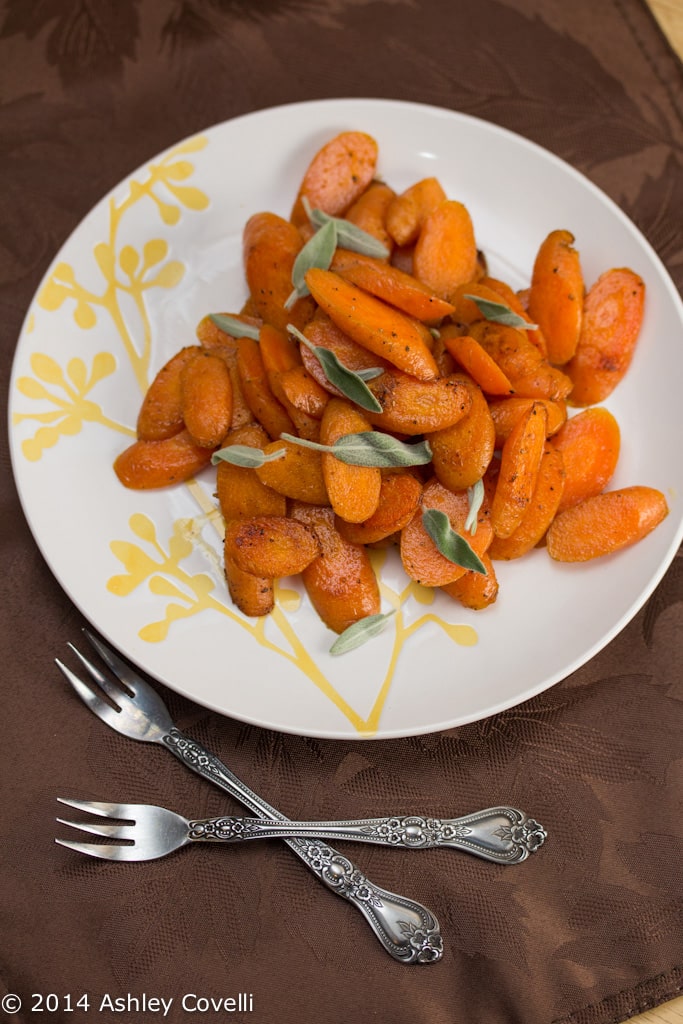
    📖 Recipe

    Tomato-Glazed Portobello and Chickpeas with Cilantro-Lime Yogurt Sauce

    Tomato-Glazed Portobello and Chickpeas with Cilantro-Lime Yogurt Sauce
    Big Flavors from a Tiny Kitchen - Ashley Covelli
    No ratings yet
    Print Recipe Pin Recipe
    Course: Main Dish

    Ingredients
     

    • 4 large portobello mushroom caps halved then cut into ¼-inch thick slices
    • 3 cloves garlic minced
    • 2 teaspoons dried oregano
    • 2 tablespoons red wine vinegar
    • 4 tablespoons extra-virgin olive oil
    • Kosher salt and freshly cracked black pepper to taste
    • 2 tablespoons vegetable oil
    • 1 small yellow onion diced
    • 1 15.5-ounce can chickpeas, rinsed and drained
    • 1 8-ounce can no salt added tomato sauce
    For Cilantro-Lime Yogurt Sauce:
    • ½ cup plain Greek yogurt I used Stonyfield 0% Fat
    • 1 lime zested, plus 1 tablespoon juice
    • 1 tablespoon cilantro finely chopped
    • Kosher salt and freshly ground black pepper to taste
    For Serving:
    • Steamed jasmine rice
    • Lime wedges
    • Chopped cilantro

    Instructions
     

    1. Place mushrooms, garlic, oregano, vinegar, olive oil, salt and pepper in a large bowl or freezer bag and toss to coat. Close and refrigerate for 2 hours.
    2. Meanwhile, mix ingredients for sauce together in a small bowl and refrigerate until ready to serve.
    3. In a large Dutch oven (preferably cast iron), heat vegetable oil over moderate heat. Add the mushrooms and onion and cook, stirring occasionally, until tender. Add chickpeas and tomato sauce and stir to combine. Continue cooking until the chickpeas are heated through and the tomato sauce has reduced down a bit to just glaze everything. Taste for seasoning and adjust with more salt and pepper if desired.
    4. Serve mushrooms and chickpeas over steamed rice, top with a dollop of yogurt sauce and garnish with cilantro. Squeeze a lime wedge over each serving for extra tanginess, if desired.

    Did you make this recipe?

    Leave a comment + star rating below to let people know how it was!
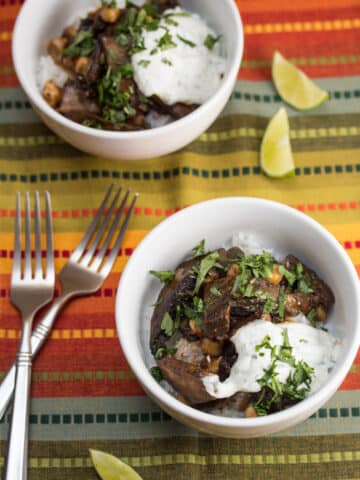
    Chewy Peanut Butter Chocolate Chip Cookies

    March 24, 2014 by Ashley 3 Comments

    Chewy Peanut Butter Chocolate Chip Cookies

    It's been proven time and time again that peanut butter and chocolate are a match made in heaven. But science is all about experimenting and trying new things to see if you get consistent results, right?

    Clearly I'm not a scientist. That's just how I rationalize the obscene amount of these cookies (both baked and in dough form) that I consumed.

    Chewy Peanut Butter Chocolate Chip Cookies

    These little beauties are knock-your-socks-off amazing. Seriously. I made them for a group of friends who came over for a game night, and they were a HUGE hit.

    Chewy Peanut Butter Chocolate Chip Cookies

    I used a small scoop and got just short of 4 dozen cookies out of this recipe. They were bite-sized and beyond delicious. This entire tin disappeared in the blink of an eye.

    These were definitely some of the best cookies I've ever made. Soft and chewy with melty chocolate chips, plus the creamy peanut butter flavor throughout. Just awesome. You need these cookies in your life - immediately!

    Chewy Peanut Butter Chocolate Chip Cookies

    Chewy Peanut Butter Chocolate Chip Cookies
    Confections of a Foodie Bride (Slightly adapted from The Pastry Queen)

    1 stick butter, at room temp
    ½ cup smooth peanut butter
    ½ cup dark brown sugar
    ½ cup granulated sugar
    1 egg
    1 teaspoon vanilla
    1 cup flour
    ½ teaspoon baking soda
    ½ teaspoon salt
    1 ½ cups chocolate chips

    Preheat oven to 375 and line a baking sheet with parchment or a baking mat.

    Cream the butter and peanut butter on medium high for 1 minute.

    Add sugars and beat at med-high for another minute. Add egg and vanilla and mix until smooth.

    Add flour, baking soda and salt on low speed until thoroughly combined. Mix in chocolate chips (the dough will be quite soft).

    Chill dough for 15-20 minutes.

    Drop the dough by the small scoopfuls onto a lined baking sheet.

    Bake for 10-12 minutes until edges are golden brown. For a crispier cookie, allow the entire cookie to brown. Let cookies cool on baking sheet for 10 minutes and then transfer to a rack to cool completely.

    Yields: ~24 cookies
    Estimated time: 45 minutes

    Big Flavors Rating: 5 Stars

    Lamb Stir-Fry with Pomegranate and Yogurt

    March 17, 2014 by Ashley Leave a Comment

    Lamb Stir-Fry with Pomegranate and Yogurt

    Did I miss the memo about The Great Pomegranate Shortage of 2014? Because surely this is the only way to explain why I struck out at FIVE separate stores when trying to find pomegranate seeds or whole fruits.

    Juice? Yep. They have that. But the usually stocked areas of beautiful arils? G-O-N-E. Gone.

    And normally I wouldn't go to so much trouble for one ingredient, but it really would have been the perfect way to garnish this dish.

    Onward and upward.

    Lamb Stir-Fry with Pomegranate and Yogurt

    This stir-fry is rich with Middle Eastern flavor, and the use of lamb is a nice change from the typical beef, chicken, shrimp or tofu. Using a cast iron skillet is a great way to impart a lot of flavor into the meat, and I loved the simple marinade full of garlic and toasted spices.

    I used a spice grinder instead of chopping the toasted spices. Since I couldn't find pomegranate seeds, I drizzled a bit of pomegranate molasses on top at the end, which was good, but seeds would have been better.

    This was a big hit at the dinner table, and was a fun way to celebrate Stir-Friday.

    Lamb Stir-Fry with Pomegranate and Yogurt
    Bon Appétit March 2014

    Yield: Makes 4 servings
    Active time: 25 minutes
    Total time: 35 minutes

    Affordable leg of lamb is a great way to break out of the usual beef-chicken-pork rut, especially when used in a quick-cooking but complex-tasting dish like this.

    2 teaspoons cumin seeds
    1 teaspoon coriander seeds
    1 ½ pounds boneless leg of lamb, thinly sliced against the grain
    1 teaspoon paprika
    4 garlic cloves, finely chopped
    1 tablespoon red wine vinegar
    4 tablespoons olive oil, divided
    Kosher salt, freshly ground pepper
    ½ cup plain Greek yogurt
    1 medium red onion, cut into ½" wedges
    Cooked rice (for serving)
    ¼ cup pomegranate seeds
    2 tablespoons chopped pistachios
    Fresh oregano, mint, and/or cilantro leaves (for serving)

    Toast cumin and coriander seeds in a small dry skillet over medium heat until fragrant, about 1 minute. Let cool, then finely chop. Toss lamb with cumin, coriander, paprika, garlic, vinegar, and 2 tablespoons oil in a large bowl to coat; season with salt and pepper. Cover and chill 15 minutes.

    Whisk yogurt and 1 tablespoon water in a small bowl; season with salt and pepper.

    Heat remaining 2 tablespoons oil in a large skillet, preferably cast iron, over medium-high heat. Working in batches, cook lamb, tossing occasionally, until browned, about 5 minutes per batch; transfer to a plate with a slotted spoon.

    Add onion to skillet and cook, stirring often, until beginning to brown and soften, about 3 minutes. Add ½ cup water; season with salt and pepper and cook, stirring occasionally, until onion is tender and water is evaporated, about 3 minutes. Return lamb to skillet and toss to combine. Season with salt and pepper.

    Serve lamb over rice, topped with yogurt, pomegranate seeds, pistachios, and herbs.

    DO AHEAD: Lamb can be marinated 1 day ahead. Keep chilled.

    Per serving: 420 calories, 26 g fat, 2 g fiber

    Big Flavors Rating: 4 Stars

    Pork Tenderloin with Date and Cilantro Relish

    March 14, 2014 by Ashley 2 Comments

    Pork Tenderloin with Date and Cilantro Relish

    I don't know what's been more frustrating this winter: the bone-chilling, ice-cold, blizzard-every-other-week weather or the fact that my family has been sick off and on constantly since Thanksgiving. I mean seriously. The white flag was raised long ago - we give, WE GIVE!

    In between bouts of this and that (I'll spare you the details), I made some delicious Brussels Sprouts in Garlic Butter to go alongside this tasty pork dish.

    Pork Tenderloin with Date and Cilantro Relish

    The relish really intrigued me. I've never made a relish that included dates before, and the flavors worked so beautifully with the pork. The dates can be a little tricky to cut, since they're so sticky, so proceed with caution.

    I love that the relish can be made ahead of time. It's great for busy weeknights - just don't forget to stir the pan juices from the tenderloin in before serving.

    This was a really interesting combination of ingredients that we enjoyed. The sweetness of the fruit is a perfect match for this juicy pork. The cilantro really brightens it up and gives it a fresh finish. Delicious!

    Pork Tenderloin with Date and Cilantro Relish

    Pork Tenderloin with Date and Cilantro Relish
    Bon Appétit November 2013

    Yield: Makes 4 servings
    Active time: 20 minutes
    Total time: 35 minutes

    This cut of pork can be very lean, so take care not to overcook it or it will be dry. Ideally, it should still be a little pink in the center.

    3 tablespoons olive oil, divided
    1 pork tenderloin (about 1 ½ pounds)
    Kosher salt, freshly ground pepper
    ⅔ cup Medjool dates (about 4 ounces), cut into small pieces
    2 tablespoons fresh orange juice
    3 tablespoons chopped fresh cilantro plus leaves for serving

    Preheat oven to 425°F. Heat 1 tablespoon oil in a large ovenproof skillet over medium-high heat. Season pork with salt and pepper and cook, turning, until browned on all sides, 6–8 minutes. Transfer skillet to oven and cook pork until an instant-read thermometer inserted in thickest part registers 140°F, 10–15 minutes. Transfer pork to a cutting board and let rest at least 5 minutes before slicing; set aside pan drippings.

    Toss dates, orange juice, reserved pan drippings, 3 tablespoons chopped cilantro, and remaining 2 tablespoons oil in a small bowl; season with salt and pepper. Spoon relish over pork and top with cilantro leaves.

    DO AHEAD: Relish (without pan drippings) can be made 4 hours ahead. Cover and chill. Add pan drippings just before serving.

    Per serving: 360 calories, 14 g fat, 2 g fiber

    Big Flavors Rating: 4 Stars

    Brussels Sprouts in Garlic Butter

    March 7, 2014 by Ashley 4 Comments

    Brussels Sprouts in Garlic Butter

    A lot of people talk smack about Brussels sprouts. A lot of them have only had sad, overcooked, bland sprouts. It's a shame, really.

    Because when they're done properly, Brussels sprouts are one of the tastiest foods around!

    Brussels Sprouts in Garlic Butter

    This is a quick and simple recipe that is absolutely delicious. I broke out the cast iron Dutch oven to make these, which gave them an extra bit of crispiness on the cut side that may not have been quite as good with a standard skillet. That caramelization was so, so wonderful. It's the stuff Brussels sprouts dreams are made of.

    These are garlicky and highly addictive. It was definitely only 2 servings in my house. I'll make these again for sure!

    Brussels Sprouts in Garlic Butter

    Brussels Sprouts in Garlic Butter
    Joy of Cooking (via food.com - Tracy K.)

    Total Time: 25 mins
    Prep Time: 10 mins
    Cook Time: 15 mins
    Servings: 2-4

    Tracy K's Note:
    This is a recipe from Joy of Cooking... totally changed my mind about Brussels Sprouts! It's imperative that you use fresh sprouts, the texture would be way off with the frozen ones.

    15 Brussels sprouts, halved lengthwise
    1 ½ tablespoons butter
    1 ½ tablespoons olive oil
    3 cloves garlic, smashed with the flat of a knife
    freshly grated parmesan cheese (optional)
    salt and pepper

    1. Melt butter and olive oil in a medium skillet (over medium-high heat) until butter is foamy.
    2. Reduce heat to medium, add smashed garlic and cook until lightly browned.
    3. Remove garlic and discard.
    4. Add sprouts cut side down, cover, and cook without stirring on medium-low heat 10-15 minutes or until tender when pierced with a knife.
    5. The cut side of the sprouts should get nice and browned, with a nutty, buttery flavor enhanced by garlic.
    6. Top with freshly grated parmesan and salt& pepper to taste.

    Big Flavors Rating: 4 Stars

    Garlicky Cilantro Naan

    March 2, 2014 by Ashley 7 Comments

    Garlicky Cilantro Naan

    I squirm at the thought of dipping cookies into milk. Crumbs in my beverage? Nothankyou. I will make an exception for the occasional biscotti.

    But when it comes to dunking bread of any type into saucy foods, soups, stews, etc. I am totally, 150% on board with that action.

    Garlicky Cilantro Naan

    This is a simple way to dress up store-bought naan. It packs a ton of flavor - perfect for garlic lovers! The cilantro breaks it up and adds a bit of freshness that goes with most Indian curries.

    My husband and I absolutely love this stuff, and it's super simple to make. It's easily halved, doubled, quadrupled, etc. We like to snip the finished naan into triangles with kitchen scissors and dunk away!

    Note - it's totally possible to find vegan naan, and vegan butter works well here, too, if dairy is a concern in your home.

    We love pairing this naan with pullao or cilantro lime rice and cucumber raita with our Indian dinners. YUM!

    📖 Recipe

    Garlicky Cilantro Naan

    Garlicky Cilantro Naan
    This is a simple way to dress up store-bought naan. It packs a ton of flavor - perfect for garlic lovers! The cilantro breaks it up and adds a bit of freshness that goes with most Indian curries.
    Big Flavors from a Tiny Kitchen - Ashley Covelli
    5 from 1 vote
    Print Recipe Pin Recipe
    Servings: 2 servings
    Course: Side Dish
    Cuisine: American
    Prep Time 5 minutes mins
    Cook Time 5 minutes mins
    Total Time 10 minutes mins

    Ingredients
     

    • 2 pieces naan
    • 4 tablespoons melted butter or ghee
    • 4 cloves garlic minced
    • 2 tablespoons finely chopped cilantro

    Instructions
     

    1. Preheat oven to 400°F.
    2. Combine butter or ghee, garlic and cilantro in a small bowl. Brush half of the mixture on each piece of naan.
    3. Bake 3-6 minutes, or until naan is heated through and starting to brown a bit on top.

    Did you make this recipe?

    Leave a comment + star rating below to let people know how it was!

    Kidney Beans with a Cardamom-Yogurt Sauce

    March 2, 2014 by Ashley 2 Comments

    Kidney Beans with a Cardamom-Yogurt Sauce

    This vegetarian curry was unlike anything I've made before. You cook all of the liquid out of yogurt, and the solids that remain are what gives it a tangy flavor.

    This was really nice on a cold evening after a long day. It's warm and comforting, and the blend of spices (I used a fresh batch of Punjabi garam masala) was beautifully fragrant. I love making my own spice blends and pastes, and this book is full of tons of options.

    Kidney Beans with a Cardamom-Yogurt Sauce

    I used canned beans that I rinsed and drained, and it worked out well. If I have more time next time, I'll use dried. I've been meaning to try out cooking dried beans in the pressure cooker for quite some time now. I also used 3 white cardamom pods and 3 green. I find that the flavor of the two types is very different, and I didn't want to commit to just one.

    I served this with Garlicky Cilantro Naan, which was perfect for dunking into the curry.

    Kidney Beans with a Cardamom-Yogurt Sauce
    660 Curries: The Gateway to Indian Cooking – Raghaven Iyer

    2 tablespoons Ghee (page 21) or canola oil
    1 small red onion, finely chopped
    6 green or white cardamom pods
    1 cup plain yogurt
    ½ teaspoon ground turmeric
    2 cups cooked kidney beans
    2 teaspoons coarse kosher or sea salt
    2 teaspoons Karuvapillai podi (page 35) or Punjabi garam masala (page 25)
    ½ teaspoon cayenne (ground red pepper)
    2 tablespoons finely chopped fresh cilantro leaves and tender stems for garnishing

    1. Heat the ghee in a medium-size saucepan over medium-high heat. Add the onion and cardamom pods, and stir-fry until the onion turns light brown around the edges, 3 to 5 minutes.

    2. Stir in the yogurt and continue to cook, uncovered, stirring occasionally, until the watery liquid evaporates from the yogurt and leaves behind reddish-brown curd-like pellets, 12 to 15 minutes.

    3. Sprinkle in the turmeric and incorporate it into the tart sauce. Add 2 cups water and the kidney beans, salt, Karuvapillai podi, and cayenne. Bring the curry to a boil. Then lower the heat to medium and gently boil the sauce, uncovered, stirring occasionally, until it has thickened, 10 to 15 minutes.

    4. Sprinkle the cilantro over the curry, and serve. (Remove the cardamom pods first, if you wish.)

    Big Flavors Rating: 4 Stars

    Horseradish Dill Mashed Potatoes

    March 1, 2014 by Ashley Leave a Comment

    Horseradish Dill Mashed Potatoes

    To soak up all of the delicious mushroom gravy from the Salisbury Steak that I made for dinner, I decided to make mashed potatoes. I normally put lots of sour cream, butter and milk in my mashed potatoes (and even cream cheese if I have any on hand), but my sour cream was… let's just say beyond sour.

    Horseradish Dill Mashed Potatoes

    I did have some buttermilk in the fridge, and I figured that would add a nice tangy note to the potatoes. I also added horseradish to make it a little spicy, and fresh dill for a bit of brightness. It went really well with the steak, and was great slathered in mushroom gravy. And without the sour cream, extra butter and cream cheese, these are actually pretty healthy. Bonus!

    If your mashed potatoes are too dry, add another splash of buttermilk. If you like 'em spicier, add more horseradish. You can certainly peel your potatoes if you don't enjoy eating the skins, but my family loves them, plus there's more nutritional value in them if you leave them unpeeled. Not to mention it means less prep work, which is a good thing on a busy weeknight.

    📖 Recipe

    Horseradish Dill Mashed Potatoes

    Horseradish Dill Mashed Potatoes
    Big Flavors from a Tiny Kitchen - Ashley Covelli
    No ratings yet
    Print Recipe Pin Recipe
    Course: Side Dish

    Ingredients
     

    • 4 russet potatoes scrubbed clean, diced
    • 1 dried bay leaf
    • 2 tablespoons unsalted butter
    • 1 ¼ cup buttermilk
    • 1 tablespoon prepared horseradish
    • Kosher salt and freshly cracked black pepper to taste
    • ¼ cup chopped dill

    Instructions
     

    1. Place diced potatoes in a large pot and cover with cold water by a few inches. Add bay leaf and a pinch of salt. Place on stovetop over high heat. Once the water boils, reduce heat and simmer until potatoes are tender when pierced with a knife, about 15 minutes, depending how large your potato pieces are.
    2. Drain potatoes and add butter, buttermilk, horseradish, salt and pepper. Using a potato masher, smash the potatoes in the pot until they're as smooth as you like them and all the ingredients are mixed in. Stir in dill.

    Notes

    Make sure you cut your potatoes into consistently-sized pieces to ensure even cooking. The smaller the dice, the more quickly they'll cook.

    Did you make this recipe?

    Leave a comment + star rating below to let people know how it was!

    Salisbury Steak with Mushroom Gravy

    March 1, 2014 by Ashley Leave a Comment

    Salisbury Steak with Mushroom Gravy

    With all the crazy winter weather we've been having this year, comfort food has been on heavy rotation. When I saw this recipe on TV a few weeks ago, I knew it would hit the spot and warm us up.

    This is pretty easy to put together, and the flavor is definitely comforting. The gravy is rich and saucy, and the steaks are well seasoned and tender. This went great with a heaping scoop of Horseradish Dill Mashed Potatoes.

    Salisbury Steak with Mushroom Gravy

    Salisbury Steak with Mushroom Gravy
    Best Recipes Ever - Kary Osmond

    Servings: 4

    1 lb (454 g) lean ground beef
    1 onion, chopped
    2 cups (500 mL) quartered cremini mushrooms or white mushrooms, (about 8 oz/250 g)
    1 teaspoon (5 mL) dried thyme
    2 tablespoon (30 mL) all-purpose flour
    1 cup (250 mL) beef stock or vegetable stock

    In bowl, mix together beef, 2 tablespoon (25 mL) water and ½ teaspoon (2 mL) each salt and pepper; shape into four ½-inch (1 cm) thick patties. (Make-ahead: Cover tightly and refrigerate for up to 6 hours.) In nonstick skillet, brown patties over medium-high heat. Transfer to plate; set aside.

    Drain any fat from pan. Add onion; cook over medium heat, stirring occasionally, until softened, about 3 minutes. Add mushrooms and thyme; cook, stirring occasionally, until mushrooms are golden, about 5 minutes.

    Sprinkle with flour; cook, stirring, for 1 minute. Stir in stock a little at a time, stirring constantly to prevent lumps; bring to boil. Reduce heat and simmer until slightly thickened, about 5 minutes.

    Return patties and any accumulated juices to pan; cover and simmer until no longer pink inside, about 15 minutes.

    Tip: This is a saucy dish, so for hearty appetites, you can increase the beef to 1-½ lb (750 g).

    Big Flavors Rating: 4 Stars

    Roasted Spaghetti Squash with Garlicky Herbed Bread Crumbs

    February 28, 2014 by Ashley Leave a Comment

    Roasted Spaghetti Squash with Garlicky Herbed Bread Crumbs

    In the midst of a super long day with my toddler, I came up with this tasty lunch. I used spaghetti squash as the "pasta" but just couldn't go totally carb-free, so I topped it with a healthy dose of garlicky, herbed Panko. The crunchiness of this topping was perfect with the creamy roasted squash.

    Roasted Spaghetti Squash with Garlicky Herbed Bread Crumbs

    I used what I had in the house for this dish, and I didn't have any fresh parsley, so I used dried. If you happen to have fresh, follow the recipe as written, but toss in the finely chopped parsley at the end, after the breadcrumbs have been toasted.

    Roasted Spaghetti Squash with Garlicky Herbed Bread Crumbs

    This is also easily vegan, if you leave off the Parmesan. But I love Parmesan with my pasta, so I topped mine with a few curls, and it was great.

    Roasted Spaghetti Squash with Garlicky Herbed Bread Crumbs

    📖 Recipe

    Roasted Spaghetti Squash with Garlicky Herbed Bread Crumbs

    Roasted Spaghetti Squash with Garlicky Herbed Bread Crumbs
    Big Flavors from a Tiny Kitchen - Ashley Covelli
    No ratings yet
    Print Recipe Pin Recipe
    Course: Main Dish

    Ingredients
     

    • 1 spaghetti squash halved lengthwise, seeds removed
    • 2 tablespoons extra-virgin olive oil plus more for finishing
    • 2 cloves garlic minced
    • 6 tablespoons Panko bread crumbs
    • 2 tablespoons dried parsley
    • Pinch of dried red pepper flakes
    • 2 teaspoons balsamic vinegar
    • Parmesan cheese for serving (optional, but encouraged!)

    Instructions
     

    1. Preheat oven to 350°F. Place squash, cut side up, on a baking sheet and roast for 1 hour. Remove from oven and let cool slightly. Use a fork to gently scrape the strands of "spaghetti" loose from the skin. I've found that scraping crosswise (instead of lengthwise) produces more spaghetti-like strands, versus a big pile of mashed squash.
    2. In a skillet, heat 2 tablespoons oil over medium heat. Add garlic, breadcrumbs, parsley and pepper flakes. Cook, stirring occasionally, until the breadcrumbs darken in color and are fragrant.
    3. To serve, put a pile of squash on your plate (or, leave it right in the squash skin). Drizzle with a little olive oil and balsamic vinegar. Toss it a bit with a fork and top generously with breadcrumb mixture. I enjoyed shaving some Parmesan cheese curls over top while it was still warm, so it would melt down a bit onto the squash.

    Did you make this recipe?

    Leave a comment + star rating below to let people know how it was!
    • « Previous Page
    • 1
    • …
    • 15
    • 16
    • 17
    • 18
    • 19
    • …
    • 35
    • Next Page »

    Hi, I'm Ashley and I’ve been writing about food & recipes here at Big Flavors from a Tiny Kitchen since 2006. I want to help you (yes, you!) gain confidence in the kitchen so you are excited to cook at home for yourself and your loved ones.

    More about me →

    Favorite Spring Recipes

    • Mayo-free Deviled Eggs
    • Middle Eastern Fattoush Salad with Homemade Pita Chips
    • Birthday Cake Confetti Pancakes with Sprinkles
    • Italian Cream Cheese and Ricotta Cheesecake
    • Garlicky Mushroom Ricotta Pizza with Wild Arugula + Aged Balsamic
    • Slow Cooker "Roasted" Beets
    • Honey Balsamic Roasted Carrots
    • Italian Ricotta Cookies
    • Rhubarb Custard Pie
    • Easy Instant Pot Herbed Potato Salad

    Mother's Day + Easter Brunch

    • Epic Brunch Board on a Budget
    • Baby Spinach and Cheddar Quiche Made with Fresh Spinach
    • Turkey Salad Tea Sandwiches with Dried Cherries
    • Great Grandma Maria Francesca Cardile's Italian Easter Cookies
    • Brie Waffle Bites
    • Challah French Toast
    • Creamsicle Smoothies
    • DM Bloody Mary
    • Turkey Scotch Eggs
    • The Herbalist

    Popular Now

    • Cast iron skillet full of chicken fajitas.
      Favorite Restaurant-Style Chicken Fajitas
    • Overhead view of spinach and cheddar quiche with forks.
      Baby Spinach and Cheddar Quiche Made with Fresh Spinach
    • Chicken and bell pepper stir-fry served over white rice.
      Chicken and Bell Pepper Stir-Fry
    • Serving dish of cooked shrimp garnished with chopped parsley.
      Quick and Easy Sautéed Shrimp
    • Overhead view of a dutch oven filled with sausages, peppers, and onions.
      Sausage and Peppers
    • Overhead view of assorted breakfast items displayed on a board.
      Epic Brunch Board on a Budget

    Footer

    ↑ back to top

    About

    • About Ashley
    • Press + Recognition
    • Events
    • Virtual Cooking Classes
    • Podcast
    • Contact
    • Privacy Policy

    Newsletter

    • Sign up to receive delicious recipes and exclusive content right to your inbox!

    As an Amazon Associate I earn from qualifying purchases at no added cost to you.

    ©2006–2026  BIG FLAVORS FROM A TINY KITCHEN LLC | ALL RIGHTS RESERVED

    *Third-party advertisers may collect or use non-personally identifiable information to serve you more relevant ads.

    Rate This Recipe

    Your vote:


    A rating is required
    A name is required
    An email is required