
This post may contain affiliate links, which won’t change your price but will share some commission.
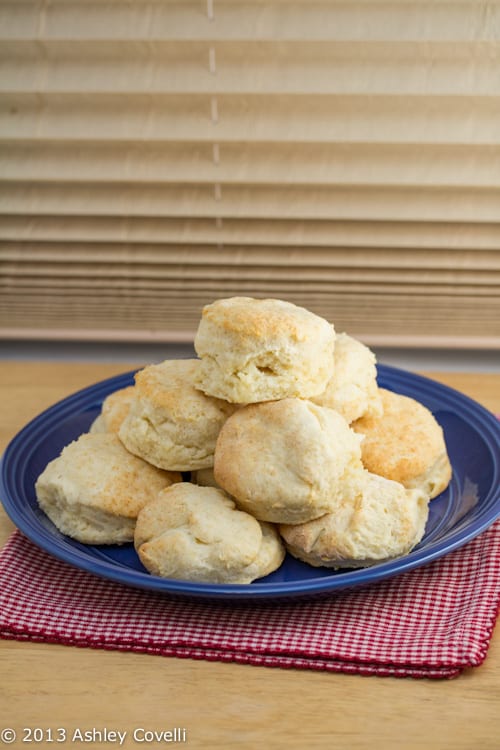
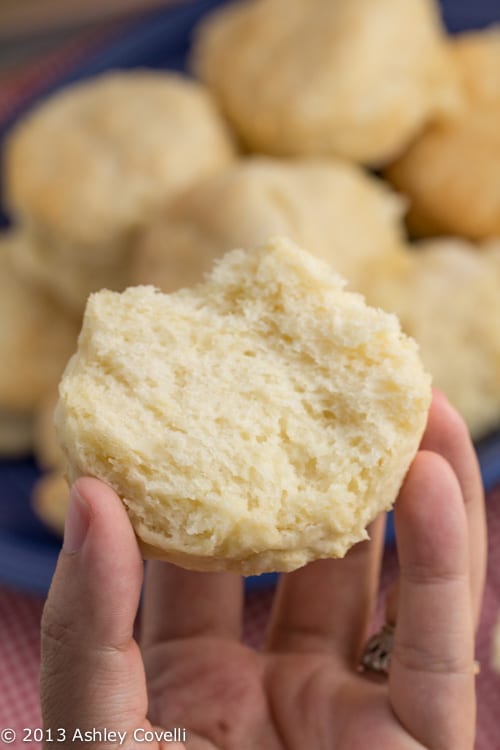
For some reason, I was under the impression that making buttermilk biscuits from scratch would be really daunting. When I found myself with half a container of buttermilk in the fridge (leftover from making Nathan's Lemon Cake), I decided I'd poke around online and see if I could find a highly rated recipe. Let me tell you - this one came through BIG TIME. Wow. These biscuits were pretty easy to put together, and they were nice and light and fluffy and absolutely melted in our mouths. I went the food processor route for making the dough, so it would be less likely to be overworked, and it came together in a cinch. I definitely want to try out the freezing method listed in the recipe, and maybe I'll try to track down White Lily flour one of these days, as I've heard really great things about it. I will absolutely be making these beauties again... and again... and again...
Southern Buttermilk Biscuits
Food.com - P4
Total Time: 22 mins
Prep Time: 10 mins
Cook Time: 12 mins
Yield: 10 biscuits
These buttermilk biscuits are authentic. This recipe came from my great-great-grandmother, and was handed down to all the women in my family, and we are all Southern. I am the first one to commit the sin of using a food processor (lol) but I find it works very well. I would put these biscuits up against anyone's - they are perfect in every single way. I hope you all enjoy them.
2 cups unbleached all-purpose flour, plus more for dusting the board (if you can get White Lily flour, your biscuits will be even better)
¼ teaspoon baking soda
1 tablespoon baking powder (use one without aluminum)
1 teaspoon kosher salt or 1 teaspoon salt
6 tablespoons unsalted butter, very cold
1 cup buttermilk (approx)
1 Preheat your oven to 450°F.
2 Combine the dry ingredients in a bowl, or in the bowl of a food processor.
3 Cut the butter into chunks and cut into the flour until it resembles course meal.
4 If using a food processor, just pulse a few times until this consistency is achieved.
5 Add the buttermilk and mix JUST until combined.
6 If it appears on the dry side, add a bit more buttermilk. It should be very wet.
7 Turn the dough out onto a floured board.
8 Gently, gently PAT (do NOT roll with a rolling pin) the dough out until it's about ½" thick. Fold the dough about 5 times, gently press the dough down to a 1 inch thick.
9 Use a round cutter to cut into rounds.
10 You can gently knead the scraps together and make a few more, but they will not be anywhere near as good as the first ones.
11 Place the biscuits on a cookie sheet- if you like soft sides, put them touching each other.
12 If you like"crusty" sides, put them about 1 inch apart- these will not rise as high as the biscuits put close together.
13 Bake for about 10-12 minutes- the biscuits will be a beautiful light golden brown on top and bottom.
14 Do not overbake.
15 Note: The key to real biscuits is not in the ingredients, but in the handling of the dough.
16 The dough must be handled as little as possible or you will have tough biscuits.
17 I have found that a food processor produces superior biscuits, because the ingredients stay colder and there's less chance of over mixing.
18 You also must pat the dough out with your hands, lightly.
19 Rolling with a rolling pin is a guaranteed way to overstimulate the gluten, resulting in a tougher biscuit.
20 Note 2: You can make these biscuits, cut them, put them on cookie sheets and freeze them for up to a month.
21 When you want fresh biscuits, simply place them frozen on the cookie sheet and bake at 450°F for about 20 minutes.
Big Flavors Rating: 5 Stars

Kumar's Kitchen says
we absolutely love southern biscuits,yours look perfectly light and golden....will go so well with a rich gravy,delicious...will be trying these lovely biscuits soon,thanks for sharing 🙂
Ashley says
I love biscuits and gravy. I may do that next time I make a batch of these beauties!
Joanne says
I'm always on the lookout for biscuits, biscuits and more biscuits! Thankfully I have buttermilk in the fridge. I see these in my weekend.
Katie says
Do these have to be eaten right away or can I bake them and serve them a few hours later?
Ashley says
They'll be fine for a few hours. If you want, you could gently warm them in the oven again, or even just a quick zap in the microwave if you want to serve them warm. We ate them at room temperature for several days after I baked them, and they were fantastic! Hope you enjoy them! 🙂