Big Flavors from a Tiny Kitchen

menu icon
go to homepage
  • Recipes
  • About
  • Events
  • Contact
  • Subscribe
    • Facebook
    • Instagram
    • Pinterest
  • subscribe
    search icon
    Homepage link
    • Recipes
    • About
    • Events
    • Contact
    • Subscribe
    • Facebook
    • Instagram
    • Pinterest
  • ×
    Home » Recipes

    Italian Sausages with Lentils

    October 23, 2014 by Ashley 2 Comments

    Italian Sausages with Lentils

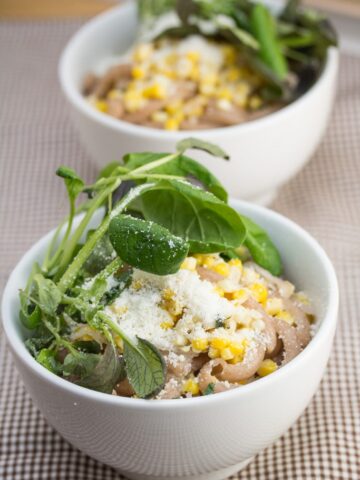
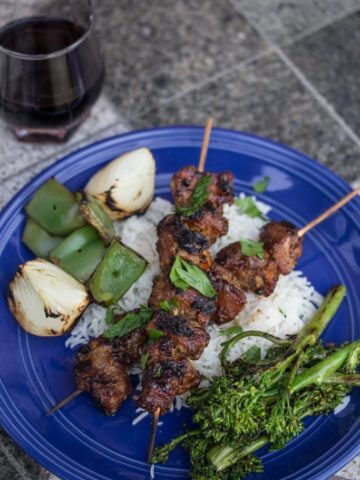
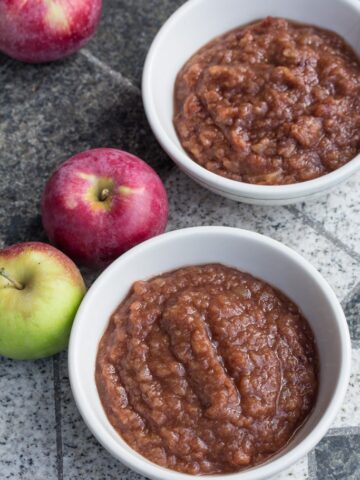
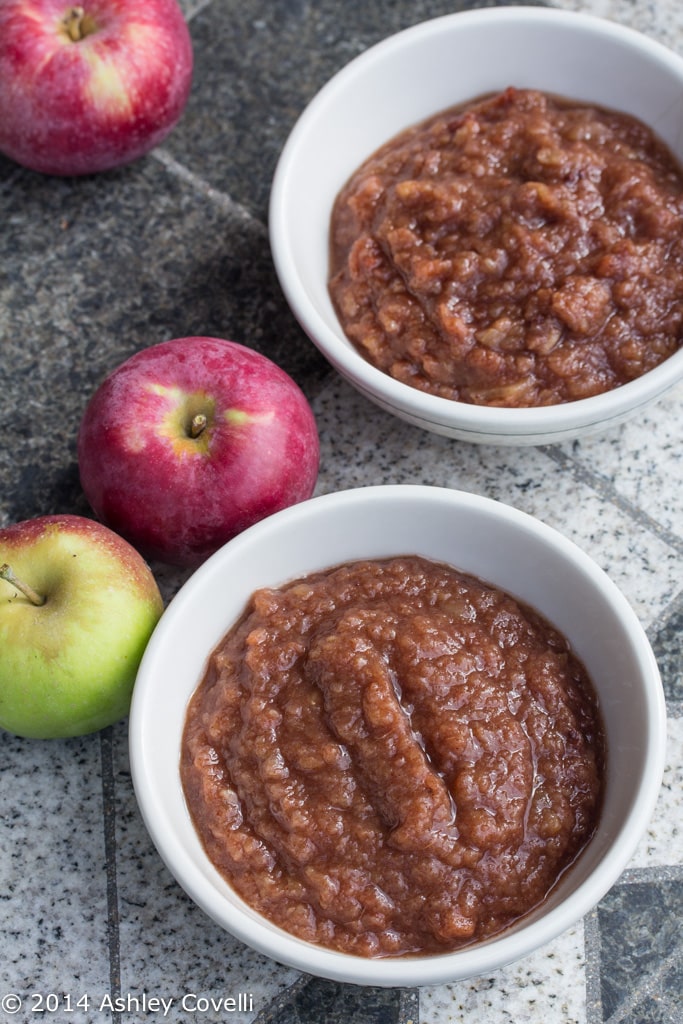
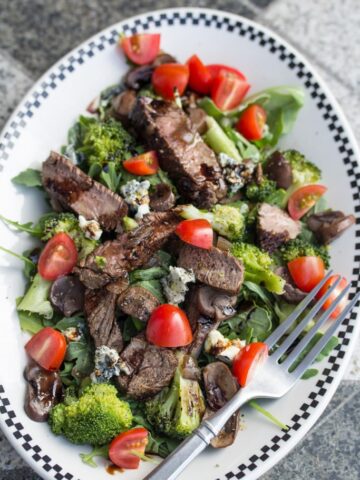
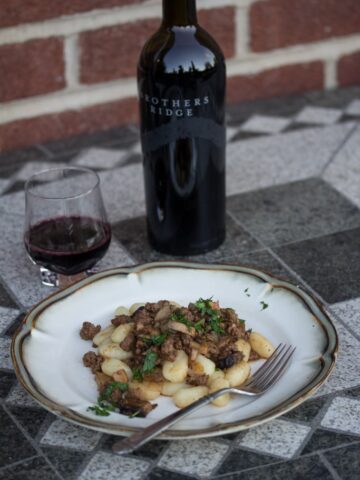
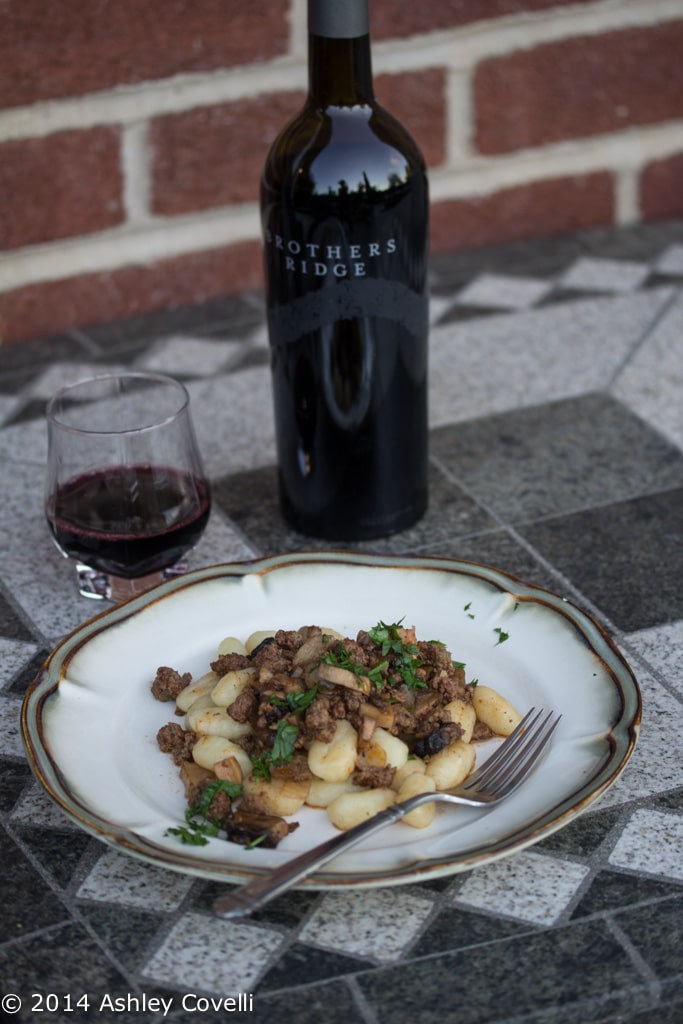
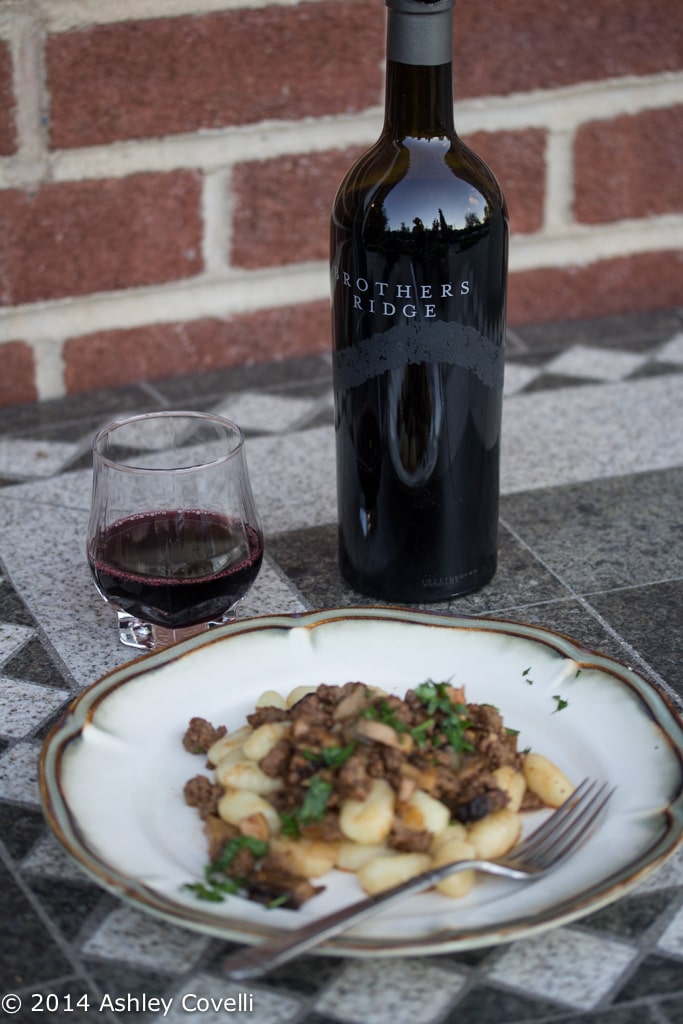
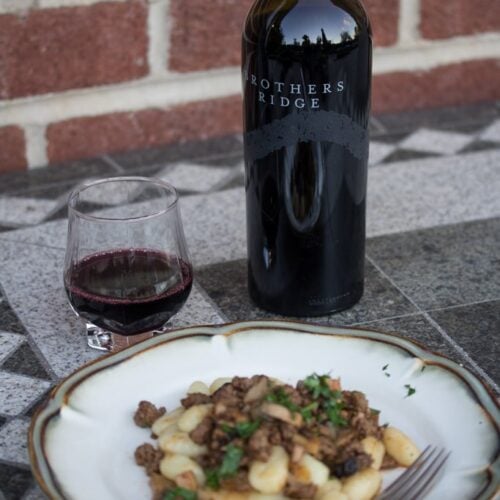
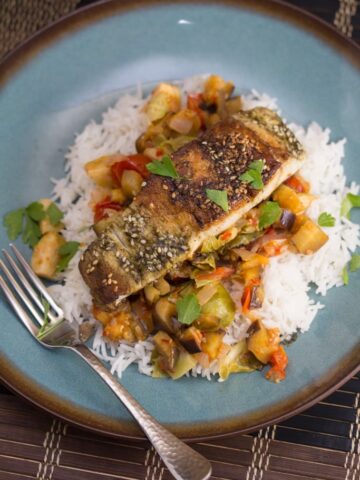
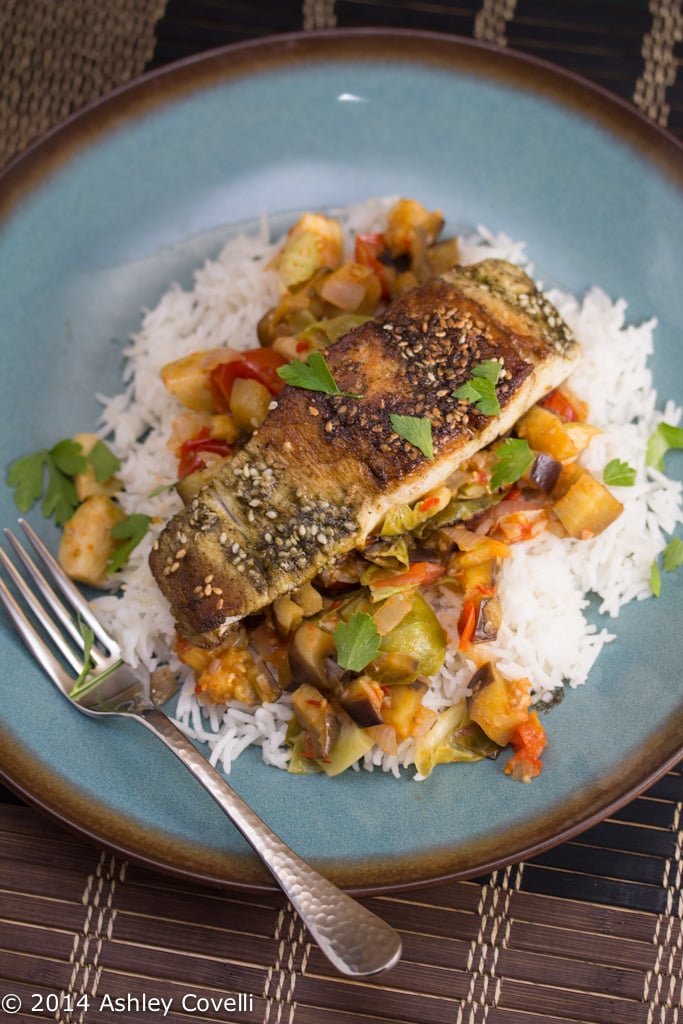
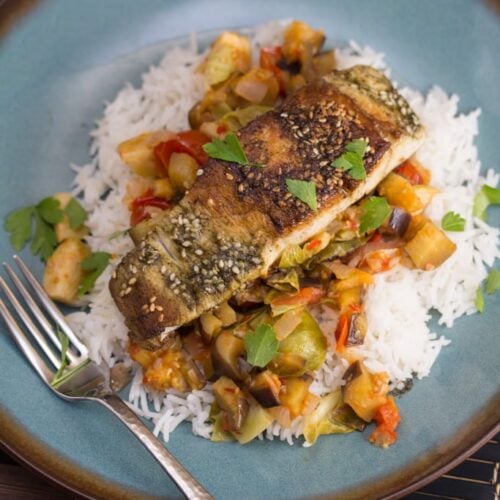
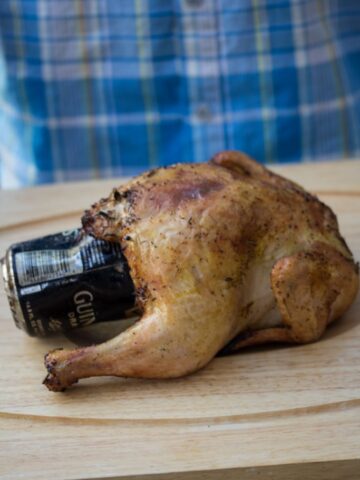
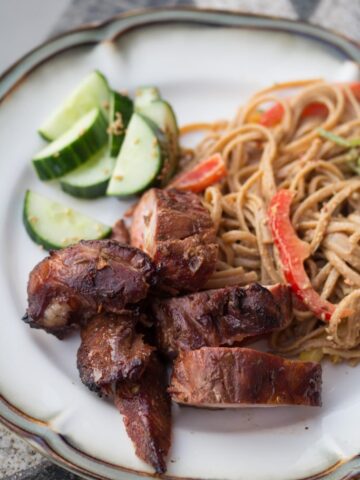
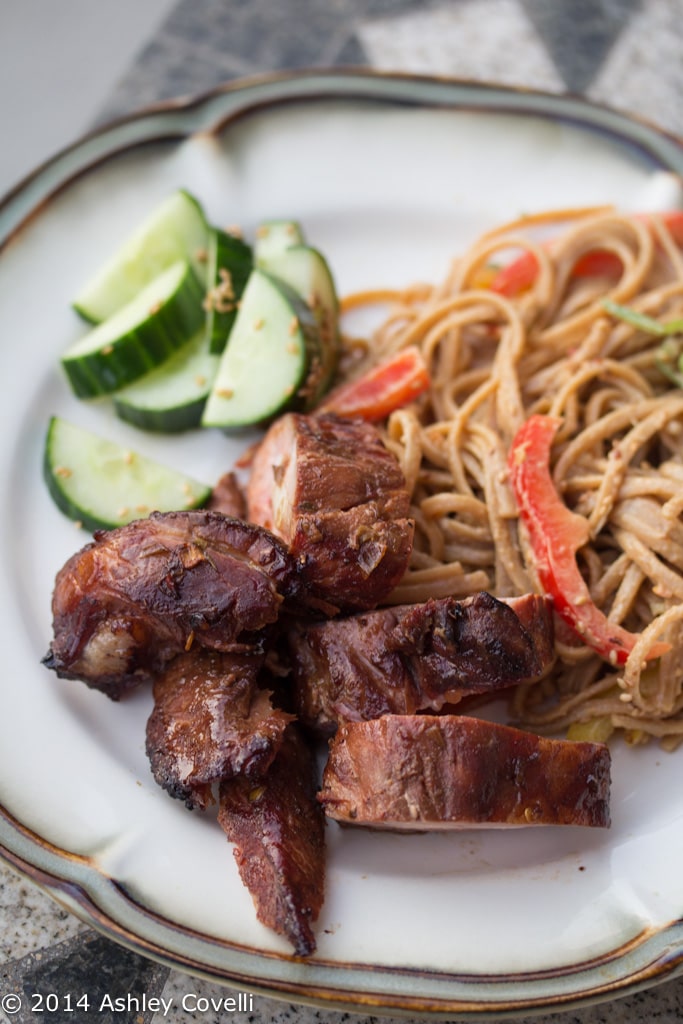
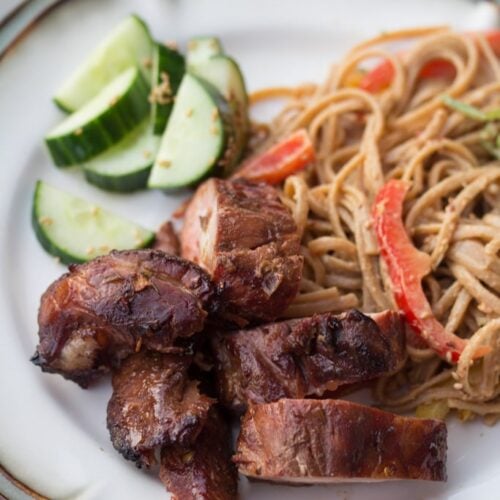
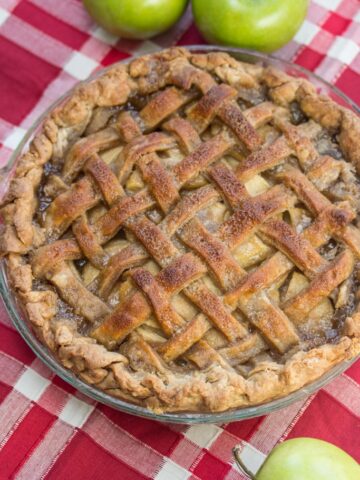
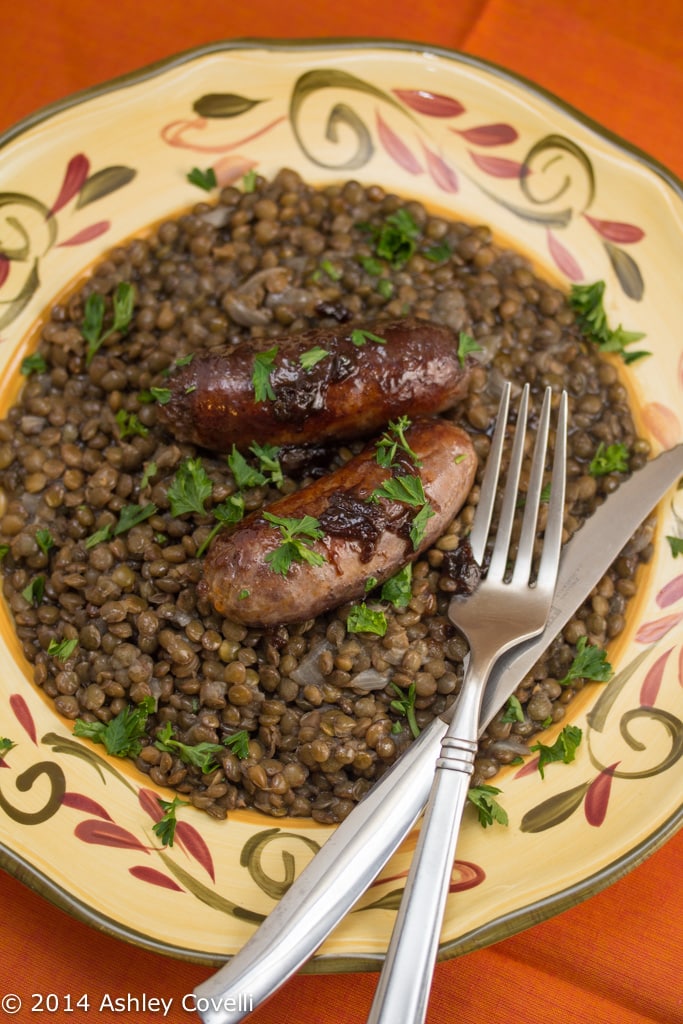
    This meal may not be the prettiest out there, but it is one of the tastiest plates of comfort food I've had in quite some time. It's not surprising that this is the type of food that Nigella Lawson grew up with!

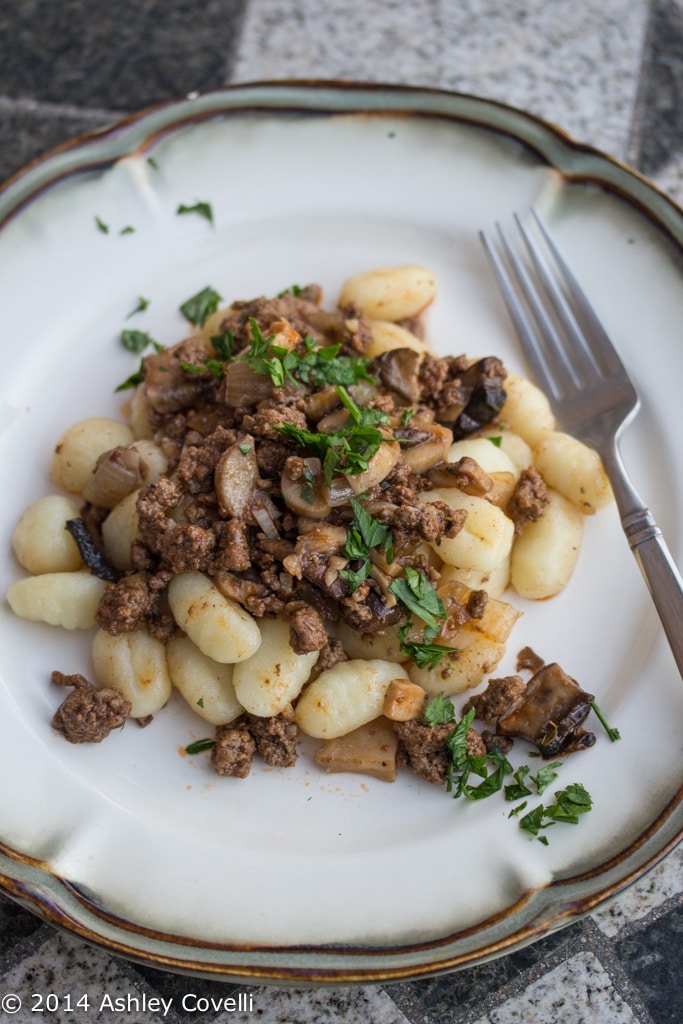
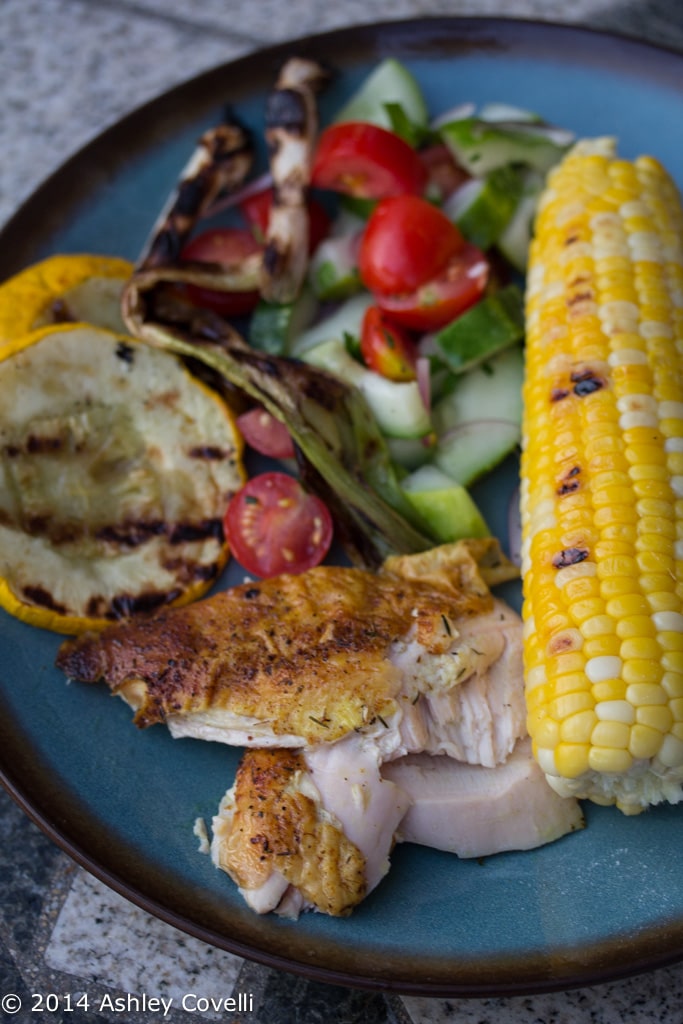
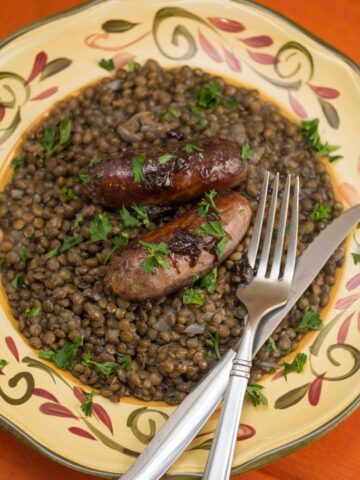
    Italian sausages are browned all over and then cooked in a garlicky red wine bath, then served on top of hearty green lentils. I used spicy Italian sausage here, and was totally blown away with how much flavor came out of these few ingredients.

    Italian Sausages with Lentils

    My husband practically licked his plate clean. It's safe to say that I'll definitely be making this one again and again!

    Funny side note: the next day, my toddler asked us if we were going to eat "wet salami and beans" again, and we were cracking up, because... well... I guess it did kind of look like that's what we were enjoying so much! Ha!

    Italian Sausages with Lentils
    Mom's Secret Recipe File - Chris Styler
    Nigella Lawson (Adapted from Nigella Bites)

    3 - 4 tablespoons olive oil (not extra virgin)
    1 onion, finely chopped
    Sprinkling of salt
    18 ounces dried Puy lentils (about 2 ¾ cups)
    1 fat clove garlic, skin removed and squished with the flat side of a knife
    8 Italian sausage links
    ⅓ cup plus 1 tablespoon red wine
    ¼ cup water
    Flat-leaf parsley for sprinkling

    1. To cook the lentils, put 2 to 3 tablespoons of oil into a good-sized saucepan (one that has a lid that fits) on the heat, and when it's warm, add the onion. Sprinkle with salt (which helps prevent it from browning) and cook over a low to medium heat until soft, about 5 minutes. Add the lentils, stir well, and cover generously with cold water. Bring to a boil, cover, and simmer gently for 30 minutes or so, until cooked and most if not all of the liquid has been absorbed. I don't add salt at this stage since the sauce provided by the sausages later (which will be poured over the lentils) will be pretty salty itself. So wait and taste. And remember: You can of course cook the lentils in advance.

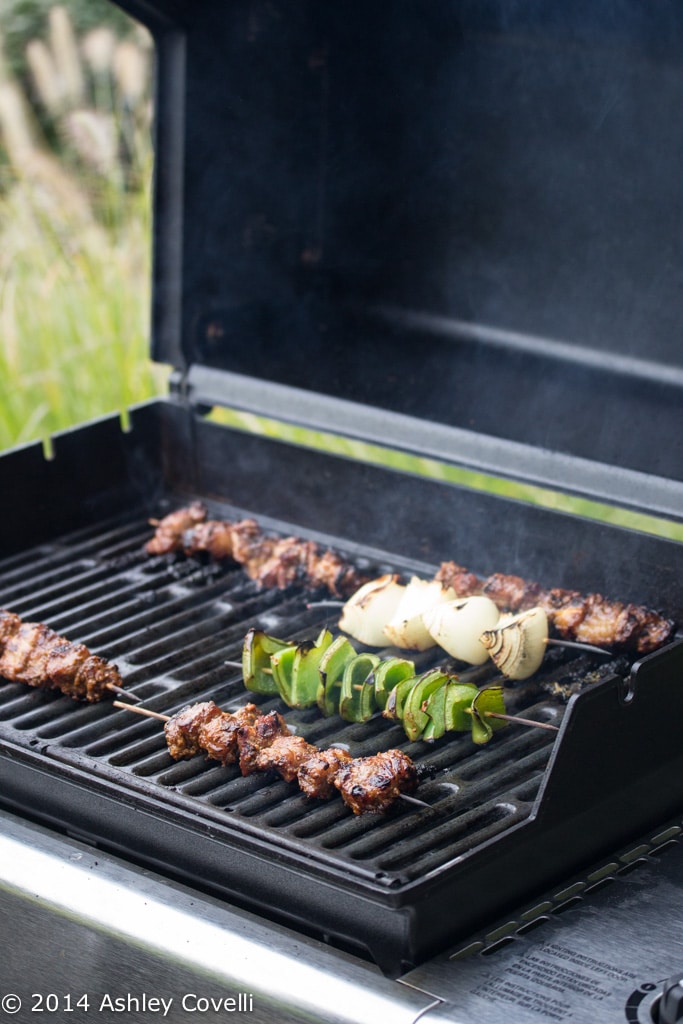
    2. Anyway, when the lentils are nearly ready or when you're about to reheat them, put a heavy frying pan over medium heat, cover with a film of oil, and add the bruised garlic. Cook for a few minutes, then add the sausages and brown them on both sides, which won't take more than 5 minutes or so - throw in the wine and water, and let bubble up. Cover the pan with a lid or aluminum foil and cook about 15 minutes. Using a fork, mash the now-soft garlic into the sauce and taste for seasoning. Add a little more water if it's too strong.

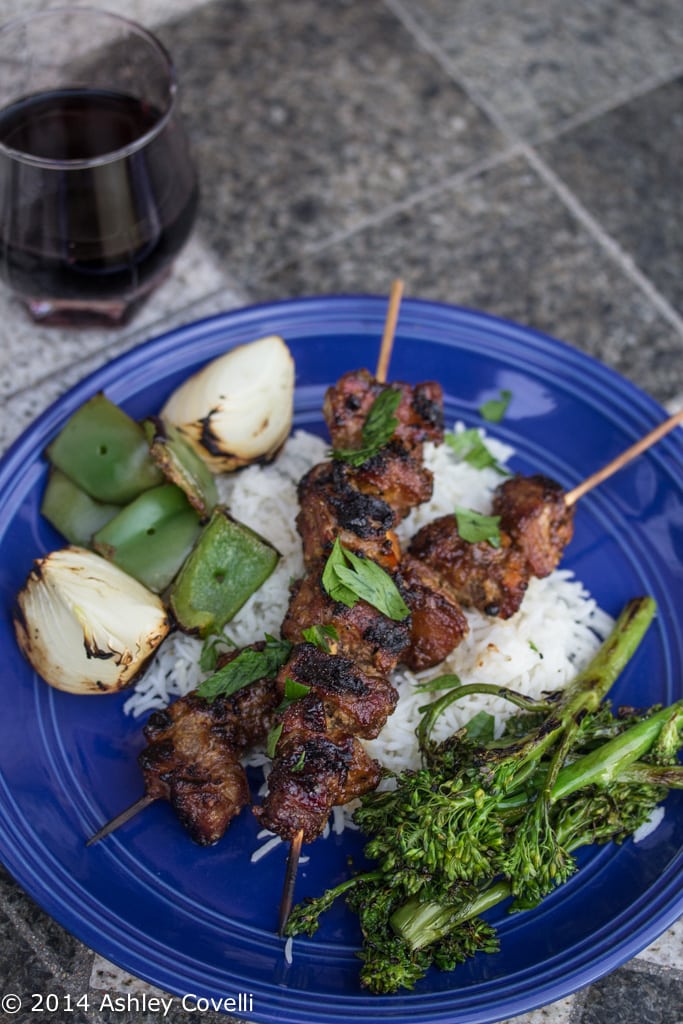
    3. Remove the lentils to a shallowish bowl or dish. (I evacuate the sausages from their cooking pan, plonk the lentils in, and then proceed). Cover with sausages and their garlicky, winey gravy. Sprinkle on some flat-leaf parsley.

    Big Flavors Rating: 5 Stars

    Rebecca T's Kale Salad

    October 22, 2014 by Ashley 3 Comments

    Rebecca T's Kale Salad

    This summer, I was lucky enough to meet up with a group of food lovers that I've been friends with online for a decade or so. It was wonderful to get together and have a big ol' potluck!

    Because potlucks where everyone knows how to cook amazing food are the best kinds of potlucks!

    Rebecca T's Kale Salad

    This kale salad was one of the items that was prepared for the potluck. The kale was fluffy, creamy and delicious, and I loved the combination of mix-ins. I asked for the recipe, noting that I needed to make it for myself at home!

    The friend who made this at the potluck didn't include the nutritional yeast, but I wanted to try it out. It added a nice, nutty flavor. Massaging avocado into the kale makes for a nice, creamy dressing that coats every bit of this tasty salad.

    Rebecca T's Kale Salad

    This salad is a nice change of pace from the typical kale salads that I've had. I loved the garlicky, lemony flavors that were paired with crunchy nuts and seeds and sweet currants. My friend made it with dried cranberries, which I think tasted even better. I'll definitely be making this one again!

    Rebecca T's Kale Salad
    Adapted from Whole Foods

    1 bunch kale
    1 ripe avocado
    ½ teaspoon kosher salt
    juice of 1 lemon
    ½ teaspoon garlic powder
    2 teaspoon honey
    2 teaspoon nutritional yeast powder [this is a hard ingredient to find but you can get it in the bulk section at Whole Foods and it's super cheap. It adds a nice "something" to the salad but I'm sure you could leave it out.]
    ¼ cup dried sweetened cranberries or currants
    ¼ cup raw pumpkin seeds [also in bulk section at WF]
    ¼ cup pine nuts, lightly toasted

    Wash kale, remove stems and chop. Place in large bowl with avocado and salt. Massage kale [I know it's weird, just do it] until well-coated with avocado. This wilts the kale and makes it much much less tough. Add remaining ingredients and mix it all up with your hands.

    This is delicious AND you get a moisturizing hand treatment to boot! 🙂

    Big Flavors Rating: 4 Stars

    Whole Wheat Gramigna Pasta with Roasted Corn & Baby Greens

    October 21, 2014 by Ashley Leave a Comment

    Whole Wheat Gramigna Pasta with Roasted Corn & Baby Greens

    Fresh whole wheat pasta is tossed with a buttery, herb-studded sweet corn and pecorino cheese sauce. A heaping pile of baby greens tops this bowl of comfort food for a surprisingly hearty meal!

    Whole Wheat Gramigna Pasta with Roasted Corn & Baby Greens

    This was another hit from a recent Blue Apron shipment. I was surprised at how filling it was for a vegetarian dish. The sweet corn-butter-cheese combo is a big hit, and the addition of fresh basil really worked for us.

    Just a note - the recipes from Blue Apron call for "1 bunch" of herbs, and that correlates to the size of the "bunch" they send if you're using their service (which I'm absolutely in love with!). I'd say their bunches are about 1-2 tablespoons.

    Whole Wheat Gramigna Pasta with Roasted Corn & Baby Greens

    2 Cloves Garlic
    2 Ears Corn
    1 Bunch Basil
    1 Shallot
    2 Tablespoons Butter
    10 Ounces Fresh Whole Wheat Gramigna Pasta
    ⅓ Cup Grated Pecorino Cheese
    ½ Ounce Baby Greens

    See Blue Apron for the full recipe.

    Swedish Roast Chicken with Spiced Apple Rice

    October 20, 2014 by Ashley 1 Comment

    Swedish Roast Chicken With Spiced Apple Rice

    I came across a wonderful cookbook at my local library that has been a surprise hit in my house for the last few weeks. It's a book full of recipes from well-known chefs' mothers. It's not the prettiest book out there, but this no frills volume is home to some seriously tasty food that was the pure comfort food for many of today's best chefs.

    The first recipe I tried from this book was this Swedish roast chicken. An aromatic, exotic spice blend is rubbed on the chicken which is then stuffed with a blend of sweet potatoes, apples, onions, shallots and garlic. I would have never thought to add fresh mint to roasting veggies, but it went well with the fresh thyme and really gave the veggies an interesting flavor that we enjoyed.

    Swedish Roast Chicken With Spiced Apple Rice

    Something that totally blew my mind here - this recipe has you deglaze the pan juices from the roast chicken and then add a little water to it and cook the rice in all of that goodness. There's so much flavor in there! Stirring in a little yogurt with the roasted apples and veggies at the end helped to bind it together. It was super fragrant and absolutely delicious.

    This cookbook is definitely on my wish list now. I really liked reading the bios and intros from each chef and seeing what 3-4 recipes they chose to share. There's a great variety of cuisines represented. Definitely worth checking out!

    Swedish Roast Chicken With Spiced Apple Rice
    Mom's Secret Recipe File - Chris Styler
    Marcus Samuelsson's Grandmother (Adapted from Aquavit and the New Scandinavian Cooking)

    1 medium sweet potato, peeled and cut into ½-inch cubes
    1 large onion, cut into ½-inch cubes
    2 Granny Smith apples, peeled, cored and cut into ½-inch cubes
    2 shallots, coarsely chopped
    1 garlic clove, chopped
    1 teaspoon fresh thyme leaves
    1 tablespoon finely chopped fresh mint
    2 tablespoons water
    1 tablespoon olive oil
    ½ teaspoon ground cinnamon
    2 cardamom pods or ¼ teaspoon ground cardamom
    2 tablespoons water
    1 tablespoon olive oil
    ½ teaspoon ground cinnamon
    2 cardamom pods or ¼ teaspoon ground cardamom
    2 star anise
    2 whole cloves or ⅛ teaspoon ground cloves
    2 black peppercorns
    4 white peppercorns (or 4 additional black peppercorns)
    1 teaspoon kosher salt
    1 (3 ½ pound) chicken, preferably free-range

    For the spiced apple rice:
    1 cup long grain white rice
    1 teaspoon kosher salt, or to taste
    1 ½ tablespoons yogurt
    Freshly ground black pepper

    1. Preheat the oven to 350°F.

    2. Blanch the sweet potato in boiling water for 2 minutes. Drain, rinse under cold water, and drain again. In a medium bowl, combine the sweet potato, onion, apples, shallots, garlic, thyme and mint. Combine the water and the olive oil and add to the vegetable mixture, tossing to coat.

    3. Using a mortar and pestle, lightly crush the cinnamon, star anise, cloves, black peppercorns, and white peppercorns with the salt. (Or combine the spices on a cutting board and crush with the bottom of a heavy pot.) Add half of the spice mixture to the vegetables and reserve the rest.

    4. Rinse the chicken inside and out and pat dry with paper towels. Remove all the excess fat. Lightly stuff the bird's cavity with about half the vegetable mixture and tie its legs together with kitchen string. Place the chicken in a roasting pan and rub it all over with the reserved spice mixture. Scatter the remaining vegetable mixture around the chicken.

    5. Roast for about 1 ½ hours, or until an instant-read thermometer inserted into the thigh reaches 160°F. After the first hour, or when the vegetables in the pan are tender, remove them from the pan and set aside in a bowl. Check the pan occasionally as the chicken roasts, adding a bit of water if it becomes completely dry.

    6. When the chicken is cooked, transfer it to a cutting board. Remove the vegetables from the cavity and and add to the other vegetables in the bowl. Cover the chicken loosely with foil and let rest while you cook the rice.

    7. Add ¼ cup hot water to the roasting pan, stirring well to deglaze the pan. Pour the liquid into a measuring cup, skim off the fat, and add enough water to make 2 cups of liquid. Pour this liquid into a medium saucepan. Add the rice and the salt and bring to a boil over high heat. Reduce the heat to low, cover, and cook for about 18 minutes, until the rice is tender and all the liquid is absorbed.

    8. Fold the yogurt and reserved vegetables into the rice. Season with salt if necessary and pepper. Carve the chicken and serve with the rice.

    Big Flavors Rating: 5 Stars

    Lamb Kebabs in Pomegranate-Walnut Marinade (Kebab-e Torsh)

    October 16, 2014 by Ashley Leave a Comment

    Lamb Kebabs in Pomegranate-Walnut Marinade (Kebab-e Torsh)

    This was one of the first recipes to catch my eye from the Persian cookbook I picked up recently. I love pomegranate molasses, and the idea of a thick, flavorful lamb marinade sounded completely irresistible.

    Ground walnuts and thick, tangy pomegranate molasses turn this marinade into a paste that is slathered over cubes of lamb. When you're ready to cook, fire up the grill and dinner will be ready in a flash!

    Lamb Kebabs in Pomegranate-Walnut Marinade (Kebab-e Torsh)

    The only mistake I made here was that I didn't brush enough of the marinade off of the lamb before we grilled it. It's very potent stuff, so it was a little overwhelming. But the blend of flavors was really beautiful!

    Pomegranate molasses is something I don't use often enough, and this was a good way to use up a lot from the bottle I had in the kitchen.

    Lamb Kebabs in Pomegranate-Walnut Marinade (Kebab-e Torsh)

    To go with the lamb, I steamed some basmati rice and had Dino grill skewers of onions and green bell peppers. I also requested some grilled broccoli, sprinkled with a little truffle salt, because that's my latest grilled side dish addiction. YUM!

    I served this with a glass of 2011 Rodney Strong Symmetry (Red Meritage), which was bold, rich and a bit spicy. It went really well with the strong flavors of our dinner. Definitely a great combination!

    Lamb Kebabs in Pomegranate-Walnut Marinade (Kebab-e Torsh)
    The New Persian Kitchen - Louisa Shafia

    Serves 6

    2 pounds lamb tenderloin or boneless shank or neck, cut into 1 ½-inch chunks
    1 cup walnuts
    ¾ cup pomegranate molasses
    2 cloves garlic, crushed
    2 tablespoons grapeseed oil
    1 cup loosely packed fresh flat-leaf parsley, plus extra chopped for garnish
    Sea salt and freshly ground black pepper

    Place the meat in a large casserole dish. In a food processor, grind the walnuts, pomegranate molasses, garlic and oil into a puree. Add the parsley and pulse into small bits. Pour the marinade over the meat and toss well. Cover and refrigerate overnight.

    If using wooden or bamboo skewers, soak them in salty water for a couple of hours before grilling. Thread 3 or 4 pieces of meat onto each skewer ¼ inch apart, leaving 2 inches of space at the end. Discard the marinade. Brush or wipe extra marinade from the skewers. Leave the meat out while you heat the grill so it can come up to room temperature (no more than 45 minutes total).

    Prepare a hot grill.

    Lightly oil the grill and grill the kebabs for 6 to 8 minutes, turning occasionally. When done, the meat should be slightly charred on the outside and very pink on the inside.

    Transfer to a serving platter and season with salt and pepper. Garnish with parsley and serve.

    Big Flavors Rating: 4 Stars

    Applegate HALF TIME Lunch Kit Review + Giveaway {CLOSED}

    October 15, 2014 by Ashley 4 Comments

    Applegate HALF TIME Lunch Kit Review + Giveaway

    This post was created in partnership with Stonyfield. As always, all opinions are 100% my own.

    When I was a kid, I loved the idea of Lunchables - a pre-packed lunch, all ready to go. The only problem was... well... they tasted AWFUL.

    Now that I'm a parent, I love packing lunches for my son. I try to include a variety of items to keep them healthy yet exciting, but sometimes I just don't have the time. So when Applegate teamed up with Stonyfield and Annie's to make HALF TIME lunch kits, I was really anxious for my son to try them out!

    Applegate HALF TIME Lunch Kit Review + Giveaway

    We met some friends for a play date at a local park, and I figured it would be a perfect time to try them out. There are 3 varieties - ham & cheese, turkey & cheese and bologna & cheese. My son and his friend tried out the ham and turkey ones first. They were so excited to have their own "special lunch boxes", and my friend and I were happy to give them food that was free of nitrates and artificial ingredients.

    Applegate HALF TIME Lunch Kit Review + Giveaway

    The kits are great - they come with meat, cheese and crackers - all separated, because you know how some kids can't stand to have different types of food touch each other. <AHEM> (my son)

    They also contain a bag of snacks from Annie's (either crackers or gummy snacks) and a tube of Stonyfield organic yogurt. There's a good mix of sweet and savory, and enough variety to keep the kids' attention.

    My friend also noticed (because, unlike me, she didn't tear right into the package) that you can open them into their own little box with a lid. For older kids, there are puzzles on the inside of the box, and for the moms all ages, there are jokes printed on the yogurt packages.

    Applegate HALF TIME Lunch Kit Review + Giveaway

    The samples I was sent came with a reusable lunch bag from Applegate and some permanent markers so that my son could decorate his own bag.

    Double wielding markers is the most efficient way of applying your chosen design, of course 😉

    Applegate HALF TIME Lunch Kit Review + Giveaway

    He was so excited to decorate BOTH SIDES of his own special lunch bag.

    My tablecloth may have also gotten a little dose of extra color. Oops!

    Applegate HALF TIME Lunch Kit Review + Giveaway

    I was afraid he wouldn't be into bologna one (it's never been one of my favorite types of meat), but he really liked it! He also loved calling out all of the shapes ("The meat is a circle! The cheese is a square! The crackers are hexagons!"). It's a very fun and easy way to get some good, healthy food into his tummy! All I need to do is grab a box and a drink for him and lunch is ON!

    Would you like to win your own HALF TIME prize pack, including all 3 varieties of HALF TIME, a draw-your-own lunch bag, a set of permanent markers, coupons and an activity book? To enter to win, leave a comment below telling me what flavor you are most looking forward to trying. The contest will close on Friday, October 31, 2014 at 12 noon (Eastern Standard Time). One winner will be chosen via random.org and will be contacted via email to get mailing information. U.S. residents only. Good luck, everyone!

    UPDATE - The winner has been selected via random.org - CONGRATS to Becca!

    Slow Cooker Cider Applesauce

    October 15, 2014 by Ashley Leave a Comment

    Slow Cooker Cider Applesauce

    We took a trip to a local orchard a few weeks ago to pick apples. We picked a half bushel, and one of the things I wanted to use a bunch of them for was applesauce.

    This applesauce is just apples and a few spices - no sugar added! The spices make it taste like apple cider. It cooks away in the slow cooker for a few hours, and then you just whisk it together or blend it (for a smoother sauce).

    Slow Cooker Cider Applesauce

    This applesauce was delicious! I used a mix of a few different types of apples which added a nice depth of flavor. The cinnamon I used was really potent (gotta love Penzeys!) so it was maybe a little much, but otherwise it was really tasty.

    I gave the apples a stir about halfway through, because the spices were only on the top and I didn't want them to burn. Next time I'd probably toss it all together before I start cooking it. I whisked lightly and it gave it a really nice, not-too-smooth texture.

    Slow Cooker Cider Applesauce (No Sugar Added)
    Allrecipes.com - Cookingfor7

    PREP: 10 mins
    COOKL 4 hrs
    READY IN: 4 hrs 10 mins
    MAKES: 16 servings

    5 pounds apples - peeled, cored, and thinly sliced
    1 ½ tablespoons ground cinnamon
    ½ teaspoon ground cloves
    ¼ teaspoon ground nutmeg

    Layer apples into a slow cooker. Sprinkle cinnamon, cloves, and nutmeg over the apples.

    Cook on High until apples are soft, 4 to 5 hours. Whisk apples vigorously for a chunkier-style applesauce. Purée with an immersion blender for a smoother applesauce.

    Big Flavors Rating: 4 Stars

    Steakhouse Salad

    October 14, 2014 by Ashley Leave a Comment

    Steakhouse Salad

    One of the things I love about having Italian in-laws is that when they cook, there's always a ton leftover, and they usually send us home with tupperware full of leftovers.

    So last week, after a meal of beef tenderloin with roasted mushrooms, onions and sautéed broccoli, I decided to turn the leftovers into a steakhouse inspired salad.

    Steakhouse Salad

    I piled up the leftover steak, mushrooms, onions & broccoli on top of a bed of baby arugula, topped it with some Saint Agur blue cheese, and halved grape tomatoes. A little sea salt, freshly cracked black pepper, aged balsamic and a really nice extra-virgin olive oil brought it all together.

    I really liked the tanginess of the blue cheese and balsamic with the tender steak. This was a great way to use up leftovers, especially with a small amount of steak. It would be a great use of restaurant leftovers as well!

    Salted Caramel Apple Pie Bars

    October 12, 2014 by Ashley 4 Comments

    Salted Caramel Apple Pie Bars

    Remember that Homemade Salted Caramel Sauce that I posted yesterday? Yeah. It was for these beauties.

    My husband has dubbed this the best dessert I've ever made. And I have to agree. I mean, I have made a lot of really tasty desserts so far this year (like this Nutter Butter Icebox Cake, this Cranberry Orange Trifle with Candied Walnuts or these Chewy Peanut Butter Chocolate Chip Cookies), but these apple-filled bars just take it to a whole new level.

    Salted Caramel Apple Pie Bars

    A shortbread crust is topped with a layer of spiced apples which is then topped with an oat and brown sugar streusel. It's baked, chilled, sliced and then drizzled with a little bit (or a lot!) of homemade salted caramel sauce.

    Words really can't describe how delicious this dessert was. Dino has already told me there's no way I could ever outdo this one, and doesn't even want me to try for fear that he'll become a binge-eating hermit. That's not a direct quote, but also not far from what he actually said to me.

    Salted Caramel Apple Pie Bars

    I used a mix of apples from our apple picking adventure a few days ago, and it worked out really well. I used 3 small/medium apples so I could get a nice variety of apple flavor in my bars.

    And it so delivered. If you need an OMG wow dessert, I can't recommend this one highly enough.

    Salted Caramel Apple Pie Bars

    Salted Caramel Apple Pie Bars
    Sally's Baking Addiction

    prep time: 25 MINUTES total time: 3 HOURS, 20 MINUTES

    Shortbread Crust
    ½ cup (115g) unsalted butter, melted
    ¼ cup (50g) granulated sugar
    1 teaspoon vanilla extract
    ¼ teaspoon salt
    1 cup (125g) all-purpose flour

    Apple Filling
    2 large apples, peeled and thinly sliced (¼ inch thick)*
    2 Tablespoons all-purpose flour
    2 Tablespoons granulated sugar
    1 teaspoon ground cinnamon
    ⅛ teaspoon ground nutmeg

    Streusel
    ½ cup (40g) old-fashioned oats
    ⅓ cup (70g) light or dark brown sugar
    ¼ teaspoon ground cinnamon
    ¼ cup (30g) all-purpose flour
    ¼ cup (60g) unsalted butter, cold and cubed
    Homemade salted caramel sauce

    Preheat the oven to 300F degrees. Line an 8-inch baking pan with aluminum foil, leaving an overhang on all sides. Set aside.

    Make the crust: Stir the melted butter, granulated sugar, vanilla, and salt together in a medium bowl. Add the flour and stir until everything is combined. Press the mixture evenly into the prepared baking pan. Bake for 15 minutes while you prepare the filling and streusel.

    Make the apple filling: Combine the sliced apples, flour, granulated sugar, cinnamon, and nutmeg together in a large bowl until all of the apples are evenly coated. Set aside.

    Make the streusel: Whisk the oats, brown sugar, cinnamon, and flour together in a medium bowl. Cut in the chilled butter with a pastry blender or two knives (or even with your hands) until the mixture resembles coarse crumbs. Set aside.

    Remove the crust from the oven, and turn the oven up to 350F degrees. Evenly layer the apples on top of the warm crust. It will look like there are too many apple slices, so layer them tightly and press them down to fit. Sprinkle the apple layer with streusel and bake for 30-35 minutes or until the streusel is golden brown.

    Remove from the oven and allow to cool for at least 20 minutes at room temperature, then chill in the refrigerator for at least 2 hours. Lift the foil out of the pan using the overhang on the sides and cut into bars. Once cut, pour salted caramel sauce on top. These apple pie bars can be enjoyed warm or cold. The bars will stay fresh in an airtight container in the refrigerator for 3 days or frozen up to 3 months - thaw overnight in the fridge, then drizzle with salted caramel before serving.

    Big Flavors Rating: 5 Stars

    Homemade Salted Caramel Sauce

    October 11, 2014 by Ashley 2 Comments

    Homemade Salted Caramel Sauce

    I've made salted caramel a few times before, but this method was new to me. I didn't stir it a ton at the beginning, but once the sugar started to get some color, I definitely kept it moving around.

    Homemade Salted Caramel Sauce

    I didn't have salted butter, and I wanted to make sure my salted caramel tasted salted, so I added an additional ¼ teaspoon of salt.

    This turned out beautifully! Every time I had to go back into the jar to get some more to heat up, I ended up snacking on it cold, too. It would be good on so many different desserts, but is equally delicious delivered to your mouth directly via spoon. Or finger. No judgement here.

    Homemade Salted Caramel Sauce

    Homemade Salted Caramel Sauce
    Sally's Baking Addiction

    1 cup (200g) granulated sugar
    6 Tablespoons (90g) salted butter, cut up into 6 pieces
    ½ cup (120ml) heavy cream
    1 teaspoon salt

    1. Heat granulated sugar in a medium saucepan over medium heat, stirring constantly with a rubber spatula.

    2. Sugar will form clumps and eventually melt into a thick brown, amber-colored liquid as you continue to stir. Be careful not to burn.

    3. Once sugar is completely melted, immediately add the butter. Be careful in this step because the caramel will bubble rapidly when the butter is added.

    4. Stir the butter into the caramel until it is completely melted, about 2-3 minutes.

    5. Very slowly, drizzle in ½ cup of heavy cream while whisking. Since the heavy cream is colder than the caramel, the mixture will rapidly bubble and/or splatter when added.

    6. Allow the mixture to boil for 1 minute. It will rise in the pan as it boils.

    7. Remove from heat and stir in 1 teaspoon of salt. Allow to cool down before using.

    8. Cover the caramel tightly and store for up to 2 weeks in the refrigerator. Warm the caramel up for a few seconds before using in a recipe.

    Big Flavors Rating: 5 Stars

    Wild Mushrooms and Grass-Fed Beef Over Gnocchi

    October 10, 2014 by Ashley 2 Comments

    Wild Mushrooms and Grass-Fed Beef Over Gnocchi

    This post was created in partnership with Rodney Strong Vineyards. As always, all opinions are 100% my own.

    The folks over at Rodney Strong Vineyards sent over a beautiful assortment of wine for me to review in celebration of their 25th anniversary. They sent me the same wines that were served at a four-city celebrity chef event benefiting the James Beard Foundation on September 20th.

    Wild Mushrooms and Grass-Fed Beef Over Gnocchi

    The first wine that I decided to try was the 2010 Brothers Ridge Cabernet Sauvignon. I was inspired to create a main course featuring grass-fed beef and a hearty mix of mushrooms to go with this bold red. I used the mushrooms that were leftover from when I made the Chef Jehangir Mehta's Mushroom Blended "Graffiti" Burgers, which is why the amounts I used are so precise.

    The mushrooms added a nice depth of flavor to the beef, and the tomato paste and Worcestershire make it wonderfully rich. I served this over gnocchi to get a kind of "meat and potatoes" vibe going, but it would be great over rice or pasta, too. Maybe even over mashed potatoes. Hmm...

    Wild Mushrooms and Grass-Fed Beef Over Gnocchi

    The wine went perfectly with this dish. I was seriously impressed with how smooth yet bold it was. It had a really deep, dark fruit flavor that I absolutely adored. My husband doesn't drink wine very often (he's more of a craft beer guy), but he was blown away with it too, and has since been interested in trying out each of the other bottles that they sent over.

    Wild Mushrooms and Grass-Fed Beef Over Gnocchi

    This meal was pure comfort food heaven! I may not have gotten to attend the 25th anniversary celebrations, but this meal was definitely fit for a special occasion.

    Summer Ciambotta with Purple Potatoes & Farro

    October 9, 2014 by Ashley Leave a Comment

    Summer Ciambotta with Purple Potatoes & Farro

    This stew is rich and hearty without the heaviness of meat. It’s a really nice segue between summer and fall. It takes a bit of time to simmer away on the stove, but it’s totally worth it.

    We really enjoyed the brightness that the fresh herbs added - especially the mint. It really brought everything together.

    Summer Ciambotta with Purple Potatoes & Farro

    Just a note - the recipes from Blue Apron call for “1 bunch” of herbs, and that correlates to the size of the “bunch” they send if you’re using their service (which I’m absolutely in love with!). I’d say their bunches are about 1-2 tablespoons.

    10 Ounces Heirloom Tomato
    6 Ounces Purple Potatoes
    3 Cloves Garlic
    1 Bunch Mint
    1 Bunch Parsley
    1 Lemon
    1 Red Onion
    1 Zucchini
    2 Tablespoons Butter*
    ¾ Cup Pearled Farro

    See Blue Apron for the full recipe.

    Turmeric Chicken with Sumac and Lime

    October 8, 2014 by Ashley Leave a Comment

    Turmeric Chicken with Sumac and Lime

    This succulent chicken dish was the main course for our Persian dinner a while back. It was rich and absolutely delicious!

    Turmeric Chicken with Sumac and Lime

    Chicken thighs are tossed in a mix of turmeric, salt and pepper and braised in a garlicky cooking liquid until tender. The pan juices are then reduced into a delicious sauce and poured over the chicken, which gets a sprinkling of sumac. A garnish of lime is the perfect, tangy accompaniment to the rich chicken.

    Turmeric Chicken with Sumac and Lime

    We really enjoyed this meal. I served it with steamed basmati rice, Turkish Roasted Tomato and Red Pepper Dip and Fresh Herb Platter (Sabzi Khordan).

    Turmeric Chicken with Sumac and Lime
    The New Persian Kitchen – Louisa Shafia

    Serves 4

    1 teaspoon ground turmeric
    Sea salt and freshly ground black pepper
    4 bone-in chicken thighs
    2 tablespoons grapeseed oil
    ¾ cup water
    4 cloves garlic, minced
    2 juicy limes, halved
    Sumac, for garnish

    In a small bowl, mix the turmeric with 1 tablespoon salt and 2 teaspoons pepper. Place the chicken on a rimmed baking sheet and sprinkle with the spice mixture, turning to coat both sides.

    Heat a large skillet over medium-high heat and add the oil. Brown the chicken well on both sides, about 7 minutes per side. Pour in the water, then add the garlic, stirring it into the water. Bring the water to a boil, then turn down the heat to low and cover. Braise the chicken for 2 minutes, until the inside is opaque. Transfer the chicken to a serving platter, turn up the heat to high, and reduce the cooking liquid for a few minutes, stirring occasionally until it’s slightly thickened. Season to taste with salt and pepper, and pour the sauce over the chicken.

    Dust the chicken with sumac and pepper, garnish with lime halves, and serve.

    Big Flavors Rating: 4 Stars

    Fresh Herb Platter (Sabzi Khordan)

    October 7, 2014 by Ashley Leave a Comment

    Fresh Herb Platter (Sabzi Khordan)

    I made this appetizer to go along with the Turkish Roasted Tomato and Red Pepper Dip for our Persian meal a while back. This traditional appetizer platter is bursting with freshness.

    Fresh Herb Platter (Sabzi Khordan)

    A blend of toasted spices and olive oil is poured over feta cheese as the centerpiece of this fragrant spread. I was able to find some fresh feta at a local Middle Eastern market, and it was absolutely delicious. I skipped the caraway seeds, because that's one flavor I just can't seem to get myself to enjoy.

    Fresh Herb Platter (Sabzi Khordan)

    I really like her tip for removing bitterness from walnuts at the end of the recipe. That was a new one for me and worked out well.

    This is a great way to start any Persian meal. I like to platters like this out throughout the meal so that people can pick on the components as often as they like.

    Fresh Herb Platter (Sabzi Khordan)
    The New Persian Kitchen - Louisa Shafia

    Serves 4 to 6

    8 ounces feta cheese
    1 tablespoon coriander seeds
    1 tablespoon cumin seeds
    1 tablespoon caraway seeds
    ⅓ cup extra-virgin olive oil
    Coarse salt, such as Maldon salt, fleur de sel, or kosher salt
    2 bunches whole fresh herbs, in any combination: spearmint, basil, cilantro, flat-leaf parsley, tarragon, dill, chives, marjoram
    1 bunch scallions, quartered crosswise, roots removed
    2 cups walnuts (see Note below)
    6 radishes, trimmed and quartered
    Lavash or other flatbread

    Drain the feta and place it in a medium bowl. Grind the spices coarsely, if desired. Heat a small skillet over high heat. Add the coriander, cumin, and caraway seeds, and shake the pan continuously until the spices start to release their aroma, about 2 minutes. Immediately transfer to a bowl and pour in the olive oil. Add a pinch of coarse salt. Swirl the spices in the oil and steep for a few minutes. Pour the mixture over the feta. You can even work it in with your hands, gently crumbling the feta, if desired.

    Wash and dry the herbs. Trim the stems, but leave them intact. Place the herbs on a large platter in a few fluffy piles. Place the walnuts on the platter, along with the radishes and lavash. Transfer the feta to the platter and garnish it with coarse salt.

    For a single serving, pick up a few stalks of herbs. Tear the flatbread into a manageable piece and stuff it with the herbs, walnuts, a small piece of cheese, and a radish or two. Fold and eat like a sandwich.

    Note:
    To remove bitterness from the walnuts, place them in a bowl, add boiling water to cover and a pinch of salt, and soak from 1 hour up to overnight. Before serving, drain and rinse until the water runs clear.

    Big Flavors Rating: 4 Stars

    Turkish Roasted Tomato and Red Pepper Dip

    October 6, 2014 by Ashley 3 Comments

    Turkish Roasted Tomato and Red Pepper Dip

    I’ve been wanting to check out this book for quite some time now. Being half Persian, I absolutely adore Persian cuisine and don’t eat it nearly often enough! This book is absolutely beautiful and celebrates traditional Persian dishes with a modern twist.

    There are a lot of meat-laden Persian meals, so the author includes notes after those recipes for making them vegetarian-friendly (usually by swapping the meat for mushrooms or tempeh). Modernizations like this and the use of whole grains really makes this book stand out among my other go-to cookbooks.

    Turkish Roasted Tomato and Red Pepper Dip

    The first dish I made from this cookbook was this Turkish Roasted Tomato and Red Pepper Dip. It was absolutely delicious! It reminded me of a super fresh version of the Muhummara that I’ve been making for several years now.

    Fresh tomatoes and a red bell pepper are tossed with oil and roasted together until they get nicely caramelized. The veggies are then blended with a mix of aromatic ingredients to form a smooth dip that's rich and full of Middle Eastern flavor.

    I served this with some pita bread, and it disappeared really quickly!

    Turkish Roasted Tomato and Red Pepper Dip
    The New Persian Kitchen - Louisa Shafia

    Makes 2 cups

    3 medium to large tomatoes (1 ½ pounds), halved
    1 red bell pepper, halved and seeded
    1 tablespoon grapeseed oil
    Sea salt and freshly ground black pepper
    2 cloves garlic, minced
    1 shallot, minced
    3 tablespoons extra virgin olive oil
    1 tablespoon pomegranate molasses
    1 teaspoon smoked paprika
    1 cup loosely packed fresh flat-leaf parsley

    Preheat the oven to 400°F.

    Combine the tomatoes and red pepper in a large bowl and drizzle with grapeseed oil. Season with salt and pepper, and toss well to coat. Spread the vegetables on a baking sheet, and roast, stirring occasionally, for 45 minutes, until tender. Let cool.

    In a small bowl, whisk the garlic and shallot with the extra-virgin olive oil, pomegranate molasses, paprika, and a pinch of salt.

    Combine the roasted vegetables, parsley, and marinade in a food processor and pulse several times until mostly smooth. Season to taste with salt and pepper, and serve.

    Big Flavors Rating: 5 Stars

    Best Barbecue Coleslaw

    October 2, 2014 by Ashley Leave a Comment

    Overhead view of a bowl of coleslaw with a fork.

    I'm a big fan of all types of coleslaw. So when I needed to use up a head of cabbage from our friend's CSA haul, I knew that a big batch of coleslaw was in order.

    This slaw uses buttermilk, lemon juice and vinegar for extra tang, and it gets better and better the longer it hangs out in the fridge. I enjoyed this for days!

    Best Barbecue Coleslaw

    Shredding the cabbage with the shredder blade on my food processor made this pretty easy, but you can also use bags of pre-shredded cabbage like the recipe calls for if you like. This would be great at a barbecue for sure!

    Best Barbecue Coleslaw
    Southern Living October 1997

    2 (10-ounce) packages finely shredded cabbage
    1 carrot, shredded
    ½ cup sugar
    ½ teaspoon salt
    ⅛ teaspoon pepper
    ½ cup mayonnaise
    ¼ cup milk
    ¼ cup buttermilk
    2 ½ tablespoons lemon juice
    1 ½ tablespoons white vinegar

    Combine cabbage and carrot in a large bowl.

    Whisk together sugar and next 7 ingredients until blended; toss with vegetables. Cover and chill at least 2 hours.

    Big Flavors Rating: 5 Stars

    Pan-Fried Barramundi with Zahatar Over Harissa Glazed Vegetables

    October 1, 2014 by Ashley Leave a Comment

    Pan-Fried Barramundi with Zahatar Over Harissa Glazed Vegetables

    Earlier this summer, one of our neighbors went back to his hometown in Israel to visit his family. He brought back some zahatar for me to enjoy. I hadn't used the green type before - only the reddish brown, sumac studded za'atar.

    He recommended pouring some olive oil in a dish, mixing in some of the zahatar and dipping bread in it. It was delicious that way, but since I have a big bag of it now, I wanted to try out some other dishes incorporating this green spice blend.

    Pan-Fried Barramundi with Zahatar Over Harissa Glazed Vegetables

    I had some Barramundi in the freezer, so I decided to thaw it out and slather a zahatar-oil mixture over the fish and let it marinate quickly while making some spicy, glazed vegetables. I used the veggies I had on hand at the time, and it was a fantastic combination! It worked out really beautifully underneath the fish.

    You can take the veggies out of the pan after they're cooked give it a quick wipe and cook the fish right in that same pan if you wish. I served this over steamed jasmine rice and it worked out really well.

    Mexican-Style Turkey Burger with Warm Corn-Tomato Salad

    September 30, 2014 by Ashley Leave a Comment

    Mexican-Style Turkey Burger with Warm Corn-Tomato Salad

    These turkey burgers are full of Mexican spices and lime zest, making them anything but boring. They're topped with ripe avocado and a sprinkle of Cotija cheese and served alongside a warm and colorful salad.

    I had Dino fire up the grill to cook the burgers and toast the buns, but I do like the fact that the recipe has you use one pan to cook the entire meal. Less mess is always a good thing, especially on a busy weeknight.

    Mexican-Style Turkey Burger with Warm Corn-Tomato Salad

    These were some of the tastiest turkey burgers we've had. They didn't dry out and the flavors worked really well together. I really liked the salad that went alongside, and it made enough to save a little to snack on the next day. Yum!

    3 Scallions
    2 Ears Corn
    2 Ounces Cotija Cheese
    1 Avocado
    1 Large Bunch Cilantro
    1 Lime
    1 Tomato
    10 Ounces Ground Turkey
    1 Teaspoon Mexican Spice Blend (Ancho Chili Powder, Ground Chipotle, Garlic Powder & Ground Cumin)
    ¼ Cup Panko Breadcrumbs
    2 Potato Buns

    See Blue Apron for the full recipe.

    Suss-Saures Rotkraut (Sweet-And-Sour Red Cabbage)

    September 26, 2014 by Ashley Leave a Comment

    Suss-Saures Rotkraut (Sweet-And-Sour Red Cabbage)

    This tangy side was our other contribution to this month's Swiss themed Supper Club dinner. The way the recipe was originally written wasn't very clear, and had a few errors, so I've revised it below.

    Apples and brown sugar add the sweet while vinegar and lemon juice add the sour to this warming side dish while red wine and butter make it nice and rich.

    Suss-Saures Rotkraut (Sweet-And-Sour Red Cabbage)

    This went great with all of the other Swiss dishes that we enjoyed that evening. The tanginess was perfect to cut through some of the richer dishes. I'll definitely be making this one again!

    The prep work on this dish will go much faster if you shred the cabbage with the shredder blade on a food processor. My head of cabbage was gigantic, and I couldn't fit it all into the Dutch oven, so I didn't use it all. I think I see a red cabbage slaw in my future!

    Bunder Gerstensuppe (Swiss Barley Soup)

    September 25, 2014 by Ashley 1 Comment

    Bunder Gerstensuppe (Swiss Barley Soup)

    The theme of my Supper Club's September dinner was Swiss cuisine. I wanted to try to find something other than fondue to make, and it was fairly tricky to find recipes for things that weren't Swiss cheese or Swiss chard.

    It was frustrating - I really wanted to find something authentic, especially since I have some Swiss ancestry. Once I saw this hearty soup, I knew it would be a hit!

    Bunder Gerstensuppe (Swiss Barley Soup)

    Leeks, onions, carrots and celery are sautéed to form a base for this comforting soup. Bacon, barley and potatoes bulk it up and a bit of cream is added at the end for richness.

    It was hearty without being too heavy, and it was a big hit at dinner. The leftovers reheat really well, too! This soup will make your kitchen smell divine while it simmers away.

    Bunder Gerstensuppe (Swiss Barley Soup)
    Food.com

    Total Time: 1 hrs 40 mins
    Prep Time: 20 mins
    Cook Time: 1 hrs 20 mins
    Servings: 4

    2 tablespoons unsalted butter
    2 tablespoons olive oil
    1 medium onion, peeled and finely chopped
    1 large leek, washed and finely chopped (white part only)
    3 medium carrots, peeled and finely diced
    3 stalks celery, finely diced (including leaves)
    1 bay leaf
    5 ounces smoked bacon, diced
    8 cups chicken stock (or vegetable stock)
    ¾ cup pearl barley
    2 medium russet potatoes, peeled and diced
    salt and pepper, to taste
    1 cup cream
    fresh parsley, chopped (for garnish)

    1 Heat butter and olive oil in a soup kettle over medium-high heat.

    2 Add onion and leek and cook until they begin to soften, about 10 minutes.

    3 Add the carrots, celery, bay leaf and bacon and lower heat to medium. Cook for 10 minutes, stirring occasionally.

    4 Add stock, barley and potatoes. Simmer for 1 hour.

    5 Add salt and pepper to taste. Stir in cream and bring back to heat, without boiling.

    6 Ladle into bowls and garnish with parsley.

    Big Flavors Rating: 4 Stars

    Chef Jehangir Mehta’s Mushroom Blended “Graffiti” Burger

    September 24, 2014 by Ashley 2 Comments

    Chef Jehangir Mehta’s Mushroom Blended “Graffiti” Burger

    Earlier this summer, I was fortunate enough to be invited to spend some time time chatting with Chef Jehangir Mehta about one of my favorite ingredients - mushrooms! He was so much fun to watch on The Next Iron Chef - I was rooting for him that season. He had some really bold flavor combinations and seemed like a very down-to-earth guy, so I was excited to try out some of his food and talk shop with him.

    He has been developing a blendability technique where he blends finely chopped mushrooms with meat in dishes that are typically meat-heavy. So in something like a hamburger, replacing a portion of the beef with mushrooms both enhances the flavor of the beef and also stretches the amount of food you can make with just a  pound of meat.

    Chef Jehangir Mehta's Mushroom Blended

    The Graffiti Burger was delicious. It was juicy and full of exotic spices. If I hadn't been told that part of the beef had been swapped out for mushrooms, I would have had no idea. And the garlic fries were crazy addictive.

    As we talked, we were also treated to some Mushroom Vegetable Dumplings that were outrageously good. The garnish on top looked like shredded cheese, but he told me it was fried chickpea flour. My friend Jenn and I were practically licking the plate clean.

    Chef Jehangir Mehta's Mushroom Dumplings

    We had a blast chatting with Chef Mehta and talking about all things delicious. He had a lot of great gossip stories to share along with all of the food talk.

    Chef Jehangir Mehta with Ashley Covelli
    Photo courtesy The Mushroom Channel

    I got his burger recipe and was excited to try out at home. I desperately wanted to try making the enoki fries that he serves at his restaurant, too, but wasn't able to track down more than a handful of them, so I didn't think it would be worth the effort. Ah well, next time!

    The burgers call for some exotic mushrooms and spices, but I was able to get my hands on all of them. For some reason, I can never find Thai bird chiles though, so I used some cayenne instead. I don't think I ground the mushrooms finely enough, because the burgers fell apart on the grill a bit. But they were still delicious and nice and juicy!

    Chef Jehangir Mehta's Mushroom Blended

    My husband and I really enjoyed the bold spices that these burgers packed. They were fragrant and delicious. I topped them with some garden tomatoes and served them alongside grilled corn and Brussels sprouts.

    I think next time I'd like to try making some pickled mushrooms for a topping the way Chef Mehta served them. I think they worked best as sliders on brioche, so I may try making that from scratch next time, too. What can I say? I like a challenge 🙂 Now if I could just get my hands on that dumpling recipe...

    Cantaloupe, Prosciutto and Shaved Parmesan Salad

    September 23, 2014 by Ashley 3 Comments

    Cantaloupe, Prosciutto and Shaved Parmesan Salad

    I picked up a super ripe cantaloupe and some thinly sliced prosciutto to snack on while my husband was out of town for work. Because fancy snacking makes the time pass more quickly. Right?

    Cantaloupe, Prosciutto and Shaved Parmesan Salad

    When lunchtime came around, I realized that some of this sweet-and-salty goodness would be perfect on top of a salad! I added the melon and prosciutto to a bed of baby arugula, shaved some Parmesan cheese over top, drizzled it all with a really nice extra-virgin olive oil and aged balsamic and dusted the whole thing with freshly cracked black pepper.

    This salad really hit the spot. It was sweet, salty and satisfying. And it looked elegant, too. This would be a wonderful starter for a nice homemade Italian dinner. Maybe I’ll even make it for my husband sometime 😉

    Big Flavors Rating: 5 Stars

    Green and Red Garden Salad with Poppy Seed Dressing

    September 22, 2014 by Ashley 1 Comment

    Green and Red Garden Salad with Poppyseed Dressing

    My husband was home for salad o’clock lunchtime, so I asked if he wanted to get in on the giant salad action. He was pretty happy with the results!

    Green and Red Garden Salad with Poppyseed Dressing

    This mix reminds me of the things I liked to grab from the salad bar as a kid when I would go out to eat with my grandparents. I always went for the poppy seed dressing because it was so sweet and delicious.

    I used Brianna's Poppy Seed Dressing this time, which I love, but I’ve been eyeing some recipes for making a homemade version. I’m definitely going to try that out soon!

    For the salads, I piled on some baby arugula, pea shoots, chopped heirloom tomato, thinly sliced red onion, broccoli florets, chopped avocado and sliced baby bella mushrooms.

    I sprinkled on a little gray salt, freshly cracked black pepper, and the poppy seed dressing.The creaminess of the avocado was awesome with the dressing, and there was a lot of crunchiness from the broccoli. It was big and hearty and totally hit the spot!

    Big Flavors Rating: 4 Stars

    Cod with Pickled Grapes & Summer Succotash

    September 21, 2014 by Ashley Leave a Comment

    Cod with Pickled Grapes & Summer Succotash

    A friend of mine gave me a trial week of Blue Apron a few weeks ago, and it couldn't have come at a better time. I had been swamped with work and a custom cupcake order (not to mention taking care of my energetic two-year-old), so I didn't have much downtime for menu planning and shopping.

    I decided to make the seafood dish first. I hadn't ever cooked with cod before, and I'm not usually a fan of tarragon, but this recipe totally won me over!

    Cod with Pickled Grapes & Summer Succotash

    Cod fillets are seasoned tossed in rice flour and served over a colorful assortment of veggies. They're topped with tangy, tarragon-studded pickled grapes for a sweet-and-sour punch.

    The cod was beautifully flaky, and the succotash was hearty and filling. I loved the pickled grape topping, but then again, I don't often meet a pickle I didn't love.

    I love that this took the work of menu planning and prep away from me for the week, and this is a meal I'll definitely be making again and again. My only note if you're going to make this at home without using the Blue Apron service is that "1 bunch" of herbs isn't like 1 bunch from the grocery store. It's probably 1-2 tablespoons.

    I've ordered a few more weeks of Blue Apron since, and love it so much that I sent a gift week to my brother and his wife as a housewarming gift. They were thrilled! The customer service was awesome, too, which always scores big points in my book.

    2 Cloves Garlic
    1 Bunch Tarragon
    1 Ear Of Corn
    1 Tomato
    1 Shallot
    ¼ Pound Green Beans
    ¼ Pound Red Seedless Grapes
    2 Tablespoons White Wine Vinegar
    1 Tablespoon Sugar
    2 Cod Fillets
    ½ Cup Rice Flour

    See Blue Apron for the full recipe.

    Tajine Spiced Grilled Lamb Chops with Mint

    September 19, 2014 by Ashley 2 Comments

    Tajine Spiced Grilled Lamb Chops

    The weather has been perfect for grilling lately. I've been trying to prep ingredients before my husband gets home from work so that he can just fire up the grill and get dinner cooked and on the table without a lot of effort.

    It's a nice way to share the cooking responsibilities some days 🙂

    Tajine Spiced Grilled Lamb Chops

    I picked up a rib rack of lamb from my local Farmers Market, sliced it into chops (which was a lot trickier than I thought it would be!), seasoned both sides of the meat generously with some Special Lamb Tajine spice from Spices and Tease (here's a similar tajine seasoning blend), and a bit of kosher salt and freshly cracked black pepper.

    Dino grilled them until they were beautifully seared and medium rare. He put a mint leaf from our garden on each chop, which went beautifully with the flavor of the lamb and spice blend.

    Tajine Spiced Grilled Lamb Chops

    We served the lamb with some broccoli that was grilled and seasoned with a little truffle salt and some frozen pierogis that he also grilled. I love sour cream with my pierogis, and that provided a nice bit of coolness to the plate.

    This was a fantastic meal - one I'd love to enjoy again really soon!

    Tajine Spiced Grilled Lamb Chops

    Spiced Guinness Beer Can Chicken

    September 14, 2014 by Ashley 3 Comments

    Spiced Guinness Beer Can Chicken

    A really easy and delicious meal that we don't enjoy often enough is beer can chicken. Basically, you take a can of beer, drink about ⅓ of it, shove it up a chicken's rear end and stand it up on the grill. The beer keeps the chicken nice and moist while it cooks, and the flavor is awesome with minimal effort.

    Spiced Guinness Beer Can Chicken

    When we were in the beer aisle at the grocery store, we really didn't want to end up with a case of any of the canned beer that they had leftover, so Dino decided to grab one of his favorites - Guinness. It comes in a 4 pack, and he really enjoys drinking it, so we knew it would be put to good use.

    On our way out of the store, I remembered that their cans have a plastic ball inside of them, which would NOT be good for the grill. Dino said he'd handle it, so we headed home.

    Spiced Guinness Beer Can Chicken

    I rinsed the chicken and pat it dry, then sprinkled a tablespoon of Special Poultry seasoning from Spices and Tease, salt and pepper all over the outside of the chicken. I brought the seasoned chicken outside to Dino who had MacGyvered the beer can to open it up and remove the plastic ball.

    He carefully inserted the can into the chicken's cavity and set it upright on the grill. He let it cook until it reached around 160°F in the thick part of the breast and then very carefully removed it to a carving board.

    Spiced Guinness Beer Can Chicken

    The chicken was very tender and juicy, and the skin had just the right amount of spice. We served it with grilled corn, zucchini and grilled onions along with a quick salad I made with tomatoes, cucumbers and herbs. It was a great meal!

    Lamb Burgers with Pickled Feta Spread

    September 13, 2014 by Ashley 4 Comments

    Lamb Burgers with Pickled Feta Spread

    My husband mentioned wanting to eat lamb burgers recently. I checked my blog archives and realized I hadn't made any since 2010! Woah! It's due in part to the fact that I didn't have a good source for lamb locally. I do now, so expect to see lots more tasty lamb recipes in the future 🙂

    On a related note, he pointed out that if you search for lamb on my blog, everything I've made to date has been absolutely delicious! It's a great ingredient.

    Lamb Burgers with Pickled Feta Spread

    I searched for a new burger recipe and came across this one from Anne Burrell. I didn't make the homemade whole wheat pitas, but I'll definitely try out that recipe in the future. It got rave reviews on the Food Network site.

    These burgers pack a ton of flavor from a combination of fresh herbs, lemon zest and red onion. Tangy pickled feta spread is smeared on for a deliciously creamy condiment. I had never pickled cheese before, which is surprising since I love all things pickled and all things cheese. Yum!

    Lamb Burgers with Pickled Feta Spread

    My only note is that when I was making it, my instinct was to not add water to the meat as directed. I added it anyway, and the burgers ended up being really crumbly and falling apart. There was too much liquid. So they fell apart on the grill. They still tasted great, but next time I will definitely omit the water.

    The pickled feta takes a few hours to come together (mostly marinating time), so be sure to plan ahead when starting this recipe.

    Lamb Burgers
    Anne Burrell

    Total Time: 5 hr 30 min
    Prep: 25 min
    Inactive: 4 hr 15 min
    Cook: 50 min
    Yield:4 servings

    Ingredients
    Extra-virgin olive oil
    2 red onions, 1 cut into ¼-inch dice and 1 sliced for garnish
    Kosher salt
    Pinch crushed red pepper
    2 cloves garlic, finely smashed
    1 ½ pounds ground lamb
    ½ bunch fresh dill, finely chopped
    ½ bunch fresh mint, finely chopped
    2 sprigs fresh oregano, finely chopped
    Zest of ½ lemon
    4 Whole-Wheat Pitas, recipe follows, or 4 seeded hamburger buns
    Pickled Feta Spread, recipe follows
    1 beefsteak tomato, sliced for garnish
    2 cups baby spinach, for garnish

    Whole-Wheat Pitas:
    1 ¼ cups warm water
    1 teaspoon sugar
    1 envelope active dry yeast
    1 ½ cups bread flour, plus a little more for dusting
    1 ½ cups whole-wheat flour
    2 teaspoons cumin seeds, toasted and ground
    2 teaspoons kosher salt
    Pinch cayenne pepper
    ¼ cup extra-virgin olive oil, plus more for oiling bowl

    Pickled Feta Spread:
    1 cup champagne vinegar
    1 tablespoon sugar
    ½ tablespoon kosher salt
    2 mint tea bags
    1 bay leaf
    3 fresh mint stems (leaves reserved for something else), optional
    3 fresh dill stems, same deal as the mint stems
    3 fresh oregano stems, same deal as the mint stems
    8 ounces feta, coarsely crumbled
    ½ cup plain Greek yogurt

    Coat a large sauté pan with olive oil, toss in the diced onions and season with salt and crushed red pepper. Bring the pan to medium-high heat and cook the onions for 3 to 4 minutes. Add the garlic and cook for 2 to 4 more minutes. Turn the heat off and let cool.

    In a large bowl, combine the lamb, the cooled onion mixture, the dill, mint, oregano, lemon zest and ½ to ¾ cup water. Sprinkle with salt and combine well. Make a little "tester patty," cook it and taste for seasoning.

    Preheat the grill.

    Form the lamb mixture into 4 equal patties and sprinkle with salt. Grill the burgers to your desired doneness, 4 to 5 minutes per side for medium-rare. Remove the burgers from the grill and let rest for 3 to 4 minutes.

    Cut the Whole-Wheat Pitas in half. Schmear each half generously with the Pickled Feta Spread. Top one half with a burger, then tomatoes, sliced onions and spinach. Place the other pita half on top.

    Whole-Wheat Pitas:
    In a small bowl, combine the warm water, sugar and yeast and let sit for 15 minutes.

    In the bowl of a stand mixer, combine the flours, cumin, salt and cayenne. Add the yeast mixture and the olive oil. Mix on medium speed to combine and knead the dough. It should take 6 to 7 minutes. The dough will be firm and not sticky or tacky.

    Place the dough in a lightly oiled mixing bowl, cover with plastic wrap and let rise in a warm place until the dough has doubled in size, about 1 ½ hours.

    Preheat the oven to 500 degrees F.

    Divide the dough into 8 equal pieces and roll into 7-inch rounds (¼-inch thick). Divide the dough between 2 sheet trays, cover them loosely with a clean tea towel or plastic wrap and let rest for 20 minutes.

    Bake the pitas for 3 to 4 minutes, then turn the pitas over and bake for 2 more minutes. Let cool and use as desired.

    Pickled Feta Spread:
    Place the vinegar, sugar, salt, tea bags, bay leaf and herb stems, if using, in a small saucepan along with 1 cup water. Heat until the sugar and salt has dissolved. Remove from the heat and let cool.

    Place the feta in a small container. Add the vinegar mixture and be sure that the feta is submerged in the liquid. Let sit for a couple of hours outside the refrigerator if using right away, or in the refrigerator if using in the future.

    Strain the feta from the pickling liquid and discard the tea bags, bay leaf and stems. Place the feta in a food processor and add the yogurt. Pulse until combined.

    Big Flavors Rating: 4 Stars

    Baked Chocolate Doughnuts with Chocolate Glaze

    September 11, 2014 by Ashley 5 Comments

    Baked Chocolate Doughnuts with Chocolate Glaze

    So the day after I baked a record number of cupcakes, I went out to visit some friends and came home to this:

    Baked Chocolate Doughnuts with Chocolate Glaze

    Apparently my husband and toddler decided to do some baking of their own.

    Donuts.

    From scratch.

    Ambitious much?

    Baked Chocolate Doughnuts with Chocolate Glaze

    My husband picked a recipe from a site that I absolutely adore, and this donut recipe certainly did not disappoint.

    The changes they made were to use self-rising flour and omit the baking soda. They used espresso instead of coffee, and for the glaze, they used a mix of 4 ounces 100% cacao baking chocolate mixed with 1 ounce of 60% bittersweet chocolate.

    The donuts were nice and tender, and the glaze was dark and delicious. They held up really well for a few days, too. My husband even took a few shots of the donuts with my camera (below) - I think he may be gunning for my job! 😉

    Baked Chocolate Doughnuts with Chocolate Glaze

    Awesome work all around, boys!

    Baked Chocolate Doughnuts with Chocolate Glaze

    Baked Chocolate Doughnuts with Chocolate Glaze
    Spoon Fork Bacon

    Makes 20

    Doughnuts:
    2 cups bread flour
    1 cup light brown sugar
    ⅔ cup unsweetened cocoa powder
    1 teaspoon baking soda
    ½ teaspoon salt
    1 cup buttermilk
    ½ cup strong brewed black coffee, cooled
    2 eggs, lightly beaten
    6 tablespoons unsalted butter, cooled
    2 teaspoons apple cider vinegar
    1 teaspoon pure vanilla extract
    ¾ cup melted semisweet chocolate chips, cooled

    Glaze:
    ½ cup (1 stick) unsalted butter, softened
    ⅓ cup heavy cream
    1 ½ tablespoons light corn syrup
    1 teaspoon vanilla extract
    5 ounces chopped bittersweet chocolate
    2 ¼ cups sifted powdered sugar

    Garnish:
    chocolate sprinkles/jimmies

    1. Preheat oven to 350˚F.

    2. Place flour, sugar, cocoa powder, baking soda, and salt into a mixing bowl and whisk together. Set aside.

    3. Pour buttermilk coffee, eggs, butter, vinegar, and vanilla into another mixing bowl and whisk together.

    4. Pour the flour mixture into the buttermilk mixture and stir until fully mixed. Fold in melted chocolate until just combined.

    5. Lightly grease a couple baked doughnut pans and pour batter into a piping bag or gallon sized re-closeable bag and pipe batter into the doughnut molds, filling ¾ of the way up.

    6. Bake the doughnuts for 18 to 20 minutes or until a toothpick comes out clean when inserted into the center of a doughnut.

    7. Remove from molds and transfer doughnuts onto a cooling rack and allow doughnuts to cool completely.

    8. For glaze: Place all ingredients, except powdered sugar, into a small saucepan over medium-low heat. Stir until butter and chocolate have melted and mixture is smooth. Whisk in powdered sugar, ½ cup at a time, until all 2 ¼ cups has been added and mixture is smooth. Pour mixture into a heatproof bowl and set over a saucepan filled with 2 inches of simmering water (to create a double boiler, which is needed to keep the glaze loose and make it easy to dip the doughnuts)

    9. To assemble: Dip the tops of each doughnut into the warm glaze and shake to remove any excess glaze. Place doughnuts onto a cooling rack, glaze side-up and top with a small amount of chocolate sprinkles. Repeat until all doughnuts have been dipped and sprinkled. Allow doughnuts to sit for 10 to 15 minutes to allow the glaze to harden. Serve.

    Big Flavors Rating: 5 Stars

    Gazpacho with Basil Cornbread Croutons

    September 8, 2014 by Ashley 3 Comments

    Gazpacho with Basil Cornbread Croutons

    One of my husband's co-workers has generously donated his CSA share to us a few times this summer. He's been going on vacation a lot and is happy to pass along all of the delicious farm fresh fruits and veggies to someone that would put them to good use.

    So when the latest share included a whole lot of gorgeous late summer tomatoes, I knew that gazpacho was in order.

    Gazpacho with Basil Cornbread Croutons

    And when I found a gazpacho recipe that included cornbread in crouton form... I was totally on board.

    I made this in a few batches in my Vitamix, and it came together pretty quickly. I love that it's a dish that can be made ahead of time.

    Gazpacho with Basil Cornbread Croutons

    The cornbread croutons were a perfect addition to this gazpacho. I kept dropping more and more of them into my bowl. My toddler was all about chomping on them, too!

    I baked them for less time than indicated (for the second baking) because they were getting nice and golden already and I didn't want to risk burning them.

    Gazpacho with Basil Cornbread Croutons

    This soup is the perfect way to celebrate the flavors of summer. Cool, refreshing and full of freshness.

    Gazpacho with Basil Cornbread Croutons
    In Sock Monkey Slippers

    serves 6

    Basil Cornbread Croutons:
    1 cup all-purpose flour
    ¾ cup cornmeal
    ¼ cup sugar
    2 tablespoons baking powder
    1 teaspoon salt
    1 ¼ cup milk
    2 eggs
    ½ cup basil leaves

    Gazpacho:
    3 pounds ripe tomatoes
    2 red bell peppers, seeded
    1 cucumber, seeded
    1 shallot, peeled
    ½ cup parsley leaves
    ½ cup extra virgin olive oil
    ⅓ cup red wine vinegar
    ½ teaspoon kosher salt
    ¼ teaspoon fresh ground black pepper

    * note: this recipe is great to make a day ahead of serving. You can also make the crutons in advance as well and store in a container for up to a week.

    1. Preheat oven to 350°F. For the Croutons: In a large bowl, mix to combine flour, cornmeal, sugar, baking powder, and salt. In another bowl, mix to combine milk and eggs. Pour the wet ingredients into the dry and stir until just incorporated.

    2. With a knife, or the chopper attachment on the hand blender, chop the basil and add it to the batter. Pour the batter into a greased 9″x9″ baking pan and place in the oven. Bake for 35 to 40 minutes until golden and a toothpick inserted in the center comes out clean.

    3. Remove the cornbread from the pan and allow to cool. Preheat the oven to 400°F. With a knife, slice the cornbread into cubes and place on a baking sheet.Bake for 30 to 35 minutes, flipping once, until the croutons are crunchy. Set aside to cool.

    4. For the gazpacho: With the chopper attachment on the hand blender, dice the tomatoes, red bell peppers, cucumber, shallot, and parsley — place in a large bowl. Add olive oil, vinegar, salt, and pepper.

    5. With the hand blender on high, puree until smooth. If you don’t happen to have a hand blender, place ingredients in a blender or food processor and puree. Taste and add additional salt and pepper if necessary. Place in the refrigerator for at least an hour or overnight before serving. Pour into serving bowls and top with a drizzle of extra virgin olive oil and croutons.

    Big Flavors Rating: 4 Stars

    Chocolate Cupcakes with Salted Caramel Frosting

    September 6, 2014 by Ashley 3 Comments

    Chocolate Cupcakes with Salted Caramel Frosting

    I had my first big cupcake order last week. Four dozen regular-sized cupcakes plus 6 dozen minis. Wow. The order was for both chocolate and vanilla cupcakes. I already have an absolute favorite recipe for Vanilla Cupcakes with Vanilla Buttercream, so I went with that, but I didn’t have any favorite chocolate cupcake recipes. I mean, these Self-Filled Cupcakes were very good, and so were these Super Easy, Super Moist Chocolate Cupcakes, but they just weren’t calling to me.

    Chocolate Cupcakes with Salted Caramel Frosting

    So I asked some of my cooking buddies and was directed to this recipe for chocolate cake with salted caramel frosting. It sounded pretty involved (especially the frosting!), but I figured what the heck? The worst case scenario would be that they wouldn’t turn out well and I’d learn a lesson. Best case scenario I would find a new go-to recipe.

    Chocolate Cupcakes with Salted Caramel Frosting

    These cupcakes definitely took a lot of work, but they were well worth it. They were nice and moist and very chocolatey. This recipe made 26 regular cupcakes and 24 mini cupcakes for me. I’d guess it would make about 2 ½ dozen if you were making all regular sized ones.

    Chocolate Cupcakes with Salted Caramel Frosting

    The sweetness of the salted caramel cream cheese frosting was balanced by the bittersweet chocolate cupcakes. I used Penzeys Dutch Process High Fat Cocoa Powder and it worked out really well. I didn’t color the frosting on these, because the caramel made it a nice, creamy, lightly golden color. I embellished them with some sprinkles and called it a day.

    Chocolate Cupcakes with Salted Caramel Frosting

    The minis were going to be used to spell out the company name, so I sent them a diagram with how to lay them out. They sent over a photo of the finished display, and they looked great!

    HOPE Cupcakes

    Chocolate Cake
    Kimberly Taylor Images (adapted from Ina Garten)

    12 tablespoons (1 ½ sticks) unsalted butter, at room temperature
    ⅔ cup granulated sugar
    ⅔ cup light brown sugar, packed
    2 extra-large eggs, at room temperature
    2 teaspoons pure vanilla extract
    1 cup buttermilk, shaken, at room temperature
    ½ cup sour cream, at room temperature
    2 tablespoons brewed coffee
    1 ¾ cups all-purpose flour
    1 cup good cocoa powder
    1 ½ teaspoons baking soda
    ½ teaspoon kosher salt

    Preheat the oven to 350 degrees F. Grease your cake pans.

    In the bowl of an electric mixer fitted with a paddle attachment, cream the butter and 2 sugars on high speed until light and fluffy, approximately 5 minutes. Lower the speed to medium, add the eggs 1 at a time, then add the vanilla and mix well. In a separate bowl, whisk together the buttermilk, sour cream, and coffee. In another bowl, sift together the flour, cocoa, baking soda, and salt. On low speed, add the buttermilk mixture and the flour mixture alternately in thirds to the mixer bowl, beginning with the buttermilk mixture and ending with the flour mixture. Mix only until blended. Fold the batter with a rubber spatula to be sure it’s completely blended. Divide your batter between your cake pans – use any extra to make some cupcakes. I like to fill my 6″ rounds ⅔ full. Bake for 20-25 minutes, until a toothpick inserted into the middle comes out clean. Let cool for 10-15 minutes and then remove to a cooling rack to cool completely.

    Salted Caramel

    1 cup sugar
    4 tablespoons water
    2 tablespoons light corn syrup
    ½ cup heavy cream
    2 tablespoons butter
    ½ teaspoon lemon juice
    ½ teaspoon salt, kosher or sea

    1. Combine the sugar, water, and the corn syrup in a large saucepan and stir with a wooden spoon over medium heat until sugar is dissolved.
    2. Cover the saucepan and let it cook over medium heat for 3 minutes.
    3. After 3 minutes, remove the lid, increase the heat to medium-high, and bring to a boil.
    4. Do not stir from this point on, but instead swirl the liquid around the pan so that the caramel doesn’t burn.
    5. Continue to cook until the caramel turns an even amber color then remove from the heat and let stand for about 30 seconds.
    6. *** Be careful here *** Pour the heavy cream into the mixture. The mixture will bubble up significantly and is very hot.
    7. Stir the mixture, again being careful. Add the butter, lemon juice, and salt. Stir until combined.
    8. Measure 1 cup into a Pyrex measuring cup. Stirring occasionally, allow to cool until thick like molasses and warm to the touch, about 20 minutes. Save any extra in a sealed container in the refrigerator. It is delicious on ice cream, not to mention your finger… 🙂

    Salted Caramel Frosting

    2 sticks butter at room temperature
    8 ounces of cream cheese
    3-4 cups sifted powdered sugar
    1 cup salted caramel (recipe above)

    1. Beat butter and cream cheese at medium speed until creamy.
    2. Add 2 cups of the powdered sugar into the butter/cream cheese mixture and beat to combine.
    3. Add 1 cup of the salted caramel and beat to combine.
    4. Add additional powdered sugar until the frosting is the sweetness and consistency you desire.

    Big Flavors Rating: 4 Stars

    Green and Orange Salad with Brie

    September 5, 2014 by Ashley 1 Comment

    Green and Orange Salad with Brie

    Perfectly ripe nectarines add sweetness to this fresh, colorful salad. The added creaminess of brie and s sprinkle of salty, crunchy pistachios makes it irresistible.

    Green and Orange Salad with Brie

    I started with a pile of baby arugula and added some pea shoots, chopped nectarine, sliced orange bell pepper, a few pieces of baby Brie (one of my favorite items from Trader Joe's), a sprinkle of roasted pistachios, gray salt, pepper, aged balsamic & EVOO.

    Straight Outta Comté Leftover Salad

    September 4, 2014 by Ashley 3 Comments

    Straight Outta Comté Leftover Salad

    I’ve been piecing together odds and ends that are hanging out in the kitchen to make fun lunchtime salads lately. It’s been fun and challenging… and delicious!

    Straight Outta Comté Leftover Salad

    For this salad, I piled some baby arugula and pea shoots on a plate and topped them with Slow Cooker “Roasted” Beets, leftover grilled sweet corn, some of the caramelized onions from the Sockeye salmon dish I made the night before, slices of Comté cheese, a sprinkle of gray salt, freshly cracked black pepper, a good extra-virgin olive oil and aged balsamic.

    It was bright and colorful and delicious! And I made myself laugh when I came up with the name for it, so that’s always a bonus, right? 😉

    Big Flavors Rating: 4 Stars

    Sockeye Salmon with Caramelized Onions

    September 3, 2014 by Ashley 2 Comments

    Sockeye Salmon with Caramelized Onions

    Salmon is such a versatile fish. I usually stock up on frozen fillets when I’m at Trader Joe’s because I like having them on hand for simple weeknight meals.

    I had a few onions that I needed to use up, so I decided to caramelize them, add a bit of Worcestershire and red wine vinegar to deepen their flavor, and then top them with a beautifully seared piece of seasoned Sockeye salmon. It worked out beautifully!

    Sockeye Salmon with Caramelized Onions

    These onions would be great over a nice piece of steak or grilled chicken, too. Maybe even over a portobello steak! I served the salmon with some Spicy Sautéed Beet Greens with Garlic Chips and a bit of No-Knead Crusty White Bread that I had hanging out in the freezer (that I then warmed up in the oven as the salmon was cooking).

    Baby Arugula Salad with Strawberries, Brie and Grilled Broccoli

    August 31, 2014 by Ashley 1 Comment

    Baby Arugula Salad with Strawberries, Brie and Grilled Broccoli

    I've been trying to make some fun salad variations for lunch lately. This was the one that kicked it all off.

    Baby Arugula Salad with Strawberries, Brie and Grilled Broccoli


    I put a big pile of baby arugula on a plate and topped it with pea shoots, sliced strawberries, Brie bites, aged balsamic, EVOO, salt and pepper. I added some leftover grilled broccoli w truffle salt, and it was absolutely delicious together!

    Applewood Smoked Marinated Pork Spare Ribs

    August 30, 2014 by Ashley 1 Comment

    Applewood Smoked Marinated Pork Spare Ribs

    The main course for the Asian inspired dinner party I had a while back was smoked ribs. I came up with a marinade and asked Dino to grill them. He thought smoking them with applewood chips would be a good idea, and he was right! They turned out fabulously!

    The marinade was simple to put together ahead of time, and the applewood smoke added a nice, rich flavor to the meat. Our friends were super impressed with this meal - and so were we!

    Applewood Smoked Marinated Pork Spare Ribs

    I served the pork spare ribs with Vietnamese Summer Roll Salad with Peanut Dressing, Peanut Sesame Noodles and cucumbers that I tossed with rice vinegar, honey, sesame oil and toasted sesame seeds. I made a batch of Coconut Jelly for dessert. It was an awesome meal!

    Chilled Minty Pea Soup with Lemon

    August 29, 2014 by Ashley 1 Comment

    Chilled Minty Pea Soup with Lemon

    This post was created in partnership with Stonyfield. As always, all opinions are 100% my own.

    The end of summer is always a busy time in my house. Between birthdays (mine, my husband’s AND both of his parents), outdoor activities, BBQs, and traveling it seems like I blink and it’s somehow already Labor Day.

    It makes finding the time and energy to make delicious food a little trickier than other times of the year. Especially when it’s hot and humid and the air conditioning doesn’t reach my tiny kitchen.

    Chilled Minty Pea Soup with Lemon

    So for times like these, we should just live off of super simple meals that cool us off, right?

    When Stonyfield asked me to create a chilled soup using their yogurt, I wanted to make sure I made something bright and refreshing. Peas and mint are so beautiful together, and with the richness that their yogurt adds to the mix, this soup turned out velvety and delicious.

    Chilled Minty Pea Soup with Lemon

    When I first made this, I barely thawed my peas. I figured my Vitamix could handle it. Well… it could, but let’s just say that I ended up with what my son thought was a smoothie. It tasted great, but it was much better after it melted down a bit. So I’d recommend fully thawing your peas in the fridge overnight. Or maybe even just submerge the bag in a bowl of water until they’re a little softer before you try blending it.

    The lemon zest adds a nice zing to this bright green soup. Make sure to keep it chilled until right before serving, as it tastes the most refreshing when it’s nice and cold.

    Chilled Minty Pea Soup with Lemon
    Big Flavors from a Tiny Kitchen - Ashley Covelli

    1 pound frozen peas, thawed (see note above)
    2 tablespoons extra virgin olive oil
    1 clove garlic, minced
    1 shallot, chopped (about 2-3 tablespoons)
    ½ teaspoon kosher salt
    ¼ teaspoon freshly cracked black pepper
    1 cup cold water
    Zest of 1 lemon (about 1 teaspoon)
    ¼ cup fresh mint, roughly chopped
    ½ cup plain yogurt (I used Stonyfield Smooth & Creamy Whole Milk)

    Heat oil in a small sauté pan over moderate heat. Add garlic, shallot, salt and pepper. Cook, stirring occasionally, until soft, about 5 minutes.

    Add peas, water, lemon zest, mint and yogurt to a blender, along with the garlic and shallots from the pan. Blend until smooth. Taste and adjust seasoning if necessary.

    Chill soup until ready to serve.

    Big Flavors Rating: 4 Stars

    Baby Arugula Salad with Nectarine and Burrata

    August 29, 2014 by Ashley 2 Comments

    Baby Arugula Salad with Nectarine and Burrata

    If you follow me on Instagram, you may have noticed that I’ve been on a big salad kick lately. I’ve found it to be a great way to use up odds and ends that I have hanging out in the kitchen.

    Baby Arugula Salad with Nectarine and Burrata

    I’ve always been big fan of fruit and cheese (need I mention the time I shared a cheese plate, cheese fondue and cheesecake as a meal with a friend of mine? As one meal. One ridiculously cheesetastic meal…), and layering them on top of baby arugula with aged balsamic may just be my new favorite thing.

    If you haven’t tried Burrata yet, you must. It is just pure heaven. It’s like ricotta and fresh mozzarella had a silky smooth cheese baby that transports you to cheese heaven. Seriously. It’s just ridiculously good.

    Baby Arugula Salad with Nectarine and Burrata

    Anyway, to make this salad, I piled some baby arugula on a plate. I topped it with the Burrata, super ripe nectarine, pistachios, thinly sliced shallot, gray salt, freshly cracked black pepper, a good quality extra-virgin olive oil and some aged balsamic. It was beautiful, had wonderful textural contrast (the smooth cheese, the crunchy nuts) and really showcased the succulent fruit. It’s definitely a combination I’ll enjoy again and again!

    Big Flavors Rating: 5 Stars

    Grandma Ople's Apple Pie

    August 27, 2014 by Ashley 5 Comments

    Grandma Ople's Apple Pie

    The second dish I made for my Supper Club's movie night was this stunning apple pie. I chose it in tribute to the iconic '90s comedy American Pie.

    Grandma Ople's Apple Pie

    This pie was different from other apple pies I've made in the past in that you cook up a thickened mixture of sugar and butter and (carefully!) pour it over top of the lattice before baking the pie. This method was new to me, and the results were beautiful!

    Grandma Ople's Apple Pie

    I used some of the whole wheat crust dough that I had stashed in the freezer, and it worked out great. I love the slight saltiness of that crust recipe.

    The pie was golden brown and delicious, and the apples were cooked perfectly (it also helped that we have an apple machine that ensures all of the apples are sliced evenly). It was rich and delicious - a big hit with my Supper Club. This was a really interesting method of making apple pie that totally paid off.

    Grandma Ople's Apple Pie

    Grandma Ople's Apple Pie
    Allrecipes - MOSHASMAMA

    "This was my grandmother's apple pie recipe. I have never seen another one quite like it. It will always be my favorite, and I hope it becomes one of your favorites as well!”

    Prep: 30 mins
    Cook: 1 hr
    Ready in: 1 hr 30 mins
    Makes 1 - 9 inch pie

    1 recipe pastry for a 9 inch double crust pie
    ½ cup unsalted butter
    3 tablespoons all-purpose flour
    ½ cup white sugar
    ½ cup packed brown sugar
    ¼ cup water
    8 Granny Smith apples - peeled, cored and sliced

    1. Melt butter in a sauce pan. Stir in flour to form a paste. Add white sugar, brown sugar and water; bring to a boil. Reduce temperature, and simmer 5 minutes.

    2. Meanwhile, place the bottom crust in your pan. Fill with apples, mounded slightly. Cover with a lattice work crust. Gently pour the sugar and butter liquid over the crust. Pour slowly so that it does not run off.

    3. Bake 15 minutes at 425 degrees F (220 degrees C). Reduce the temperature to 350 degrees F (175 degrees C), and continue baking for 35 to 45 minutes.

    Big Flavors Rating: 5 Stars

    Homemade Ketchup in the Slow Cooker

    August 24, 2014 by Ashley 2 Comments

    Homemade Ketchup in the Slow Cooker

    I've been tempted to try making my own ketchup for years now. When I found a recipe that called for cooking it in the slow cooker, I was totally sold.

    Canned tomatoes, vinegar, sugar and spices simmer in the slow cooker all day, filling your house with the most wonderful aroma. This was the first time I saw a slow cooker recipe that called for leaving the lid OFF, so I made sure to stay close to home all day just in case anything went awry. I had visions of tomatoes spurting all over the kitchen. Luckily, that didn't happen.

    Homemade Ketchup in the Slow Cooker

    I blitzed the ketchup in my Vitamix after it was done and didn't bother straining it. I don't mind a little extra texture in my ketchup. But I definitely can see how it would be a bit of a hassle if you wanted it to be smoother.

    I love having the option to use ketchup that I made from scratch. I also used it as the base for a killer cocktail sauce (recipe coming soon!), and we have plenty stashed away in the kitchen for future use. I'm not sure how long this will keep, and that's probably the biggest drawback.

    All in all it's a great recipe that's a nice alternative to store-bought.

    Homemade Ketchup in the Slow Cooker

    Homemade Ketchup
    Allrecipes - Chef John

    This ketchup does come close to those name brands in terms of taste, texture and color. I've never had a tomato paste-based ketchup that I liked, so I decided to cook down crushed tomatoes instead. By using the slow cooker, we take most of the labor out of the process."

    Makes 3 cups
    Prep: 10 mins
    Cook: 12 hrs
    Ready in: 12 hrs 10 mins

    2 (28 ounce) cans peeled ground tomatoes
    ½ cup water, divided
    ⅔ cup white sugar
    ¾ cup distilled white vinegar
    1 teaspoon onion powder
    ½ teaspoon garlic powder
    1 ¾ teaspoons salt
    ⅛ teaspoon celery salt
    ⅛ teaspoon mustard powder
    ¼ teaspoon finely ground black pepper
    1 whole clove

    1. Pour ground tomatoes into slow cooker. Swirl ¼ cup water in each emptied can and pour into slow cooker. Add sugar, vinegar, onion powder, garlic powder, salt, celery salt, mustard powder, black pepper, cayenne pepper, and whole clove; whisk to combine.

    2. Cook on high, uncovered, until mixture is reduced by half and very thick, 10 to 12 hours. Stir every hour or so.

    3. Smooth the texture of the ketchup using an immersion blender, about 20 seconds.

    4. Ladle the ketchup into a fine strainer and press mixture with the back of a ladle to strain out any skins and seeds.

    5. Transfer the strained ketchup to a bowl. Cool completely before tasting to adjust salt, black pepper, or cayenne pepper.

    Big Flavors Rating: 4 Stars

    Summer Cucumber and Herb Salad

    August 23, 2014 by Ashley 2 Comments

    Summer Cucumber and Herb Salad

    We're lucky enough to have several friends who have had overflowing gardens this summer. We've helped them use up veggies that would have otherwise gone to waste, and that's a pretty great thing! It's a nice way to make super fresh side dishes.

    Summer Cucumber and Herb Salad

    For this particular salad, I mixed the cucumbers and onion from my friend's garden with some fresh herbs from mine. The result was a deliciously crunchy salad that was bursting with the flavors of summer.

    Summer Cucumber and Herb Salad
    • « Previous Page
    • 1
    • …
    • 13
    • 14
    • 15
    • 16
    • 17
    • …
    • 35
    • Next Page »

    Hi, I'm Ashley and I’ve been writing about food & recipes here at Big Flavors from a Tiny Kitchen since 2006. I want to help you (yes, you!) gain confidence in the kitchen so you are excited to cook at home for yourself and your loved ones.

    More about me →

    Favorite Spring Recipes

    • Mayo-free Deviled Eggs
    • Middle Eastern Fattoush Salad with Homemade Pita Chips
    • Birthday Cake Confetti Pancakes with Sprinkles
    • Italian Cream Cheese and Ricotta Cheesecake
    • Garlicky Mushroom Ricotta Pizza with Wild Arugula + Aged Balsamic
    • Slow Cooker "Roasted" Beets
    • Honey Balsamic Roasted Carrots
    • Italian Ricotta Cookies
    • Rhubarb Custard Pie
    • Easy Instant Pot Herbed Potato Salad

    Mother's Day + Easter Brunch

    • Epic Brunch Board on a Budget
    • Baby Spinach and Cheddar Quiche Made with Fresh Spinach
    • Turkey Salad Tea Sandwiches with Dried Cherries
    • Great Grandma Maria Francesca Cardile's Italian Easter Cookies
    • Brie Waffle Bites
    • Challah French Toast
    • Creamsicle Smoothies
    • DM Bloody Mary
    • Turkey Scotch Eggs
    • The Herbalist

    Popular Now

    • Cast iron skillet full of chicken fajitas.
      Favorite Restaurant-Style Chicken Fajitas
    • Overhead view of spinach and cheddar quiche with forks.
      Baby Spinach and Cheddar Quiche Made with Fresh Spinach
    • Chicken and bell pepper stir-fry served over white rice.
      Chicken and Bell Pepper Stir-Fry
    • Serving dish of cooked shrimp garnished with chopped parsley.
      Quick and Easy Sautéed Shrimp
    • Overhead view of a dutch oven filled with sausages, peppers, and onions.
      Sausage and Peppers
    • Overhead view of assorted breakfast items displayed on a board.
      Epic Brunch Board on a Budget

    Footer

    ↑ back to top

    About

    • About Ashley
    • Press + Recognition
    • Events
    • Virtual Cooking Classes
    • Podcast
    • Contact
    • Privacy Policy

    Newsletter

    • Sign up to receive delicious recipes and exclusive content right to your inbox!

    As an Amazon Associate I earn from qualifying purchases at no added cost to you.

    ©2006–2026  BIG FLAVORS FROM A TINY KITCHEN LLC | ALL RIGHTS RESERVED

    *Third-party advertisers may collect or use non-personally identifiable information to serve you more relevant ads.