Big Flavors from a Tiny Kitchen

menu icon
go to homepage
  • Recipes
  • About
  • Events
  • Contact
  • Subscribe
    • Facebook
    • Instagram
    • Pinterest
  • subscribe
    search icon
    Homepage link
    • Recipes
    • About
    • Events
    • Contact
    • Subscribe
    • Facebook
    • Instagram
    • Pinterest
  • ×
    Home » Recipes

    Camembert and Apple Panini with Coarse Ground Mustard and Mixed Greens

    February 16, 2013 by Ashley 3 Comments

    Camembert and Apple Panini with Coarse Ground Mustard and Mixed Greens

    Camembert and Apple Panini with Coarse Ground Mustard and Mixed Greens

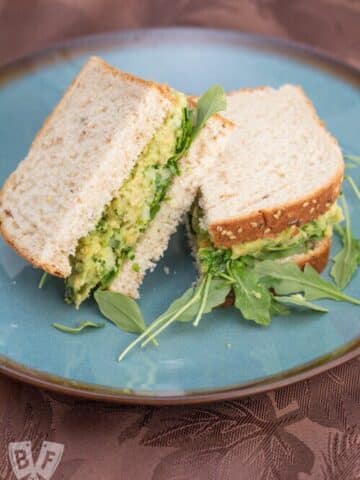
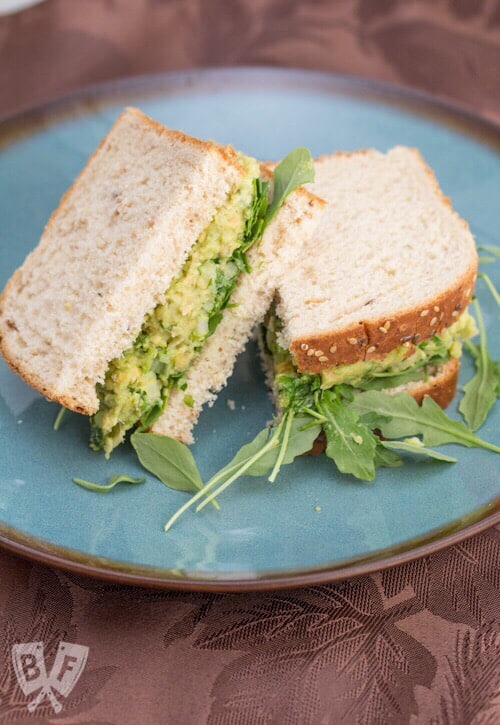
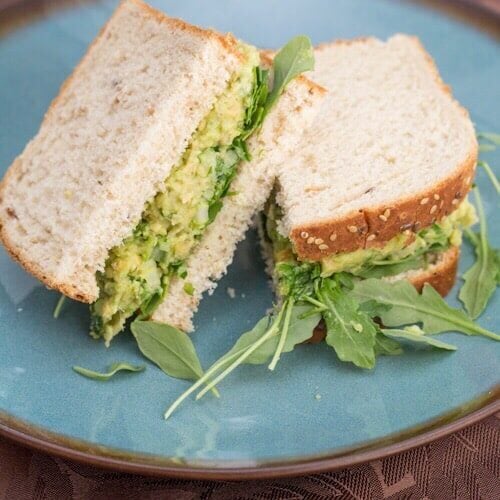
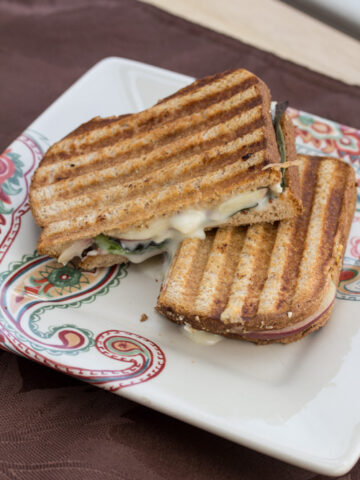
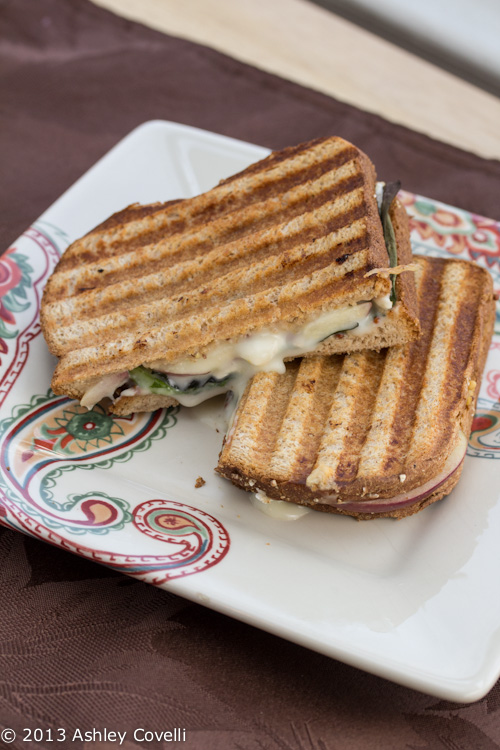
    I put this panini together for lunch and it was awesome! I lightly buttered the outside of 2 pieces of multigrain bread. I flipped them over and spread a thin layer of coarse ground mustard on the insides.

    I layered some mixed greens on one piece, and on the other, I layered slices of Camembert and apples that I picked up from the Farmers' Market this morning. I put the sandwich together and grilled it on the panini press until the cheese was nice and melted and the bread was golden brown and crispy.

    It was sweet, creamy, crunchy, tangy...a really wonderful combination! I'll definitely be making something like this again!

    Big Flavors Rating: 5 Stars

    Chile Libre

    February 15, 2013 by Ashley Leave a Comment

    Cola cocktails garnished with lime wedges.

    One of my friends was having a really crummy day, so I invited her over to hang out and try to keep her mind off of things.

    While we were chatting, I whipped up a couple of these cocktails from The Domestic Mixologist. They were spicy and refreshing.

    I also gave her a piece of my Valentine's Day treat to Dino. It definitely helped cheer her up. Success!

    Chile Libre

    Vietnamese Pho: Beef Noodle Soup

    February 10, 2013 by Ashley Leave a Comment

    Vietnamese Pho: Beef Noodle Soup

    Vietnamese Pho: Beef Noodle Soup

    I was planning to make something for Chinese New Year today, but when my husband asked if I'd be willing to make Vietnamese Pho: Beef Noodle Soup again, I couldn't think about anything else. This stuff is soooo good, and it's totally worth the hours it takes to cook it. This time around, I did without cooking beef in the broth as well, and just used some thin slices of grass-fed ribeye steak at the end. I love freezing some of the broth so we can have Pho another time without the big time investment!

    Vietnamese Pho: Beef Noodle Soup

    Vietnamese Pho: Beef Noodle Soup
    Jaden's Steamy Kitchen (Adapted from Into the Vietnamese Kitchen)

    Servings: 8

    Sometimes, I omit the 1lb of beef meat in the broth (you'll see I've made it optional) - as I've found that as long as I have good bones, the broth will have enough flavor to not need the extra beef meat.

    Ingredients:

    THE BROTH
    2 onions, halved
    4" nub of ginger, halved lengthwise
    5-6 lbs of good beef bones, preferably leg and knuckle
    1 lb of beef meat - chuck, brisket, rump, cut into large slices [optional]
    6 quarts of water
    1 package of Pho Spices [1 cinnamon stick, 1 tbl coriander seeds, 1 tbl fennel seeds, 5 whole star anise, 1 cardamom pod, 6 whole cloves - in mesh bag]
    1 ½ tablespoons kosher salt (halve if using regular table salt)
    ¼ cup fish sauce
    1 inch chunk of yellow rock sugar (about 1 oz) - or 1oz of regular sugar

    THE BOWLS
    2 lbs rice noodles (dried or fresh)
    cooked beef from the broth
    ½ lb flank, london broil, sirloin or eye of round, sliced as thin as possible.
    big handful of each: mint, cilantro, basil
    2 limes, cut into wedges
    2-3 chili peppers, sliced
    2 big handfuls of bean sprouts
    Hoisin sauce
    Sriracha hot sauce

    Directions:

    Char: Turn your broiler on high and move rack to the highest spot. Place ginger and onions on baking sheet. Brush just a bit of cooking oil on the cut side of each. Broil on high until ginger and onions begin to char. Turn over and continue to char. This should take a total of 10-15 minutes.

    Parboil the bones: Fill large pot (12-qt capacity) with cool water. Boil water, and then add the bones, keeping the heat on high. Boil vigorously for 10 minutes. Drain, rinse the bones and rinse out the pot. Refill pot with bones and 6 qts of cool water. Bring to boil over high heat and lower to simmer. Using a ladle or a fine mesh strainer, remove any scum that rises to the top.

    Boil broth: Add ginger, onion, spice packet, beef, sugar, fish sauce, salt and simmer uncovered for 1 ½ hours. Remove the beef meat and set aside (you'll be eating this meat later in the bowls) Continue simmering for another 1 ½ hours. Strain broth and return the broth to the pot. Taste broth and adjust seasoning - this is a crucial step. If the broth's flavor doesn't quite shine yet, add 2 teaspoons more of fish sauce, large pinch of salt and a small nugget of rock sugar (or 1 teaspoon of regular sugar). Keep doing this until the broth tastes perfect.

    Prepare noodles & meat: Slice your flank/london broil/sirloin as thin as possible - try freezing for 15 minutes prior to slicing to make it easier. Remember the cooked beef meat that was part of your broth? Cut or shred the meat and set aside. Arrange all other ingredients on a platter for the table. Your guests will "assemble" their own bowls. Follow the directions on your package of noodles - there are many different sizes and widths of rice noodles, so make sure you read the directions. For some fresh rice noodles, just a quick 5 second blanch in hot water is all that's needed. The package that I purchased (above) - needed about 45 seconds in boiling water.

    Ladling: Bring your broth back to a boil. Line up your soup bowls next to the stove. Fill each bowl with rice noodles, shredded cooked beef and raw meat slices. As soon as the broth comes back to a boil, ladle into each bowl. the hot broth will cook your raw beef slices. Serve immediately. Guests can garnish their own bowls as they wish.

    Big Flavors Rating: 5 Stars

    Chipotle Chile Candied Pecan, Dried Cranberry, and Crumbled Blue Cheese Salad

    February 10, 2013 by Ashley Leave a Comment

    Chipotle Chile Candied Pecan, Dried Cranberry, and Crumbled Blue Cheese Salad

    I really liked the way that this salad sounded when I was making the Chipotle Chile Candied Pecans a few days ago, so I went out and got all of the ingredients to put it together for lunch today. I used sliced pears and some aged balsamic and good quality extra-virgin olive oil to dress the salad. It was out of this world! The crunchy, sweet, spicy pecans really add something wonderful to this already great combination of ingredients. I'll definitely be making this again!

    Chipotle Chile Candied Pecan, Dried Cranberry, and Crumbled Blue Cheese Salad

    Chipotle Chile Candied Pecan, Dried Cranberry, and Crumbled Blue Cheese Salad
    Gifts Cooks Love - Sur La Table

    Combine a handful of these candied pecans, along with ¼ cup of sweetened dried cranberries and ½ cup blue cheese, with 8 cups of loosely packed mesclun greens. Toss with your favorite vinaigrette and serve Add thin slices of crisp apples or ripe pears, if desired.

    Big Flavors Rating: 5 Stars

    Avocado Filled With Sweetened Condensed Milk

    February 9, 2013 by Ashley 1 Comment

    Avocado Filled With Sweetened Condensed Milk

    Avocado Filled With Sweetened Condensed Milk

    I saw this idea over on Viet World Kitchen back when we made Sinh to Bo (Vietnamese Avocado Shake) a little while ago. Avocados were on sale, so I decided to give it a try. It's so simple, creamy and delicious. It's a real treat!

    Big Flavors Rating: 5 Stars

    DM Bloody Mary

    February 9, 2013 by Ashley Leave a Comment

    Bloody Mary with garnishes.

    This Bloody Mary is the best ever! My husband makes amazing Bloody Marys, and they get even better when you include Chile-Infused Vodka from The Domestic Mixologist.

    This is nice, spicy way to start off your day.

    DM Bloody Mary

    Slow-Cooker French Dips

    February 8, 2013 by Ashley 25 Comments

    French dip sandwich with au jus

    Slow-Cooker French Dips are an easy and delicious family comfort food meal!

    French dip sandwich with au jus

    Why we love this recipe

    • It's quick and easy to put together.
    • They only require a few ingredients.
    • Melted cheese makes everything better!

    These winter storms really stink. But hey, if I'm gonna be snowed in, I want to have something awesome like these Slow-Cooker French Dips for dinner.

    They make the house smell wonderful all day, and are nice and warm and just heavenly. They're pretty low maintenance, too, perfect for my slumber party weekend with my good friend Jenn!

    I haven't made these in a while, so I was glad to make another batch today. Yum!

    Still hungry? You may also like...

    ¾ view of 3 assembled Instant Pot French Dip Sandwiches with au jus, an Instant Pot, and shredded meat alongside.

    Instant Pot French Dip Sandwiches

    Vietnamese shrimp sandwiches on plates with fresh herbs and peanut sauce.

    Vietnamese Shrimp Sandwiches with Peanut Sauce

    Sloppy Joe sandwich with pickles and sweet potato fries

    Our Favorite Sloppy Joe Sandwiches

    Overhead view of a bowl of beef stew with bread and butter.

    Grandpa Henderson's Beef Stew

    Doing some online shopping?  Check out my Amazon Shop page for recommendations!

    Check out my latest posts...

    • Jar of homemade Italian seasoning blend.
      Italian Seasoning Blend
    • Bowl of tzatziki with olive oil drizzled over the top.
      Easy Homemade Tzatziki
    • Turkey sausage patties and a jar of breakfast sausage seasoning.
      Turkey Sausage Patties

    The Herbalist

    February 8, 2013 by Ashley Leave a Comment

    Gin cocktails garnished with lime.

    My friend Jenn braved Winter Storm Nemo to come have a slumber party at my house. I wanted to make sure to have some good cocktails ready to go when she got here. This is one of my favorites that we created over at The Domestic Mixologist. It was a bit hit! It went great with the Chipotle Chile Candied Pecans that I made (and the goat cheese, of course...but what doesn't go well with goat cheese?). It was such a refreshing way to start the evening!

    The Herbalist

    Hot Hot Hot Chocolate

    February 8, 2013 by Ashley 4 Comments

    Hot Hot Hot Chocolate

    Mara and I came up with the perfect way to keep warm during Nemo...Hot Hot Hot Chocolate! I mean, what's better than a high-quality mug of hot cocoa...spiked with spicy chile rum?

    If you're feeling extra festive, you could top a mug of this hot cocoa with some homemade peppermint whipped cream.

    Hot Hot Hot Chocolate

    Hot Hot Hot Chocolate
    The Domestic Mixologist

    Luxury hot chocolate mix (we used Ghirardelli)
    Whole milk
    1 ounce chile rum
    Marshmallows and chocolate shavings for garnish.

    Brew hot chocolate in a small saucepan according to package instructions. Add chile rum and stir. Pour into mug and garnish with marshmallows and chocolate shavings.

    Big Flavors Rating: 5 Stars

    World Nutella Day: Nutella No Bake Cookies

    February 6, 2013 by Ashley 4 Comments

    World Nutella Day: Nutella No Bake Cookies

    Guys...I was >thisclose< to missing World Nutella Day!

    It's been a super busy week, and I didn't realize what day it was until I picked my husband up from the train after work and was on my way home to heat up some leftovers for dinner.

    I didn't have time to stop at the store or find a recipe ahead of time, so I just trusted that I'd be able to put something together with ingredients that I had on hand at home.

    Let me tell you...these cookies are DANGEROUS. Oh man...they were SO good. Super easy to put together, and I normally have all of the ingredients at home.

    The addition of peanut butter makes them extra rich and delicious. I had just enough Nutella at home to make these, so now I have to go buy another vat!

    I will definitely be making these beauties again. YUM!

    World Nutella Day: Nutella No Bake Cookies

    Nutella No Bake Cookies
    The Vintage Mixer

    Makes 2 dozen

    3 tablespoons butter
    ½ cup granulated sugar
    ¼ cup milk
    1 tablespoon unsweetened cocoa powder
    ¼ cup peanut butter
    ¾ cup Nutella hazelnut spread
    2 cups rolled oats*

    In a medium to large saucepan, melt the butter over medium to medium-low heat. Add the sugar, milk, and cocoa powder and mix until combined. Stir in the peanut butter and Nutella until melted, followed by the oats. Remove from stove. Continue mixing until all of the ingredients are incorporated.
    Working quickly, use a small ice cream scoop to shape balls of dough and place them on a parchment-lined sheet pan. Refrigerate for thirty minutes until firm. Store in an airtight container.

    *Optional: use Gluten Free

    Big Flavors Rating: 5 Stars

    Check out Ms Adventures in Italy, Bleeding Espresso, and World Nutella Day for more Nutella fun!

    Chocolate Macarons with Espresso Salted Caramel Buttercream

    February 3, 2013 by Ashley 3 Comments

    Chocolate Macarons with Espresso Salted Caramel Buttercream

    Chocolate Macarons with Espresso Salted Caramel Buttercream

    I've been wanting to try my hand at making macarons for quite a while now. So when Joanne of Eats Well With Others came up to visit my tiny kitchen, I asked if she'd be up for making them again. She's made them a few times (most recently red freaking velvet ones!!) so I figured I'd be more comfortable making them with someone who had successfully baked them before. Our original idea was to make chocolate macarons and then use some sort of caramel frosting to make little football lace designs on the tops since it was Superbowl Sunday. But then...the fun started...

    Do you see this?! This freak of nature was a giant clump of cocoa powder that somehow re-formed inside the pastry bag and made it almost impossible to pipe the batter onto our baking sheets. In the words of Liz Lemon...WHAT THE WHAT?!

    Chocolate Macarons with Espresso Salted Caramel Buttercream

    Once we got past the initial clumps, Joanne piped the awesome chocolate macaron batter into little mounds on the silpat-lined baking sheets.

    Chocolate Macarons with Espresso Salted Caramel Buttercream

    Then, it was on to the "salted" caramel buttercream. I say "salted" because after we made the caramel (which had some issues of its own...we aren't even gonna go there. Let's just say we don't think it's a reliable recipe). I added a few notes to the recipe in brackets. I mean, you really would be in trouble if you used a whole egg and not an egg white to try to form soft peaks. But we realized that when we were reading it and managed to make it work. So we tasted it, and then I said, "hey...how is this SALTED caramel? It didn't call for any salt! We decided to add some espresso salt that I had in my pantry to the caramel. It tasted ah-mazing! There were a few gigantic slightly larger chunks of hardened caramel that we decided to pick out of the buttercream. I mean, really, who wants to end up in a dentist's office after breaking their tooth on a giant chunk-o-dessert, right?

    Chocolate Macarons with Espresso Salted Caramel Buttercream

    Troubles aside, we decided that it was a success - I mean, those macs had beautiful feet! Hooray!! They tasted wonderful, and we had a BLAST making them. I thought it would be funny to take one extra photo of the "runners up" in our macaron beauty pageant. Just to show you that they weren't all the beauties featured in the first photo of my post. I affectionately named that one in the back Jabba the Hut. It was a combo of the one gigantic and the one tiny macaron shells that were leftover after we paired all of the similarly sized ones up. Too funny. Still just as delicious as the rest.

    Chocolate Macarons with Espresso Salted Caramel Buttercream

    I'll definitely try my hand at these again...but I won't be repeating this buttercream recipe.

    Chocolate Macarons
    David Lebovitz via Vanilla & Lace

    1 cup (100 gr) powdered sugar
    ½ cup powdered almonds (about 2 ounces, 50 gr, sliced almonds, pulverized)
    3 tablespoons (25 gr) unsweetened Dutch-process cocoa powder
    2 large egg whites, at room temperature
    5 tablespoons (65 gr) granulated sugar

    Preheat oven to 375 degrees F (180 degrees C).

    Line two baking sheets with parchment paper and have a pastry bag with a plain tip (about ½-inch, 2 cm) ready.

    Grind together the powdered sugar with the almond powder and cocoa so there are no lumps; use a blender or food processor since almond meal that you buy isn't quite fine enough.

    In the bowl of a standing electric mixer, beat the egg whites until they begin to rise and hold their shape. While whipping, beat in the granulated sugar until very stiff and firm, about 2 minutes.

    Carefully fold the dry ingredients, in two batches, into the beaten egg whites with a flexible rubber spatula. When the mixture is just smooth and there are no streaks of egg white, stop folding and scrape the batter into the pastry bag (standing the bag in a tall glass helps if you're alone).

    Pipe the batter on the parchment-lined baking sheets in 1-inch (3 cm) circles (about 1 tablespoon each of batter), evenly spaced one-inch (3 cm) apart.

    Rap the baking sheet a few times firmly on the counter top to flatten the macarons, then bake them for 15-18 minutes. Let cool completely then remove from baking sheet.

    Big Flavors Rating: 5 Stars

    [Espresso Salted] Caramel Buttercream
    adapted from Let the Baking Begin

    For the buttercream
    1 egg [white]
    100 grams unsalted butter, room temperature
    6 tablespoons sugar
    2 tablespoons water

    For the caramel
    ½ cups sugar
    3 tablespoons water
    ¼ cup heavy cream

    [generous sprinkle of espresso salt]

    To make the Buttercream
    Combine the sugar and water in a small saucepan. Turn your stove to medium heat. Cook the syrup to soft ball stage (that’s when a drop of syrup, dropped into a glass of water can be formed into a soft ball). Whip the egg [white] to soft peaks. Carefully pour in the syrup between the whip attachment and the bowl while continuing to whip. Whip until the bowl feels cool to the touch. Meanwhile, whip the room temperature butter to whiter in color and fluffy, about 2 minutes. When the egg has cooled, continuing to whip, drop 1 tablespoon of butter at a time. The mixture might become runny and might look curdled, continue to whip and it will come together into a smooth buttercream. Set aside.

    To make the Caramel
    Heat the cream and keep ready to be combined with the syrup. Combine the water with sugar and cook at medium heat, until amber in color. Be very careful to not overcook the syrup, as when it starts turning slightly amber it will take about 30 seconds to go from good amber, to burnt amber (unusable). Take off the heat. Slowly add the heavy cream into the syrup, keeping your hands as far as possible from the steam cloud that will form as soon as you start adding warm milk to extremely hot syrup. Once the bubbles have subsided, start mixing with a wooden spoon, to form a homogenous caramel. Let cool to room temperature.

    Start whipping the butter cream again. Add the caramel into the buttercream, 1 tablespoon at a time, until smooth, but still some chunks of caramel present. The buttercream will become a little bit more runny then in the beginning, but that’s ok. [Stir in espresso salt to taste]

    Sandwich the cookies with a dollop of caramel buttercream.

    Let the macarons sit in a covered container, in the fridge overnight. Then, remove from the fridge and let come to room temperature before devouring

    Big Flavors Rating (with tweaks): 5 Stars

    Bollywood Coconut Curry Popcorn Seasoning

    February 2, 2013 by Ashley 3 Comments

    Bag of popcorn kernels with a seasoning to go alongside.

    Bollywood Coconut Curry Popcorn Seasoning

    I've been following Joanne's blog, Eats Well With Others, for several years now. We had plans to finally meet up and cook and eat together, and I wanted to give her some sort of food gift. I've had Gifts Cooks Love: Recipes for Giving by Diane Morgan for a while now, but haven't made anything from it. So who better to make a foodie gift for than another food blogger?! I had a few recipes flagged, but decided on this one after I almost burnt down my kitchen and didn't want to do any more cooking. This spice blend smells wonderful! It made a bunch, so I have some for myself, too. I paired it with some popcorn kernels from my local Farmers' Market, and a mason jar of Chile-Infused Vodka from my other project, The Domestic Mixologist. I hope she likes it!

    Bollywood Coconut Curry Popcorn Seasoning

    Bollywood Coconut Curry Popcorn Seasoning
    Gifts Cooks Love - Sur La Table

    Prep Time: 20 Minutes
    Makes about 2 cups popcorn seasoning, enough to fill three (5- to 6-ounce) spice jars

    1 ¾ cups sweetened shredded coconut
    7 tablespoons Madras curry powder
    3 ½ teaspoons granulated sugar
    2 tablespoons kosher or sea salt
    1 ¾ teaspoons ground ginger
    1 ¾ teaspoons ground cinnamon
    1 teaspoon cayenne pepper
    1 teaspoon garlic powder

    Food Processor, Measuring Cups and Spoons, Three Spice Jars or Tins

    1. In a food processor, fitted with the metal blade, pulverize the coconut into tiny bits, 1 to 2 minutes. Add the curry powder, sugar, salt, ginger, cinnamon, cayenne and garlic powder. Pulse to combine.

    2. Divide into ¾-cup portions and transfer to jars or tins with tight-fitting lids.

    Storing: Store the popcorn seasoning away from heat and light for up to 4 months.

    Gift card: This Bollywood Coconut Curry Popcorn Seasoning was blended on [give date] and can be enjoyed for up to 4 months. Generously sprinkle it over freshly popped popcorn coated with melted butter. It can also be tossed with microwave popcorn; just be sure to drizzle it with melted butter so the seasoning clings to each kernel!

    Gift-giving tips: Tie each jar or tin with raffia or ribbon and attach a gift card. To turn this into a gift basket, consider including popcorn kernels. To make the gift more elaborate, see page 173 for a Retro Popcorn Gift Kit idea.

    Big Flavors Rating: 4 Stars

    Polpette di Melanzane (Crispy Eggplant Meatballs)

    February 2, 2013 by Ashley 4 Comments

    Polpette di Melanzane (Crispy Eggplant Meatballs)

    I was immediately intrigued when I saw this recipe for vegetarian meatballs in one of my favorite cookbooks. This recipe takes a bit of time, but it is beyond worth it. The "meatballs" are super fluffy and tender, and the outside gets nice and crispy.

    A few notes - I didn't use fresh breadcrumbs. I used store-bought ones and it worked beautifully. Also, I should have gone with my gut and not used olive oil for frying these.

    Olive oil doesn't have a high smoke point, and it's not good for stuff like this. I get it, olive oil is Italian...but it's just not appropriate here.

    So, after I took my cast iron skillet full of smoking olive oil off of the stovetop, I let out a sigh of relief that I didn't start a kitchen fire, and started a new skillet with vegetable oil. Much better.

    Peanut oil would also work well here. Just not olive oil. Nope. Anyway, these went beautifully with some angel hair pasta and Sugo di Pomodoro (Quick Tomato Sauce).

    We will definitely be having these again. I bet they freeze great, too!

    Polpette di Melanzane (Crispy Eggplant Meatballs)

    Polpette di Melanzane (Crispy Eggplant Meatballs)
    My Calabria - Rosetta Costantino

    1 large eggplant, about 1 pound (450 grams), unpeeled
    Kosher salt
    1 cup (80 grams) fresh breadcrumbs (page 127), or more if needed
    ¼ cup (25 grams) freshly grated pecorino cheese
    2 tablespoons minced flat-leaf parsley
    1 garlic clove, minced
    Freshly ground black pepper
    1 large egg, lightly beaten
    ⅓ cup (50 grams) fine dry breadcrumbs (page 127)
    Extra virgin olive oil for frying

    Cut the eggplant into 1-inch (2 ½-centimeter) to 1 ½ inch (4-centimeter) cubes. Bring 2 quarts (2 liters) of water and 1 tablespoon of salt to a boil in a 4-quart (4-liter) pot over high heat and add the eggplant. Boil uncovered until the eggplant is soft, about 10 minutes. The cubes want to float, so you will need to push them down into the water repeatedly with a wooden spoon. Drain in a colander and let cool, then press on the eggplant with a wooden spoon to remove excess water. The eggplant should be as dry as possible. Very finely chop by hand.

    In a bowl, combine the eggplant, fresh breadcrumbs, cheese, parsley and garlic. Blend the ingredients gently with a fork, then season to taste with salt and pepper. Mix the egg in thoroughly. In a small skillet lightly coated with olive oil, fry a tablespoon of the mixture and taste for seasoning.

    Working with a little of the mixture at a time, roll between your palms into small balls about 1 inch (2 ½ centimeters) in diameter and set them on a tray. If the mixture is too moist to roll easily, stir in a few more fresh breadcrumbs. Put the fine breadcrumbs in a small bowl, roll each ball in the crumbs to coat evenly, then set the coated balls aside on a clean tray.

    Pour olive oil into a 10-inch (25-centimeter) skillet to a depth of ½ inch (12 millimeters). Don't skimp on the oil or the meatballs won't fry properly. Turn the heat to medium. When the oil begins to shimmer, put a test ball in the skillet; it should sizzle immediately. If not, let the oil heat a little longer. When the oil is ready, carefully place half the balls in the skillet. They should fit in a single layer without crowding.

    Fry the balls, turning gently with a spoon so as not to break them, until deeply browned all over, about 3 minutes total. With a slotted spoon, transfer the balls as they are done to a tray lined with paper towels. Repeat with the remaining balls. Let cool for about 10 minutes, then serve.

    Makes about thirty-two 1-inch (2 ½-centimeter) meatballs

    Big Flavors Rating: 5 Stars

    Sugo di Pomodoro (Quick Tomato Sauce)

    February 2, 2013 by Ashley Leave a Comment

    A plate of spaghetti topped with tomato sauce and basil.

    My husband's family is from Calabria, Italy. His dad is an amazing cook, so I don't often make Italian food at home, since he makes it for us often, and I don't want to make sub-par versions of their favorites.

    I make exceptions when it comes to recipes from people like Lidia Bastianich or Rosetta Costantino, because they know what they're doing, and their recipes are wonderful!

    I've been trying to cook out of the stash of cookbooks that I own more frequently, so I dug out My Calabria. I found a vegetarian meatball recipe that I wanted to make, and figured it would be great over pasta with tomato sauce.

    I was glad to find this recipe that was quick and easy to make. I used canned San Marzano tomatoes and a chile de arbol, and it turned out beautifully. My husband LOVED it!

    His only note was that it was a little sweet. He said that when he makes sauce, he adds a bay leaf in with the garlic at the beginning, which he said tames the sweetness of the tomatoes. Next time! This is a great recipe, and I'll definitely make it again.

    Sugo di Pomodoro (Quick Tomato Sauce)

    Sugo di Pomodoro (Quick Tomato Sauce)
    My Calabria - Rosetta Costantino

    3 ½ pounds (1 ½ kilograms) fresh tomatoes, peeled, seeded, and diced, or 1 quart (1 liter) Home-Canned Peeled Tomatoes (page 296) or one 28-ounce can Italian San Marzano tomatoes, with juice
    3 tablespoons (45 milliliters) extra virgin olive oil
    2 large garlic cloves, halved
    5 fresh basil leaves
    2 teaspoons kosher salt
    1 small fresh or dried hot red pepper, halved, optional

    If you are using Home-Canned Tomatoes or store-bought canned tomatoes, pour them into a bowl and break them up by hand, discarding any hard cores or bits of skin. I don't want a perfectly smooth sauce, so I don't process the tomatoes further. If you prefer a smooth sauce, pass the tomatoes (fresh or canned) through a food mill fitted with the medium disk, or puree them in a food processor or blender.

    Heat the olive oil in a skillet over moderately high heat, add the garlic, and sauté until golden, about one minute. Add the tomatoes and their juices carefully. (They will splatter.) Tear the basil in half and add along with the salt. Add the hot pepper, if using. Simmer briskly, stirring occasionally, until you have a thick, chunky sauce. Fresh tomatoes and Homemade Canned Tomatoes will take 10 to 15 minutes. Store-bought canned tomatoes will cook down more quickly, as they often contain tomato puree. Remove the garlic cloves before serving.

    Makes about 2 ½ cups

    Big Flavors Rating: 5 Stars

    Toad in the Hole

    February 2, 2013 by Ashley Leave a Comment

    Toad in the Hole

    Toad in the Hole

    My husband rocks. He makes breakfast on weekends, and sometimes, he does things like this, where he uses a heart-shaped cookie cutter to make a regular Toad in the Hole breakfast even better. It's super simple, and the hearts would be perfect for Valentine's day breakfast! He heats the griddle or a frying pan and butters one side of each piece of bread. He uses a cookie cutter to cut a hole in the middle of the bread. He places the bread, butter side down, onto the griddle and sprays oil in the hole. He cracks an egg and drops it into the hole and lets it fry. Once the white is almost set, he flips it.He seasons it with salt and pepper and it's great! He usually fries the cut-out parts, too. For ours, he leaves the yolks nice and runny. For our son, he cooks them almost all the way through. This is especially good with farm fresh eggs.

    Garden Pea Soup

    February 1, 2013 by Ashley 4 Comments

    Garden Pea Soup

    This is another recipe that I found in the cookbook that came with my Vitamix. It's super easy to put together, and turned out really well! We seasoned it up with salt and a good amount of pepper at the end, and it made it even better. This is a great low-maintenance recipe that will definitely be a repeat for busy weeknights. I also think I can add a few things to it to make it taste even better, but this is a great start. I served it with the remaining Avocado Egg Rolls with Chipotle Ranch Dipping Sauce. Yum!

    Garden Pea Soup

    Garden Pea Soup
    Vitamix

    Yield: 4 cups (960 ml)

    3 ⅔ cups (880 ml) chicken or vegetable broth
    2 (276 g) small russet potatoes, scrubbed, quartered
    ⅔ cup (40 g) fresh sweet peas or ¼ package frozen sweet peas
    2 tablespoons large shallot or small onion, chopped
    ¼-inch (.6 cm) strip of lemon peel

    1. Cook potatoes, peas, and shallot with 2 cups (480 ml) of broth in a saucepan until the potatoes are tender.

    2. Place cooked ingredients, remaining broth, and lemon peel into the Vitamix container and secure lid.

    3. Select Variable 1.

    4. Turn machine on and slowly increase speed to Variable 10, then to High.

    5. Blend for 30-45 seconds until smooth.

    Big Flavors Rating: 4 Stars

    Garlic Shrimp and White Beans

    January 31, 2013 by Ashley 2 Comments

    Garlic Shrimp and White Beans

    Garlic Shrimp and White Beans

    I keep things like shrimp and chicken in the freezer so I can make meals without having to worry about buying meat. It's nice because I usually have enough on hand to put something together without running out to the store. This recipe, however, called for a few things that I didn't have, but it just looked so good that I didn't mind at all. I used a dried bay leaf for this, and it turned out so delicious! You really build layers of flavor. It isn't a lot of work (especially if you buy already peeled and deveined shrimp, or you convince your husband to peel shrimp for you while you prep the rest of the meal) and the payoff is huge. I broiled some slices of bread while the rest of the ingredients were cooking on the stovetop to get it nice and toasty. It's great to dip the bread in the sauce that's left in the bottom of the pan. I really enjoyed slathering the bread with some beans, sauce and shrimp and devouring it. I will definitely be making this again. Wow!

    Garlic Shrimp and White Beans

    Garlic Shrimp and White Beans
    The Bon Appétit Test Kitchen - October 2012

    6 tablespoons olive oil, divided
    3 garlic cloves, minced, divided
    2 dried chiles de árbol
    1 bay leaf, preferably fresh
    1 ¼ cups chopped tomato (about 8 ounces)
    Kosher salt, freshly ground pepper
    1 tablespoon tomato paste
    2 15-ounce cans white beans (such as cannellini), rinsed, drained
    1 cup low-sodium chicken broth
    1 pound medium shrimp
    1 teaspoon smoked paprika
    2 tablespoons chopped flat-leaf parsley
    Grilled bread (optional)

    Ingredient info: Dried chiles de árbol are available at Latin markets, specialty foods stores, and some supermarkets.

    Preheat broiler. Heat 2 tablespoons oil in a large, heavy, ovenproof skillet over medium heat. Add 1 garlic clove, chiles, and bay leaf and cook, stirring constantly, just until fragrant, 1-2 minutes (do not allow garlic to burn). Add tomato; season with salt and pepper. Cook, stirring and smashing tomato with the back of a wooden spoon, until tomato is completely broken down, about 5 minutes.

    Add tomato paste and cook, stirring constantly, until paste is deep red and caramelized, 3-4 minutes. Stir in beans and broth. Bring to a brisk simmer and cook until juices are slightly reduced and thickened, 3-4 minutes. Season to taste with salt and pepper.

    Combine remaining 2 garlic cloves, 2 tablespoons oil, shrimp, and paprika in a medium bowl; season with salt and pepper and toss to evenly coat shrimp. Scatter shrimp over beans in an even layer.
    Broil until shrimp are golden and cooked through, about 3 minutes. Drizzle remaining 2 tablespoons oil over shrimp and beans; garnish with parsley. Serve with bread, if desired.

    Big Flavors Rating: 5 Stars

    Honey Vanilla Early Grey Lavender Tea Latte

    January 31, 2013 by Ashley Leave a Comment

    Honey Vanilla Early Grey Lavender Tea Latte in a blue mug.

    When I saw this post over on my friend Amy's blog, I just knew I had to make this for myself. I didn't have any earl gray lavender tea, but I had earl gray and I had dried lavender, so I used that - just added a pinch of lavender to the cup.

    This was really nice and comforting. I'd probably go with a little less honey next time. I used some local wildflower honey and it was just a tad too sweet for my liking. I'd probably try it out with 1 ½ teaspoons first and sweeten it further from there if necessary.

    This was a really nice, different treat to help relax at the end of a long day. I'll definitely make it again!

    Honey Vanilla Early Grey Lavender Tea Latte

    Honey Vanilla Early Grey Lavender Tea Latte
    Our Sacred hEarth

    1 teaspoon vanilla extract
    1 tablespoon honey
    1 earl grey lavender tea bag, or tea of choice.
    1 cup milk

    Over the stove top heat the milk, honey and vanilla, stirring slowly with wisk at first until honey is melted and combined. As milk reaches simmer, wisk to add a bit of froth and remove from heat. Pour over tea bag and allow to steep for 5-10 minutes. Enjoy!

    Big Flavors Rating: 4 Stars

    Homemade Ranch Dressing Mix

    January 31, 2013 by Ashley 8 Comments

    Homemade Ranch Dressing Mix

    Homemade Ranch Dressing Mix

    I was making something for lunch that called for ranch dressing mix. So I figured I must be able to make my own, rather than buying a version that was full of chemicals. So I found this post on I Believe I Can Fry (ha!) and was intrigued. I've never heard of powdered buttermilk before, and luckily there was a photo on the post so I could see what I was looking for at the store. I could only find a box with packets of dried buttermilk, so I had to cut the recipe in half. It smells like ranch dressing, and when combined with the ingredients for my lunch recipe, it sure tasted like ranch. This will be great to have on hand for salad dressing without all the junk. I'll definitely report back when I make regular ranch with it.

    Homemade Ranch Dressing Mix

    Homemade Ranch Dressing Mix
    I Believe I Can Fry

    1 cup powdered buttermilk
    2 tablespoon dried parsley
    1 tablespoon dried chives
    2 teaspoon dried minced onion
    2 teaspoon onion powder
    2 teaspoon garlic salt
    1 teaspoon garlic powder
    1 teaspoon dill weed
    1 teaspoon salt
    ½ teaspoon white pepper
    ½ teaspoon celery salt

    Combine all of the ingredients in a food processor and pulse until powdered. Store in an air-tight container.

    Big Flavors Rating: 5 Stars

    Sinh to Bo (Vietnamese Avocado Shake)

    January 30, 2013 by Ashley 2 Comments

    Sinh to Bo (Vietnamese Avocado Shake)

    When we purchased our Vitamix, my husband emailed a recipe to me and said it needed to be the first thing that we made with it. It ended up being the second, but boy, oh boy, was it good! I love in the intro that it mentions avocado with sweetened condensed milk poured into the hole where the pit was as a snack. That sounds like something I'll need to try out soon, too! There are some other variations mentioned on the original post - all things I'd love to try out sometime. This shake is rich and creamy and sweet and just oh so wonderful. It was really easy to put together, and I'll most definitely be making it again and again! Vietnamese cuisine rocks my world!

    Sinh to Bo (Vietnamese Avocado Shake)

    Sinh to Bo (Vietnamese Avocado Shake)
    Viet World Kitchen

    Makes about about 2 ¼ cups, enough to serve 2 or 3

    1 ripe medium avocado (6–8 ounces)
    1 cup ice (8 ice cubes)
    ⅓ cup sweetened condensed milk
    ¼ to ½ cup milk

    Scoop the avocado flesh into a blender. Add the remaining ingredients, starting out with the least amount of milk and puree until completely smooth. Taste and add additional milk, depending on the avocado type and if a thinner consistency is desired.

    Big Flavors Rating: 5 Stars

    Mango Coconut Sherbet

    January 29, 2013 by Ashley 4 Comments

    Mango Coconut Sherbet

    We had an Osterizer from my in-laws that they received as a wedding gift about a decade before I was born. They gave it to us since they rarely used it. It was amazing! That thing could crush ice like nobody's business.

    A few months ago, it finally bit the dust. It definitely got a lot of mileage in our home...but it was finally time to move on and get another blender. After some research online and surveying of friends and family, we decided that we really wanted to get a Vitamix.

    We ended up finding a certified reconditioned one online, which was awesome! So when it got here, we couldn't wait to try it out. I wanted to make a Peach Soy Sherbert that was featured in the DVD that came with the blender, because I thought we had all of the ingredients at home. Turns out we didn't, so I used the directions and made something a bit different with what we had in the kitchen.

    Mango Coconut Sherbet

    Mango Coconut Sherbet
    Ashley Covelli (using directions by Vitamix)

    Yield: 3 c (690 g)
    Difficulty: Easy
    Total Time: 11 Minutes

    1 cup (240 ml) coconut milk beverage
    1 pound (454 g) frozen unsweetened mango chunks
    ½ teaspoon vanilla extract

    Place all ingredients into the Vitamix container in the order listed and secure lid.

    Select Variable 1.

    Turn machine on and slowly increase speed to Variable 10, then to High.

    Use the tamper to press the ingredients into the blades.

    In about 30-60 seconds, the sound of the motor will change and four mounds should form.

    Stop machine. Do not over mix or melting will occur. Serve immediately.

    If mixture has consistency of a milkshake, firm it up by slowly adding another cup of frozen ice cubes. Process until smooth. For recipe variation, other fruits may be substituted.

    Note: This recipe has been written for the Vitamix 5200 with Standard 64-ounce container. If you are using a different Vitamix machine or container size, you may need to make adjustments to the Variable Speed, processing time, and/or ingredient quantities.

    Big Flavors Rating: 4 Stars

    Mustard Roasted Brussels Sprouts with Capers

    January 21, 2013 by Ashley 3 Comments

    Plate of Mustard Roasted Brussels Sprouts with Capers.

    Tossing Brussels sprouts in a quick vinaigrette before roasting them in the oven is a great way to add flavor to this side dish recipe.

    Plate of Mustard Roasted Brussels Sprouts with Capers.

    I saw some gorgeous brussels sprouts at the market today, so I decided to come up with a way to cook them to go with the shrimp that I made tonight.

    I basically made a flavored vinaigrette and tossed them in it, roasted them, stirred in some capers, and then roasted them a little more. They turned out spectacularly!

    This was super easy and really burst with flavor. The tanginess from the mustard, vinegar and capers was bright and wonderful.

    And I love those little bits where the brussels sprouts get a little dark and crispy. I'll definitely be making these beauties again. Yum!

    Still hungry? You may also like...

    Maple Roasted Butternut Squash Pizza with Brussels Sprouts, Bacon + Pomegranate.
    Maple Roasted Butternut Squash Pizza with Brussels Sprouts, Bacon + Pomegranate
    Plate of Slowly Cooked Salmon with Roasted Brussels Sprouts, Avocado & Apples.
    Slowly Cooked Salmon with Roasted Brussels Sprouts, Avocado & Apples
    Plate of Chicken Thighs with Bacon, Brussels Sprouts and Easy Apple Jus.
    Single-Skillet Chicken Thighs with Bacon, Brussels Sprouts and Easy Apple Jus
    Toasted Farro Grain Bowls with Roasted Winter Veggies.
    Toasted Farro Grain Bowls with Roasted Winter Veggies

    Doing some online shopping? Check out my Amazon shop page for recommendations!

    Check out my latest posts...

    • Jar of homemade Italian seasoning blend.
      Italian Seasoning Blend
    • Bowl of tzatziki with olive oil drizzled over the top.
      Easy Homemade Tzatziki
    • Turkey sausage patties and a jar of breakfast sausage seasoning.
      Turkey Sausage Patties

    Tyler Florence's Sauteed Shrimp

    January 21, 2013 by Ashley Leave a Comment

    Tyler Florence's Sauteed Shrimp

    I wanted to make a shrimp dish tonight, and I figured Tyler Florence would have some good options for me. I came across this recipe and thought it would be perfect. I had some shallots that I needed to use up anyway, so all I needed to pick up was a lemon and some parsley. Easy enough! This was really tasty. My only complaint with it is that the breading gets soggy from stirring them back into the sauce. But the flavor is great. Definitely a nice, easy main course for a busy day.

    Tyler Florence's Sauteed Shrimp

    Sauteed Shrimp
    Food 911 - Tyler Florence

    Yield: 4 Servings

    ½ cup all-purpose flour
    Sea salt and freshly ground black pepper
    1 pound jumbo shrimp, peeled and de-veined
    2 tablespoons unsalted butter
    2 tablespoons olive oil
    2 garlic cloves, finely chopped
    2 shallots, finely chopped
    1 lemon, juiced
    ½ cup chicken broth
    Chopped fresh flat-leaf parsley, for garnish

    Put the flour on a plate and season with a healthy amount of salt and pepper; mix with a fork to combine evenly. Dredge the shrimp in the seasoned flour to coat all sides.

    Heat the butter and oil in a heavy bottomed pan over medium heat until butter stops foaming and just starts to turn a light brown. Add the shrimp, and give it a toss, saute for 5 minutes until the shrimp is firm and there is a crispy coating on the outside. Remove the shrimp to a side plate and cover to keep warm.

    Put the pan back on the heat and add the garlic and shallots. Cook and stir for 1 minute until soft. Add the lemon juice and chicken broth, give it a stir and let it cook down for 1 minute to thicken slightly. Put the shrimp back in the pan and coat in the lemon sauce. Season with salt and pepper and garnish with chopped parsley before serving.

    Big Flavors Rating: 4 Stars

    Baked Apple Pie Egg Rolls

    January 20, 2013 by Ashley 1 Comment

    Baked Apple Pie Egg Rolls

    Ladies and gentlemen, I have died and gone to dessert heaven. I spied this post over on Spoon Fork Bacon and thought it would be the perfect way to end our mini-potluck. These were pretty easy to put together (although I did overstuff them a bit - it made 12 for me and they did burst a bit), and they filled our house with the most wonderful aroma. The cardamom whipped cream is something that blew me away. I would eat that on just about anything. Seriously. It was that good. Anyway, these really impressed our friend, and were a wonderful way to end the meal. I'll definitely be making them again, and I look forward to trying more desserts in eggroll form!

    Baked Apple Pie Egg Rolls

    Baked Apple Pie Egg Rolls
    Spoon Fork Bacon

    Makes 16

    Ingredients:
    apple pie filling:
    2 green apples (abut 2 heaping cups), peeled and diced
    1 lemon, juiced
    ⅓ cup granulated sugar
    3 ½ tablespoons instant tapioca pearls
    2 teaspoons ground cinnamon
    ½ teaspoon ground nutmeg
    ¼ teaspoon ground all-spice
    ⅛ teaspoon salt

    1 egg, lightly beaten
    16 egg roll wrappers
    sweetened cardamom whipped cream:
    ¾ cup heavy cream
    ¼ cup superfine sugar (granulated is fine)
    2 teaspoons vanilla extract
    ½ teaspoon ground cardamom

    1. Preheat oven to 375°F.

    2. Place filling ingredients into a mixing bowl and stir together until well combined. Allow mixture to sit for about 10 minutes.

    3. Lay 1 egg roll wrapper onto a clean surface and brush edge with a 1 inch perimeter of egg wash.

    4. Spread 3 tablespoons of the filling across one side of the prepared egg roll wrapper.

    5. Fold the sides over and brush with egg wash. Carefully roll filling tightly in the wrapper and press gently to seal.

    6. Place onto a baking sheet lined with parchment and coat with a thin layer of cooking spray. Repeat until all the filling and wrappers have been used.

    7. Bake egg rolls for 20 to 25 minutes or until golden brown and crisp. Serve immediately with sweet cardamom whipped cream (recipe follows).

    8. sweet cardamom whipped cream: Place cream in a mixing bowl and whip with a hand mixer, on medium-high speed. As the mixture thickens, slowly add sugar until fully incorporated. Add vanilla and cardamom and continue to whip until medium to stiff peaks form. Serve with baked apple pie egg rolls.

    Big Flavors Rating: 5 Stars

    Seared Scallops with Bacon, Cabbage, and Apple

    January 17, 2013 by Ashley Leave a Comment

    Seared Scallops with Bacon, Cabbage, and Apple

    I was flipping through the newest issue of Cooking Light and this recipe stood out to me. I had some dill leftover from when I made that awesome 5 Layer Greek Dip (that I may actually be making again next week for a potluck!), and I love trying to use up ingredients that I already have on hand. I also have an open package of bacon in the fridge, so I figured this recipe would be perfect. It's been a while since I made scallops, too (wow - did I not make them at all in 2012!?). This was also in the 20 minute recipe section of the issue. It's like this recipe was basically screaming my name. So, after a long day, I picked my husband up from the train station, left him to entertain our baby, and cooked up a batch of scallops. This was really tasty! It was a great combination of ingredients, and pretty easy to prepare. It took a while for me to shred the cabbage in the food processor, but other than that, it was a breeze. The scallops were tender and sweet, and the bacon added just the right amount of crunch. The only note I have is that it pretty much made 2 servings for us. All we had left was a little slaw. I didn't serve it with anything else (CL suggests roasted potatoes), but hey...201 calories per serving means that our servings were only 402, so that's not too shabby!

    Seared Scallops with Bacon, Cabbage, and Apple

    Seared Scallops with Bacon, Cabbage, and Apple
    Cooking Light January 2013

    Quick but hearty. Serve with roasted potatoes.

    Yield: Serves 4

    3 center-cut bacon slices, cut crosswise into ½-inch pieces
    6 cups thinly sliced green cabbage
    1 tablespoon chopped fresh thyme
    ½ cup water
    1 ½ cups chopped Fuji apple (1 medium)
    3 tablespoons cider vinegar
    ½ teaspoon freshly ground black pepper, divided
    1 tablespoon canola oil
    16 large sea scallops (about 1 pound)
    ¼ teaspoon salt
    2 teaspoons chopped fresh dill

    1. Cook bacon pieces in a Dutch oven over medium-high heat until crisp. Remove bacon pieces from pan, reserving 1 ½ tablespoons drippings in pan. Add sliced cabbage and chopped thyme to pan; sauté 2 minutes, stirring cabbage mixture occasionally. Add ½ cup water, scraping pan to loosen browned bits. Bring mixture to a boil. Reduce heat to medium; cover pan. Cook 5 more minutes. Stir in chopped apple and cider vinegar; cover. Cook 5 minutes. Stir in cooked bacon and ¼ teaspoon pepper.

    2. Heat a large, heavy skillet over high heat. Add oil to pan; swirl to coat. Sprinkle scallops with ¼ teaspoon salt and remaining ¼ teaspoon black pepper. Add scallops to pan; cook 3 minutes on each side or until scallops are done. Place about 1 cup cabbage mixture on each of 4 plates. Arrange 4 scallops on each serving. Sprinkle each serving with ½ teaspoon dill.

    Amount per serving
    Calories: 201
    Fat: 6.1g
    Saturated fat: 1.2g
    Monounsaturated fat: 2.3g
    Polyunsaturated fat: 1.3g
    Protein: 22.4g
    Carbohydrate: 15.1g
    Fiber: 3.9g
    Cholesterol: 43mg
    Iron: 1.2mg
    Sodium: 458mg
    Calcium: 86mg

    Big Flavors Rating: 4 Stars

    Chocolate-Lavender Mousse

    January 13, 2013 by Ashley 1 Comment

    Chocolate-Lavender Mousse

    This decadent chocolate dessert has a hint of flower power! Beautiful served with shaved chocolate on top.

    Chocolate-Lavender Mousse

    We needed to have a dessert option at the launch party for The Domestic Mixologist.

    We ended the event (or in some cases, started it...since I dove into dessert before the beverages) with mini "a-mousse bouche" versions of this dessert recipe.

    They were a big hit. Chocolate and lavender go really well together!

    Still hungry? You may also like...

    Plate of peppermint hot chocolate cookies with glasses of milk, marshmallows, and peppermints alongside.
    Peppermint Hot Chocolate Cookies
    3 plates with slices of triple chocolate pumpkin pie.
    Triple Chocolate Pumpkin Pie
    These Melt-in-Your-Mouth Buttermilk Chocolate Cookies are a supremely chocolatey dessert recipe that is a great way to use a partial container of buttermilk - guaranteed to satisfy even the strongest chocolate cravings.
    Melt-in-Your-Mouth Buttermilk Chocolate Cookies
    An assortment of jars of hot cocoa mix with a mug of hot chocolate up front.
    Uncle Tom's Cabin Moon Gulch Hot Chocolate Mix

    Doing some online shopping? Check out my Amazon shop page for recommendations!

    Check out my latest posts...

    • Jar of homemade Italian seasoning blend.
      Italian Seasoning Blend
    • Bowl of tzatziki with olive oil drizzled over the top.
      Easy Homemade Tzatziki
    • Turkey sausage patties and a jar of breakfast sausage seasoning.
      Turkey Sausage Patties

    Launch Party: Rooster Shots

    January 13, 2013 by Ashley Leave a Comment

    Three shot glasses with salted rims.

    This is one of the cocktails that we served at the launch party for The Domestic Mixologist. This is a spicy little shot that will really wake you up and get you ready to partayyyy!

    Rooster Shots

    Launch Party: Ethiopian Spiced Almonds

    January 13, 2013 by Ashley Leave a Comment

    Overhead view of a bowl of spiced almonds.

    Ethiopian Spiced Almonds are a quick and easy snack made with berbere seasoning. Feel free to mix up the flavor with your favorite spices!

    Overhead view of a bowl of spiced almonds.

    I've been hard at work on a new website, and today, it finally went live! It's called The Domestic Mixologist, and it's a project that my friend Mara and I have been developing since the end of last year.

    Of course, we had to throw a little party to kick it off. We had a "Testing and Tasting Party", where people could test drive our new website while tasting some of our signature concoctions.

    To round out the menu, I wanted to make another batch of spiced almonds. I used a similar technique to the Spanish Spiced Almonds that I made for New Year's Eve, but decided to use some berbere spice. They turned out great!

    Going Away Gift: Chocolate-Triple Hazelnut Truffles

    January 4, 2013 by Ashley Leave a Comment

    Chocolate-Triple Hazelnut Truffles

    Chocolate-Triple Hazelnut Truffles

    A dear friend of ours is moving across the country, and he's having a going away party tomorrow evening. I wanted to make something as a little send-off gift for him, and I chose this Cooking Light recipe that I've been eyeing for a few weeks now. I didn't think it looked like it would make 21 truffles, and I was right. I used a small scoop and got maybe a dozen (I totally forgot to count!). The hazelnuts I found weren't salted, and that was fine. In the excitement of my son learning how to walk with the assistance of a walker tonight (!), I totally forgot to toast the hazelnuts. My bad. I know it would have made these even tastier (hey, we had to QC the batch, to make sure we weren't giving our friend bad candy!). I'll definitely try these out again, with toasting. And hey, we'll just see if he peeks at my blog before tomorrow night to see what he's in store for! 😉

    Chocolate-Triple Hazelnut Truffles

    Chocolate-Triple Hazelnut Truffles
    Cooking Light December 2012

    Mild milk chocolate allows the triple hit of nutty goodness to come forward in these creamy truffles; bittersweet chocolate would overpower those flavors. To speed up prep, chill the chocolate mixture for 1 hour or until completely set; let stand at room temperature for 30 minutes to soften before scooping.

    Yield: Serves 21 (serving size: 1 truffle)
    Total: 6 Hours, 20 Minutes

    3 tablespoons hazelnut-chocolate spread (such as Nutella)
    2 ½ tablespoons Frangelico (hazelnut-flavored liqueur)
    1 tablespoon light-colored corn syrup
    ½ teaspoon vanilla extract
    Dash of salt
    5 ounces milk chocolate, finely chopped
    ⅓ cup finely chopped salted hazelnuts, toasted

    1. Combine the first 6 ingredients in the top of a double boiler. Cook over simmering water until chocolate melts (about 2 minutes), stirring constantly. Spoon mixture into a shallow dish. Let stand at room temperature 6 hours or up to overnight.

    2. Scoop about 1 tablespoon chocolate mixture with a spoon. Dredge in nuts; roll into a ball. Repeat procedure with remaining chocolate mixture and nuts.

    Amount per serving
    Calories: 79
    Fat: 4g
    Saturated fat: 1.7g
    Monounsaturated fat: 1.4g
    Polyunsaturated fat: 0.2g
    Protein: 0.8g
    Carbohydrate: 9.8g
    Fiber: 0.4g
    Cholesterol: 2mg
    Iron: 0.1mg
    Sodium: 13mg
    Calcium: 15mg

    Big Flavors Rating: 4 Stars

    Ginger-Lime Syrup

    January 3, 2013 by Ashley 5 Comments

    Ginger-Lime Syrup

    This is one of the recipes that I've been developing with a friend of mine for a new project. I'm going to make the big announcement in about a week and a half. It's pretty exciting stuff! This syrup has a lot of uses, and I can't wait to show them off! It's sweet, spicy and a bit sour, and totally rocks!

    Ginger-Lime Syrup

    Breakfast for Dinner: Challah French Toast

    January 3, 2013 by Ashley 3 Comments

    Plates of challah french toast with powdered sugar, fresh berries, and maple syrup.

    My husband and I have an understanding. I do most of the dinner cooking, and he does most of the breakfast cooking once the weekend rolls around.

    So when a big snowstorm was heading out way (again), and his office was predicted to be closed the next day, he came home with a killer loaf of Challah from a bakery in NYC to make one of our favorites - Challah French Toast.

    Challah is fluffy, eggy and delicious, and works so beautifully as the base of French toast. I really liked that the loaf he bought had poppy seeds on it, too, because it added a nice bit of crunch. This is definitely one of my favorite, indulgent breakfasts.

    This is great on its own, served with oven baked bacon, turkey sausage patties, or pork breakfast sausage patties.

    Side note: if you have any leftover Challah, it's ridiculously good as a Challah Nutella Banana Panini. Trust.

    Challah French Toast

    New Year's Eve Tapas Party: Sherried Mushrooms

    December 31, 2012 by Ashley Leave a Comment

    Sherried Mushrooms

    This was another make-ahead recipe for our holiday get together. Cream sherry is something that I bought yeeeeeears ago to make Spice-Rubbed Cornish Hens with Haroseth Stuffing and Sherry Jus (which turned out AWESOME!) for my Supper Club and I don't think I've used it since. Uh, yeah, I'm obviously not the type to worry about vinegar expiring haha! Anyhow, I was glad to find another recipe to use some of that in. These mushrooms turned out great! They weren't quite as good as the other Marinated Mushrooms that I've made a few times before, but they were still great.

    Sherried Mushrooms

    Sherried Mushrooms
    Eating Well March/April 2007

    Tapas are not always fancy—usually they're just a few simple ingredients prepared well, like these tender, juicy mushrooms. Just place a dish of toothpicks next to the serving dish and let guests help themselves.

    12 servings, ½ cup each
    Active Time: 40 minutes
    Total Time: 40 minutes

    3 pounds white mushrooms, trimmed
    1 tablespoon extra-virgin olive oil
    ¾ cup cream sherry, (see Tip)
    8 cloves garlic, minced
    2 tablespoons lemon juice
    ½ teaspoon kosher salt
    Freshly ground pepper, to taste
    2 tablespoons minced fresh parsley

    Clean mushrooms and cut in half (or quarters if large). Heat oil in a large skillet or Dutch oven over medium-high heat. Add mushrooms and cook, stirring, for 10 minutes. Stir in sherry and garlic and continue cooking, stirring occasionally, until most of the juices have evaporated, 10 to 14 minutes. Stir in lemon juice and season with salt and pepper. Stir in parsley just before serving.

    Make Ahead Tip: Cover and refrigerate for up to 1 day. Bring to room temperature before serving.

    Tip: Cream sherry is a fortified wine used to flavor sauces. Find it near other fortified wines in your wine or liquor store. Opened bottles will keep in a cool, dry place for months.

    NUTRITION
    Per serving: 53 calories; 1 g fat ( 0 g sat , 1 g mono ); 0 mg cholesterol; 7 g carbohydrates; 0 g added sugars; 2 g protein; 0 g fiber; 145 mg sodium; 491 mg potassium.

    Nutrition Bonus: Potassium & Selenium (14% daily value).

    Carbohydrate Servings: ½

    Exchanges: 1 ½ vegetable

    Big Flavors Rating: 4 Stars

    Peppermint Bark

    December 23, 2012 by Ashley Leave a Comment

    Peppermint Bark

    Peppermint Bark

    Peppermint Bark

    I love peppermint bark, but I've never made it before. It seemed pretty easy, so I bought a few items from the store and put this together. It turned out awesome - rich and creamy and refreshingly minty. I didn't bother with a double boiler - just heating it in the microwave, stirring every 30 seconds. Perfection!

    Peppermint Bark

    Peppermint Bark
    Ashley Covelli

    1 bag chocolate chips
    1 bag white chocolate chips
    1 ½t peppermint extract, divided
    5 candy canes or a handful of peppermint candies

    Line a baking sheet with wax paper or parchment. In a large microwave safe bowl (I used a 4 cup measuring cup), microwave the chocolate chips for 30 seconds, stir, and microwave for another 30 seconds. Repeat, stirring in between each trip to the microwave, until all of the chocolate is melted and smooth. Stir in ¾t peppermint extract. Pour the chocolate onto prepared pan and smooth it out into a thin layer with an offset spatula. Pop the tray into the freezer until the chocolate is set (about 30 minutes).

    Unwrap the candy canes or peppermint candies and place them in a zip-top bag. Smash them with a meat tenderizer, rolling pin or heavy pan until they have broken into nice chunks. Pour the contents of the bag into a sieve and shake to remove the super fine dust.

    Repeat the melting process with the white chocolate chips. Add the remaining ¾t peppermint extract and stir to combine. Pour the white chocolate on top of the hardened chocolate, spreading with an offset spatula. Immediately sprinkle the candy pieces on top, and press down on them slightly to make sure they adhere. Pop the tray back into the freezer until set.

    Once the chocolate is firm, remove the tray and let the bark come to room temperature. Break the sheet into chunks and enjoy!

    Big Flavors Rating: 5 Stars


    Traditional Korean Braised Tofu

    December 20, 2012 by Ashley 2 Comments

    Traditional Korean Braised Tofu

    I love Korean cuisine. I even got to take a Korean cooking class back in July for my birthday. I have quite a few Korean ingredients in my kitchen, and some, like the red pepper powder, come in really large quantities, so I'm always happy to find a new recipe to use them in.

    This was really tasty! I loved that I could do all of the prep in the morning and it was ready when we were ready for dinner. We agreed that we'd prefer it slightly warmer than straight out of the fridge - I think room temperature would be nice.

    I really liked this method of preparing tofu, and I think I may try it again with different ingredients.

    Traditional Korean Braised Tofu

    Traditional Korean Braised Tofu
    Blogging Over Thyme

    Makes ~ 2 lbs tofu; Serve chilled

    This dish is best served cold. As you can probably tell, the ingredient list for this dish is surprisingly straight-forward and simple. The successfulness of the dish really boils down to the marinating time and ratio of ingredients together. Be sure to use authentic, finely ground Korean red pepper powder—available in almost every Asian supermarket!

    Marinade (yields roughly 2 cups)
    ½ cup soy sauce
    ¾ cup water
    1 tablespoon (Korean) fine red pepper powder (**available in Asian supermarkets**)
    1 tablespoon dark brown sugar
    1 tablespoon canola/vegetable oil
    1 teaspoon toasted sesame oil
    1 cup scallions, finely sliced
    ½ teaspoon lime juice
    ⅛ cup toasted sesame seeds

    Combine all ingredients in small bowl. Allow to sit out for 10-15 minutes—or while you prepare the tofu (see below).

    Pan-Fried Tofu
    2 blocks of firm tofu, sliced into thin rectangles
    canola/vegetable oil

    Remove tofu from package. Slice into rectangles—roughly ½-inch in thickness. Lay out a thick layer of paper towels or kitchen towel on your counter and place the tofu slices on top to absorb any excess water (for this recipe, you don’t need to press the tofu).

    Heat large non-stick skillet over medium heat with a thin layer of canola or vegetable oil. Once hot, add tofu, spreading out in the pan so they are not touching each other. The tofu should sizzle when it hits the pan. You can do this using multiple skillets, if available, to make the process go faster, or pan-fry them in batches.

    Sear tofu on each side for roughly 3-4 minutes, until light brown on both sides. Remove and place on paper-towel lined plate to absorb any excess oil. Repeat until all tofu is seared. Allow to cool to room temperature.

    Spread out the tofu on a baking dish or any other container with a large surface area (and relatively high sides)--you can do this in two layers, if necessary. Pour over the marinade, cover, and refrigerate for roughly ~6-8 hours. Turn the tofu once or twice during this time, so that each piece gets marinated properly.

    Best served chilled by itself, or with some sushi rice!

    Big Flavors Rating: 4 Stars

    Big Flavors Top Cookie Recipes for the Holidays

    December 20, 2012 by Ashley 3 Comments

    Chocolate Peanut Butter Surprise Cookies

    Looking for some cookies to bake for the holidays? Or something to binge eat while waiting to see if the Mayans were right about the end of the world?

    Well, let me tell ya, we've had a lot of awesome cookies in this house. It's a good thing and a bad thing...I usually send batches to work with Dino so that I get the satisfaction of baking cookies without the guilt of eating them all (yeah, so I may eat a lot of the dough while I'm prepping them, and we always have to QC and make sure the batches are good...but that's all in the name of science, right?).

    Well, a lot of my friends have been asking for cookie recommendations lately, so here are a few of our favorites. Enjoy!

    Chocolate Peanut Butter Surprise Cookies

    Chocolate Peanut Butter Surprise Cookies
    Melt-in-Your-Mouth Buttermilk Chocolate Cookies

    Melt-in-Your-Mouth Buttermilk Chocolate Cookies
    Grandma's Christmas (or Halloween, or Valentine's Day...) Cookies

    Grandma's Christmas Cookies
    Pecan Butter Balls (Mexican Wedding Cookies)

    Mexican wedding cookies in a gift box with a plate alongside.
    Chewy Coconut Cookies

    Plate of coconut cookies with a bite taken out of one.
    Mrs. Sigg's Snickerdoodles

    Stack of snickerdoodle cookies topped with cinnamon sticks.
    Lemon Crinkle Cookies

    Lemon Crinkle Cookies

    Ricotta Cookies

    Ricotta Cookies
    Maple Cookies

    Maple Cookies

    Molasses Sandwich Cookies

    Pile of molasses sandwich cookies with gift bags and a Christmas tree behind.

    Restaurant Style Salsa

    December 11, 2012 by Ashley Leave a Comment

    Restaurant Style Salsa

    Finally! I have found the salsa recipe. You know, the one that is served at Mexican restaurants that always makes you gorge yourself on chips and salsa, and then you end up taking ¾ of your meal to go? OK, maybe that's just me. But still... I love this stuff. So when I came across this recipe, I figured it was worth a try. And let me tell you: it... is... AWESOME! I had to pulse the large can of tomatoes first, dump them into a big bowl, and then pulse the rest of the ingredients together. Then I added it to the other tomatoes and stirred it to combine. It was really difficult to wait for an hour to let it chill, but I knew that this was an important step to allow the flavors to mingle. It's tangy, smooth and has just the right amount of heat. This makes a ton of salsa. And that's a good thing... this is gonna be around for a few days, and I'm thrilled!

    Restaurant Style Salsa

    Restaurant Style Salsa
    The Pioneer Woman Cooks: Food From My Frontier by Ree Drummond

    Yield: Serves 12
    Prep Time: 10 minutes

    Homemade restaurant style salsa that will MAKE you eat an entire bag of chips. It's that good!

    1 can (28 Ounce) whole tomatoes with juice
    2 cans (10 Ounce) Rotel (diced tomatoes and green chilies)
    ¼ cup chopped onion
    1 clove garlic, minced
    1 whole jalapeño, quartered and sliced thin
    ¼ teaspoon sugar
    ¼ teaspoon salt
    ¼ teaspoon ground cumin
    ½ cup fresh cilantro (more to taste)
    ½ whole lime, juiced

    1. In a large food processor or blender, combine whole tomatoes, Rotel tomatoes, onion, jalapeno, garlic, sugar, salt, cumin, lime juice, and cilantro. Pulse until you get the salsa to the consistency you'd like. Taste and adjust seasonings, if necessary.

    2. Refrigerate salsa for at least an hour. Serve with tortilla chips.

    Big Flavors Rating: 5 Stars

    Smashed Chickpea & Avocado Salad Sandwich

    December 8, 2012 by Ashley 21 Comments

    A sandwich that is filled with an avocado and chickpea mixture and baby arugula, sliced in half on a blue plate.

    This Smashed Chickpea & Avocado Salad Sandwich is a fresh, hearty, healthy vegan lunch option that's guaranteed to please meat-eaters and vegetarians alike! It's a rich and creamy sandwich filling that you can feel good about eating!

    I saw this sandwich over on Pinterest, and just knew it was something I wanted to try. I love interesting sandwich combinations, and slap an avocado on almost anything and I'm game!

    A sandwich that is filled with an avocado and chickpea mixture and baby arugula, sliced in half on a blue plate.

    So I made a batch of this goodness this afternoon, and we really enjoyed it! I did not bother peeling the skin off of the chickpeas...that just sounds like torture. I don't think the texture was adversely affected at all.

    I put a bed of baby arugula on the bread, topped with this salad, and lunch was ready!

    The avocado makes it nice and creamy, the chickpeas give it some substance, and the tangy lime really brightens up the entire dish. This was a nice and easy weekend lunch that I'll definitely make again.

    I'm already dreaming up ways to change up the filling to give it some flair - it's going to be a fun recipe to play around with!

    Looking for more sandwich ideas? Check out some of our favorite recipes:

    Farro, Avocado, Cucumber, and Cherry Tomato Salad with Feta

    December 2, 2012 by Ashley 19 Comments

    Farro, Avocado, Cucumber, and Cherry Tomato Salad with Feta

    We were in the mood for something light and healthy for dinner tonight, so I made another batch of one of our favorite dishes - Farro, Avocado, Cucumber, and Cherry Tomato Salad. I love adding crumbled feta to the top of this (which obviously makes it non-vegan). It's light yet satisfying, and we really love it!

    Farro, Avocado, Cucumber, and Cherry Tomato Salad with Feta

    Farro, Avocado, Cucumber, and Cherry Tomato Salad
    Cooking Light July 2008

    Farro is a whole grain with a pleasantly chewy texture. Look for it at specialty markets and gourmet grocers or health food stores. With crunchy cucumber, sweet cherry tomatoes, and buttery avocado, this dish makes a refreshing lunch. Pair it with a simple starter soup and whole-grain crackers for dinner.

    1 cup uncooked farro or spelt
    4 teaspoons extravirgin olive oil
    ¼ teaspoon fresh grated lime rind
    1 tablespoon fresh lime juice
    1 tablespoon white wine vinegar
    ¾ teaspoon salt
    ½ teaspoon black pepper
    2 cups red, orange, and yellow cherry tomatoes, halved
    1 ¾ cups chopped seeded English cucumber (about 1 small)
    ¼ cup fresh cilantro leaves
    ¾ cup sliced peeled avocado (about 1 small)

    1. Place farro in a large saucepan; cover with water to 2 inches above farro. Bring to a boil. Cover, reduce heat, and simmer 30 minutes. Drain and rinse with cold water; drain well.

    2. Combine oil, rind, juice, vinegar, salt, and pepper in a large bowl; stir with a whisk. Add farro, tomatoes, cucumber, and cilantro; toss gently to coat. Place about 1 cup farro mixture on each of 5 plates; garnish evenly with avocado. Serve immediately.
    Yield

    5 servings

    Nutritional notes:
    CALORIES 208(36% from fat); FAT 8.3g (sat 1.1g,mono 4.8g,poly 1g); IRON 2.1mg; CHOLESTEROL 0.0mg; CALCIUM 16mg; CARBOHYDRATE 33.4g; SODIUM 363mg; PROTEIN 5.6g; FIBER 6.1g

    Big Flavors Rating: 5 Stars

    Mom's Pot Roast

    November 27, 2012 by Ashley 1 Comment

    Mom's Pot Roast

    Nothing says fall comfort food quite like a nice, big pot roast. So I broke out the cast iron dutch oven, filled it up, and let the sweet smells fill the house all afternoon. This turned out great, as usual!

    Mom's Pot Roast

    Thanksgiving: Perfect Pumpkin Pie

    November 22, 2012 by Ashley 8 Comments

    Pumpkin pie with a slice on a plate and a bite taken out of it.

    This classic pumpkin pie is super easy to put together and it will not disappoint! The perfect way to end Thanksgiving dinner.

    Perfect Pumpkin Pie

    This pumpkin pie really does live up to its name. I made it for the first time on Halloween years ago, and it has become a staple in my house ever since.

    The recipe is super easy to put together and it will not disappoint! I often use a store-bought pie crust to help it take even less time.

    If you'd like to make your own pie crust, check out my favorite pie crust recipe or try the whole wheat pie crust from this pecan pie recipe.

    If you want to take your pumpkin pie to the next level, I highly recommend making my Triple-Chocolate Pumpkin Pie. It's downright decadent!

    Collage of Thanksgiving recipe images with text that reads, "Thanksgiving Central".

    Thanksgiving prep doesn't have to be stressful! Grab our favorite Turkey Day recipes, tips, and more all in one spot.

    Thanksgiving Central has recipes categorized by course, ideas for using leftovers, and more. Check it out here! 🦃

    🎃 Ingredient Spotlight: Canned Pumpkin

    This recipe uses canned pumpkin which can be found in your grocery store located in the baking aisle.

    It is not the same thing as canned pumpkin pie mix, and both items often have a photo of pumpkin pie on the label.

    This is a friendly reminder to always double-check the label.

    Side-by-side of canned pumpkin and canned pumpkin pie mix.
    Be sure to check the label when buying canned pumpkin! Both pure pumpkin and pumpkin pie mix show pie on the label.

    Our dinner was ruined once due to this very mix-up.

    My father-in-law was an awesome cook. We loved cooking together in each others' kitchens and did so every chance we got.

    Once when he was coming over to make one of my favorite soup recipes (this curried pumpkin soup), I asked if he could stop by the store to pick up the canned pumpkin.

    He was happy to do it, and he came over and we had a blast cooking up a storm.

    But something wasn't quite right.

    You can read the whole story over on the recipe post, but the short version is that he bought the wrong type of canned pumpkin.

    Pumpkin pie mix is canned pumpkin purée that has added spices like clove, cinnamon, allspice, and ginger. And it's also pre-sweetened.

    So it's great for when you want to make a dessert, but most certainly not what you want if you're making a savory dish.

    So please, please, please double-check the can the next time you're buying canned pumpkin for a recipe.


    Still hungry? You may also like...

    3 plates with slices of triple chocolate pumpkin pie.
    Triple-Chocolate Pumpkin Pie
    Plates of Dutch apple pie with ice cream on top.
    Classic Dutch Apple Pie
    Rhubarb custard pie on a plate with a fork next to the pie plate.
    Rhubarb Custard Pie
    Chocolate Cream Pie with Orange Zested Whipped Cream
    Chocolate Cream Pie with Orange Zested Whipped Cream

    Doing some online shopping? Check out my Amazon shop page for recommendations!


    Check out my latest posts...

    • Jar of homemade Italian seasoning blend.
      Italian Seasoning Blend
    • Bowl of tzatziki with olive oil drizzled over the top.
      Easy Homemade Tzatziki
    • Turkey sausage patties and a jar of breakfast sausage seasoning.
      Turkey Sausage Patties

    • « Previous Page
    • 1
    • …
    • 22
    • 23
    • 24
    • 25
    • 26
    • …
    • 35
    • Next Page »

    Hi, I'm Ashley and I’ve been writing about food & recipes here at Big Flavors from a Tiny Kitchen since 2006. I want to help you (yes, you!) gain confidence in the kitchen so you are excited to cook at home for yourself and your loved ones.

    More about me →

    Favorite Spring Recipes

    • Mayo-free Deviled Eggs
    • Middle Eastern Fattoush Salad with Homemade Pita Chips
    • Birthday Cake Confetti Pancakes with Sprinkles
    • Italian Cream Cheese and Ricotta Cheesecake
    • Garlicky Mushroom Ricotta Pizza with Wild Arugula + Aged Balsamic
    • Slow Cooker "Roasted" Beets
    • Honey Balsamic Roasted Carrots
    • Italian Ricotta Cookies
    • Rhubarb Custard Pie
    • Easy Instant Pot Herbed Potato Salad

    Mother's Day + Easter Brunch

    • Epic Brunch Board on a Budget
    • Baby Spinach and Cheddar Quiche Made with Fresh Spinach
    • Turkey Salad Tea Sandwiches with Dried Cherries
    • Great Grandma Maria Francesca Cardile's Italian Easter Cookies
    • Brie Waffle Bites
    • Challah French Toast
    • Creamsicle Smoothies
    • DM Bloody Mary
    • Turkey Scotch Eggs
    • The Herbalist

    Popular Now

    • Cast iron skillet full of chicken fajitas.
      Favorite Restaurant-Style Chicken Fajitas
    • Overhead view of spinach and cheddar quiche with forks.
      Baby Spinach and Cheddar Quiche Made with Fresh Spinach
    • Chicken and bell pepper stir-fry served over white rice.
      Chicken and Bell Pepper Stir-Fry
    • Serving dish of cooked shrimp garnished with chopped parsley.
      Quick and Easy Sautéed Shrimp
    • Overhead view of a dutch oven filled with sausages, peppers, and onions.
      Sausage and Peppers
    • Overhead view of assorted breakfast items displayed on a board.
      Epic Brunch Board on a Budget

    Footer

    ↑ back to top

    About

    • About Ashley
    • Press + Recognition
    • Events
    • Virtual Cooking Classes
    • Podcast
    • Contact
    • Privacy Policy

    Newsletter

    • Sign up to receive delicious recipes and exclusive content right to your inbox!

    As an Amazon Associate I earn from qualifying purchases at no added cost to you.

    ©2006–2026  BIG FLAVORS FROM A TINY KITCHEN LLC | ALL RIGHTS RESERVED

    *Third-party advertisers may collect or use non-personally identifiable information to serve you more relevant ads.