Big Flavors from a Tiny Kitchen

menu icon
go to homepage
  • Recipes
  • About
  • Events
  • Contact
  • Subscribe
    • Facebook
    • Instagram
    • Pinterest
  • subscribe
    search icon
    Homepage link
    • Recipes
    • About
    • Events
    • Contact
    • Subscribe
    • Facebook
    • Instagram
    • Pinterest
  • ×
    Home » Recipes

    First Birthday Party: Colorful Elmo Cupcakes (Amy Sedaris' Vanilla Cupcakes w Vanilla Buttercream Frosting)

    November 22, 2012 by Ashley Leave a Comment

    First Birthday Party: Colorful Elmo Cupcakes

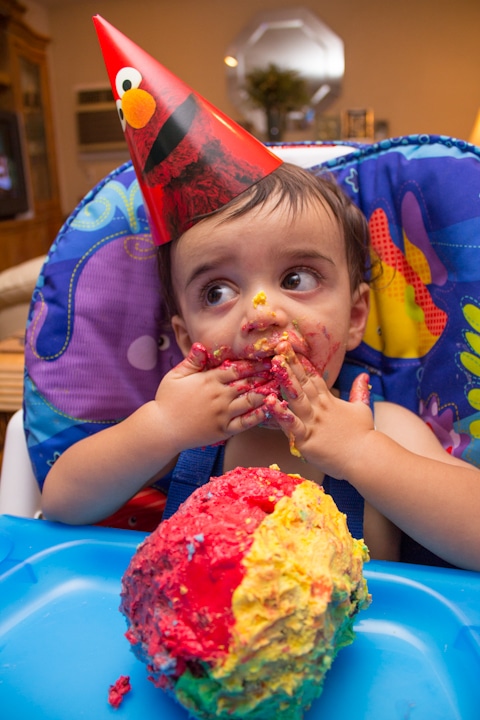
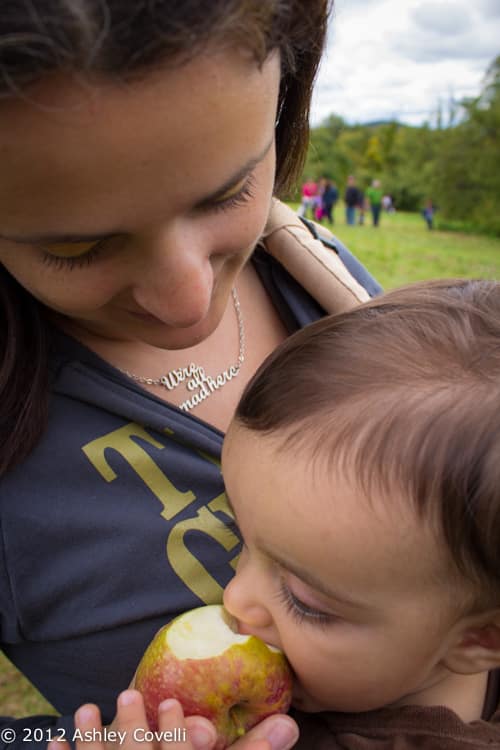
    This Thanksgiving was extra special because it was my son's first birthday. Wow. A year already!! I didn't want to let the fact that it was Thanksgiving deter me from baking a special cake just for him to go to town on. I wanted a simple cupcake recipe that I could take part of to make into a little cake so that we could all enjoy it.

    First Birthday Party: Colorful Elmo Cupcakes

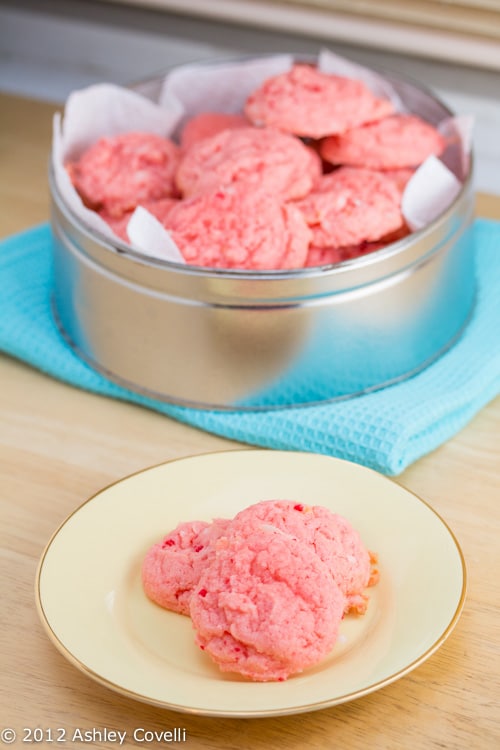
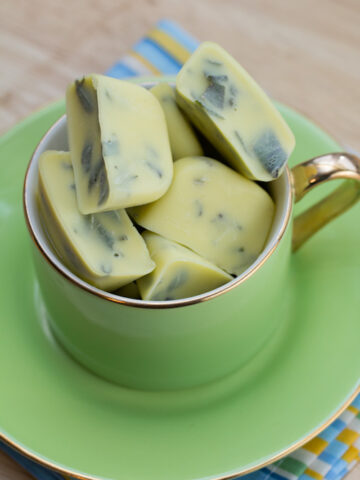
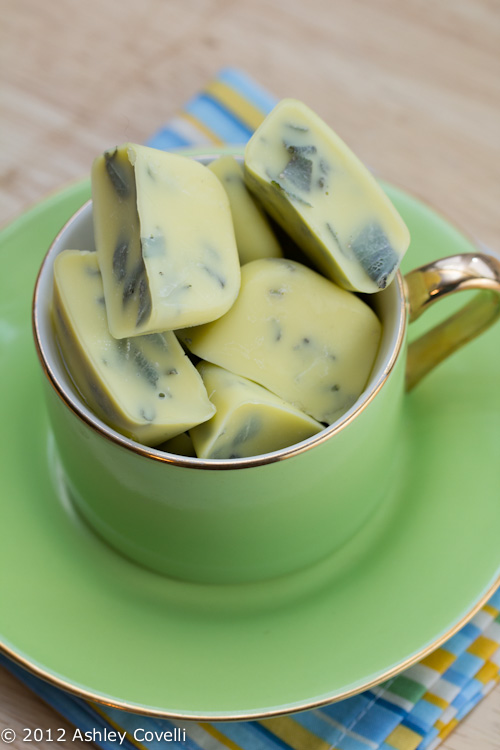
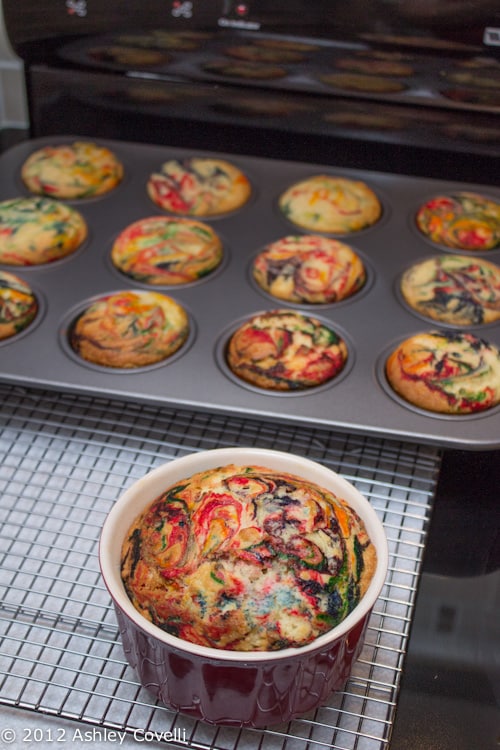
    I wanted to make it a little more fun by making them colorful, so after I portioned out the batter, I put drops of food coloring onto each and swirled it around with a toothpick. It was way easier than doing a bunch of colored batches of batter, and it gave them a really cool tie-dyed effect. Here's what they looked like before I baked them...

    First Birthday Party: Colorful Elmo Cupcakes

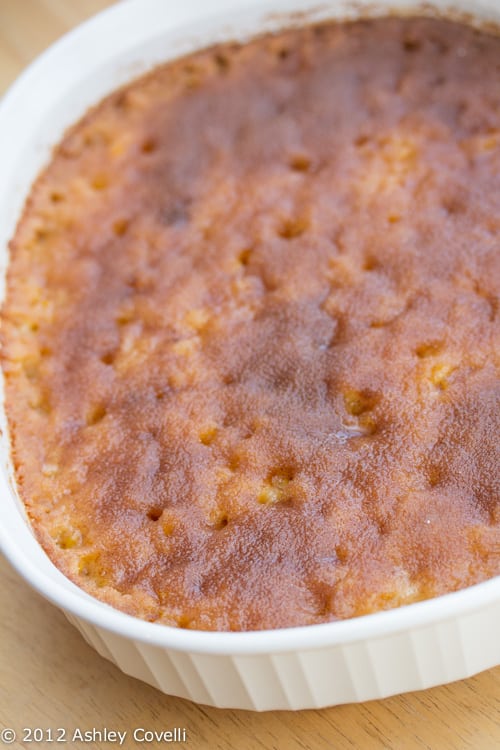
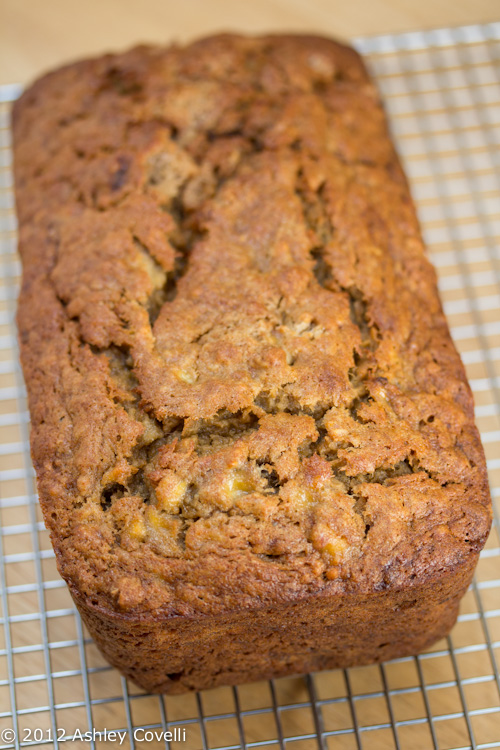
    ...and after they came out of the oven.

    First Birthday Party: Colorful Elmo Cupcakes

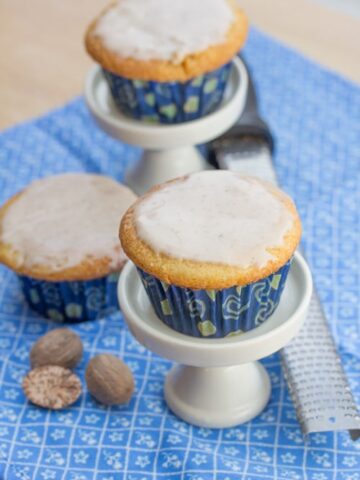
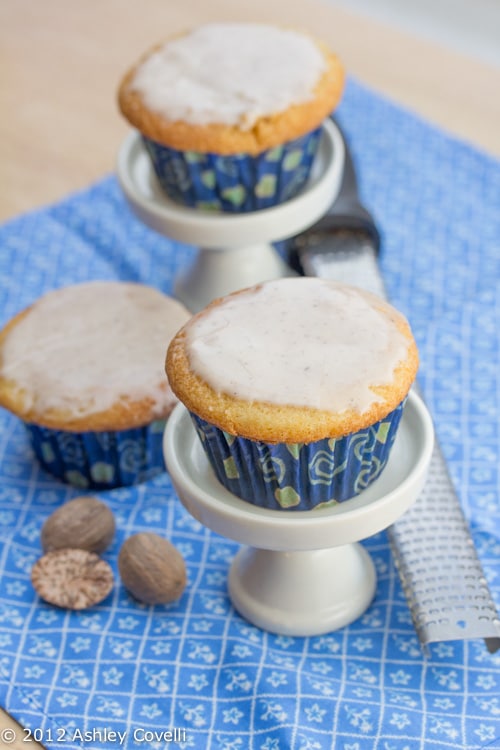
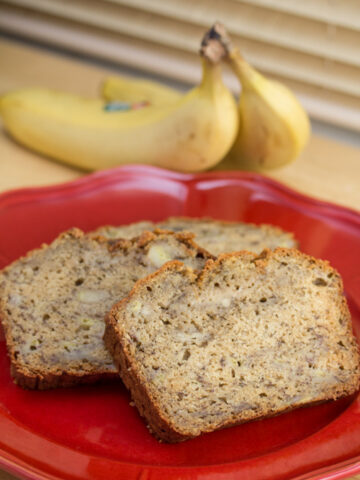
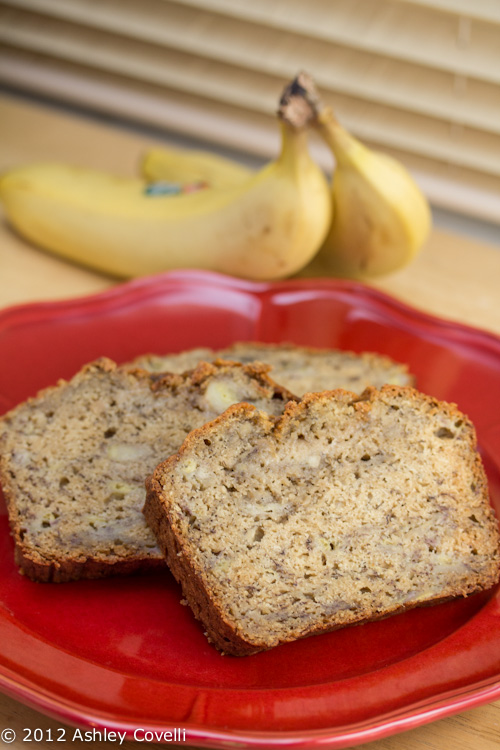
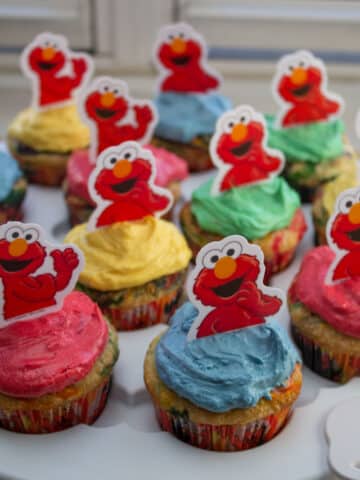
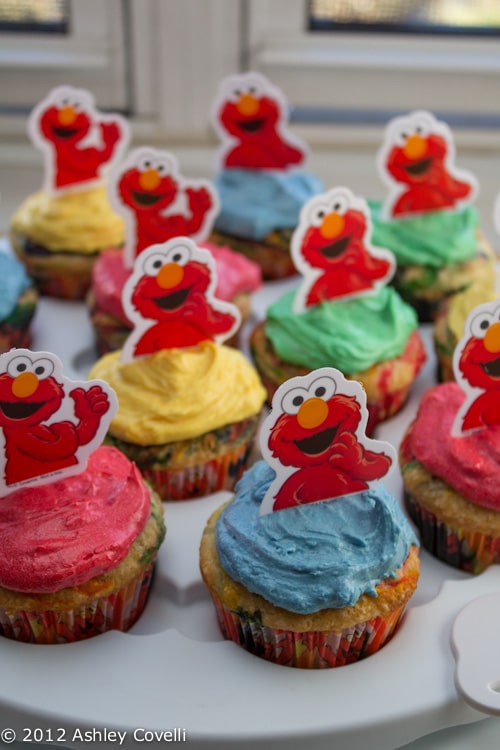
    I cooled them overnight and frosted them all on Thanksgiving morning. They were super moist, and the buttercream was delicious. The frosting did cover up the tie-dye, but you could still see it peeking out a bit. I'd definitely make these again.

    Amy Sedaris's Vanilla Cupcakes
    I Like You: Hospitality Under the Influence - Amy Sedaris

    yield: Makes 24 cupcakes

    1 ½ sticks unsalted butter
    1 ½ cups sugar
    2 eggs
    2 teaspoons pure vanilla extract
    2 ½ teaspoons baking powder
    ¼ teaspoon salt
    2 ½ cups flour
    1 ¼ cups milk

    Turn oven on to 375 degrees F.

    Put butter in mixer and beat at medium speed until somewhat smooth. Pour in sugar and beat well. Add 2 eggs. I like to crack the eggs on the side of the bowl while it is moving, which can be really stupid. I like to take chances. Yes, I have had to throw away my batter because I lost eggshells in the mix. Yes, it was a waste of food and yes, I know how expensive butter is, but what can I say? I'm a daredevil. Mix well. Add: vanilla, baking powder, salt, flour, and milk. Beat until it looks like it is supposed to and pour into individual baking cups, until they are about ⅔ full. Bake for 20 minutes or until golden brown. Should produce 24 cupcakes; I get 18 because I'm doing something wrong, although my cupcakes were voted second best in the city by New York Magazine.

    Frost with Amy Sedaris's Vanilla Buttercream Frosting.

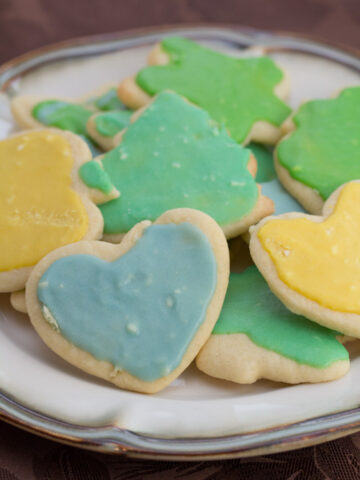
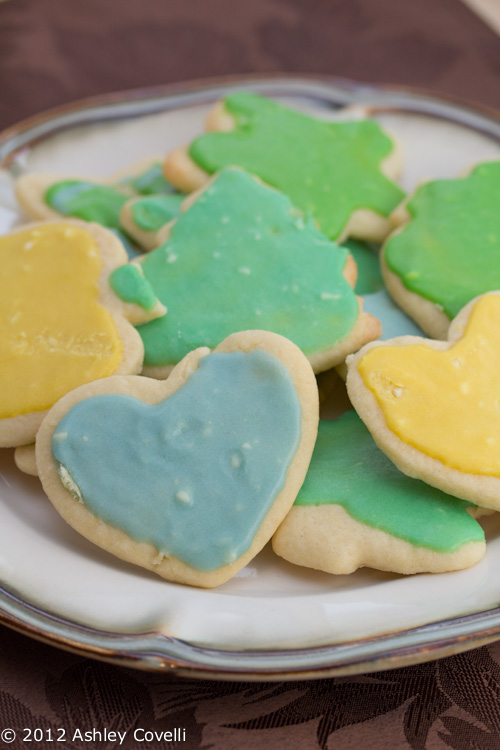
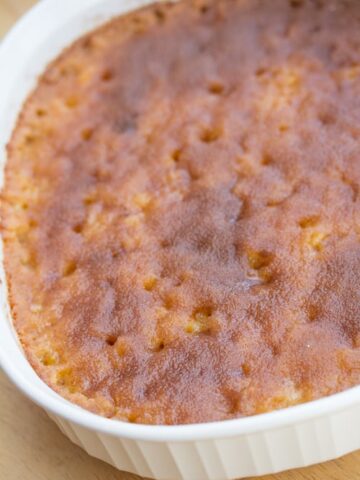
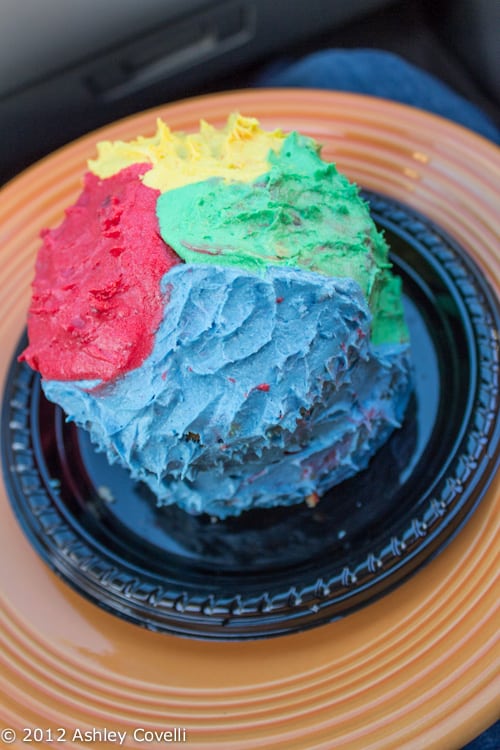
    Here's the mini two layer cake that I ended up making with the remaining batter. I lucked out that I picked a recipe that made 24 cupcakes - I made 12 and used the rest of the batter for the cake. I made 4 different colors of frosting, and they unintentionally turned out perfect for the Elmo/Sesame Street themed party!

    First Birthday Party: Colorful Elmo Cupcakes

    Amy Sedaris's Vanilla Buttercream Frosting
    I Like You: Hospitality Under the Influence - Amy Sedaris

    yield: Makes enough for 24 cupcakes

    1 box confectioners' sugar
    1 stick unsalted butter
    1 teaspoon pure vanilla extract*
    ¼ cup milk or light cream
    food coloring (optional)

    *Less than 1 teaspoon pure almond extract can be substituted.

    In a bowl combine: one box of confectioners' sugar, one stick of unsalted butter, one teaspoon of pure vanilla extract, and ¼ cup of milk or light cream and beat for a while. Really whip it, don't be afraid to get in there. I occasionally add food coloring and sometimes substitute pure almond extract for vanilla.
    If you do choose to add pure almond extract instead of vanilla, you're on your own. I don't know the measurement for it, but I do know it's less than the amount of vanilla you would add.

    Big Flavors Rating: 5 Stars

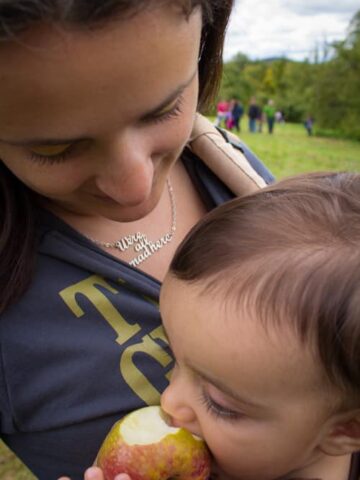
    I think the birthday boy enjoyed it 😉

    First Birthday Party: Colorful Elmo Cupcakes

    Supper Club: Mango Lassi

    November 17, 2012 by Ashley Leave a Comment

    Mango Lassi

    The last-minute addition for our Supper Club's Indian night this month was one of our favorite drinks - mango lassi. It's nice and refreshing, especially with spicy food. We had some frozen mango, so it was even easier for us to put together. We didn't blend it for quite as long as we wanted to, but it was really tasty. I sprinkled the cardamom into the pitcher and stirred it in, but it would have definitely looked prettier sprinkled on top.

    Mango Lassi

    Mango Lassi
    Simply Recipes

    1 cup plain yogurt
    ½ cup milk
    1 cup chopped mango (peeled and stone removed)
    4 teaspoons sugar, to taste
    A dash of ground cardamom (optional)

    Put mango, yogurt, milk, sugar and cardamom into a blender and blend for 2 minutes, then pour into individual glasses, and serve. Can sprinkle with a little cardamom.

    The lassi can be kept refrigerated for up to 24 hours.

    Yield: Makes about 2 cups.

    Big Flavors Rating: 4 Stars

    Supper Club: "Mitty" Chawal (Dirty Rice with Caramelized Onions)

    November 17, 2012 by Ashley 1 Comment

    "Mitty" Chawal (Dirty Rice with Caramelized Onions)

    We definitely had to have a rice dish for our Supper Club, so we made this - a very fragrant and delicious dirty rice. This was very unique and tasty, and unlike anything I've made before. It's a bit of a time investment, but most of it isn't hands-on. Next time, we may use a spice grinder instead of a mortar and pestle to break up the spices, because the chunks can be a little off-putting if you aren't expecting to bite into a piece of cardamom pod or cinnamon stick. This was really nice, and the onions were sweet and delicious.

    "Mitty" Chawal (Dirty Rice with Caramelized Onions)

    "Mitty" Chawal (Dirty Rice with Caramelized Onions
    660 Curries: The Gateway to Indian Cooking - Raghaven Iyer

    Serves 6

    1 cup Indian or Pakistani white basmati rice
    ½ teaspoon black peppercorns
    8 to 10 green or white cardamom pods, to taste
    6 whole cloves
    2 cinnamon sticke (each 3 inches long), broken into smaller pieces
    2 tablespoons Ghee or canola oil
    1 large red onion, finely chopped
    1 teaspoon white granulated sugar
    1 ½ teaspoons coarse kosher or sea salt

    1. Place the rice in a medium-size bowl. Fill the bowl halfway with water, to cover the rice. Gently rub the slender grains through your fingers, without breaking them, to wash off any dust or light foreign objects (like loose husks), which will float to the surface. The water will become cloudy. Drain this water. Repeat three or four times, until the water remains relatively clear, drain. Now fill the bowl halfway with cold water and let it sit at room temperature until the grains soften, 20 to 30 minutes.

    2. While the rice is soaking, combine the peppercorns, cardamom pods, cloves, and cinnamon pieces in a mortar. Pound the spices with the pestle, breaking them down into smaller chips and releasing their aromatic oils.

    3. Heat the ghee in a medium-size saucepan over medium heat. Add the onion, sugar, and pounded spices, and stir-fry until the onion turns dark purple-brown and soft, 10 to 15 minutes.

    4. Drain the rice and add it to the onion mixture, tossing them together gently. Pour in 1 ½ cups cold water and add the salt. Stir the rice once to incorporate the ingredients. Raise the heat to medium-high and cook until the water has evaporated from the surface and craters are starting to appear in the rice, 5 to 8 minutes. Now (and only now) stir once to bring the partially cooked layer from the bottom of the pan to the surface. Cover the pan with a tight-fitting lid and reduce the heat to the lowest possible setting. Cook for 8 to 10 minutes (8 for an electric burner, 10 for a gas burner). Then turn off the heat and let the pan stand on that burner, undisturbed, for 10 minutes.

    5. Remove the lid, fluff the rice with a fork, and serve.

    Big Flavors Rating: 4 Stars

    Supper Club: Jhinga Vindaloo (Shrimp with Cashew Nuts and Vinegar)

    November 17, 2012 by Ashley 1 Comment

    Jhinga Vindaloo (Shrimp with Cashew Nuts and Vinegar)

    This was the other main dish that we made for this month's Supper Club. This was very easy to put together, and it doesn't take much time at all. Peeling the shrimp, if you buy them with the shells still on, and marinating them for 15 minutes are the longest parts. Otherwise, it comes together in a snap. This had a very nice spicy flavor, and it was one of the favorite dishes of the evening.

    Jhinga Vindaloo (Shrimp with Cashew Nuts and Vinegar)

    Jhinga Vindaloo (Shrimp with Cashew Nuts and Vinegar)
    660 Curries: The Gateway to Indian Cooking - Raghaven Iyer

    Serves 4

    ¼ cup distilled white vinegar
    1 tablespoon coriander seeds, ground
    1 teaspoon cumin seeds, ground
    1 teaspoon cayenne (ground red pepper)
    1 teaspoon coarse kosher or sea salt
    ¼ teaspoon ground turmeric
    10 raw cashew nuts, ground (see Tip)
    1 pound large shrimp (16 to 29 per pound), peeled and deveined but tails left on
    2 tablespoons canola oil
    2 tablespoons finely chopped fresh cilantro leaves and tender stems for garnishing

    1. Combine the vinegar, coriander, cumin, cayenne, salt, turmeric, and cashews in a small bowl and stir to make a smooth, slightly thin paste. Pour this over the shrimp in a medium-size bowl, making sure you scrape in every spicy, acidic drop. Toss well to coat the shellfish with the marinade. Refrigerate, covered, for about 15 minutes.

    2. Heat the oil in a medium-size skillet over medium-high heat. Add the shrimp, arranging them in a single layer and reserving the residual marinade in the bowl. Sear the shrimp on each side to seal in the flavors, about 1 minute per side. Pour in the residual marinade and stir once or twice. Lower the heat to medium and simmer the curry, uncovered, stirring occasionally, until the shrimp are salmon-orange, curled, and tender and the sauce is almost entirely absorbed, 3 to 5 minutes.

    3. Sprinkle with the cilantro, and serve.

    Tip: I grind the cashew nuts in a spice grinder. Oftentimes, a few small pieces refuse to incorporate. When that happens, I remove some of the packed cashew powder, especially around the blades, to free up more space for the remaining pieces to end up powdered.

    Big Flavors Rating: 5 Stars

    Pumpkin Pie Spiced Belgian Waffles

    November 10, 2012 by Ashley 1 Comment

    Pumpkin Pie Spiced Belgian Waffles

    This morning, Dino made a batch of Belgian Waffles. This time around, he added around a tablespoon of the Pumpkin Pie Spice that I made about a year ago. We topped the waffles with sliced banana and maple syrup. They smelled amazing and tasted wonderful.

    Pumpkin Pie Spiced Belgian Waffles

    Belgian Waffles
    Adapted From: allrecipes.com - Megan

    "Simple waffles made with flour, egg, butter and sugar."

    Serving Size: 5

    2 cups all-purpose flour
    1 tablespoon pumpkin pie spice
    1 teaspoon salt
    4 teaspoons baking powder
    2 tablespoons white sugar
    2 eggs
    1 ½ cups warm milk
    ⅓ cup butter, melted
    1 teaspoon vanilla extract
    1 can vegetable oil spray

    Prep Time: 20 Minutes
    Cook Time: 15 Minutes

    1. In a large bowl, mix together flour, pumpkin pie spice, salt and baking powder; set aside.
    2. In a separate bowl, beat the eggs and sugar. Stir in the milk, butter and vanilla. Pour the milk mixture into the flour mixture; beat just until barely blended. Let stand for 10-20 minutes.
    3. Preheat waffle iron to desired temperature.
    4. Fully coat the iron with cooking spray. Ladle the batter into a preheated waffle iron. Cook the waffles until golden and crisp. Serve immediately.

    Big Flavors Rating: 5 Stars

    Mixed Holiday Sugar Cookies

    November 6, 2012 by Ashley 1 Comment

    Mixed Holiday Sugar Cookies

    Mixed Holiday Sugar Cookies

    I made a batch of my Grandma's Christmas cookie dough, and this time around, I used cookie cutters from Christmas, Halloween and Valentine's Day. Why not? And I must have used up all of my red food coloring the last time I made red velvet cake, because all I had was yellow, green and blue. I had meant to bake them before my friend came over, but my son was a handful during the day, so I asked if she'd be interested in cutting out and decorating cookies with me. To my surprise, she had never baked cookies before. Like, at all! So her first experience with making cookies was using a bunch of really random cookie cutters and funky colors of icing haha! They turned out wonderful as always, although I didn't get all of the lumps out of the icing, and I took a picture of them after they were stacked, so they don't look as pretty as usual. But hey...they're delicious, soft cookies that always remind me of my very favorite Grandma 🙂

    Flank Steak with Chimichurri

    October 29, 2012 by Ashley Leave a Comment

    A plate of flank steak topped with chimichurri.

    I wanted to make a quick dinner before the hurricane hit us, since it may be our last hot meal for a while. I picked this recipe and it turned out great! It was super easy to put together, and the chimichurri is super flavorful. The power went out right as we took our last bites. Oh, what fun...

    A plate of flank steak topped with chimichurri.

    Flank Steak with Chimichurri
    Gourmet January 2001

    1 ½ pounds trimmed flank steak
    1 ½ teaspoons kosher salt
    ½ teaspoon ground cumin
    ½ teaspoon ground coriander
    ¼ teaspoon black pepper
    1 large garlic clove
    1 ½ cups fresh cilantro
    1 ½ cups fresh flat-leaf parsley
    ¼ cup distilled white vinegar
    ⅓ cup olive oil
    ¼ teaspoon cayenne

    Preheat broiler.

    Pat steak dry. Stir together 1 teaspoon salt, cumin, coriander, and pepper in a small bowl and rub mixture onto both sides of steak. Broil steak on a broiler pan about 4 inches from heat 6 minutes per side for medium-rare. Transfer to a cutting board and let stand 5 minutes.

    Meanwhile, with motor running, add garlic to a food processor and finely chop. Add cilantro, parsley, vinegar, oil, cayenne, and remaining ½ teaspoon salt, then pulse until herbs are finely chopped.

    Holding a knife at a 45-degree angle, thinly slice steak. Serve with sauce.

    Big Flavors Rating: 4 Stars

    Supper Club: Nutella Dirt Cake

    October 28, 2012 by Ashley 5 Comments

    Nutella Dirt Cake

    Nutella Dirt Cake

    The other thing we made for our Supper Club's Spooky Foods night, was a spin on dirt cups. We used one of our favorite, light Nutella recipes and turned it into a muddy pumpkin patch fit for Halloween. We doubled the recipe, put it in a 9x9" pan and topped it with crushed holiday Oreos (the ones with red filling), gummy bats and candy pumpkins. We served it with a shovel for added spookiness. It was a big hit, and definitely tastes better with Nutella than plain old chocolate pudding.

    Nutella Dirt Cake

    Decadent Dip
    soyfoods.com

    1 pkg (10.5 oz) silken tofu
    6 tablespoons Nutella®

    Whirl the silken tofu and Nutella® together in a blender, scraping down sides as needed. Put into a serving dish and serve with fresh fruit or banana bread dippers.

    Yield: 1-¼ cups (5 servings) Serving size: ¼ cup

    Nutritional notes:
    Per serving: 131 calories, 7 g total fat (0.6 g sat fat), 5 g pro, 13 g carb, 0 mg fiber, 39 mg sodium, 0 mg cholesterol

    Exchanges: 1 other carbohydrate, ½ lean meat, 1 fat

    Big Flavors Rating: 5 Stars

    Broiled Flank Steak with Warm Tomato Topping

    October 25, 2012 by Ashley Leave a Comment

    A plate of flank steak topped with tomatoes over orzo.

    This was a super easy and tasty dinner. I absolutely love tomatoes, and this was a nice, quick way to add them to a main course. The seasoning blend is simple, yet it packs a ton of flavor. I served this over buttered orzo.

    A plate of flank steak topped with tomatoes over orzo.

    Broiled Flank Steak with Warm Tomato Topping
    Cooking Light January 2008

    Let the steak stand while you heat the topping. Fill out the meal with orzo, and garnish with fresh cilantro sprigs, if desired.

    Yield: 4 servings (serving size: 3 ounces meat and about ⅓ cup topping)

    1 ¼ teaspoons ground cumin, divided
    ¾ teaspoon salt, divided
    ⅛ teaspoon ground red pepper
    1 (1-pound) flank steak, trimmed
    Cooking spray
    1 teaspoon olive oil
    1 teaspoon bottled minced garlic
    1 jalapeño pepper, seeded and minced (about 1 tablespoon)
    2 cups grape or cherry tomatoes, halved
    ¼ cup chopped fresh cilantro

    Preheat broiler.

    Combine 1 teaspoon cumin, ½ teaspoon salt, and red pepper; sprinkle evenly over steak. Place steak on a broiler pan coated with cooking spray; broil 10 minutes or until desired degree of doneness, turning once. Cut steak diagonally across grain into thin slices.

    Heat oil in a large nonstick skillet over medium heat. Add garlic and jalapeño to pan; cook 1 minute. Add remaining ¼ teaspoon cumin, remaining ¼ teaspoon salt, and tomatoes to pan; cook 3 minutes or until tomatoes begin to soften. Remove from heat; stir in cilantro. Serve tomato topping with steak.

    Amount per serving:
    Calories: 194
    Calories from fat: 37%
    Fat: 7.9g
    Saturated fat: 2.5g
    Monounsaturated fat: 3.1g
    Polyunsaturated fat: 0.5g
    Protein: 25.3g
    Carbohydrate: 4.3g
    Fiber: 1.2g
    Cholesterol: 37mg
    Iron: 2.4mg
    Sodium: 514mg
    Calcium: 38mg

    Big Flavors Rating: 4 Stars

    5th Annual Power of Pink Challenge: Cake Mix Cookies

    October 23, 2012 by Ashley 1 Comment

    A tin of pink cookies with a plate alongside.

    If there's one thing we can all agree on, it's that cancer sucks. It has torn apart way too many families, and it sadly seems to be affecting more and more people every year.

    Jen over at Beantown Baker is hosting the 5th Annual Power of Pink Challenge. It's to help raise awareness for breast cancer during the month of October.

    Lots of bloggers are uniting to make pink foods as a way to help bring attention to this disease.

    For my pink recipe, I chose something I saw over at Taste and Tell. This recipe couldn't be easier, and you're rewarded with some super fluffy cookies.

    I wasn't super crazy about the strawberry flavor - it kinda tasted like strawberry Quik. I used a 2 teaspoon cookie scoop and got about 40 cookies out of this recipe.

    I sent them to work with Dino, and they were a hit there. I think I may like the chocolate ones better. But having this as a base for a cookie recipe is really great if you need cookies in a pinch!

    A tin of pink cookies with a plate alongside.

    Cake Mix Cookies
    Taste and Tell

    Prep Time: 5 minutes
    Cook Time: 10 minutes
    Total Time: 20 minutes

    These super easy cookies start with a cake mix. Change up flavors and add ins to your favorite flavors.

    Strawberry
    1 strawberry cake mix
    2 eggs
    ½ cup vegetable oil
    ½ cup coconut

    Chocolate
    1 chocolate cake mix
    2 eggs
    ½ cup oil
    ½ cup mini chocolate chips

    Mix eggs and vegetable oil until well combined. Stir in cake mix and add ins; drop by teaspoons onto greased cookie sheet. Cook for 8-10 minutes at 350 F.

    Big Flavors Rating: 3 Stars

    The Power of Pink Challenge

    Eggs with Curry

    October 21, 2012 by Ashley Leave a Comment

    Eggs with curry sauce and toast.

    Some of my college friends were staying with us for a few days, and Dino was telling them about a breakfast we had at a diner a few years ago. It was eggs with sausages and Irish curry. One of my friends' eyes lit up at the sound of that, so he decided to make some for us for breakfast the next morning. He did some browsing online and then came up with this version for us. This is great with any style of eggs, and even the baby loved it!

    Eggs with curry sauce and toast.

    Curry Sauce
    Dino Covelli

    2 Cups Chicken Stock
    1 Medium Sized Onion (white or yellow)
    3 Tbspn All Purpose Flour
    1 Tbspn Curry Powder
    1 Tbspn Margarine
    Salt

    Chop the onion
    In a medium sized saucepan, fry Onions in the Margarine
    Wnen Onions are translucent, add the Chicken Stock
    Whisk in the Flour and Curry Powder
    Lower heat to simmer, stirring often
    Let reduce to desired consistency
    Salt to taste

    Big Flavors Rating: 4 Stars

    Chicken and Apples in Honey Mustard Sauce

    October 16, 2012 by Ashley 5 Comments

    Chicken with apples, brussels sprouts, and a baked potato.

    We're almost out of apples from this year's apple picking adventure. I picked this recipe for dinner tonight, and it was wonderful!

    The pan sauce is delicious, and this is really easy to put together. The chicken is juicy and tender, and we really enjoyed it!

    I served this with baked potatoes and some brussels sprouts that I tossed with olive oil, salt and pepper and roasted in the oven. It was a great meal!

    Chicken with apples, brussels sprouts, and a baked potato.

    Chicken and Apples in Honey Mustard Sauce
    Simply Recipes

    Prep time: 5 minutesCook time: 25 minutes

    The sauce this recipe produces is fairly mild. If you would like a more intensely honey-mustard sauce, double up on the apple cider/mustard/honey mixture and skip the broth. Whatever you do, do not use red delicious apples for this recipe. That variety of apple simply does not cook well.

    ½ cup apple cider
    1 ½ teaspoons cornstarch
    Salt
    Freshly ground black pepper
    1 tablespoon honey
    2 tablespoon Dijon mustard
    ½ cup flour, for dredging
    1 pound boneless, skinless chicken breasts
    2 tablespoon olive oil
    2 small unpeeled apples, cored and cut into eighths (use Fuji, Granny Smith, Jonathan, Jonagold, Pippin, or McIntosh apples, good cooking apples)
    ½ cup chicken broth
    Fresh parsley for garnish

    1. Whisk cider, cornstarch, mustard, honey, salt and pepper (to taste) in a bowl. Set aside.

    2. Salt the chicken well and dust in flour. Shake off the excess.

    3. In a large non-stick skillet, heat the oil on medium to medium high heat. Once the oil is hot add the chicken breasts to the pan. Cook until golden brown on one side, about 3-4 minutes. Turn chicken, add apples, and cook until the chicken has browned on the other side.

    4. Add chicken broth and cider mixture to the pan and bring to a boil. Turn the heat down to low, cover the pot and simmer until chicken is tender, about 15 minutes.

    5. With slotted spoon, remove chicken and apples to serving plates. Spoon sauce over chicken and apples and sprinkle with parsley. Serve with rice or noodles.

    Yield: Serves 4.

    Big Flavors Rating: 4 Stars

    Boneless Pork Chops with Apple Chutney

    October 15, 2012 by Ashley Leave a Comment

    Pork chop topped with apple chutney served with a baked potato.

    This was an easy recipe that was very tasty. The only change I made was to cook the pork chops in the pan, rather than partially in the pan and then in the oven. I don't think they were thick enough to bother with that. The chutney is very good - the sweetness of the apples and raisins go great with the tanginess of the vinegar and the slight spiciness of the cayenne.

    Pork chop topped with apple chutney served with a baked potato.

    Boneless Pork Chops with Apple Chutney
    Martha Stewart Living - October 2001

    Yield: Serves 4

    4 tablespoons olive oil
    2 teaspoons coarse salt, plus more for seasoning
    1 teaspoon freshly ground black pepper, plus more for seasoning
    4 boneless center-cut pork chops (1 ¼ pounds), cut ¾ inch thick
    1 large onion, cut into ½-inch dice
    4 green apples (such as Granny Smith), peeled, cored, and cut into ½-inch dice
    ½ cup cider vinegar
    ½ cup golden raisins
    1 teaspoon ground ginger
    ¼ teaspoon dry mustard
    Pinch of cayenne pepper

    Preheat oven to 400 degrees. Heat 2 tablespoons olive oil in an ovenproof skillet over medium heat. Sprinkle salt and pepper on both sides of pork chops; add to skillet. Saute until golden brown, about 2 minutes; flip. Cook 2 minutes more; place pan in oven. Roast until meat is cooked through and registers 155 degrees on an instant-read thermometer, about 5 minutes. Transfer to a platter.

    Meanwhile, in a large saucepan, heat remaining 2 tablespoons olive oil over medium heat; add onion. Saute over medium heat until translucent and beginning to brown, about 6 minutes. Add apples; saute 4 minutes more. Add vinegar, raisins, ginger, mustard, and cayenne. Stir well to combine; cover. Continue cooking, stirring occasionally, until apples are very tender but hold their shape, about 3 minutes. Season with salt and pepper, and serve over pork chops.

    Big Flavors Rating: 4 Stars

    Old Fashioned Apple Pie

    October 13, 2012 by Ashley Leave a Comment

    Overhead view of an apple pie.

    Sometimes me and Dino are extra awesome. Like when we decide to bake a pie close to midnight. We most certainly did not let this cool for an hour before digging in. It made the house smell amazing, and the brandy gave it a really different flavor, which we loved. This is a really tasty pie, and we'll definitely be making it again. We did cheat a bit and used frozen pie crusts, but hey...we ate pie at midnight, so it was a success in my book!

    Overhead view of an apple pie.

    Old Fashioned Apple Pie
    Simply Recipes

    Prep time: 1 hour, 15 minutesCook time: 55 minutes

    Crust Ingredients
    2 cups all-purpose flour, plus extra for rolling
    ½ cup finely ground blanched almonds or almond flour (can substitute ½ cup flour if you don't have almonds)
    16 tablespoon (2 sticks) unsalted butter, cut into ½ inch cubes, chilled in freezer for at least 15 minutes
    1 teaspoon salt
    1 heaping teaspoon brown sugar
    3 to 6 tablespoon water, very cold

    Filling Ingredients
    ⅔ cup sugar
    3 tablespoons all-purpose flour
    ¼ teaspoon ground allspice
    ⅛ teaspoon nutmeg
    ½ teaspoon cinnamon
    3 pounds of ¼-1/2 inch thick slices of peeled and cored good cooking apples such as Granny Smith, Pippin, Golden Delicious
    1 ½ tablespoons brandy
    1 teaspoon vanilla extract

    Egg Wash
    1 large egg yolk
    1 tablespoon cream

    1. In a food processor, combine flour, almonds, salt and brown sugar, pulse to mix. Add butter and pulse 6 to 8 times, until mixture resembles coarse meal, with pea size pieces of butter. Add water 1 Tablespoon at a time, pulsing until mixture just begins to clump together. If you pinch some of the crumbly dough and it holds together, it's ready, if not, add a little more water and pulse again.
    Remove dough from machine and place on a clean surface. Carefully shape into 2 discs. Do not over-knead the dough! You should still be able to see little bits of butter in the dough. These bits of butter are what will allow the result crust to be flaky. Wrap each disc in plastic wrap and refrigerate at least 1 hour.

    2. Position rack in bottom third of oven and preheat to 375°F.

    3. Combine sugar, flour and spices in large bowl. Use your hands and mix in the apples so they are well coated, then add brandy and vanilla extract.

    4. Remove one crust disk from the refrigerator. Let sit at room temperature for 5-10 minutes. Sprinkle some flour on top of the disk. Roll out with a rolling pin on a lightly floured surface to a 12 inch circle; about ⅛ of an inch thick. As you roll out the dough, use a metal spatula to check if the dough is sticking to the surface below. Add a few sprinkles of flour if necessary to keep the dough from sticking. Gently fold in half. Place on to a 9-inch pie plate, lining up the fold with the center of the pan. Gently unfold and press down to line the pie dish with the dough.

    5. Spoon in apple filling, mounding slightly in center.

    6. Roll out second disk of dough, as before. Gently turn over onto the top of the apples in the pie. Pinch top and bottom of dough rounds firmly together. Trim excess dough with kitchen shears, leaving a ¾ inch overhang. Fold dough under itself so that the edge of the fold is flush with the edge of the pan. Flute edges using thumb and forefinger or press with a fork.

    7. Stir yolk and cream in small bowl to blend. Brush over top of pie. Cut slits in top crust to allow steam to escape. Bake pie until crust begins to turn golden, about 20 minutes, then reduce heat to 350°F. Tent the rims with aluminum foil or a pie protector if the edges are browning too quickly. Bake until crust is golden and juices are bubbling, anywhere from an additional 30 to 45 minutes, depending on the type of apples you are using. Transfer to rack; let stand 1 hour. Serve pie warm or at room temperature.

    Yield: Serves 8.

    Big Flavors Rating: 5 Stars

    Sautéed Apple Ice Cream Sundae with Apple Jellies

    October 12, 2012 by Ashley Leave a Comment

    A bowl of ice cream with apples and jellies on top.

    A bowl of ice cream with apples and jellies on top.
    Since I didn't have a deep-dish pie crust when I made Dutch Apple Pie a few days ago, we had some sliced apples tossed in cinnamon and sugar in the fridge. I told Dino I thought it would be tasty to sauté them and top them with vanilla ice cream. He went into the kitchen and did that, plus he topped the sundaes with a few of the Apple Jellies I made.

    Moldy Cheese Day: Arugula-Walnut Pesto Farfalle

    October 9, 2012 by Ashley Leave a Comment

    Bowl of farfalle with arugula-walnut pesto.

    I love these weird food holidays. I saw this one and thought it would be a great day to use up some of the leftover gorgonzola from when I made Quinoa Salad with Apple, Chickpeas, Toasted Almonds & Apple Cider Vinaigrette a few days ago. This was a really interesting combination of ingredients. The plump, sweetness from the raisins was great with the tang from the lemon zest and gorgonzola. The pesto is simple and tasty. This was a really nice, different spin on pasta, and we really enjoyed it.

    Bowl of farfalle with arugula-walnut pesto.

    Arugula-Walnut Pesto Farfalle
    Sunset June 2010

    Yield: Serves 4
    Total: 30 Minutes

    12 ounces farfalle pasta
    2 cups baby arugula
    1 tablespoon lemon zest
    1 tablespoon minced garlic
    1 cup toasted walnut pieces, divided
    3 tablespoons olive oil
    ½ teaspoon kosher salt
    ¼ teaspoon pepper
    ¾ cup crumbled gorgonzola cheese
    ½ cup golden raisins

    1. Cook pasta according to package directions.

    2. Whirl together arugula, zest, garlic, ¼ cup walnuts, the oil, salt, and pepper in a food processor until blended, scraping inside of bowl as needed.

    3. Drain pasta, reserving about ¼ cup of the water. Return pasta to pot and add pesto, stirring to coat. Stir in remaining walnuts, the cheese, raisins, and reserved pasta water.

    Note: Nutritional analysis is per 1 ½-cup serving.

    Amount per serving
    Calories: 740
    Calories from fat: 45%
    Protein: 22g
    Fat: 37g
    Saturated fat: 8.1g
    Carbohydrate: 84g
    Fiber: 6.5g
    Sodium: 535mg
    Cholesterol: 19mg

    Big Flavors Rating: 4 Stars

    Crunchy Parmesan Chicken Tenders

    October 8, 2012 by Ashley Leave a Comment

    Chicken tenders on a plate with peas, dipping sauce, and quinoa salad.

    The name of this recipe is misleading...it wasn't crunchy at all. But it tasted great! And the sauce was fanfriggintastic! I'll definitely be making the sauce again. I think that using Panko or deep-frying would make this recipe deliver on the crunchy front. The amount of parmesan adds great flavor. I always use regular (usually whole wheat) breadcrumbs and sprinkle in some Italian seasoning whenever a recipe calls for seasoned breadcrumbs, and it works out great. This is a nice, easy weeknight dish. I served this with some peas and leftover Quinoa Salad with Apple, Chickpeas, Toasted Almonds & Apple Cider Vinaigrette.

    Chicken tenders on a plate with peas, dipping sauce, and quinoa salad.

    Crunchy Parmesan Chicken Tenders
    Giada De Laurentiis

    Total Time: 27 min
    Prep: 15 min
    Cook: 12 min
    Yield:: 6 servings

    4 tablespoons plus ½ cup extra-virgin olive oil
    1 cup buttermilk
    1 ½ pounds chicken tenders (about 18)
    3 large garlic cloves, minced
    ½ teaspoon salt
    3 tablespoons balsamic vinegar
    Freshly ground black pepper
    1 ¼ cups freshly grated Parmesan
    ¾ cup Italian-style seasoned bread crumbs

    Preheat the oven to 500 degrees F.

    Brush 1 tablespoon of oil over each of 2 heavy large lined baking sheets. Place the buttermilk in a large bowl. Add the chicken tenders and stir to coat. Let stand at least 15 minutes and up to 30 minutes.

    Meanwhile, mash the garlic with the salt in a medium bowl. Whisk in the vinegar and then the remaining ½ cup of oil. Season the vinaigrette, to taste, with pepper. Transfer the vinaigrette to a small serving bowl.

    Stir the Parmesan and bread crumbs in a pie dish. Remove the chicken tenders from the buttermilk and dredge them in the bread crumb mixture to coat completely, pressing to adhere. Arrange the coated chicken tenders on the prepared baking sheets, spacing evenly. Drizzle the remaining 2 tablespoons of oil over the chicken tenders and bake until they are cooked through and golden brown, about 12 minutes.

    Transfer the chicken tenders to a platter and serve the vinaigrette alongside for dipping.

    Big Flavors Rating: 4 Stars

    Roasted Red Pepper and Goat Cheese Alfredo Pasta

    October 4, 2012 by Ashley 3 Comments

    When Joe over at Culinary in the Country posted this recipe on facebook, I thought it looked amazing! He mentioned that he used evaporated milk instead of heavy cream. I had some evaporated milk in the fridge leftover from when I made Cinnamon Corn a while back, and I had no idea what I was going to do with it until that moment. I mean...goat cheese and pasta!? How can you go wrong? This was a really easy recipe to put together, and it was fantastic! It was creamy and tangy, and the flavor of the basil really pulls it all together. This is definitely going to be a repeat recipe in our house!

    Bowl of pasta topped with Parmesan and parsley.

    Roasted Red Pepper and Goat Cheese Alfredo Pasta
    Closet Cooking

    Sweet roasted red peppers in a creamy and tangy goat cheese alfredo sauce served over pasta.

    Servings: makes 2 servings

    Prep Time: 5 minutes
    Cook Time: 10 minutes
    Total Time: 15 minutes

    ½ pound pasta
    2 tablespoons butter
    1 clove garlic, grated
    ½ cup heavy cream
    4 ounces goat cheese
    ¼ cup parmigiano reggiano (parmesan), grated
    2 roasted red peppers, coarsely chopped
    salt and pepper to taste
    1 handful basil

    Cook the pasta as directed on the package.

    Melt the butter in pan over medium heat, add the garlic and cook until fragrant, about a minute.

    Add the cream, goat cheese, parmesan and roasted red peppers and simmer until the cheese has melted.

    Remove from heat, season with salt and pepper, add the basil and puree with a hand blender or in a blender or food processor.

    Serve hot over the pasta garnished with more parmesan and basil.

    Big Flavors Rating: 5 Stars

    National Vodka Day: Moscow Mule

    October 4, 2012 by Ashley Leave a Comment

    Moscow mules in glasses with orange straws and lime wheels.

    When I found out that this holiday existed, I was psyched. I mean...talk about a great reason to be festive ;). So I was looking to try out a new cocktail, and this one caught my eye. A friend also suggested it, so I figured it was worth a shot. It was really tasty! I love ginger beer, and the sourness from the lime goes so well with it. This is a holiday I'll need to celebrate every year!

    Moscow mules in glasses with orange straws and lime wheels.

    Moscow Mule
    About

    This is a refreshing vodka highball that uses ginger beer. Ginger beer is a non-alcoholic "root beer" that has a sweet taste and can be found at most organic grocers. Both the Moscow Mule and Dark & Stormy are classic mixed drinks with ginger beer and are drinks every bartender should know.

    Prep Time: 3 minutes
    Total Time: 3 minutes
    Yield: 1 Cocktail

    1 ¾ oz vodka
    ½ oz lime juice
    Ginger beer
    Lime wedge for garnish

    Pour the vodka and lime juice into a highball glass with ice cubes.

    Top off with the ginger beer.

    Garnish with the lime wedge.

    Big Flavors Rating: 4 Stars

    Saving Fresh Herbs In Olive Oil

    October 2, 2012 by Ashley Leave a Comment

    Saving Fresh Herbs In Olive Oil

    Preserving fresh herbs is a great way to cut down on food waste, as well as providing you with fresh herbs that are ready to cook with all year round!

    Saving Fresh Herbs In Olive Oil

    I got a bunch of sage from the CSA, and I didn't know what to do with it. It's so delicate and I wanted to make sure it stayed fresh until I was ready to use it.

    I remembered seeing something on Pinterest a while back about freezing fresh herbs in olive oil in an ice cube tray, so I tried it out. I simply chopped the sage and sprinkled a bit in each section of the ice cube tray, topped with olive oil and popped it in the freezer.

    The whole process only took about 2 minutes, and I now have fresh herbs at the ready. And since they're in olive oil, all I need to is pop one of the cubes into a skillet and turn on the heat. Boom - fresh herb-infused olive oil, ready for frying up something delicious!

    I transferred my herb-oil cubes into a freezer bag after they had fully frozen to prevent any freezer burn.

    This process would work great with all sorts of fresh herbs! I think things like rosemary, chives, tarragon, and parsley would hold up well. You could even do an herb mix with a few different herbs. Just be sure to label your freezer bags so you know which herbs are which.

    You could really pack the compartments full of herbs with just a small amount of oil if you prefer, or go all out and measure the amounts of herbs/oil and make note of it with permanent marker on your freezer bag. There are loads of options!

    I plan to do this as a way to stretch the end of my herb garden harvest at the end of each summer, too.

    Have you had luck preserving herbs in oil? I'd love to hear about it in the comments section below!

    Frisky Bison AKA Polish Kiss (Żubrówka Cocktail)

    October 2, 2012 by Ashley Leave a Comment

    Frisky Bison AKA Polish Kiss (Żubrówka Cocktail)

    Frisky Bison AKA Polish Kiss (Żubrówka Cocktail)

    I can't tell you how often people have come over to our house and asked us what the fuzzy green thing was in our liquor cabinet. It's Żubrówka - bison grass vodka, brought to us from a friend in Poland.

    We had it once before, mixed with apple juice. Apparently, in the US it's known as a Polish Kiss, but in the UK it's known as a Frisky Bison. I think the latter is a MUCH better name for a cocktail ;).

    Anyhow, you mix this vodka in a shaker filled with ice with unfiltered apple juice, to taste. We used some freshly juiced apples from the orchard. It was awesome.

    This vodka has such a unique flavor - if you can get your hands on it, definitely give it a try.

    Szechwan Shrimp

    October 1, 2012 by Ashley Leave a Comment

    A plate of Szechwan shrimp over rice.

    This was a super easy recipe. I thawed some frozen shrimp and just sautéed them in the pan in some oil, put them on a paper towel-lined plate while I prepared the rest of the recipe, and put them back in the pan at the end to heat through. It worked really well. It was fast and definitely hit the spot. I don't think this quite makes 4 servings though, so definitely have some side dishes, or double the recipe if you're trying to feed 4.

    A plate of Szechwan shrimp over rice.

    Szechwan Shrimp
    Allrecipes - FOODGU1

    "Don't let some of the ingredients fool you -- this spicy shrimp makes a simple, impressive dish, which I usually make for company. For more or less heat, adjust amount of red pepper. Serve over hot steamed rice."

    Prep Time: 10 Min
    Cook Time: 10 Min
    Ready In: 20 Min

    4 servings

    4 tablespoons water
    2 tablespoons ketchup
    1 tablespoon soy sauce
    2 teaspoons cornstarch
    1 teaspoon honey
    ½ teaspoon crushed red pepper
    ¼ teaspoon ground ginger
    1 tablespoon vegetable oil
    ¼ cup sliced green onions
    4 cloves garlic, minced
    12 ounces cooked shrimp, tails removed

    In a bowl, stir together water, ketchup, soy sauce, cornstarch, honey, crushed red pepper, and ground ginger. Set aside.

    Heat oil in a large skillet over medium-high heat. Stir in green onions and garlic; cook 30 seconds. Stir in shrimp, and toss to coat with oil. Stir in sauce. Cook and stir until sauce is bubbly and thickened.

    Nutritional Information
    Amount Per Serving Calories: 142 | Total Fat: 4.4g | Cholesterol: 164mg

    Big Flavors Rating: 4 Stars

    Apple Picking

    September 29, 2012 by Ashley Leave a Comment

    Mother and baby at an apple orchard.

    Mother and baby at an apple orchard.

    Last year, we didn't go apple picking. I was pregnant and didn't feel like walking around an orchard for a few hours. So this year, we got to take our son with us. He had a BLAST, and I found out that apples are the best teething rings ev-er! We got our usual half bushel of apples, and rest assured, there will be a lot of fun apple posts coming up in the next few weeks 🙂

    Dad's Stuffed Bell Peppers

    September 27, 2012 by Ashley Leave a Comment

    Stuffed bell peppers topped with ketchup.

    The first time I had stuffed bell peppers, they were amazing. My friend's mom made them for us, and it was one of the tastiest things I had ever eaten.

    Since then, I've never found any that I really cared for. In fact, I checked, and I haven't tried cooking them myself other than once in 2007, back when my blog was just a baby 😉

    Anyway, I saw that Elise over at Simply Recipes has 2 versions of stuffed peppers on her site - one that her mom makes, and one that her dad makes. I was torn between the 2 recipes, but ended up going for the one with lots of ketchup.

    It sounded more meatloaf-y to me. Yum! I had some grass fed ground beef to use, and was glad to get a chance to use some leftover rice that I had in the fridge. These were definitely really good, especially with the grass fed beef, but I think I'm still on my quest for the perfect stuffed bell pepper recipe.

    At the rate I'm trying them, it's gonna be a long time before I find it 😉

    Stuffed bell peppers topped with ketchup.

    Dad's Stuffed Bell Peppers
    Simply Recipes

    A classic American dish that one can't easily find in restaurants (unless it is a cafeteria) is stuffed bell peppers. It's essentially meatloaf stuffed into bell peppers and baked in the oven. My mom and dad have their own different versions, both delicious. Here is my dad's:

    Prep time: 10 minutes
    Cook time: 50 minutes

    4 bell peppers, any color
    Salt
    5 tablespoon extra-virgin olive oil
    1 medium yellow onion, peeled and chopped
    1 clove of garlic, peeled and chopped
    1 lb of lean ground beef
    1 ½ cup of cooked rice
    1 cup chopped tomatoes, fresh or canned (if using can, drain of excess liquid first)
    1 tablespoon chopped fresh oregano or 1 teaspoon of dried oregano
    Fresh ground pepper
    ½ cup ketchup
    ½ teaspoon of Worcestershire Sauce
    Dash of Tabasco sauce

    1. Bring a large pot of water to a boil over high heat. Meanwhile, cut top off peppers 1 inch from the stem end, and remove seeds. Add several generous pinches of salt to boiling water, then add peppers and boil, using a spoon to keep peppers completely submerged, until brilliant green (or red if red peppers) and their flesh slightly softened, about 3 minutes. Drain, set aside to cool.

    2. Preheat oven to 350 degrees F. Heat 4 tablespoon of the oil in a large skillet over medium heat. Add onions and cook, stirring often, until soft and translucent, about 5 minutes. Add the garlic and cook a minute more. Remove skillet from heat, add meat, rice, tomatoes, and oregano, and season generously with salt and pepper. Mix well. (You may find it easier to put the ingredients at this point into a large bowl and mix together with your hands.)

    3 Drizzle remaining 1 tablespoon of olive oil inside the peppers. Arrange the cut side of the peppers up in a baking dish, then stuff peppers with filling. Combine ketchup, Worcestershire sauce, Tabasco sauce, and ¼ cup of water in a small bowl, then spoon over filling. Add ¼ cup of water to the baking dish. Place in oven and bake for 40-50 minutes (or longer, depending on how big the peppers are that you are stuffing), until the internal temperature of the stuffed peppers is 150-160°F.
    Yield: Serves 4-6.

    Big Flavors Rating: 4 Stars

    Stuffed Cucumbers

    September 27, 2012 by Ashley 2 Comments

    Stuffed cucumber slices on a plate.

    Stuffed cucumber slices on a plate.

    I was planning to take this appetizer to a potluck with a mommy group that I'm part of, but it ended up getting canceled, so I made it for us at home. It was fine, but nothing special. It needs a little something else to be really special. I shouldn't have bothered peeling the cucumber - I like the flavor of the peel. I think if this had a little more mixed into the cheese, it would have been better. It's a great idea! I think also maybe a creamier cheese would hold up better - the crumbly feta tends to fall out easily.

    Stuffed Cucumbers
    Yummly

    Total time: 30 min
    Prep time: 10 min

    1 european cucumber (seedless, chilled peeled)
    ½ cup feta cheese (crumbled)
    2 tbsps mayonnaise
    8 drops worcestershire sauce
    1 tablespoon parsley (minced)

    1. Cut the cucumber in half lengthwise and with a teaspoon scrape out the centers containing the seeds.

    2. In a small bowl, blend the feta, mayonnaise and Worcestershire sauce into a smooth mixture. Fill the centers of cucumbers with the cheese mixture. Sprinkle the cucumbers with parsley and chill them for at least 20 minutes. Before serving, slice the cucumbers crosswise into bite-sized pieces.

    Big Flavors Rating: 3 Stars

    Supper Club: Nutmeg Cupcakes with Maple Nutmeg Icing

    September 22, 2012 by Ashley Leave a Comment

    Nutmeg cupcakes with whole nutmeg and a microplane alongside.

    Dino chose to make a dessert for our Supper Club this month. He used this cake recipe, but the photo was of cupcakes, so he did 2 batches of cupcakes instead. Since he really wanted them to taste nutmeg-y, he used freshly grated nutmeg instead of ground. He found an icing recipe on a gluten free blog that he made using almond milk. Again, he really wanted the nutmeg to stand out, so he grated it fresh, and was pretty liberal with it. These turned out really nice and fluffy, and the nutmeg was a really different, spiced flavor. We all enjoyed them!

    Nutmeg cupcakes with whole nutmeg and a microplane alongside.

    Nutmeg Cupcakes
    Adapted from Allrecipes - Carol

    Makes 24 cupcakes

    3 eggs, room temperature
    ½ cup butter, softened
    1 ½ cups white sugar
    1 cup buttermilk
    1 teaspoon vanilla extract
    2 cups all-purpose flour
    1 teaspoon baking powder
    1 teaspoon baking soda
    2 teaspoons freshly grated nutmeg
    ¼ teaspoon salt

    Preheat oven to 350 degrees F (175 degrees C). Line muffin tins.

    Beat the butter and white sugar with an electric mixer in a large bowl until light and fluffy. The mixture should be noticeably lighter in color. Add the room-temperature eggs in three batches, blending them into the butter mixture fully. Stir in the vanilla.

    Sift together the flour, baking powder, baking soda, nutmeg, and salt.

    Pour ⅓ of the flour mixture into the bowl; mix just until incorporated. Stir in ½ the buttermilk, mixing gently. Continue adding the flour alternately with the buttermilk, mixing until combined. Scoop the batter into the muffin liners.

    Bake in the preheated oven until a toothpick inserted in the center of the cupcakes come out clean, about 25 to 30 minutes. Let the cupcakes cool in the pan for 10 minutes, then invert them on a wire rack to cool completely before icing.

    Maple Nutmeg Icing
    Adapted from Gluten Free Goddess

    Use only a little liquid at a time as you beat the frosting. If it gets too thin, add more confectioner's (powdered) sugar.

    1 cup confectioner's or powdered sugar
    2 tablespoons pure maple syrup
    ½ teaspoon vanilla extract
    1 tablespoon almond milk
    freshly grated nutmeg, to taste

    Beat until smooth and add more almond milk a tablespoon at a time until the icing is creamy- but not too thin. Taste test and add more nutmeg if it needs it.

    Beat the icing for three to four minutes (this improves the texture).

    Big Flavors Rating: 4 Stars

    Supper Club: Cinnamon Corn

    September 22, 2012 by Ashley Leave a Comment

    Overhead view of a cinnamon corn casserole.

    This month's Supper Club theme was Spice Grab Bag. During one of our past events, we all picked a spice and wrote the name down on a piece of paper. We tossed them in a bag and we all grabbed one, and that had to be the featured flavor in the dish for this month. I drew cinnamon, and I was going to make a dessert, but Dino had nutmeg, and he couldn't find something non-desserty to make that really featured nutmeg. So I found this corn dish and thought it sounded interesting. It sounded kind of like a cinnamon-spiced creamed corn to me. I used a stick of butter instead of margarine. It was super simple to put together, but it took me 1 ½ hours to get it to cook all the way, which I was not planning on. Luckily, even though it doesn't look too great, it tastes wonderful! It's like a really sweet creamed corn pudding. I was calling it "corn brulée". It was one of those recipes that's just weird enough to be a hit. I think this could be served as a dessert, with a scoop of vanilla ice cream on top. And you could definitely cut back on the amount of sugar in the recipe and still have it be plenty sweet. Yum. I meant to get a photo of it after we dug in to show off the creamy texture, but I forgot. Oops!

    Overhead view of a cinnamon corn casserole.

    Cinnamon Corn
    Allrecipes - Linda Rier

    "This sweet, creamy corn dish has been a family favorite for almost 30 years. Family and friends continue to request it."

    Prep Time: 5 Min
    Cook Time: 1 Hr
    Ready In: 1 Hr 5 Min

    Yield 4 to 6 servings

    ½ cup margarine
    ½ cup white sugar
    ¼ cup all-purpose flour
    ⅔ cup evaporated milk
    2 (15 ounce) cans whole kernel corn, drained
    ¼ cup white sugar
    1 teaspoon ground cinnamon

    Preheat oven to 350 degrees F (175 degrees C). Lightly grease a 1 ½ quart casserole dish.

    In a large saucepan, heat margarine and ½ cup sugar until margarine is melted. Mix in flour, then remove from heat. Whisk in evaporated milk, then mix in corn. Pour into prepared casserole dish.

    Bake in preheated oven for 60 minutes, until a knife inserted in center comes out clean. Sprinkle ¼ cup sugar and cinnamon over top.

    Nutritional Information
    Amount Per Serving Calories: 481 | Total Fat: 22.1g | Cholesterol: 10mg

    Big Flavors Rating: 4 Stars

    Vegan Mexican Hot Chocolate Snickerdoodles

    September 18, 2012 by Ashley 3 Comments

    Vegan Mexican Hot Chocolate Snickerdoodles

    I saw this recipe and just had to try it. I didn't even realize they were vegan until I read the recipe. These are really nice - and go big...don't skimp on the cayenne! The kick is great...it kind of sneaks up on you. Plus the warmth from the cinnamon...yum! I used almond milk for this, and they were a big hit with everyone who tried them. I ended up with 40 cookies from this recipe - not 24 like the recipe estimated.

    Vegan Mexican Hot Chocolate Snickerdoodles

    Mexican Hot Chocolate Snickerdoodles
    Culinary in the Country (Adapted from Vegan Cookies Invade Your Cookie Jar)

    For the cookie dough

    1 ⅔ cups all-purpose flour
    ½ cup Dutch process cocoa powder
    1 teaspoon baking soda
    ½ teaspoon cinnamon
    ¼ to ½ teaspoon cayenne pepper
    ¼ teaspoon salt
    ½ cup canola oil
    1 cup granulated sugar
    ¼ cup pure maple syrup
    3 tablespoons soy, almond or regular milk (if using regular milk, the cookies won't be vegan)
    2 teaspoons vanilla

    For the sugar coating

    ⅓ cup granulated sugar
    1 teaspoon cinnamon

    To prepare cookie dough

    Preheat oven to 350 degrees.

    In a large bowl, whisk together flour, cocoa powder, baking soda, cinnamon, cayenne and salt.

    In a medium bowl, whisk together oil, sugar, maple syrup, milk and vanilla. Pour mixture into the dry ingredients, stirring with a wooden spoon until combined.

    To prepare sugar coating

    In a shallow dish, stir together sugar and cinnamon.

    Roll dough into walnut sized balls, then gently flatten each ball into a 2" disc. Place once side of the dough disc into the sugar coating, pressing to adhere. Place dough, sugar side up, onto parchment-lined baking sheets, spacing them at least 2" apart.

    Place into the oven and bake until the cookies have spread and are crackly on top, about 9 to 12 minutes. Remove from the oven and place baking sheet on a wire rack - let cookies cool for 5 minutes, then transfer to a wire rack to cool completely.

    Makes about 24 cookies.

    Big Flavors Rating: 4 Stars

    Eggplant Stir-fry with Bok Choy and Chicken

    September 18, 2012 by Ashley Leave a Comment

    Eggplant Stir-fry with Bok Choy and Chicken in a bowl.

    I still had some veggies left from the CSA, so I decided to make a stir-fry.

    I had one piece of chicken breast left, too, so I figured it would be a veggie-heavy dish with a little meat.

    I served this over brown rice, and we drizzled low sodium soy sauce and sriracha on top before diving in. It was really good!

    Eggplant Stir-fry with Bok Choy and Chicken in a bowl.

    Tatsoi Salad with Spicy Peanut Dressing

    September 15, 2012 by Ashley Leave a Comment

    2 plates of Tatsoi Salad with Spicy Peanut Dressing.

    Hearty green tatsoi pairs nicely with a spicy peanut dressing in this tasty salad. A great way to use your farmers' market haul!

    2 plates of Tatsoi Salad with Spicy Peanut Dressing.

    When I was picking up my CSA goodies, I saw a vegetable that was new to me - tatsoi.

    The farmer told me that it was kind of like bok choy and that it was good to stir-fry or in a salad.

    It's slightly bitter and has a really interesting texture. It's hearty and held up nicely to all of the toppings and the heavy dressing that I put on top of it.

    Feel free to use any veggies that you have on hand - I just used what I got from the CSA this week.

    Still hungry? You may also like...

    ¾ view of 3 assembled Instant Pot French Dip Sandwiches with au jus, an Instant Pot, and shredded meat alongside.
    Instant Pot French Dip Sandwiches
    Overhead view of a sheet pan with Falafel-Spiced Chickpea Flatbread on top surrounded by garnishes.
    Falafel-Spiced Chickpea Flatbreads
    These Melt-in-Your-Mouth Buttermilk Chocolate Cookies are a supremely chocolatey dessert recipe that is a great way to use a partial container of buttermilk - guaranteed to satisfy even the strongest chocolate cravings.
    Melt-in-Your-Mouth Buttermilk Chocolate Cookies
    Overhead view of assorted breakfast items displayed on a board.
    Epic Brunch Board on a Budget

    Doing some online shopping? Check out my Amazon shop page for recommendations!

    Check out my latest posts...

    • Jar of homemade Italian seasoning blend.
      Italian Seasoning Blend
    • Bowl of tzatziki with olive oil drizzled over the top.
      Easy Homemade Tzatziki
    • Turkey sausage patties and a jar of breakfast sausage seasoning.
      Turkey Sausage Patties

    Happy Hour Cocktail: La Paloma

    September 14, 2012 by Ashley 2 Comments

    Two paloma cocktails garnished with lime wheels.

    We bought a new bottle of Patrón, and I wanted to try out a new cocktail. I did a quick survey of some friends, and this cocktail was the one that won my vote. I used Izze Sparkling Grapefruit. I love that stuff because they don't use any high fructose corn syrup or other unnatural ingredients. We aren't big soda drinkers in my house, so when we do, we get the good stuff. Anyway, this cocktail is really crisp and refreshing - perfect for the end of summer. I found this recipe on Esquire's site - if you check it out there, they have a great commentary on the drink from their resident cocktail historian. Pretty funny stuff! La Paloma is Spanish for "The Dove" - not sure why, maybe because it makes you feel nice and peaceful at the end of a long summer day...

    Two paloma cocktails garnished with lime wheels.

    La Paloma
    Esquire

    2 ounces tequila
    ½ ounce lime juice
    pinch of salt
    grapefruit soda

    Combine the tequila (reposado, preferably), lime juice, and salt in a tall glass. Add ice, top off with grapefruit soda, and stir. The soda can be hard to find; we prefer the Mexican Jarritos brand, but anything will do, even, at last resort, lemon-lime soda with a splash of grapefruit juice. Some prefer the salt on the rim of the glass, but we say just throw it in. Others omit it entirely. Don't.

    Big Flavors Rating: 4 Stars

    Chocolate Chip Cookie in a Cup

    September 13, 2012 by Ashley 12 Comments

    Chocolate Chip Cookie in a Cup

    Today was exhausting. I had a teething baby on my hands all day, a lot of stuff to get done, and no energy left after he was in bed to do any of it. We had leftovers for dinner. Dino went upstairs to do some work, and I collapsed on the couch. And then it hit me. I wanted dessert, and I wanted it now. I didn't want to exert much energy, and I didn't have anything around that was already made. Then I remembered that I've seen several sites where you can mix a cake, brownie or cupcake in a mug, microwave it, and have dessert in less than 5 minutes. So I searched for a recipe.

    This really hit the spot. It wasn't the best chocolate chip cookie in the world (partially because I think I microwaved it a few seconds too long), but it was really good. And it didn't take long to make. And it didn't make a huge mess in the kitchen. And I got to use the 2 egg yolks that I had leftover from when I made Orange Chicken with Scallions earlier this week. I'm already thinking up variations on this recipe in my head. This is dangerous!

    Chocolate Chip Cookie in a Cup

    Chocolate Chip Cookie in a Cup
    created by Melissa at No. 2 Pencil

    1 Tablespoon Butter
    1 Tablespoon Granulated White Sugar
    1 Tablespoon of firmly packed Dark Brown Sugar
    3 Drops of Vanilla Extract
    Small Pinch of Kosher Salt
    1 Egg Yolk (discard the egg white)
    Scant ¼ cup of All Purpose Flour
    2 Tablespoons of Semi Sweet Chocolate Chips

    Start by melting your butter in the microwave. Add sugars, vanilla and salt. Stir to combine. Separate your egg and add the yolk only to your cup. Stir to combine. Add flour, then stir again. Add the chocolate chips, and give a final stir. Cook in microwave 40-60 seconds, start checking for doneness at 40 seconds. Mine takes 50 seconds.

    Serve warm.

    Big Flavors Rating: 4 Stars

    Tomato Tarte Tatin

    September 12, 2012 by Ashley Leave a Comment

    Overhead view of a partially eaten tomato tarte tatin.

    I had a lot of beautiful tomatoes from the CSA haul, and I asked some friends if anyone had a good tomato gratin recipe. One of them sent this link to me, saying she hadn't tried it, but that it had been bookmarked for quite some time. I only needed to buy onions and a pie crust to get this beauty cookin', so I went for it. Maybe next time, I'll try out the recommended pie crust recipe - I didn't feel like fussing with one today. This turned out to be amazing. The tomatoes melt down and get kind of jammy with the caramelized onions and balsamic, and the brightness from the lemon zest really brings it to life. I absolutely adored this. I probably should have added a second tablespoon of flour, because my tomatoes ended up being pretty juicy, but I didn't mind. Yum!

    Overhead view of a partially eaten tomato tarte tatin.

    Tomato Tarte Tatin
    101 Cookbooks

    2 medium yellow onions, chopped
    2 tablespoons extra-virgin olive oil or clarified butter

    1 ½ pounds / 24 oz small tomatoes (here it's a mix of heirloom cherry & early girls)

    scant ½ teaspoon fine grain sea salt
    2 teaspoons balsamic vinegar
    a bit of flour
    zest of one lemon

    1 pie crust, this rye crust is my go-to
    1 egg whisked with a tablespoon of water

    Preheat the oven to 400F / 205C.

    While the oven is warming, uses a large skillet over medium heat to saute the onions and a couple pinches of salt in the oil/clarified butter. Cook, stirring regularly, until the onions are deeply golden and caramelized, 10-15 minutes. Remove from heat.

    While the onions are cooking, cut any larger early girl tomatoes in half. I typically leave the small cherry tomatoes whole. Add to the caramelized onions along with the sea salt and balsamic vinegar. Transfer to a 10 or 11-inch cast iron skillet or equivalent deep pie dish. If you get the sense that your tomatoes are quite juicy, and might release a lot of liquid, you can toss the mixture with a tablespoon or two of flour at this point. Sprinkle mixture with lemon zest.

    Roll out your pie dough, and use it to cover the tomato mixture - tucking in the sides a bit. Brush the crust with the egg wash, cut a few decorative slits in the crust, and bake in the top third of the oven until the crust is deeply golden and the tomatoes are bubbling a bit at the sides, 25 - 30 minutes.

    Serves 6-8.
    Prep time: 10 min - Cook time: 45 min

    Big Flavors Rating: 5 Stars

    Savory Stuffed Sweet Dumplings

    September 12, 2012 by Ashley Leave a Comment

    Stuffed sweet dumpling squash.

    Two sweet dumpling squash.

    Some friends of mine are out of town for a few days, and because of that, I was the proud recipient of their weekly CSA goodies. One of the things that I received was some sweet dumpling squash. I've never had them before, and was excited to try them. I looked up some recipes, and decided on this one, since it also used some onions, tomatoes and green peppers that I got from the CSA. It also needed some brown rice, and I had some leftover from when I made Orange Chicken with Scallions on Monday. That was great, because I didn't have to bother with cooking any rice. I used 1 cup since I estimated that rice doubles in volume once cooked.

    Colorful mix of veggies being cooked on the stovetop.

    This is a nice recipe - a great way to use up some gorgeous produce. We enjoyed the stuffing, but especially nice is the flavor of the squash. It's almost like a mix between a pumpkin and a sweet potato. I had read that the skin is edible, so I made sure to scrub the squash well before baking it. I ate every last bit of squash...minus the stem!

    Stuffed sweet dumpling squash.

    Savory Stuffed Sweet Dumplings
    foodreference.com

    2 sweet dumpling squashes (approx. 24 ounces)
    ½ cup long-grain brown rice
    1 ¼ cup water
    2 cups tomatoes, chopped
    1 cup onion, chopped
    1 cup green bell pepper, chopped
    ¼ teaspoon freshly ground black pepper
    ½ teaspoon dried thyme leaves
    ½ teaspoon dried marjoram
    1 ½ tablespoon extra virgin olive oil
    ½ cup raw pine nuts, toasted
    salt to taste

    Cut squashes in half lengthwise (from stem to blossom end). Scoop out seeds, and place the squash cut side down on a baking sheet covered with aluminum foil, shiny side down.
    Bake at 400ºF for 40 minutes.

    While squashes are baking, combine rice, water, and salt in a 2-quart saucepan.
    Cover and bring to a boil over high heat.
    Turn heat down to low and steam 35 to 45 minutes until tender.

    Combine tomatoes, onion, bell pepper, black pepper, herbs, and olive oil in a large skillet.
    Sauté over high heat until onions are softened and transparent, about 5 to 7 minutes.

    When rice is cooked, add to ingredients in skillet along with pine nuts and mix well.
    Season to taste.

    Stuff squash cavities.

    Spread the remainder of the stuffing onto the bottom of a lightly oiled 7" x 9" baking pan.

    Lay squashes on top of stuffing.
    Cover baking dish with aluminum foil, shiny side down.
    Bake at 350ºF for 25 to 30 minutes.

    Nutritional analysis per serving: Calories 325, Fat 9g, Calories From Fat 25%, Carbohydrates 54g Protein 8g, Cholesterol 0mg, Fiber 5g, Sodium 17mg.
    CDC.gov - 5 a Day

    Big Flavors Rating: 4 Stars

    Orange Chicken with Scallions

    September 10, 2012 by Ashley 2 Comments

    Orange chicken over rice garnished with green onions.

    I had 2 pieces of chicken left from when I made Chicken with Honey-Beer Sauce. I found this recipe and I thought it looked interesting. It took a bit of time to cook, since you have to do the chicken in two batches, but it was totally worth it. I'm sure that Dino would have housed the entire batch all by himself if I wasn't there to eat it, too. He loved it. The orange flavor is great, and the slight heat from the red pepper flakes is perfect. Our baby loved it, too! I served this over brown rice and it was a great dinner.

    Orange chicken over rice garnished with green onions.

    Orange Chicken with Scallions
    Fine Cooking

    Serves 2 to 3

    1 large navel orange
    1 tablespoon soy sauce
    1 tablespoon rice vinegar
    2 teaspoons light brown sugar
    ⅛ teaspoon crushed red pepper flakes
    1 pound boneless, skinless chicken breasts, cut into 1-inch cubess
    ¾ teaspoon kosher salt
    2 large egg whites
    ⅓ cup cornstarch
    3 to 4 tablespoons canola or peanut oil
    4 scallions, trimmed and thinly sliced (keep whites and greens separate)

    1. Using a vegetable peeler, shave the zest from the orange in long, wide strips. If necessary, remove any large patches of bitter white pith from the zest strips with a paring knife. Juice the orange into a small bowl and mix with the soy sauce, rice vinegar, brown sugar, and red pepper flakes.

    2. Sprinkle the chicken with ½ teaspoon of the salt. In a mini chopper or food processor, process the egg whites, cornstarch, and the remaining ¼ teaspoon salt until smooth. In a medium bowl, toss the chicken with the cornstarch batter.

    3. Heat 2 tablespoons of the oil in a 12-inch nonstick skillet or large stir-fry pan over medium-high heat until shimmering hot. Using tongs, transfer about half the chicken to the pan. Reduce the heat to medium and cook, flipping every minute or so, until the chicken browns and crisps all over and is firm to the touch, 3 to 4 minutes. With clean tongs, transfer to a paper-towel-lined plate. Add the remaining 1 tablespoon oil to the skillet (or 2 tablespoons oil if the pan seems very dry) and repeat the cooking process with the remaining chicken; transfer to the plate.

    4. Put the orange zest strips in the skillet and cook, stirring, until they darken in spots, 15 to 30 seconds. Stir the orange juice mixture and add it to the pan. Let it boil for about 10 seconds and then add the chicken and the scallion whites. Cook, stirring often, until the sauce reduces to a glaze and the chicken is just cooked through (check by cutting into a thicker piece), 1 to 2 minutes. If the chicken isn't cooked through but the glaze is cooking away, add a couple tablespoons of water and continue cooking. Serve sprinkled with the scallion greens.

    Big Flavors Rating: 5 Stars

    Garlicky Lime Marinated Grilled Beef Tenderloin

    September 10, 2012 by Ashley Leave a Comment

    Steak on a plate with quinoa corn salad and fresh watermelon.

    I had a bit of beef tenderloin leftover from when I made Beef Tenderloin with Smoked Paprika Mayonnaise, so I decided to make a quick marinade for it. This turned out really nice. We're big garlic lovers, and the citrus flavor from the lime zest and juice was a nice addition. I served this with some slices of watermelon and leftover Quinoa with Corn, Scallions, and Mint.

    Steak on a plate with quinoa corn salad and fresh watermelon.

    Garlicky Lime Marinated Grilled Beef Tenderloin
    Ashley Covelli

    1 ½ pounds beef tenderloin

    Marinade:
    4 cloves garlic, minced
    1 lime, zested and juiced
    ½ cup olive oil
    Kosher salt and freshly cracked black pepper, to taste

    Add marinade ingredients to a small bowl and whisk to combine. Put beef in a large Ziploc bag and pour in marinade. Close bag, squeezing out as much air as possible, and let marinate in the refrigerator for 1 ½ hours.

    Preheat grill. While it's getting hot, remove the meat from the refrigerator to take the chill off. When the grill is ready, remove meat from marinade and grill to the degree of doneness that you like.

    Let meat rest for 10 minutes. Slice against the grain and enjoy!

    Big Flavors Rating: 4 Stars

    Banana Banana Bread

    September 7, 2012 by Ashley 1 Comment

    Banana Banana Bread

    Banana Banana Bread

    I had a few overripe bananas that I wanted to bake with, but I needed more. Luckily, one of my neighbors came to the rescue. I ended up using 5 bananas to get the 2 ⅓ cups, and I'm glad I didn't skimp! In fact, as I'm writing this post, I checked my old posts and realized that I made this once before, but I didn't have enough bananas at home to make it properly. This bread is really tasty. Using the right amount of bananas bumped it up an entire star for us. It's not the best banana bread I've made, but it's up there. It packs a lot of banana flavor, and doesn't have a lot of ingredients to fuss around with. This is definitely a good way to use up a bunch of bananas if they're on their way out.

    Banana Banana Bread

    Banana Banana Bread
    Allrecipes - Shelley Albeluhn

    "Why compromise the banana flavor? This banana bread is moist and delicious with loads of banana flavor! Friends and family love my recipe and say it's by far the best! It's wonderful toasted!! Enjoy!"

    Original Recipe Yield 1 - 9x5 inch loaf

    2 cups all-purpose flour
    1 teaspoon baking soda
    ¼ teaspoon salt
    ½ cup butter
    ¾ cup brown sugar
    2 eggs, beaten
    2 ⅓ cups mashed overripe bananas

    Preheat oven to 350 degrees F (175 degrees C). Lightly grease a 9x5 inch loaf pan.
    In a large bowl, combine flour, baking soda and salt. In a separate bowl, cream together butter and brown sugar. Stir in eggs and mashed bananas until well blended. Stir banana mixture into flour mixture; stir just to moisten. Pour batter into prepared loaf pan.

    Bake in preheated oven for 60 to 65 minutes, until a toothpick inserted into center of the loaf comes out clean. Let bread cool in pan for 10 minutes, then turn out onto a wire rack.

    Nutritional Information
    Amount Per Serving Calories: 229 | Total Fat: 8.8g | Cholesterol: 56mg

    Big Flavors Rating: 4 Stars

    Chicken with Honey-Beer Sauce

    September 5, 2012 by Ashley Leave a Comment

    Chicken breast with sauce served with asparagus and cole slaw.

    Need an excuse to drink beer? Here's one...make a recipe that calls for ½ cup! I cracked open a beer for myself and one for my father-in-law and used ¼ cup of each. Awesome. This recipe is really tasty and pretty simple! The shallots melt down into the sauce and make a great accompaniment to the chicken. It's sweet and a little tangy, and definitely goes well with that leftover beer 😉 I served this with Rainbow Waldorf Salad and some asparagus that I sautéed with low sodium teriyaki sauce.

    Chicken breast with sauce served with asparagus and cole slaw.

    Chicken with Honey-Beer Sauce
    Cooking Light September 2012

    Opt for an inexpensive, full-flavored domestic beer, like Blue Moon wheat ale.

    Yield: Serves 4 (serving size: 1 breast half and 2 tablespoons sauce)
    Cost per Serving: $2.36

    2 teaspoons canola oil
    4 (6-ounce) skinless, boneless chicken breast halves
    ¼ teaspoon freshly ground black pepper
    ⅛ teaspoon salt
    3 tablespoons thinly sliced shallots
    ½ cup beer
    2 tablespoons lower-sodium soy sauce
    1 tablespoon whole-grain Dijon mustard
    1 tablespoon honey $
    2 tablespoons fresh flat-leaf parsley leaves

    1. Heat a large skillet over medium-high heat. Add oil to pan; swirl to coat. Sprinkle chicken evenly with pepper and salt. Add chicken to pan; sauté 6 minutes on each side or until done. Remove chicken from pan; keep warm. Add shallots to pan; cook 1 minute or until translucent. Combine beer and next 3 ingredients (through honey) in a small bowl; stir with a whisk. Add beer mixture to pan; bring to a boil, scraping pan to loosen browned bits. Cook 3 minutes or until liquid is reduced to ½ cup. Return chicken to pan; turn to coat with sauce. Sprinkle evenly with parsley.

    Big Flavors Rating: 4 Stars

    Beef Tenderloin with Smoked Paprika Mayonnaise

    September 3, 2012 by Ashley 2 Comments

    Beef Tenderloin with Smoked Paprika Mayonnaise

    My mother-in-law bought a beef tenderloin, and since she and my father-in-law were coming over today, she asked if I wanted to do something with it (she's a master of subtlety haha!) and I thought it would be a fun challenge. I don't think I've worked with a whole beef tenderloin in the past. This recipe looked really easy and didn't involve a lot of hands-on time. A lot of the reviewers said that you should double the rub for a larger piece of meat, so I did. The oven is at a really high heat, and it was getting pretty smoky in the kitchen, so I lowered the temp to 450°F for the last few minutes of cooking time. This roast came out beautifully! It was melt-in-your-mouth perfect. I can definitely see entertaining with this. It didn't even necessarily need the sauce. We all actually liked the sauce mixed in with rice better than on the beef. I think it would be great with some pommes frites or roasted potatoes. Yum!

    Beef Tenderloin with Smoked Paprika Mayonnaise

    Beef Tenderloin with Smoked Paprika Mayonnaise
    Gourmet July 2008

    yield: Makes 8 to 12 servings
    active time: 25 min
    total time: 1 ¼ hr

    Lovers of beef and chorizo can have their steak and eat it, too: Here, a garlic, cumin, and smoked-paprika rub on rare roast beef has the alluring smoky meatiness you've always associated with the richly flavored sausage. The same seasonings, plus some drippings from the meat, transform ordinary store-bought mayonnaise into a simply spectacular accompaniment.

    For beef:
    2 large garlic cloves
    1 teaspoon smoked paprika
    1 teaspoon ground cumin
    1 tablespoon olive oil
    1 (3 ½- to 4-pound) trimmed beef tenderloin roast, tied

    For mayonnaise:
    1 cup mayonnaise
    1 teaspoon smoked paprika
    ½ teaspoon ground cumin
    2 tablespoons meat juices from beef, or to taste

    Roast tenderloin:
    Preheat oven to 500°F with rack in middle.

    Mince and mash garlic to a paste with 1 ¼ teaspoon salt. Transfer to a small bowl and stir in paprika, cumin, oil, and 1 teaspoon pepper.

    Pat tenderloin dry, then rub garlic mixture all over it. Roast in a roasting pan until an instant-read thermometer inserted diagonally 2 inches into center of meat registers 120°F, 25 to 35 minutes for medium-rare.

    Transfer to a platter along with any pan juices and cool, loosely covered with foil, 30 minutes to 1 hour. (Internal temperature will rise to about 130°F as it rests.)

    Make mayonnaise:
    Stir together mayonnaise, paprika, cumin, and ½ teaspoon pepper. Stir in meat juices and salt to taste

    To serve:
    Cut meat into thick slices. Serve warm or at room temperature, with smoked-paprika mayonnaise.

    Cooks' note:
    Smoked-paprika mayonnaise keeps, chilled, 2 weeks.

    Big Flavors Rating: 5 Stars

    Green Beans with Tomatoes and Shiitake Mushrooms

    September 3, 2012 by Ashley 2 Comments

    Green beans with tomatoes and shiitake mushrooms.

    Green beans with tomatoes and shiitake mushrooms.

    I was in the mood to make a green bean side dish, and I thought they would be nice paired with some meaty shiitake mushrooms and tomatoes. I heated about 2 tablespoons of extra-virgin olive oil in a large nonstick skillet and then added 2 cloves of minced garlic and 2 chopped shallots, stirring until nice and fragrant and slightly softened. Then I added in about a pound of fresh green beans that I trimmed and halved. I sprinkled them with kosher salt and freshly ground pepper and let them cook for a few minutes. Then, I added about 2 cups of coarsely chopped shiitake caps and 8 ounces of halved grape tomatoes. I stirred it around and then covered it for a few minutes, until they started to cook down a bit. Then, I added in 1 tablespoon of white balsamic with oregano flavor, and let it cook for a few more minutes. It turned out awesome! The meatiness of the mushrooms was great with the beans, and the tang from the tomatoes and vinegar was perfect. I'll definitely make this again!

    Big Flavors Rating: 5 Stars

    • « Previous Page
    • 1
    • …
    • 23
    • 24
    • 25
    • 26
    • 27
    • …
    • 35
    • Next Page »

    Hi, I'm Ashley and I’ve been writing about food & recipes here at Big Flavors from a Tiny Kitchen since 2006. I want to help you (yes, you!) gain confidence in the kitchen so you are excited to cook at home for yourself and your loved ones.

    More about me →

    Favorite Spring Recipes

    • Mayo-free Deviled Eggs
    • Middle Eastern Fattoush Salad with Homemade Pita Chips
    • Birthday Cake Confetti Pancakes with Sprinkles
    • Italian Cream Cheese and Ricotta Cheesecake
    • Garlicky Mushroom Ricotta Pizza with Wild Arugula + Aged Balsamic
    • Slow Cooker "Roasted" Beets
    • Honey Balsamic Roasted Carrots
    • Italian Ricotta Cookies
    • Rhubarb Custard Pie
    • Easy Instant Pot Herbed Potato Salad

    Mother's Day + Easter Brunch

    • Epic Brunch Board on a Budget
    • Baby Spinach and Cheddar Quiche Made with Fresh Spinach
    • Turkey Salad Tea Sandwiches with Dried Cherries
    • Great Grandma Maria Francesca Cardile's Italian Easter Cookies
    • Brie Waffle Bites
    • Challah French Toast
    • Creamsicle Smoothies
    • DM Bloody Mary
    • Turkey Scotch Eggs
    • The Herbalist

    Popular Now

    • Cast iron skillet full of chicken fajitas.
      Favorite Restaurant-Style Chicken Fajitas
    • Overhead view of spinach and cheddar quiche with forks.
      Baby Spinach and Cheddar Quiche Made with Fresh Spinach
    • Chicken and bell pepper stir-fry served over white rice.
      Chicken and Bell Pepper Stir-Fry
    • Serving dish of cooked shrimp garnished with chopped parsley.
      Quick and Easy Sautéed Shrimp
    • Overhead view of a dutch oven filled with sausages, peppers, and onions.
      Sausage and Peppers
    • Overhead view of assorted breakfast items displayed on a board.
      Epic Brunch Board on a Budget

    Footer

    ↑ back to top

    About

    • About Ashley
    • Press + Recognition
    • Events
    • Virtual Cooking Classes
    • Podcast
    • Contact
    • Privacy Policy

    Newsletter

    • Sign up to receive delicious recipes and exclusive content right to your inbox!

    As an Amazon Associate I earn from qualifying purchases at no added cost to you.

    ©2006–2026  BIG FLAVORS FROM A TINY KITCHEN LLC | ALL RIGHTS RESERVED

    *Third-party advertisers may collect or use non-personally identifiable information to serve you more relevant ads.