Big Flavors from a Tiny Kitchen

menu icon
go to homepage
  • Recipes
  • About
  • Events
  • Contact
  • Subscribe
    • Facebook
    • Instagram
    • Pinterest
  • subscribe
    search icon
    Homepage link
    • Recipes
    • About
    • Events
    • Contact
    • Subscribe
    • Facebook
    • Instagram
    • Pinterest
  • ×
    Home » Recipes

    Lobster Mac & Cheese

    July 16, 2015 by Ashley 2 Comments

    Lobster Mac & Cheese

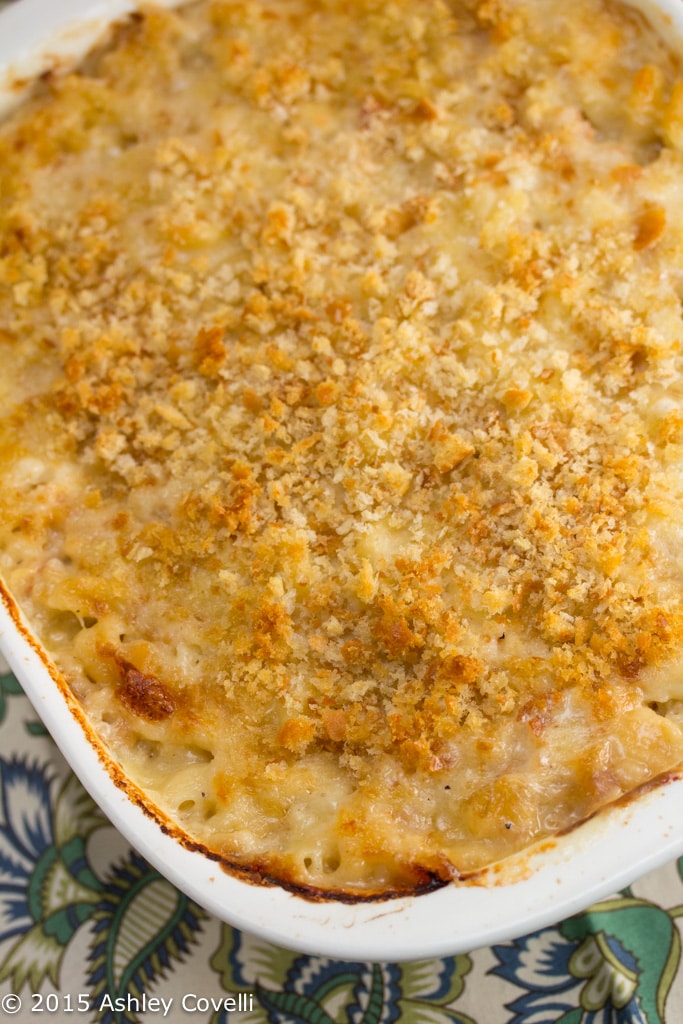
    The ultimate upgrade to a comfort food classic - lobster studded, cheesy pasta baked underneath a layer of crispy breadcrumbs.

    The second dish we made for our Ina Garten themed Supper Club dinner was this outrageously decadent Lobster Mac & Cheese.
    Lobster Mac & Cheese

    The mixture of Gruyère and extra-sharp Cheddar really intensifies the cheesiness of this dish in the best possible way.

    This was my first time cooking lobster at home. I picked up some frozen lobster tails and followed the instructions for cooking them in the oven. Easy peasy and much less intimidating than I thought it would be!

    A photo posted by Ashley Covelli (@bigflavors) on May 30, 2015 at 7:36pm PDT

    I really loved the way the cheese clung to the cavatappi, so I definitely recommend trying to find that pasta if you can. I'd probably go for something like rotini if that wasn't available.

    The buttered bread crumbs add a nice, golden crust on top of this dish. Super tasty!
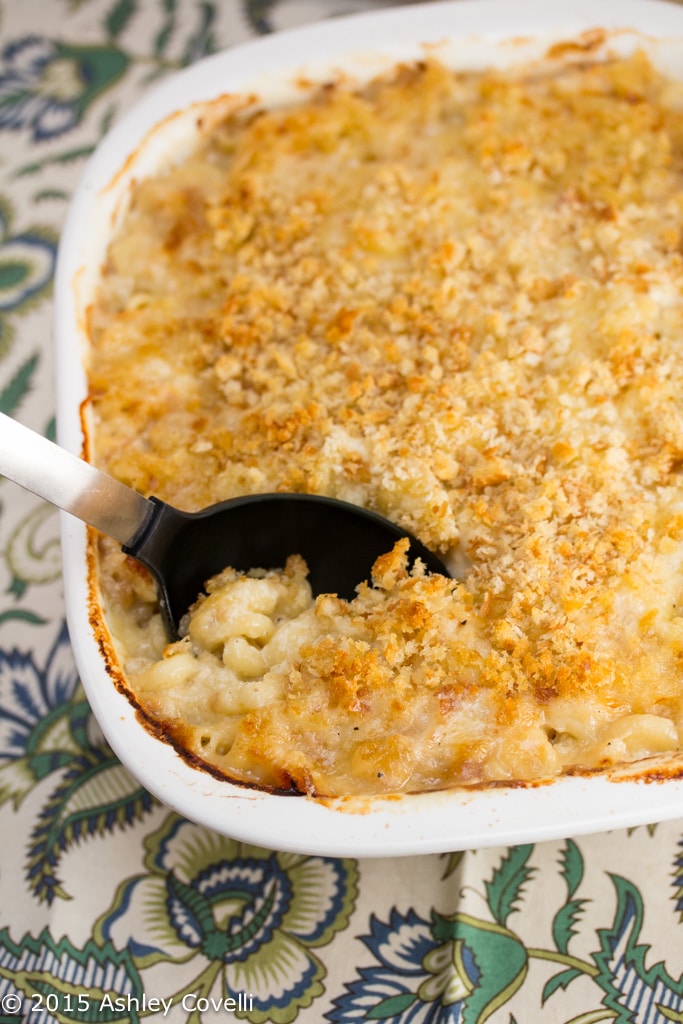
    Lobster Mac & Cheese

    I ended up putting the pot back on the heat until the cheese melted. It wasn't hot enough to melt all of that cheese when it wasn't on the stovetop the way Ina instructs.

    I don't have a bunch of individual gratin dishes, so I cooked it in a big baking dish that I put on top of a baking sheet juuuuust in case it overflowed in the oven (it didn't).
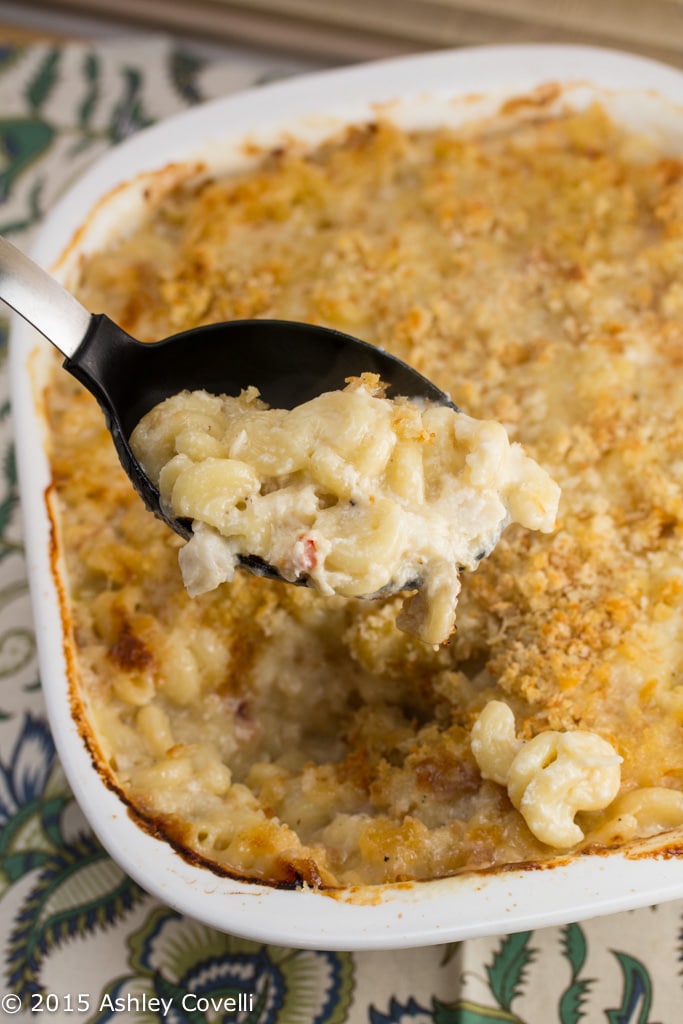
    Lobster Mac & Cheese

    This recipe makes a TON. It was a big hit with our Supper Club, and the leftovers were absolutely delicious reheated the next day.

    📖 Recipe

    Lobster Mac & Cheese
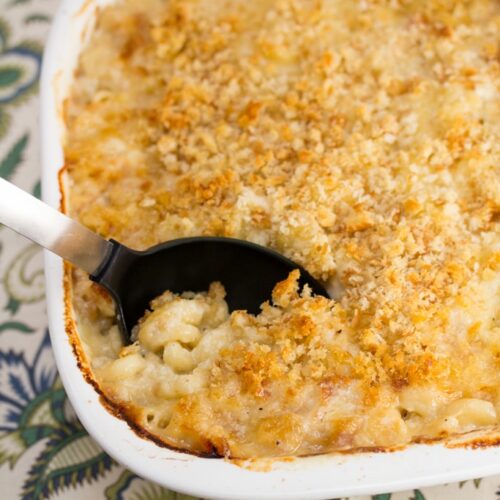
    Casserole dish of lobster mac and cheese with a spoon grabbing a serving.
    The ultimate upgrade to a comfort food classic - lobster studded, cheesy pasta baked underneath a layer of crispy breadcrumbs.
    Ina Garten
    No ratings yet
    Print Recipe Pin Recipe
    Servings: 6 to 8 servings
    Course: Main Dish
    Cuisine: American
    Prep Time 30 minutes mins
    Cook Time 40 minutes mins
    Total Time 1 hour hr 10 minutes mins

    Ingredients
     

    • 2 tablespoons vegetable oil
    • Kosher salt
    • 1 pound cavatappi or elbow macaroni
    • 1 quart whole milk
    • 8 tablespoons 1 stick unsalted butter, divided
    • ½ cup all-purpose flour
    • 4 cups grated Gruyere cheese 12 ounces
    • 2 cups grated extra-sharp Cheddar 8 ounces
    • ½ teaspoon freshly ground black pepper
    • ½ teaspoon ground nutmeg
    • 1 ½ pounds cooked lobster meat ½-inch-diced
    • 1 ½ cups fresh white bread crumbs 5 slices, crusts removed

    Instructions
     

    1. Preheat the oven to 375 degrees F.
    2. Add the oil to a large pot of boiling salted water, add the pasta and cook al dente according to the directions on the package. Drain well.
    3. Heat the milk in a small saucepan, but don't allow it to boil. In a large pot, melt 6 tablespoons of the butter and add the flour. Cook over low heat for 2 minutes, stirring constantly with a whisk. Still whisking, add the hot milk and cook for 1 to 2 minutes, until thickened and smooth. Off the heat, add the Gruyere, Cheddar, 1 tablespoon salt, the pepper and nutmeg and stir until the cheese melts. Stir in the cooked pasta and lobster. Pile the mixture into 6 to 8 (2-cup) gratin dishes.
    4. Melt the remaining 2 tablespoons of butter, combine with the bread crumbs and sprinkle on top. Bake for 30 to 35 minutes, until the sauce is bubbly and the pasta is browned on top.

    Notes

    Recipe from Ina Garten via Food Network
    Did you make this recipe?

    Leave a comment + star rating below to let people know how it was!

    Perfect Roast Chicken

    July 15, 2015 by Ashley 10 Comments

    Perfect Roast Chicken

    Fresh thyme, lemon and garlic perfume this succulent chicken from the inside while it roasts!

    June's Supper Club theme was Ina Garten, and let's just say it was one of the most delicious meals we've had as a group. Everything was pure, delicious comfort food.

    It was our turn to host, so we made 2 main courses and a cocktail. A friend of mine recommended this roast chicken recipe, and it did not disappoint!

    Perfect Roast Chicken

    Lemon, thyme and garlic go inside the chicken, and it's surrounded by root veggies while it roasts. The flavors work together absolutely beautifully!
    The directions were a bit odd - they instruct you to put all of the thyme inside the chicken, but also instruct you to put it with the veggies on the outside of the chicken. I saved a few sprigs from the bunch for the veggies and stuffed the rest inside.

    I also put the veggies in a big bowl to toss them with the oil and seasoning instead of attempting to do that around a chicken in the pan. I put a rack in the roasting pan, put the chicken on that, and then poured the veggies all around and spread them out. It worked really well.

    Perfect Roast Chicken

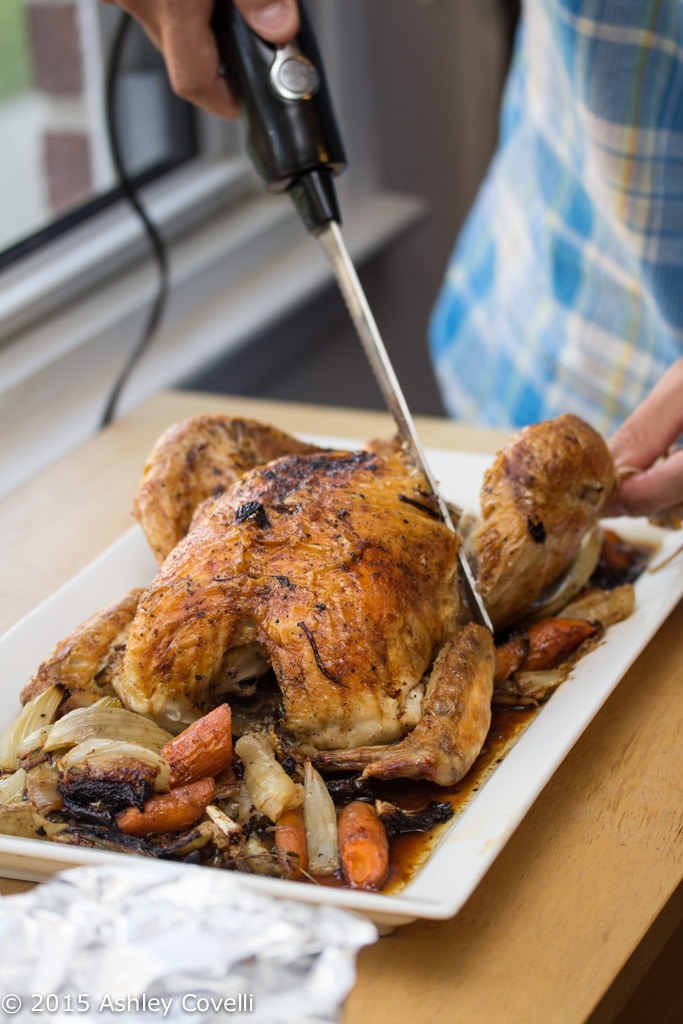
    The skin on the chicken was beautifully golden and delicious. The lemon and herbs permeated the meat, and the veggies were nicely caramelized. It was an outstanding chicken!

    Until now, we always went straight to Thomas Keller's Favorite Simple Roast Chicken since it's soooo delicious, but now I think we'll alternate between that and this recipe. It was absolutely delicious!!

    📖 Recipe

    Perfect Roast Chicken

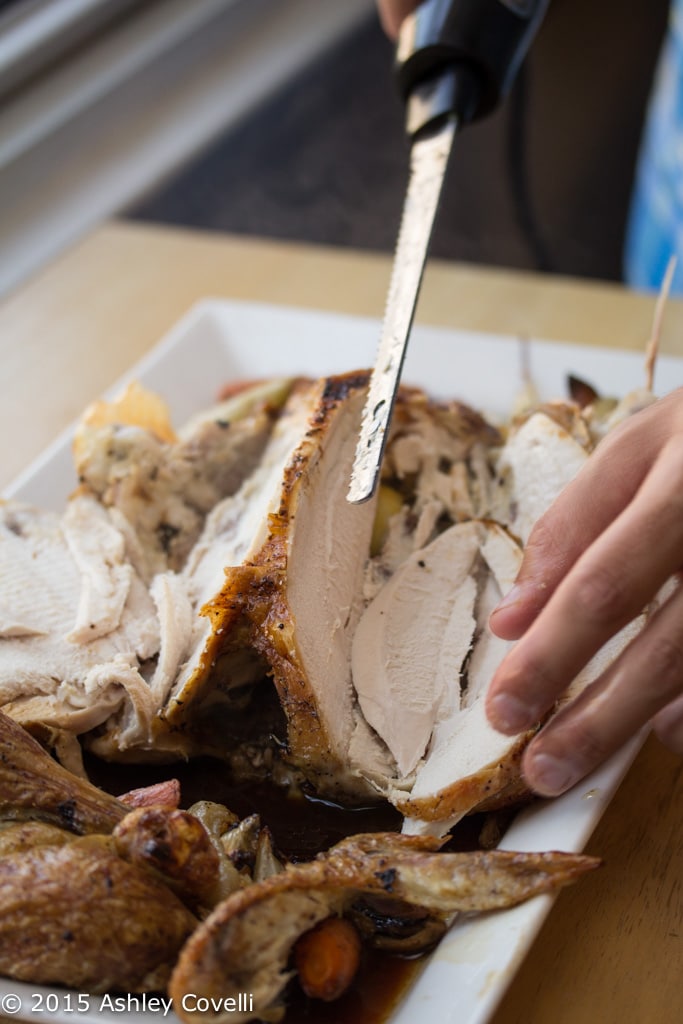
    Carving a roasted chicken with an electric knife.
    Fresh thyme, lemon and garlic perfume this succulent chicken from the inside while it roasts!
    Ina Garten
    No ratings yet
    Print Recipe Pin Recipe
    Servings: 4 -6 servings
    Course: Main Dish
    Cuisine: American
    Prep Time 10 minutes mins
    Cook Time 1 hour hr 30 minutes mins
    Total Time 1 hour hr 40 minutes mins

    Ingredients
     

    • 1 5 to 6 pound roasting chicken
    • Kosher salt
    • Freshly ground black pepper
    • 1 large bunch fresh thyme
    • 1 lemon halved
    • 1 head garlic cut in half crosswise
    • 2 tablespoons ¼ stick butter, melted
    • 1 large yellow onion thickly sliced
    • 4 carrots cut into 2-inch chunks
    • 1 bulb of fennel tops removed, and cut into wedges

    Instructions
     

    1. Preheat the oven to 425 degrees.
    2. Remove the chicken giblets. Rinse the chicken inside and out. Remove any excess fat and leftover pinfeathers and pat the outside dry. Liberally salt and pepper the inside of the chicken. Stuff the cavity with the bunch of thyme, both halves of lemon, and all the garlic. Brush the outside of the chicken with the butter and sprinkle again with salt and pepper. Tie the legs together with kitchen string and tuck the wing tips under the body of the chicken. Place the onions, carrots, and fennel in a roasting pan. Toss with salt, pepper, thyme, and olive oil. Spread around the bottom of the roasting pan and place the chicken on top.
    3. Roast the chicken for 1 ½ hours, or until the juices run clear when you cut between a leg and thigh. Remove the chicken and vegetables to a platter and cover with aluminum foil for about 20 minutes. Slice the chicken onto a platter and serve it with the vegetables.

    Notes

    Recipe from Barefoot Contessa - Ina Garten

    Did you make this recipe?

    Leave a comment + star rating below to let people know how it was!

    Whipped Goat Cheese Dip with Balsamic Tomatoes

    July 14, 2015 by Ashley 8 Comments

    Whipped Goat Cheese Dip with Balsamic Tomatoes

    This post was created in partnership with Stonyfield and Late July. As always, all opinions are 100% my own.

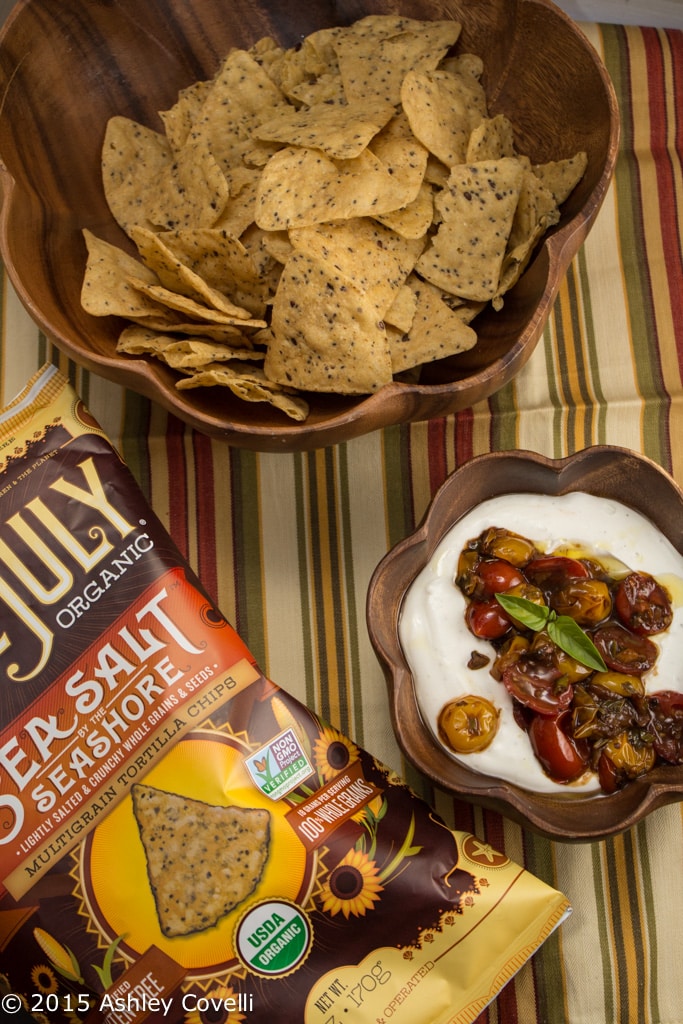
    Tangy goat cheese is whipped with Greek yogurt and topped with a tangy, garlicky tomato-and-herb mixture for a flavorful appetizer offering.

    I love goat cheese, tomatoes, fresh herbs and balsamic in my salads, so I figured why not make a dip out of those same flavors?

    Whipped Goat Cheese Dip with Balsamic Tomatoes

    Fat free Greek yogurt lightens up the goat cheese. The tanginess of those 2 ingredients works really well together.

    When I served this dip, I put half of the tomatoes on top at first, and after we snacked our way through the top layer of dip, added the rest.

    This dip is delicious both at room temperature or cold - the texture will be more firm if you refrigerator first. I used fresh herbs from my garden - reserve a sprig or 2 to garnish your finished dish if you like - the pop of bright green looks really nice!

    📖 Recipe

    Whipped Goat Cheese Dip with Balsamic Tomatoes

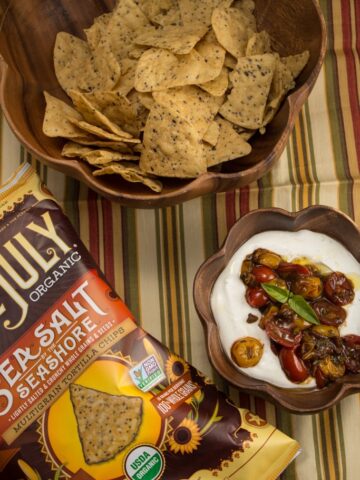
    Bowl of tortilla chips and whipped goat cheese dip topped with balsamic tomatoes and basil.
    Tangy goat cheese is whipped with Greek yogurt and topped with a tangy, garlicky tomato-and-herb mixture for a flavorful appetizer offering.
    Big Flavors from a Tiny Kitchen - Ashley Covelli
    No ratings yet
    Print Recipe Pin Recipe
    Servings: 8 servings
    Course: Appetizer
    Cuisine: American
    Prep Time 10 minutes mins
    Cook Time 2 minutes mins
    Total Time 12 minutes mins

    Ingredients
     

    For tomatoes:
    • 1 tablespoon olive oil
    • 2 cloves garlic minced
    • ⅛ teaspoon crushed red pepper flakes
    • 1 ½ cup multi-colored grape or cherry tomatoes halved
    • 2 tablespoons fresh basil chopped
    • 1 tablespoon fresh parsley chopped
    • 2 tablespoons balsamic vinegar
    • ¼ teaspoon kosher salt
    For dip:
    • 8 ounce log goat cheese softened slightly
    • ¼ cup fat free plain Greek yogurt I used Stonyfield 0% Fat Plain Greek
    • ¼ teaspoon kosher salt
    • ⅛ teaspoon freshly cracked black pepper
    • Extra-virgin olive oil for garnish

    Instructions
     

    1. Make tomatoes: Heat oil in a medium skillet over moderate heat. Add garlic and pepper flakes and sauté until fragrant, about 30 seconds. Add tomatoes, herbs, balsamic and salt and sauté, stirring occasionally, until tomatoes have started to melt down and the liquid that they have released starts to thicken. Remove from heat to let cool.
    2. Make dip: Place goat cheese, yogurt, salt and pepper in the bowl of a food processor. Turn it on and let it whip for 60-90 seconds.
    3. To serve, place whipped goat cheese dip in a bowl and top with cooled balsamic tomatoes. Top with a drizzle of oil. Serve with chips (like Late July Organic's Sea Salt by the Sea Shore Multigrain Tortilla Chips), toasted baguette slices or veggies for dipping.
    4. If you prefer the dip to be a little firmer, you can refrigerate the goat cheese mixture after it comes out of the food processor.

    Did you make this recipe?

    Leave a comment + star rating below to let people know how it was!

    Hidden Valley Ranch Country Marinade Grilled Chicken

    July 7, 2015 by Ashley Leave a Comment

    Hidden Valley Ranch Country Marinade Grilled Chicken

    Thanks to Tyson Foods for sponsoring this post. As always, all opinions are 100% my own.

    Gather 'Round the Grill and get ready for lots of flavor with this simple & delicious 4 ingredient chicken recipe!

    The weather is warming up, and that means that grilling season is upon us. My husband loves to grill - so much that we have a charcoal grill and a propane grill out on our patio. We don't have a lot of space, but we have a cozy little setup for dining al fresco that we try to utilize whenever the weather is nice. It's a great way to spend some time outside with our family.

    v

    My parents were in town recently, and we knew we'd be firing up the grill at least once during their visit. It's always fun to hang out and catch up while dinner is cooking a few feet away from us. Plus, who doesn't love grilled chicken?

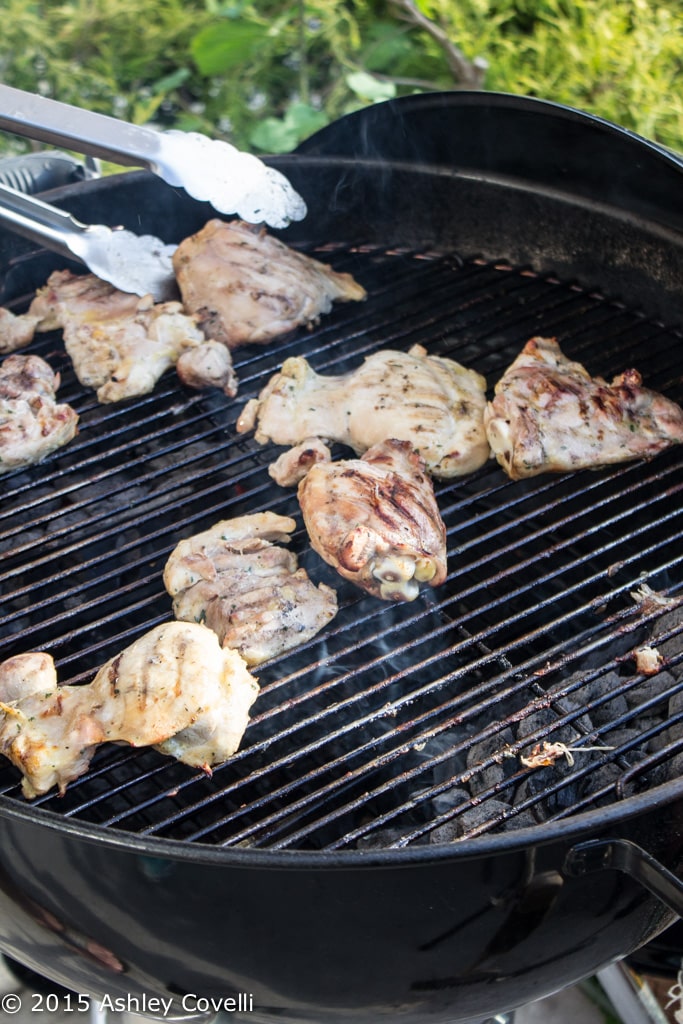
    So on our way back from a long afternoon upstate, I asked my husband if he'd stop at Walmart so I could pick up all of the ingredients we needed to make dinner on the grill later. I knew I wanted to make a simple yet delicious meal for my parents, and this recipe using Tyson® Fresh Boneless Skinless Chicken Thighs (as well as some bone-in, skin-on thighs) was something I knew even the picky eaters everyone in my family would love.

    Hidden Valley Ranch Country Marinade Grilled Chicken

    Shopping for the ingredients was actually pretty funny. My husband dropped me off at the door since I was on crutches, and my dad helped me get into one of those little motorized shopping carts (maaaaaan, those things are fast!). I zipped around the store, chasing him through the aisles until we made it to the grocery section. We definitely got some funny looks from the other shoppers.

    Ahem.

    I was able to get everything I needed for this recipe and got a great value at Walmart. It's not somewhere I usually shop, but it was super convenient that day. Plus I got to spend time with my dad while my son (and husband!) napped in the car. Talk about a win/win!

    Hidden Valley Ranch Country Marinade Grilled Chicken

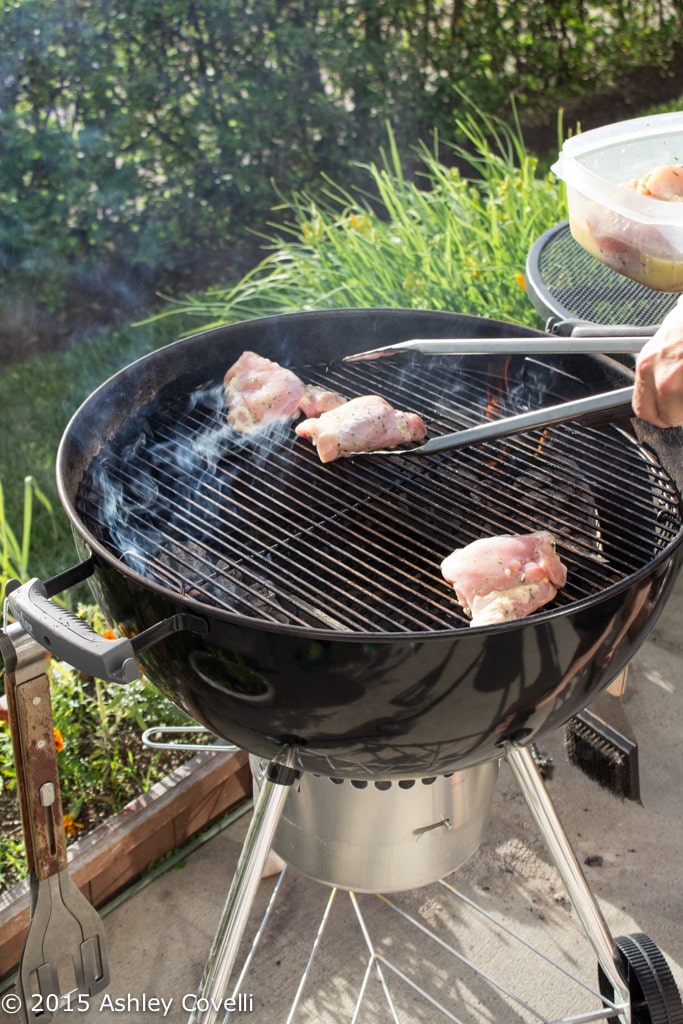
    Once we got home, I put the marinade together and got to work on a big ol' side salad to go with the chicken. The chicken only took an hour to marinate, so everyone got to hang out on the patio chatting and drawing with sidewalk chalk while my husband prepped the grill. The weather was beautiful and everyone had a good time.
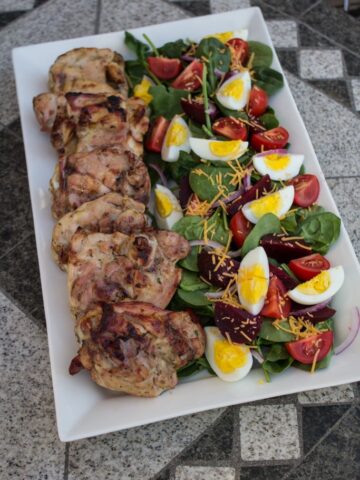
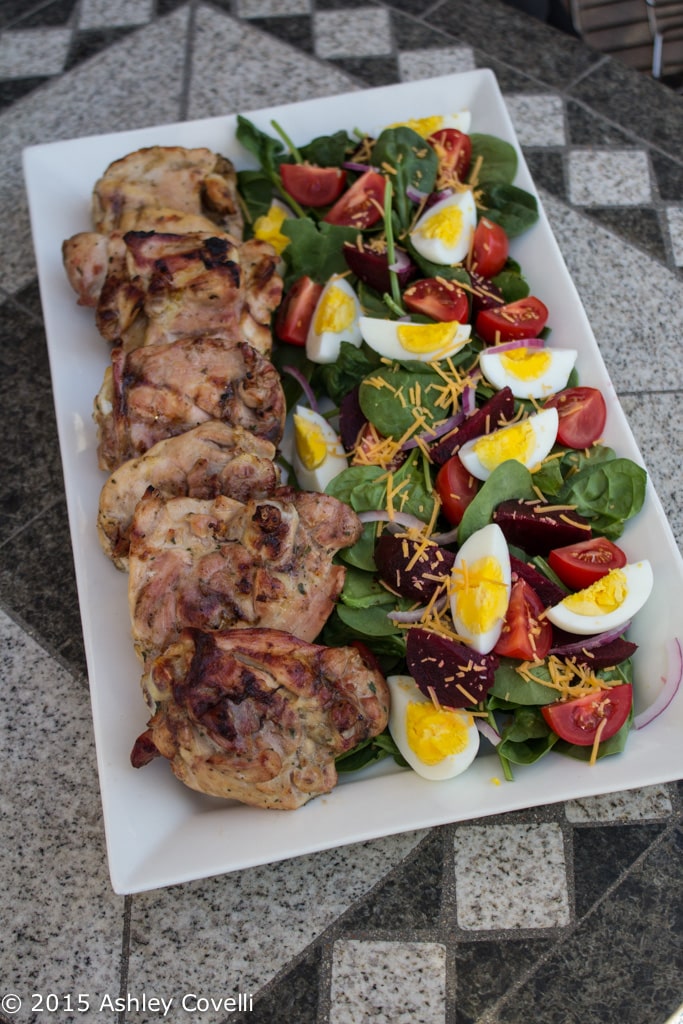
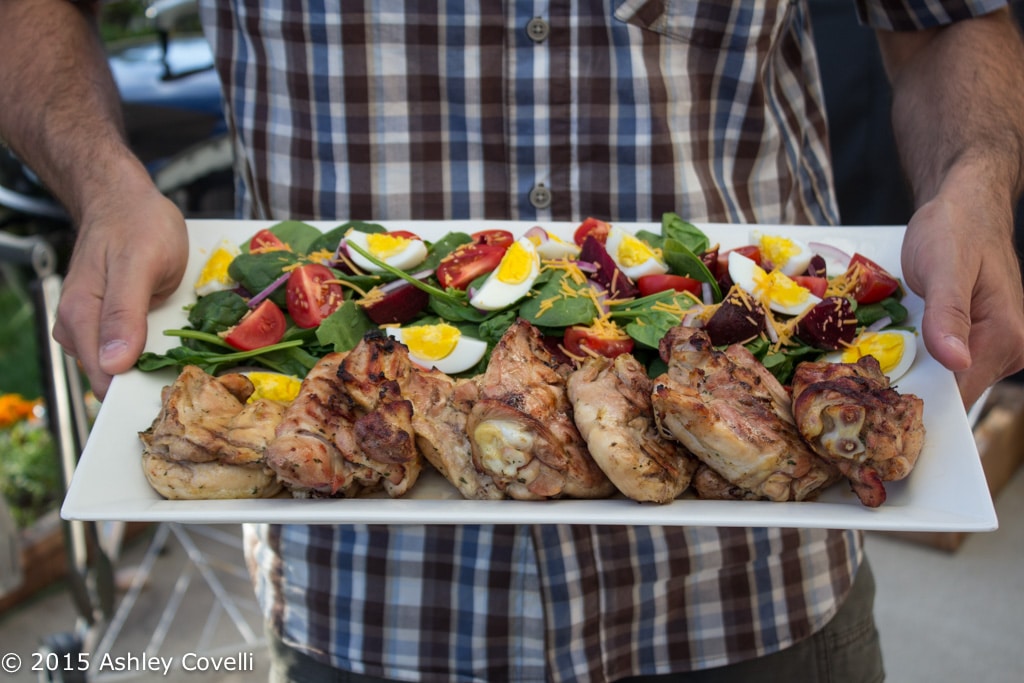
    I thought a nice big family-style presentation would be good for the grilled chicken, so I dug out the biggest platter in the house. I laid out a bed of baby spinach on half of it and topped it with hard-boiled eggs, tomatoes, red onions, roasted beets, and cheddar cheese.

    Once the chicken came off the grill, I arranged it on the other half of the platter, and dinner was ready!

    Hidden Valley Ranch Country Marinade Grilled Chicken

    I had some Asian Slaw, Potato Salad with Mustard + Dill and grilled corn on the cob leftover from dinner a few days before that, which made for a delicious, low maintenance addition to our dinner spread.

    I love how grilling gets the whole family involved in making dinner. The chicken was a hit with all 5 of us. My 3-year-old took one bite and said, "this chicken is DELICIOUS!", which is high praise coming from a finicky toddler.

    A photo posted by Ashley Covelli (@bigflavors) on Jun 13, 2015 at 6:08pm PDT

    Thanks again to Tyson Foods for sponsoring this post and inspiring me and my family to gather 'round the grill. Make sure to stay tuned later this month for another delicious, grilled chicken recipe! Tyson Gather 'Round logo.

    📖 Recipe

    Hidden Valley Ranch Country Marinade Grilled Chicken

    Hidden Valley Ranch Country Marinade Grilled Chicken on a platter with salad.
    Fire up the grill and get ready for lots of flavor with this 4 ingredient chicken recipe!
    Hidden Valley
    No ratings yet
    Print Recipe Pin Recipe
    Servings: 6 servings
    Course: Main Dish
    Cuisine: American
    Prep Time 1 hour hr
    Cook Time 40 minutes mins
    Total Time 1 hour hr 40 minutes mins

    Ingredients
     

    • 1 cup chicken broth
    • 1 packet 1 ounce Hidden Valley® Original Ranch® Salad Dressing & Seasoning Mix
    • 1 teaspoon spicy brown mustard
    • 3 pounds chicken pieces (breasts, thighs and legs), skin removed

    Instructions
     

    1. In a bowl, mix the seasoning mix together with the chicken broth and mustard until smooth. Place chicken pieces in a Glad® Food Storage Zipper Bag with seasoning mixture. Seal the bag and marinate for 1 hour.
    2. Preheat the grill.
    3. Remove the chicken from the bag and discard the marinade. Grill the chicken about 10 to 12 minutes on each side or until juices run clear.** Remove the chicken from the grill and let stand covered for 5 minutes before serving.

    Notes

    Recipe from Hidden Valley
    *Recipe only gluten free when made with all gluten free ingredients. Read labels of all packaged ingredients to determine whether they contain gluten.
    **Chicken should be cooked until it reaches an internal temperature of 170°F.

    Did you make this recipe?

    Leave a comment + star rating below to let people know how it was!

    This is a sponsored conversation written by me on behalf of Tyson Foods Inc. The opinions and text are all mine.

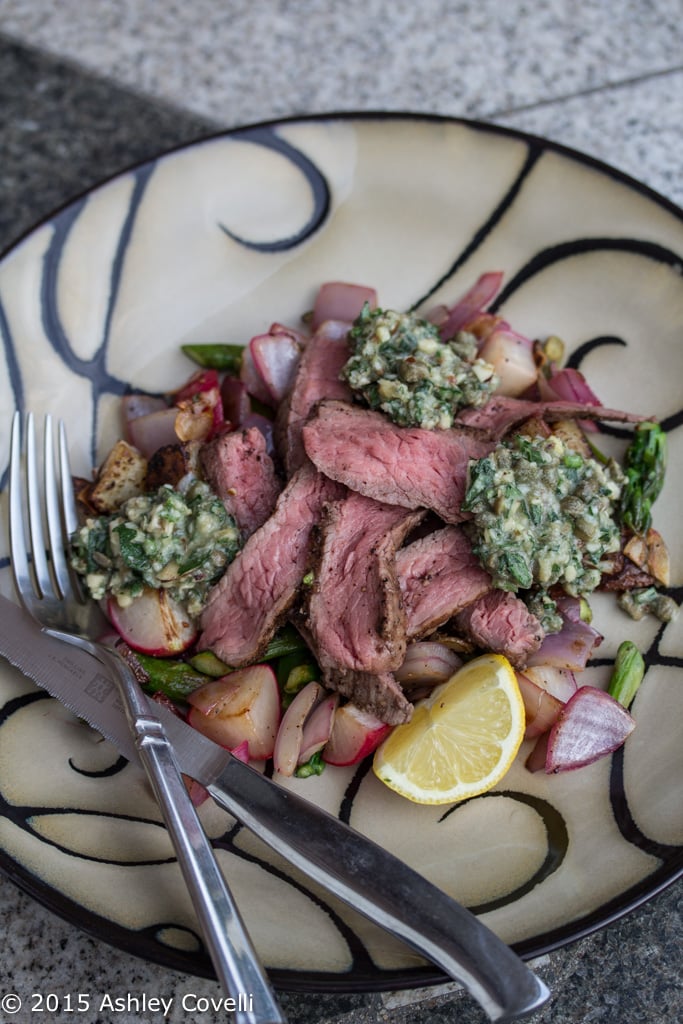
    Sirloin Tip Steaks with New Potato, Asparagus & Radish Hash

    July 1, 2015 by Ashley Leave a Comment

    Sirloin Tip Steaks with New Potato, Asparagus & Radish Hash

    Parsley, capers, almonds, Parmesan & olive oil come together in a delectable Italian salsa verde that ties this meal together.

    This dish was one of our favorite Blue Apron meals to date. The salsa verde was so ridiculously tasty that I was actually sneaking spoonfuls of it as I was cooking the rest of the dish. I had to keep telling myself that I needed to save some for our plates.

    It was just so buttery and salty and it went beautifully with the tender steak and sautéed veggies.

    Sirloin Tip Steaks with New Potato, Asparagus & Radish Hash

    The lemon really brightened this dish up, too. We really enjoyed the mix of veggies in the hash, and practically licked our plates clean.

    This is one we will definitely be making again and again!

    • 2 Sirloin Tip Steaks
    • 3 Cloves Garlic
    • ½ Bunch Asparagus
    • 3 Ounces Radishes
    • 1 Lemon
    • 1 Red Onion
    • 6 Ounces New Potatoes
    • 1 Large Bunch Parsley*
    • 2 Tablespoons Capers
    • 2 Tablespoons Sliced Almonds
    • ¼ Cup Grated Parmesan Cheese

    See Blue Apron for the full recipe.

    Deep Fried Nutella S’mores Dumplings

    June 30, 2015 by Ashley 5 Comments

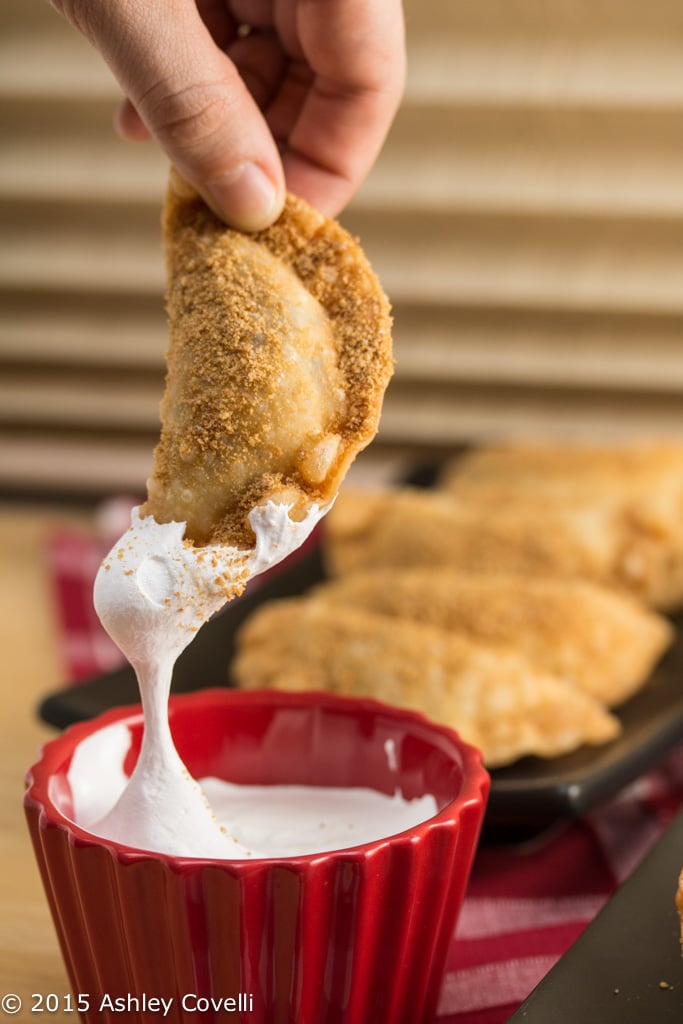
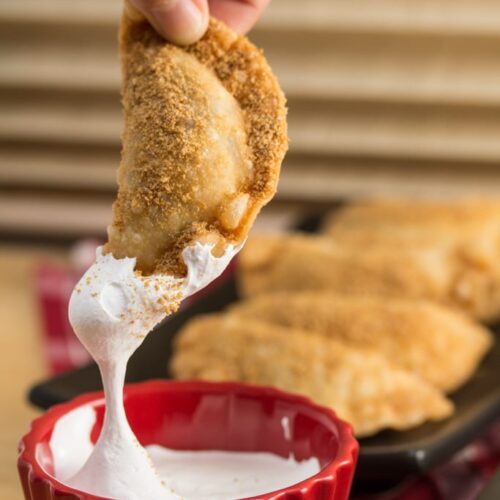
    Dunking a Deep Fried Nutella S’mores Dumpling into marshmallow fluff.

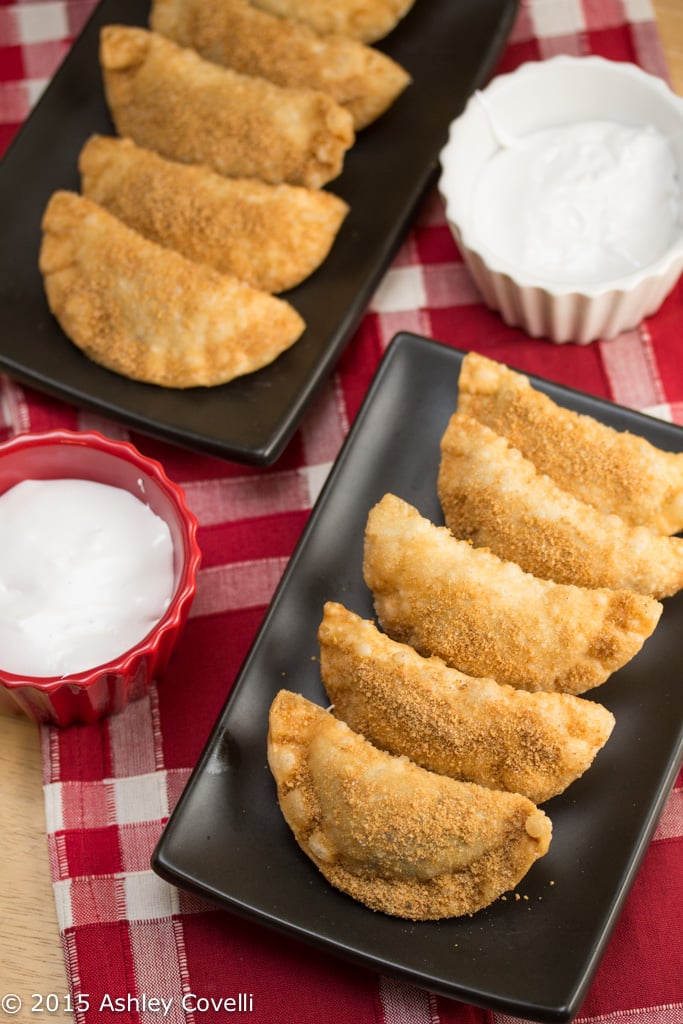
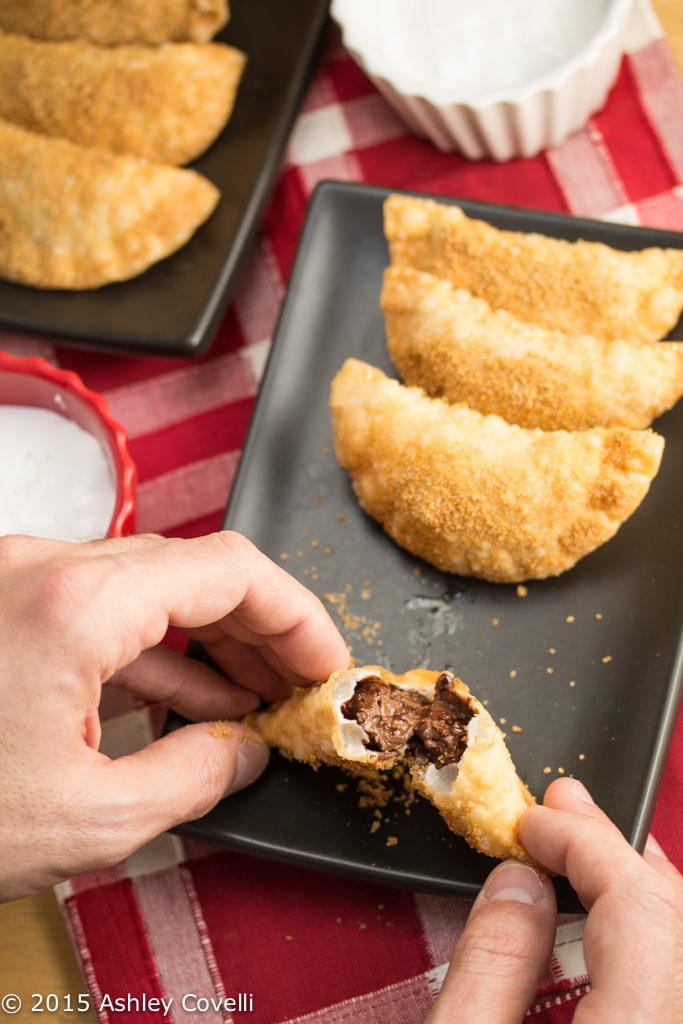
    We took all the fun of s'mores but upped the ante by stuffing them inside dumpling wrappers, swapping the chocolate for Nutella, deep frying them and dunking them in marshmallow fluff.

    Remember when me and Joanne got together earlier this year for Dumplingpalooza? It probably comes as no surprise that during our brainstorm sessions, the two of us developed the dessert recipe first.

    Duh.

    Deep Fried Nutella S'mores Dumplings

    S'mores are always a fun dessert, and my family loves making them with Nutella instead of chocolate bars. It just adds a layer of richness that goes so well with the marshmallow and graham crackers. YUM.

    So for these dumplings, we filled the wrappers with Nutella and deep-fried them.

    When they come out of the oil, they get a dusting of graham cracker crumbs that have been laced with cinnamon and sugar.

    Deep Fried Nutella S'mores Dumplings

    And lest you think we forgot about the marshmallows, we served these beauties up with bowls of fluff for dipping.

    Oh yes we did.

    Deep Fried Nutella S'mores Dumplings

    This is a super fun way to enjoy s'mores without the campfire!

    This was a sweet, crispy way to end our dumpling-making evening.

    Deep Fried Nutella S'mores Dumplings

    📖 Recipe

    Deep Fried Nutella S’mores Dumplings

    Dunking a Deep Fried Nutella S’mores Dumpling into marshmallow fluff.
    We took all the fun of s'mores but upped the ante by stuffing them inside dumpling wrappers, swapping the chocolate for Nutella, deep frying them and dunking them in marshmallow fluff.
    Eats Well With Others
    No ratings yet
    Print Recipe Pin Recipe
    Servings: 12 dumplings
    Course: Dessert
    Cuisine: American
    Prep Time 10 minutes mins
    Cook Time 10 minutes mins
    Total Time 20 minutes mins

    Ingredients
     

    • Peanut oil for deep frying
    • Nutella
    • Dumpling wrappers
    • 9 full graham cracker sheets finely crushed
    • 1 tablespoon granulated sugar
    • 1 teaspoon cinnamon
    • Marshmallow fluff

    Instructions
     

    1. Prepare oil and assemble dumplings: Heat several inches of peanut oil in a large, deep pot (preferably cast iron) to 325°F. While the oil is coming up to temperature, get a small bowl of water ready. Scoop a heaping teaspoon of the Nutella into a dumpling wrapper. Dip a finger in the water and run it around the perimeter of the dumpling wrapper. Fold it in half and press the edges firmly to seal around the filling. Set on a tray and repeat with remaining dumpling wrappers until you run out of wrappers or filling.
    2. Deep-fry dumplings: Once the dumplings are ready and the oil has reached 325°F, carefully place 6 dumplings in the oil and fry until golden brown on both sides, flipping occasionally with a spider or metal tongs. Remove dumplings to a paper towel-lined tray that has been topped with a metal cooling rack. In a small bowl, stir together the graham cracker crumbs, sugar, and cinnamon. Sprinkle over the dumplings while still warm. Repeat with remaining dumplings. Serve warm with the marshmallow fluff to dip in.

    Notes

    An Eats Well With Others + Big Flavors from a Tiny Kitchen Collaboration

    Did you make this recipe?

    Leave a comment + star rating below to let people know how it was!

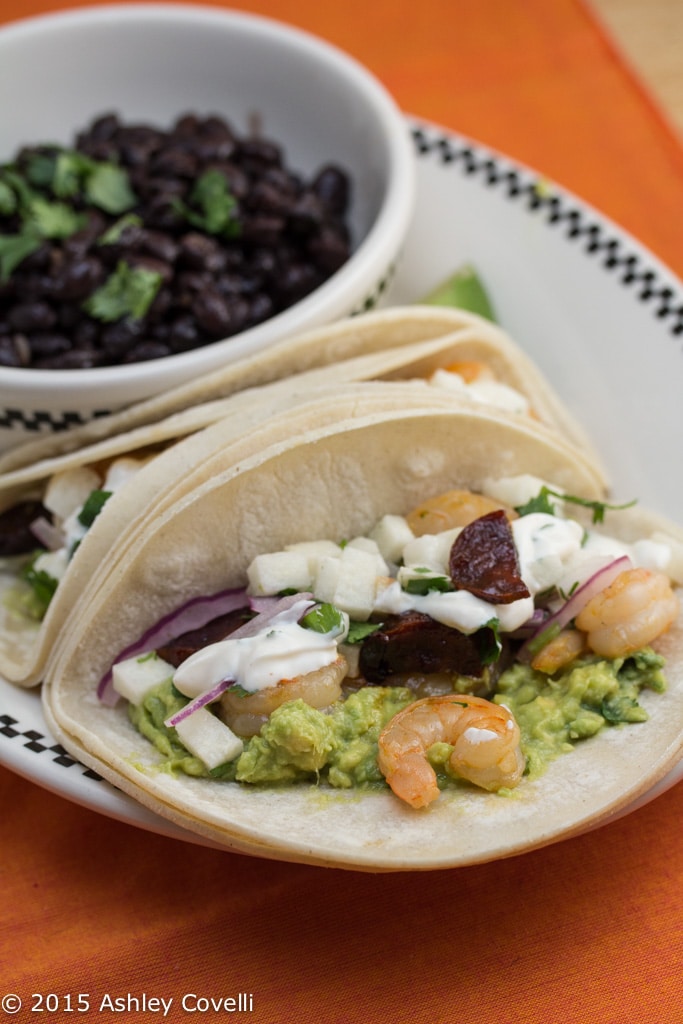
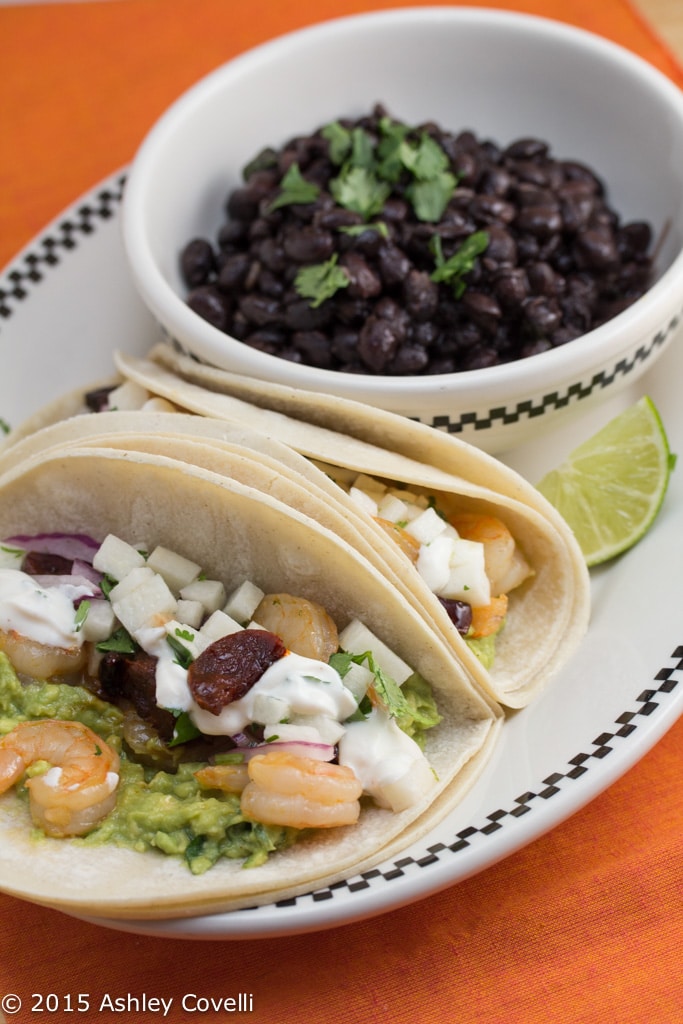
    Prickly Pear-Marinated Shrimp Tacos with Honey-Glazed Chorizo & BBQ Crema

    June 24, 2015 by Ashley 4 Comments

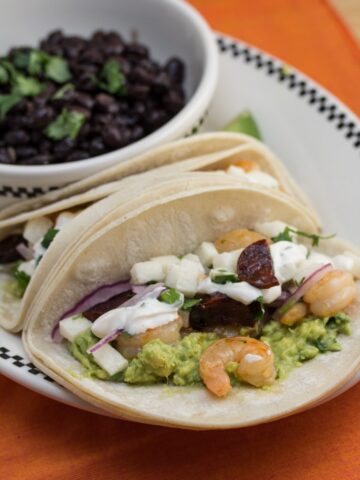
    Prickly Pear-Marinated Shrimp Tacos with Honey-Glazed Chorizo & BBQ Crema

    This installment of Big Flavors from a Mystery Basket turns ingredients sent to me from a Texan food blogger into sweet-and-spicy TACOS!

    Remember a while back when I had my husband put together a mystery basket for me to make dinner from, a la Chopped? Well it was so much fun that I'm at it again, but this time with a twist.

    FFFMysteryBoxLogo

    A few of my fellow food bloggers and I drew names and sent each other mystery boxes. The rules were simple: send 3 ingredients to another blogger, and spend around $20 total.

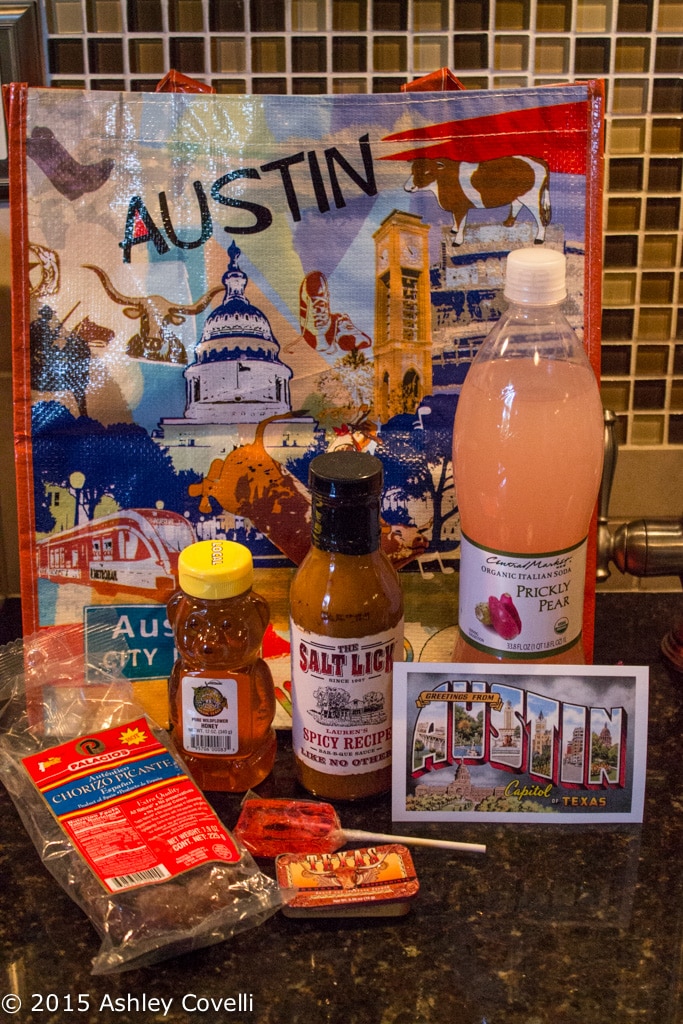
    Ashley over at Quarter Life (Crisis) Cuisine sent me a box full of goodies from Texas.

    FFFMysteryBox

    Aside from the fact that the post office nearly annihilated the box, I was thrilled to get some of her favorite local ingredients, plus a few extra goodies for me to enjoy.

    She included 4 ingredients to use, and said I could only use 3 since that's what we had agreed on, but I saw it as a challenge and used all 4: Spanish Chorizo Picante, local honey, prickly pear soda and spicy BBQ sauce from a famous Texas BBQ restaurant.

    My initial thought was that I'd make migas. But then I thought that tacos would be a fun route to take with these ingredients.

    I wanted to try to use a few of the ingredients in different aspects of this recipe, so the imaginary panel of judges wouldn't call me out on not really utilizing any of them. This was also the first really involved meal that I cooked in my tiny kitchen after getting off crutches, so it was ambitious to say the least.

    Prickly Pear-Marinated Shrimp Tacos with Honey-Glazed Chorizo & BBQ Crema

    The prickly pear soda was something I've never tried before. It was very sweet, so I figured that marinating the shrimp in it quickly would be a good way to use it without it getting too sweet.

    I used part of the marinating liquid at the end of the shrimp's cooking time as well, to really drive home the flavor. The soda also made an appearance as a way to add a bit of sweetness to the BBQ guacamole.

    I didn't want the dish to be too spicy, so I did a quick honey and sherry glaze on the chorizo. It worked out well, except I forgot that it would dry and be sticky and drained it on paper towels. Oops! I also got the chorizo a little too crispy on one side after the honey was added, so next time I'd watch it more carefully to make sure it didn't overcook.

    Prickly Pear-Marinated Shrimp Tacos with Honey-Glazed Chorizo & BBQ Crema

    I added the BBQ sauce in both the guacamole and the crema. It was nice to have a bit of kick to those 2 creamy, cool components.

    Finally, I wanted a bit of crunch, so I put together a quick jicama salad to go on top. It turned out soooo tasty. I'd totally make a bigger batch of that and serve it as an alternative to salsa. Yum!

    📖 Recipe

    Prickly Pear-Marinated Shrimp Tacos with Honey-Glazed Chorizo & BBQ Crema

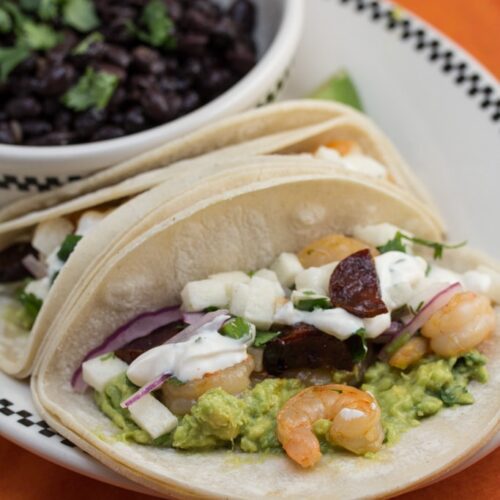
    Shrimp tacos and black beans on a plate.
    A Texas-themed mystery basket inspired these sweet-and-spicy seafood tacos.
    Big Flavors from a Tiny Kitchen - Ashley Covelli
    No ratings yet
    Print Recipe Pin Recipe
    Servings: 4 servings
    Course: Main Dish
    Cuisine: Mexican
    Prep Time 20 minutes mins
    Cook Time 10 minutes mins
    Total Time 30 minutes mins

    Ingredients
     

    For chorizo:
    • 1 tablespoon olive oil
    • 1 7.9-ounce package Spanish Chorizo Picante, sliced in half lengthwise, then into ¼-inch semi-circles
    • 1 tablespoon honey
    • 1 tablespoon sherry wine
    For BBQ crema:
    • ½ cup sour cream
    • 2 tablespoons spicy BBQ sauce
    • 1 tablespoon cilantro chopped
    For BBQ guacamole:
    • 2 ripe avocados
    • 1 tablespoon fresh lime juice
    • 1 tablespoon spicy BBQ sauce
    • 1 tablespoon cilantro chopped
    • 1 tablespoon prickly pear soda
    • 1 clove garlic minced
    • ½ teaspoon kosher salt
    For jicama salad:
    • 2 cups jicama diced small
    • 2 tablespoons red onion thinly sliced
    • 1 teaspoon fresh lime zest
    • 1 tablespoon freshly squeezed lime juice
    • 1 tablespoon cilantro chopped
    • 1 tablespoon olive oil
    • ¼ teaspoon kosher salt
    For shrimp:
    • 1 pound small shrimp peeled and deveined
    • ½ cup prickly pear soda
    • 2 tablespoons olive oil
    • 2 cloves garlic minced
    For serving:
    • 8 corn tortillas
    • Lime wedges

    Instructions
     

    1. Cook chorizo: Heat oil in a large, non-stick skillet over moderate heat. Add chorizo and cook, stirring occasionally, until golden and crispy. Drain all but about a tablespoon of the oil. Add honey and sherry and allow to reduce, stirring constantly. Remove chorizo to a bowl with a slotted spoon, leaving any remaining oil in the pan.
    2. Make BBQ crema: Mix ingredients in a small bowl and refrigerate until ready to serve.
    3. Make the BBQ guacamole: Pit and peel avocados and place in a medium bowl. Add lime juice and mash together with a fork. Add BBQ sauce, cilantro, soda, garlic and salt and mix well. Set aside.
    4. Make jicama salad: In a medium bowl, mix jicima, red onion, lime zest and juice, cilantro, oil and salt. Toss well to combine.
    5. Make shrimp: Place shrimp and soda in a bowl and let marinate 15 minutes.
    6. Put the pan with chorizo drippings back over moderate heat. If there isn't much oil left, add 1-2 tablespoons of olive oil. Add garlic and sauté until fragrant. Remove shrimp from marinade and add them to the pan with the garlic, reserving the marinade.
    7. Sauté shrimp, stirring occasionally, until pink and almost cooked through (about 3 minutes). Pour in half of reserved marinade and let it come to a boil in the pan. Cook until the soda is reduced and the shrimp are cooked through. Remove shrimp to a bowl with a slotted spoon.
    8. Serve: Warm tortillas according to package directions. For each taco, take a double layer of the warmed tortillas and spread on some BBQ guacamole. Top with shrimp, chorizo and jicama salad. Drizzle some BBQ crema over top. Garnish with lime wedges and enjoy!

    Did you make this recipe?

    Leave a comment + star rating below to let people know how it was!

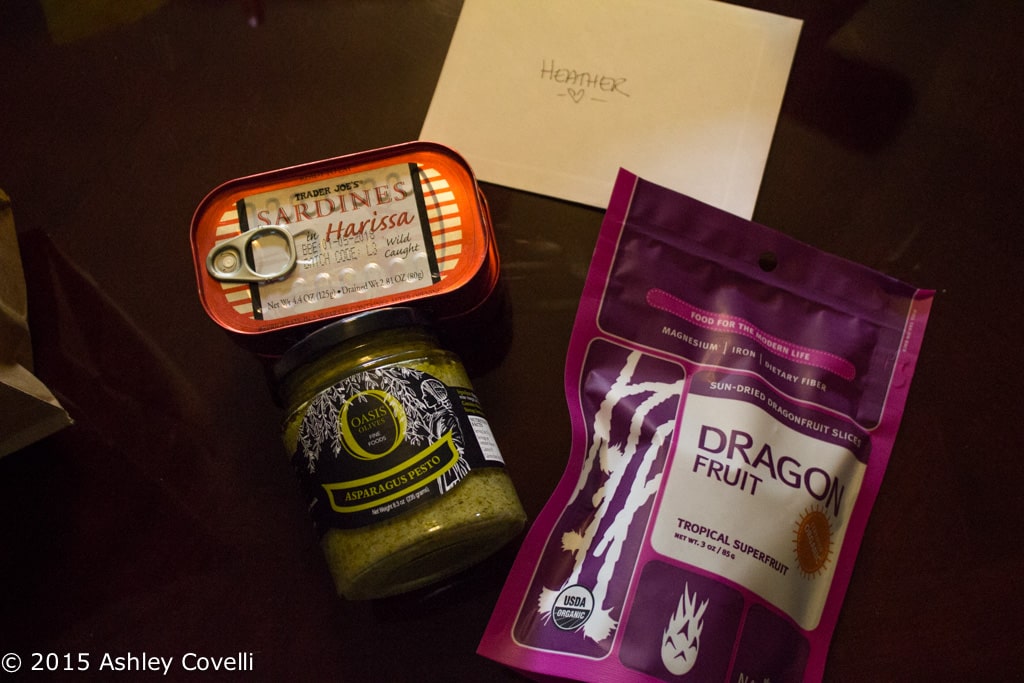
    I sent ingredients to Heather over at All Roads Lead to the Kitchen: sardines in harissa, asparagus pesto and dried dragonfruit. I'm excited to see what she comes up with!

    And before you think it was super mean to send sardines in harissa, know that I included them because she saw them on an Instagram post of mine a few months ago and reeeeally wanted to get some, but isn't near a Trader Joe's. The dried dragon fruit was something I had never seen before, and my 3-year-old found it on the shelf at a local health food store, and I thought it would make a fun and unique addition to the mystery basket.

    FFFMysteryBox

    All in all, this was a super fun experience. Thanks to all the other fabulous food bloggers that joined in on the fun! To see what was in the other mystery boxes, check out the roundup below!

    #FFFMysteryBox Participant Links and Ingredients

    • Gluten-Free Lemon Donuts w/ Blueberry Bourbon Glaze topped w/ Cacao Nibs and Candied Fennel Seeds by Nomageddon (chickpea flour, canned blueberries, chocolate covered cacao nibs, candied fennel seeds)
    • Japanese Falafel by NY Foodgasm (sweet rice flour, adzuki beans, black garlic)
    • Lemongrass Ginger Ice Cream with Spicy Tapioca Topping by Quarter Life Crisis Cuisine (fresh lemongrass, candied ginger, black tapioca pearls)
    • Prickly Pear-Marinated Shrimp Tacos with Honey-Glazed Chorizo & BBQ Crema by Big Flavors from a Tiny Kitchen (spicy barbecue sauce, prickly pear soda, Spanish chorizo picante, honey)
    • Tilapia and Sardines in Creamy Asparagus Sauce over Confetti Couscous by All Roads Lead to the Kitchen (dried dragon fruit, asparagus pesto, sardines in Harissa)

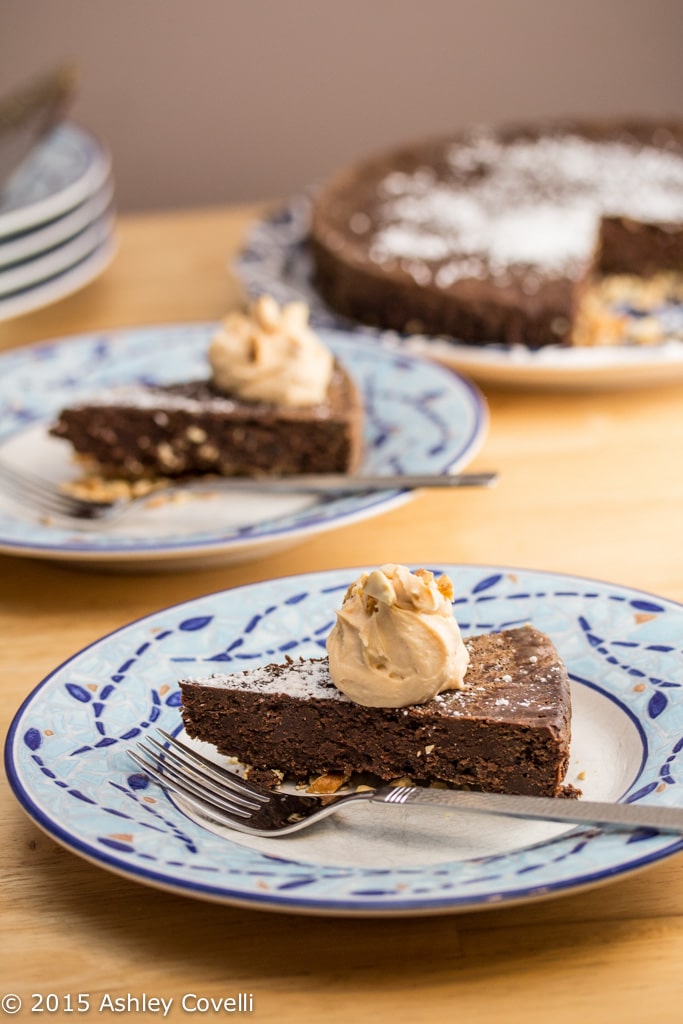
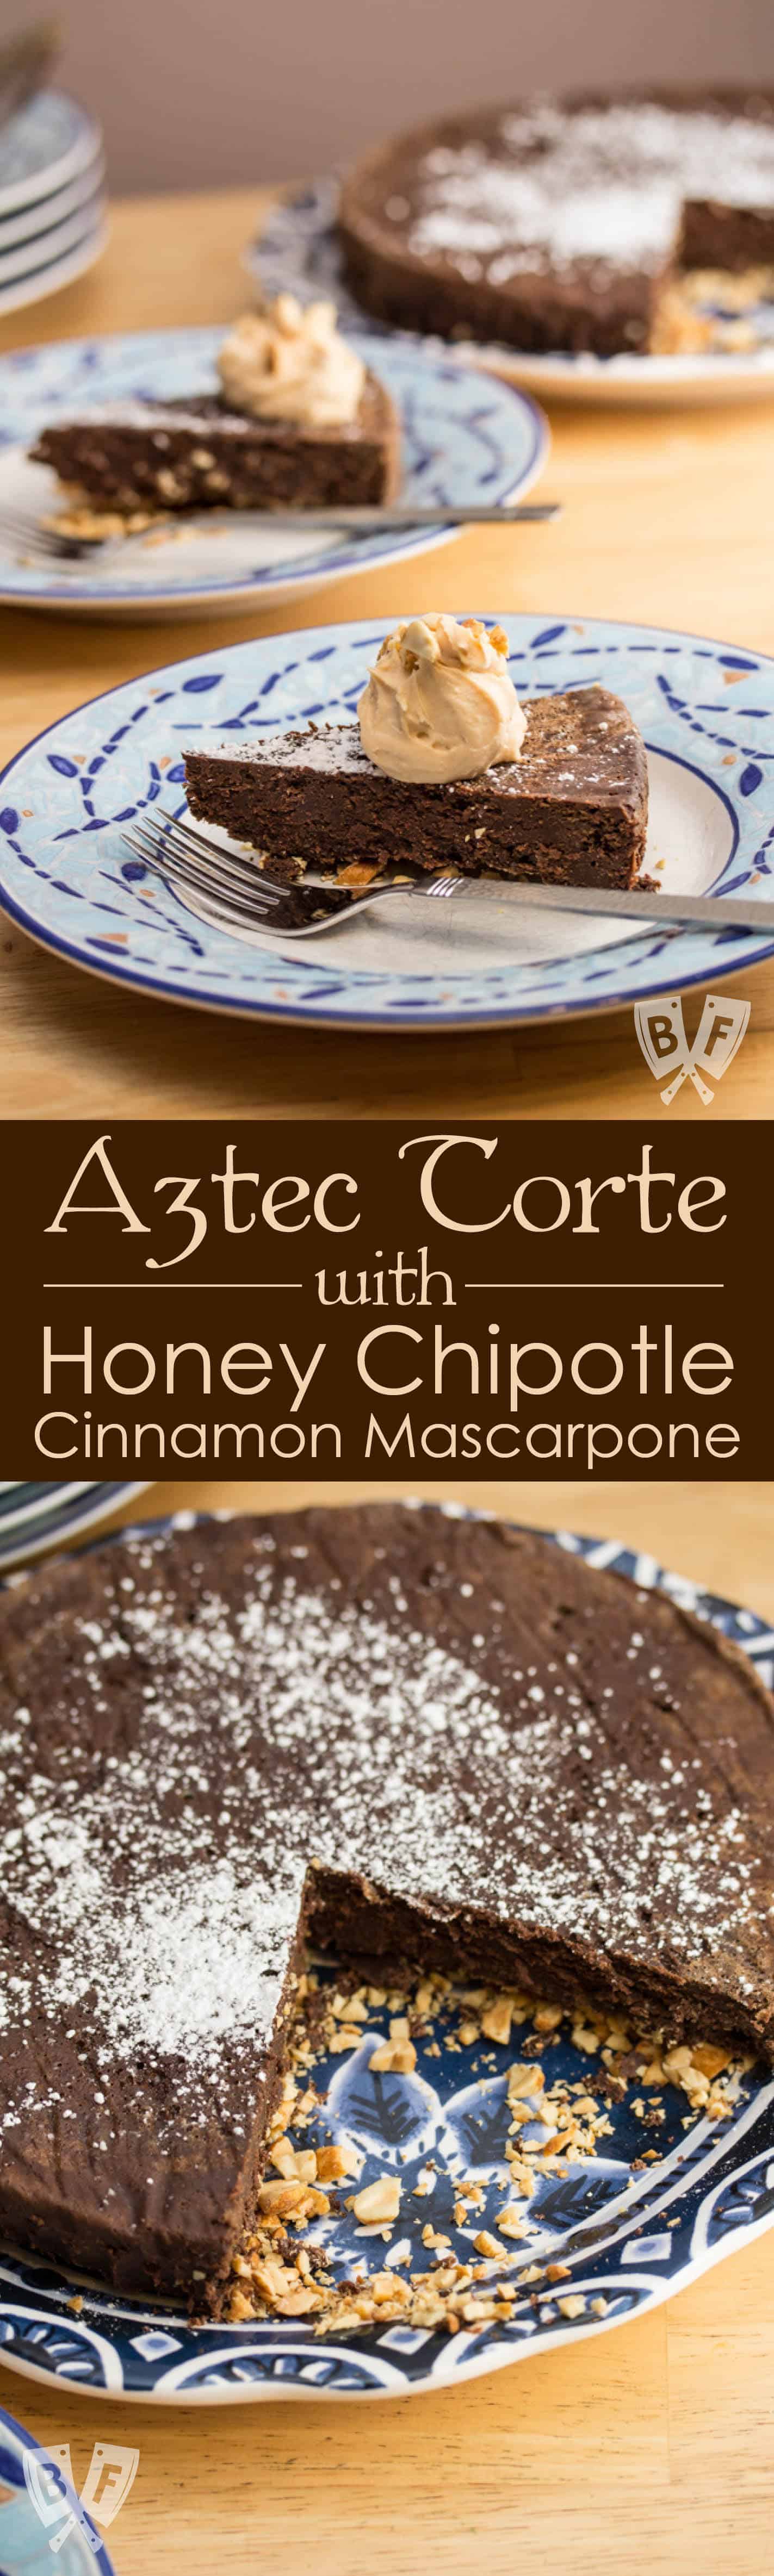
    Aztec Torte with Honey Chipotle Cinnamon Mascarpone

    June 23, 2015 by Ashley 9 Comments

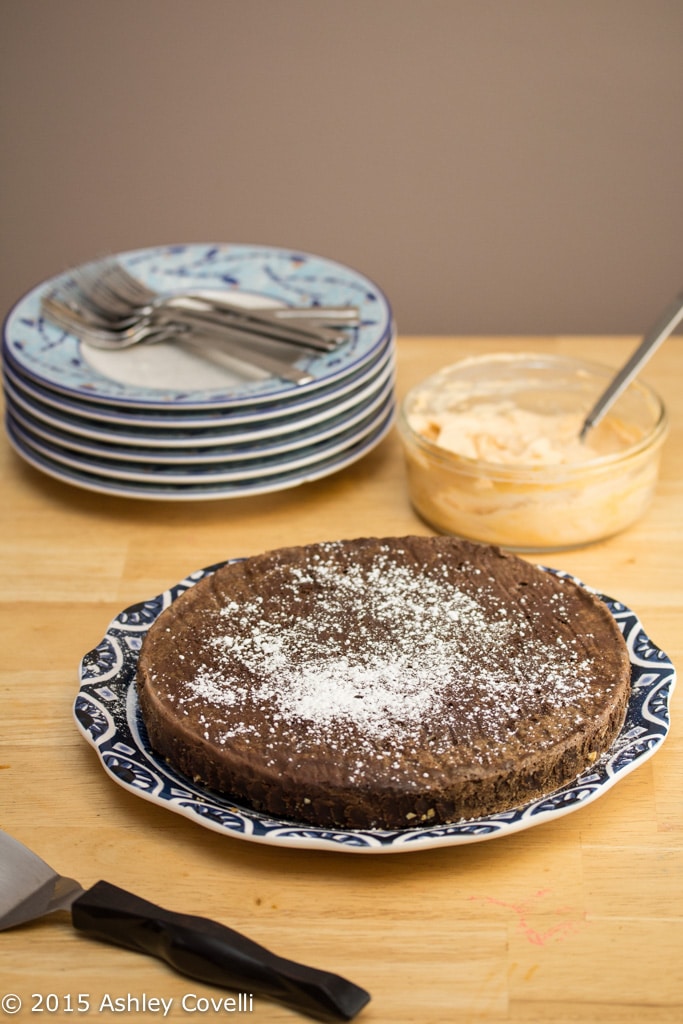
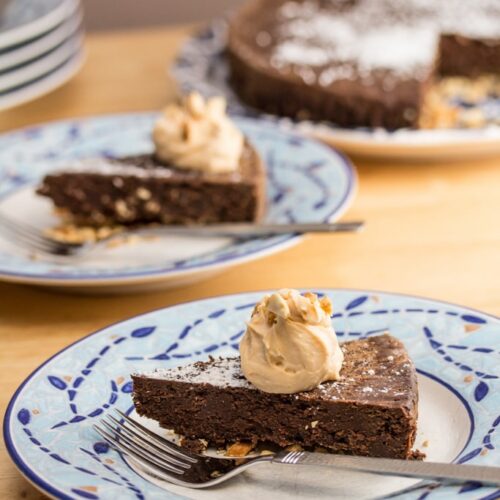
    Aztec Torte with Honey Chipotle Cinnamon Mascarpone: Rich, dark chocolate gets a chipotle-induced kick in this sweet-and-spicy, peanut-crusted dessert.
    Rich, dark chocolate gets a chipotle-induced kick in this sweet-and-spicy, peanut-crusted dessert.

    Things have been pretty hectic over here lately, and I realized that I'm way behind on sharing out Supper Club recipes!

    This was the dessert course for our April dinner. The theme was round. A friend of mine posted a recipe for an Aztec Torte a few weeks prior, and I knew I wanted to take a stab at making one in my tiny kitchen.

    Aztec Torte with Honey Chipotle Cinnamon Mascarpone

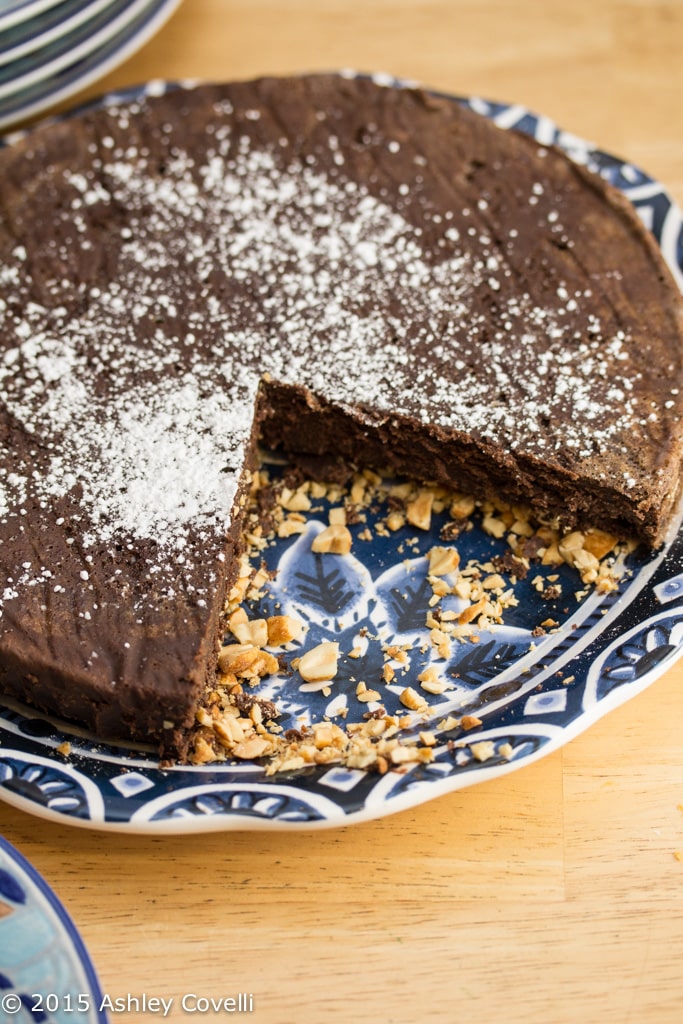
    The original recipe's instructions were a little tricky for me to follow, so I took a few liberties and made some changes where it made sense. The one thing I didn't do right was that I didn't chop the peanuts finely enough. That resulted in a crumbly (yet still delicious) crust.

    I do like that the crust gets pressed into the top of this torte when it comes out of the oven. Then, once it's cooled, you turn it out onto a pan and the topping becomes the base. Pretty cool!

    Aztec Torte with Honey Chipotle Cinnamon Mascarpone

    There isn't a whole lot of chipotle in this torte, so I thought I'd amp it up with a spicy, sweet topping. So this fancied up mascarpone was the perfect, creamy addition to this dish. It really complimented the flavors of the torte well and gave an extra layer of heat.

    The torte itself was rich, dense and delicious. It was almost like a truffle. Yummm...

    Aztec Torte with Honey Chipotle Cinnamon Mascarpone

    This was a big hit with my Supper Club. I think a little more care with the crust next time and this will be a solid, knockout dessert recipe!

    📖 Recipe

    Aztec Torte with Honey Chipotle Cinnamon Mascarpone

    Chocolate cake slices on plates.
    Rich, dark chocolate gets a chipotle-induced kick in this sweet-and-spicy, peanut-crusted dessert.
    Big Flavors from a Tiny Kitchen - Ashley Covelli (adapted from Cook Eat Share)
    No ratings yet
    Print Recipe Pin Recipe
    Servings: 8 Servings
    Course: Dessert
    Cuisine: American
    Prep Time 10 minutes mins
    Cook Time 20 minutes mins
    Total Time 30 minutes mins

    Ingredients
     

    For Torte:
    • ¾ pound bittersweet chocolate finely chopped
    • 6 tablespoons unsalted butter
    • ¾ cup creamy peanut butter
    • 1 ½ teaspoons chipotle in adobo finely chopped
    • 4 large eggs at room temperature
    • ¾ cup honey roasted peanuts finely chopped (plus additional for garnish, if desired)
    For Topping:
    • 8 ounces mascarpone slightly softened
    • 2 tablespoons honey
    • 1 tablespoon adobo sauce from can of chipotle in adobo
    • ¼ teaspoon cinnamon
    • ¼ teaspoon kosher salt
    For Garnish:
    • Powdered sugar optional

    Instructions
     

    1. Preheat the oven to 425°F. Cut a circle of parchment paper to line the bottom of a springform pan. Grease the bottom and sides of the pan, then insert the parchment and grease it also. Wrap the outside of the pan with a double layer of aluminum foil to make it watertight.
    2. Heat the chocolate and butter in the top of a double boiler over gently simmering water, whisking constantly once it starts to melt. Whisk until smooth, then remove from heat and whisk in the peanut butter and chipotle.
    3. In a mixing bowl, beat the eggs till they are light and have increased in volume (should take about 2-3 minutes).
    4. Carefully fold the eggs into the chocolate mix in three batches until no streaks of egg are visible. Pour the batter into the prepared pan and smooth the top. Pour about one inch of warm water into a larger baking pan and set the springform in it. Place the pans in the middle rack of the oven and bake for 15 minutes.
    5. Remove from the oven and set the torte on a cooling rack. Sprinkle the minced peanuts on the top of the torte, pressing very gently so they will adhere. When the torte has cooled, cover and chill at least four hours, up to overnight.
    6. To un-mold, dip a knife into warm water, dry it, and run it around the inner edge of the springform. Remove the side of the pan, then hold a large plate over the top of the cake and turn it out over carefully. Remove the plate and parchment paper. The peanuts will now be the crust.
    7. To make Honey Chipotle Cinnamon Mascarpone, in a medium bowl using an electric mixer or whisk, mix together softened mascarpone, honey, adobo sauce, cinnamon and salt.
    8. To serve, slice torte into 8 wedges. Dust each slice with powdered sugar and top with a big dollop of mascarpone. Sprinkle on a few additional chopped peanuts, if desired.

    Notes

    Torte adapted from Cook Eat Share

    Did you make this recipe?

    Leave a comment + star rating below to let people know how it was!
    Aztec Torte with Honey Chipotle Cinnamon Mascarpone: Rich, dark chocolate gets a chipotle-induced kick in this sweet-and-spicy, peanut-crusted dessert.

    Dukkah-Spiced Salmon with Spring Vegetable & Oyster Mushroom Ragout

    June 21, 2015 by Ashley Leave a Comment

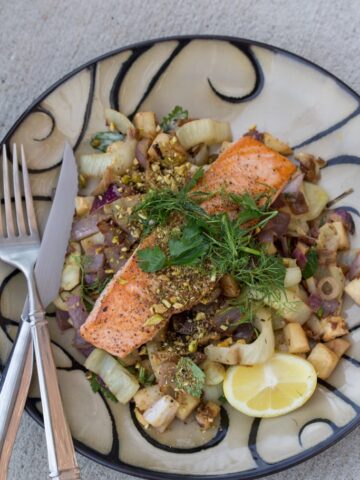
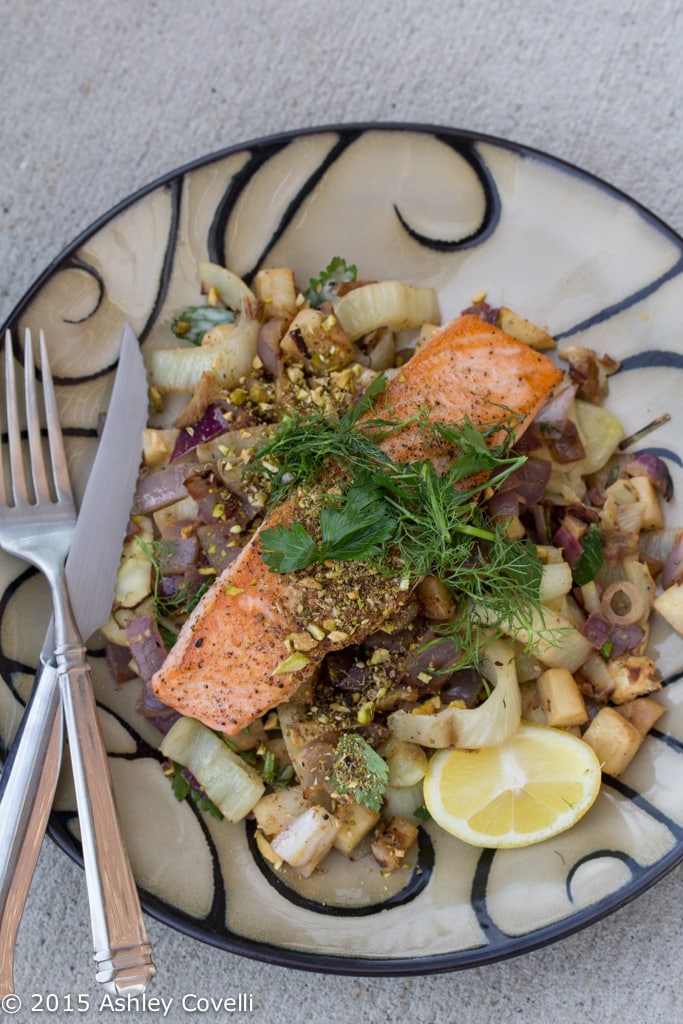
    Dukkah-Spiced Salmon with Spring Vegetable & Oyster Mushroom Ragout

    Crème Fraîche adds a bit of richness to the veggies in this succulent seafood meal.

    I tend to forget how much I enjoy celeriac. It's a delicious, earthy addition to the vegetable mix in this Blue Apron recipe.

    The salmon was nice and tender, and the seasoning blend on top had lots of flavor. The lemon juice really brightened up the dish, and we really enjoyed the mix of fresh herbs on top.

    Dukkah-Spiced Salmon with Spring Vegetable & Oyster Mushroom Ragout

    This was a really tasty meal. It did make a TON of veggies, so we had some of those leftover, which was nice for lunch the next day.

    • 2 Skinless Salmon Fillets
    • 1 Fennel Bulb With Fronds
    • 1 Stem Green Garlic
    • 1 Lemon
    • ½ Pound Celeriac
    • 1 Tablespoon Pistachios
    • 2 Tablespoons Crème Fraîche
    • 1 Bunch Parsley*
    • 5 Ounces Mixed Oyster Mushrooms
    • 1 Red Onion
    • 1 Teaspoon Dukkah Salmon Spice Blend (Za'atar, Coarsely Ground Coriander Seeds, Coarsely Ground Fennel Seeds, Coarsely Ground Cumin Seeds, Coarsely Ground Black Sesame Seeds & Fennel Pollen)

    See Blue Apron for the full recipe.

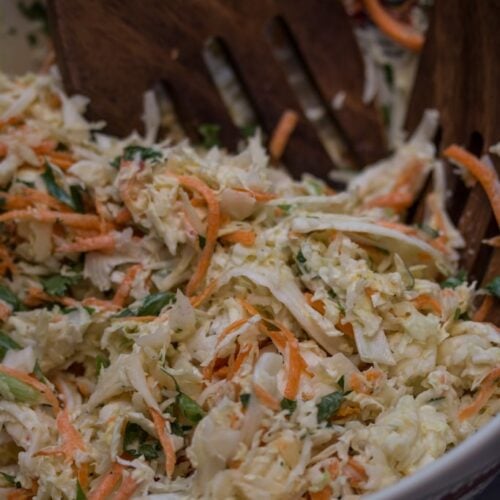
    Asian Slaw

    June 19, 2015 by Ashley 1 Comment

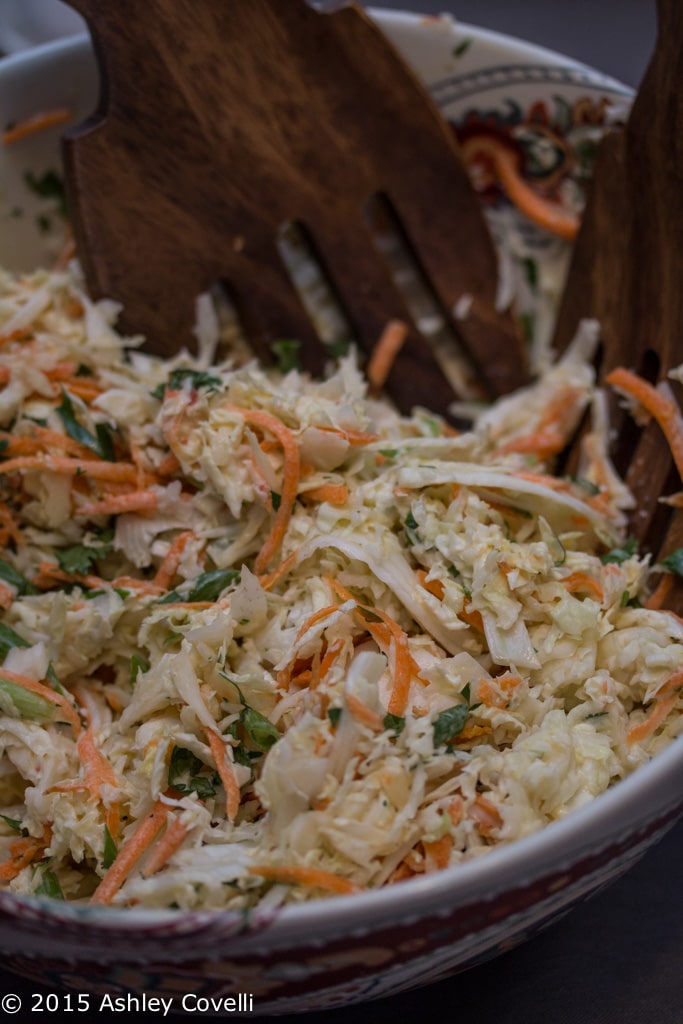
    Asian Slaw

    A mix of mayonnaise and low-fat yogurt lightens up this vibrant, cilantro & lime studded slaw.

    We had a plan. I picked up a pork butt from the Farmers Market. I bought ingredients to make cole slaw and potato salad. My husband got the smoker going outside and I went out for a quick trail run before coming home to prepare dinner for my in-laws and some friends.

    A photo posted by Ashley Covelli (@bigflavors) on Jun 7, 2015 at 8:05am PDT

    And then I ended up falling and spraining my ankle. The same ankle I've injured twice before.

    Ugh.

    I managed to hobble back to the car and get myself home before it swelled up too much. For the rest of the day, I was stuck on the couch with my ankle buried underneath a bag of ice. It felt like an eternity. Meanwhile all I wanted to do was make my sides and dig into a smoked pork sandwich!

    Asian Slaw

    I had my husband help me set up a makeshift work station in the kitchen so I could put the side dishes together while on crutches. Luckily, I already had planned out what I wanted to make, and knew it wouldn't take too long to get it done (even with one leg).
    This slaw has a mix of mayonnaise and low-fat yogurt to keep it nice and light. There's just a little bit of heat from the chile garlic sauce, but feel free to amp it up and add more if you like things spicy. Some of our dinner guests weren't into spicy food, so I kept it mild. The head of Napa cabbage I got yielded 10 cups once it was shredded, and it made a nice big batch that we ended up using to go on the side of lunches and dinners for several days.

    This slaw held up great in the fridge! It was so great to have it on hand since I wasn't able to be on my feet. I also made a Potato Salad with Mustard + Dill (recipe coming soon!) that was a big hit.

    A photo posted by Ashley Covelli (@bigflavors) on Jun 7, 2015 at 5:09pm PDT

    Dinner ended up coming together a lot later than we had planned on (my hubby ran into some issues with the smoker), but we made it work, and everyone was thrilled with the meal!

    This Asian Slaw was exceptionally good piled on top of a smoked pork sandwich that was dripping with BBQ sauce (I used Stubb's Sweet Heat). Absolutely delicious!
    A photo posted by Ashley Covelli (@bigflavors) on Jun 7, 2015 at 7:05pm PDT

    📖 Recipe

    Asian Slaw

    A bowl of slaw.
    A mix of mayonnaise and low-fat yogurt lightens up this vibrant, cilantro & lime studded slaw.
    Big Flavors from a Tiny Kitchen - Ashley Covelli
    No ratings yet
    Print Recipe Pin Recipe
    Servings: 6 servings
    Course: Side Dish
    Cuisine: Asian
    Prep Time 10 minutes mins
    Total Time 10 minutes mins

    Ingredients
     

    • ¼ cup mayonnaise
    • ½ cup low-fat plain yogurt
    • 1 teaspoon freshly grated lime zest
    • 1 tablespoon freshly squeezed lime juice
    • 1 teaspoon chile garlic sauce
    • 1 tablespoon unseasoned rice vinegar
    • 1 tablespoon honey
    • ½ teaspoon kosher salt
    • 10 cups shredded Napa cabbage
    • 1 ½ cups grated carrots about 3 medium
    • 3 green onions thinly sliced
    • ½ cup cilantro chopped

    Instructions
     

    1. In a large bowl, whisk together mayonnaise, yogurt, lime zest, lime juice, chile garlic sauce, rice vinegar, honey and salt.
    2. Add cabbage, carrots, green onions and cilantro and toss well to combine. Refrigerate until ready to serve.

    Notes

    Original Recipe by Big Flavors from a Tiny Kitchen - Ashley Covelli
    The shredding disc of a food processor will make quick work of shredding the cabbage and grating the carrot for this dish.
    Did you make this recipe?

    Leave a comment + star rating below to let people know how it was!

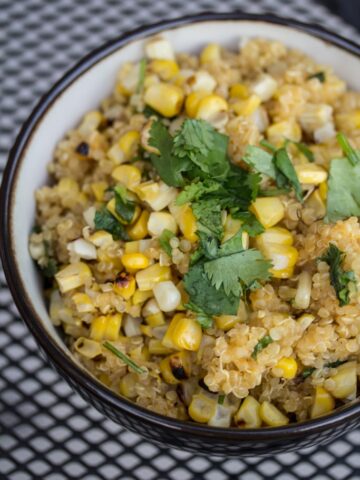
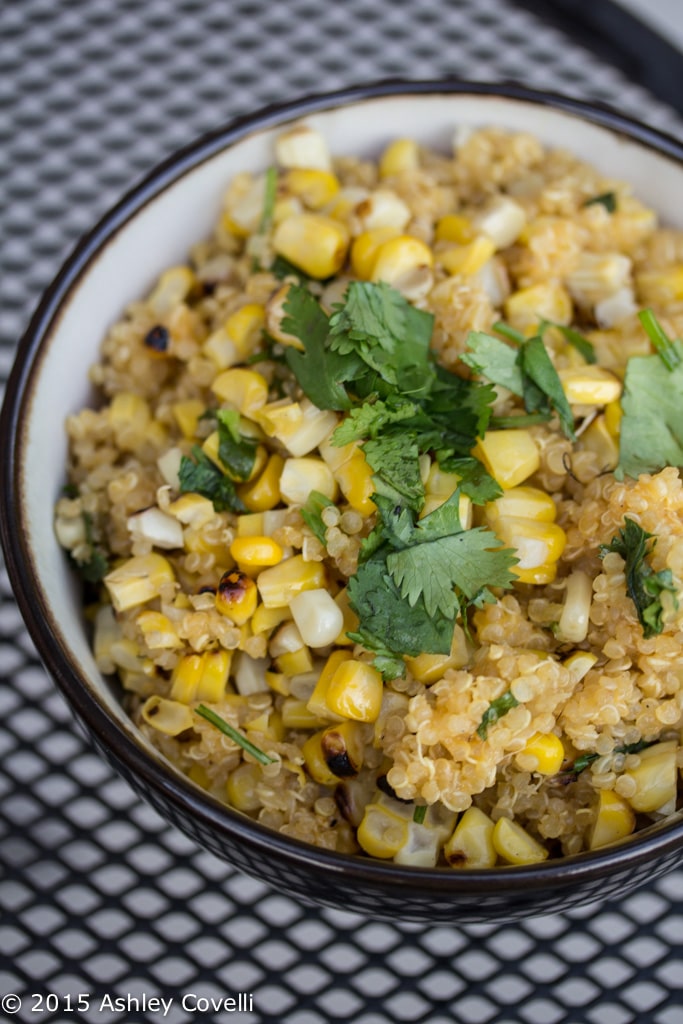
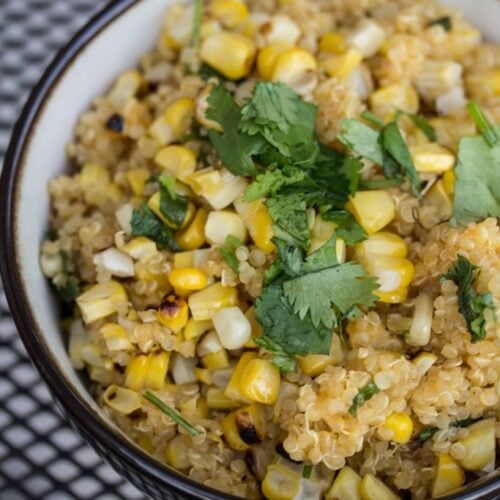
    Grilled Corn + Cheddar Quinoa

    June 18, 2015 by Ashley 1 Comment

    Grilled Corn + Cheddar Quinoa

    Fresh cilantro brightens up this sweet, smoky side dish.

    I have a serious relationship with corn. I grew up in Indiana, and was lucky enough to have an uncle who grew the most mouthwateringly delicious sweet corn. I always looked forward to getting a big bag, fresh from the farm. I've even eaten it straight off the stalk. YUM.

    Now that I live in New York, I still love having corn whenever we fire up the grill. My in-laws joke that we need one ear of corn per person, plus an extra 4 or 5 just for me.

    It's not that much of a stretch...

    Grilled Corn + Cheddar Quinoa

    Anyway, when I saw a friend post this recipe a few weeks ago, I knew I needed to make it to go along with my Bar-B-Q Turkey Burgers with Grilled Pineapple Guacamole.

    I didn't bother following the directions on how to grill the corn - I just asked my husband to grill it before he put the burgers on. Otherwise, I followed the recipe as written.

    This was sweet and smoky and really tasty! I loved the addition of fresh cilantro - it really brightened up the whole dish.

    This would also be easily made vegetarian by substituting vegetable stock for the chicken. Bonus points if you make your own from leftover veggie scraps!
    📖 Recipe

    Grilled Corn + Cheddar Quinoa

    A bowl of grilled corn and cheddar quinoa with cilantro.
    Fresh cilantro brightens up this sweet, smoky side dish.
    How Sweet Eats
    No ratings yet
    Print Recipe Pin Recipe
    Servings: 4 servings
    Course: Side Dish
    Cuisine: American
    Prep Time 10 minutes mins
    Cook Time 30 minutes mins
    Total Time 40 minutes mins

    Ingredients
     

    • 1 cup uncooked quinoa rinsed
    • 2 cups low-sodium chicken broth
    • 4 ears of sweet corn grilled
    • 2 tablespoons olive oil
    • 1 teaspoon salt
    • 1 teaspoon pepper
    • 2 tablespoons butter
    • 4 ounces cheddar cheese freshly grated
    • ¼ cup fresh cilantro chopped

    Instructions
     

    1. Preheat your grill on the highest setting. Shuck corn ears and brush each with olive oil and sprinkle with ½ teaspoon of salt and pepper. Wrap each in a square of aluminum foil – just so there is one layer cover the corn. Grill for about 5 minutes each “side” – rotating corn 4-5 times during grilling.
    2. Once corn has cooled, cut the kernels off the cob.
    3. Add quinoa and chicken stock to a saucepan and bring to a boil. Once boiling, reduce to a simmer, cover and let cool for 15-18 minutes, then fluff with a fork. Immediately stir in butter, cheddar and remaining salt and pepper. Add in corn and stir to combine, then top with a bit of fresh cilantro. Serve!

    Notes

    Recipe from How Sweet Eats

    Did you make this recipe?

    Leave a comment + star rating below to let people know how it was!

    Red, White & Blue Spinach Salad with Fresh Burrata

    June 17, 2015 by Ashley 6 Comments

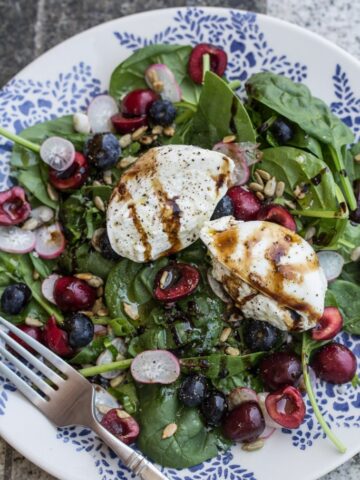
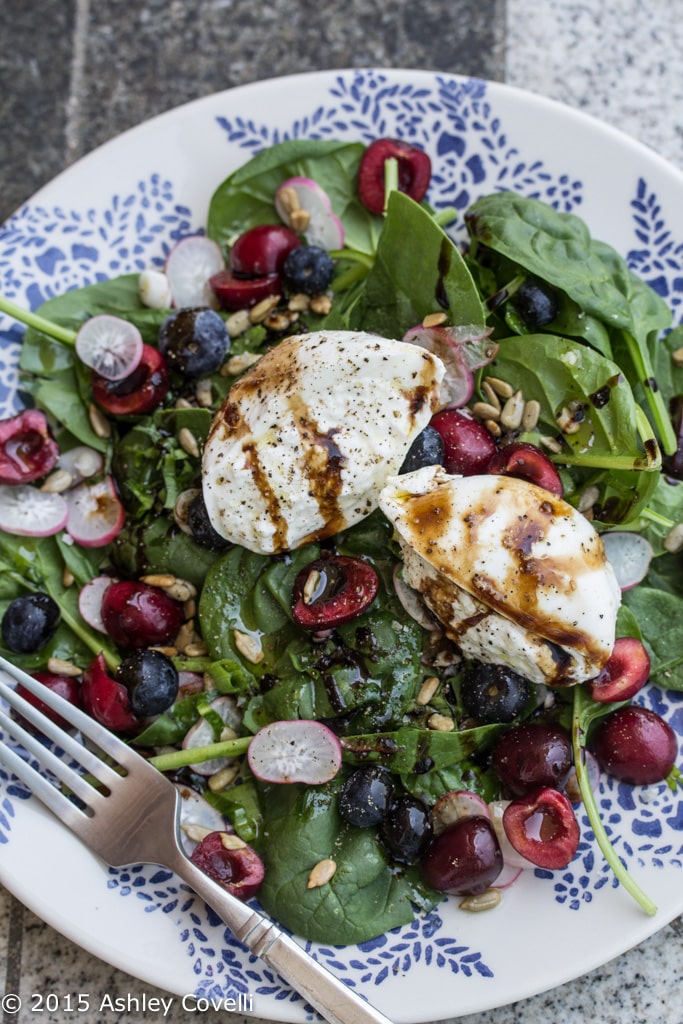
    Overhead view of a plate of salad topped with fruit, vegetables, and burrata cheese drizzled with aged balsamic.

    Fresh fruit, radishes, ramps and burrata cheese add a flavorful punch to this plate of greens! Perfect for patriotic holiday celebrations and summer lunches!

    I've been working on making salads more interesting lately. And a great way to find inspiration for topping options is a stroll through the Farmers Market.

    Overhead view of a plate of salad topped with fruit, vegetables, and burrata cheese drizzled with aged balsamic.

    I found some beautiful fresh burrata cheese at one of the local farm stands, and I just knew it needed to go on top of a big pile of greens for lunch.

    I also picked up some ramps and radishes, which added a nice bit of onion-y, peppery flavor.

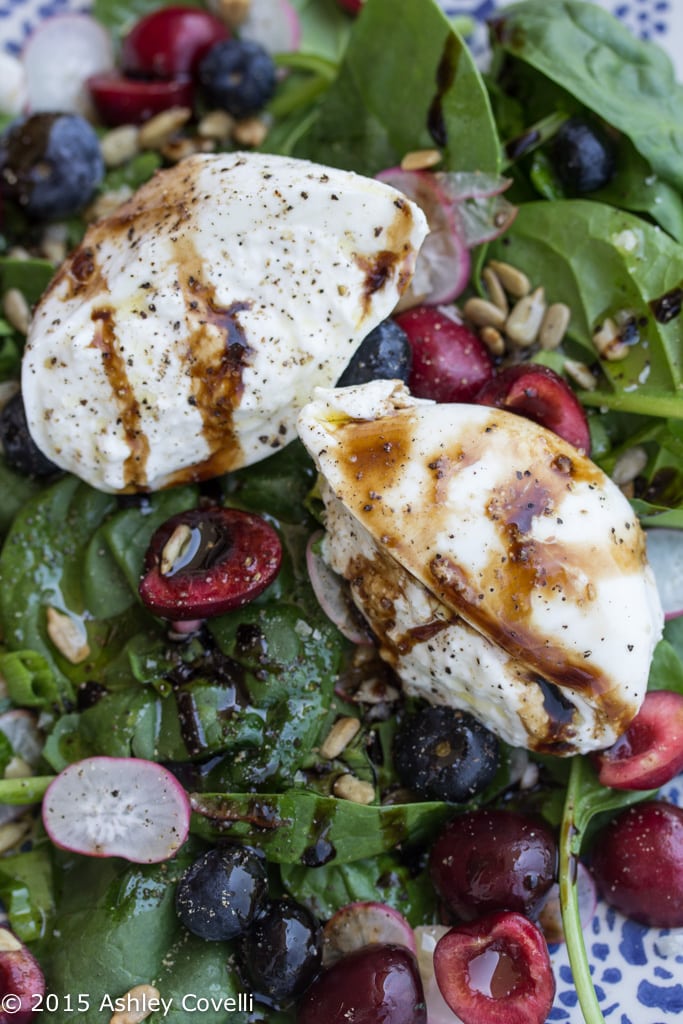
    Close-up view of a plate of salad topped with fruit, vegetables, and burrata cheese drizzled with aged balsamic.

    For sweetness, I sprinkled on some fresh blueberries and cherries, and a sprinkle of sunflower seeds for crunch.

    A little bit of gray salt, freshly cracked black pepper, really nice olive oil and some aged balsamic, and this salad was good to go!

    This combination of flavors worked out beautifully. And the combination of colors really made this salad even more enjoyable. The red, white & blue combo would make this a perfect addition to a Memorial Day or 4th of July meal. Yum!

    Looking for more of our favorite salads? Check out these 5-star recipes:

    • Roma Salad with Caper-Dill Vinaigrette
    • Falafel-Spiced Chickpea Salad with Tahini-Lemon Vinaigrette
    • Taco Salad with Homemade Chipotle Ranch Dressing
    • Quick Chickpea Salad with Lemon-Dill Vinaigrette
    • Pax Romana's Quinoa Salad with Mixed Vegetable, Goat Cheese & Orange Dressing
    • Fennel + Citrus Salad with Shallots + Capers
    • Creamy Cucumber, Avocado, Chickpea, & Sun-Dried Tomato Salad
    • Smoky Shrimp Salad with Green Goddess Dressing
    • BBQ Ranch Chopped Chicken Salad
    • Cantaloupe, Prosciutto and Shaved Parmesan Salad
    • Triple Crunch Asian Salad

    Recipe for Red, White & Blue Spinach Salad with Fresh Burrata

    📖 Recipe

    Red, White & Blue Spinach Salad with Fresh Burrata

    Overhead view of a plate of salad topped with fruit, vegetables, and burrata cheese drizzled with aged balsamic.
    Fresh fruit, radishes, ramps and burrata cheese add a flavorful punch to this plate of greens! Perfect for patriotic holidays and summer lunches!
    Big Flavors from a Tiny Kitchen - Ashley Covelli
    No ratings yet
    Print Recipe Pin Recipe
    Servings: 1 Serving
    Course: Salad
    Cuisine: American
    Prep Time 5 minutes mins
    Total Time 5 minutes mins

    Ingredients
     

    • 2-3 big handfuls baby spinach
    • 2 ramps thinly sliced
    • 1 handful fresh blueberries
    • 1 handful fresh cherries pitted and halved
    • 1-2 tablespoons roasted sunflower seeds
    • 1 ball fresh burrata cheese
    • Kosher salt to taste (I used gray salt)
    • Freshly cracked black pepper to taste
    • 2 tablespoons good quality extra-virgin olive oil
    • 2 tablespoons aged balsamic

    Instructions
     

    1. Pile greens on a plate. Top with sliced ramps, blueberries, cherries, and sunflower seeds.
    2. Cut the burrata in half just before placing it on top of the salad. 
    3. Sprinkle with salt and pepper, then drizzle on oil and vinegar.

    Did you make this recipe?

    Leave a comment + star rating below to let people know how it was!

    Laotian Larb Gai with Sticky Rice, Peanuts & Mint

    June 12, 2015 by Ashley 1 Comment

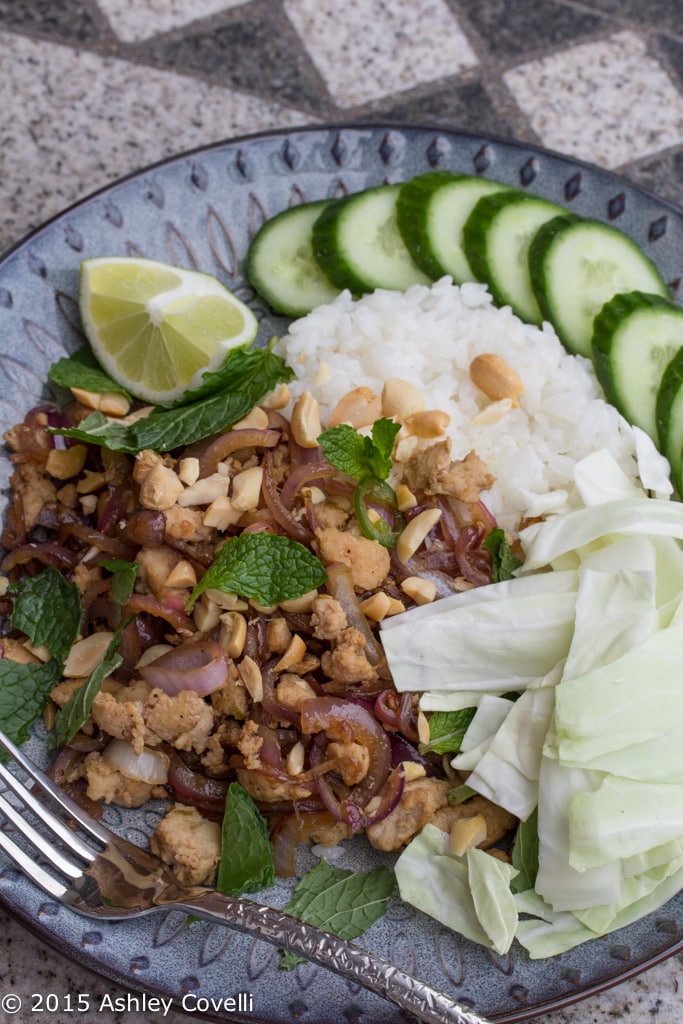
    Laotian Larb Gai with Sticky Rice, Peanuts & Mint

    Cool cucumbers, cabbage and mint are the finishing touches on this spicy Asian chicken salad.

    I first heard of this dish from one of my best friends in college, whose parents were from Laos. The first time she ordered it and I snagged a bite, I was in pure food heaven!

    So when it was on the menu one week for Blue Apron, I knew I had to try it for myself!

    Laotian Larb Gai with Sticky Rice, Peanuts & Mint

    I've made larb a few times at home (like this Chicken Larb and this Beef Larb), but this version included a few key ingredients that I hadn't used before - coconut palm sugar and golden mountain syrup. Those ingredients really deepened the flavor of this sweet-and-spicy dish, and brought it to the next level.

    I was a little skeptical of eating this with chunks of raw cabbage, but it was a perfect accompaniment. This was a delicious meal, and we'll definitely be having it again!

    • 10 Ounces Ground Chicken
    • ½ Cup Sushi Rice
    • 1 Lime
    • 1 Persian Cucumber
    • ½ Pound Green Cabbage
    • 1 Red Onion
    • 1 Bunch Mint
    • 2 Tablespoons Golden Mountain Sauce
    • 1 Tablespoon Coconut Palm Sugar
    • 1 Serrano Chile Pepper
    • ¼ Cup Peanuts

    See Blue Apron for the full recipe.

    Chicken Cutlets with Strawberry-Avocado Salsa

    June 11, 2015 by Ashley 3 Comments

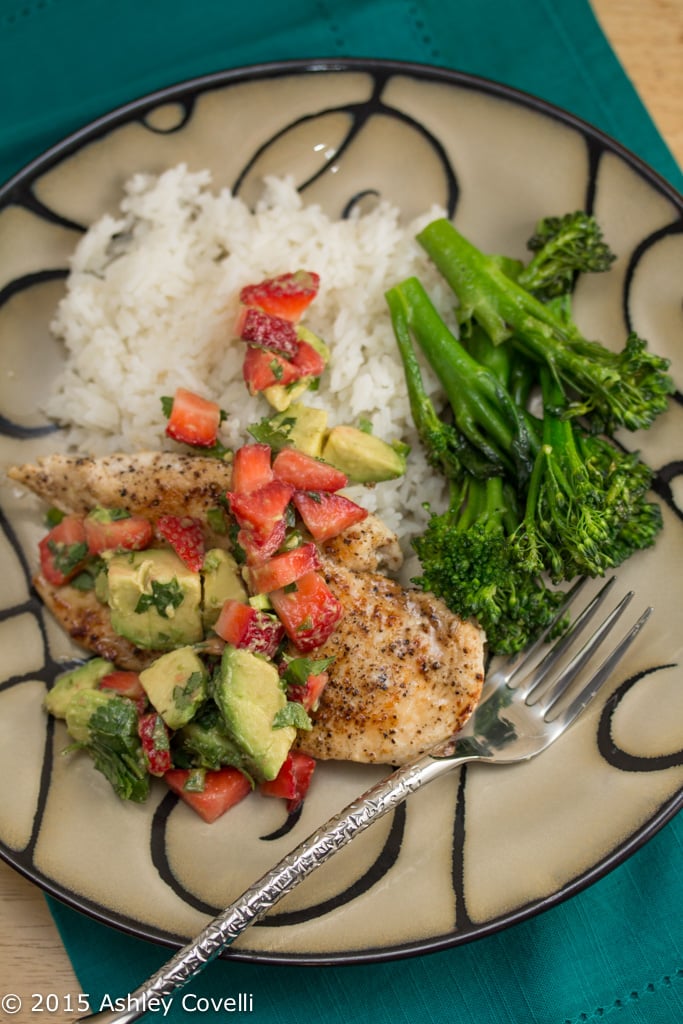
    Chicken Cutlets with Strawberry-Avocado Salsa

    Chicken is anything but boring in this bright, flavorful, sweet-and-spicy weeknight meal.

    I haven't been making chicken dishes as often as I used to. It's so easy to get bored with it.

    But then a recipe like this comes around that packs a ton of flavor and I ask myself why I haven't been cooking with chicken more often. It's such a great canvas for flavors!

    Chicken Cutlets with Strawberry-Avocado Salsa

    The vibrant strawberry-avocado salsa is the perfect blend of sweet, spicy and most importantly, DELICIOUS. I loved the brightness of the strawberry and lime paired with the creamy avocado.

    I served this over jasmine rice and broccolini sautéed with truffle salt. It was an awesome meal!

    📖 Recipe

    Chicken Cutlets with Strawberry-Avocado Salsa

    A plate of chicken topped with strawberry and avocado with broccolini.
    Chicken is anything but boring in this bright, flavorful, sweet-and-spicy weeknight meal.
    Big Flavors from a Tiny Kitchen - Ashley Covelli
    No ratings yet
    Print Recipe Pin Recipe
    Servings: 4 (serving size: 1 chicken cutlet and about ½ cup salsa)
    Course: Main Dish
    Cuisine: American
    Prep Time 10 minutes mins
    Cook Time 10 minutes mins
    Total Time 20 minutes mins

    Ingredients
     

    • 1 ½ cups chopped strawberries
    • ½ cup diced peeled ripe avocado
    • 2 tablespoons minced seeded jalapeño pepper
    • 2 tablespoons chopped fresh cilantro
    • 2 teaspoons fresh lime juice
    • ¾ teaspoon kosher salt divided
    • 1 tablespoon olive oil
    • 4 4-ounce chicken breast cutlets
    • ¼ teaspoon freshly ground black pepper
    • 4 lime wedges

    Instructions
     

    1. Combine strawberries, avocado, jalapeño, cilantro, lime juice, and ¼ teaspoon salt in a small bowl; toss to combine.
    2. Heat a large skillet over medium heat. Add oil to pan; swirl to coat. Sprinkle chicken with remaining ½ teaspoon salt and pepper. Add chicken to pan; cook 3 minutes on each side or until done.
    3. Divide chicken among 4 serving plates, and spoon salsa evenly over each serving. Garnish each serving with a lime wedge.

    Did you make this recipe?

    Leave a comment + star rating below to let people know how it was!

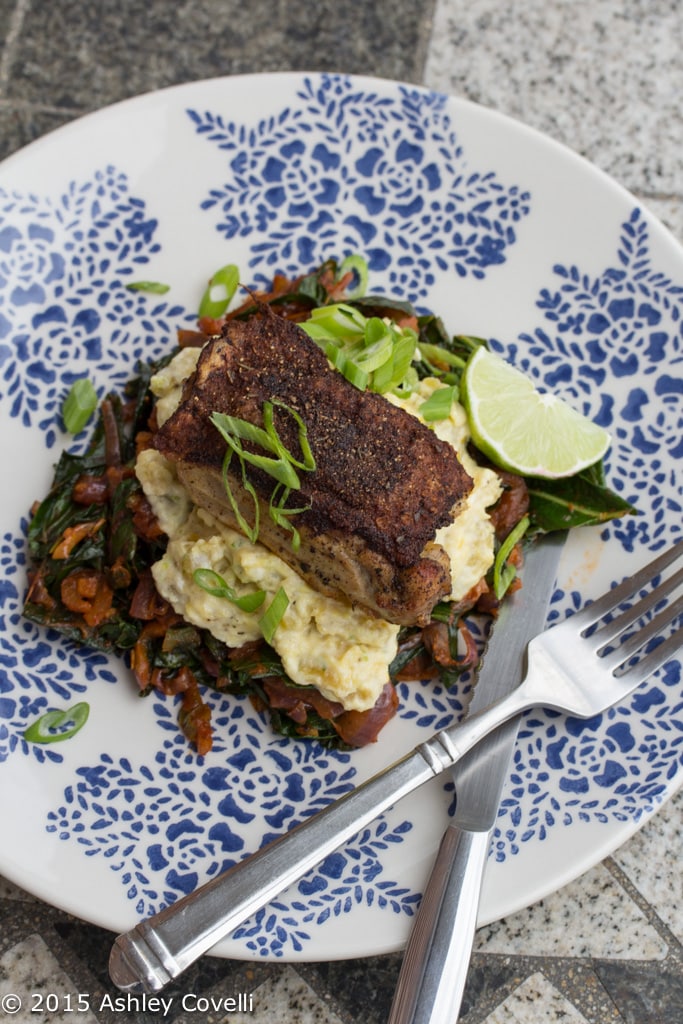
    Piri-Piri Chicken with Coconut-Smashed Plantains & Stewed Collard Greens

    June 10, 2015 by Ashley Leave a Comment

    Piri-Piri Chicken with Coconut-Smashed Plantains & Stewed Collard Greens

    Crispy skinned chicken thighs get some tropical island flair in this sweet-and-spicy meal.

    This Blue Apron recipe was my first time using coconut milk powder. I had no idea it came in that form! It added great flavor to the plantains, which made a deliciously sweet, smooth base for the chicken to sit on.

    Piri-Piri Chicken with Coconut-Smashed Plantains & Stewed Collard Greens

    The stewed collard greens were really nice here, too. And I loved how crispy the skin got on the chicken thighs. It was a really nice combination of bold, sweet-and-spicy flavors.

    Make sure you hit this with enough salt and lime juice at the end, since the sweetness of the plantains could overwhelm the rest of the flavors. I really enjoyed this dish as-is, but my husband thought it was too sweet.

    • 2 Bone-In, Skin On Chicken Thighs
    • 1 Pound Plantains
    • 2 Scallions
    • 1 Bunch Collard Greens
    • 1 Lime
    • 1 Red Onion
    • 2 Tablespoons Tomato Paste
    • 1 1-Inch Piece Ginger
    • ¼ Cup Coconut Milk Powder
    • 1 Tablespoon Piri-Piri Spice Blend (Cayenne Pepper, Ground Cinnamon, Ground Cardamom, Dried Oregano, Smoked Paprika, Ground Ginger, Dried Lemon Peel & Light Brown Sugar)

    See Blue Apron for the full recipe.

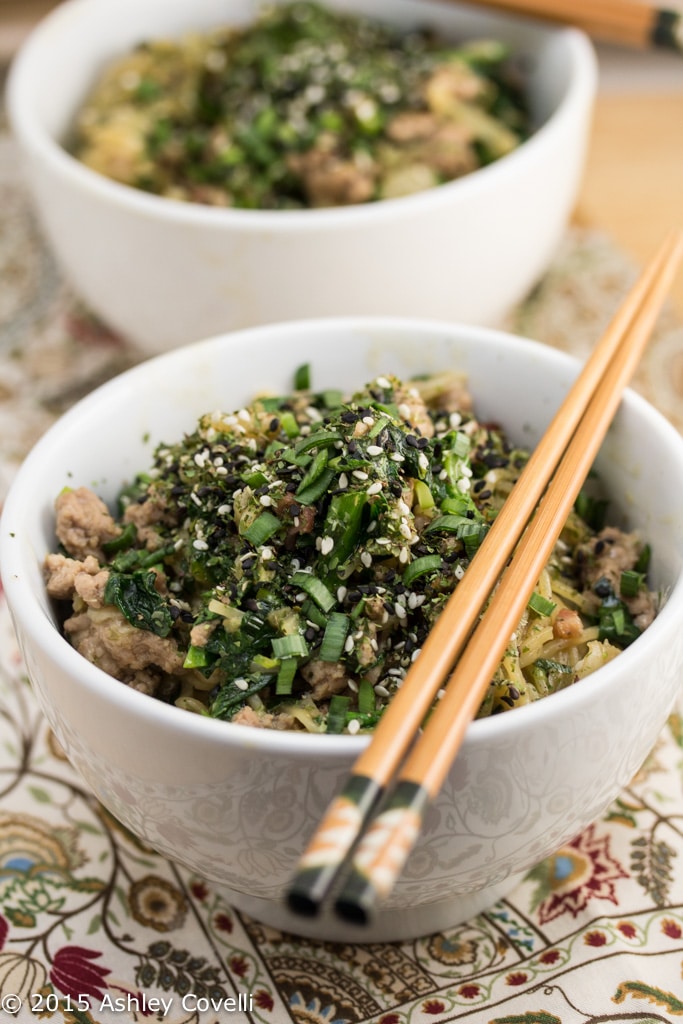
    Triple Pork Ramen with Roasted Garlic & Pea Tips

    June 6, 2015 by Ashley 2 Comments

    Triple Pork Ramen with Roasted Garlic & Pea Tips

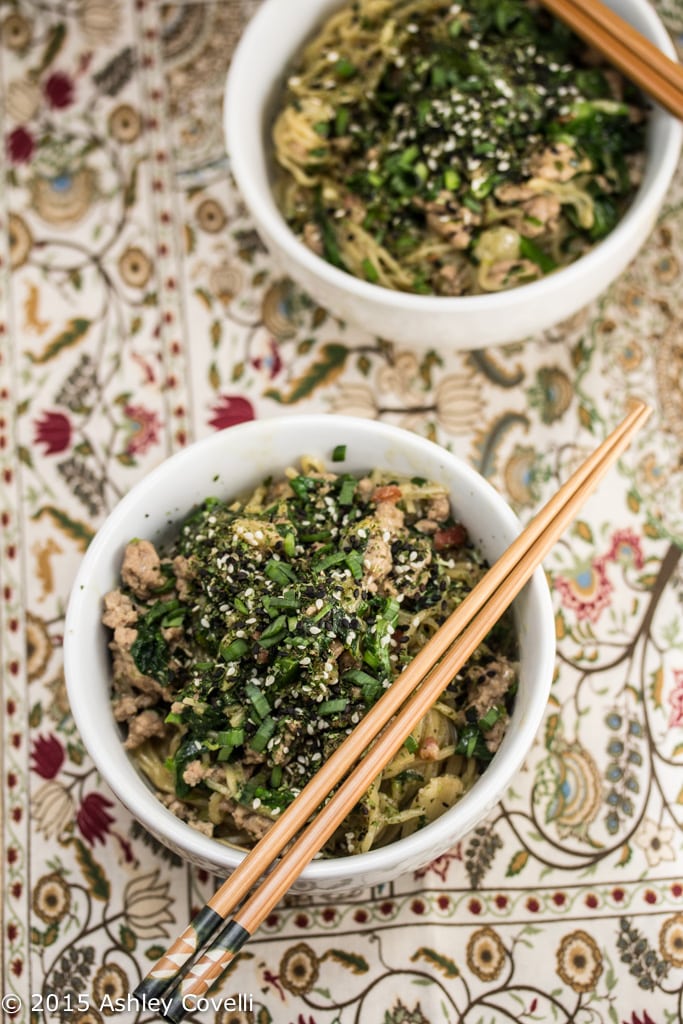
    Bacon, ground pork and pork demi-glace share the spotlight in this "dry" mazeman ramen.

    This isn't your everyday bowl of ramen. It's coated with a thin sauce, rather than served in a bowl of broth, and it's absolutely delicious!

    Triple Pork Ramen with Roasted Garlic & Pea Tips

    Garlic chives and roasted garlic are big flavor boosters in these noodle bowls. A sprinkle of mazeman spice blend adds a bold layer of umami to the top of each dish.

    We both enjoyed the deep, rich pork flavor that was present in these bowls. This style of ramen is a great alternative to the broth-based kind, especially in the warmer months when a big bowl of soup doesn't always sound appealing.

    Triple Pork Ramen with Roasted Garlic & Pea Tips

    • 5 Ounces Ground Pork
    • 1 Slice Bacon
    • 12 Ounces Fresh Ramen Noodles
    • 2 Ounces Pea Tips
    • 1 Bunch Garlic Chives
    • 1 Head Garlic
    • 3 Tablespoons Pork Demi-Glace
    • 2 Tablespoons Soy Sauce
    • 2 Tablespoons Mirin
    • 1 1-Inch Piece Ginger
    • 1 Teaspoon Pork Mazeman Spice Blend (Black Sesame Seeds, White Sesame Seeds, Kibbled Nori & Sansho Pepper)

    See Blue Apron for the full recipe.

    Lindrusso's Spinach Balls

    June 5, 2015 by Ashley Leave a Comment

    Lindrusso's Spinach Balls

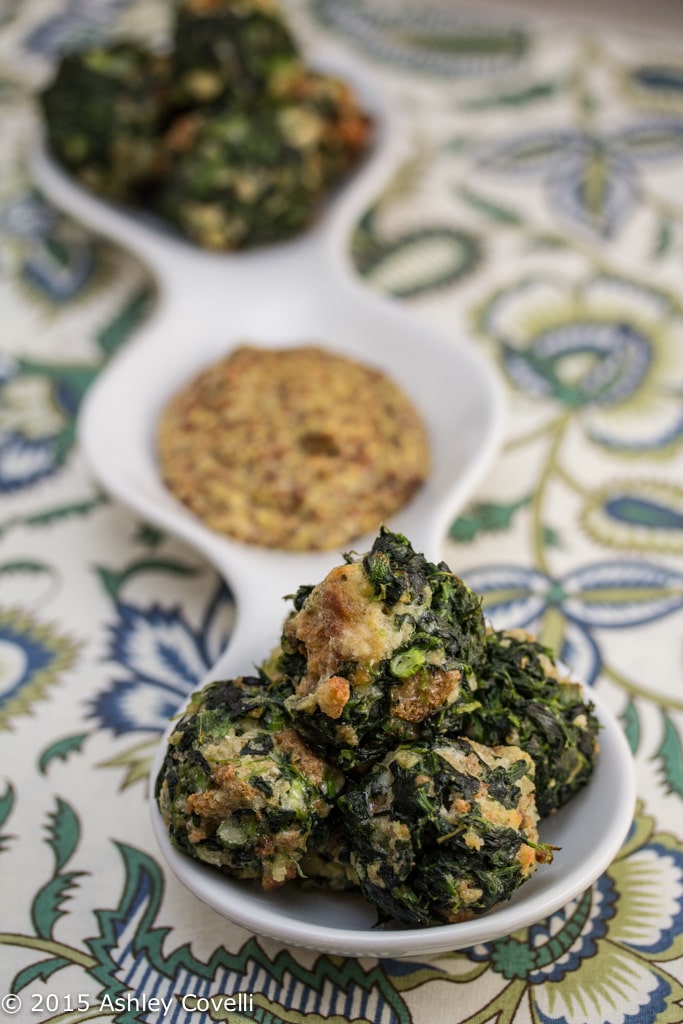
    Serve these bite-sized spinach and parmesan morsels with your favorite mustard for a tangy appetizer offering!

    These spinach balls are pretty famous with a group of my online cooking buddies, who have all been making them for yeeeeears.

    I finally got on board and made these as an appetizer for my friend Jenn for one of our weekend slumber parties.

    Lindrusso's Spinach Balls

    These were easy to make, and they make a LOT! I liked them even better leftover the next day. I think that the mustard for dipping is key, as the tanginess really brightens up each bite.

    These would be great for a potluck or dinner party, and I'm told they freeze really well, too!

    📖 Recipe

    Lindrusso’s Spinach Balls

    Spinach balls and dipping sauce.
    Serve these bite-sized spinach and parmesan morsels with your favorite mustard for a tangy appetizer offering!
    The Savory Notebook
    No ratings yet
    Print Recipe Pin Recipe
    Course: Appetizer
    Cuisine: American
    Prep Time 30 minutes mins
    Cook Time 10 minutes mins
    Total Time 40 minutes mins

    Ingredients
     

    • 2 10-ounce packages frozen chopped spinach, thawed and squeezed dry
    • 2 cups crushed herb stuffing mix Pepperidge Farms seasoned bread crumbs
    • 1 cup firmly packed grated Parmesan cheese
    • ½ cup butter melted
    • 4 scallions chopped
    • 3 beaten eggs
    • 1 dash nutmeg

    Instructions
     

    1. Combine all ingredients in a large bowl. Shape into 1-inch balls. Cover and refrigerate or freeze until ready to bake.
    2. Arrange spinach balls on an ungreased cookie sheet and bake 10 to 15 minutes at 350°F or until lightly browned. Serve with your favorite mustard for dipping.

    Notes

    Recipe from The Savory Notebook

    Did you make this recipe?

    Leave a comment + star rating below to let people know how it was!

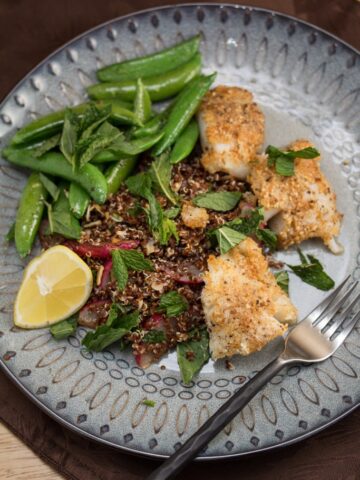
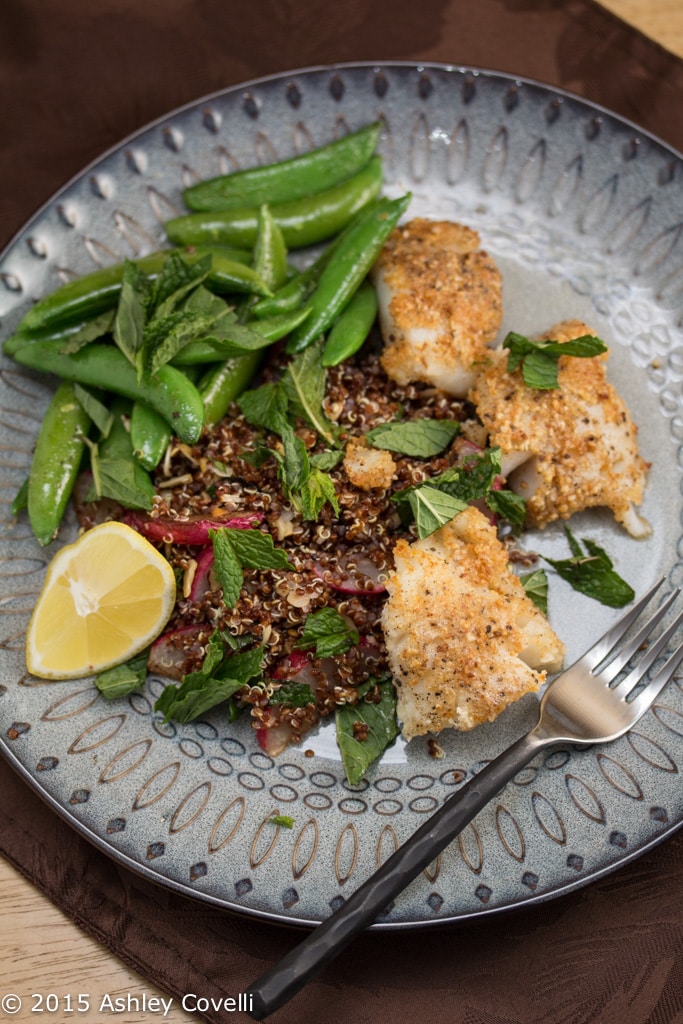
    Almond-Crusted Cod with Snap Peas & Radish-Red Quinoa Salad

    June 3, 2015 by Ashley Leave a Comment

    Almond-Crusted Cod with Snap Peas & Radish-Red Quinoa Salad

    Crispy spring veggies, fresh mint and lemon brighten up this light-yet-hearty seafood meal.

    Cod is such a versatile fish. It doesn't have a very strong flavor, so it's really good at taking on the other flavors in a dish. And it cooks up so beautifully flaky.

    In this dish, cod is coated with almond flour and pan-fried in a mix of oil and butter. There's just something about giving something a butter bath in a pan that soothes my soul...

    Almond-Crusted Cod with Snap Peas & Radish-Red Quinoa Salad

    The cod is served over red quinoa that has sautéed radishes and mint mixed in, as well as bright, crispy, quick-cooked sugar snap peas. Fresh lemon ties it all together perfectly.

    We really enjoyed this meal. It was fresh and bright and didn't leave us feeling like we ate a heavy plate of fried fish. Definitely a tasty meal that we'd enjoy again.

    • 2 Cod Fillets
    • 3 Ounces Radishes
    • 2 Cloves Garlic
    • 1 Lemon
    • ¼ Pound Sugar Snap Peas
    • 1 Large Bunch Mint*
    • 2 Tablespoons Butter
    • 2 Tablespoons Sliced Almonds
    • ¼ Cup Almond Flour
    • ¼ Cup Red Quinoa
    • ¼ Teaspoon Crushed Red Pepper Flakes

    See Blue Apron for the full recipe.

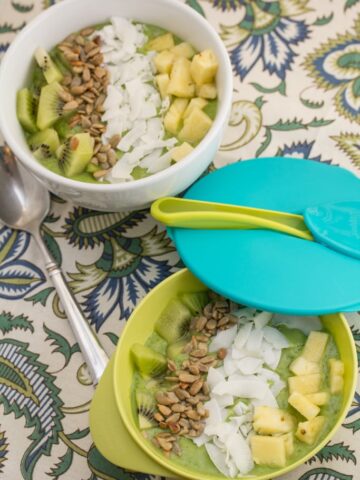
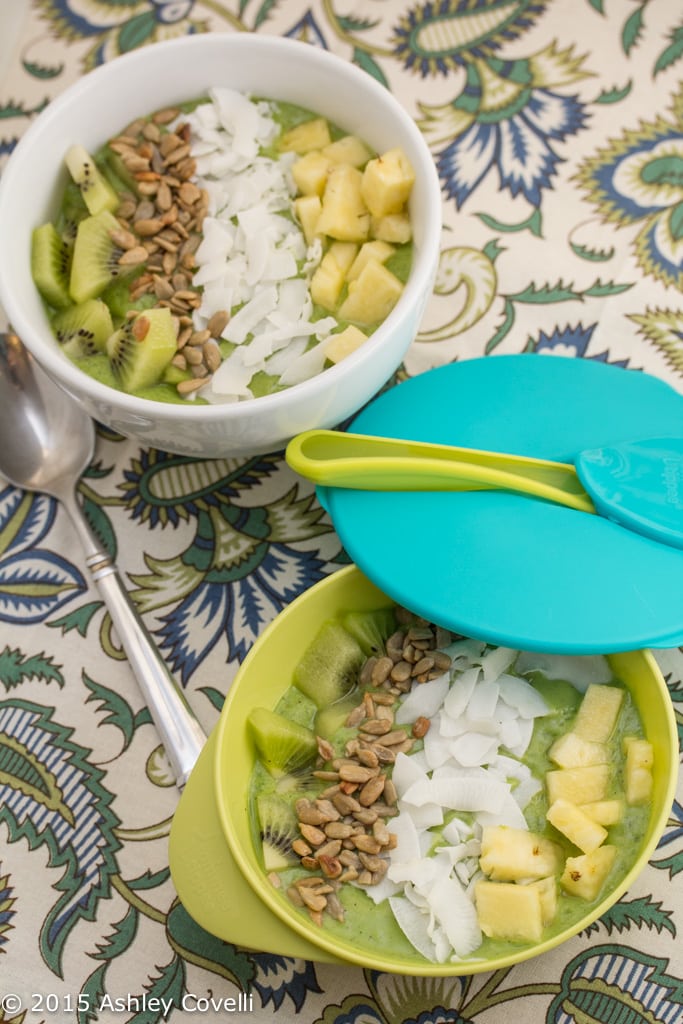
    Kiwi, Spinach, Pineapple & Banana Smoothie Bowls

    May 29, 2015 by Ashley 10 Comments

    Kiwi, Spinach, Pineapple & Banana Smoothie Bowls

    This post was created in partnership with Stonyfield and Tommee Tippee. As always, all opinions are 100% my own.

    Smoothies. I love 'em, but for some reason they never feel like a meal to me when I drink them through a straw. I'm almost always itchin' to snack again not too long after I drink one.

    It may be my brain playing tricks on me, but the act of drinking my meal just doesn't feel right.

    But a smoothie bowl on the other hand takes all of the things I enjoy about a nice, healthy smoothie adds in some crunchy toppings and transforms it into something that feels more satisfying and meal-like to me.

    I guess I just like to spoon.

    Kiwi, Spinach, Pineapple & Banana Smoothie Bowls

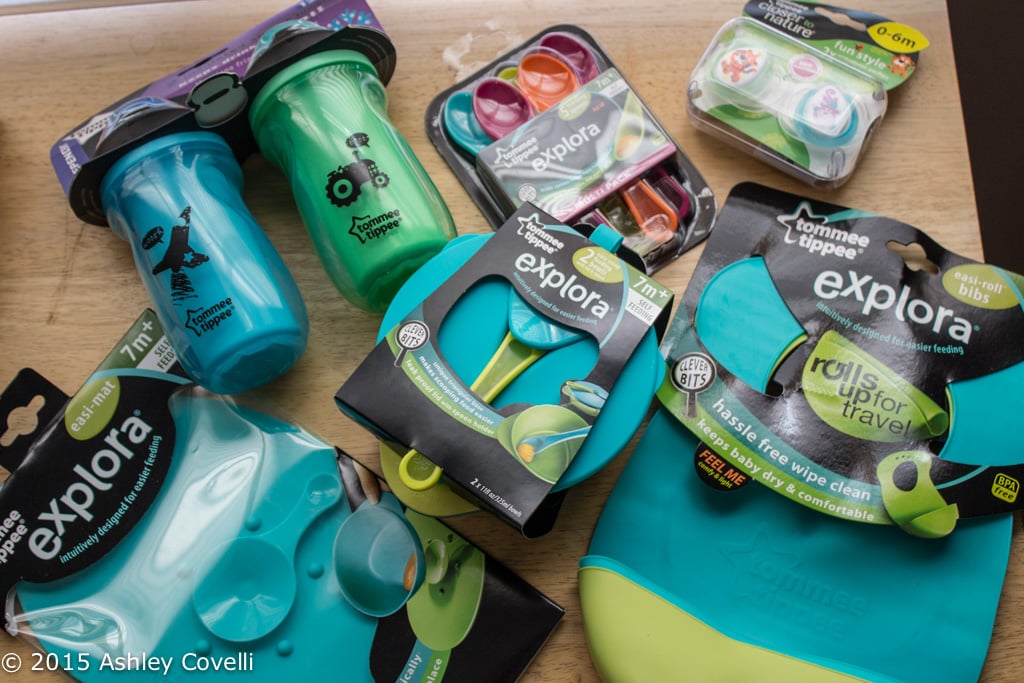
    These smoothie bowls were inspired by my favorite plain lowfat organic yogurt and assortment of toddler feeding products sent over by Tommee Tippee.

    Between meals and snack times, it can be tedious to keep food interesting for my 3-year-old. I'm lucky that he enjoys a variety of healthy foods, and even luckier that he'll drink anything that's frozen and blended into a smoothie.

    So I figured that smoothie bowls would be right up his alley, too!

    Tommee Tippee Giveaway

    I absolutely loved the Easy Scoop Feeding Bowls with Lid and Spoon. The bowl has a triangular base to help kids scoop up their food more easily, and the spoon stores right in the top for meals and snacks on the go.

    For smaller babies or toddlers just learning to self-feed, the Easi-Mat helps keep the bowl from flying around and spilling all over the place. We've all been there. Cleaning food off the walls and floor is suuuuper fun.

    /sarcasm

    Kiwi, Spinach, Pineapple & Banana Smoothie Bowls

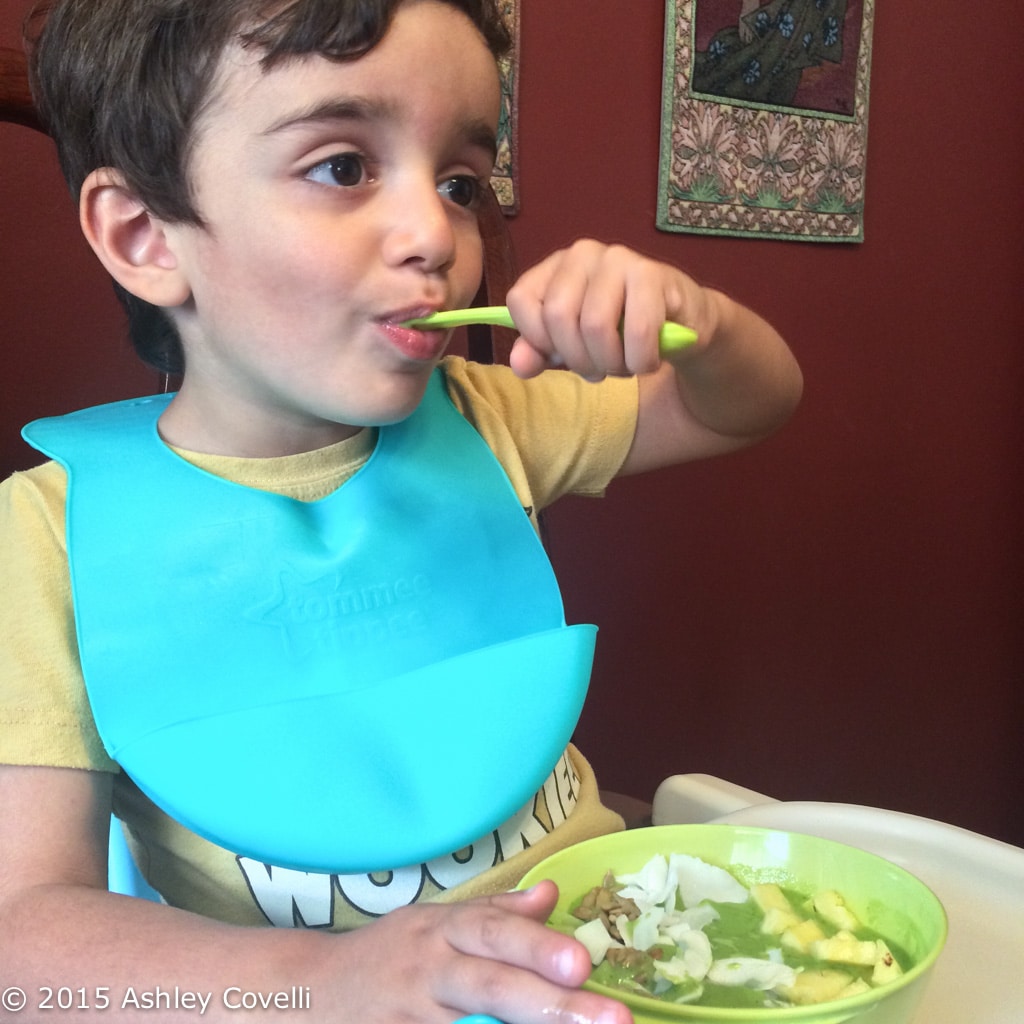
    My son absolutely loved the smoothie bowls! He had fun picking out which toppings he wanted to eat with each bite, and he thought the new bowl and spoon set were super cool.

    We had these smoothie bowls for lunch, but they'd be great as breakfast or dessert, too. He thought they were a delicious treat, and I couldn't agree more!

    Kiwi, Spinach, Pineapple & Banana Smoothie Bowls

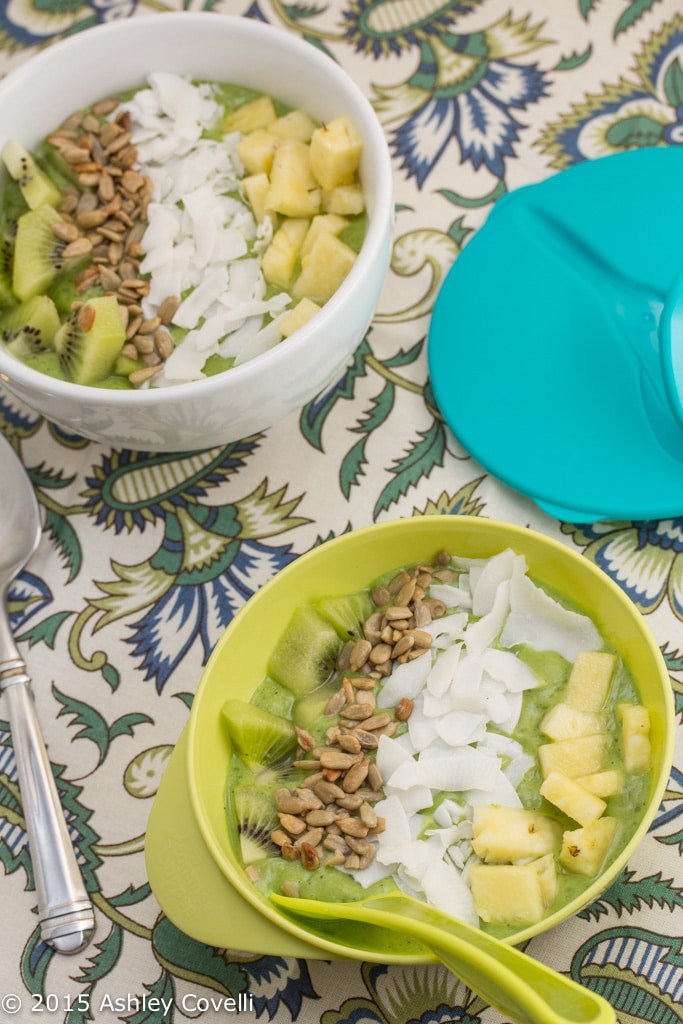
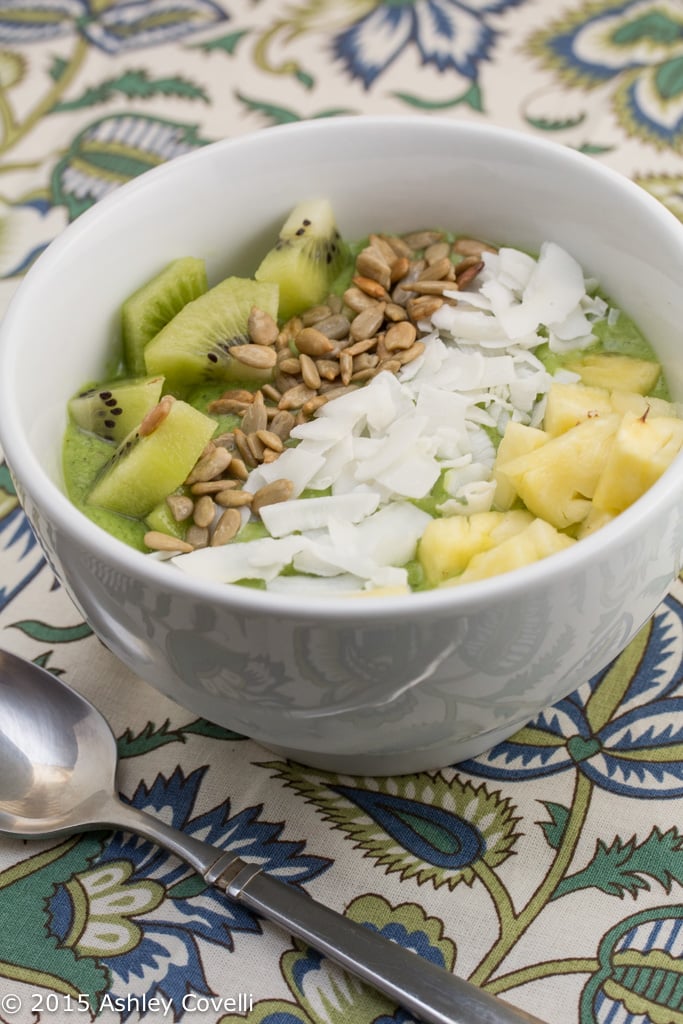
    I really enjoyed the combination of flavors in these smoothie bowls. There's a nice dose of leafy greens with all of the spinach, and the mix of kiwi and pineapple worked beautifully together. I always have frozen bananas on hand - they're a great way to make your smoothie cold and slushy without watering it down at all. If you don't have them handy, just add in a regular banana and a handful of ice.

    I love putting coconut chips on just about everything. Here, they add a nice bit of crunch to the topping, along with the sunflower seeds. Any combination of fresh or dried fruits, nuts and seeds could work here. The sky is the limit!

    Kiwi, Spinach, Pineapple & Banana Smoothie Bowls

    📖 Recipe

    Kiwi, Spinach, Pineapple & Banana Smoothie Bowls

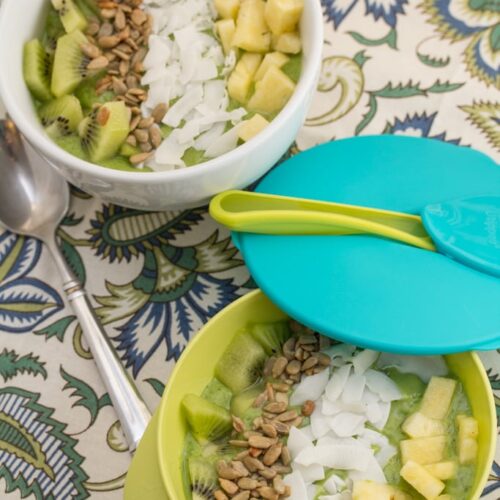
    Smoothie bowls topped with tropical fruits.
    Grab a spoon and enjoy this creamy, vibrant green smoothie, topped with your favorite dried fruits, seeds and nuts!
    Big Flavors from a Tiny Kitchen - Ashley Covelli
    No ratings yet
    Print Recipe Pin Recipe
    Servings: 3 -4 servings
    Course: Breakfast
    Cuisine: American
    Prep Time 5 minutes mins
    Total Time 5 minutes mins

    Ingredients
     

    For smoothies:
    • 1 cup plain yogurt I used Stonyfield lowfat
    • 2 kiwi peeled and roughly chopped
    • 2 frozen bananas*
    • 2 cups packed baby spinach
    • 2 cups pineapple peeled and roughly chopped
    For topping (feel free to use whatever you have on hand):
    • Coconut chips or flakes
    • Chopped kiwi
    • Chopped pineapple
    • Sunflower seeds without shells

    Instructions
     

    1. Place smoothie ingredients in a blender and blend until smooth. If it's too thick, add some cold coconut water or filtered water to loosen it up a bit.
    2. Divide smoothie mixture between 3-4 bowls and sprinkle each with rows of your choice of toppings. Enjoy!

    Notes

    *If you don't have frozen bananas on hand, use fresh bananas and add in a handful of ice cubes

    Did you make this recipe?

    Leave a comment + star rating below to let people know how it was!

    Want to win your own assortment of Tommee Tippee goodies, along with a stash of Stonyfield yogurt coupons? To enter to win, leave a comment below telling me your favorite food to eat out of a bowl. The contest will close on Friday, June 5, 2015 at 12 noon (Eastern Standard Time). One winner will be chosen via random.org and will be contacted via email to get mailing information. Prize will be shipped by the sponsor. U.S. residents only. Good luck, everyone!

    UPDATE - The winner has been selected via random.org - CONGRATS to coupcrazy!

    Blueberry Cream Overnight French Toast Casserole

    May 28, 2015 by Ashley 4 Comments

    Blueberry Cream Overnight French Toast Casserole

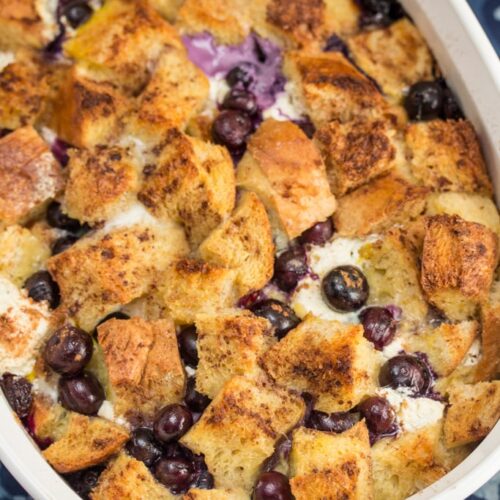
    This simple, rich & creamy make-ahead breakfast casserole is an absolute showstopper!

    My cousin Carey and I decided to cook a massive Mother's Day brunch this year while I was visiting my family in Indiana. We collaborated on a magnificent menu plan for 20 adults and 10 kids.

    This casserole is one of the dishes that we made that day. It was ridiculously decadent and so delicious!

    Blueberry Cream Overnight French Toast Casserole

    Unfortunately, I ended up getting a 24-hour stomach bug that left me unable to be much any help.

    (Shoutout to my hubby for helping with the meal prep while I was... incapacitated.)

    I felt alright by Mother's Day, but I didn't have much of an appetite to enjoy the fruits of our labor. So once I came back home to New York, I knew I needed a do over, and a slumber party with my friend Jenn was the perfect excuse to splurge!

    This casserole is super simple to put together before bed. It sits in the fridge overnight and in the morning, you just pop it into the oven, make a pot of coffee and get ready to indulge!

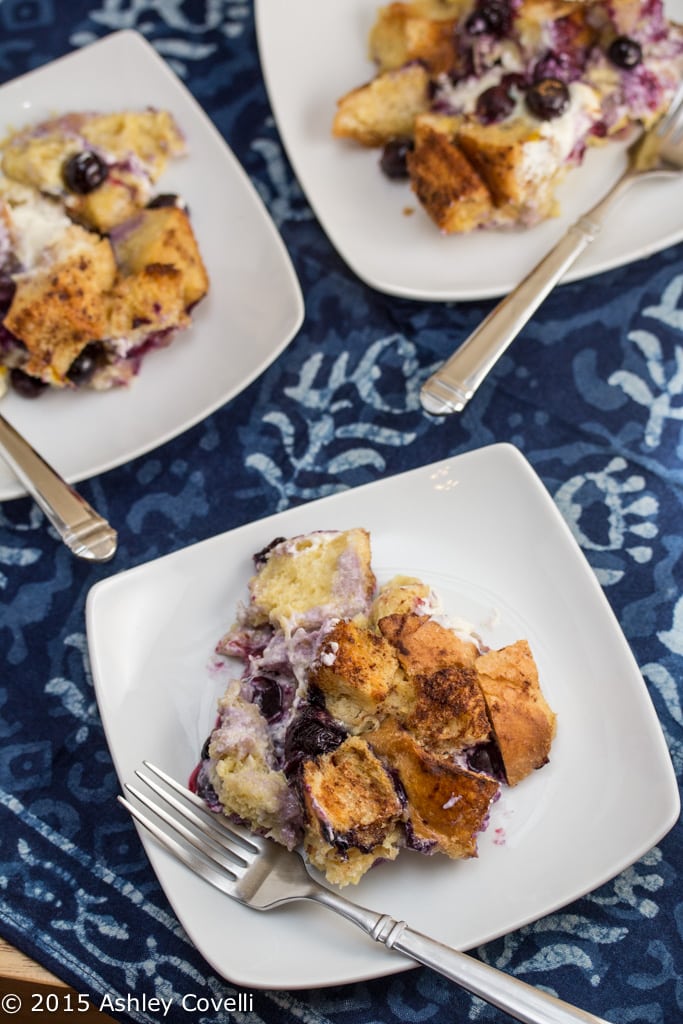
    Blueberry Cream Overnight French Toast Casserole on plates.

    I ended up cutting the recipe in half, which worked out perfectly for a smaller group of people. I used half a large loaf of Italian bread, and it worked out really well.

    My mom ended up having to miss the Mother's Day brunch gathering, so I'll have to do yet another do over when she comes to visit me this fall. Drats ;). Here are a few shots of the offerings that she missed out on:

    These Brie Waffle Bites were ah-mazing! And oh so pretty! My toddler and Carey's 11-year-old made the waffles together, and it was one of the cutest things I've ever witnessed.

    A photo posted by Ashley Covelli (@bigflavors) on May 10, 2015 at 2:26pm PDT

    The Granola Cups were a recipe that I had pinned a while back and was really excited to try. They turned out beautifully, and they're on my menu plan to make again at home soon!

    We served them with vanilla yogurt, but they were extra delicious with the Lemon Cream Fruit Dip. That's another one I'm going to have to make for myself.

    A photo posted by Ashley Covelli (@bigflavors) on May 10, 2015 at 4:24pm PDT

    Our brunch was a huge success. I got to catch up with a lot of family members that I hadn't seen in about 2 years. Hopefully we'll get to do it again soon!

    📖 Recipe

    Blueberry Cream French Toast Casserole

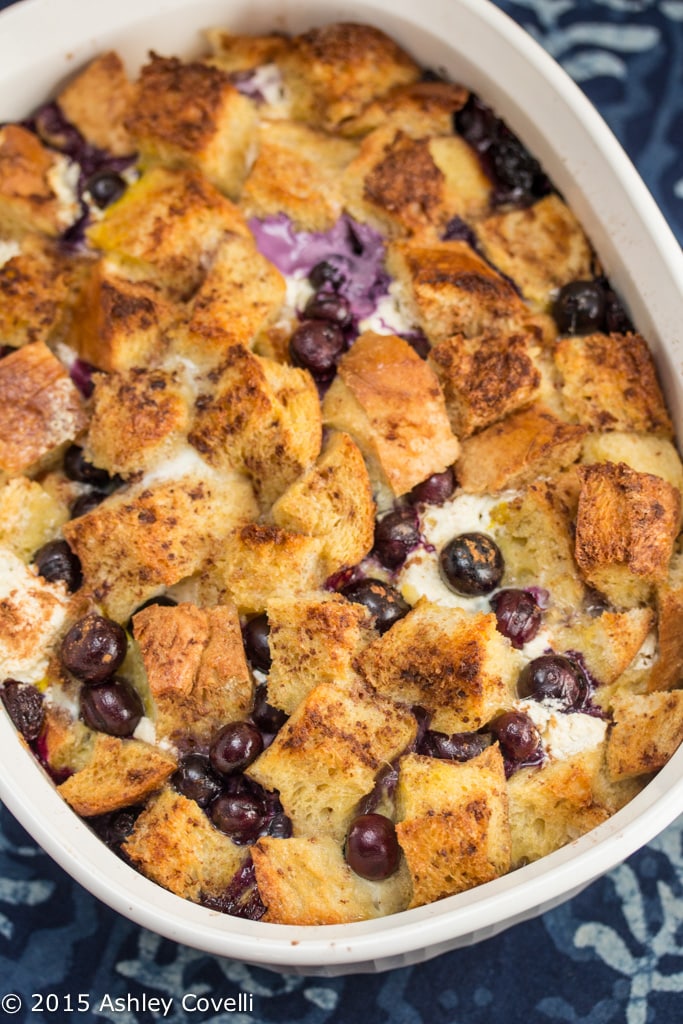
    Blueberry Cream Overnight French Toast Casserole.
    This simple, rich & creamy make-ahead breakfast casserole is an absolute showstopper!
    Big Flavors from a Tiny Kitchen - Ashley Covelli
    No ratings yet
    Print Recipe Pin Recipe
    Servings: 8 servings
    Course: Breakfast
    Cuisine: American
    Prep Time 15 minutes mins
    Cook Time 45 minutes mins
    Total Time 1 hour hr

    Ingredients
     

    • 1 16-20oz. loaf Italian bread, brioche, or thick-sliced Texas toast or French toast bread, cut into 1-inch cubes
    • 8 ounces cream cheese slightly softened
    • ⅓ cup granulated sugar
    • 1 ½ cups blueberries if using frozen, thaw and drain them
    • 2 tablespoons all-purpose flour
    • 2-3 teaspoons ground cinnamon
    • 8 large eggs
    • 1 ½ cups milk
    • ¾ cup maple syrup
    • 1 teaspoon vanilla extract
    • 6 tablespoons unsalted butter melted

    Instructions
     

    1. Coat a 13x9-inch baking dish with nonstick cooking spray. Spread half of the bread cubes in an even layer in the baking dish.
    2. In a medium bowl, cream together cream cheese and sugar using an electric mixer. Drop this mixture by teaspoonfuls evenly over bread.
    3. In a large bowl, toss together blueberries and flour. Scatter the blueberries over the cream cheese mixture, then top with the remaining bread to cover. Sprinkle cinnamon evenly over the top.
    4. In the bowl used for the blueberries, mix together eggs, milk, maple syrup, vanilla, and melted butter. Pour mixture over the bread, pressing with a spatula or spoon to help the bread soak up the liquid. Cover and refrigerate overnight.
    5. When you're ready to bake, take the casserole out of the refrigerator and place it on top of a large, rimmed baking sheet.
    6. Preheat oven to 350°F. Once preheated, bake the casserole until golden brown, about 45 to 50 minutes.

    Useful products:

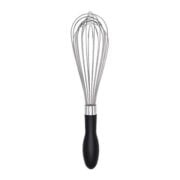
    whisk
    13x9-inch baking dish
    ground cinnamon

    Did you make this recipe?

    Leave a comment + star rating below to let people know how it was!

    Tomato Achaar Spiced Lamb Over Gnocchi with Garlicky Mint Yogurt Sauce

    May 27, 2015 by Ashley 2 Comments

    Tomato Achaar Spiced Lamb Over Gnocchi with Garlicky Mint Yogurt Sauce

    Tomato relish adds Indian flair to this Turkish-inspired meal.

    A few weeks ago, me and my husband went into NYC to see Bob's Burgers Live (and it was ah-mazing!!). We needed to grab some dinner beforehand, and we ended up at a Turkish restaurant near the Beacon Theatre.

    For my main course, I had Manti - little dumplings with lamb and a delicious, garlicky yogurt sauce.

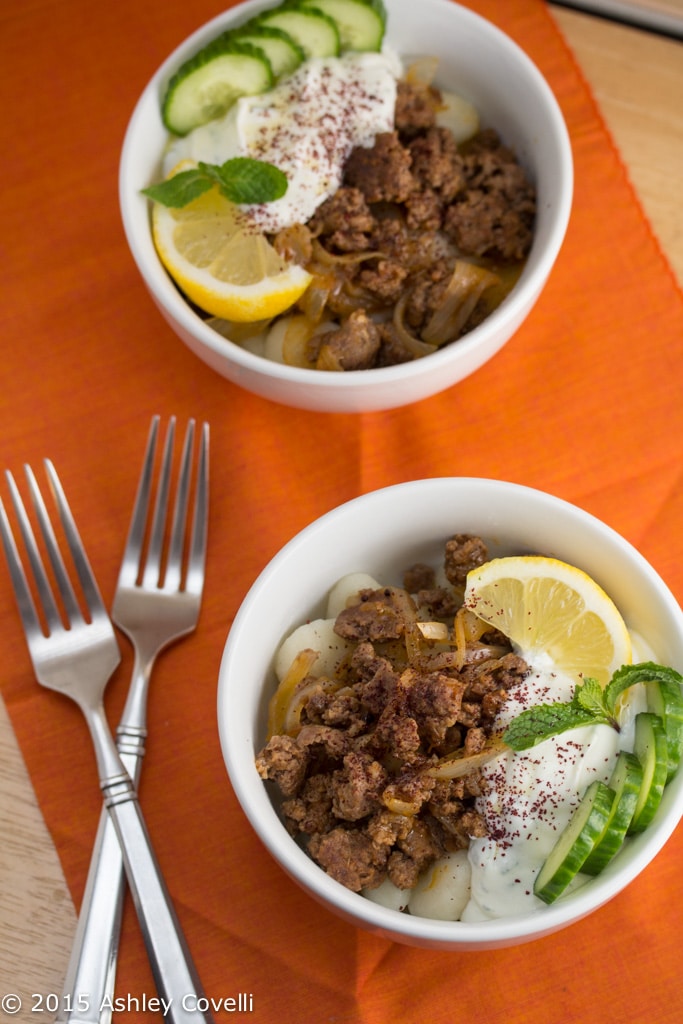
    Tomato Achaar Spiced Lamb Over Gnocchi with Garlicky Mint Yogurt Sauce

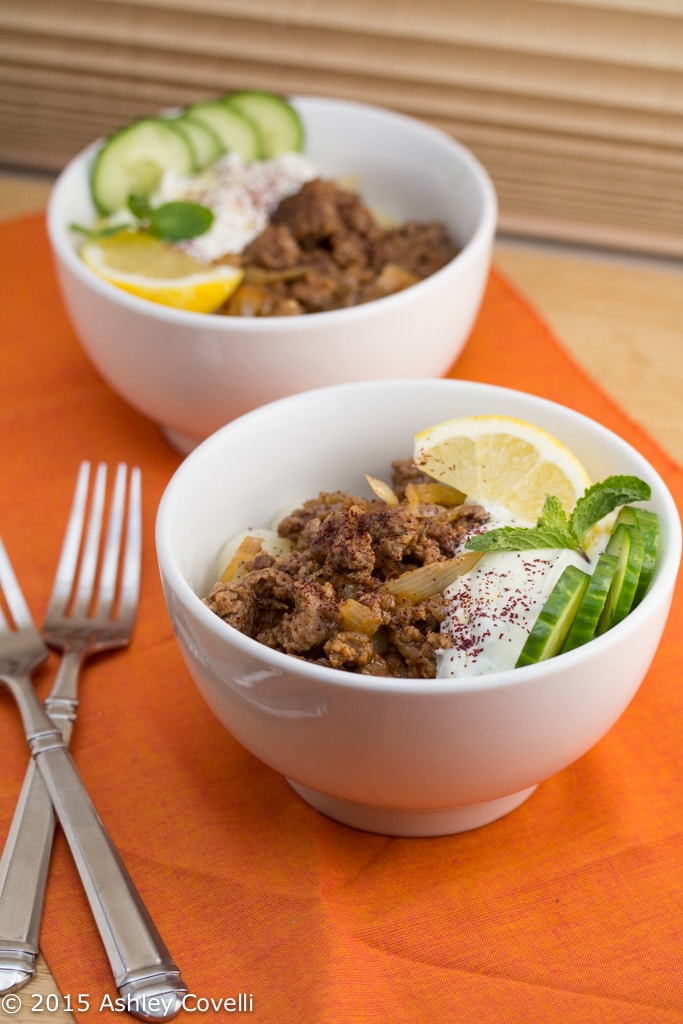
    This meal was inspired by things I had hanging out in my pantry and that delicious Turkish dinner. In lieu of homemade dumplings, I used store bought gnocchi.

    When I was thinking of how to flavor the lamb, I remembered some Tomato Achaar that I had picked up from a local food blogger that I met last year. It added a really rich flavor to the dish, and it was great paired with the garlicky yogurt sauce.

    Tomato Achaar Spiced Lamb Over Gnocchi with Garlicky Mint Yogurt Sauce

    This meal was delicious, and the toppings were exceptionally tasty leftover, stuffed into pita bread. Even better than over the gnocchi! I love finding creative ways to use leftovers and odds & ends around the kitchen. Major success!

    📖 Recipe

    Tomato Achaar Spiced Lamb Over Gnocchi with Garlicky Mint Yogurt Sauce

    Bowls of spiced lamb over gnocchi with yogurt sauce.
    Tomato relish adds Indian flair to this Turkish-inspired meal.
    Big Flavors from a Tiny Kitchen - Ashley Covelli
    No ratings yet
    Print Recipe Pin Recipe
    Servings: 3 -4 servings
    Course: Main Dish
    Cuisine: Turkish
    Prep Time 10 minutes mins
    Cook Time 20 minutes mins
    Total Time 30 minutes mins

    Ingredients
     

    For lamb:
    • 1 pound ground lamb
    • ½ teaspoon kosher salt
    • ¼ teaspoon freshly cracked black pepper
    • 1 small yellow onion thinly sliced
    • 2 tablespoons Tomato Achaar
    • ½ cup low sodium chicken stock
    For sauce:
    • 4 cloves garlic smashed
    • ½ teaspoon kosher salt
    • 1 ½ cups Greek yogurt at room temperature
    • 1 tablespoon freshly squeezed lemon juice
    • 3 tablespoons mint chopped
    To serve:
    • 1 17.6-ounce package gnocchi
    • Sumac
    • Cucumber slices optional
    • Lemon wedges optional
    • Mint sprigs optional

    Instructions
     

    1. Heat a skillet over medium-high heat. Add lamb, ½ teaspoon salt and ¼ teaspoon pepper. Cook, breaking the meat apart with a spoon, until brown all over. Drain excess fat, if needed.
    2. Add onion and achaar and continue to cook until onions start to soften. Add chicken stock and bring to a boil, then lower to a simmer, stirring occasionally, until most of the liquid has cooked out.
    3. While the lamb is cooking, using a mortar and pestle, grind together the garlic and ½ teaspoon of salt until it turns into a thick paste. If you don't have a mortar and pestle, you can smash the garlic and salt together on a cutting board with the side of your knife several times, until it forms a paste. Combine the garlic paste, yogurt, lemon juice and mint in a bowl (or in your mortar, if it's large enough). Set aside.
    4. Bring a large pot of salted water to a boil. Cook gnocchi according to package directions.
    5. To serve, divide gnocchi between bowls. Top with spiced lamb mixture and a few spoons of yogurt sauce. Sprinkle a little sumac over the top of everything, and garnish with cucumber, lemon and mint, if desired.

    Did you make this recipe?

    Leave a comment + star rating below to let people know how it was!

    Creamy Tomato One Pot Pasta

    May 26, 2015 by Ashley 1 Comment

    Creamy Tomato One Pot Pasta

    Reduced fat cream cheese makes this one pot dish extra luxurious without the guilt!

    Quick-cooking meals that only use one pot or pan are so great to keep in your weeknight cooking arsenal. Things like this Single-Skillet Bacon-Rosemary Chicken Thighs with Roasted Tomatoes or this One-Pan Orecchiette with Chickpeas and Olives are great examples of dishes that pack a ton of flavor without making a huge mess in the kitchen.

    When I saw this recipe over on Diethood, I knew it would be perfect for a busy weeknight!

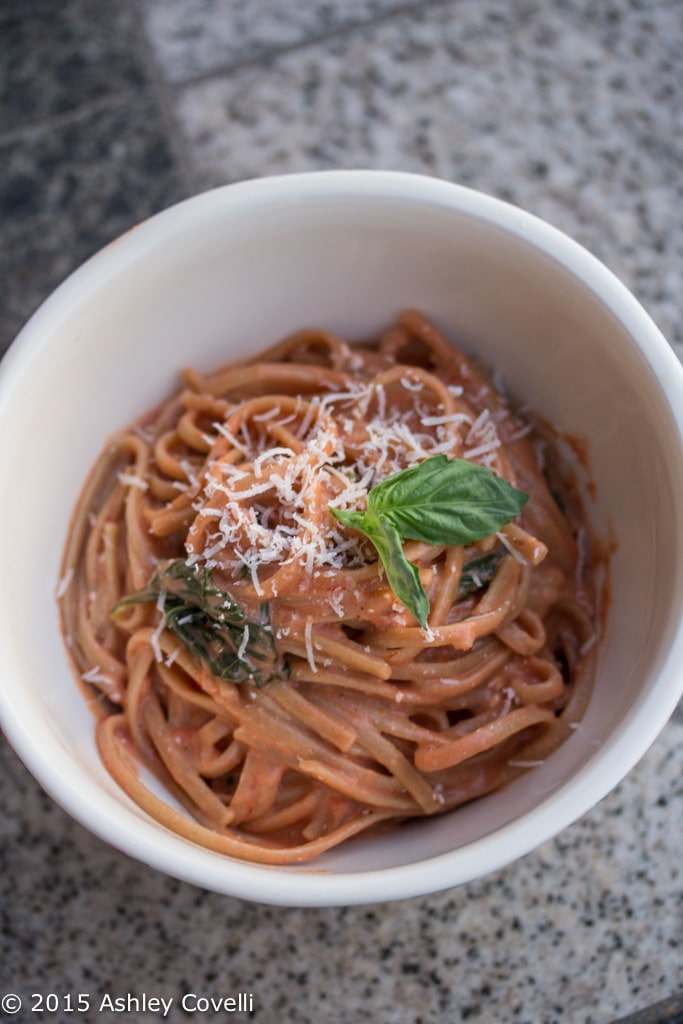
    Creamy Tomato One Pot Pasta

    This pasta was quick and delicious, and so creamy, you'd never guess it was healthy! I love the texture of whole grain pasta, and it really holds onto the sauce well in this dish.

    It was a nice, simple meal that packed a lot of flavor, and my whole family really enjoyed it. I'll definitely be making it again!

    📖 Recipe

    Creamy Tomato One Pot Pasta

    A bowl of creamy tomato pasta with basil on top.
    Reduced fat cream cheese makes this one pot dish extra luxurious without the guilt!
    Diethood
    No ratings yet
    Print Recipe Pin Recipe
    Servings: 6 Servings (1-¼ cups per serving)
    Course: Main Dish
    Cuisine: Italian
    Prep Time 5 minutes mins
    Cook Time 20 minutes mins
    Total Time 25 minutes mins

    Ingredients
     

    • 12- ounces whole grain fettuccine or linguine
    • 2 cups water
    • 2 cups vegetable broth
    • 1 large onion sliced
    • ½- cup fresh basil leaves
    • 3 garlic cloves minced
    • salt and fresh ground pepper to taste
    • 3- ounces ? Less-Fat Cream Cheese
    • 1-½ cups tomato/pasta sauce
    • ¼- cup grated parmesan cheese or to taste

    Instructions
     

    1. In a stockpot, combine pasta, water, vegetable broth, onions, basil leaves, garlic, salt and pepper.
    2. Cover, cook over medium-high heat and bring to a boil.
    3. Remove cover and continue to cook for 10 to 12 minutes, or until pasta is cooked and almost all liquid is absorbed; stirring occasionally.
    4. Remove from heat and stir in cream cheese and tomato sauce; mix until combined.
    5. Stir in grated parmesan cheese; taste for seasonings and adjust accordingly.
    6. Serve immediately.

    Notes

    Recipe by Diethood

    Did you make this recipe?

    Leave a comment + star rating below to let people know how it was!

    Blueberry and Feta Bulgur Salad with Mint Dressing

    May 25, 2015 by Ashley 1 Comment

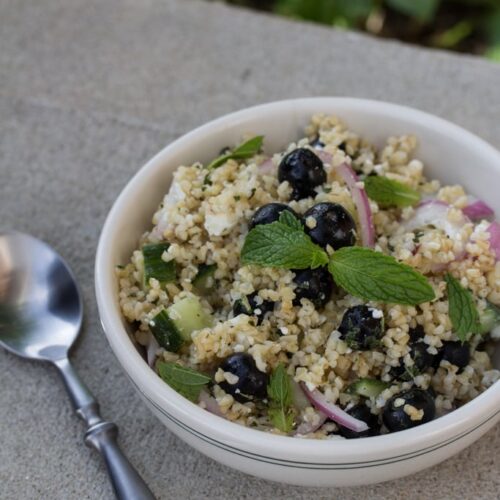
    Blueberry and Feta Bulgur Salad with Mint Dressing

    Sweet blueberries and cool cucumbers add contrast to this quick & easy salad that's perfect for picnic season!

    A friend of mine came over for the morning to hang out at the playground with me and my toddler. I thought it would be nice to pack a picnic lunch for us to enjoy while he ran around and hopefully tired himself out.

    He seriously doesn't appreciate naps as much as I do. Weirdo.

    Anyway, I had this summery salad from the latest issue of Cooking Light, and I knew it would be perfect for our afternoon together.

    A photo posted by Ashley Covelli (@bigflavors) on May 14, 2015 at 10:50am PDT

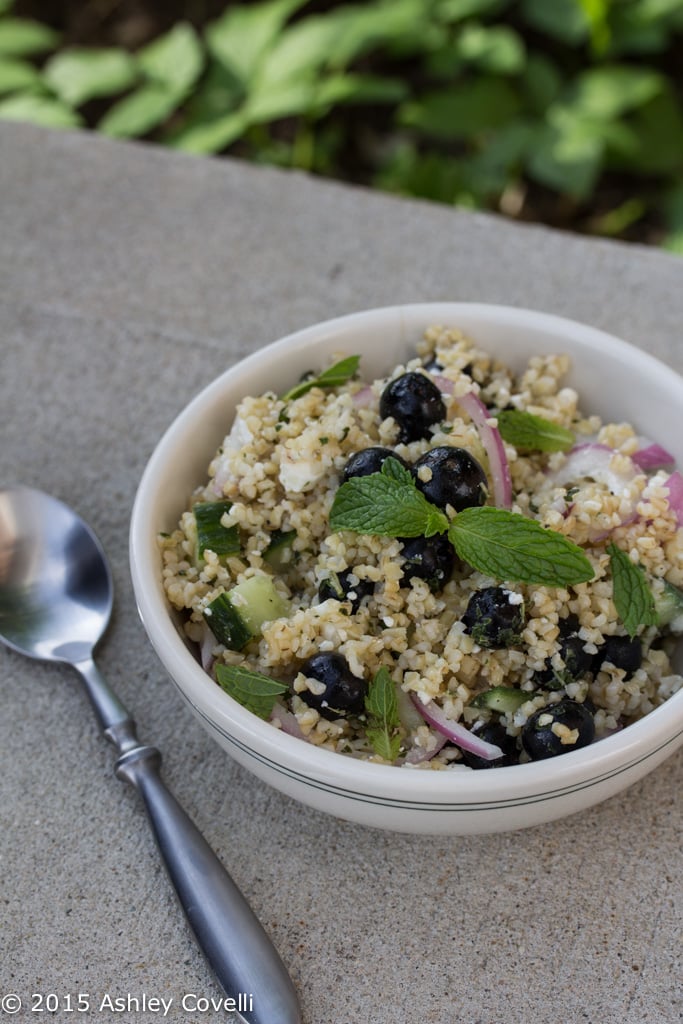
    This salad is awesome! You can prep all of the ingredients while the bulgur cooks in hot water and still have time to spare. I didn't even transfer the bulgur to a mixing bowl, I just took the saucepan off the heat and popped a lid on it. Easy peasy.

    I'm a big fan of raw onions, but not everyone is, so soaking them in cold water for 10 minutes is an excellent way to take the bite off of them.

    The feta is delicious in this recipe, but it would be fine without if you want to keep this vegan-friendly. It would also be good with some sliced steak on top, it you wanted to make it carnivore-friendly. Mmm...

    Blueberry and Feta Bulgur Salad with Mint Dressing

    My major note with this is that if you're eating it as a meal, like we did, it makes about 3 servings. At least it did for us. I packed 2 to-go containers to take to the playground, and what's in the small bowl pictured above is all that was left.

    This salad is absolutely delicious, and would be great for a picnic or as a side dish for a big BBQ dinner. I'll definitely be making this one again!

    📖 Recipe

    Blueberry and Feta Bulgur Salad with Mint Dressing

    A bowl of blueberry and feta bulgur salad with mint.
    Sweet blueberries and cool cucumbers add contrast to this quick & easy salad that's perfect for picnic season!
    Cooking Light
    No ratings yet
    Print Recipe Pin Recipe
    Servings: 8 Servings (¾ cup per serving)
    Course: Main Dish
    Cuisine: American
    Prep Time 10 minutes mins
    Cook Time 25 minutes mins
    Total Time 35 minutes mins

    Ingredients
     

    • 1 cup water
    • 1 cup cracked bulgur wheat
    • ¾ cup mint leaves
    • ⅓ cup extra-virgin olive oil
    • 1 ½ tablespoons fresh lemon juice
    • ⅝ teaspoon kosher salt
    • ½ teaspoon freshly ground black pepper
    • 1 ½ cups diced English cucumber
    • 1 ¼ cups blueberries
    • ¾ cup thinly vertically sliced red onion soaked in cold water for 10 minutes, and drained
    • 2 ounces feta cheese crumbled (about ½ cup)

    Instructions
     

    1. Bring 1 cup water to a boil in a small saucepan.
    2. Combine the boiling water and bulgur in a mixing bowl. Let mixture stand, covered, 25 minutes or until all water is absorbed.
    3. Place the mint, oil, lemon juice, salt, and pepper in a blender; process until pureed.
    4. Use a fork to fluff the bulgur. Add the dressing, cucumber, blueberries, onion, and feta to the grains; toss to combine.

    Notes

    Recipe adapted from Cooking Light June 2015
    VARIATION
    Tomato and Corn Bulgur Salad: Sub basil for the mint, halved cherry tomatoes for the cucumber, fresh corn kernels for the blueberries, and ¼ cup toasted pine nuts for the feta. Sprinkle with 2 cooked and crumbled bacon slices. Serves 8 (serving size: ¾ cup)

    Did you make this recipe?

    Leave a comment + star rating below to let people know how it was!

    Iced Almond-Lemon Loaf Trifle + Yogurt Culture Cookbook Giveaway {CLOSED}

    May 21, 2015 by Ashley 10 Comments

    Iced Almond-Lemon Loaf Trifle

    This post was created in partnership with Stonyfield, OXO and Yogurt Culture. As always, all opinions are 100% my own.

    Plain yogurt is one of my favorite kitchen staples, and it's not just for breakfast! I use it for so many different things, both sweet and savory.

    I was thrilled when I was given the chance to check out Yogurt Culture, an entire book dedicated to all things yogurt. The author, Cheryl Sternman Rule, shares my love for plain yogurt as a blank culinary canvas. Her book is packed with 115 recipes for fun and exciting ways to incorporate yogurt into your diet.

    A photo posted by Ashley Covelli (@bigflavors) on Apr 1, 2015 at 6:27am PDT

    I was really excited to hear that OXO was a sponsor for this campaign, especially when I received a brand new 9" Whisk. Believe it or not, I prefer to use a small whisk over the larger balloon whisk that I own. I had been using a really old, beat up 9" whisk for years, because I never found another one that I felt lived up to it.

    This OXO whisk has a really comfortable, soft handle that fits incredibly comfortably in my hand, and the wires are nice and sturdy. I've had issues with other whisks in the past not holding up well when it's game time. So this is my new favorite!

    Iced Almond-Lemon Loaf Trifle

    This book covers yogurt from all angles, from the history of yogurt around the world, to different yogurt companies and how to read and understand labels and health benefits.

    There are recipes from all over the globe for yogurt-filled snacks, dips, condiments, dressings, beverages, entrées, breads, desserts and more. There's even a section on how to whip up homemade yogurt, Greek (strained) yogurt & one of my favorite Middle Eastern treats, Labneh.

    The photography is gorgeous, and there really is a wealth of information packed in the pages. I'm excited to try out quite a few of her recipes!

    Iced Almond-Lemon Loaf Trifle

    For Easter dessert this year, I chose to make her Iced Almond-Lemon Loaf Cake. I ended up running into a little trouble with the recipe. There was a lot of batter, and it ended up overflowing in the oven while baking. Luckily, I put a sheet pan under my loaf pan, so it didn't make a mess in my oven, but it also didn't turn out to be presentable as a loaf.

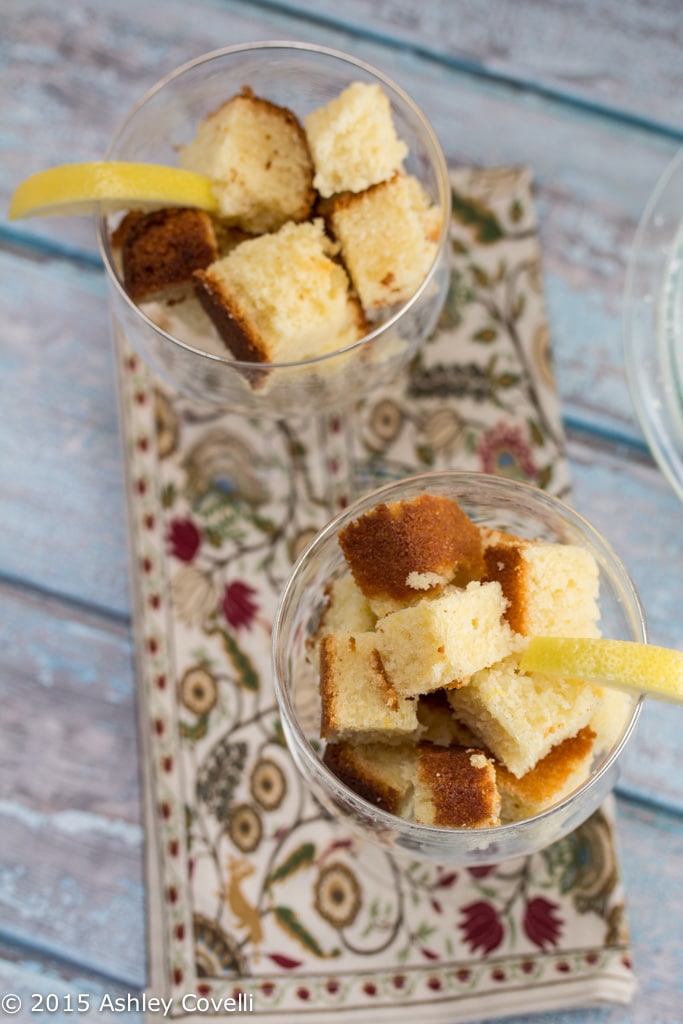
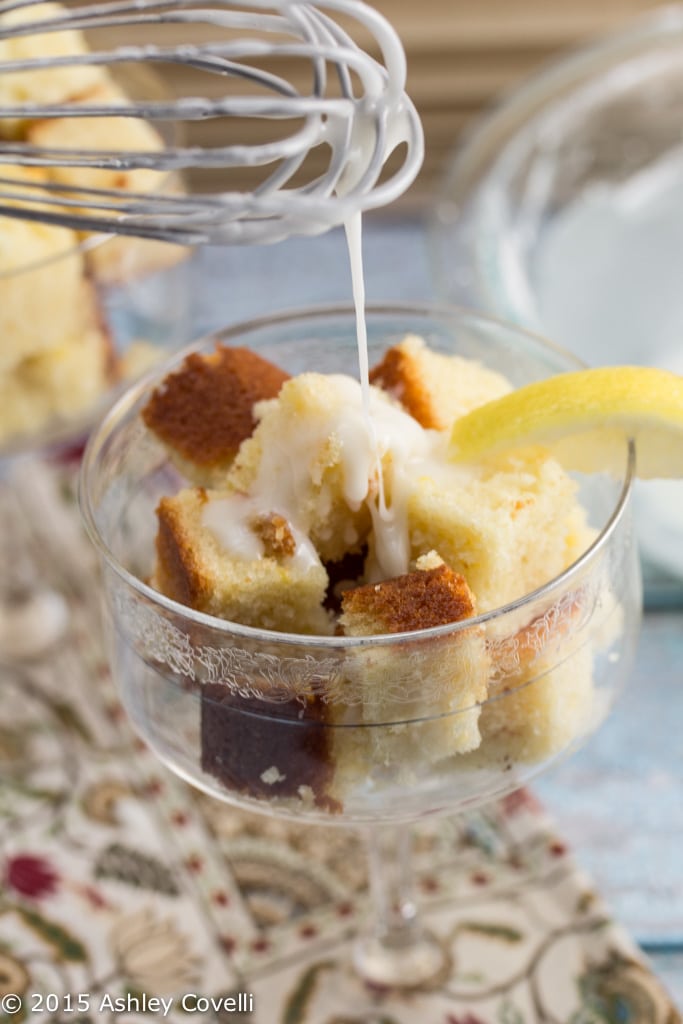
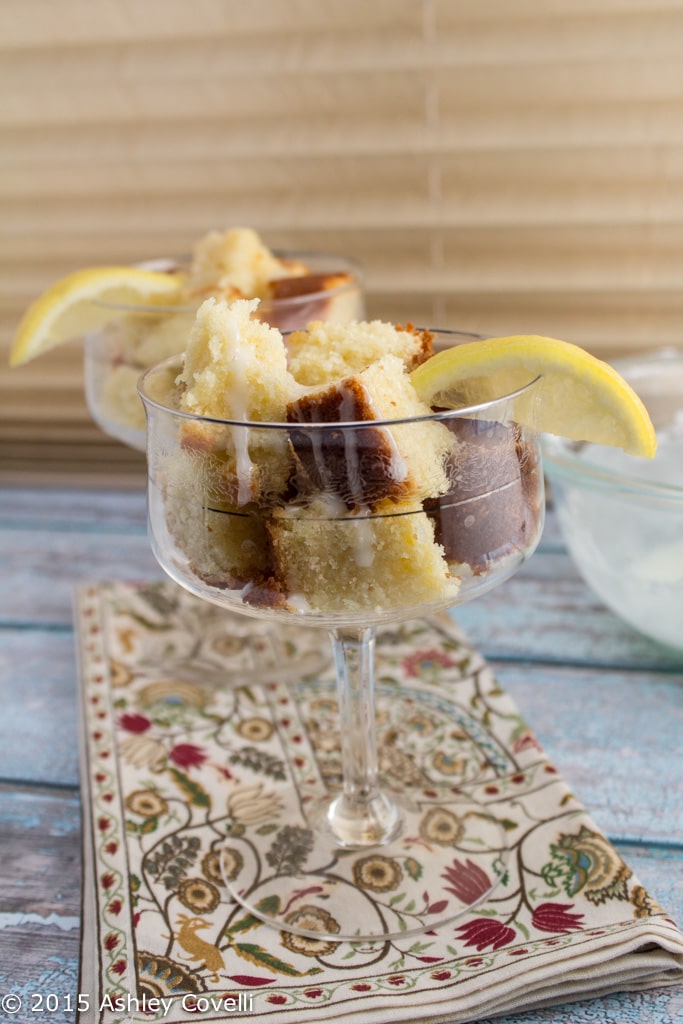
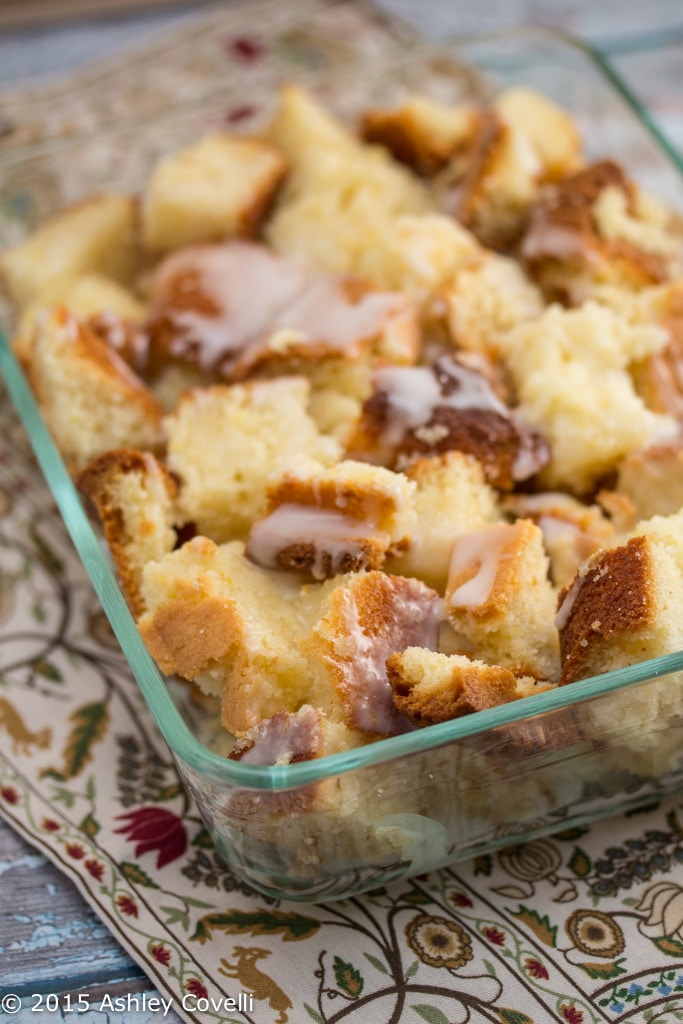
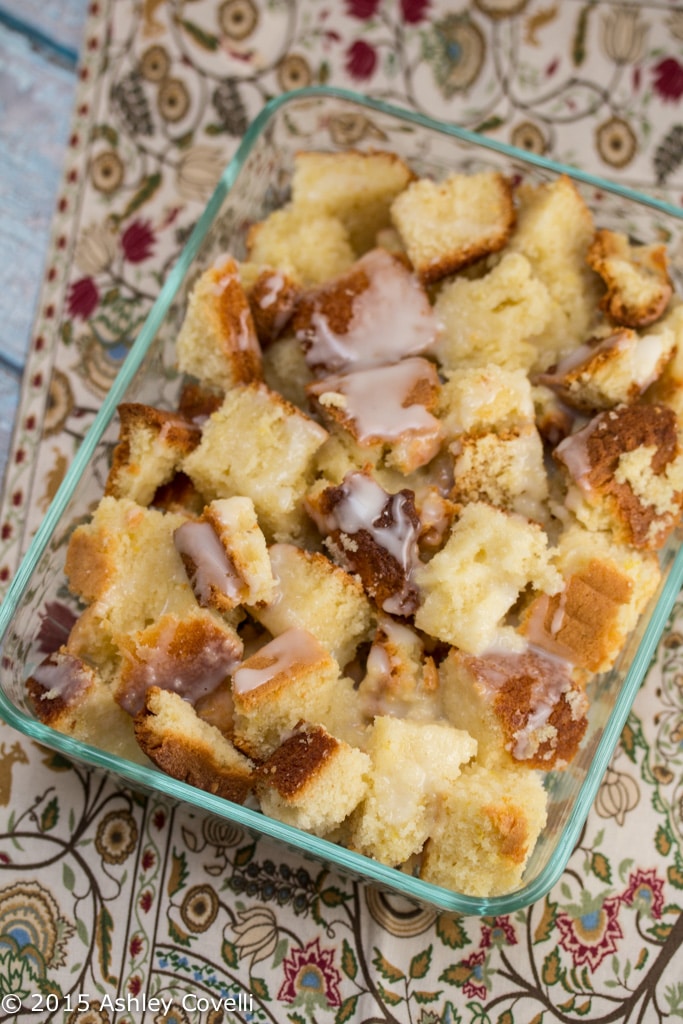
    But I saw it as a challenge - I diced up the cake and drizzled on the tangy, lemony icing all over it and made it into trifles!

    Iced Almond-Lemon Loaf Trifle

    Served in a glass, these trifles looked super elegant. I ended up packing it up in a glass dish to bring to my in-laws' house, and it was a big hit. Nobody cared that it wasn't in cake form.

    This cake was nice and moist from the addition of yogurt, and the almond and lemon flavors worked incredibly well together. Next time, I'd either divide the batter between 2 loaf pans and monitor the baking time, or just fill the pan a bit less and maybe make muffins or a mini loaf or 2 with the extra batter.

    Iced Almond-Lemon Loaf Trifle

    Even though this recipe presented me with a challenge, it still turned out well and I'm anxious to try out other recipes from the book.

    Iced Almond-Lemon Loaf Trifle

    📖 Recipe

    Iced Almond-Lemon Loaf Cake

    Lemon cake cut into cubes in wine glasses.
    Get a double dose of both almond and lemon in this bright, refreshing baked treat.
    Yogurt Culture
    No ratings yet
    Print Recipe Pin Recipe
    Course: Dessert
    Cuisine: American
    Prep Time 20 minutes mins
    Cook Time 50 minutes mins
    Total Time 1 hour hr 10 minutes mins

    Ingredients
     

    For the cake
    • 10 tablespoons 1¼ sticks unsalted butter, at room temperature, plus soft butter for greasing the pan
    • 2 cups all-purpose flour
    • 2 teaspoons baking powder
    • ¼ teaspoon baking soda
    • 1 teaspoon kosher salt
    • ½ cup almond meal
    • Zest of 2 large lemons
    • 1 cup granulated sugar
    • 2 large eggs at room temperature
    • 2 teaspoons pure almond extract
    • 1 cup plain whole-milk or low-fat yogurt not Greek
    For the icing
    • ½ cup confectioners’ sugar
    • 1 tablespoon plain whole-milk or low-fat yogurt not Greek
    • 1 tablespoon fresh lemon juice

    Instructions
     

    1. Prep. Preheat the oven to 350°F, with a rack in the center position. Generously butter a 9-by-5-inch loaf pan.
    2. Mix the batter. Into a large bowl, sift the flour, baking powder, baking soda, and salt. Whisk in the almond meal and lemon zest. In a stand mixer fitted with the paddle, cream the butter and granulated sugar until light and fluffy, about 5 minutes. Reduce the speed to low and add the eggs one at a time, beating well after each addition and scraping down the sides as needed. Beat in the almond extract. Slowly beat in half the dry ingredients, then the yogurt, then the remaining dry ingredients until incorporated. Raise the speed to medium and beat for 1 to 2 minutes to develop some structure.
    3. Bake the cake. Scrape the batter into the prepared pan and smooth the top. Bake until risen and lightly browned and a skewer inserted in the center comes out clean, 50 to 60 minutes. Cool in the pan on a rack for 15 minutes. Slide a knife around the perimeter and invert the cake onto the rack. Cool completely, then flip right side up.
    4. Ice the cake. Sift the confectioners’ sugar into a medium bowl. Whisk in the yogurt and then the lemon juice, 1 teaspoon at a time, until the icing is smooth, thick, and drips slowly from the whisk. Wave the whisk over the cake to drizzle lines of icing, or scrape the icing over the cake and smooth with an offset spatula.
    5. Store. Once the icing firms, cover the cake with plastic wrap. It can be kept at room temperature for up to 48 hours, or covered with a layer of foil and refrigerated for up to 5 days.

    Notes

    Recipe from Yogurt Culture by Cheryl Sternman Rule

    Did you make this recipe?

    Leave a comment + star rating below to let people know how it was!

    Want to win your own copy of Yogurt Culture, along with a stash of Stonyfield yogurt coupons? To enter to win, leave a comment below telling me your favorite way to use yogurt in the kitchen. The contest will close on Friday, May 29, 2015 at 12 noon (Eastern Standard Time). One winner will be chosen via random.org and will be contacted via email to get mailing information. Prize will be shipped by the sponsor. U.S. residents only. Good luck, everyone!

    UPDATE - The winner has been selected via random.org - CONGRATS to 1froglegs!

    Balsamic Roasted Tomato Caprese Pasta Salad

    May 20, 2015 by Ashley 21 Comments

    Balsamic Roasted Tomato Caprese Pasta Salad

    Tossing sweet, garlicky balsamic-and-basil roasted tomatoes with pasta and fresh mozzarella is a fun spin on a classic Caprese salad that's perfect for picnic season!

    I go to monthly potlucks with a group of moms and kids that I met a few years ago, and I'm always trying to think up something new and exciting to bring.

    It can be tricky because I don't want to make something that the kids won't touch, but I also don't want to make something totally boring. So I thought that wagon wheel pasta was a surefire way to keep kids and grown-ups alike interested in my contribution!

    Balsamic Roasted Tomato Caprese Pasta Salad

    This pasta salad takes the flavors of a classic Caprese salad and mixes them with the balsamic roasted tomato sauce from one of my favorite pasta recipes for a bold, flavorful addition to any picnic spread.

    I was planning to use bocconcini and cut them in half, but then I saw the most adorable little perlini mozzarella, and decided to go with that instead. Cooling the pasta salad down before adding the mozzarella in helps ensure that these little bites of cheese don't melt before heading into the refrigerator.

    Balsamic Roasted Tomato Caprese Pasta Salad

    I had a few partial boxes of pasta on hand, so I did some math to add them to the boiling water in stages to make sure they'd all be cooked al dente.

    I actually really liked the contrast between the wagon wheels and the 2 types of shells. It's a great way to use up those odd amounts of pasta that most people have hanging around the kitchen!

    This pasta salad was a HUGE hit, and it made a ton! I sprinkled a little more fresh basil on at the end, just to brighten it up a bit. I'll definitely be making this one again and again.

    📖 Recipe

    Balsamic Roasted Tomato Caprese Pasta Salad

    Overhead view of balsamic roasted tomato Caprese pasta salad.
    Tossing sweet, garlicky balsamic-and-basil roasted tomatoes with pasta and fresh mozzarella is a fun spin on a classic Caprese salad that's perfect for picnic season!
    Big Flavors from a Tiny Kitchen - Ashley Covelli
    No ratings yet
    Print Recipe Pin Recipe
    Servings: 8 servings
    Course: Side Dish
    Cuisine: Italian
    Prep Time 10 minutes mins
    Cook Time 40 minutes mins
    Total Time 50 minutes mins

    Ingredients
     

    • 2 pounds grape or cherry tomatoes preferably multi-colored
    • 2 cloves garlic minced
    • ¼ cup fresh basil roughly chopped
    • ¼ cup olive oil
    • ¼ cup balsamic vinegar
    • ½ teaspoon kosher salt
    • ¼ teaspoon freshly cracked black pepper
    • 1 pound dry pasta I used a mix of shells and wagon wheels
    • 8 ounces fresh perlini mozzarella drained*

    Instructions
     

    1. Preheat oven to 400°F. Place tomatoes, garlic, basil, olive oil, balsamic vinegar, salt & pepper in a 9x13 (3 quart) baking dish and toss to combine. Bake for 20 minutes, stir, and bake for another 15-20 minutes, until the tomatoes are nice and soft and melt when pressed gently with a spoon.
    2. Meanwhile, bring a large pot of salted water to a boil. Cook pasta to al dente, according to package directions. Drain well. If the pasta is finished before the tomato sauce is ready, drizzle in a little olive oil and stir so the pasta doesn't stick. Place in a large bowl.
    3. Once the tomatoes are finished, mix them into the drained pasta and allow to cool to just above room temperature, stirring occasionally.
    4. Once cool, mix in the drained mozzarella and refrigerate until ready to serve.

    Notes

    *You can substitute bocconcini, halved, or a big piece of mozzarella, diced, if you can't find perlini.

    Did you make this recipe?

    Leave a comment + star rating below to let people know how it was!

    Green Olive Meatloaf

    May 19, 2015 by Ashley 3 Comments

    Green Olive Meatloaf

    Green olives add a fun twist to this comfort food classic.

    I saw this meatloaf over on Experimental Epicurean and thought it looked like a nice change of pace from traditional meatloaf.

    This was super easy to put together, which made it perfect for a busy weeknight.

    Green Olive Meatloaf

    My loaf didn't come out looking as pretty as the one from the original post - it was a little crumbly. I also think that the olives I picked up from the Farmers Market were a bit too potent in this recipe. I think the little ones from the regular grocery store would have worked out better, and maybe using unsalted saltine crackers. But a little extra ketchup helped balance that out, and we really enjoyed it.

    I served it with some leftover rice and green peas to round out the meal.

    📖 Recipe

    Green Olive Meatloaf

    Green Olive Meatloaf
    Green olives add a fun twist to this comfort food classic.
    Experimental Epicurean
    5 from 1 vote
    Print Recipe Pin Recipe
    Servings: 6 servings
    Course: Main Dish
    Cuisine: Italian
    Prep Time 10 minutes mins
    Cook Time 1 hour hr
    Total Time 1 hour hr 10 minutes mins

    Ingredients
     

    • 1 lb ground beef
    • 1 large egg
    • ½ teaspoon salt
    • ¼ teaspoon ground black pepper
    • 2 teaspoons Dijon mustard
    • 2 teaspoons Worcestershire sauce
    • 8 saltine crackers crushed
    • 1 ½ cups chopped green olives

    Instructions
     

    1. Heat oven to 375 °F. Add meat to a large bowl along with the egg, salt, pepper, mustard, Worcestershire sauce, crackers, and olives.
    2. Using your hands, mix the ingredients together until well mixed.
    3. With wet hands, pat mixture into a 9×5-inch loaf shape on a foil lined and non-stick spray coated baking sheet.
    4. Bake until crisp on top and cooked through, about 1 hour.
    5. Cool slightly and serve with ketchup.

    Notes

    Recipe by Experimental Epicurean

    Did you make this recipe?

    Leave a comment + star rating below to let people know how it was!

    The Best Banana Bundt Cake

    May 18, 2015 by Ashley 4 Comments

    The Best Banana Bundt Cake

    Yogurt helps keep this banana-packed bundt cake nice and tender. Bonus: it tastes even better leftover!

    With a toddler in the house, I always have a stash of bananas on hand. They're great for snacking and especially great for baking! So when I saw a bunch getting extra ripe, I knew what I had to do...

    The Best Banana Bundt Cake

    This is Dorie Greenspan's banana cake recipe, and it is FABULOUS! It's nice and tender from a mix of super ripe mashed bananas and yogurt. I used low fat yogurt, but I'd love to try the sour cream variation as well.

    As tradition would have it, I had a tough time getting this cake out of my bundt pan. I think next time I'll cool it completely in the pan before flipping it out. I really greased the pan well, so I'm not 100% sure how this happened:

    A photo posted by Ashley Covelli (@bigflavors) on May 2, 2015 at 5:44am PDT

    Argh.

    Anyway, this cake tasted better and better the longer it sat in the fridge (not that it lasted too long)! I didn't make the glaze and it really didn't need it. I'm definitely curious about it though, so I may give it a try next time.

    And there will be a next time!

    The Best Banana Bundt Cake

    📖 Recipe

    The Best Banana Bundt Cake

    Slices of The Best Banana Bundt Cake on plates.
    Yogurt helps keep this banana-packed bundt cake nice and tender. Bonus: it tastes even better leftover!
    Dorie Greenspan
    No ratings yet
    Print Recipe Pin Recipe
    Servings: 1 bundt cake or 12 muffins
    Course: Dessert
    Cuisine: American
    Prep Time 15 minutes mins
    Cook Time 1 hour hr 5 minutes mins
    Total Time 1 hour hr 20 minutes mins

    Ingredients
     

    • 3 cups all-purpose flour
    • 2 teaspoons baking soda
    • ½ teaspoon salt
    • 8 ounces unsalted butter at room temperature (1 cup or 2 sticks)
    • 2 cups sugar
    • 2 teaspoons pure vanilla extract
    • 2 large eggs preferably at room temperature
    • about 4 very ripe banana mashed (1 ½ - 1 ¾ cups)
    • 1 cup plain yogurt or 1 cup sour cream or a combination of the two

    Instructions
     

    1. Center a rack in the oven and preheat to 350°F Generously butter a 9- to 10-inch (12 cup) Bundt pan. (If you use a silicone pan there's no need to butter it.) Don't place the pan on a baking sheet - you want the oven's heat to circulate through the Bundt's inner tube.
    2. Whisk the flour, baking soda and salt together.
    3. Working with a stand mixer, preferably fitted with a paddle attachment, or with a hand mixer in a large bowl, beat the butter until creamy. Add the sugar and beat at medium speed until pale and fluffy. Beat in the vanilla, then add the eggs one at a time, beating for about 1 minute after each egg goes inches Reduce the mixer speed to low and mix in the bananas. Finally, mix in half the dry ingredients (don't be disturbed when the batter curdles), all the sour cream and then the rest of the flour mixture. Scrape the batter into the pan, rap the pan on the counter to debubble the batter and smooth the top.
    4. Bake for 65-75 minutes, or until a thin knife inserted deep into the center of the cake comes out clean. Check the cake after about 30 minutes - if it is browning too quickly, cover it loosely with a foil tent. Transfer the cake to a rack and cool for 10 minutes before unmolding onto the rack to cool to room temperature. If you have time, wrap the cooled cake in plastic and allow it to sit overnight before serving - it's even better the next day.
    5. OPTIONAL LEMONY WHITE ICING: Sift ¾ cup confectioners' sugar into a bowl and squeeze in enough fresh lemon juice (start with 2 teaspoons and add more by drops) to make an icing thin enough to drizzle down the Bundt's curves.
    6. MUFFIN OPTION: Halve the recipe. You can add nuts or chocolate chips. Bake 28-32 minutes. Yields 12 muffins.

    Notes

    Recipe by Dorie Greenspan via Food.com

    Did you make this recipe?

    Leave a comment + star rating below to let people know how it was!

    One Pot Cheesy Turkey Taco Chili Mac

    May 14, 2015 by Ashley Leave a Comment

    One Pot Cheesy Turkey Taco Chili Mac

    A quick, homemade taco seasoning blend amps up the flavor in this comforting one pot meal.

    Things unintentionally got a little quiet here on my blog for the past week. We took a road trip to Indiana to visit my family over Mother's Day and I ended up getting really sick, and... let's just say that food was the LAST thing on my mind (that's how you know I'm REALLY sick haha!).

    This one pot meal from Gina over at Skinnytaste was a big hit at my house a few weeks ago.

    One Pot Cheesy Turkey Taco Chili Mac

    There's just something about only having to dirty ONE pot while making a big meal that is perfect for my family lately. This one takes a bit of time and effort, but the results are absolutely delicious!

    This pasta makes enough to feed an army, and leftovers are nice for quick lunches during the week. I liked the addition of both refried and pink beans in this.

    Just be cautious when you go to dive into your first bite - this is piping hot straight out of the pan. I was tempted to throw some sour cream on it to cool it off so I could eat it quicker, but I held out and it was totally worth it. Delicious, comforting and healthy. What could be better?

    One Pot Cheesy Turkey Taco Chili Mac

    📖 Recipe

    One Pot Cheesy Turkey Taco Chili Mac

    A close-up of a spoonful of chili mac.
    A quick, homemade taco seasoning blend amps up the flavor in this comforting one pot meal.
    Skinnytaste
    No ratings yet
    Print Recipe Pin Recipe
    Servings: 8 Servings (1 generous cup per serving)
    Course: Main Dish
    Cuisine: Italian
    Prep Time 10 minutes mins
    Cook Time 25 minutes mins
    Total Time 35 minutes mins

    Ingredients
     

    For the homemade taco seasoning:
    • 1 ½ teaspoon garlic powder
    • 1 ½ teaspoon cumin
    • 1 teaspoon kosher salt
    • 1 ½ teaspoon chili powder
    • 1 ½ teaspoon paprika
    • ½ teaspoon oregano
    For the Chili:
    • 1.3 lb 93% lean ground turkey
    • 1 medium onion chopped
    • 3 cloves minced garlic
    • 1 red bell pepper chopped
    • 10 oz can rotel tomatoes with green chilies
    • 14.5 oz can pink or red beans drained
    • 8 oz tomato sauce
    • ½ can 8 oz fat-free refried beans
    • 1 15 oz can reduced sodium chicken broth*
    • 1 ¾ cups water
    • 8 oz DeLallo Gluten Free shells or DeLallo whole wheat
    • ¾ cup part-skim shredded sharp cheddar cheese*
    • 2 tablespoon fresh cilantro chopped
    • 2 tablespoon chopped scallions
    • *Check labels for gluten-free

    Instructions
     

    1. Heat a large Dutch oven or pot with a fitted lid over medium-high heat and spray with oil, brown the turkey breaking it up with a wooden spoon as it cooks. When cooked through, add the onions, garlic, pepper and taco seasoning; cook 2-3 minutes.
    2. Add the canned tomatoes, beans, tomato sauce, refried beans, chicken broth and water. Bring to a boil, cover and simmer about 15 minutes. Adjust salt to taste.
    3. Stir in the uncooked pasta and simmer uncovered over medium heat until al dente, about 6 minutes or according to package directions.
    4. Remove the pot from heat and top with the cheese, cover and let sit for about 2-3 minutes, until the cheese melts.
    5. Serve immediately garnished with fresh cilantro and scallions.

    Notes

    Recipe by Skinnytaste

    Did you make this recipe?

    Leave a comment + star rating below to let people know how it was!

    Vietnamese "Spaghetti" + Meatballs

    May 4, 2015 by Ashley 10 Comments

    Vietnamese "Spaghetti" + Meatballs

    Fresh herb-studded meatballs are piled on a bed of rice noodles then topped with quick pickled veggies, peanuts and chili sauce.

    Is Meatball Monday a thing? Because it totally should be. No disrespect to the Meatless Monday movement, of course.

    But I made these on a Monday and WOW did they hit the spot!

    Vietnamese "Spaghetti" + Meatballs

    I love the contrast of the cold noodles with the warm meatballs, and cool pickled topping. These meatballs are jam packed with fresh flavors, and they come together pretty quickly.

    You can bring the pasta water to a boil and make the quick pickled veggies while the meatballs are baking. Then once the meatballs come out, drop the rice noodles in and get your garnishes ready.

    This should serve 3-4 easily, but me and my husband gobbled up quite a few meatballs each, so there were only a few leftover for lunch later in the week. Dang.

    Vietnamese "Spaghetti" + Meatballs

    Thai basil would be great here, but I can't always find that easily here, so I used a combination of basil and mint instead. But by all means, if you can get your hands on Thai basil, use that!

    This is a light and refreshing, yet satisfying meal that's bursting with flavor. We thoroughly enjoyed every bite of this one!

    📖 Recipe

    Vietnamese “Spaghetti” + Meatballs

    Plate of rice noodles topped with meatballs, fresh herbs, and lime.
    Fresh herb-studded meatballs are piled on a bed of rice noodles then topped with quick pickled veggies, peanuts and chili sauce.
    Big Flavors from a Tiny Kitchen - Ashley Covelli
    No ratings yet
    Print Recipe Pin Recipe
    Servings: 4 servings
    Course: Main Dish
    Cuisine: Vietnamese
    Prep Time 15 minutes mins
    Cook Time 30 minutes mins
    Total Time 45 minutes mins

    Ingredients
     

    For meatballs:
    • 1 pound ground beef I used 85% lean grass-fed organic
    • 2 tablespoons hoisin sauce
    • 1 tablespoon low sodium soy sauce
    • 3 cloves garlic minced
    • 1 tablespoon fresh basil finely chopped
    • 1 tablespoon fresh mint finely chopped
    • 1 tablespoon fresh parsley finely chopped
    • 1 green onion finely chopped
    • 1 egg beaten
    • ¼ cup breadcrumbs
    • ½ teaspoon sesame oil
    • ½ teaspoon fish sauce
    • 1 teaspoon fresh ginger peeled and grated or minced
    For pickled veggies:
    • 2 tablespoons honey
    • 2 tablespoons unseasoned rice vinegar
    • 1 teaspoon lime zest
    • 1 tablespoon freshly squeezed lime juice
    • ½ teaspoon fish sauce
    • ½ teaspoon fresh ginger peeled and grated or minced
    • ½ teaspoon sesame oil
    • 1 English cucumber sliced into ribbons with a julienne peeler, vegetable peeler or spiralizer (about 1 ½ cup total)
    • 4 carrots sliced into ribbons with a julienne peeler, vegetable peeler or spiralizer (about 1 ½ cup total)
    • 2 green onions thinly sliced
    For serving:
    • 1 pound dried rice noodles
    For garnish:
    • Sriracha chili sauce
    • Peanuts roughly chopped
    • Lime wedges
    • Fresh basil roughly chopped
    • Fresh mint roughly chopped
    • Fresh parsley roughly chopped

    Instructions
     

    1. Preheat oven to 350°F. Spray a baking sheet with oil.
    2. Gently crumble ground beef into a large bowl. Add remaining meatball ingredients (hoisin through ginger) and blend it all together with your hands, being careful not to overmix.
    3. Form into 1 ½-inch balls, rolling gently with slightly wet hands, and place in rows on the oiled baking sheet. Leave a little space in between each meatball - don't crowd them together. Bake meatballs for 20-25 minutes, or until cooked through to your liking.
    4. While the meatballs are baking, in a medium bowl, whisk together honey, rice vinegar, lime zest and juice, fish sauce, ginger and sesame oil. Add in the cucumber, carrots and green onions and toss to coat.
    5. Fill a large pot with cold water and bring to a boil. Cook the rice noodles according to package directions. Drain the noodles, rinse with cold water and drain well. If you still have some time before the meatballs finish cooking, you can place the noodles back into the pot and toss a little sesame oil in with them to keep them from sticking together.
    6. To serve, place a pile of noodles on each plate. Top with meatballs and pickled vegetables, pouring extra pickling liquid over the tops of each plate, if desired. Garnish with Sriracha sauce to taste, a sprinkling of peanuts, lime wedges and more fresh herbs. Enjoy!

    Notes

    You may need to use a spatula to get the meatballs to come off of the baking sheet easily. I haven't tried lining the baking sheet, but that may help if you have problems with them sticking.
    I used a scoop to get equal-sized meatballs and got 17 from this recipe.

    Did you make this recipe?

    Leave a comment + star rating below to let people know how it was!

    Mimosa Muffins

    May 3, 2015 by Ashley 2 Comments

    Mimosa Muffins

    Sparkling wine helps keep these orange-scented muffins beautifully tender. Cheers to brunch time!

    One of my Supper Club's favorite themes has been brunch. In fact, it's one of the only themes we have repeated over the years.

    A few years back, one of the members made these muffins, and I've been craving them ever since.

    Mimosa Muffins

    This muffin recipe is so light and refreshing. There's orange zest both in the muffin batter and in the glaze.

    I used Prosecco instead of Champagne for the batter, and it worked out beautifully. I also needed a bit more orange juice to loosen up the powdered sugar in the glaze.

    Mimosa Muffins

    I made these muffins when we had some friends over for a big brunch party a few weekends back. I also made one of our favorites: Spinach, Green Onion & Smoked Gouda Quiche and a double batch of Bircher Muesli with lots of fresh fruit and other optional toppings.

    A big pot of freshly brewed coffee from one of my favorite local roasters finished off our meal. It was a big hit with everyone, and I'm looking forward to making these muffins again and again!

    Brunch Spread

    📖 Recipe

    Mimosa Muffins

    Side view of mimosa muffins.
    Sparkling wine helps keep these orange-scented muffins beautifully tender. Cheers to brunch time!
    No. 2 Pencil
    No ratings yet
    Print Recipe Pin Recipe
    Servings: 12 Muffins
    Course: Breakfast
    Cuisine: American
    Prep Time 10 minutes mins
    Cook Time 20 minutes mins
    Total Time 30 minutes mins

    Ingredients
     

    For the muffins:
    • 2 ½ cups of all-pupose flour
    • ½ cup of sugar
    • 4 teaspoons of baking powder
    • ½ teaspoon of kosher salt
    • zest of two large oranges – 1 teaspoon reserved for glaze
    • 1 cup of champagne sparkling wine
    • 1 stick of melted butter
    • 2 large eggs
    • 1 teaspoon of pure vanilla extract
    For the glaze:
    • 1 cup of powdered sugar
    • 2 Tablespoons of freshly squeezed orange juice
    • 1 teaspoon of orange zest

    Instructions
     

    1. Preheat oven to 400 degrees and line cupcake pan, or spray with non stick cooking spray.
    2. Combine flour, sugar, baking powder and salt in a large mixing bowl. Add zest from two oranges and whisk into dry ingredients. Don’t forget to reserve a teaspoon of zest for the glaze. In a separate smaller bowl, combine melted butter, champagne, eggs and vanilla and stir together. Then add wet mixture to dry ingredients and stir, just until combined.
    3. Divide batter evenly among the cupcake pan, and bake for about 18 minutes, or until light golden brown.
    4. Remove muffins from oven, and prepare glaze while they begin to cool. Spoon glaze over muffins while they are still warm, not hot. If the muffins are very hot, the glaze will run off too quickly.

    Notes

    Recipe from No. 2 Pencil via Inspired by Charm

    Did you make this recipe?

    Leave a comment + star rating below to let people know how it was!

    Dressy Deviled Eggs

    May 1, 2015 by Ashley 18 Comments

    Dressy Deviled Eggs

    Sweet, tangy and addictive - I've put a modern twist on my Grandma's classic deviled eggs. Guaranteed to be a hit at any party!

    I've been making my Grandma's Deviled Eggs for years now. They're always a hit at parties, and I could eat a whole tray by myself. In fact, I usually make 2 trays of them and they still disappear before anything else.

    Dressy Deviled Eggs

    But I always made her deviled eggs by sight and taste, without really measuring things. And I really wanted to make sure that other people could recreate this deliciousness in their own homes. So I set out to actually measure the ingredients, plus dress 'em up a bit for this year's Easter festivities.

    One major thing that I changed this time around was to use real mayonnaise instead of Miracle Whip Light. I had to tweak the other ingredients a bit because of that substitution, including adding a bit of garlic powder.

    It. Worked. Beautifully.

    Dressy Deviled Eggs

    I usually use a small cookie scoop to get nice, round tops for my filling, but this year I decided to pipe it into the eggs. I used my OXO silicone decorating bottle and it worked out really well - much cleaner than using a pastry bag. Just make sure to smash all the lumps out of the yolks to prevent anything from getting stuck in the tip. That ain't pretty.

    I really liked how it looked having the cornichon garnish on just half of the eggs, but obviously feel free to pickle as many of 'em as you want!

    Also, I always cook 9 eggs instead of 8 to make 16 finished egg halves for a few reasons: sometimes one egg just does not want to peel easily, and sometimes you're left with not quite enough yolk to fill all of the eggs nicely. This way, you have a spare egg and a little extra filling to work with.

    Plus, QC is the perfect way to use up that 9th egg 🙂

    Dressy Deviled Eggs

    Just make sure you don't accidentally garnish with nutmeg instead of paprika like my Grandma did one year. That is not a tasty tweak!

    📖 Recipe

    Dressy Deviled Eggs

    Close-up of a deviled egg topped with a cornichon.
    Sweet, tangy and addictive - I've put a modern twist on my Grandma's classic deviled eggs. Guaranteed to be a hit at any party!
    Big Flavors from a Tiny Kitchen - Ashley Covelli (Adapted from Grandma Henderson)
    No ratings yet
    Print Recipe Pin Recipe
    Servings: 16 -18 egg halves
    Course: Appetizer
    Cuisine: American
    Prep Time 20 minutes mins
    Cook Time 15 minutes mins
    Total Time 35 minutes mins

    Ingredients
     

    • 9 large eggs
    • 1 ¼ teaspoons kosher salt divided
    • 2 ½ teaspoons white vinegar divided
    • 2 teaspoons yellow mustard
    • 1 teaspoon sugar
    • 3 tablespoons mayonnaise
    • ⅛ teaspoon freshly cracked black pepper
    • ⅛ teaspoon garlic powder
    • ⅛ teaspoon paprika
    • 8 cornichons halved lengthwise and pat dry

    Instructions
     

    1. Place eggs in a single layer on the bottom of a medium saucepan (you'll need one with a tight-fitting lid). Fill with cold water, covering the eggs by at least one inch. Add 1 teaspoon salt and ½ teaspoon vinegar. Bring to a rolling boil over high heat. Put the lid on, turn off the heat and let sit for 12 minutes.
    2. Carefully pour the boiling water into the sink and fill the pot with cold water. Let the eggs sit until they cool off enough to handle. You can change out the water with fresh cold water a few times or add a few ice cubes to speed up this process if desired.
    3. Peel the eggs, rinse them under cold water to remove any bits of shell that may be hanging on and pat them dry. Cut each egg in half lengthwise. Pop the yolks out into a medium bowl and place the whites on a platter, cut-side up.
    4. To the bowl of cooked egg yolks, add remaining ¼ teaspoon of salt, 2 teaspoons vinegar, mustard, sugar, mayonnaise, pepper and garlic powder. Mash it all together with a fork until smooth, making sure to stir well so everything is evenly incorporated. Taste for seasoning and add a little more salt/vinegar/mustard/sugar as desired.
    5. Scoop or pipe the yolk mixture into the egg whites, filling each one evenly. Garnish with a sprinkle of paprika and press a cornichon slice into the yolk on half of the eggs.

    Notes

    I always cook 9 eggs instead of 8 to make 16 finished egg halves for a few reasons: sometimes one egg just does not want to peel easily, and sometimes you're left with not quite enough yolk to fill all of the eggs nicely. This way, you have a spare egg and a little extra filling to work with. Plus, QC is the perfect way to use up that 9th egg 🙂

    Did you make this recipe?

    Leave a comment + star rating below to let people know how it was!

    Big Flavors from a Tiny Garden Volume 2

    April 27, 2015 by Ashley Leave a Comment

    Earth Day Garden 2015

    This post was created in partnership with Stonyfield and High Mowing Organic Seeds. As always, all opinions are 100% my own.

    For the past several years, my modest patio container garden has grown a lot of the fresh herbs that I cook with during the warmer months, along with a few vegetables and oodles of tiny tomatoes.

    I usually buy seedlings from my favorite local garden center, but last year I branched out into planting my own seeds, too. Some of my veggies ended up being a bit small, but it was really rewarding to grow them from seeds. My toddler loves helping me plant and care for our tiny garden, so I like to make sure he's involved in the whole process from planning to planting to care-taking and finally harvesting.

    Earth Day Garden 2015

    (Side note: I can't even handle how much bigger my little guy got since I took this same shot a year ago!)

    This year, High Mowing sent me an awesome assortment of their organic seeds to kickstart my garden for 2015. I'll admit - I was a little intimidated, but I figure that with a mix of these seeds and some seedlings that I picked up from the garden center, my garden will be up running in no time!

    And I love that their company is so committed to quality, organic seeds and involving local famers in seed production. They have over 600 heirloom, open-pollinated and hybrid varieties of vegetable, fruit, herb and flower seed. Wow!!

    So to celebrate Earth Day this year, we took a family trip to the garden center to pick up some herbs, seedlings, organic soil and a few other goodies for our garden.

    Earth Day Garden 2015

    We always use a lot of Italian parsley in my tiny kitchen, so this year I decided to double the amount we've got in previous years. My son was THRILLED to be in charge of picking out each plant and putting it onto our cart.

    Earth Day Garden 2015

    I also have one long planter that I like to put 4 small tomato plants in each year. Because space is limited, I stick to cherry/grape/pear type tomatoes.

    Earth Day Garden 2015

    Barely any of our tomatoes ever make it into our house, because they're the perfect straight-from-the-vine snack. I used to eat almost all of them, but now I have a son who shares my love for all things tomato, and I'm supposed to teach him about sharing. Luckily, my husband isn't into eating tomatoes whole like we are, so we end up splitting the ripe ones between the 2 of us.

    And I only occasionally sneak outside after he's in bed to get a few all for myself.

    Ahem.

    Earth Day Garden 2015

    We picked out a lot of goodies at the garden center. Some of the planters that I put off to the side of the patio last year didn't get enough sun to grow well. Lesson learned. So we ended up buying a big shepherd hook to hang 2 extra baskets of herbs without taking up any additional patio space.

    Earth Day Garden 2015

    My father-in-law came over to help us get the soil prepped and plant our garden. There was a crazy rainstorm on our way home from the garden center, so we waited until it cleared up and then got to work before the next storm came about an hour later.

    My son's favorite part of prepping the soil was throwing shovelfuls between containers. It's fun for him AND he gets to see bugs. Plus it gives me time to rip out the old remnants of herbs from last year and get things done. Toddlers are good at sucking out your productivity sometimes, so this was a win/win.

    Earth Day Garden 2015

    The soil that was leftover from last season has been really good to me. It was great to see how many critters were working their magic when we started tilling the soil. I've had the same soil in my planters since we moved in almost a decade ago. I just top it off with more organic soil each spring and it's good to go.

    I also use my breakfast scraps to help add nutrients to my soil. I add a little more every few weeks. And I like to sprinkle chili flakes on top of the soil to help keep the animals that wander onto our property from munching on our plants.

    Earth Day Garden 2015

    I used some Stonyfield YoBaby & Oh My Yog! cups to get the seeds started this year. I love that the Oh My Yog! labels come off nice and clean for a clear container, and the YoBaby cups are nice and small. I figure I'll plant what I can as we polish off my stash of yogurt cups. Anything I don't end up having room to transplant, I plan to give to friends and family for their own gardens. The cups make them super easy to transport!

    My father-in-law built a great little planter for me to house my seed cups until they're ready to be transplanted. He put a metal rack on top to hold a piece of plastic for when the cups need to be covered. He poked drainage holes in the bottom of each of the cups for me. Once they've sprouted and been transplanted, I can fill that planter with soil and plant more goodies in it. Woohoo!

    Earth Day Garden 2015

    After filling the cups with soil, I popped them into the planter box and added a few seeds to each cup. I put 3 seeds (of the same type) per cup, in case some seeds take better than others.

    I planted Sweetie Tomatoes in the 4 large cups, Corno di Toro Sweet Peppers in one of the small cups and Ping Tung Long Eggplant in the other 2.

    Earth Day Garden 2015

    I planted Ruby Red Chard seeds directly into the soil in one of my big planters, and in a few weeks, I'm going to plant the Bennings Green Tint Summer Squash into another.

    So for this year, in addition to the seeds, I have:

    -Chives (the same ones that pop up every year - I planted them many years ago!)
    -Rosemary
    -Thyme
    -Green Basil (3)
    -Italian Parsley (4)
    -Spearamint
    -Peppermint
    -Purple Basil
    -Buttercrunch Lettuce (6)
    -Patio Tomatoes
    -Yellow Pear Tomatoes
    -Tumbling Tom Tomatoes
    -Tiny Tim Tomatoes
    -Marigolds (6 - in between the tomatoes and mixed in with the herbs)
    -Garlic (we planted 6 last fall, so far 4 have sprouted up already... we'll see how many we end up with)

    I also have Ruby (yes, I named my rhubarb plant) going strong over at my in-laws' house. She's basically the source for all of the Rhubarb Custard Pies that I make throughout the summer.

    Earth Day Garden 2015

    We got a lot done in a short amount of time this year. And I'm loving how the new shepherd hooks look outside our house!

    Earth Day Garden 2015

    After everything was in the ground, we gave it all a quick watering and called it a day!

    Earth Day Garden 2015

    Do you have a garden? What are you planting this year? I'd love to hear about it in the comments!

    Triple Crunch Asian Salad

    April 23, 2015 by Ashley 16 Comments

    Triple Crunch Asian Salad

    Watermelon radishes add a splash of color to this crisp, refreshing salad.

    Last week, I introduced you to Dumplingpalooza with these Deep Fried Roasted Garlic Mac & Cheese Dumplings. They're pure evil in the best possible (cheese-filled, carb-laden) way.

    When me and my friend Joanne were planning our recipe list, we had intended to make 4 different types of dumplings. But alas, after making a batch of our own dumpling wrappers plus stuffing, baking and deep-frying about a hundred other dumplings, we were too burnt out in the mood for something a bit lighter.

    And that's how this recipe was born.

    Triple Crunch Asian Salad

    We used the rest of the choy sum from the mac & cheese dumplings along with some watermelon radishes that I had picked up at my local Farmers Market and a can of water chestnuts that I had in the pantry.

    Ha... "pantry" makes it sound like I have actual storage space. Definitely not the case. But I digress...

    This salad totally hit the spot. The dressing has a sweet-and-salty balance that's perfumed with lime and sesame. The watermelon radishes were just sooooo pretty, and the crunchiness of all 3 salad components really woke us up after going into a dumpling coma.

    You know, just in time to make MORE dumplings for dessert. We don't go around calling just anything a "palooza", after all!

    📖 Recipe

    Triple Crunch Asian Salad

    Bowls of salad with watermelon radishes.
    Watermelon radishes add a splash of color to this crisp, refreshing salad.
    Big Flavors from a Tiny Kitchen - Ashley Covelli with Eats Well With Others
    No ratings yet
    Print Recipe Pin Recipe
    Servings: 2 servings
    Course: Salad
    Cuisine: Asian

    Ingredients
     

    For dressing:
    • 2 tablespoons seasoned rice vinegar
    • 1 tablespoon honey
    • 3 tablespoons low-sodium soy sauce
    • 1 tablespoon sesame oil
    • 1 tablespoon lime zest
    • 1 tablespoon lime juice
    For salad:
    • 4 cups choy sum or baby bok choy stems chopped
    • 1 8-ounce can water chestnuts, roughly chopped
    • 2 watermelon radishes quartered and thinly sliced (about 1 cup)

    Instructions
     

    1. In a large bowl, whisk together dressing ingredients.
    2. Add choy sum, water chestnuts and watermelon radishes and toss until evenly coated. Enjoy!

    Did you make this recipe?

    Leave a comment + star rating below to let people know how it was!

    Need more dumpling action? Head over to Joanne's blog to see what she has to say about the Baked Purple Yam + Sweet Potato Dumplings with Peanut Sauce that we made that day. Because we don't deep-fry all.of.the.things, just most.of.the.things...

    Baked Purple Yam + Sweet Potato Dumplings with Peanut Sauce

    Bánh Bò Nướng: Vietnamese Honeycomb Cake

    April 22, 2015 by Ashley 50 Comments

    A slice of vibrant green Vietnamese honeycomb cake on a plate.

    Pandan extract gives this traditional Vietnamese cake a vibrant, green hue.

    For March's green-themed Supper Club dinner, Dino was eager to try out an interesting recipe he obtained from one of his coworkers.

    Bánh Bò Nướng is a Vietnamese dessert in which extract from pandan leaves gives it a rich, green hue.

    A green bundt cake on a plate with a slice placed on a smaller plate with a vibrant green filling.

    The word "honeycomb" in this case comes from the fact that when the cake is sliced open, it looks like the texture of a honeycomb.

    The key to creating this texture is a mix of tapioca flour (AKA tapioca starch) and single-acting baking powder.

    We learned that the most popular and regularly available baking powder in the USA is double-acting, meaning that it has one reaction when mixed with wet ingredients and a second reaction when exposed to heat.

    Single-acting baking powder only reacts with wet ingredients, so it's key that you seek it out if you want to make this recipe at home.

    Apparently the use of double-acting baking powder will cause a huge, gummy mess.

    I found Dr. Oetker's Original Baking Powder at our local Stop & Shop, which is a single-acting, German baking powder.

    Dino's coworker, Gina, recommended that we use buko pandan flavor extract. Buko refers to young coconut- and so the bottle we used was a mixture of young coconut and pandan flavoring.

    Gina has been perfecting this recipe for years, so we trust her!

    Hands taking a photo with a phone of a green bundt cake on a plate with a slice placed on a smaller plate with a vibrant green filling.

    This cake is not a typical dessert by any means. It has a spongy texture and is not overly sweet.

    Pandan itself has a rich, nutty and grassy flavor which works very well with the coconut milk and young coconut flavoring.

    To me, the taste was reminiscent of marzipan.

    It certainly fit the bill for our green-themed dinner, and it got a big reaction when sliced open due to its interesting texture and vibrant, green color.

    If we make this cake again, we would seek out pure pandan extract without the young coconut flavor and artificial ingredients to see how it differed from this version.

    This would be a fun dessert to serve at a Halloween party with a chocolatey glaze- the dark color of the chocolate with the bright green would be wicked good fun!

    A slice of vibrant green Vietnamese honeycomb cake on a plate.

    Looking for more dessert recipes? Check out some of our favorites:

    • Rich Cocoa Brownie Bites
    • Elvis-Style Frozen Bananas
    • Sweet + Salty Dark Chocolate Clusters
    • 5-Ingredient Samoa Cereal Bowls
    • Orange Scented Cannoli Dip
    • Double Chocolate Chip Cookies with Vanilla Icing
    • Dessert Nachos with Fresh Baked Cinnamon Tortilla Chips
    • Tolon's Strawberry Basil Shortcake
    • Cranberry Orange Snickerdoodles
    • Bourbon Bacon Pecan Pie with a Whole Wheat Crust
    • Chocolate Cream Pie with Orange Zested Whipped Cream
    • Great Grandma Francesca Cardile's Cookies
    • Triple-Chocolate Pumpkin Pie
    • Ricotta Cookies
    • Grandma's Christmas Cookies

    📖 Recipe

    Bánh Bò Nuong: Vietnamese Honeycomb Cake

    A slice of vibrant green Vietnamese honeycomb cake on a plate.
    Pandan extract gives this traditional Vietnamese cake a vibrant green hue.
    Gina Planas
    5 from 4 votes
    Print Recipe Pin Recipe
    Servings: 8 -10 Servings
    Course: Cake, Dessert
    Cuisine: Vietnamese
    Prep Time 20 minutes mins
    Cook Time 45 minutes mins
    Total Time 1 hour hr 5 minutes mins

    Ingredients
     

    • 200 ml ½ can of coconut milk
    • 1 cup white sugar I use just a bit less
    • About ⅓ of a 20mL bottle of Buko Pandan flavoring
    • 2 cups tapioca flour/starch
    • 2 ½ teaspoons of SINGLE ACTING baking powder*
    • 6 eggs

    Instructions
     

    1. In a sauce pan over low heat, add the ½ can of coconut milk and the 1 cup sugar. You're basically just melting the sugar here so it will only take a few minutes. Turn the heat off then add the Buko Pandan flavoring. I usually put about ⅓ of the small bottle, but it all depends on how much flavoring you want your cake to have. To me, ⅓ - ½ is just perfect.
    2. Let stand for about 10-15 minutes or whenever it totally cooled down.
    3. Preheat the oven at 350 degrees for about 15 minutes.
    4. In a mixing bowl, whisk the 6 eggs (don't over beat the eggs).
    5. When the coconut milk/sugar mixture is completely cool, mix this to the beaten eggs along with the 2 cups of tapioca flour + 2 ½ teaspoon of single acting baking powder. Again, don't over mix. The consistency should be watery.
    6. Pour the batter in a bundt or cake pan (sprayed liberally with cooking spray) and bake for 40-45minutes.**

    Notes

    *SINGLE-ACTING baking powder substitution:
    1 teaspoon = ¼ teaspoon baking soda plus ½ teaspoon cream of tartar plus ¼ teaspoon cornstarch
    **I guess this will depend on your oven. I followed instructions in the past to bake it 50-60min and I noticed that the ends end up being way too dry while the inside is moist and chewy. So I started to experiment and lessened baking time, making the entire cake moist and chewy with no dry ends (of course if you prefer the first, you can bake longer so it's up to your preference).

    Did you make this recipe?

    Leave a comment + star rating below to let people know how it was!
    2 photos - 1 of a slice of vibrant green Vietnamese honeycomb cake on a plate and one of a bundt cake with a slice cut out of it.

    Single-Skillet Chicken Thighs with Bacon, Brussels Sprouts and Easy Apple Jus

    April 21, 2015 by Ashley Leave a Comment

    Plate of Chicken Thighs with Bacon, Brussels Sprouts and Easy Apple Jus.

    Crispy-skinned chicken thighs get a sweet-and-salty treatment in a cast iron skillet in this comforting single-skillet meal.

    We've been on a big cast iron skillet kick lately in my house. I used to be a little intimidated by cooking with cast iron, but now that I've seen how just how easy it is to make meals without dirtying up an army of cookware, I'm 100% on board with it.

    For this dish, chicken thighs are crisped up along with bacon and Brussels sprouts and apples for a pan of insanely delicious sweet-and-salty comfort food.

    Plate of chicken thighs with brussels sprouts and black beans.

    I love the easy apple jus that finishes off this recipe. With a toddler in the house, I always have apple juice on hand, and this is a great way to add a flavor boost to any pan sauce. Absolutely delicious!

    📖 Recipe

    Single-Skillet Chicken Thighs with Bacon, Brussels Sprouts and Easy Apple Jus

    Plate of chicken thigh with brussels sprouts and black beans.
    Crispy-skinned chicken thighs get a sweet-and-salty treatment in a cast iron skillet in this comforting single-skillet meal.
    Christine Byrne
    No ratings yet
    Print Recipe Pin Recipe
    Servings: 2 servings
    Course: Main Dish
    Cuisine: American
    Prep Time 10 minutes mins
    Cook Time 30 minutes mins
    Total Time 40 minutes mins

    Ingredients
     

    • 2 large chicken thighs bone-in, skin-on
    • kosher salt and freshly ground pepper
    • 2 slices bacon cut in 1-inch pieces
    • 2 cups Brussels sprouts trimmed and quartered
    • 1 medium Fuji* apple cored and cut in 8-10 slices
    • 1 tablespoon red wine vinegar
    • ¼ cup apple juice

    Instructions
     

    1. Preheat the oven to 425°F.
    2. Use paper towels to thoroughly dry the chicken thighs, then season them liberally with salt and pepper on both sides.
    3. Heat a large cast iron skillet over medium-high heat. When the skillet is hot, add the seasoned chicken thighs, skin-side down, and cook just until the edges of the skin start to brown, about 3 minutes. Turn the heat down to medium and add the bacon pieces, scattering them around the chicken thighs. Cook, moving the bacon around the skillet occasionally without touching the chicken thighs, just until the bacon starts to shrivel and brown slightly, about 2 minutes.
    4. Add the quartered Brussels sprouts and apple slices to the skillet and season them with a little bit of salt and pepper. Stir them around with the bacon, still trying not to move the chicken around too much. It’s fine if the chicken thighs move a little, you just want the skin to stay in contact with the hot skillet.
    5. Put the skillet in the oven and roast everything for 10 minutes. Take the skillet out, stir the bacon and Brussels sprouts, and flip the chicken thighs. Put the skillet back in the oven until the thighs are cooked through (a meat thermometer inserted into the thickest part of the thigh should read 165°F, and there should be no pink when you cut into the meat), about 10 more minutes.
    6. When the chicken is cooked, take the skillet out of the oven and use a large slotted spoon to take the chicken, bacon, Brussels sprouts and apple slices out of the skillet, dividing everything evenly among two plates. Don’t tilt the skillet and slide everything out, because you want any fat or juices to stay in the skillet. There won’t be much, since the apples and Brussels sprouts will absorb most of it, but there will be some.
    7. Put the skillet on the stove over medium-high heat (it’ll already be hot) and add the red wine vinegar while stirring and scraping the bottom of the skillet. This will deglaze your pan, so that all of the caramelized bits of bacon and chicken skin end up in your jus and not stuck to the bottom of your pan. After about 10 seconds, add the apple juice and let it simmer and reduce until it’s the consistency of a thick syrup, about a minute.
    8. To serve, pour the apple jus over the plated chicken thighs, dividing it evenly between the two plates.

    Notes

    Recipe by Christine Byrne via Buzzfeed
    Christine's Note:
    You can use any apple, really. I just think Fuji works the best.

    Did you make this recipe?

    Leave a comment + star rating below to let people know how it was!

    Seared Scallops with Citrus Trio + Wild Rice

    April 20, 2015 by Ashley 4 Comments

    Seared Scallops with Citrus Trio + Wild Rice

    Succulent seared scallops on a bed of garlicky wild rice and spinach with a bright citrus salad and crunchy toasted hazelnuts.

    This year for Valentine's Day, I wanted to cook something special at home. We hadn't had scallops for quite a while, and they're one of our favorites, so I knew that would be the way to go.

    I've also been trying to cook my way through some ingredients that have been lurking in my cabinets for a long time, and a jar of wild rice was in desperate need of attention.

    Seared Scallops with Citrus Trio + Wild Rice

    This meal takes several steps to complete, but the steps aren't difficult. While the rice is cooking, you can assemble the citrus salad, and once you add the greens to the rice, you can start prepping the scallops. The scallops cook up very quickly, so make sure you aren't distracted while you're searing them - overcooked scallops are not tasty!

    When I made this, we had a bit of rice leftover, but the amount of scallops was perfect. This dish was light, yet filling, and totally refreshing.

    📖 Recipe

    Seared Scallops with Citrus Trio + Wild Rice

    Seared Scallops with Citrus Trio + Wild Rice on a plate.
    Succulent seared scallops on a bed of garlicky wild rice and spinach with a bright citrus salad and crunchy toasted hazelnuts.
    Big Flavors from a Tiny Kitchen - Ashley Covelli
    No ratings yet
    Print Recipe Pin Recipe

    Ingredients
     

    For Rice:
    • 1 cup wild rice rinsed and drained
    • 4 cups water
    • Pinch kosher salt
    • 2 cloves garlic smashed
    • 2 cups packed baby spinach
    For Citrus Trio:
    • 1 navel orange
    • 1 ruby red grapefruit
    • 1 Honeybell or Mineola orange
    • 3 sprigs thyme
    • 1 tablespoon honey
    • 1 tablespoon extra virgin olive oil
    • ½ teaspoon kosher salt
    • ¼ teaspoon freshly cracked black pepper
    For scallops:
    • 6 large sea scallops brought up to room temperature if possible
    • Kosher salt and freshly cracked black pepper to taste
    • 1 tablespoon extra virgin olive oil
    • 1 tablespoon unsalted butter
    For Garnish:
    • ¼ cup hazelnuts toasted and roughly chopped

    Instructions
     

    1. Prepare wild rice: Place water and salt in a medium saucepan and bring to a boil. Stir in rice and garlic. Reduce heat and simmer, covered, until the rice is tender (about 40-45 minutes). Remove lid, stir in spinach and cook for an additional 5 minutes. Drain off any excess liquid.
    2. Assemble citrus trio: Cut orange, grapefruit and Honeybell into supremes over a medium bowl, catching any of the juice that drips out. Squeeze any excess juice from the membranes into the bowl as well. Strip the leaves from the thyme and add them to the bowl, along with the honey, oil, salt and pepper. Toss gently to combine.
    3. Sear the scallops: Pat scallops dry with a paper towel. Season with salt and pepper on both sides. Heat oil and butter in a medium non-stick skillet over medium-high heat. Once hot, place scallops in the skillet, making sure they aren't touching each other, and sear for about 90 seconds. Flip scallops and cook for another 90 seconds, using a spoon to baste with the melted butter/oil mixture as they finish cooking. You're looking for them to have a golden brown crust on both sides, but still be tender and translucent on the inside. Remove from the skillet onto a paper towel-lined plate.
    4. To assemble: Place a few scoops of rice on 2 plates. Top each pile of rice with 3 scallops and a some of the citrus salad, spooning over extra juice as desired. Top with toasted hazelnuts and serve. Enjoy!

    Nutrition information

    Nutrition Facts
    Seared Scallops with Citrus Trio + Wild Rice
    Serving Size
     
    2 g
    Amount per Serving
    Calories
    0
    % Daily Value*
    * Percent Daily Values are based on a 2000 calorie diet.

    Did you make this recipe?

    Leave a comment + star rating below to let people know how it was!

    Roasted Garlic Gruyère Pull-Apart Bread for #NationalGarlicDay

    April 19, 2015 by Ashley 36 Comments

    Overhead view of Roasted Garlic Gruyère Pull-Apart Bread.

    Crusty bread is slathered with Parmesan and herb roasted garlic butter then stuffed with Gruyère cheese. After a trip to the oven, the results are ooey, gooey and delicously messy.

    Roasted Garlic Gruyère Pull-Apart Bread

    As if I needed an excuse to make a dish containing garlic, my friend Heather over at All Roads Lead to the Kitchen invited me to be part of her National Garlic Day 2015 festivities. I sometimes joke that I married an Italian so I'd have an excuse to cook with garlic more often. What can I say - I love the "stinking rose", and April 19th is no exception!

    Roasted Garlic Gruyère Pull-Apart Bread

    I'm not gonna lie - this bread is messy to make. Getting the butter and cheese into all of those nooks and crannies isn't a quick and easy task. But trust me, your efforts will be rewarded with some seriously amazing, garlicky, cheesy goodness.

    The loaf of bread I used wasn't super firm, so we ended up diving in with forks. I think that something like a sourdough would hold up a little better if you want to be able to pull it apart with your fingers.

    Roasted Garlic Gruyère Pull-Apart Bread

    My husband looked seriously confused when he saw me making a giant mess with this in the kitchen, but one bite and he was in pure garlic heaven. I served this with Iron Skillet Chicken + Carrots with Toasted Lager Mustard Sauce and it was a delicious, comforting meal.

    📖 Recipe

    Roasted Garlic Gruyère Pull-Apart Bread

    Roasted Garlic Gruyère Pull-Apart Bread
    Crusty bread is slathered with Parmesan and herb roasted garlic butter then stuffed with Gruyère cheese.
    Big Flavors from a Tiny Kitchen - Ashley Covelli
    No ratings yet
    Print Recipe Pin Recipe
    Servings: 4 servings
    Course: Side Dish
    Cuisine: Italian
    Prep Time 15 minutes mins
    Cook Time 1 hour hr
    Total Time 1 hour hr 15 minutes mins

    Ingredients
     

    For roasted garlic:
    • 1 head garlic
    • Olive oil
    • Kosher salt & freshly cracked black pepper
    For bread:
    • 1 16-ounce loaf bread (I used a rustic Italian, sourdough would also work well)
    • 1 stick unsalted butter softened
    • ¼ cup freshly grated Parmesan
    • 2 green onions minced
    • 1 tablespoon flatleaf parsley minced
    • ½ cup Gruyère grated (I used a Kaltbach cave-aged variety)

    Instructions
     

    1. Roast garlic: Preheat oven to 400°F. Peel off most of the papery exterior of the garlic head, and slice the top ¼ inch or so off. Set the garlic on a piece of aluminum foil, drizzle with a little olive oil and sprinkle with a bit of kosher salt and freshly cracked black pepper. Bake until caramelized, about 40 minutes. Remove from oven and reduce the temperature to 350°F.
    2. Squeeze the roasted garlic cloves into a small bowl and mash with a fork. Add butter, Parmesan, green onions and parsley and mix until well combined.
    3. Using a serrated bread knife, slice the bread into a 1-inch wide diamond pattern, making sure not to cut all the way through the bottom of the loaf. Set the bread onto a piece of aluminum foil large enough to enclose the entire loaf.
    4. Brush the garlic-herb butter all over the top of the bread and deep into all of the nooks and crannies. Don't be afraid to get messy and use your hands to slather the butter all over. Next, grab a pinch of Gruyère and shove it into one of the cracks in the loaf. Continue, pressing the cheese into all of the open areas of the bread.
    5. Wrap the entire loaf in the foil, set it on a baking sheet and bake for 15 minutes. Carefully open up the foil (I ended up cutting the excess from around the top and leaving a layer of foil underneath the bread) and let the loaf bake an additional 5 minutes to allow the top to get nice and brown.
    6. Remove from oven and serve immediately. Enjoy!

    Did you make this recipe?

    Leave a comment + star rating below to let people know how it was!

    NationalGarlicDay2015

    Craving more? Check out these garlicky recipes from this year's National Garlic Day bloggers:

    • Garlic and White Bean Hummus from Kelli's Kitchen
    • Garlic Lovers Focaccia with Shallots and Sweet Corn from Kudos Kitchen by Renee
    • Garlicky Chard Stuffed Flank Steak from All Roads Lead to the Kitchen
    • Garlicky Lobster Crab Scampi from Food Lust People Love
    • Garlicky Rib Eye Steak with Garlic Bruschetta from Karen's Kitchen Stories
    • Louisiana Garlic Bread from Wishes and Dishes
    • Roasted Garlic Gruyère Pull-Apart Bread from Big Flavors from a Tiny Kitchen
    • Spicy Garlic Noodles with Pork from Healthy Delicious

    Deep Fried Roasted Garlic Mac & Cheese Dumplings

    April 17, 2015 by Ashley 15 Comments

    Deep Fried Roasted Garlic Mac & Cheese Dumplings

    Roasted garlic-infused mac & cheese is stuffed into dumpling wrappers, deep-fried till golden and topped with freshly grated Parmesan cheese for the ultimate comfort food snack.

    When me and Joanne (Eats Well With Others) get together to cook in my tiny kitchen, things get insanely delicious.

    We go all out - Korean lunch and food shopping at HMart complete with oodles of bubble tea and more desserts than we'll admit to.

    Followed by forgetting to pick up half of our ingredients and walking to yet another grocery store leisurely walks around town to preemptively burn off the calories from what can only be known as Dumplingpalooza.

    AKA deep-fry all.of.the.things.

    Deep Fried Roasted Garlic Mac & Cheese Dumplings

    We have an (almost) annual tradition of getting together in my tiny kitchen on Superbowl Sunday and making a boatload of food. For just 3 adults and my toddler.

    Football pretty much isn't even talked about. It's all of the great food of a Superbowl party without any of the sports.

    AKA pure bliss.

    The last time we cooked together, we made some killer Chocolate Macarons with Espresso Salted Caramel Buttercream.

    This time around we tackled 4 brand new original recipe collaborations. Did I just unintentionally make a football pun? I totally did!

    We didn't put any limits on what we could cram into dumpling wrappers, and the results were absolutely delicious!

    Deep Fried Roasted Garlic Mac & Cheese Dumplings

    This roasted garlic mac & cheese is great on its own, but wrapping it in a golden brown, Parmesan-crusted exterior takes it to the next level.

    We even threw some Asian greens in there, you know, to keep it nice and healthy. Ahem.

    We lost count of exactly how many dumplings this recipe makes. Let's just say it's a LOT. So fill and fry as many as you want and enjoy any leftover mac & cheese in a bowl for lunch.

    Or breakfast.

    This is a judgement free zone.

    Deep Fried Roasted Garlic Mac & Cheese Dumplings

    📖 Recipe

    Deep Fried Roasted Garlic Mac & Cheese Dumplings

    Deep Fried Roasted Garlic Mac & Cheese Dumplings
    Roasted garlic-infused mac & cheese is stuffed into dumpling wrappers, deep-fried till golden and topped with freshly grated Parmesan cheese for the ultimate comfort food snack.
    Big Flavors from a Tiny Kitchen - Ashley Covelli with Eats Well With Others
    4.34 from 3 votes
    Print Recipe Pin Recipe
    Servings: 12 dumplings
    Course: Appetizer
    Cuisine: American
    Prep Time 20 minutes mins
    Cook Time 1 hour hr
    Total Time 1 hour hr 20 minutes mins

    Ingredients
     

    • 1 head garlic
    • Olive oil
    • Kosher salt & freshly cracked black pepper
    • ½ pound small shell-shaped pasta or ditalini we used #23 shells
    • 2 tablespoons butter
    • ¼ cup all purpose flour
    • 2 ½ cups low-fat milk
    • ½ pound Muenster cheese grated
    • ½ pound American cheese grated
    • 1 cup choy sum or baby bok choy leaves thinly sliced
    • Peanut oil for deep-frying
    • Dumpling wrappers
    • Freshly grated Parmesan cheese for garnish

    Instructions
     

    1. Roast garlic: Preheat oven to 400°F. Peel off most of the papery exterior of the garlic head, and slice the top ¼ inch or so off. Set the garlic on a piece of aluminum foil, drizzle with a little olive oil and sprinkle with a bit of kosher salt and freshly cracked black pepper. Bake until caramelized, about 40 minutes.
    2. Cook pasta: Meanwhile, bring a pot of salted water to a boil. Cook the pasta to just shy of al dente, drain and set aside (you can toss the pasta with a bit of olive oil to help keep it from sticking while you prepare the cheese sauce).
    3. Make béchamel: Melt the butter in a medium saucepan over medium heat. Add in the flour and cook, stirring constantly, until it turns golden brown, about 2-3 minutes. Stir in the milk a quarter cup at a time, whisking constantly. Once all the milk has been added, let it simmer for 3-4 minutes until it starts to thicken slightly. Remove from the heat and stir in the cheese until melted. Stir in the roasted garlic cloves.
    4. Prepare oil & assemble dumplings: Heat several inches of peanut oil in a large, deep pot (preferably cast iron) to 325°F. While the oil is coming up to temperature, get a small bowl of water ready. Scoop a heaping teaspoon of the mac and cheese mixture into a dumpling wrapper. Dip a finger in the water and run it around the perimeter of the dumpling wrapper, fold it in half and press the edges firmly to seal around the filling. Set on a tray and repeat with remaining dumpling wrappers until you run out of wrappers or filling.
    5. Deep-fry dumplings: once the dumplings are ready and the oil has reached 325°F, carefully place 6 dumplings into the oil and fry until golden brown on both sides, flipping occasionally with a spider or metal tongs. Remove dumplings to a paper towel-lined tray that has been topped with a metal cooling rack. Immediately grate some Parmesan cheese over the top of each dumpling before adding the next batch to the oil. Repeat with remaining dumplings.

    Did you make this recipe?

    Leave a comment + star rating below to let people know how it was!

    Want to see more deep-fried dumpling action? Check out what Joanne has to say about the Deep Fried Nutella S’mores Dumplings that we made for dessert that day! And stay tuned next week for 2 more recipes from Dumplingpalooza!

    Deep Fried Nutella S’mores Dumplings

    Anne Burrell's Focaccia

    April 16, 2015 by Ashley 11 Comments

    Bread bowl full of Anne Burrell's Focaccia.

    Crispy on the outside and tender on the inside, this homemade Italian bread is simple and impressive!

    We have a fairly new family tradition, where me and my father-in-law divvy up the cooking responsibilities for big holiday meals. So for Easter this year, my contributions were going to be deviled eggs, a vegetable side dish, a bread and a dessert.

    Bread bowl full of Anne Burrell's Focaccia.

    I don't consider myself a baker, but I have made several bread recipes in the past that have been big hits (such as this No-Knead Crusty White Bread, 40-Minute Hamburger Buns, Garlic Naan, Golden Cornbread, Southern Buttermilk Biscuits,  and most recently Irish Soda Bread).

    Focaccia has been on my bucket list for quite some time now, and Anne Burrell had just the recipe to get me acquainted with the process.

    This bread takes a bit of time since it needs to rise twice, but it's really easy to make. And now that I've baked a standard version, I'm excited to start whipping up flavor variations!

    Close-up of Anne Burrell's Focaccia.

    This recipe makes an entire sheet pan full of focaccia - enough to feed an army! My Italian in-laws absolutely loved it, and my toddler was thrilled to eat this for several days. I froze about half of what I made - I think it should hold up well in there.

    📖 Recipe

    Anne Burrell’s Focaccia

    Bread bowl full of Anne Burrell's Focaccia.
    Crispy on the outside and tender on the inside, this homemade Italian bread is simple and impressive!
    Anne Burrell
    5 from 4 votes
    Print Recipe Pin Recipe
    Servings: 8 servings
    Course: Appetizer
    Cuisine: Italian
    Prep Time 2 hours hrs 35 minutes mins
    Cook Time 30 minutes mins
    Total Time 3 hours hrs 5 minutes mins

    Ingredients
     

    • 1 ¾ cups warm water
    • 1 package active dry yeast
    • 1 tablespoon sugar
    • 5 cups all-purpose flour plus additional for kneading
    • 1 tablespoon kosher salt plus coarse sea salt, for sprinkling
    • 1 cup extra-virgin olive oil divided

    Instructions
     

    1. Combine the warm water, yeast and sugar in a small bowl. Put the bowl in a warm, not hot or cool, place until the yeast is bubbling and aromatic, at least 15 minutes.
    2. In the bowl of a mixer fitted with a dough hook, combine the flour, 1 tablespoon of kosher salt, ½ cup olive oil and the yeast mixture on low speed. Once the dough has come together, continue to knead for 5 to 6 minutes on a medium speed until it becomes smooth and soft. Give it a sprinkle of flour if the dough is really sticky and tacky.
    3. Transfer the dough to a clean, lightly floured surface, then knead it by hand 1 or 2 times. Again, give it another sprinkle of flour if the dough is really sticky and tacky.
    4. Coat the inside of the mixer bowl lightly with olive oil and return the dough to the bowl. Cover it with plastic wrap and put it in a warm place until the dough has doubled in size, at least 1 hour.
    5. Coat a jelly roll pan with the remaining ½ cup olive oil. (Chef's Note: This may seem excessive, but focaccia is an oily crusted bread. This is why it is soooooooooo delicious!).
    6. Put the dough onto the jelly roll pan and begin pressing it out to fit the size of the pan. Turn the dough over to coat the other side with the olive oil. Continue to stretch the dough to fit the pan. As you are doing so, spread your fingers out and make finger holes all the way through the dough. (Chef's Note: Yes, this is strange. But when the dough rises again it will create the characteristic craggy looking focaccia. If you do not make the actual holes in the dough, the finished product will be very smooth.)
    7. Put the dough in the warm place until it has doubled in size, about 1 hour. While the dough is rising a second time, preheat the oven to 425 degrees F.
    8. Liberally sprinkle the top of the focaccia with some coarse sea salt and lightly drizzle a little oil on top. Bake the dough until the top of the loaf is golden brown, about 25 to 30 minutes. Remove the focaccia from the oven and let it cool before cutting and serving.

    Notes

    Recipe by Anne Burrell

    Did you make this recipe?

    Leave a comment + star rating below to let people know how it was!

    Iron Skillet Chicken + Carrots with Toasted Lager Mustard Sauce for #BeerMonth

    April 15, 2015 by Ashley 12 Comments

    Iron Skillet Chicken + Carrots with Toasted Lager Mustard Sauce

    Break out the cast iron and your favorite beer and get cookin' to celebrate Beer Month!

    My friend Sophia over at NY Foodgasm is at it again, celebrating all things beer with a bunch of awesome food bloggers.

    There are a lot of fun local breweries and craft beer shops where I live, but I tend to drink beer more often than I cook with beer. So when the challenge was thrown to come up with a beer-infused recipe, I knew what needed to be done.

    Cast. Iron. Skillet.

    A photo posted by Ashley Covelli (@bigflavors) on Apr 1, 2015 at 5:49pm PDT

    I picked up what was possibly the largest package of chicken legs/thighs ever from a local farm recently (the 2 pieces were 3 ¼ pounds!!) and I knew they'd work beautifully with some veggies and a sweet-and-tangy, mustardy beer sauce.

    I found a Toasted Lager from Bluepoint that I thought would work well in this recipe. I didn't want to use anything too dark or hoppy because I didn't want to mask the flavor of the chicken too much.

    I also had some carrots in the fridge, so I sliced them quickly while the chicken skin was getting crispy and popped them into the pan before it went into the oven.

    Easy peasy!

    Iron Skillet Chicken + Carrots with Toasted Lager Mustard Sauce

    I was left with a LOT of liquid in with the pan drippings, so I poured out quite a bit of them before making the sauce. Throwing a bit of chopped parsley on at the end gave it a nice pop of color.

    This chicken was nice and juicy, and the skin was perfectly crispy. Feel free to add more mustard/brown sugar, depending on how sweet/savory you want your sauce to be. And, of course, if you don't have an iron skillet go buy one immediately you can use any ovenproof skillet for this recipe.

    If you have the time, take the chicken out of the refrigerator for 10-15 minutes or so before you start cooking to take the chill off.

    📖 Recipe

    Iron Skillet Chicken + Carrots with Toasted Lager Mustard Sauce

    A plate of chicken and roasted carrots.
    Break out the cast iron and your favorite beer and get cookin’ to celebrate Beer Month!
    Big Flavors from a Tiny Kitchen - Ashley Covelli
    No ratings yet
    Print Recipe Pin Recipe
    Servings: 4 servings
    Course: Main Dish
    Cuisine: American
    Prep Time 10 minutes mins
    Cook Time 20 minutes mins
    Total Time 30 minutes mins

    Ingredients
     

    • 4 pieces bone-in skin on chicken thighs and/or legs (I used 2 whole chicken legs, 3 ¼ pounds total)
    • Kosher salt and freshly cracked black pepper
    • 12 carrots cut on the bias into 1-inch thick slices
    • ¾ cup Bluepoint Toasted Lager or your favorite lager
    • 1-2 tablespoons grainy mustard
    • 1-2 tablespoons light brown sugar
    • 1 tablespoon unsalted butter
    • Parsley roughly chopped, for garnish

    Instructions
     

    1. Preheat oven to 425°F.
    2. Heat a cast iron skillet (or other oven-proof skillet) over medium-high heat. Pat chicken dry with paper towels and season liberally on both sides with salt and pepper. Add chicken to the skillet, skin-side down and let sear for 4 minutes. Add carrots and place the whole skillet into the oven.
    3. Bake for 10 minutes, then flip the chicken pieces and stir the carrots a bit and return to the oven for another 10 minutes, or until the internal temperature of the chicken reaches 165°F. Remove chicken and carrots to a platter and tent with foil to keep warm.
    4. If there’s a lot of liquid left in the pan, pour off the majority of it, leaving a few tablespoons plus the pan drippings. Place skillet back onto the stovetop over medium-high heat. Add beer, mustard and sugar and bring to a boil. Reduce the heat to medium and allow to reduce, stirring occasionally. Taste the sauce – if it’s too sweet, add more mustard. If it’s not sweet enough, add a little more brown sugar. Add salt and pepper if needed. Remove from heat and stir in butter until melted.
    5. To serve, pour sauce over chicken and carrots, sprinkle on a little parsley and enjoy!

    Did you make this recipe?

    Leave a comment + star rating below to let people know how it was!

    Want to see what everyone else is cookin' up? Check out the complete #BeerMonth roundup below!

    BeerMonthBanner-2015

    Sophia of NY Foodgasm made Triple IPA Chili Verde with Pork

    Heather of All Roads Lead to the Kitchen made Beer Braised Pork Carnitas

    Lori of Who Needs a Cape made Beer Mimosa with Raspberries

    Ashley of Big Flavors From a Tiny Kitchen made Iron Skillet Chicken + Carrots with Toasted Lager Mustard Sauce

    Debra of Bowl Me Over made Beer Braised Chicken Stew

    Stacy of Food Lust People Love made Beer Cheddar Fondue

    Lauren of Hall Nesting made Beer Bacon Mac and Cheese

    • « Previous Page
    • 1
    • …
    • 9
    • 10
    • 11
    • 12
    • 13
    • …
    • 35
    • Next Page »

    Hi, I'm Ashley and I’ve been writing about food & recipes here at Big Flavors from a Tiny Kitchen since 2006. I want to help you (yes, you!) gain confidence in the kitchen so you are excited to cook at home for yourself and your loved ones.

    More about me →

    Favorite Spring Recipes

    • Mayo-free Deviled Eggs
    • Middle Eastern Fattoush Salad with Homemade Pita Chips
    • Birthday Cake Confetti Pancakes with Sprinkles
    • Italian Cream Cheese and Ricotta Cheesecake
    • Garlicky Mushroom Ricotta Pizza with Wild Arugula + Aged Balsamic
    • Slow Cooker "Roasted" Beets
    • Honey Balsamic Roasted Carrots
    • Italian Ricotta Cookies
    • Rhubarb Custard Pie
    • Easy Instant Pot Herbed Potato Salad

    Mother's Day + Easter Brunch

    • Epic Brunch Board on a Budget
    • Baby Spinach and Cheddar Quiche Made with Fresh Spinach
    • Turkey Salad Tea Sandwiches with Dried Cherries
    • Great Grandma Maria Francesca Cardile's Italian Easter Cookies
    • Brie Waffle Bites
    • Challah French Toast
    • Creamsicle Smoothies
    • DM Bloody Mary
    • Turkey Scotch Eggs
    • The Herbalist

    Popular Now

    • Cast iron skillet full of chicken fajitas.
      Favorite Restaurant-Style Chicken Fajitas
    • Overhead view of spinach and cheddar quiche with forks.
      Baby Spinach and Cheddar Quiche Made with Fresh Spinach
    • Chicken and bell pepper stir-fry served over white rice.
      Chicken and Bell Pepper Stir-Fry
    • Serving dish of cooked shrimp garnished with chopped parsley.
      Quick and Easy Sautéed Shrimp
    • Overhead view of a dutch oven filled with sausages, peppers, and onions.
      Sausage and Peppers
    • Overhead view of assorted breakfast items displayed on a board.
      Epic Brunch Board on a Budget

    Footer

    ↑ back to top

    About

    • About Ashley
    • Press + Recognition
    • Events
    • Virtual Cooking Classes
    • Podcast
    • Contact
    • Privacy Policy

    Newsletter

    • Sign up to receive delicious recipes and exclusive content right to your inbox!

    As an Amazon Associate I earn from qualifying purchases at no added cost to you.

    ©2006–2026  BIG FLAVORS FROM A TINY KITCHEN LLC | ALL RIGHTS RESERVED

    *Third-party advertisers may collect or use non-personally identifiable information to serve you more relevant ads.

    Rate This Recipe

    Your vote:


    A rating is required
    A name is required
    An email is required