This post may contain affiliate links, which won’t change your price but will share some commission.
I'm obsessed with Alice in Wonderland, and I was thrilled a few months back to find out that one of my favorite NYC restaurants, Alice's Tea Cup, had released a cookbook!
The restaurant is a ridiculously cute tea shop that has a whimsical menu and especially tasty baked goods.
The place is decorated with all things Alice in mind, and they even have fairy wings for little kids and will dust them with glitter when they arrive. I can't say enough about how much this place rocks.
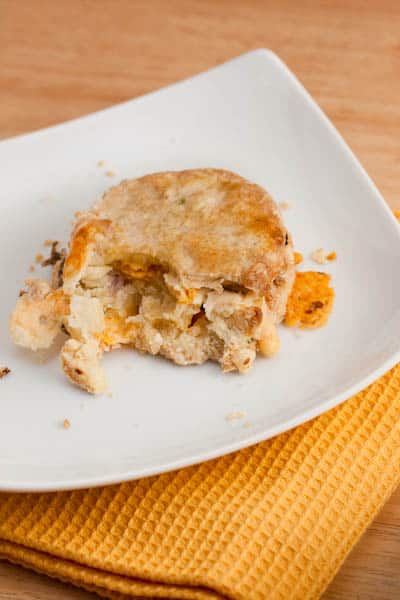
Anyway, I picked up the cookbook and was excited to try out two of the recipes tonight. The scones turned out really good. It's nice to have savory scones instead of always sweet ones.
I did have a little trouble while making these, because I was so afraid of overmixing them that I may have undermixed them instead.
They didn't brown on top, so I brushed a little more buttermilk over them after they had baked longer than what the recipe called for.
It probably didn't brown well because I didn't mix the dough quite enough, but they still tasted really good. My store didn't have any chives, so I used some green onion tops instead.
The parts where the cheese melted out and got crispy were especially good. These were kind of like self-contained ham and cheese sandwiches. Yum!
Black Forest Ham and Cheese Scones
Alice's Tea Cup - Haley Fox & Lauren Fox
Makes 10-12 scones
3 cups all-purpose flour
¼ teaspoon baking soda
¼ teaspoon baking powder
½ teaspoon kosher salt
½ cup diced cheddar cheese (½-inch dice)
½ cup diced Gruyere cheese (½-inch dice)
¾ cup Black Forest ham
¼ cup minced chives
1 ¼ sticks (10 tablespoons) unsalted butter, melted
½ cup buttermilk
1. Preheat oven to 425°F.
2. In a large mixing bowl, combine the flour, baking soda, baking powder, and salt. Add the cheese, ham, and chives to the dry mixture and combine thoroughly.
3. Make a well in the center of the dry ingredients, and pour the buttermilk and buttermilk into the well. With clean hands, combine the ingredients until all the dry mixture is wet, but do not knead!
4. Turn mixture onto a floured surface and gather the dough together. Gently pat the dough to make a disk about 1 ½ inches thick.Using a 3- or 3 ½-inch biscuit cutter cut out as many scones as you can and lay them on a nonstick baking sheet. Gather the remaining dough together lightly to cut out more scones - just don't knead the dough too much.
5. Bake the scones for about 12 minutes, or until lightly browned.
Big Flavors Rating: 4 Stars




Lydia Stewart
I LOVE scones! Sounds SO good! Ham and cheese... a match made in heaven!!