
This post may contain affiliate links, which won’t change your price but will share some commission.

Spatchcocking a turkey drastically reduces the cooking time of your holiday meal + helps the white & dark meat both stay juicy while cooking!
Spatchcocking sounds like a funny word, but it's an incredibly efficient way to prepare turkey (or chicken!) for quick, even cooking.
Gone are the days of waiting allllll day for your turkey to roast in the oven. No more worrying about overcooking the white meat while waiting for the dark meat to cook through.
This method is a total game-changer and one that we've used exclusively for Thanksgiving for several years now.
It can seem intimidating at first (yes, you're going to need to cut the backbone out of the turkey). But this post is here to walk you through the process so you can feel confident when it's time to make your Turkey Day dinner at any time of the year.

Jump To:
- 🦃 Why spatchcock a turkey?
- 🥣 Benefits of using a dry brine
- 📝 Ingredients and kitchen equipment
- 🍗 A few notes about giblets
- ✅ How to spatchcock a turkey
- ⏲ How long to cook a spatchcocked turkey
- 📖 Recipe
🦃 Why spatchcock a turkey?
- Spatchcocking enables your cook time to be reduced by about half, which is especially welcome if you're making turkey for Thanksgiving, Christmas, or any other holiday meal.
- The white meat and dark meat finish cooking at roughly the same time. That means there's less of a chance of ending up with dry breast meat.
- You can roast the meat at a higher temperature. And since all of the skin is on top, you achieve crispier, more delicious skin.
- The discarded backbone adds rich flavor to homemade turkey gravy or stock.

Thanksgiving prep doesn't have to be stressful! Grab our favorite Turkey Day recipes, tips, and more all in one spot.
Thanksgiving Central has recipes categorized by course, ideas for using leftovers, and more. Check it out here! 🦃
🥣 Benefits of using a dry brine
When we spatchcock a turkey (or chicken!), we also like to use a dry brine to season and tenderize the meat while keeping it moist and juicy.
- The spices have more of a direct impact on flavoring the meat.
- It helps keep the skin crispy.
- You'll get a deep, rich, natural turkey flavor. Injected saline solutions often mask these flavors.
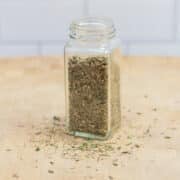
My homemade dry brine seasoning blend recipe is super easy to put together, and you can make a big batch and keep it in the pantry until you're ready to use it.
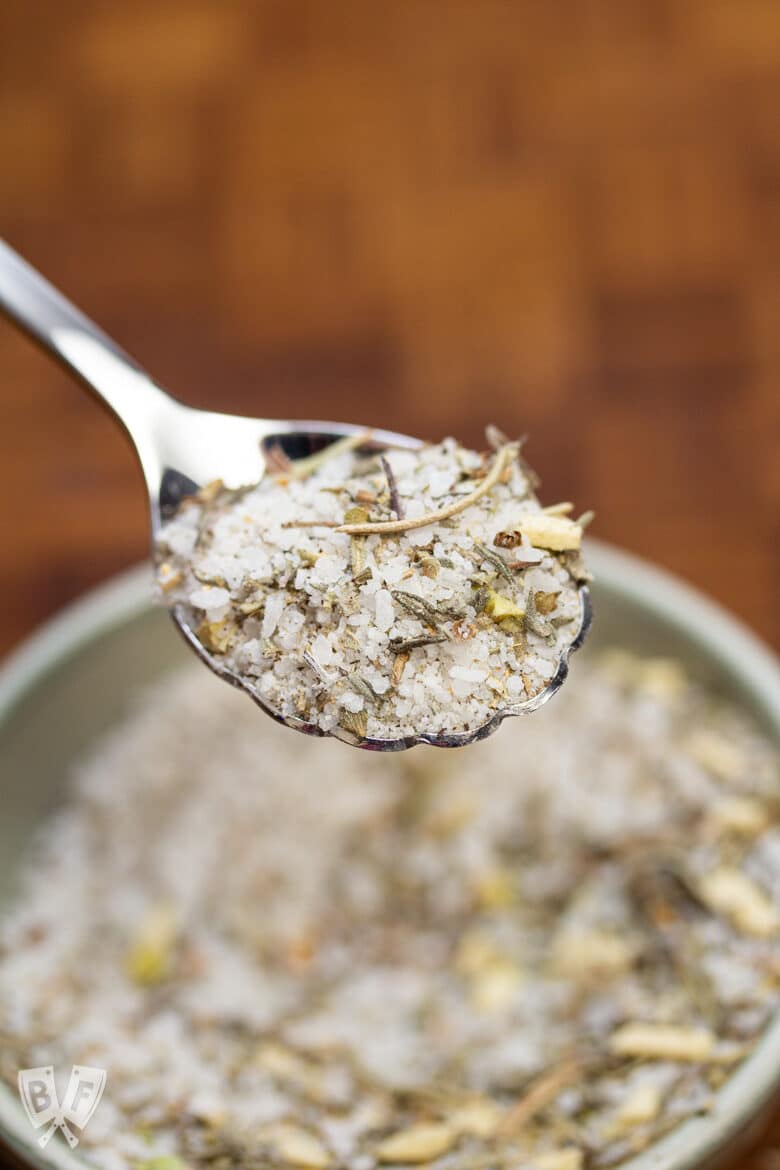
Note that my recipe makes around 1 ½ cups of seasoning, but you'll only need 1 tablespoon per 4 pounds of meat that you want to dry brine.
There's lots more info about this in my dry brine post, so head over there if you want the lowdown.
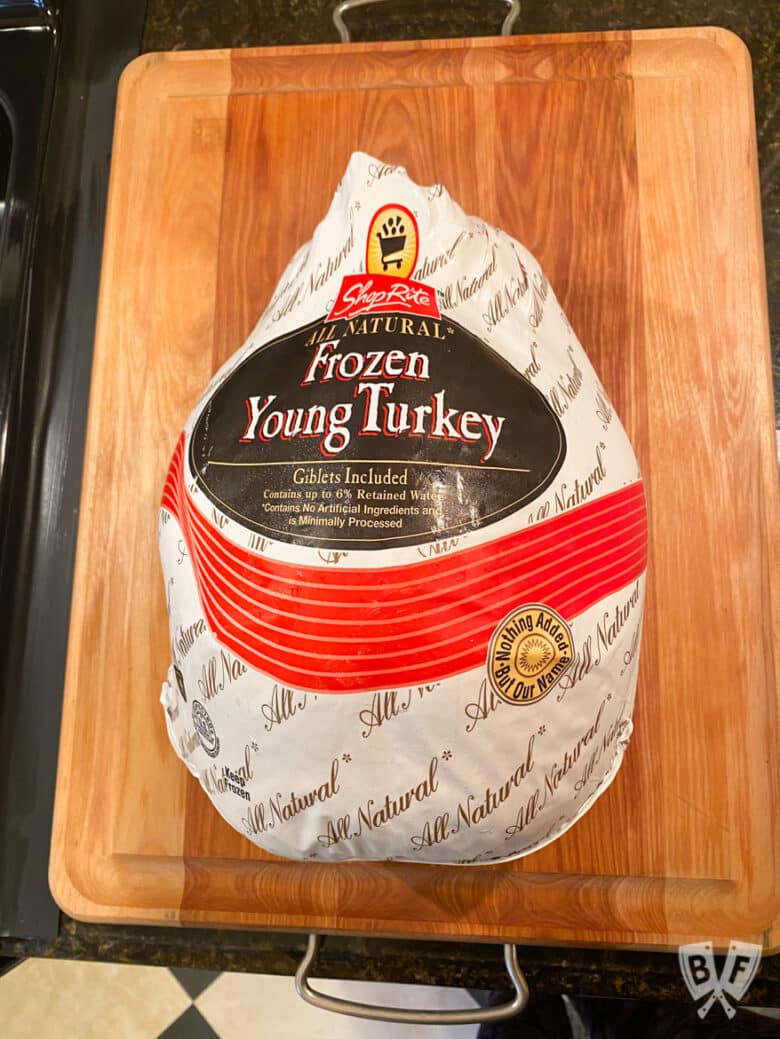
It is important to note that if you're using a dry brine, you want to choose a turkey that hasn't been previously injected with a saline solution, so be sure to read the label.
You can also check out this article from Serious Eats on how to brine a turkey or chicken (they cover both wet brining and dry brining).

📝 Ingredients and kitchen equipment
Here's everything you'll need to spatchcock your poultry. It's pretty minimal, but having these tools will make the process of breaking down the turkey or chicken much easier (see recipe card below for ingredient amounts and full directions):
- Dry brine seasoning mix (check out our favorite dry brine recipe here)
- Whole turkey or chicken (preferably one that hasn't been injected with a saline solution)
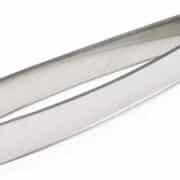
- A sharp knife for scoring the skin
- Poultry shears for removing the backbone
- Fish bone tweezers or clean pliers (not necessary, but incredibly helpful for removing any feathers that may still be hanging out in the skin of your turkey)
- Paper towels
- Baking powder (look for an aluminum-free variety when shopping)
- 9x13 baking dish - I find this helpful for keeping the meat contained in the refrigerator during the dry brining process.
- Baking sheet - a half sheet pan size works well to hold large pieces of meat flat while roasting
- Dual-probe thermometer for monitoring the temperature of both white and dark meat
🍗 A few notes about giblets
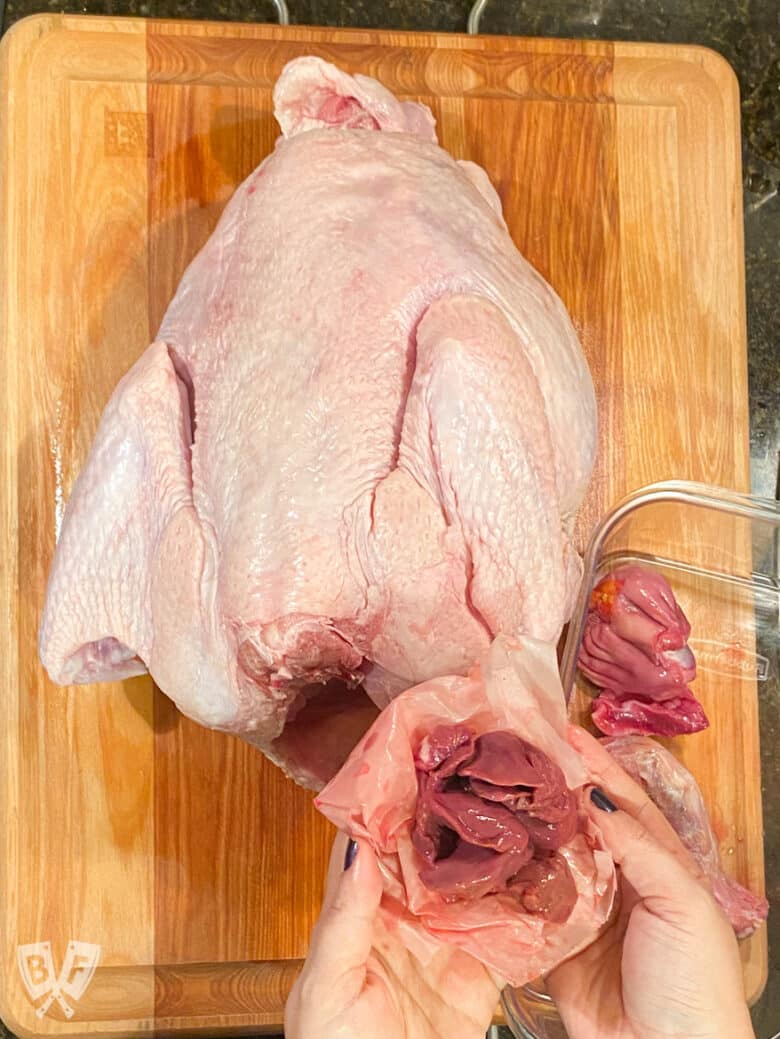
When you buy a whole turkey or chicken, you'll often find the neck bone and a bag of giblets stashed in the cavity.
Don't be afraid of that little bag - use it to add flavor to your meal!
While I recommend utilizing giblets for homemade gravy, you certainly don't have to.
Whether you're using the giblets or not, you'll need to be sure to remove that bag from the turkey before you cook it so you don't end up accidentally cooking it.
The bag often contains a mix of organs - heart, liver, and gizzards. You can read more about giblets here, but just note that for the gravy recipe, you'll want to remove the liver.
The liver is deep red and shiny. It's usually the most slippery of the organs, for lack of a better term.
Including the liver in gravy can make it bitter, so I completely omit it.
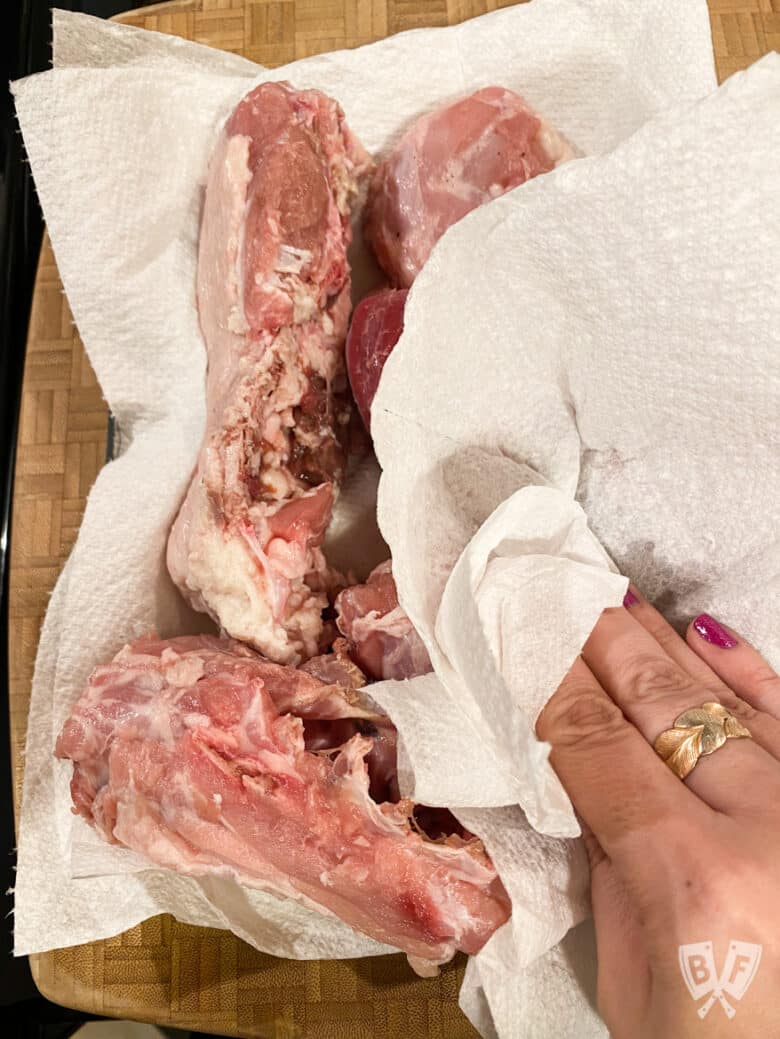
For my gravy recipe, I utilize the rest of the giblets and neckbone along with the backbone of the turkey if I have spatchcocked it.
When working with a dry brine, I remove the giblets and put them in a sealed container in the refrigerator along with any bones and trimmings from prepping the turkey.
On the day I plan to roast the poultry, I'll take them out, pat them dry, and use them to make this gorgeous gravy recipe.
I have a full post to show you how to spatchcock a turkey and will link it here as soon as I publish it.
The method for spatchcocking is great for chicken, too, and you can make gravy for your chicken in the same way.
✅ How to spatchcock a turkey
Roll up your sleeves, because prepping a turkey (or chicken) for spatchcocking is a bit of work. It's not difficult, but it takes muscle for sure, especially if you have a larger piece of poultry.
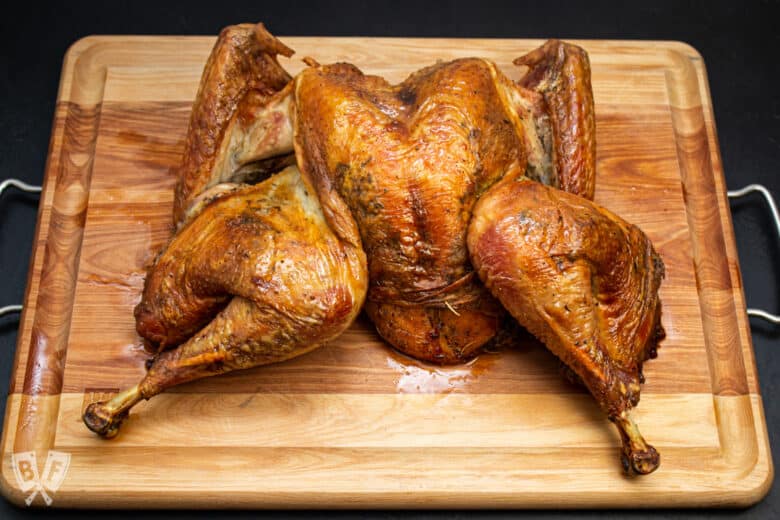
Spatchcocking is basically butterflying the piece of meat so it lays open nice and flat for even cooking.
I'm going to walk you through the entire process with photos of each step so you can feel confident moving forward in your own kitchen.
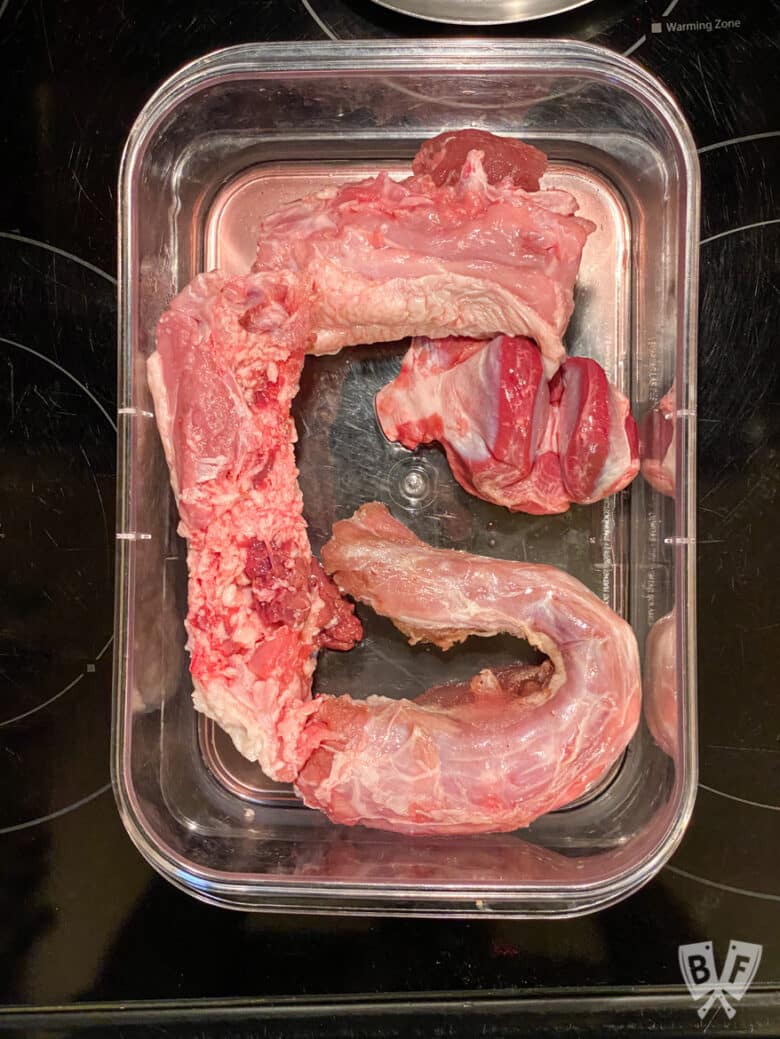
Remove the bones, giblets, and feathers


Turkeys often have the neck bone and/or a bag of giblets (heart, gizzards, liver) stuffed inside of them. Growing up, I remember these bags always getting tossed. But hang on to those bits!
Pop them into a freezer bag or container and save them to make some seriously delicious homemade turkey gravy. Trust me! The added depth of flavor is absolutely incredible.
Up until a few years ago, I only ever saw the bag of turkey parts stuffed into the main cavity of the turkey. But some, like the one in the photos for this post, have a bag stashed in the neck-end as well.
Be sure to check both - you don't want to wind up baking that in with your meat.
There are also sometimes still a few feathers (or bits of feathers) stuck in the skin of the turkey. You can sometimes remove them by hand, but I find that fish bone tweezers or clean pliers work best.
Things can get slippery, and having something to get a good grip on the feathers helps with easy removal.
Dry the skin of the turkey well
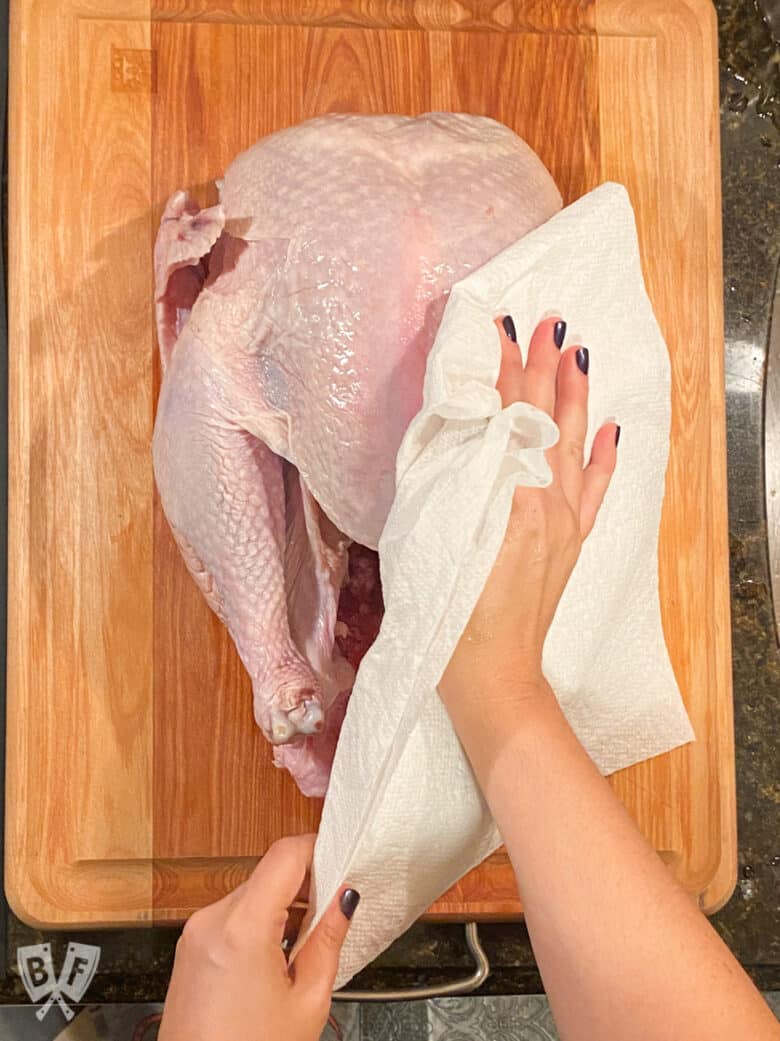


Next up, dry your turkey well with paper towels. Make sure you get the exterior as dry as you can, including spots like under the wings.
The dryer it is, the better. I'm all for reducing kitchen waste whenever possible, but some jobs are just best left for paper towels. This is one of those times (but, bonus - paper towels are compostable!).
Score the skin and remove the backbone
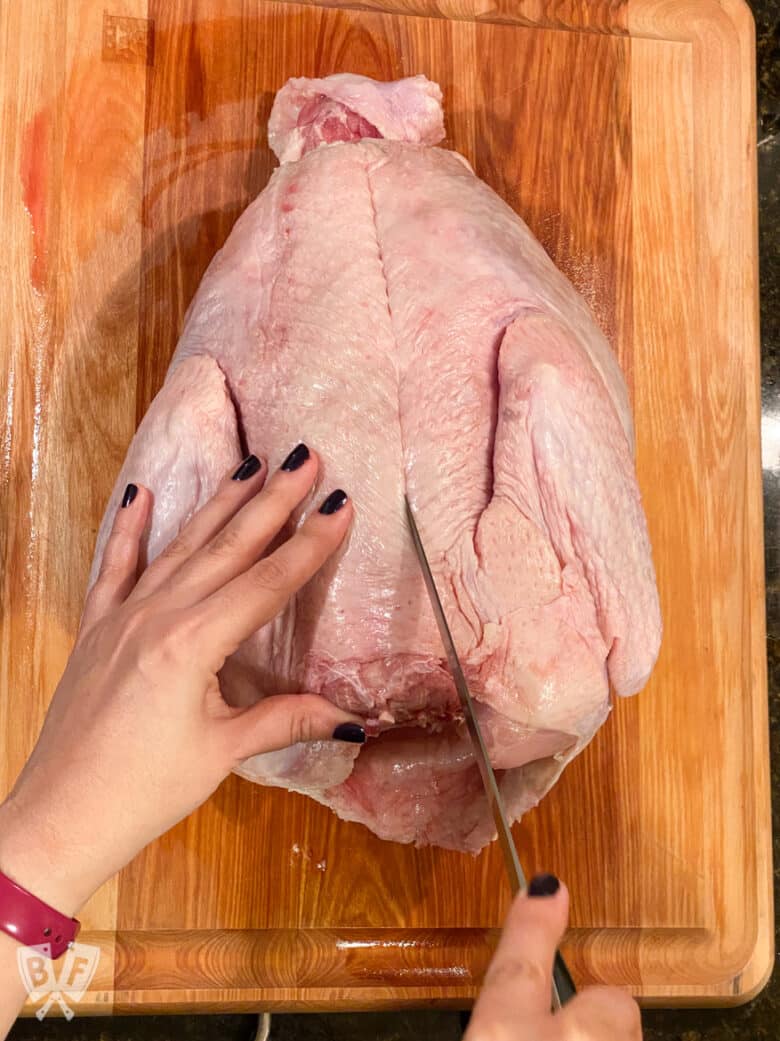

Once your turkey is dry, flip it so it's backbone-side up on your work surface. Use a sharp knife (I like using a fillet knife here) to score the skin all the way from the neck to the tail along the outer edge of both sides of the backbone.
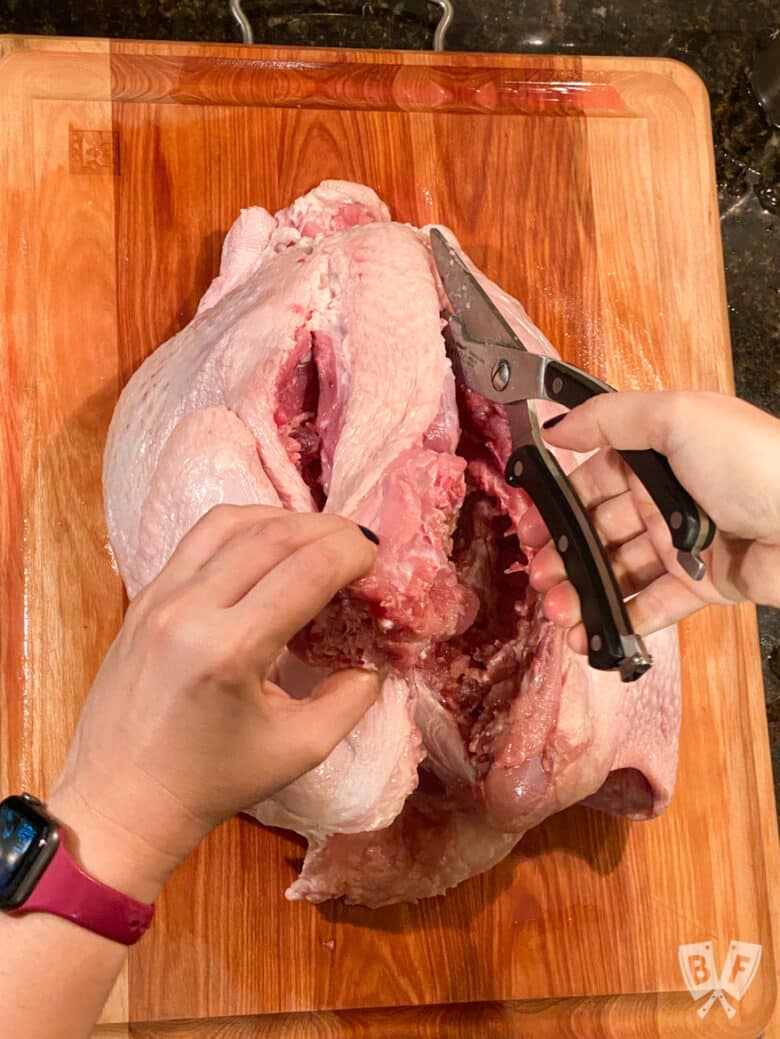
We've skipped this step in the past, but no longer. Poultry shears are great for cutting through bones, but they don't do a great job of cutting through skin. Having the skin moving around while you're trying to cut through the backbone makes the work more difficult.
Once you've scored the skin, use your poultry shears to cut through the bones all the way down both sides of the backbone. This can take some muscle, especially if it's a big turkey. But you can do it!
I like to save the backbone to make turkey stock or gravy. I find that cutting it in half or thirds once it's removed is helpful for when you go to store and/or cook with it later.
Note here that you can freeze the bones for later use. Just thaw them before proceeding to make turkey stock or gravy.
Crack the breastbone and apply the dry brine


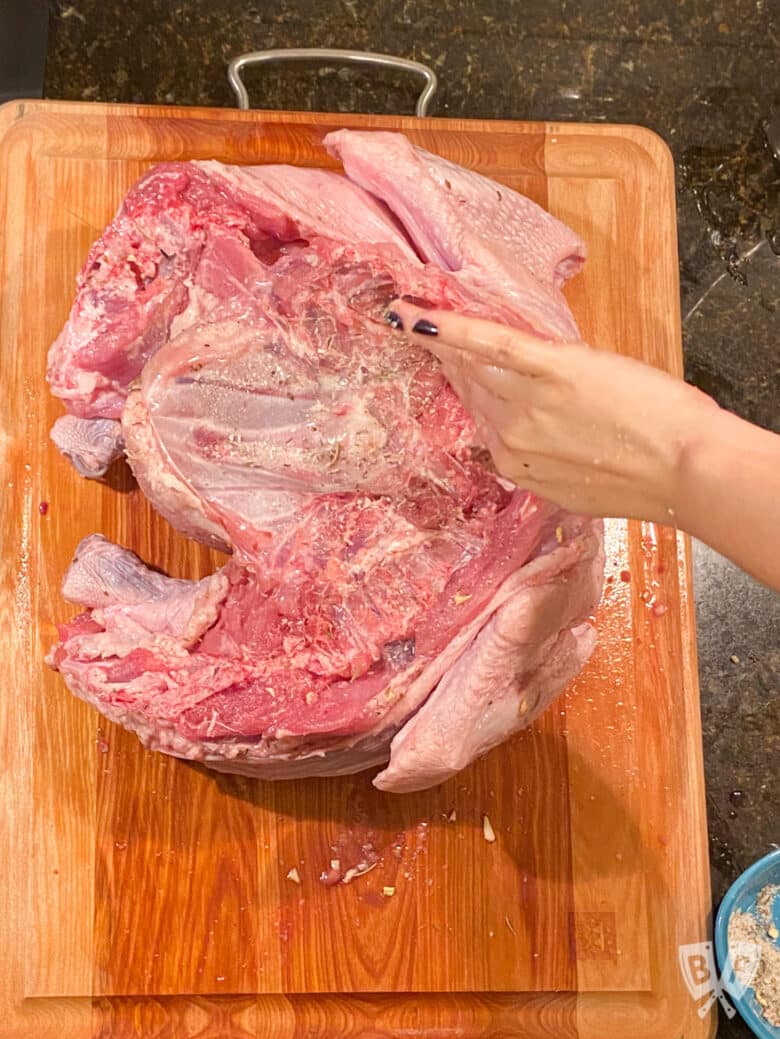
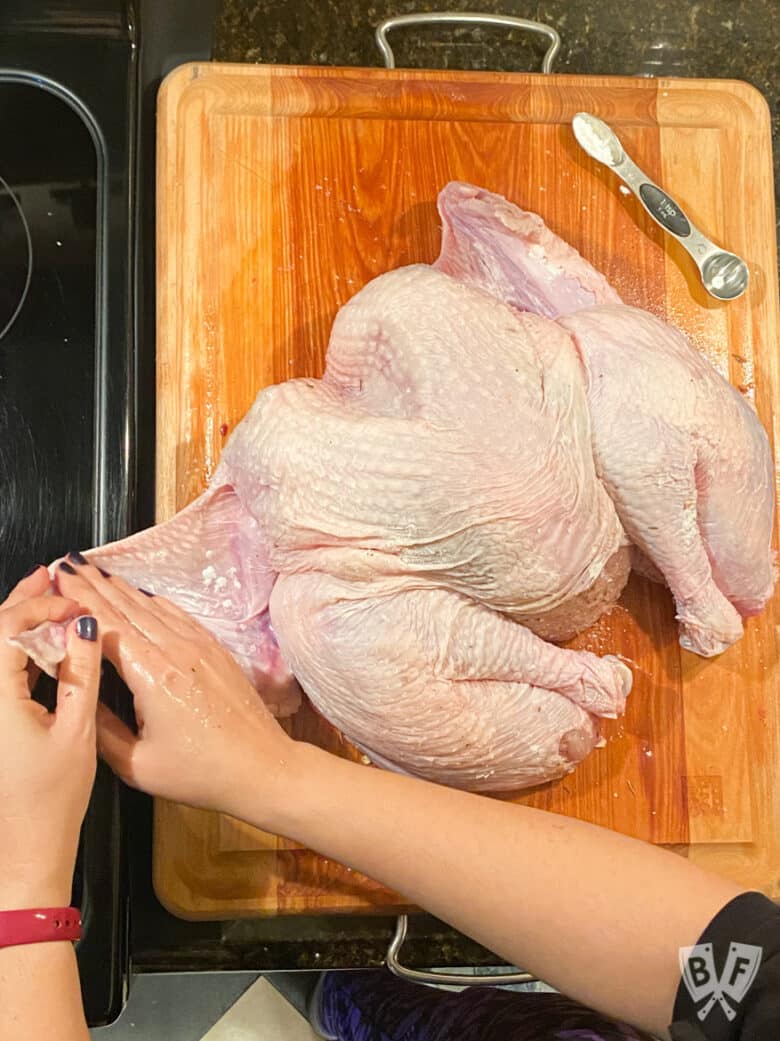
This is the last part of turkey prep that takes some muscle. You need to flip the turkey over and break the breastbone. To do this, place one hand in the center of the breast, then place your other hand on top.
Press firmly until you feel (and hear!) the breastbone pop and break. Depending on your size and the size of your turkey, this can take considerable effort. I often lean in with most of my body weight to get it to break.
Breaking the breastbone ensures that your turkey can lay nice and flat for even cooking. When turkeys are cooked whole, that big, dense ball of meat takes a long time to cook. But with a nice, flat layer, it happens much more quickly.
Are you still with me? It's time to start applying the seasoning!
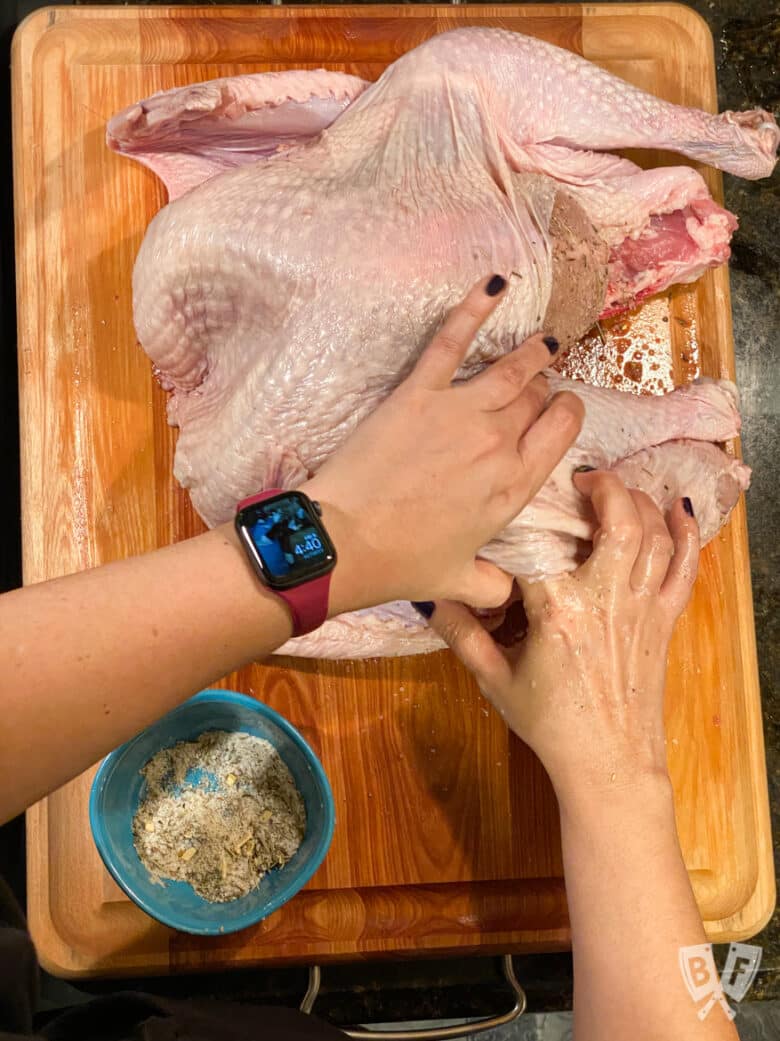
If the skin of your turkey isn't dry, pat it with paper towels again. Using your fingers, gently lift the skin of the turkey away from the meat. You're going to need to reach in and use your hands to poke around to create a pocket between the skin and the flesh.
This usually takes a little finagling, but do the best you can, finding any areas that you can work your way underneath the skin.
Take some of the dry brine spice mixture and rub it underneath the skin. You want to try to get an even-ish layer, but you don't need to measure things precisely here.
Flip the turkey back over and dry out the cavity with paper towels again if needed. Sprinkle a little more of the dry brine seasoning mixture onto the cavity side and rub it around to coat.
Final seasoning for a crispy skin
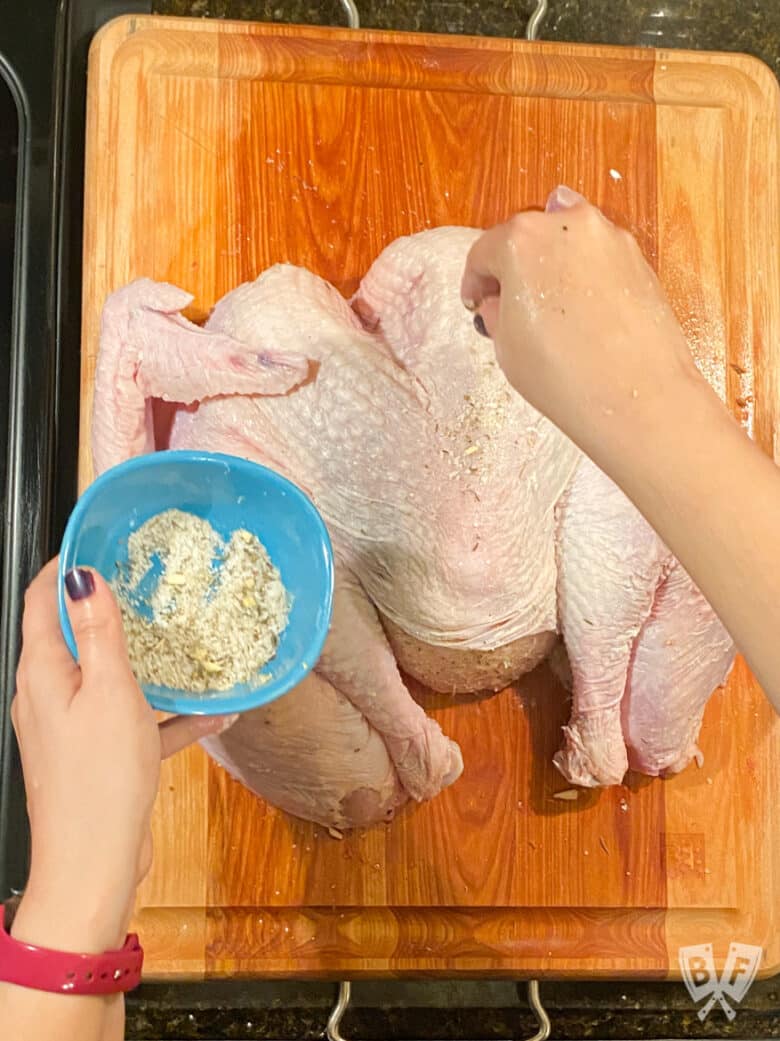

Pat the skin dry once more, then sprinkle a teaspoon of baking powder all over the skin. Rub it to really spread it around, making sure to get places like underneath the wings.
The addition of baking powder aids in getting that perfectly crispy skin once you roast the turkey.
Add the remainder of your dry brine spice mixture to the skin side of the turkey and rub it all over to coat evenly. Again, remember that you're only using a total of one tablespoon per four pounds of turkey.
So, for example, the turkey in the photographs was 16 pounds, so I used 4 tablespoons of the mixture. You don't have to be super precise here, but try to stay in the ballpark so your meat isn't overly salty.
Refrigerate your prepped turkey for 1-4 days

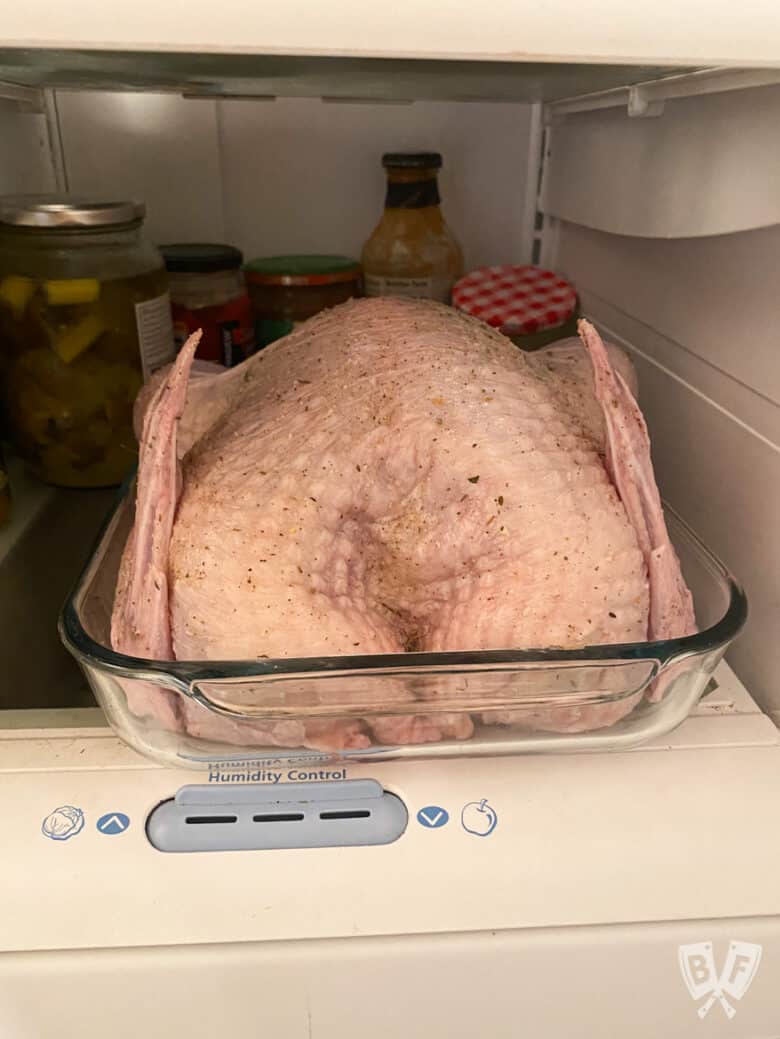
To save on refrigerator space, I like to then transfer my seasoned turkey to a 9x13 baking dish. Clear out a little space around your refrigerator so that nothing is touching it, and leave it alone in the refrigerator.
We always try to aim to brine our turkey for 4 days, but things happen and schedules can get interrupted. One day is the minimum amount of time you'll need for the dry brine to start working its magic, up to a maximum of 4.
Is leaving poultry uncovered in the refrigerator safe?
This process is similar to dry-aging steak and is done with the meat uncovered in the refrigerator.
You need to make sure you have plenty of space around the turkey for this process to take place without the worry of contaminating other things in your refrigerator.
As long as the turkey isn't touching anything, all should go well.
But if the thought of leaving poultry out in the open in your refrigerator is worrisome, you can cover the turkey with cheesecloth. This way it can still get the air circulation while it brines.
Time to cook!


When it's go-time, preheat your oven. The cook time and temperature will vary based on the size of your turkey (see chart below). Your best bet is to monitor the temperature as it's cooking.
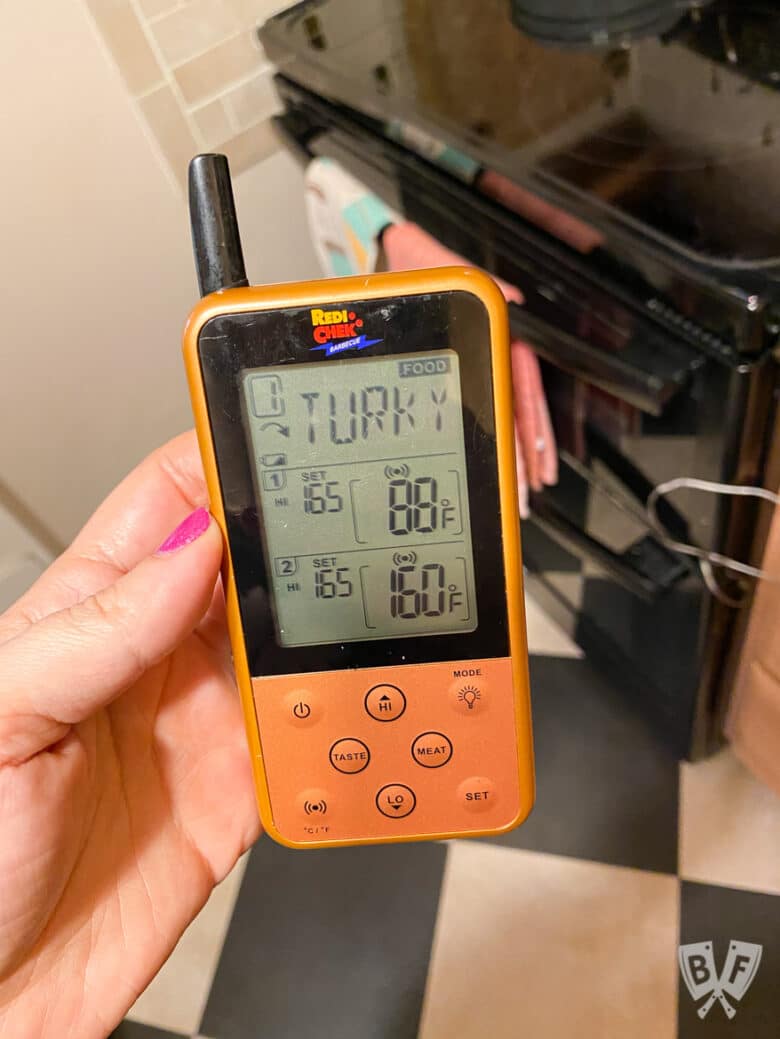
We love using a dual-probe thermometer for this, as you can monitor the temperature of the breast meat and the leg/thigh at the same time. You can also use an instant-read thermometer to check the temperature periodically during roasting.
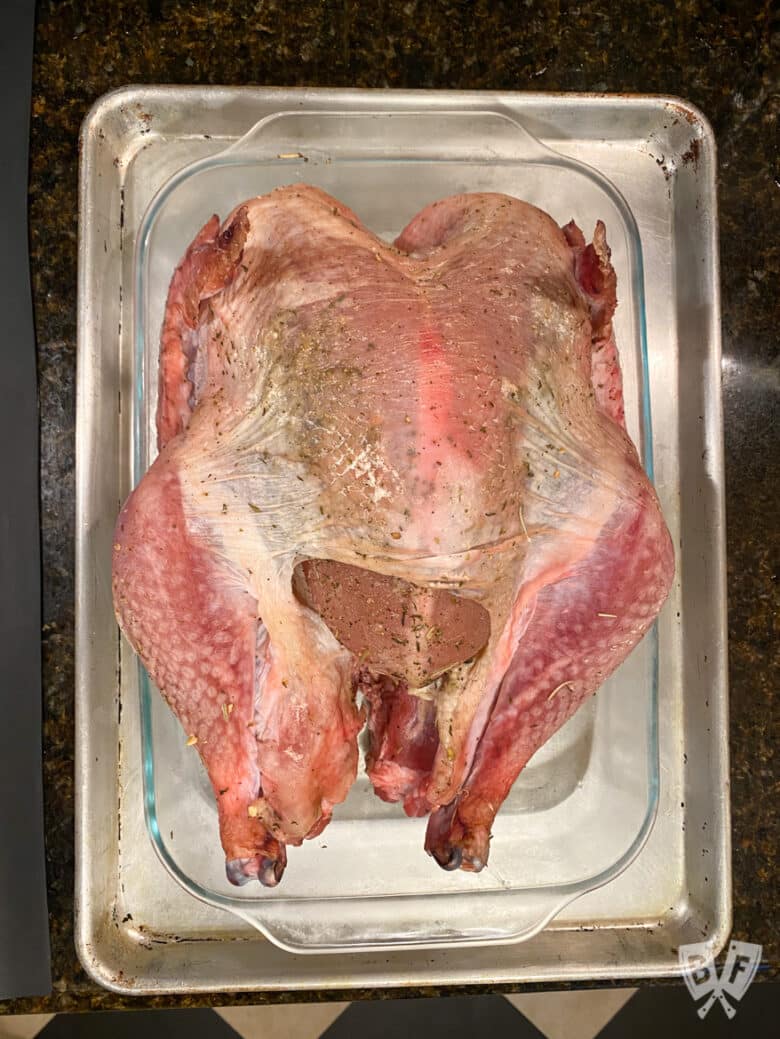
Transfer your brined turkey to a large, rimmed baking sheet. Place probes in the center of the light and dark meat to monitor the temperature of both while it roasts.


Try to be sure you're probing the meat in the center of the breast and thigh. If you're touching bone or are too close to the edge, the thermometers won't read properly.
If the temperatures are changing at drastically different rates, it's likely that they aren't placed properly. No big deal, just take it out, readjust, and pop it back into the oven.
⏲ How long to cook a spatchcocked turkey
Here are some general guidelines for cook time and oven temperature, based on the weight of your turkey:
| Turkey Weight | Oven Temperature | Cook Time |
|---|---|---|
| 8-12 pounds | 325°F | 2 ¾ to 3 hours |
| 12-14 pounds | 450°F | 2 to 2 ¼ hours |
| 12-14 pounds | 425°F | 2 ¼ to 2 ½ hours |
| 15-17 pounds | 450°F | 2 ¾ to 3 hours |
| 15-17 pounds | 425°F | 3 to 3 ¼ hours |
| 18-20 pounds | 450°F | 3 ¼ to 3 ½ hours |
| 18-20 pounds | 425°F | 3 ½ to 3 ¾ hours |
| 21-23 pounds | 450°F | 3 ¾ to 4 hours |
| 21-23 pounds | 425°F | 4 to 4 ¼ hours |
| 24 pounds | 450°F | 4 to 4 ¼ hours |
| 24 pounds | 425°F | 4 ¼ to 4 ½ hours |
Still hungry? You may also like...
Doing some online shopping? Check out my Amazon shop page for recommendations!
📖 Recipe
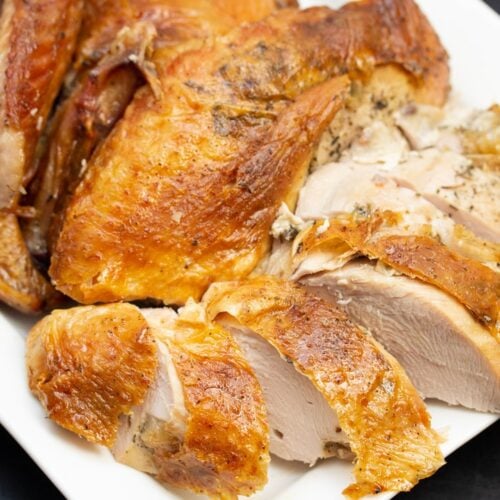
Spatchcocked Roasted Turkey with Homemade Dry Brine
Instructions
- Remove giblets and neckline from the turkey cavity and reserve for gravy, if desired.
- Dry the skin of the turkey well with paper towels. Score the skin of the turkey along both sides of the backbone with a sharp knife. Using poultry shears, cut through the ribcage along both sides of the backbone. Remove the backbone and add it to the reserved gravy bits.
- Flip the turkey so the breast is facing up. Press down firmly with one hand on top of the other until you feel it pop/crack. You'll likely need to really lean into it.
- Gently lift the skin of the turkey and season it with some of the dry brine mixture (see post above for detailed instructions and photos). Flip it over and rub some more of the mixture all over the cavity side.
- Flip the turkey over and pat the skin-side dry once more. Sprinkle baking powder all over the skin and rub well to coat, making sure to get underneath the wings. Add the remaining dry brine mixture to the skin side and rub all over to coat evenly.
- Transfer your seasoned turkey to a baking dish and refrigerate for a minimum of 1 day, up to 4 days.
- Preheat your oven according to the chart in the post above, based on the weight of your turkey. Transfer your turkey to a large, rimmed baking sheet.
- Roast in the preheated oven until the light and dark meat both reach 165°F. Reference the chart in the post above for time guidelines. I recommend probing the light and dark meat with a dual-probe thermometer.
- Once the turkey is done, remove it from the oven and tent it with foil until you're ready to carve it. Be sure to reserve the pan drippings for homemade gravy!


Karen says
Outstanding recipe and directions. Spatchcocked Turkey is amazing. Moist, delicious and cooked 12# in 90 minutes! It was my first time with this method, and it will be the first of many. It's going to be my new tradition to dry brine and butterfly the bird. Ashley, you've outdone yourself again. Genius!
Ashley says
I’m so so so glad this was a hit for you, Karen! It has been a total game-changer for us, too. I appreciate the review!
Elisa Bruno-Midili says
This was a great recipe, I made the dry brined turkey and spatchcocked it with my husband. A little tough to crack but it came out perfect. My guets loved it. I also made the gravy and stuffing which were delicios,
Thanks Ashley for such detailed and specific instruction!
Ashley says
I’m so glad the instructions were helpful! I documented it last year but just this year got it all written up. It’s the only way we do turkey these days!
Jessica Griffith says
I used this dry brine for bone-in chicken breasts and then cooked them on the grill with indirect heat. Everyone loved them and I plan to use this dry brine for our Thanksgiving turkey. I haven't been brave enough to try spatchcocking yet.
Ashley says
I'm so glad you enjoyed this on chicken, Jessica! It works so well with poultry. I hope it's a hit for your Thanksgiving turkey! Maybe try spatchcocking a chicken sometime first. It's a little less intimidating since it's smaller than a turkey. But I swear once you do it that way, you won't want to go back - the quick cooking time is hard to beat on a holiday especially!!